Do you have some old chairs lying around in your attic, garage or basement? Give them a new lease on life with an easy makeover. More often than not, old chairs are made from better quality wood than modern chairs so they’ll serve you better in the long run. Here’s how you can turn your old chairs into modern and usable chairs to fit into your home’s theme.
What You’ll Need To Give Your Chairs A Makeover
- Old Chairs To Makeover
- A Rubber Mallet – Buy Here
- Mouse Type Orbital Sander With 180 Grit Paper – Buy Here
- Good Quality Wood Glue – Buy Here
- Clamps or Some Rope – Buy Here
- Wood Primer – Buy Here
- Latex Paint – Buy Here
- Paint Brush & Small Sponge Roller – Buy Here
- 40mm Foam For Each Seat
- Fabric To Recover Each Seat
- Industrial Stapler – Buy Here
How To Give Your Chairs A Makeover
Start off by dismantling the chair, you’ll want to take apart any joints which are loose or broken. Often the old dowel joints in wooden chairs work themselves loose over time and result in a wobbly or “loose” chair.
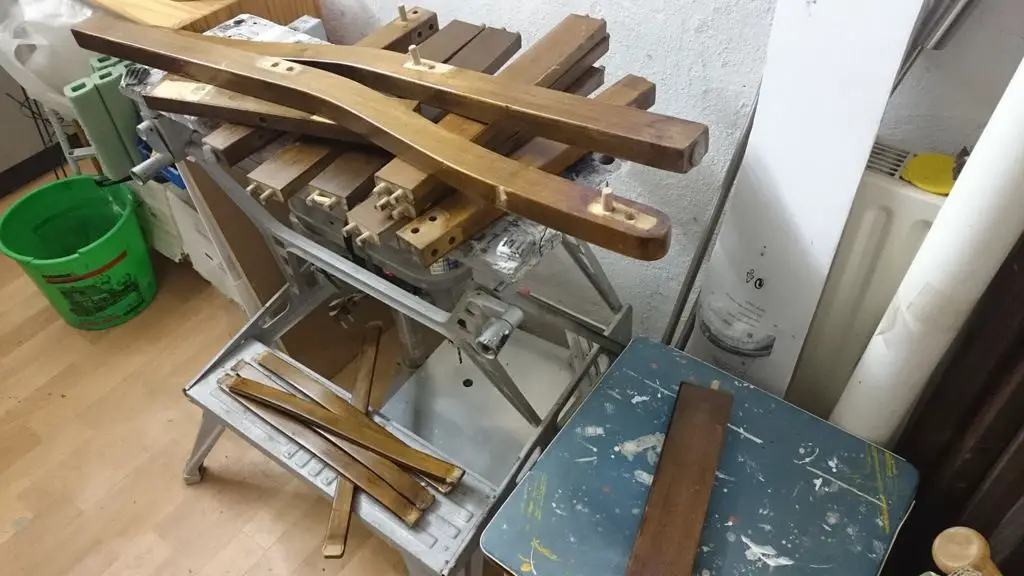
Use a rubber mallet to work the pieces loose, protect the wood with some newspaper or an old towel to prevent the mallet from damaging the wood.
If you’re not good at remembering which piece fits where then number each joint’s pieces with the same number as you take them apart, this way you’ll know exactly which pieces go where. You’ll be painting the chair afterwards anyway so the numbering will be hidden.
Now take a mouse sander or rotary tool and clean up any old glue left on the joints, you want there to only be wood left. You can also clean up any scratches, splintered edges and scuffs while you’re busy with the sander.
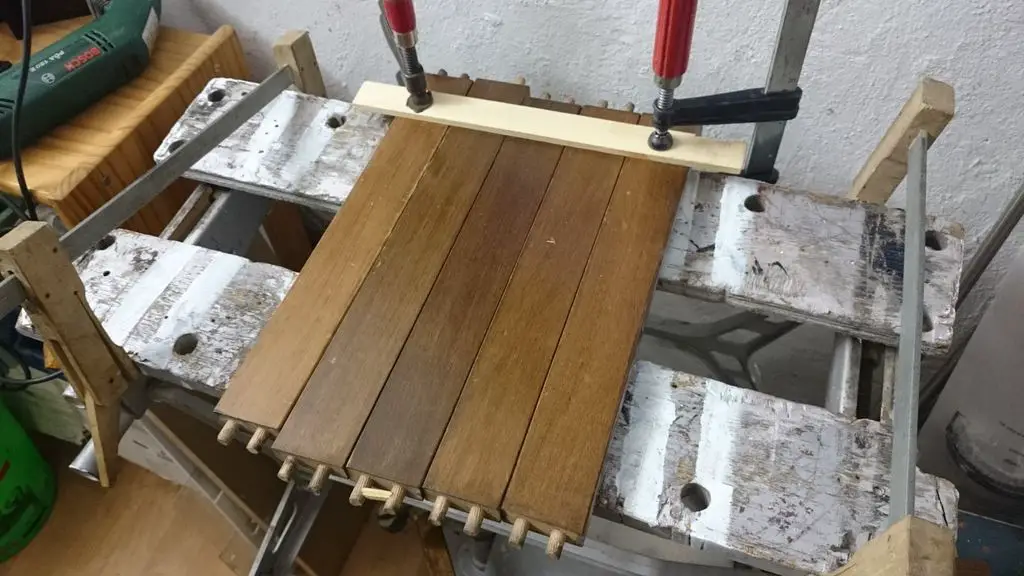
Now glue the chair back together with a good quality cold wood glue. Use a couple of clamps or some rope to clamp/tie pieces together as they dry to get strong joints.

You can also add in a few pieces in hidden places to brace or support the chair for extra stability and strength.

Once the glue has dried you can start with painting. Use a brush and small sponge roller to paint a coat of good quality primer onto the frame. If your chair is in good condition and doesn’t have a dark varnish then a primer may not be necessary.

Follow the coat of primer with a few coats of your coloured latex paint. If you like the look of chalk paint, you could try making your own inexpensive chalk paint?
Finally the seat can be re-covered. If the chair is really old then the chipboard base of the seat may need to be replaced.
Cut a section of 40mm foam to cover the chipboard base. Position the fabric over the base and foam and trim it so that it generously overlaps the edges. Flip the seat over, pull the fabric tight and staple it to the underside of the seat. Pull out any kinks and staple the fabric firmly until you have a neatly covered seat.
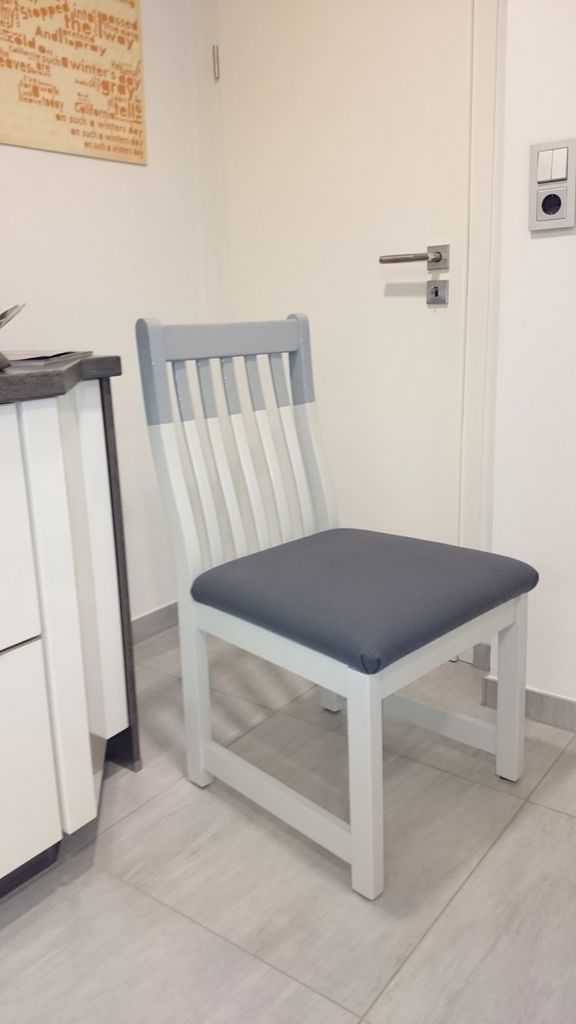
Screw the seat back onto the chair and your chair is now complete.
Have you given a chair or other item of furniture a makeover? Let us know in the comments section below, we’d love to see your before and after pictures. If you enjoyed giving your chairs a makeover, perhaps you’d enjoy flipping some other furniture as well?
This post is based on Chair Makeover by donc146 and has been modified and used under the Creative Commons license CC BY NC SA 2.5.