Greenhouses are a great way to look after plants or germinating seedlings. They help to increase humidity and temperature, shield plants from pests as well as to moderate temperature changes. In this guide, we will show you how to easily create a convenient mini greenhouse that can be placed on a window sill, using only scavenged items that everyone has access to. It has lots of space and height for plants to grow in, and can be customized to accommodate more or different types of plants.
What You’ll Need To Build Your Own Windowsill Greenhouse
- Wooden Skewers or Kebab Sticks – Buy Here
- A Clear Plastic Bag or Sheeting – Buy Here
- Craft Knife or Scissors – Buy Here
How To Build Your Windowsill Greenhouse
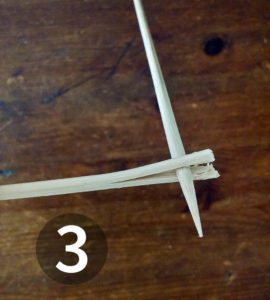
To start off, you’ll need to assemble the frame. The frame is made up using kebab sticks. Two sticks placed length ways make up each vertical post with on placed horizontally for support.
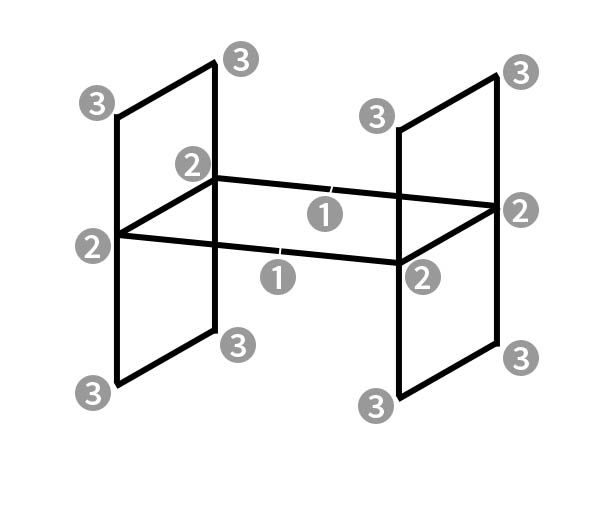
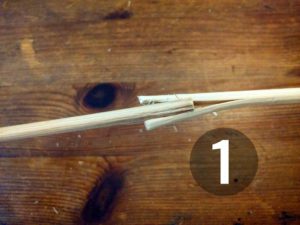
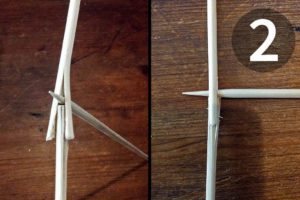
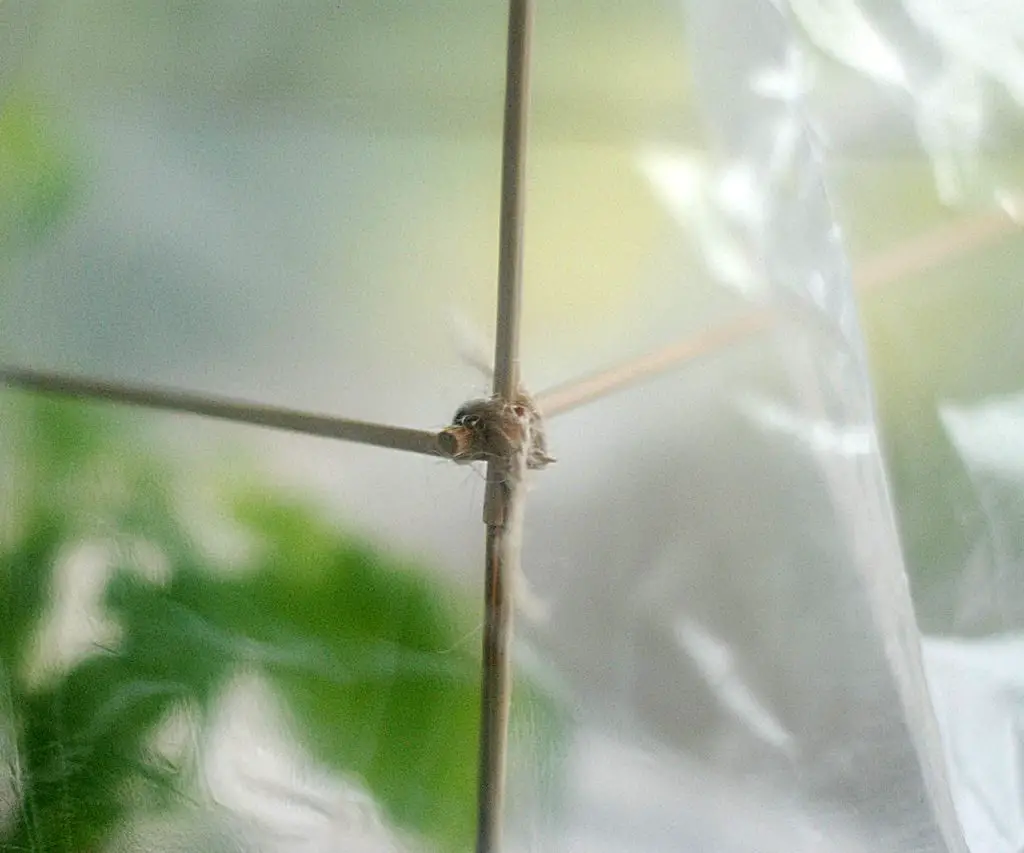
In order to join the sticks, the sticks are split using a craft knife and slid into one and other. The numbers on the above sketch indicate the type of joints, these joints are shown up close below.
To optionally strengthen the joints, drip any kind of glue, like superglue all over the joint, and wrap thread or string around the joint, knotting it to keep it in place.
Finally, to complete your greenhouse, find a clear bag which is big enough to pull over your frame. If you can’t find a big enough bag, another option is to cut plastic sheeting or bags and glue them to the structure instead. Try to tuck the bag underneath the greenhouse to help seal it properly to keep heat/moisture in and pests out. The roof area of the greenhouse will be strong enough to allow a LED light to rest on top if you want to add light, but be sure that the temperature of the light stays cool so that it does not melt the plastic.
Now place your homemade greenhouse on a sunny windowsill, insert your favorite plants or veggies and watch them grow!
Have you tried to make your won mini greenhouse? Let us know your tips and tricks in the comments section below.
This post is based on No-Budget Windowsill Greenhouse by lsadwdwadw and has been modified and used under the Creative Commons license CC BY NC SA 2.5.