Soy candles have a few benefits over paraffin wax candles, one being that they burn longer than other types of wax. Store bought candles can be quite expensive so why not make your own? They are easy to make, they can be fragranced or colored to your preference and they make the perfect gift. Soy wax turns into an oil when it is warmed which can be used as an aromatic massage oil.
Things You Will Need:
- Glass Jars For Completed Candles
- Soy Wax (500g Will Make About 3 Candles)
- Essential Oil (To Fragrance)
- Candle Wicks (Braided String Soaked In Wax)
- Kebab Sticks
- Sticky Tape
- Old Pot or Tin For Melting Wax
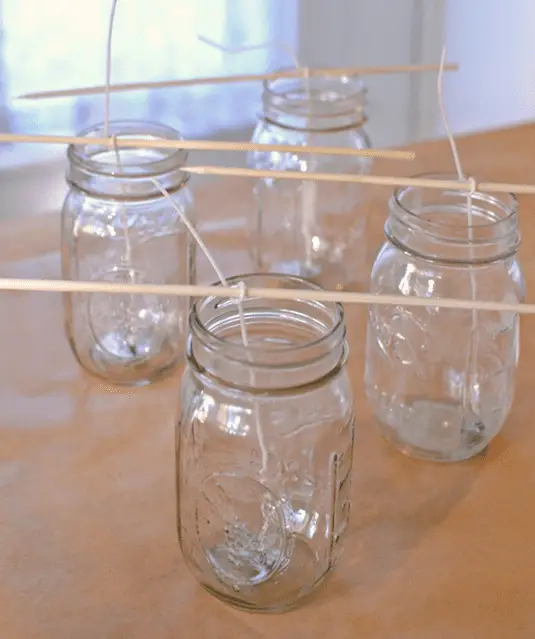
First start by preparing the wicks in the jars. Use the tape to stick a small tab of the wick to the bottom of the jar, this will keep it in place while you pour in the wax. Ensure that the wick is vertical and centered before tying it off on a kebab stick placed over the top of the jar. The kebab stick will keep the wick vertical and centered when the warm wax is added.
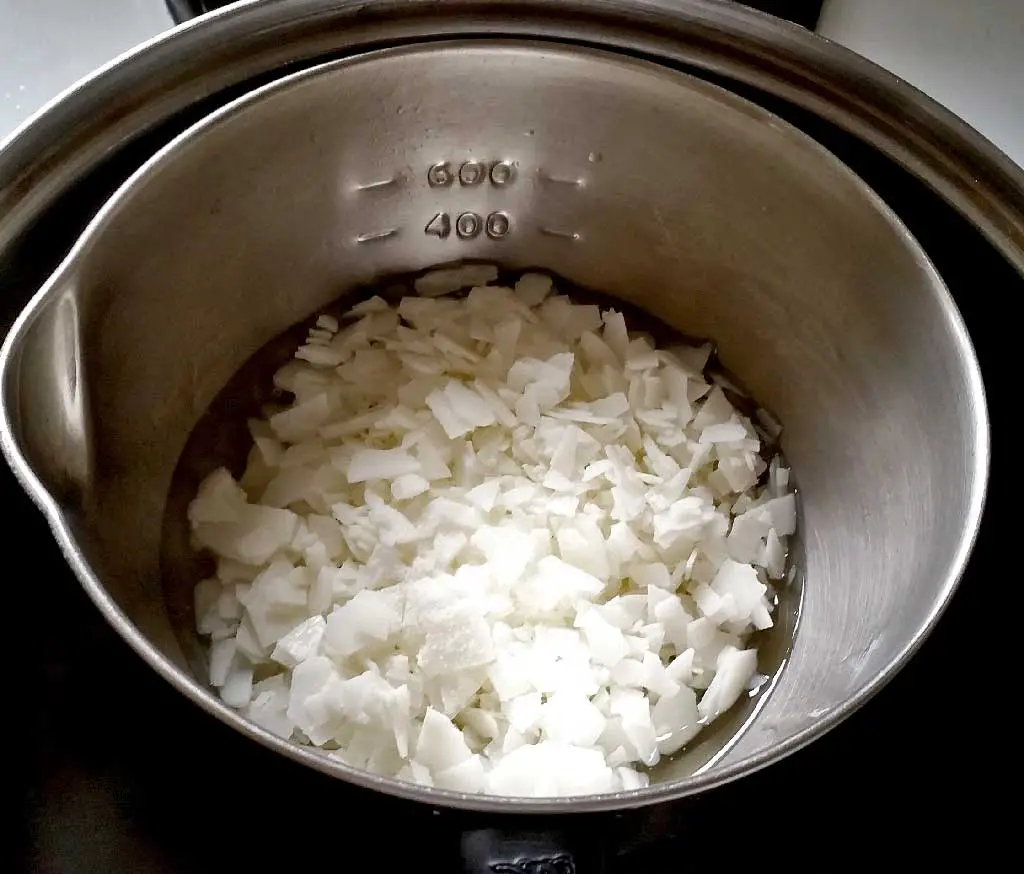
Once you have the jars prepared you can being melting the wax. Break the wax into smaller chucks or shavings and heat it in a double boiler over the stove, this should take about 15 minutes. A double boiler is simply a smaller metal boil or jug placed into a pot of boiling water, this ensures that the wax is never in direct contact with the heat of the stove and can’t burn.
Once the wax is completely melted, you may add the essential oil, add 5 to 10ml depending on the strength of the oil. Here are some commonly used oils, all of which are on our free Soy Candle Printable: Cinnamon, Orange, Lemon, Peppermint, Palmarosa, Lavender, Rosewood, Ylang Ylang & Citronella.
To colour the wax simply add a wax crayon (with the paper label removed) to the melting pot and stir it in with the soy wax.
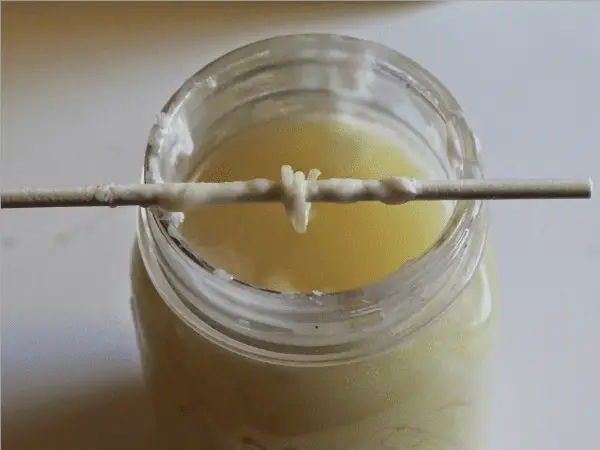
Now pour the melted wax into the jars. Fill the jars to about 3cm from the top and then allow them to harden. The wax should be fully hardened in about 8 hours. Once the wax has hardened, trim the wicks with a sharp scissors to 1cm from the surface of the wax. Decorate the jar with a ribbon or your own custom label.
What are your experiences with this project? Please share your comments, tips and advice with us in the comments section below, we would love to hear from you.