Give your furniture a modern updated look by staining it a different colour or buy raw unfinished furniture and stain it yourself. Unfortunately you won’t save a large amount of money by staining furniture yourself but you can match existing furniture styles and colours and choose accent colours for a custom look.
What you will need for this project:
- Stain (Enough For Your Item, Check The Product Coverage)
- Sandpaper – 180, 220 and 260 grit
- Sanding Block
- Paint Brush
- Optional – Screwdriver – For Dissambly
- Optional – Water Based Polyurethane Top Coat
Most unfinished furniture stores sell pine furniture although meranti, oak and maple are also popular. If you are trying to match an existing piece of furniture then it is best to take the item (a chair or drawer) with to the shop so that they can give you advice on the wood type. Although pine can generally be stained to match different wood colours, the wood grain and absorption properties play a role in the appearance of the finished product.
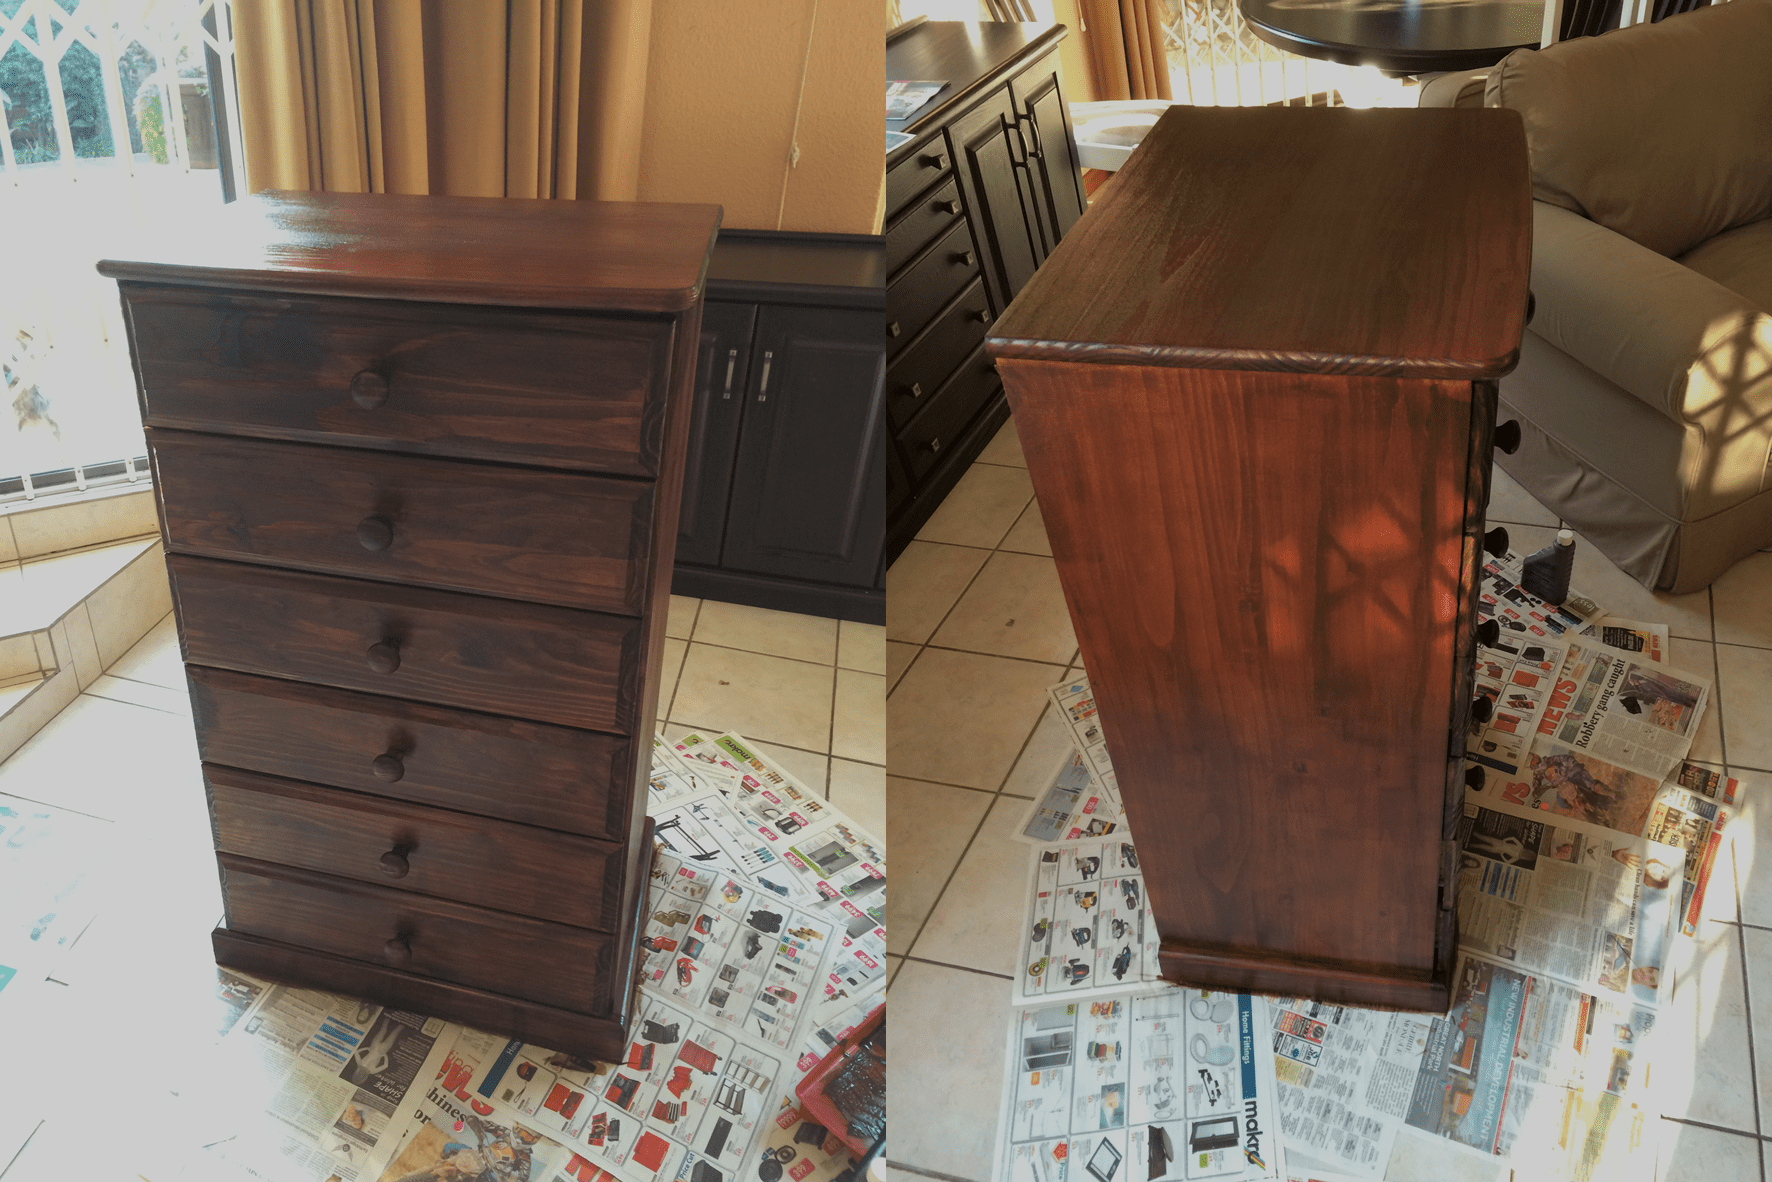
Once your have bought or found your items of furniture which you wish to stain, consider whether or not you need to take it apart. It is easiest to stain drawers separately when they are removed from the sliders. You will also need to remove pieces which you wish to stain a different colour to adjacent boards, for example the top surface of a drawer cabinet you may wish to stain darker than the rest of the cabinet. Masking tape prevents direct contact between the brush and the surface you do not wish to stain however stain may seep under the tape and the porous wood will absorb it causing streaks.
Now you will need to sand the surfaces which are to be stained. This is best done by hand with a sanding block and a fine (180 to 240 grit) sandpaper. Sand out any rough areas and particularly those with dirt marks and scratches. If you are removing the existing paint or varnish from an item of furniture, consider using an orbital sander with a rough (120 grit) sandpaper to remove it. After using the orbital sander, use the sanding block and fine grit sand paper to get a smooth surface finish.
If you are planning on mixing stains to your preferred colour then mix more than you think you will need to complete the job. If you run out of stain midway through a section you will not be able to match the colour exactly and the colour difference will be noticeable. Remember that stains usually darken when dried and absorb differently into different types of wood. To ensure that you will be happy with the finished product, consider testing the colour on a similarly finished sample of the same wood type. This way you can make adjustments to the colour without ruining your finished product.
Apply the stain to the wood. You can use a variety of brush stroke directions when applying the stain but be sure that the final brush strokes are always in the direction of the grain of the wood to get the smoothest finish. Apply the stain consistently on all faces of the wood to get an even colour. For darker colours, a second coat of stain may need to be applied however this should only be done once the first coat is well absorbed and dry.
For a gloss finish, consider applying a clear top coat. If the item of furniture is hard wearing or constantly going to be wiped down and cleaned then it may be necessary to protect the stained finish. A polyurethane top coat is probably the best solution and a water based coating is also environmentally friendly, fast drying and has a low odor. Brush the polyurethane onto the stained surface using a high quality soft bristle brush. Start at the edges and work your way to the center applying a thin and even coat. Avoid buildup on the edges by using short and light brush strokes towards the edges. The trick in getting a perfect glossy finish is to keep the work area clean, make sure that there are no airborne particles or dust which may settle on the surface and create imperfections.
Allow the surface finish to dry overnight before sanding with a fine (240 – 260 grit) sandpaper. Wipe the sanded surfaces down and then apply a second coat. For an even smoother finish, allow the second coat to dry overnight again before applying a final third coat.
What are your experiences with this project? Please share your comments, tips and advice with us in the comments section below, we would love to hear from you.