Baking soda is an extremely useful ingredient to keep around the house. From baking to cooking, cleaning to spa products, it has a broad range of uses. Here are some of the less common but very useful ways in which it can be used around the house.
Here Are Some Things You Can Do With Baking Soda
- Unclog your drain by mixing it with vinegar. Mix equal parts in a cup and quickly pour the foaming liquid down the drain to unclog and clean.
- Exfoliate by using a paste made with coconut oil. Mix 2tbsp of baking soda with 1/2tsp of coconut oil. Scrub the area to be exfoliated with the paste for 3 minutes before rinsing with cold water.
- Clean your stove with baking soda and vinegar. Sprinkle your stove top with baking soda, then spray vinegar over the fine powder. The mixture will fizz and lift the grease off of the stove.
- Easily clean up a burnt pot or pan using baking soda as the cleaning agent.
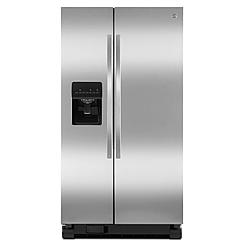
- Keep your fridge, shoes or cupboard smelling fresh. Place a cup or old tin full of it in your refrigerator and cupboard to keep them smelling fresh. Alternately sprinkle some in your shoes before putting them back in your cupboard to deodorise them.
- Make homemade bath fizz balls. Combine it with cream of tartar and some herbs and oils to create homemade bath bombs without any harsh chemicals.
- Relax with a face mask made using 1/2 tsp of baking soda, 1/2 tsp of lemon juice and 1 tbsp of honey. Mix into a paste and then spread onto the skin and allow it to stand for 15 minutes before rinsing off with cold water.
- Make a re-mineralising toothpaste using 1/2 cup of coconut oil, 3 tbsp of baking soda, 1 tbsp xylitol and 10 drops of peppermint oil. Mix together into a thick paste and use in place of normal toothpaste.
- Make boiled eggs easier to peel by adding a teaspoon of it to the water when boiling.
- Sweeten your home grown veggies by adding a teaspoon of it to the water once a week. They will naturally get a deeper colour and taste sweeter.
- Renew your car’s headlights by lightly polishing them with a mixture of equal parts of baking soda and toothpaste. A quick polish will leave your headlights looking years newer.
- Refresh your mattress by sprinkling baking soda over it, allowing it to stand for an hour or two and finally vacuuming it up with a brush attachment.
- Clean your jewelry by mixing some with dish soap and hot water. No hard work and intensive scrubbing required.
- Remove yellow shirt stains. Allow baking soda to do the hard work in removing yellow stains cause by sweat and deodorant on your white shirts.
Share This Tip