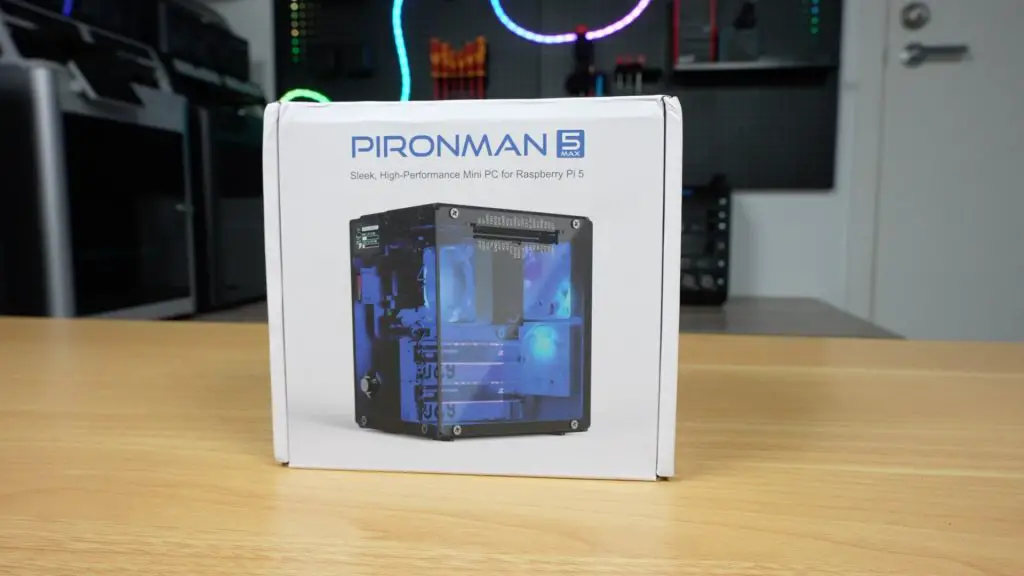
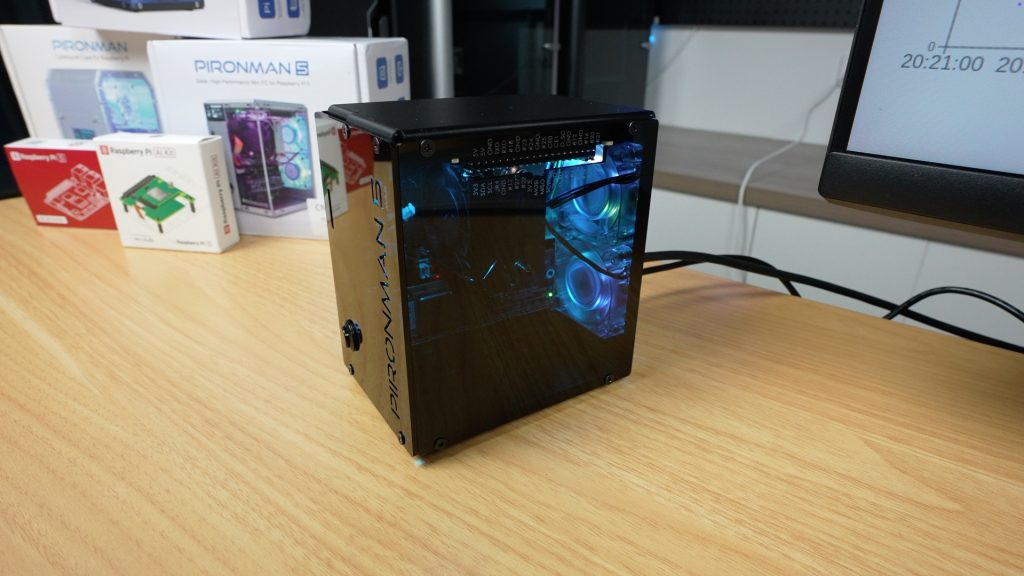
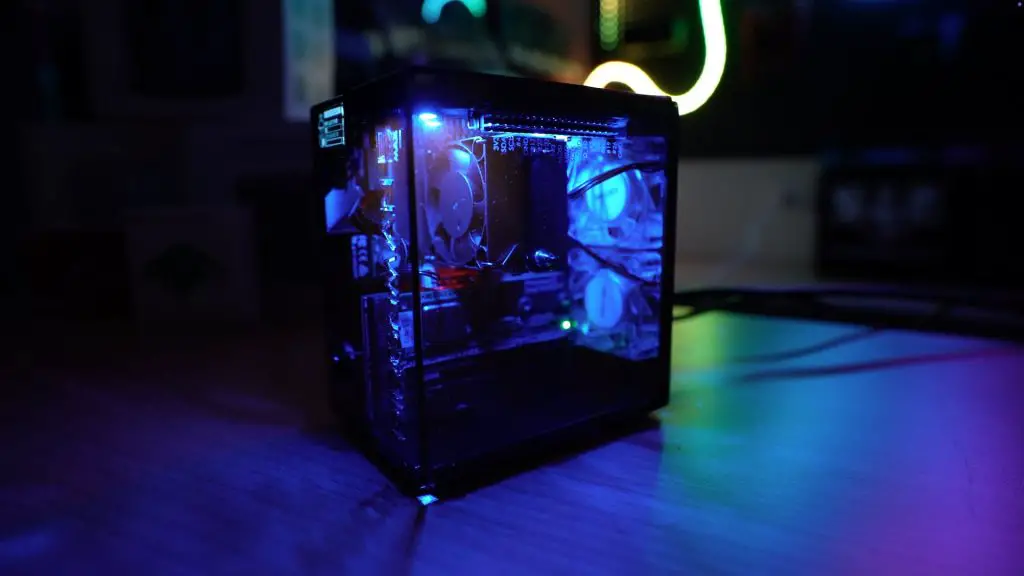
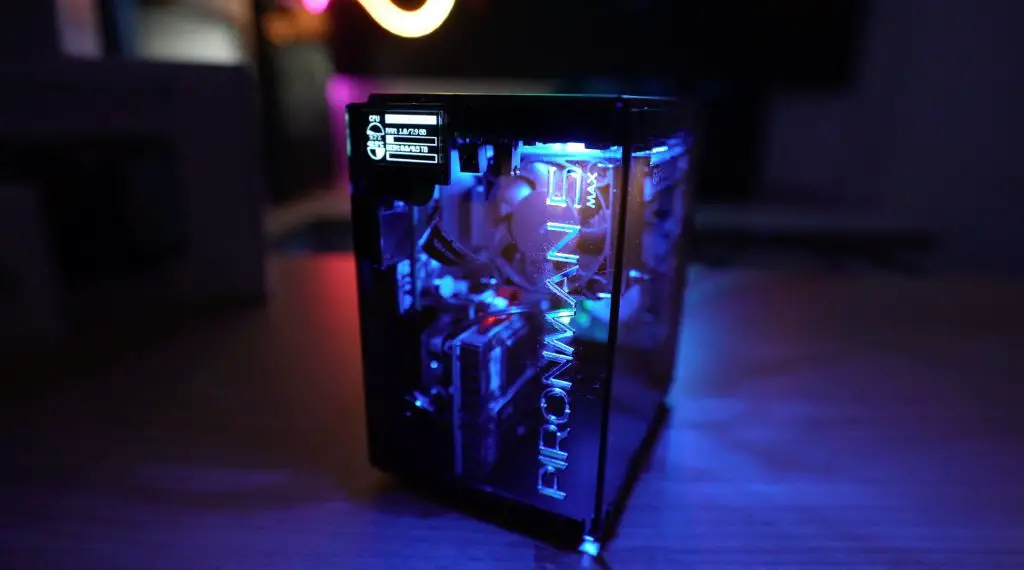
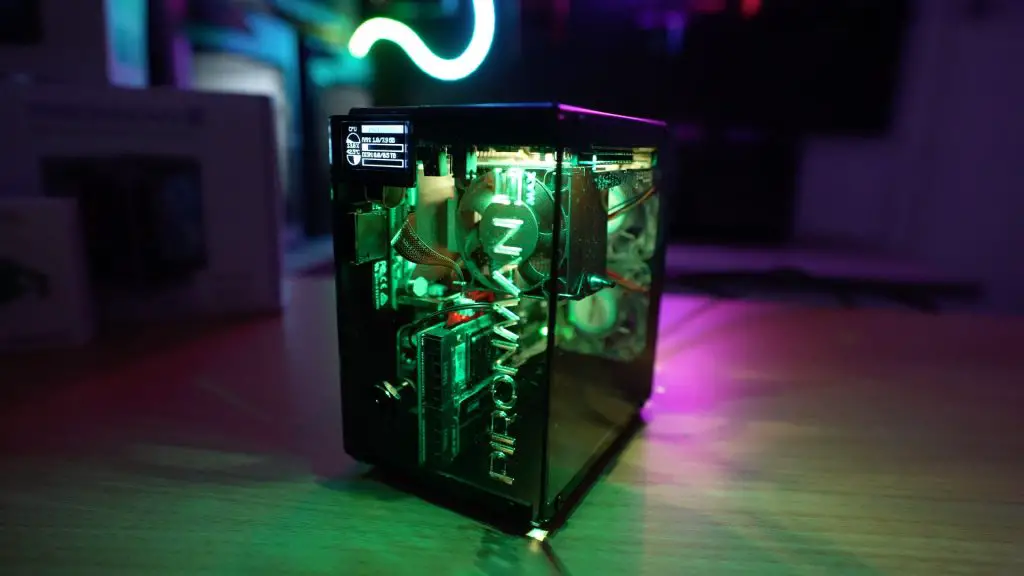
SunFounder have returned with the latest iteration of their Pironman case. This time, it’s called the Pironman 5 Max, built specifically for the Raspberry Pi 5. This case brings a host of upgrades, including dual NVMe support, a sleek black aluminium body, and tinted acrylic panels.
At $95 for the standard kit, it’s definitely on the higher end for Raspberry Pi enclosures, but it makes up for that with a range of inclusions and features. Most notably, the ability to run a Hailo-8L AI accelerator alongside an NVMe SSD. That makes it ideal for AI applications like onboard voice recognition, object detection, and real-time pose estimation.
Let’s walk through the case design, assembly, features, and performance testing to see how it holds up.
Here’s my video review of the case, read on for the write-up;
Where To Buy The Pironman 5 Max Case
- Pironman 5 Max – Buy Here
- Raspberry Pi 5 – Buy Here
- Raspberry Pi AI Kit (Hailo-8L Module) – Buy Here
- Lexar NVMe SSD – Buy Here
- Pi 5 USB C Power Supply – Buy Here
Equipment Used For Testing
First Impressions & Unboxing
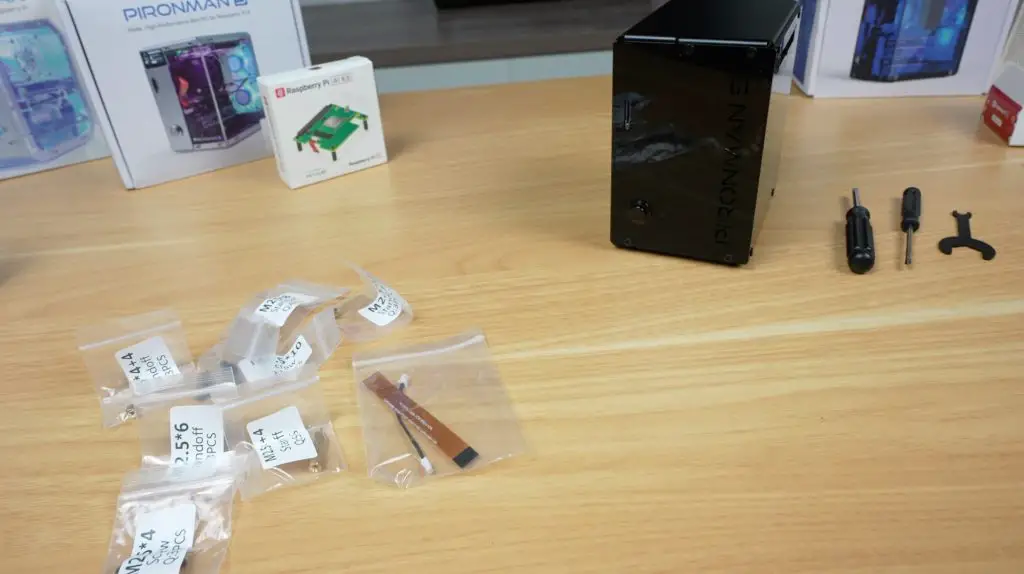
The Pironman 5 Max arrives in a clean, white branded box. Inside, you’ll find the aluminium shell, fans, cooler, expansion boards, and mounting hardware, everything you need to get up and running.

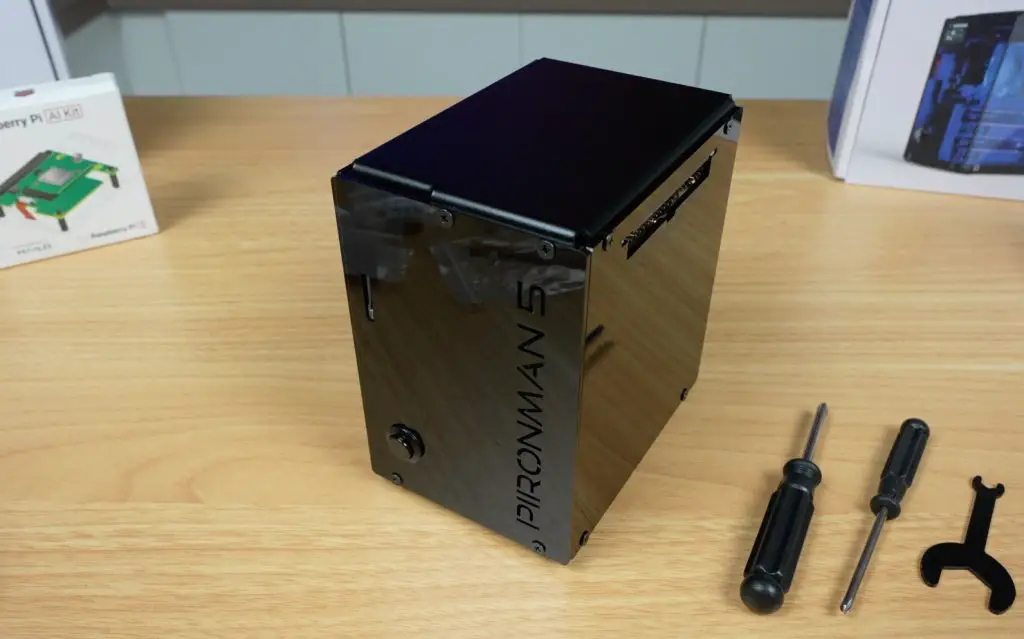
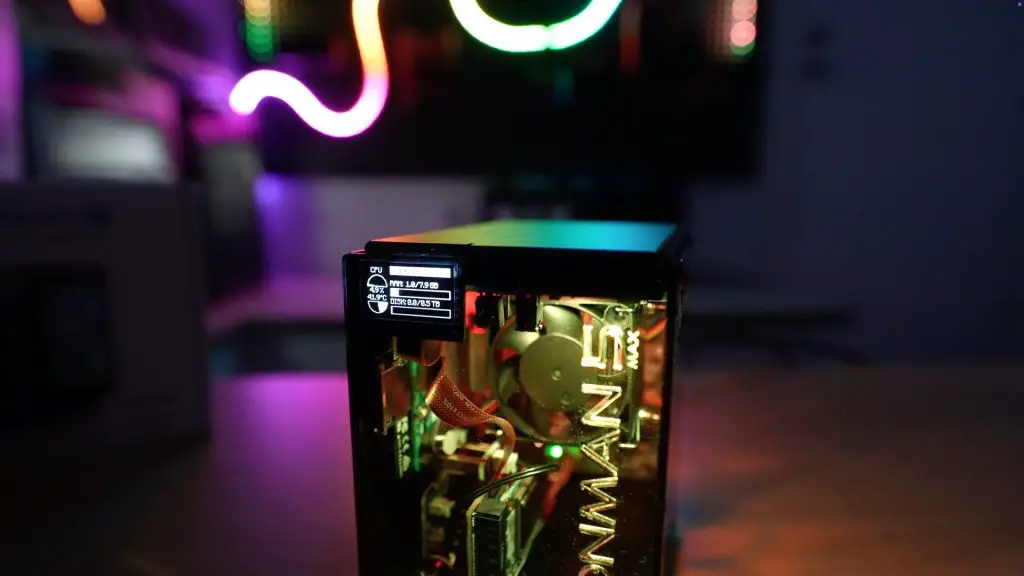
This is the third-generation Pironman case, and visually, it carries forward the design of its predecessor while swapping the silver and clear acrylic for a more refined black aluminium and tinted acrylic look. You’ll also notice upgraded features like dual M.2 NVMe ports, programmable RGB lighting, and a tap-to-wake OLED stats display.
Assembling The Pironman 5 Max Case
Like its predecessor, the Pironman 5 Max case is quite complex and requires some effort to assemble. It’s not difficult, thanks to the well-illustrated instruction sheet and clearly labelled screws, but it’s more involved than your average snap-together Pi case.

Here’s a quick overview and some photos of the assembly process;
- Install Standoffs – Attach various lengths to one half of the enclosure.
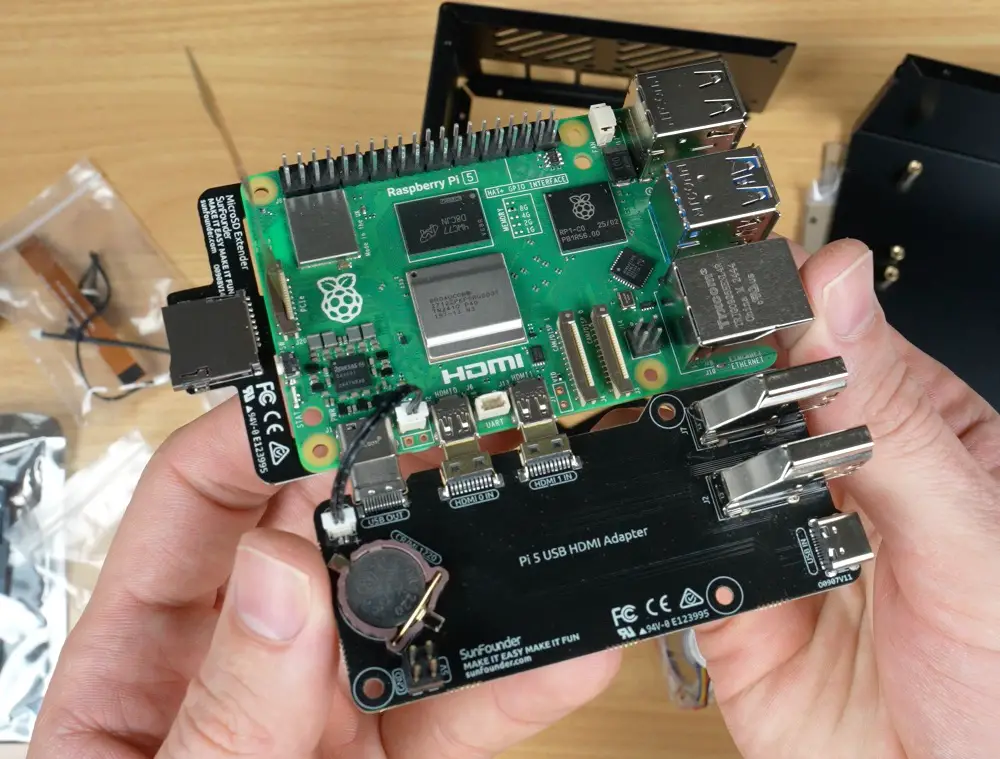
- Prepare the Pi – Plug in the carrier boards and mount the Pi 5 into the case.
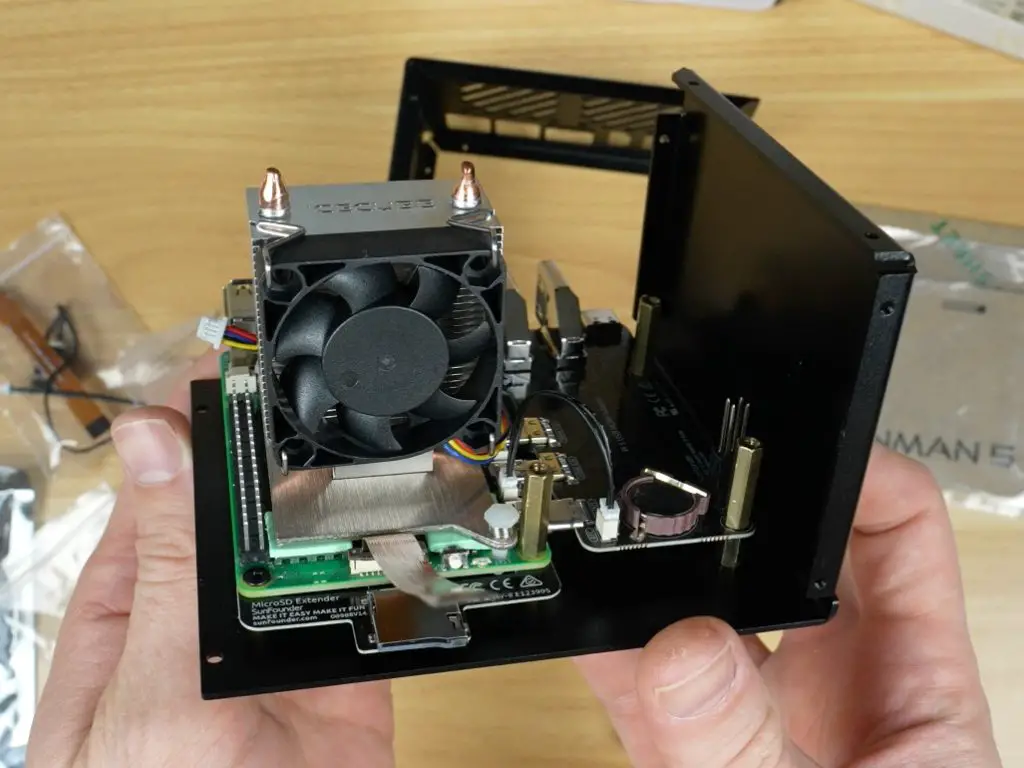
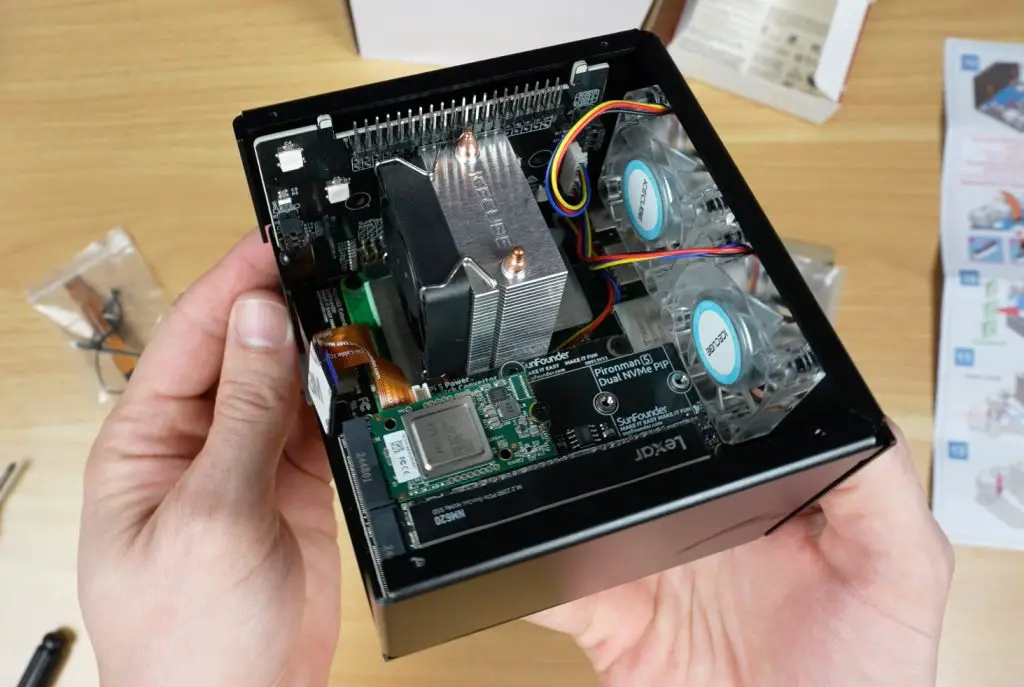
- Install the Cooler – Apply thermal pads to the CPU, WiFi module, and power circuitry. The included Ice Cube cooler uses the same mounting holes as the Pi 5 Active Cooler and similar “press into place” spring mounts.
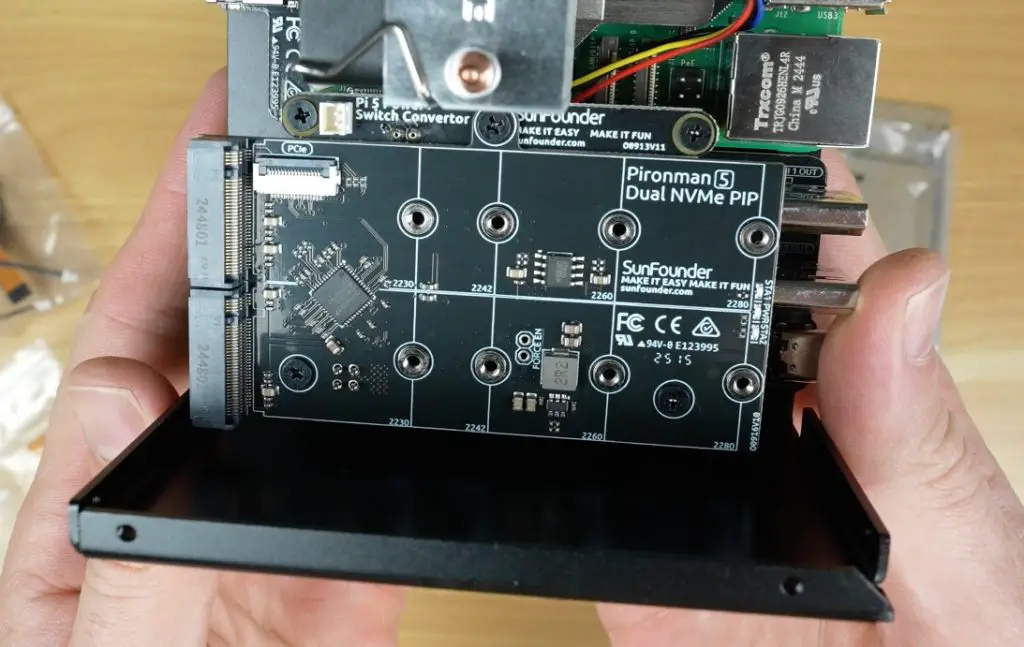
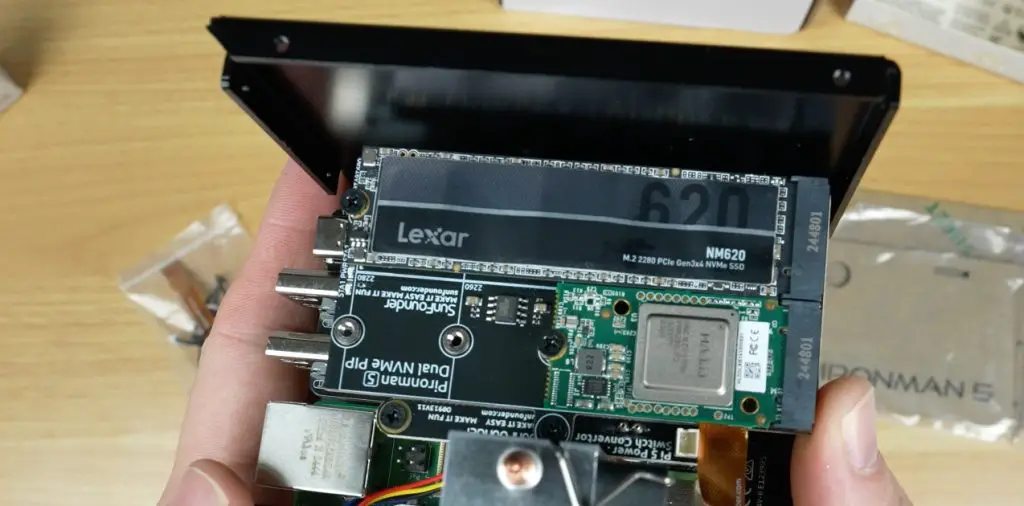
- Add the NVMe Adapter – The adaptor supports 2230 to 2280 drives. I installed the Hailo-8L AI accelerator in the top port and a Lexar 2280 NVMe SSD in the bottom (there is functionally no difference between ports)
- Attach the Fans – These mount on the back panel.
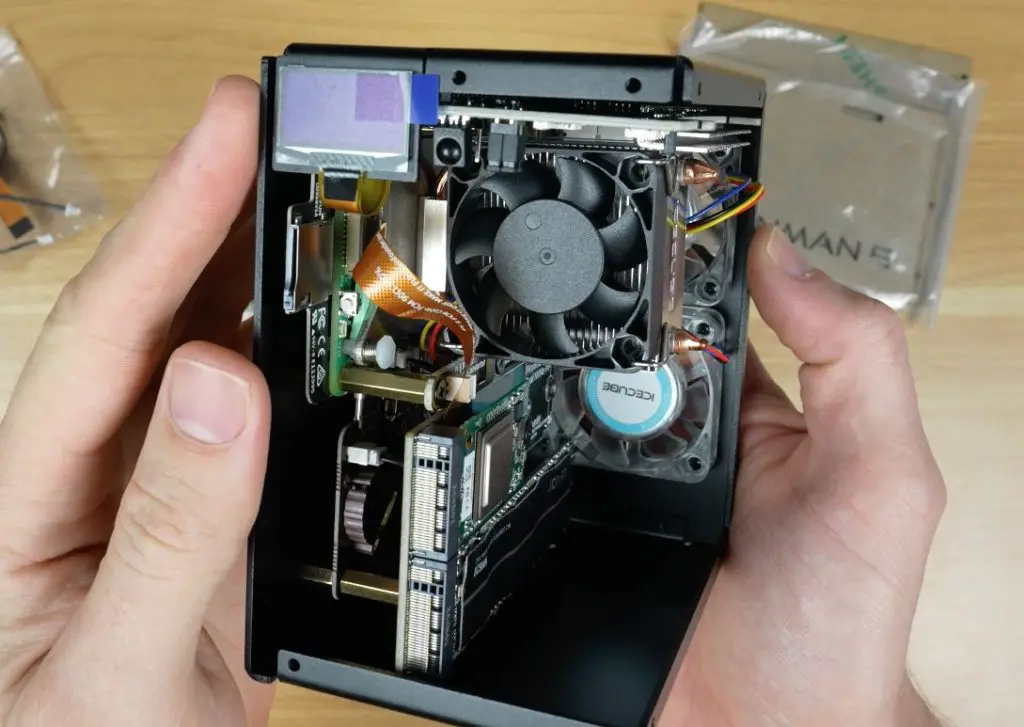
- Optional Camera Support – If you’re using a camera module, this is the time to install it (I decided to do this later as I wanted to test the case without it first).
- Add the OLED & GPIO Expansion Board – This board includes the GPIO extension and RGB lighting. The display gets stuck onto the front panel.
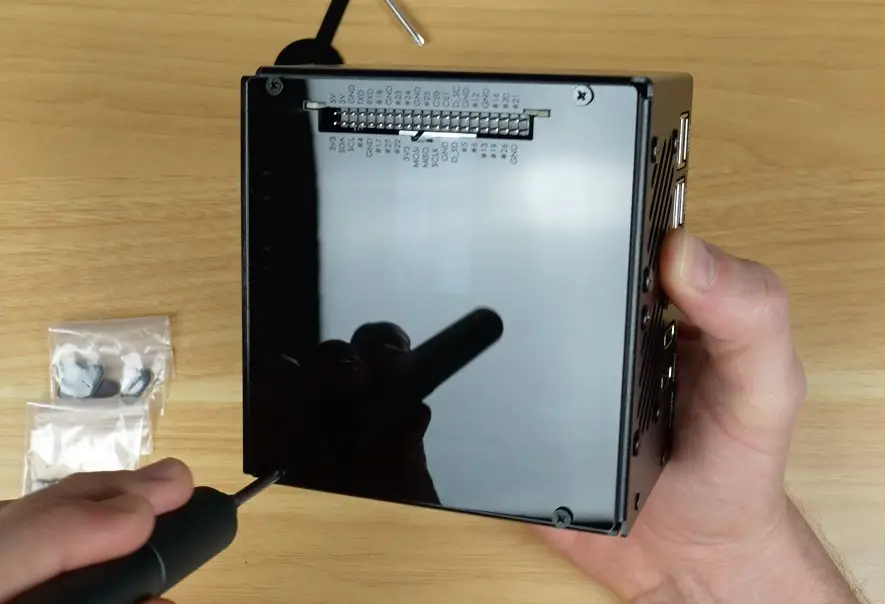
- Assemble the Shell – Screw the aluminium halves together.
- Finish with Acrylic Panels – The dark tinted panels give it a clean, high-tech look. The power button gets added to the front panel before installing it.
- Install the Rubber Feet to finish it off.


The total assembly time was around 25 minutes, and everything went together quite smoothly. There are also spare screws and cables included, which is a helpful touch.
First Boot & Software Setup
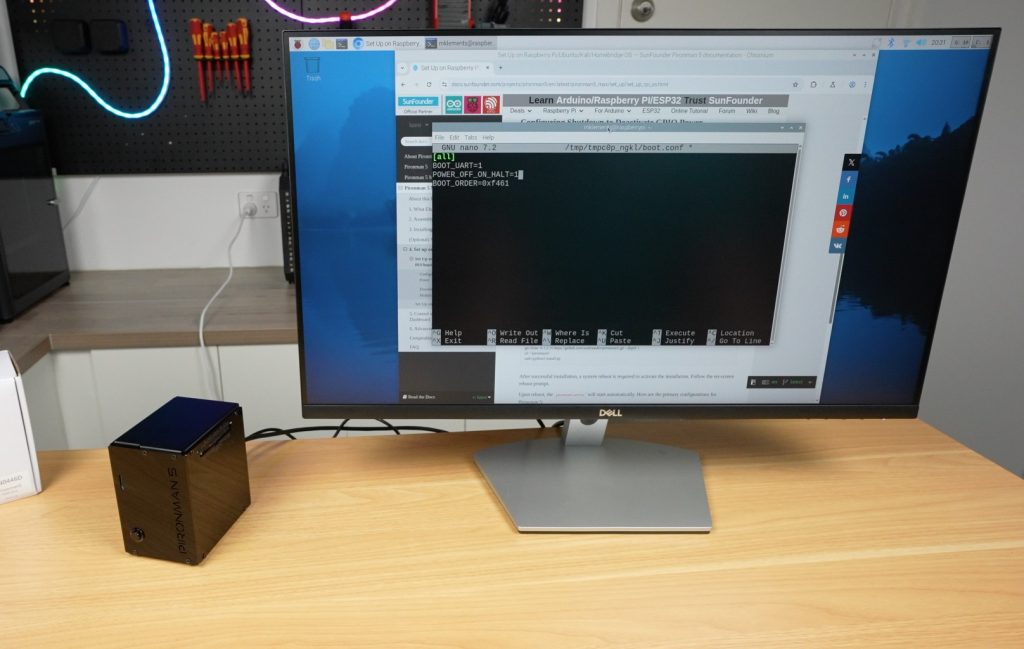
With Raspberry Pi OS pre-installed on the NVMe SSD, we can more stright on to booting it up. The OLED display and RGB lighting won’t function right away, they requiresome additional setup and software.
Fortunately, setup is easy. A quick config change and GitHub install later, and everything was up and running. I followed the instructions from SunFounder’s wiki and had no issues. They’ve also confirmed compatibility with other operating systems like Home Assistant, Ubuntu, and Kali Linux.
After rebooting, the OLED display shows:
- CPU temperature and usage
- RAM and storage capacity
- IP address

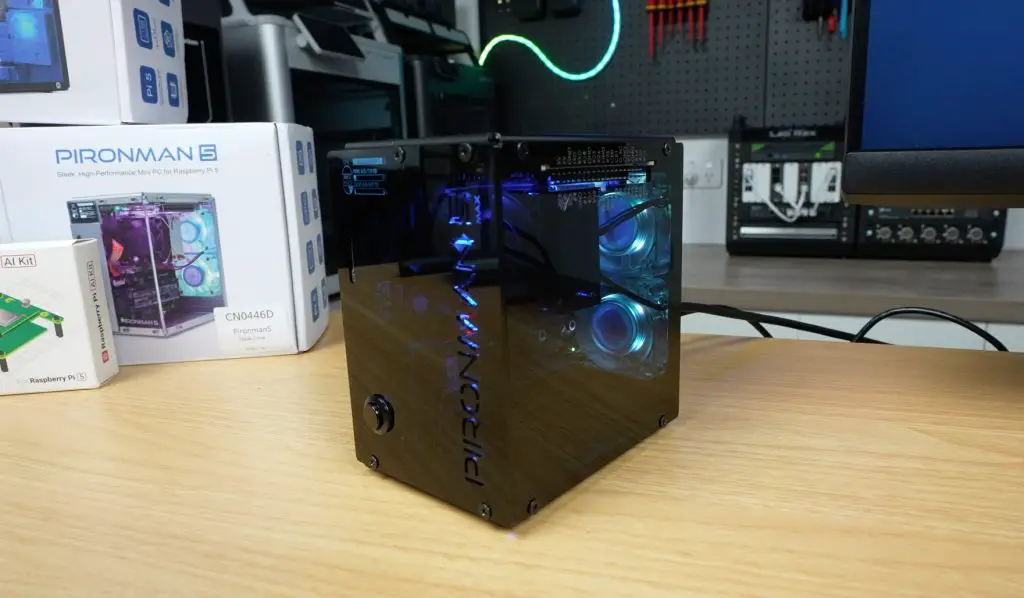
The display goes to sleep after 10 seconds by default, but you can wake it with a tap or adjust the timeout in the config files.
The Pironman 5 Max Web Dashboard
One of my favourite features from the previous Pironman case was the web-based dashboard and I’m happy to repor that they’ve retained it. You can access it via your Pi’s IP address and port 34001.
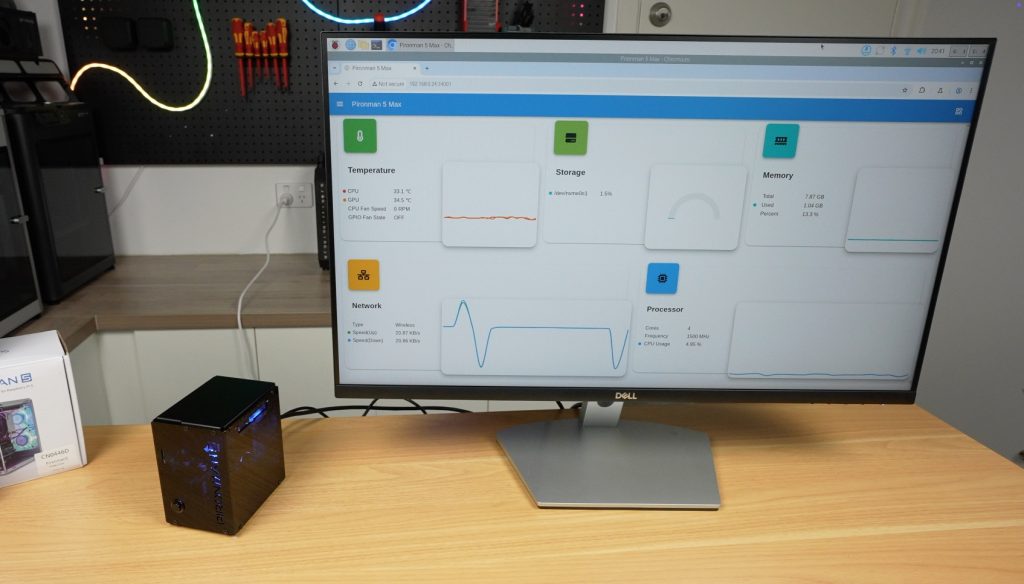
From here, you can:
- View system stats and logs
- Graph CPU usage and temps (as well as a wide range of other metrics)
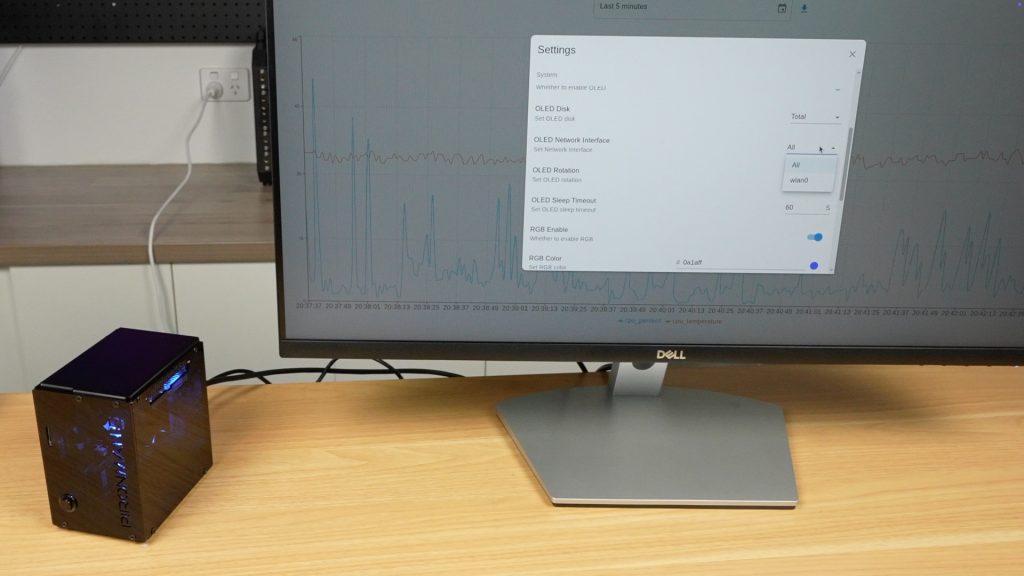
- Adjust OLED settings (like network interface, sleep timeout and display orientation)
- Customise the RGB lighting, including style, colour and animation speed
- Control fan behaviour with presets like Quiet, Balanced, and Performance
The new PWM fans are a big step up. They can now be set to come on at different temperatures, unlike the previous version’s which were either always on or off.
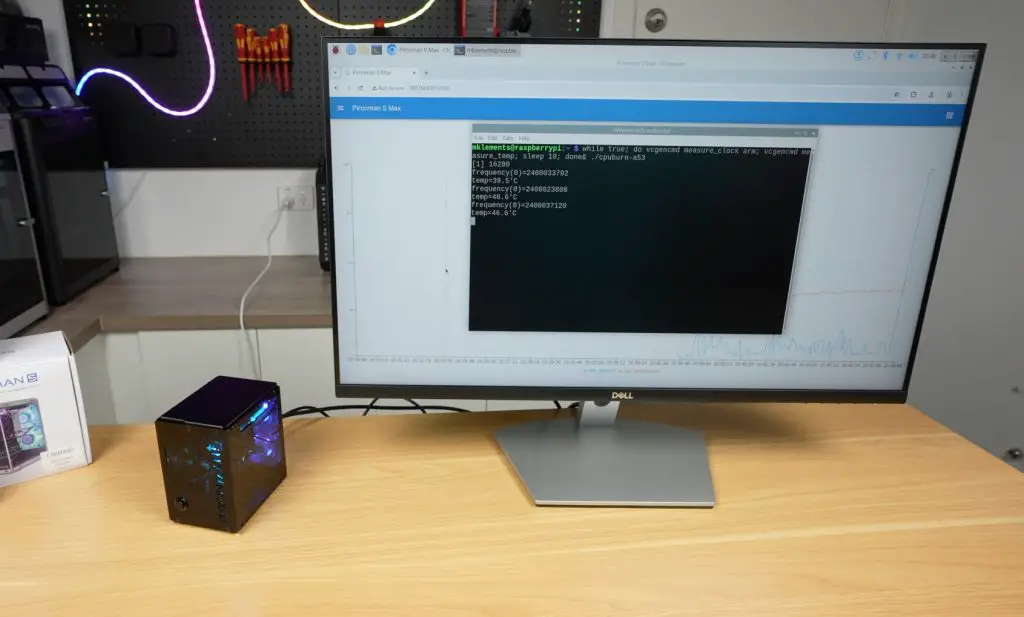
Cooling Performance
To test the coolingperformance of the case, I set the fans to Always On and ran a 30-minute CPU stress test using CPU Burn.
- Idle temperature: 35°C
- After 30 minutes under full load: 46°C
- Temperature delta: 11°C
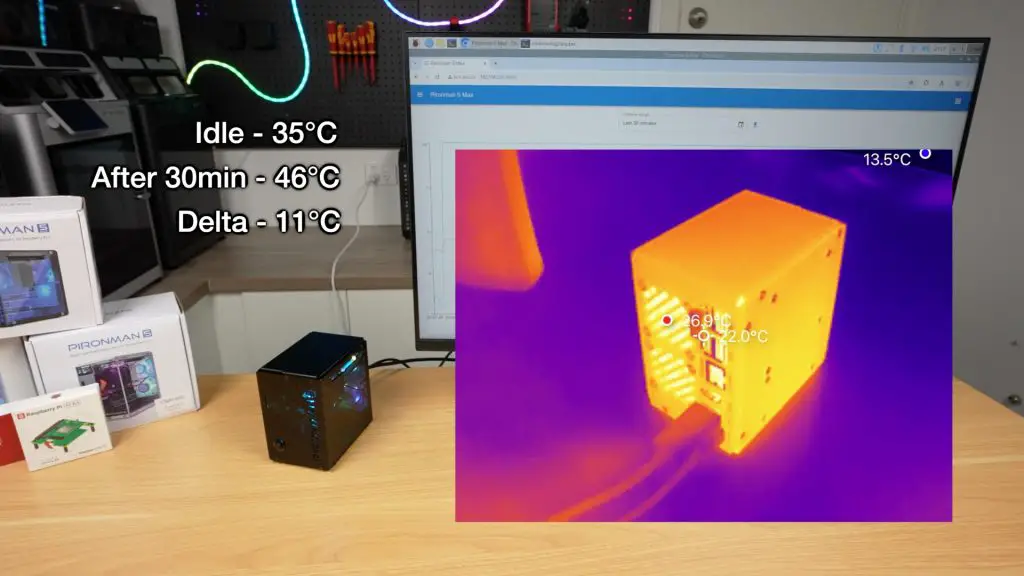

So thermal performance is pretty good, leaving a lot of headroom for overclocking.
In comparison, these are the temperatures records on the same setup (without the Hailo AI module) on the previous generation case;
- Idle temperature: 36°C
- After 30 minutes under full load: 53°C
- Temperature delta: 17°C
These results aren’t bad but you’d expect better from a case with three 40mm fans cooling a single Pi 5. I previously attributed this to restricted airflow from overly fine dust filters and inadequate inlets.
The Pironman 5 Max fixes this with front air inlets cut into the “Pironman” logo and filter-free exhaust fans, significantly improving airflow.
Fan Noise on the Pironman 5 Max
During the thermal stress test, I also measured the sound levels produced by the fans:
- Quiet mode with fans turned off (idle): 29–33dB – practically silent
- Always On (full load): 47dB – noticeably louder, potentially distracting if it’s close to you
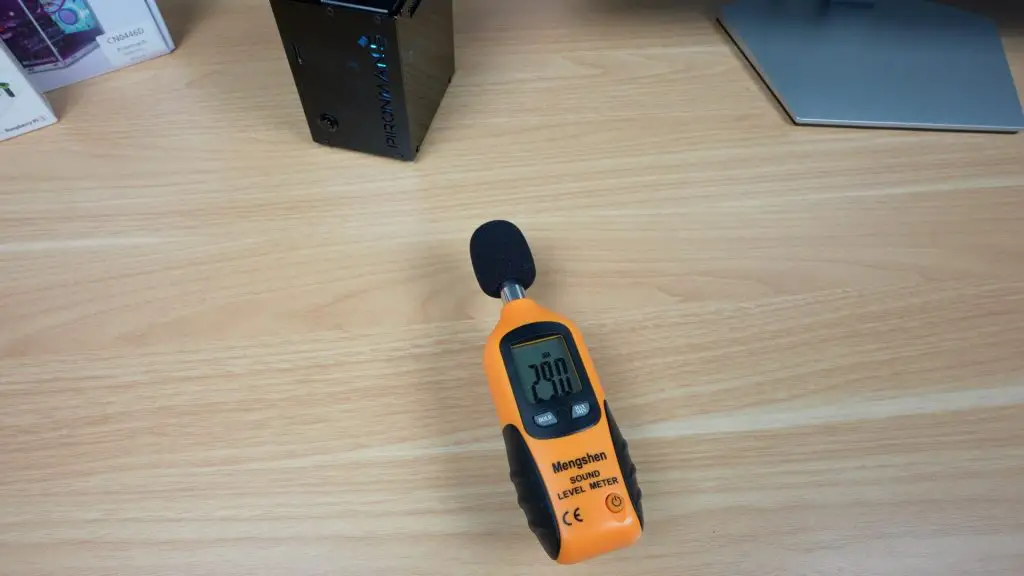

So the added PWM fan control makes a huge difference for balancing performance and noise.
NVMe & Performance
I then wanted to test the performance of the dual NVMe adaptor. I did this by running James Chambers’ Pi Benchmark script three times on the Lexar NVMe SSD. These were the results:
- Scores: 36,973, 36,947, 38,078
- Average: 37,333
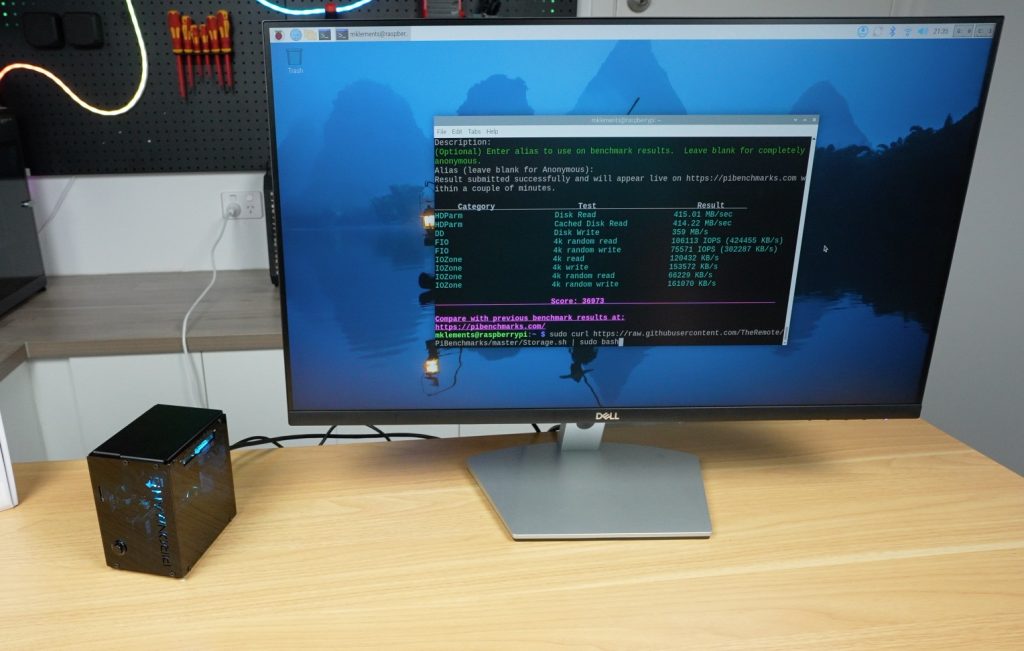
This aligns with expectations for a PCIe Gen 2 single-lane interface. You can boost it by switching to Gen 3 in the Pi’s config file.
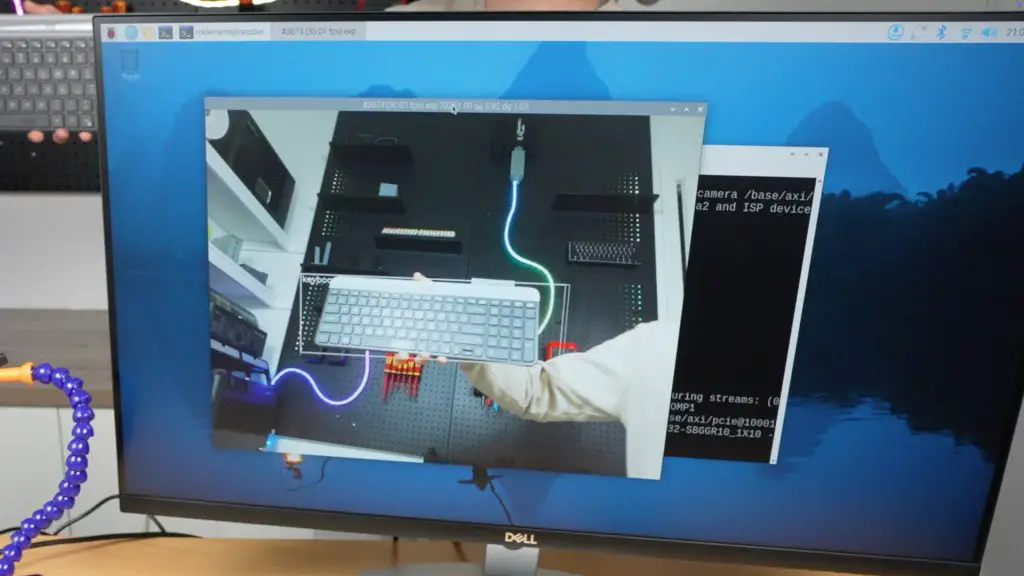
Hailo AI Accelerator
Next, I tested the Hailo AI accelerator with an added Raspberry Pi camera and Hailo’s pretrained models from their Developer Zone. The performance was quite impressive:
- Pose Estimation: 30fps, with CPU usage under 15%
- Object Detection: Also ran at 30fps with low CPU usage
- Person & Face Tracking: Handled multiple subjects in frame with ease
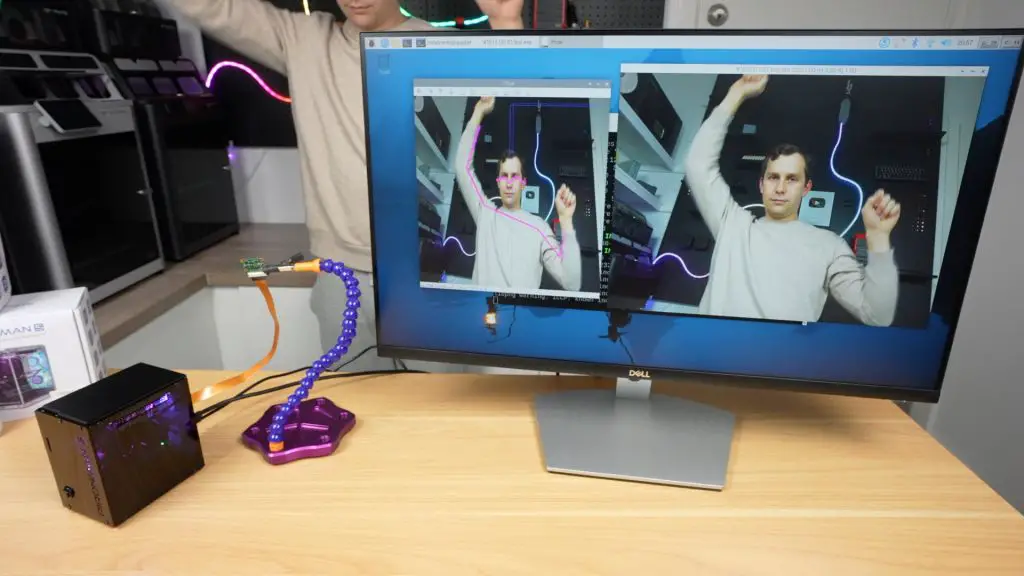
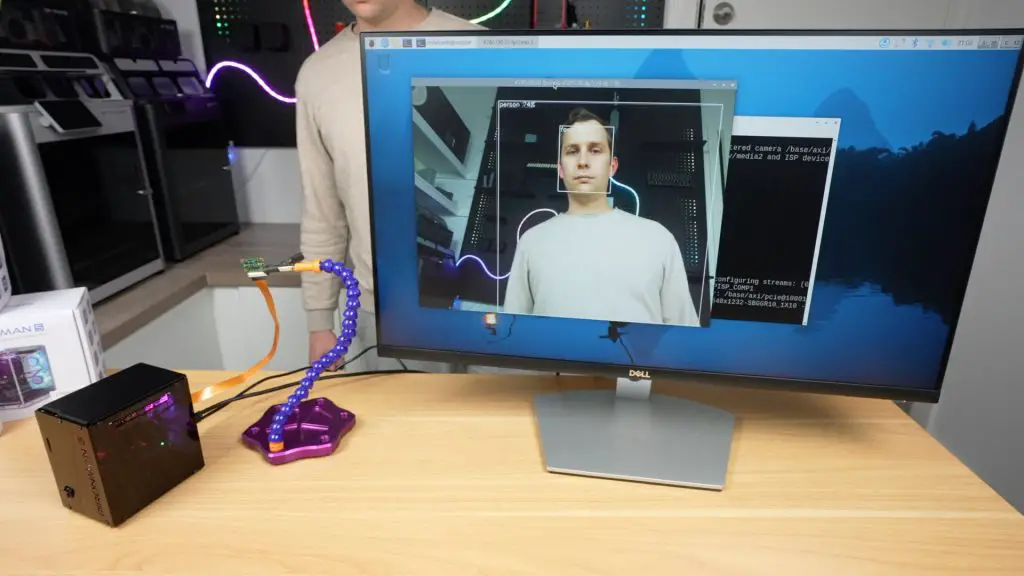
So using the Hailo AI module with a Raspberry Pi 5 significantly boosts performance for object recognition and pose estimation, enabling real-time inference with low CPU load and efficient power usage. It allows for smooth, high-speed AI processing directly on the device, ideal for edge applications without needing cloud resources.
Final Thoughts on the Pironman 5 Case
The Pironman 5 Max is a thoughtfully designed case with a premium look and a ton of functionality:
- Dual NVMe slots for expanded storage or device support
- Rear-only cable management for a cleaner setup
- Full-size HDMI ports, avoiding the inconvenience of micro HDMI
- Vast improvements to cooling and airflow
- Great AI accelerator support
- OLED display and RGB lighting with web-based customisation and controls
The case has the same footprint as its predecessor, 112mm x 117mm x 79mm, but packs in even more functionality.
The only real area for improvement would be more refined PWM control, allowing the fans to ramp smoothly with temperature rather than switching at fixed thresholds.
Despite the $95 price tag, the Pironman 5 Max offers great value considering it includes the enclosure, active cooling, dual NVMe support, OLED screen, RGB fans, and the necessary expansion boards. It’s one of the most complete cases currently available for the Raspberry Pi 5.
What do you think of the Pironman 5 Max? Let me know in the comments section below.