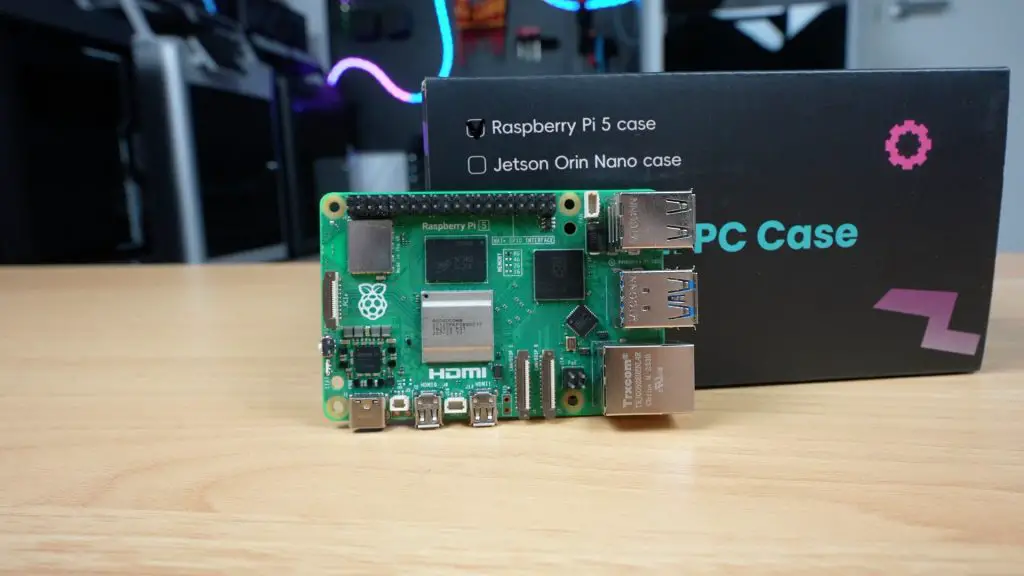
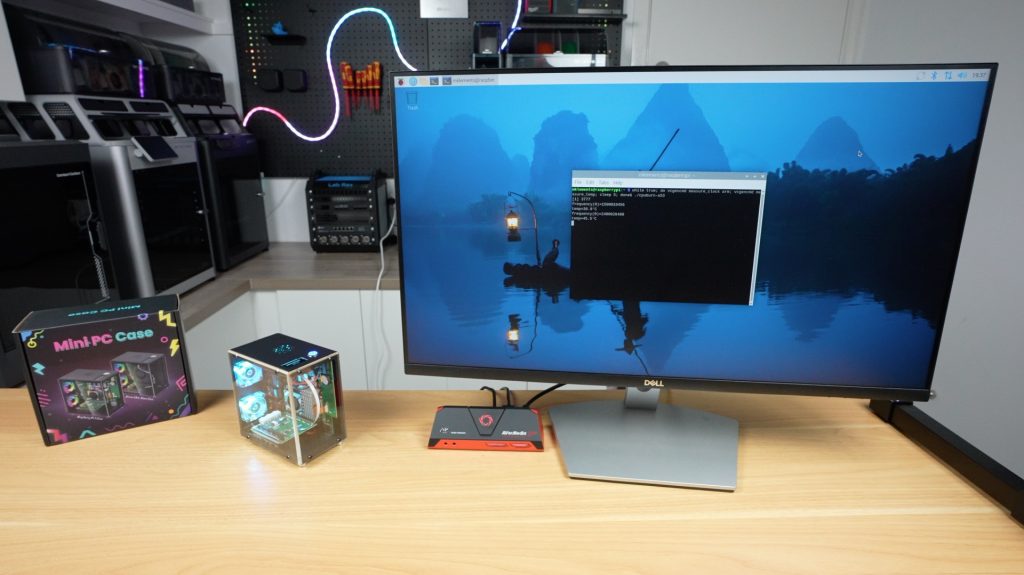
The Raspberry Pi 5 is powerful enough to be used as a mini desktop computer, and many people do, but finding the right enclosure for it can make all the difference. Today I’m looking at the new Mini PC style case from Elecrow, which aims to give your Pi the look and feel of a desktop computer without breaking the bank.
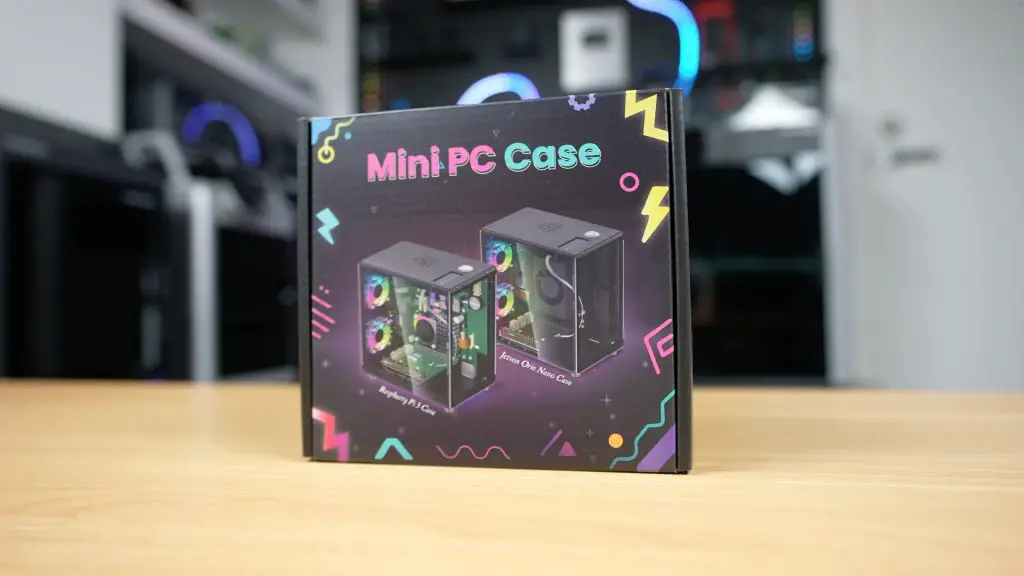
Like some of the other Raspberry Pi cases I’ve reviewed, this one comes with some cool features like a multi-fan cooling system, a port adapter that routes the Pi’s HDMI and power connections neatly to the back of the case, a 1.3″ OLED display, and an NVMe hat for connecting an SSD. What caught my attention, though, is the price. All of this comes in at just $40, which is significantly cheaper than most other cases with similar features.
So let’s find out whether it’s any good.
Here’s my video review of the case, read on for the write-up;
Where To Buy The Elecrow Mini PC Case For The Pi 5
- Elecrow’s Web Store – Buy Here
Tools & Equipment Used
- Video Capture Card AVerMedia GC513 – Buy Here
- Infiray P2 Pro Thermal Camera – Buy Here
- Sound Level Meter – Buy Here
- USB C Pencil Screwdriver – Buy Here
Unboxing the Elecrow Mini PC Case
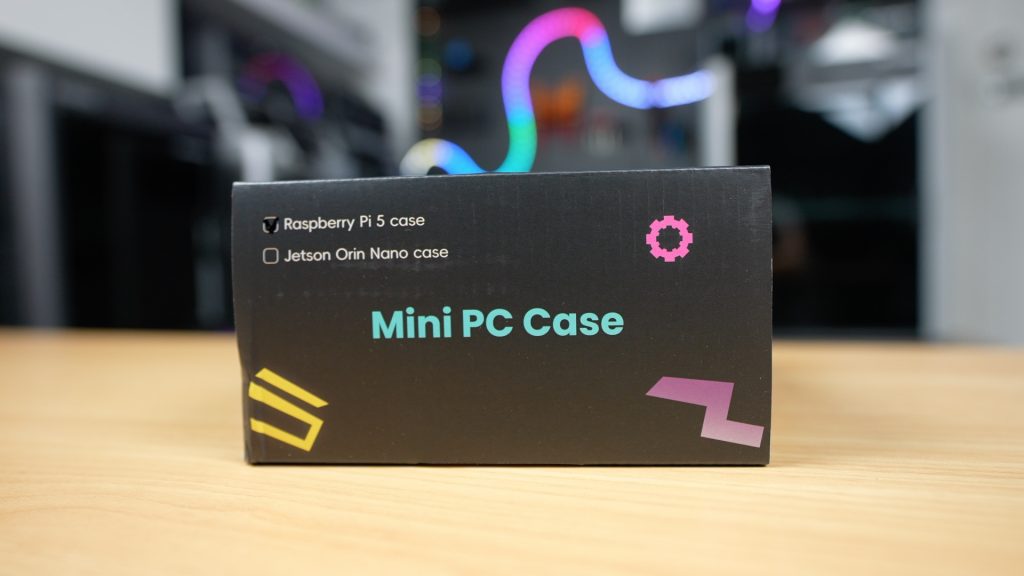
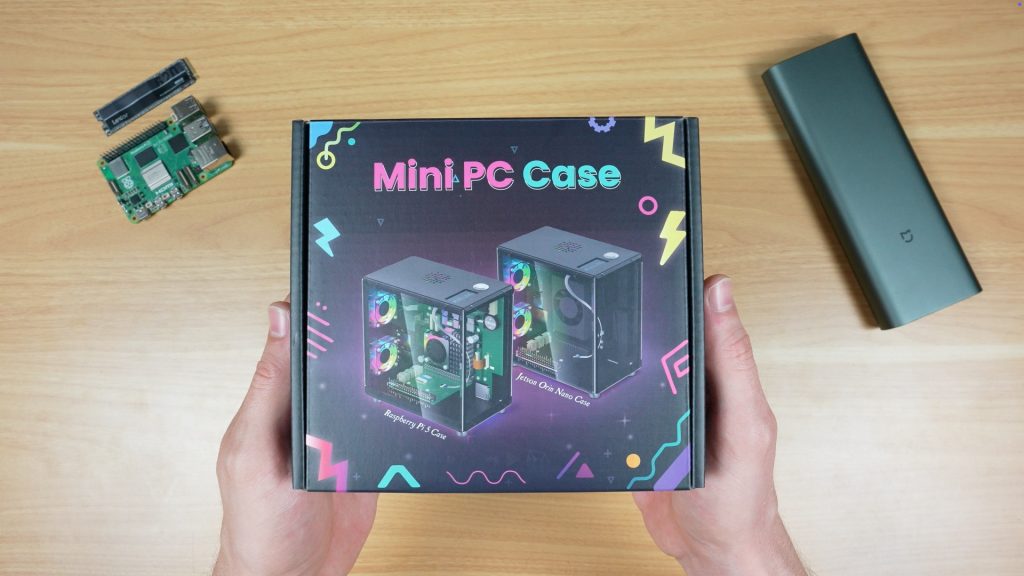
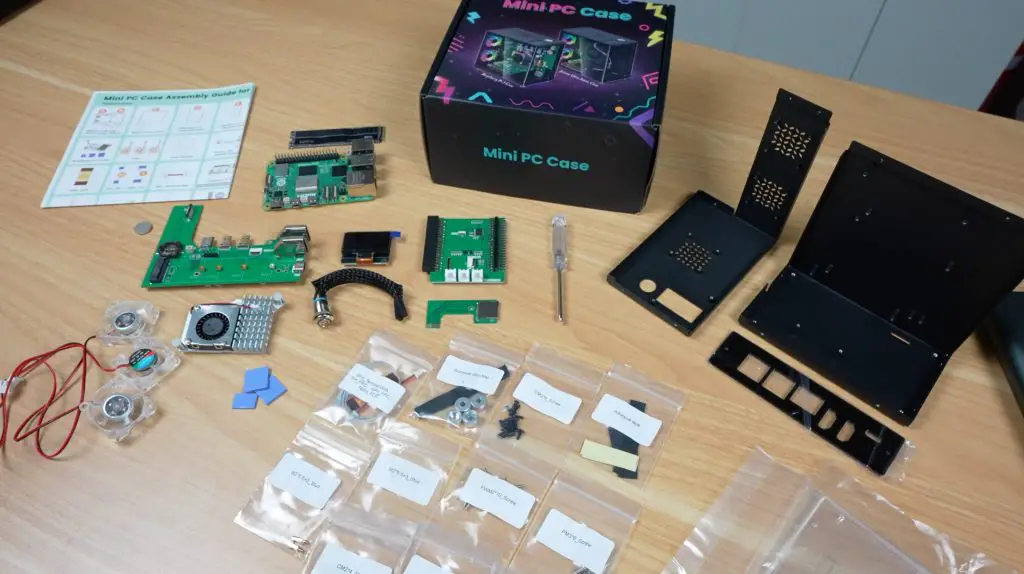
The case comes in a colourful box.
Inside it, you’ll find:
- The two metal enclosure halves
- A port adapter
- Two clear acrylic side panels
- Adapter boards and OLED display
- Cooling fans and heatsink components
- Cables, screws, and a screwdriver
Everything is well packaged, with parts and screws are individually labelled to make assembly easy. For a case marketed for both the Raspberry Pi 5 and NVIDIA Jetson Orin Nano, it would have been nice if Elecrow included the small extra components required for both platforms rather than one or the other, but it’s still a solid set of inclusions for the price.
Assembling The Mini PC Case
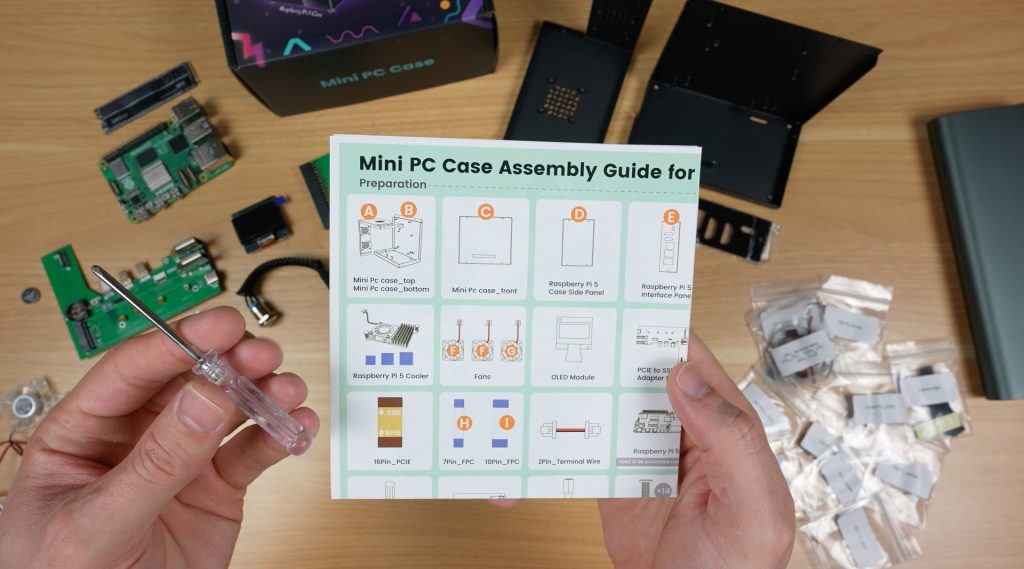
The case includes an illustrated instruction sheet and even a screwdriver, so assembly is straightforward.
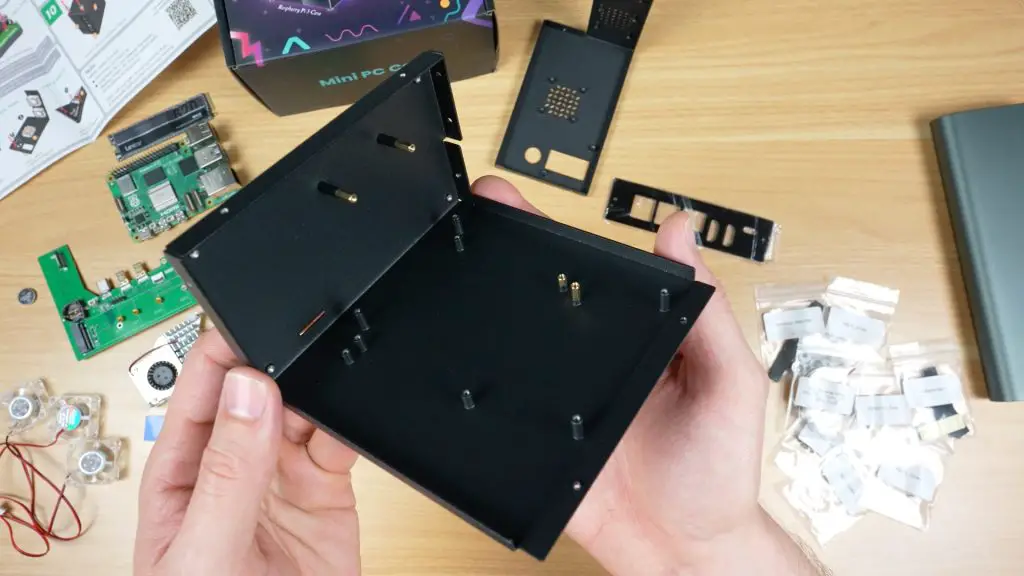
- Brass standoffs are first installed onto one half of the enclosure.
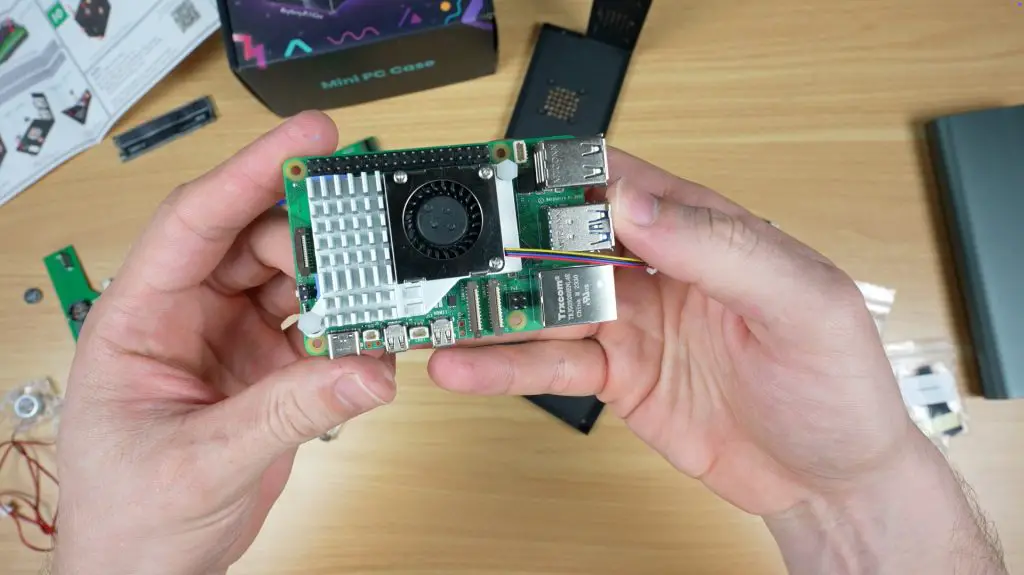
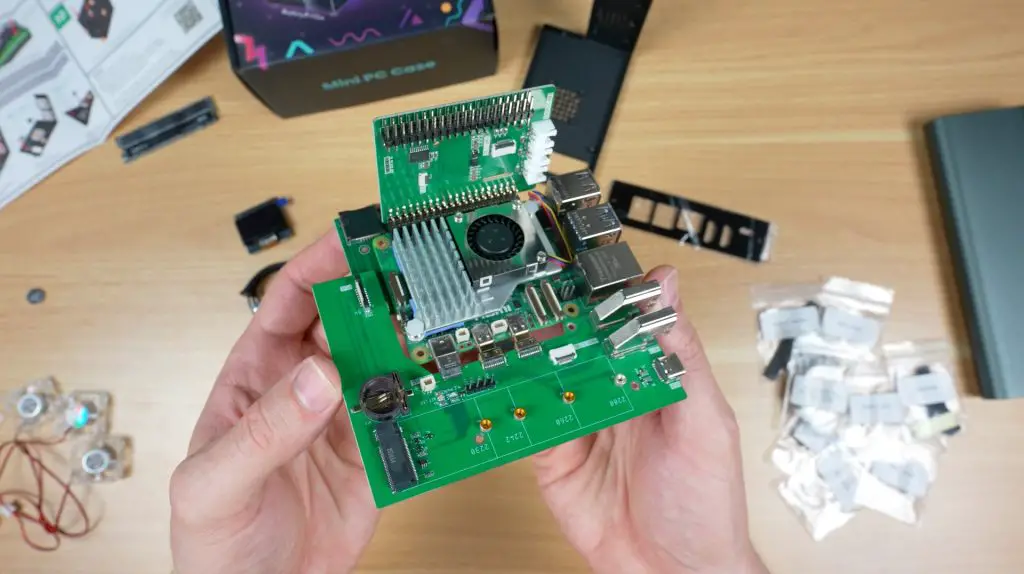
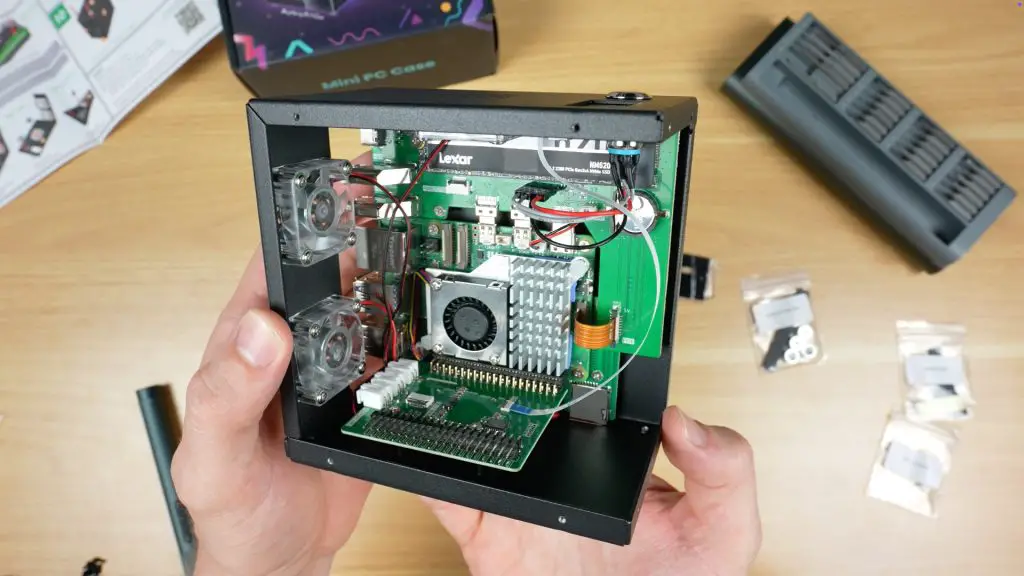
- The cooling pads and heatsink are then mounted onto the Raspberry Pi 5’s heat producing components including the CPU, power circuitry, and WiFi chip.
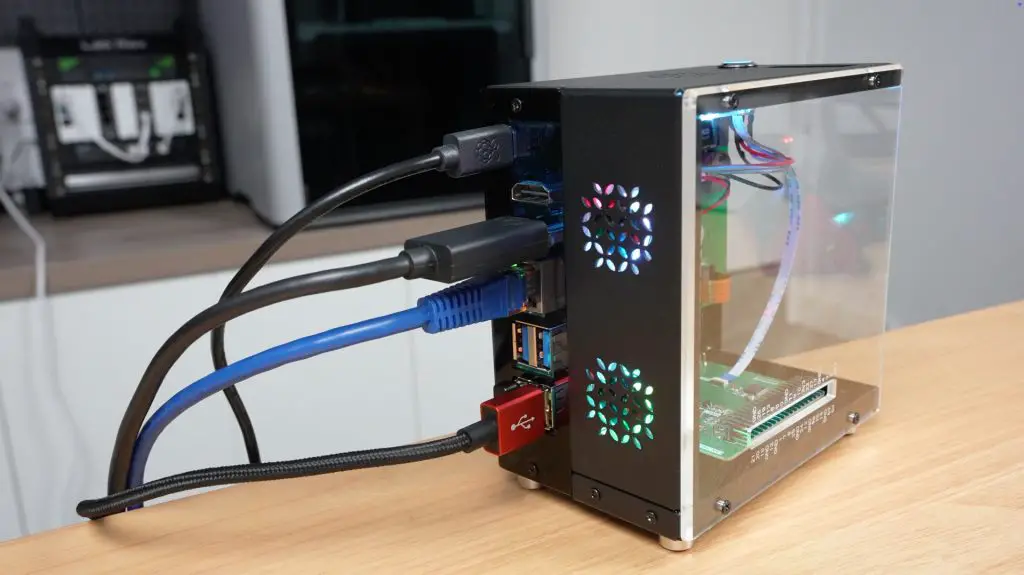
- Next, the adapter boards are connected. One handles power, HDMI, and NVMe, another handles the GPIO pins, display, and fans, and the third routes the microSD card.
- The Pi assembly is then secured to the enclosure with 10 screws (although I could only install 9, as the last one was blocked by the GPIO adapter).
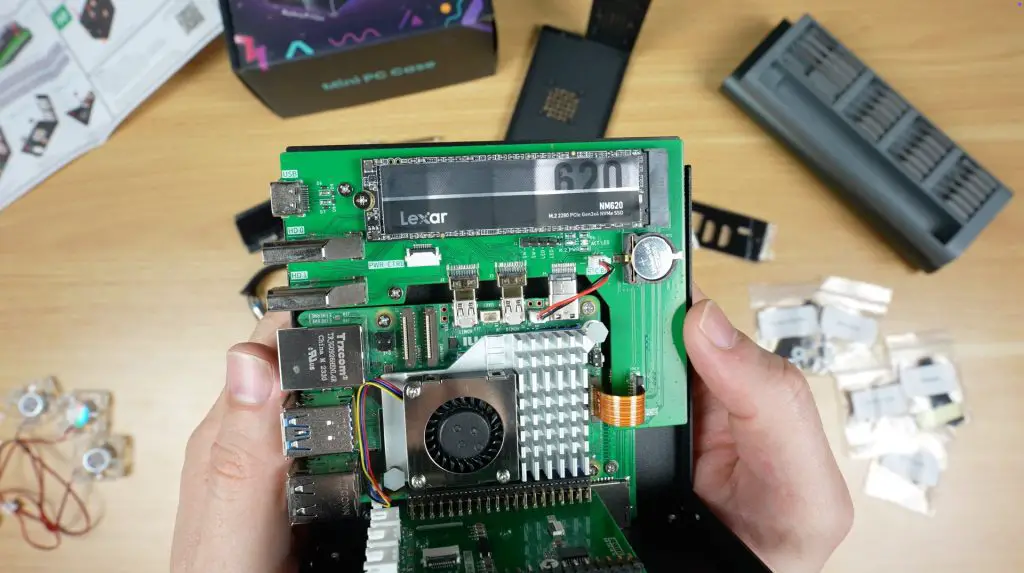
- The NVMe drive can now be installed. I tested a 512GB Lexar NM620. The hat supports a range of drive sizes from 2230 to 2280.
- The three 30mm RGB fans are installed on the enclosure halves.
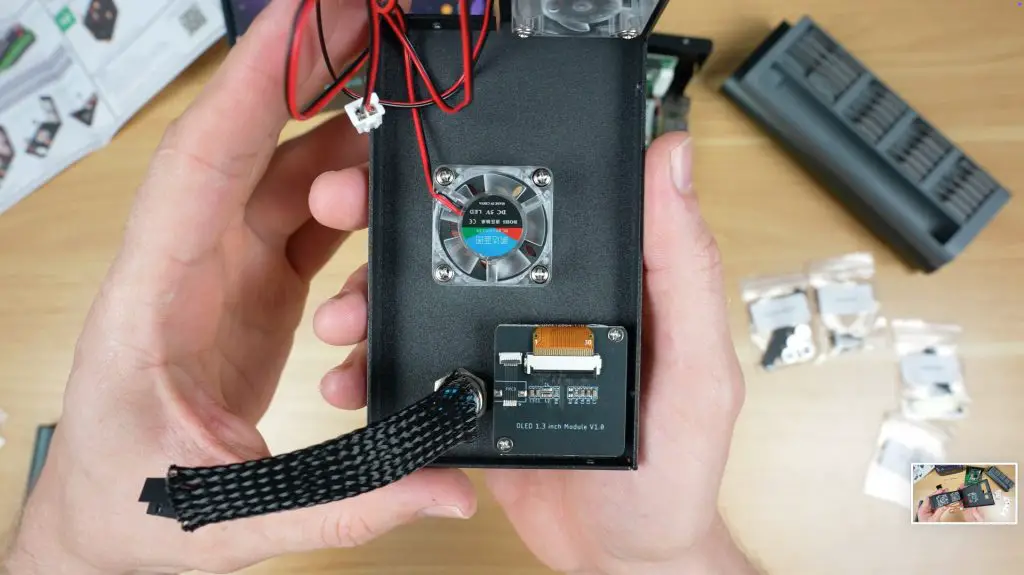
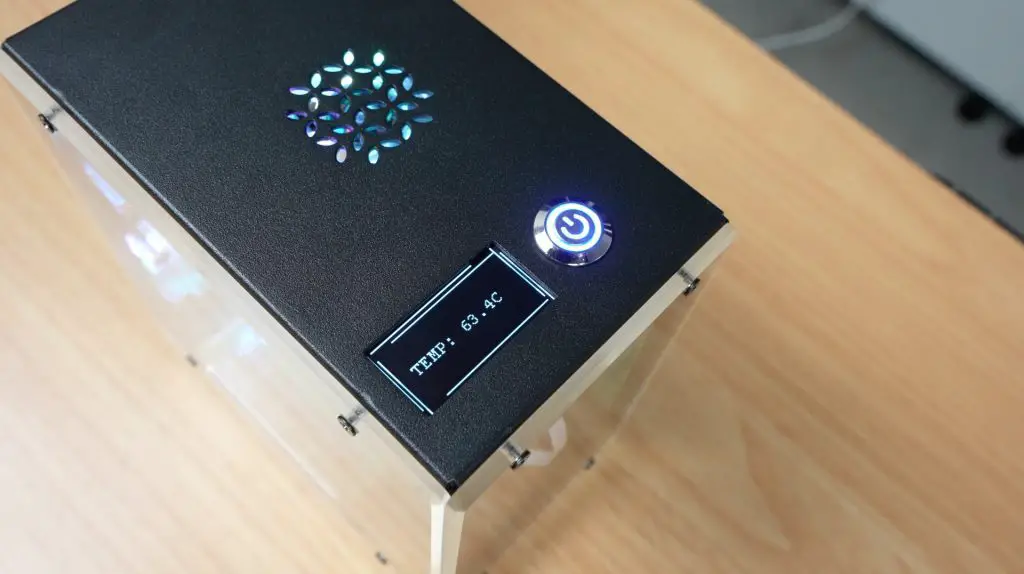
- The power button and OLED display module are added. The display is a bit larger than usual at 1.3 inches compared to the typical 1-inch displays used on these types of cases.
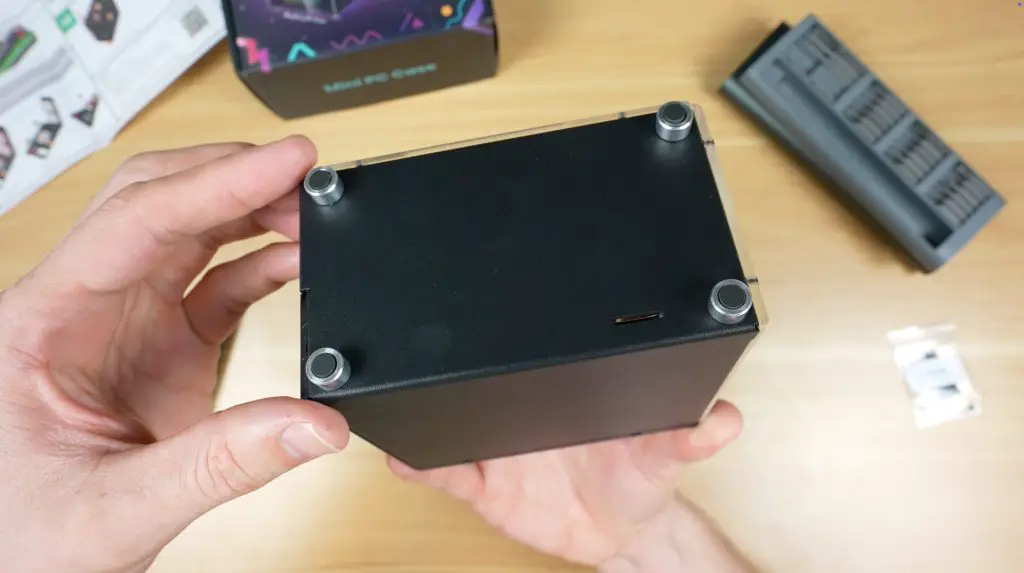
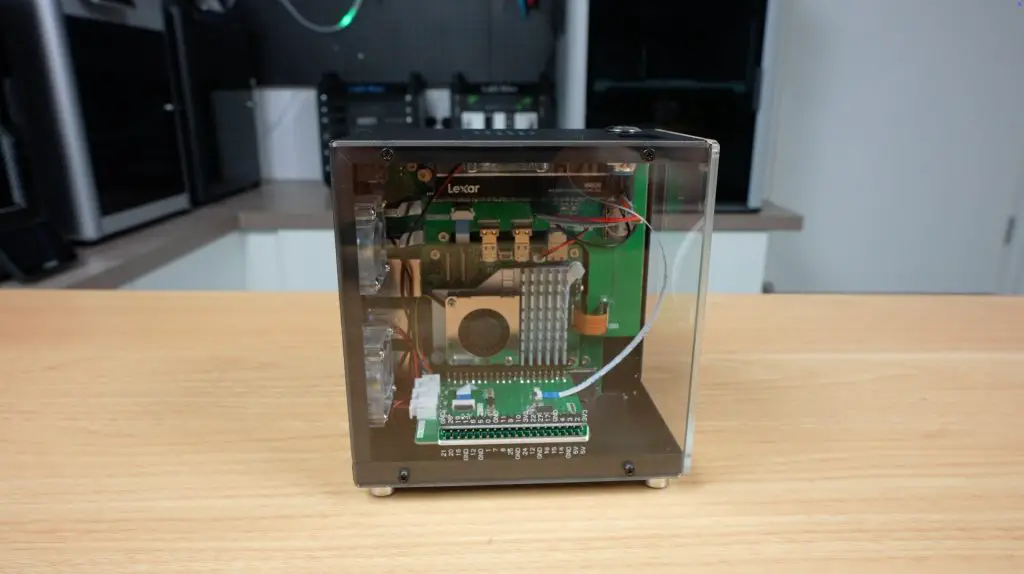
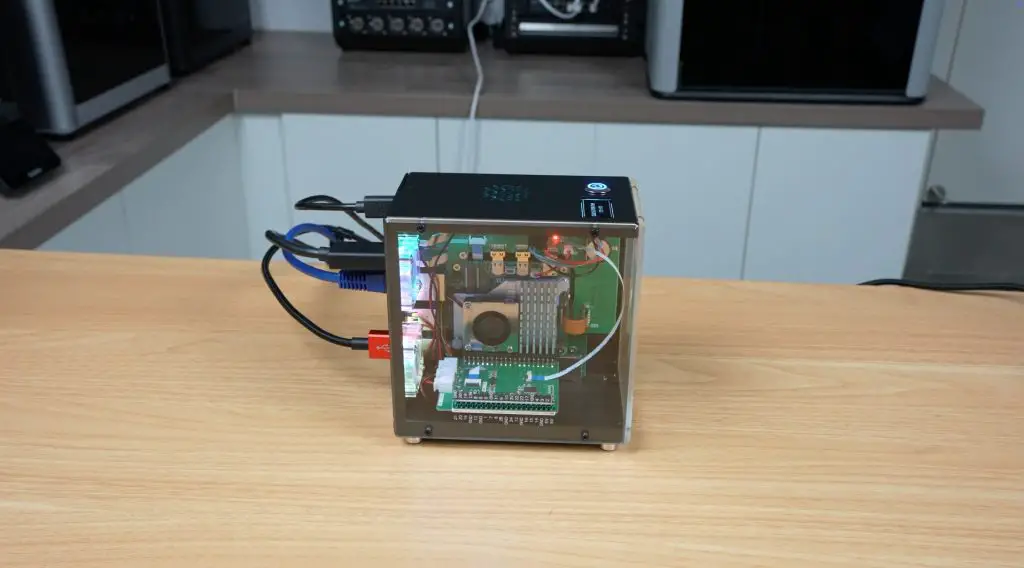
- The enclosure halves are then screwed together, with the two clear acrylic side panels and rear port cover plate closing everything up. The clear acrylic panels are bevelled, giving the case a premium finish.
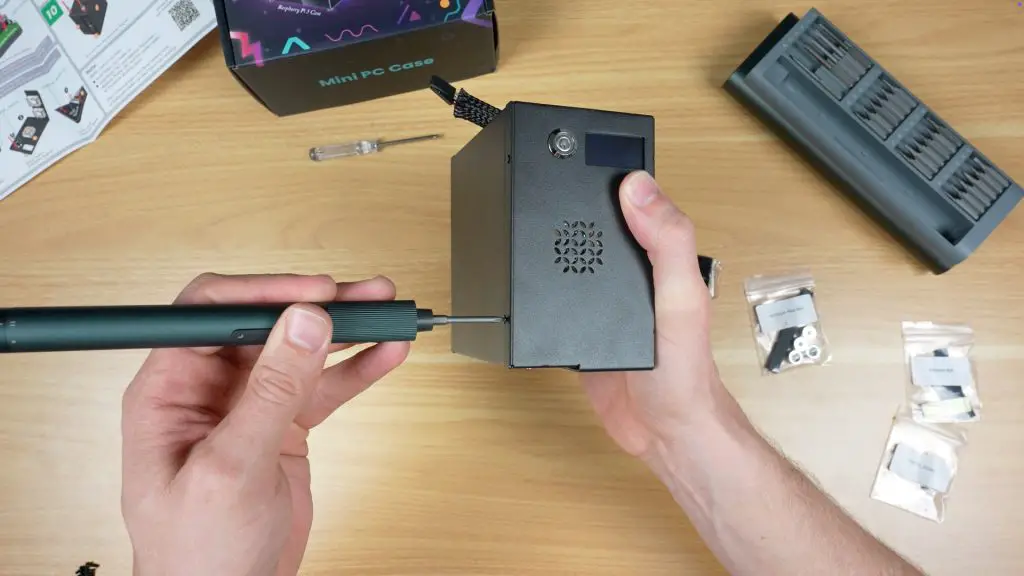
- Finally, four aluminium feet are installed on the bottom, capped with rubber inserts for vibration dampening.
With that, the case assembly is complete.

OLED Stats Display Software Setup
Getting the OLED display working requires installing a software script. This process is slightly more involved than simply running a GitHub script, but it isn’t particularly difficult. Hopefully Elecrow simplifies this in the future.
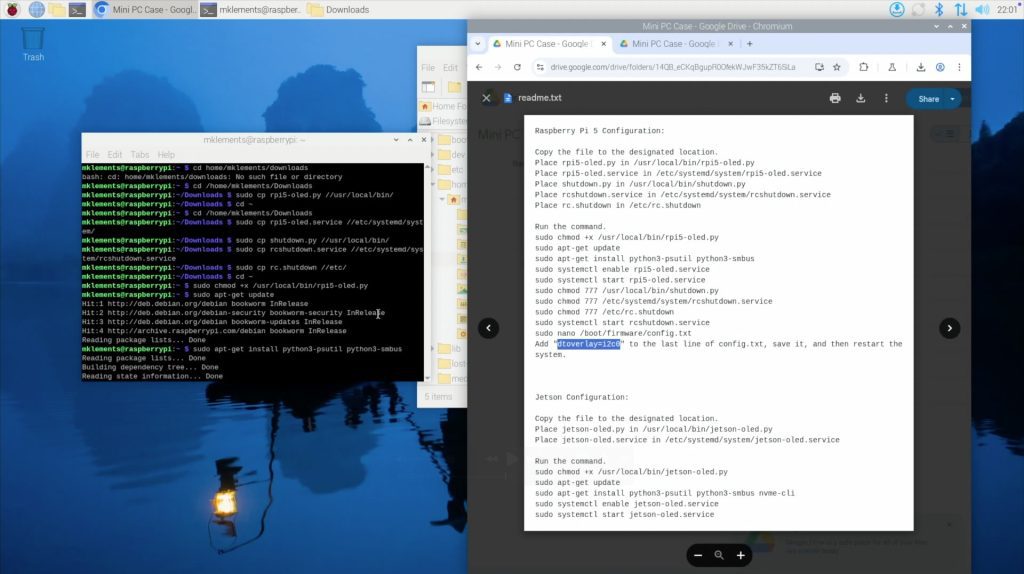
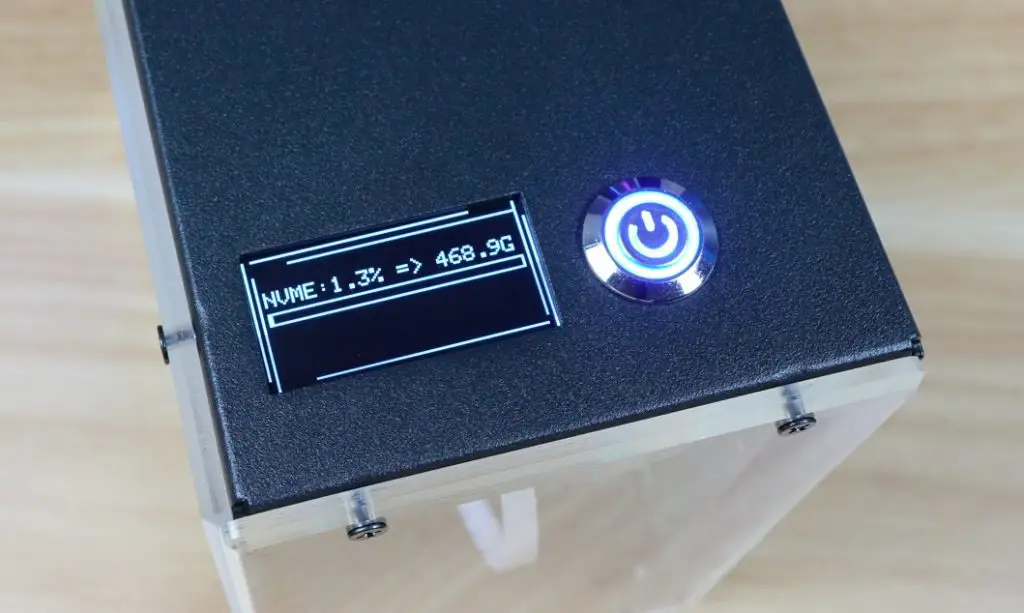
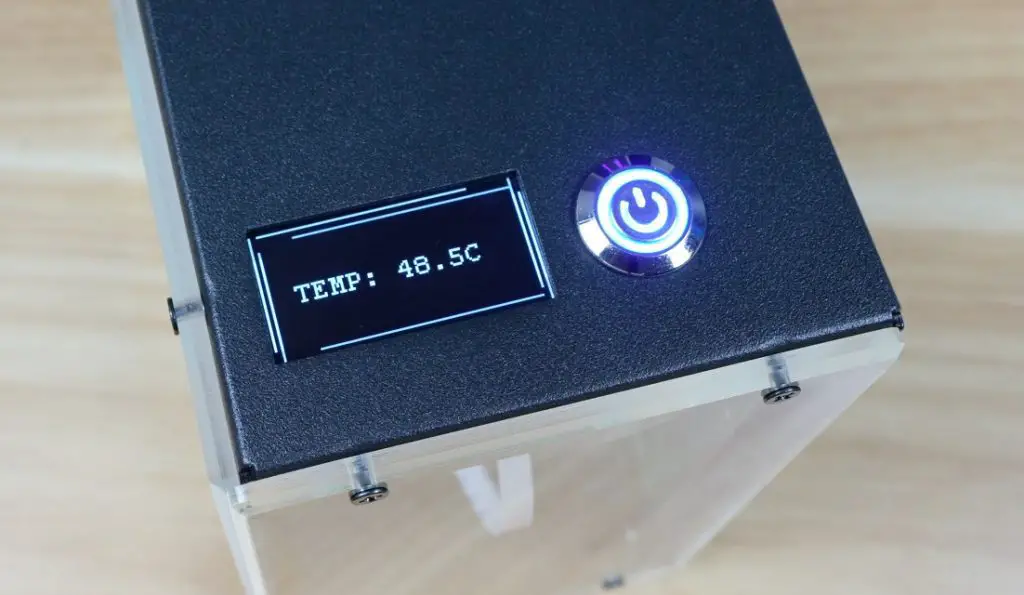
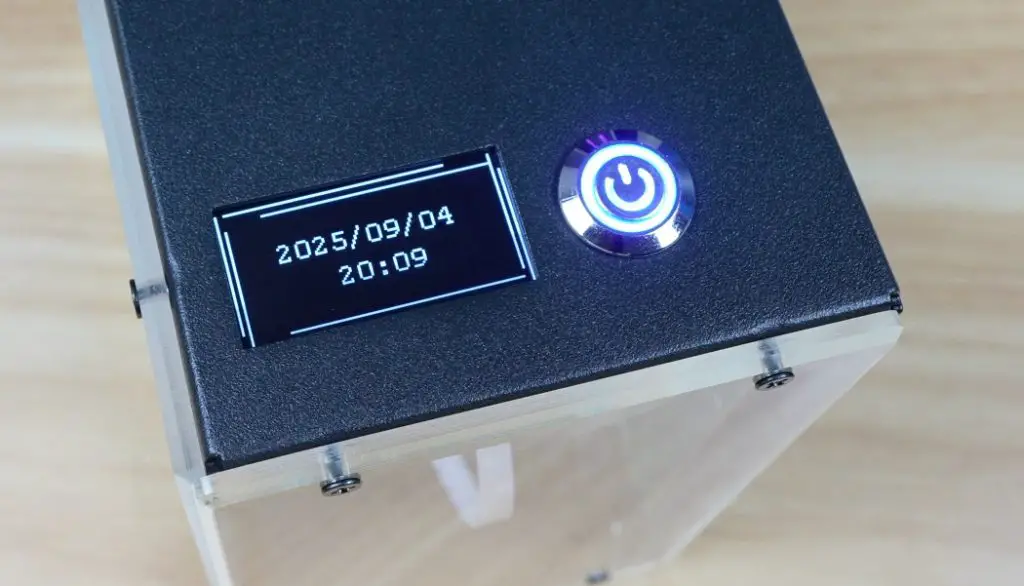
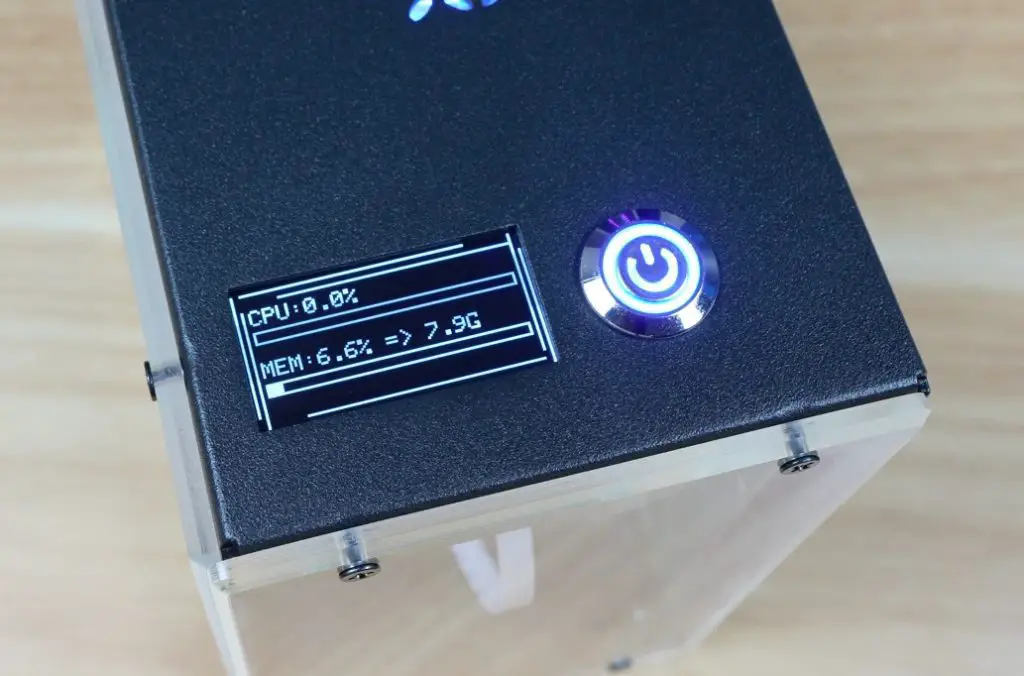
Once the script is installed and the Pi is rebooted, the display cycles through four pages showing;
- System statistics
- Storage capacity and utilisation
- CPU temperature
- Date and time
I would have liked some options here. Personally, I prefer a single screen showing system stats and temperature, but this arrangement works fine too.
Benchmarking and Thermal Testing
Since the case provides both NVMe support and active cooling, I ran a couple of tests to see how well it performs. I used James Chambers Pi Benchmarks script to test the NVMe drive performance and CPUBurn to test the cases thermals.
NVMe Performance
I tested the NVMe drive using the Pi Benchmarks script because this test favours random read/write performance which istypically how an OS uses the drive.
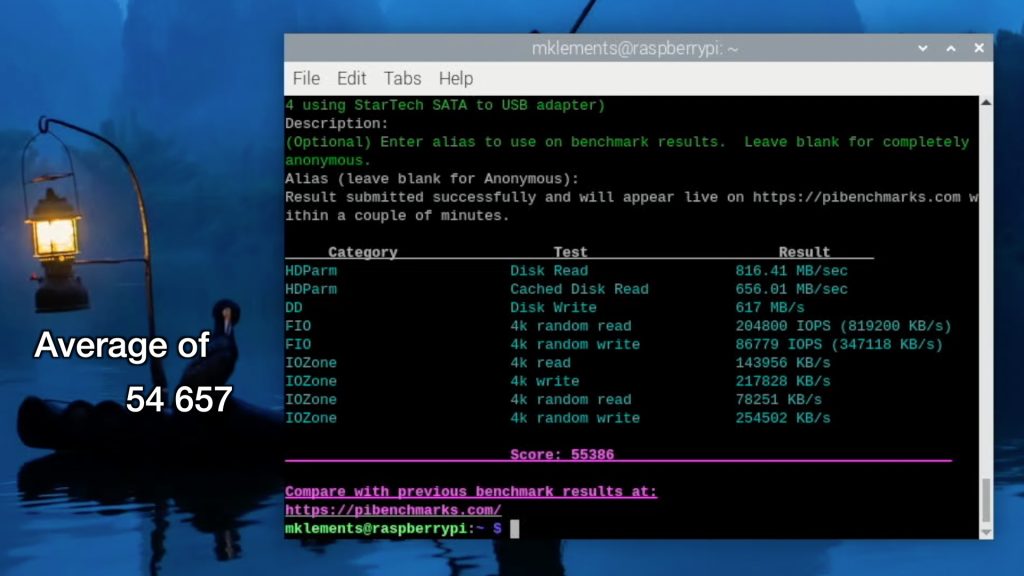
Over three runs, I achieved an average score of 54,657 (individual scores were: 53,638 / 54,947 / 55,386). This is about what you’d expect from a Lexar NM620 running at PCIe Gen 3 speeds on a Raspberry Pi 5, so there are no issues with the NVMe adaptor.
Thermal Performance
For thermal testing, I used CPUBurn, which fully loads all four Pi cores to generate the maximum amount of heat that the CPU is capable of producing.
- The test began at 39°C in a 22°C room, which is a little high for idle but not concerning.
- Within 4 minutes, the CPU temperature rose to 60°C.
- It then stabilised around 63°C for the remainder of the 20-minute test.
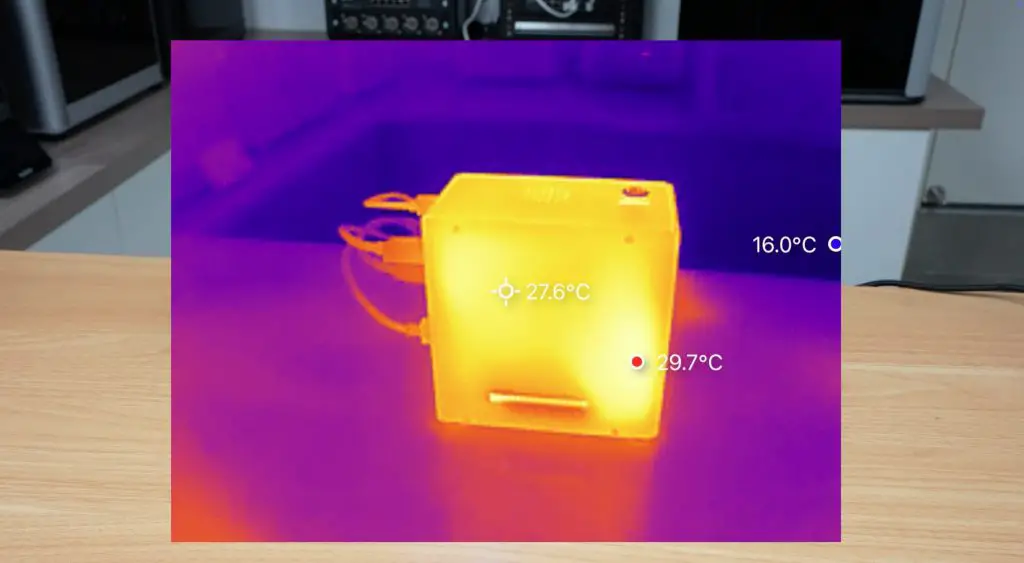
This isn’t bad, but it isn’t outstanding either. There is plenty of unused space inside the enclosure, so Elecrow could have fitted a larger cooler to improve performance. I assume they were with the smaller one to keep costs down.
Fan Noise Level
One of the first things that I noticed when booting up the Pi was that the fans are quite loud. They are not PWM-controlled, so they spin up to full speed immediately. Being 30mm fans, they have quite a sharp noise profile.
At a distance of 20cm, I measured 50 dB, which is on the noisy side for a case that’s designed to be used on your desktop.

The power button works as intended. Holding it initiates a shutdown sequence, and it then cuts power to the fans and the Pi itself, leaving the system ready for the next startup.
Final Thoughts
For just $40, this case delivers good value. You get NVMe storage support, redirected ports for a cleaner desktop setup, a functional OLED display and active cooling that keeps the Pi stable under full load. It makes the Raspberry Pi 5 feel more like a mini desktop computer than an exposed board on your desk.
Being a first generation product, there are, however, some minor quirks to it:
- As shown earlier, one screw behind the GPIO adapter is nearly impossible to install. This could quite easily be resolved by installing it at an earlier stage.
- The display setup process could be easier, ideally with a direct download link rather than a QR code. The Pi doesn’t have a camera installed, so the QR code isn’t particularly helpful.
- Cable management could be improved. For example, the OLED ribbon cable dangles in the most visible part of the case and could easily have rather been incorporated into the adaptor board alongside it.
- The redirected microSD slot comes out in a rather strange spot at the bottom of the case.
- The fans are noisy and could benefit from PWM control.
If these aren’t significant issues to you, then the Elecrow Mini PC Case is a very well-priced option for Pi 5 owners who want a desktop-style enclosure. You can check out the case on Elecrow’s web store.
Let me know what case you’ve got your Pi 5 in in the comments section below.
Pretty nice solution!
Do you have a link to the display script?
Greetings!
I like the simplicity of the design – pretty slick, but somehow without coming across as too boring 👍. Only one thing throws me off about it: the placement of the display on top, of all things – if you don’t have the case standing quite LITERALLY under your nose, you’ll be rubbernecking every time you want to see the data. Why not having it hang behind the perspex on the short side, with a minimalist attachment at the existing screws, so it’s visible from the front instead? (But that’s probably impossible without a completely new cable 🤷♂️…)