Imagine a little screen on your desk, wall or even fridge, quietly updating you with your calendar, to-do list, or the weather without the distractions of a phone or computer.
That’s what TRMNL is, a sleek, open-source, battery-powered e-ink display that’s built to be simple, low power and easy to use.
Today I’ll show you what the ready-made TRMNL can do and then we’ll go a step further and actually build one ourselves, from scratch, to see if it’s worth making your own or buying their version.
Here’s my video review and build, read on for my write-up;
Where To Buy TRMNL
To Build My DIY Version
- ESP32-S3 XIAO – Buy Here
- 7.5″ Monochrome e-Ink Display 800×480 (Seeed SKU 104990861) – Buy Here
- E-Ink Driver Board for XIAO (Seeed SKU 114993558) – Buy Here
- or E-Ink Driver Board for XIAO (Seeed SKU 114993558) – Buy Here
- 2000mAh Battery – Buy Here
- BYOD TRMNL License – Buy Here
- PLA Sparkle Filament – Buy Here
- M2.5x6mm Screws – Buy Here
- M2.5 Brass Inserts – Buy Here
Tools & Equipment Used
- Bambulab H2D 3D Printer – Buy Here
- Hakko Soldering Iron – Buy Here
- USB C Pencil Screwdriver – Buy Here
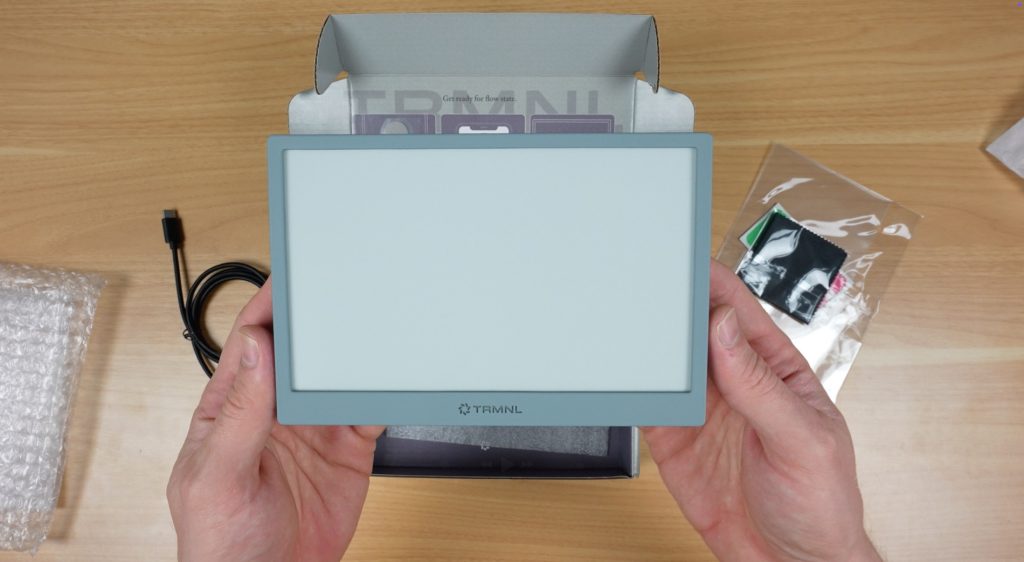
Unboxing & First Look At TRMNL
This is the TRMNL package that you can order directly from their website from $139. They also have a few different finishes and some add-ons like a battery upgrade and developer license to create your own plugins.
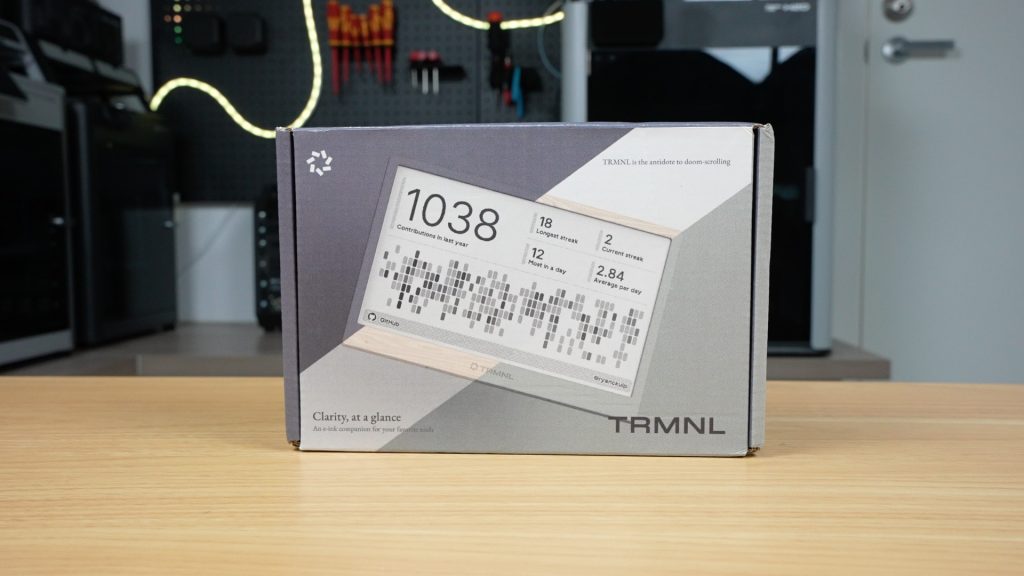
I got the Clarity Kit which includes the developer license, a USB-C charging cable, a screen protector, and then the terminal itself, which has the upgraded 2500mAh battery.
This is the grey version and it comes in a total of six different colours.
Design and Features
On the front we’ve got the 7.5” e-ink display, and on the back is the power switch, a button to refresh the screen, and a USB-C port for charging.
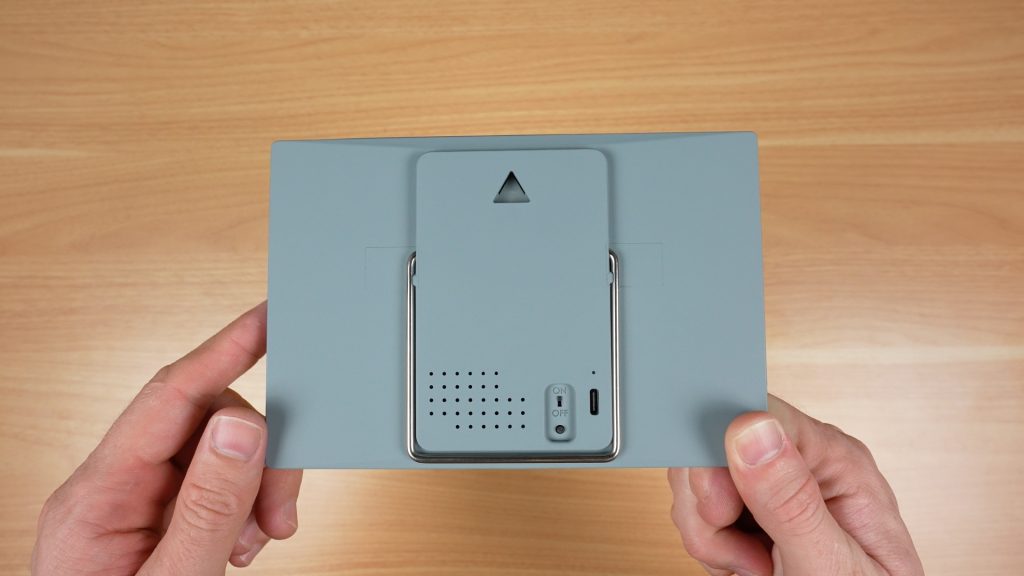
It’s also got two mounting options:
- A hanging point for a nail or screw
- A flip-out metal stand
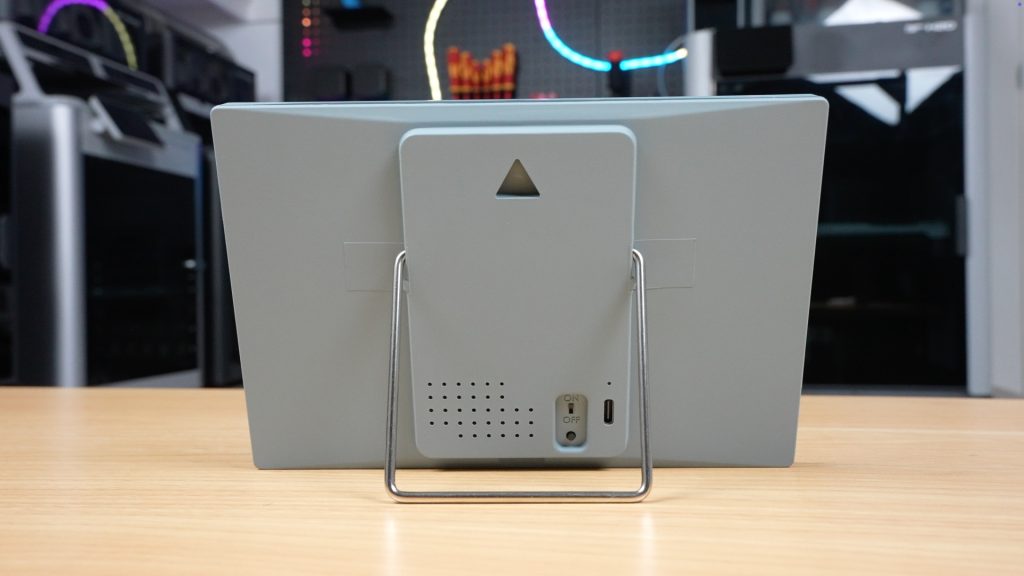
I kinda wish it had a magnetic option as well to stick it onto a fridge or filing cabinet.
The device is preassembled and ready to go, with their software already installed.
Setup Process
I found the setup process really easy to work through. You essentially connect to TRMNL’s WiFi hotspot to tell it how to connect to your WiFi network and then link it to your account using a device ID.
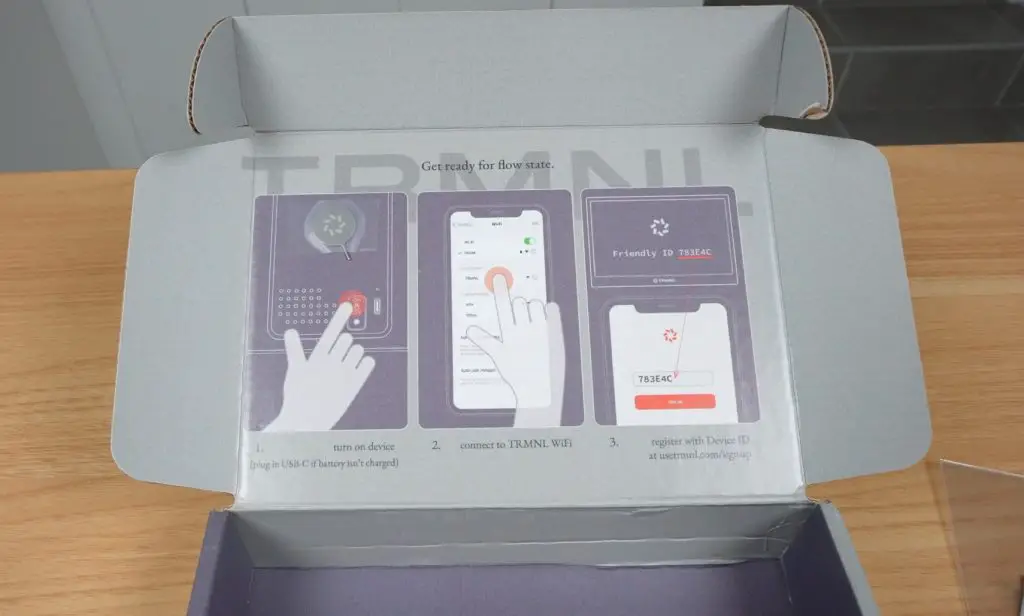
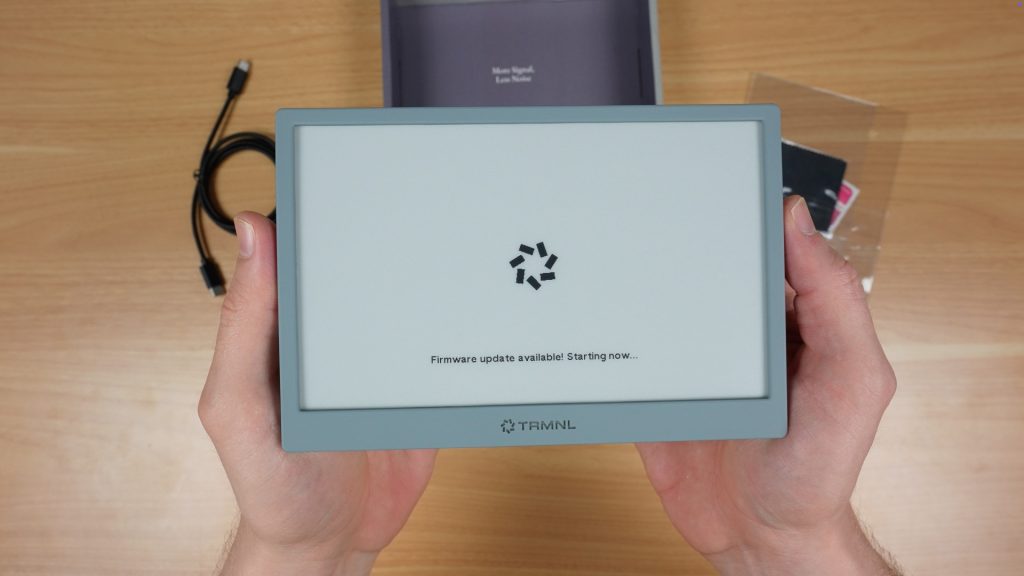
After linking to your account, it automatically updates the firmware and the rest is then managed through their website.
Battery Life
One of the best features of TRMNL is that because it’s got an e-ink display and a low power microcontroller, it doesn’t need to be permanently plugged in. The built-in battery will power it for up to 6 months between charges, depending on how often it is updating the display.
Being an e-ink display, it only requires power to change the image. Between updates the display is off and the microcontroller goes into a low power sleep mode.
Software and Plugins
Their website is fairly easy to use once you get the hang of it, but it can be a bit confusing when you first open it up.
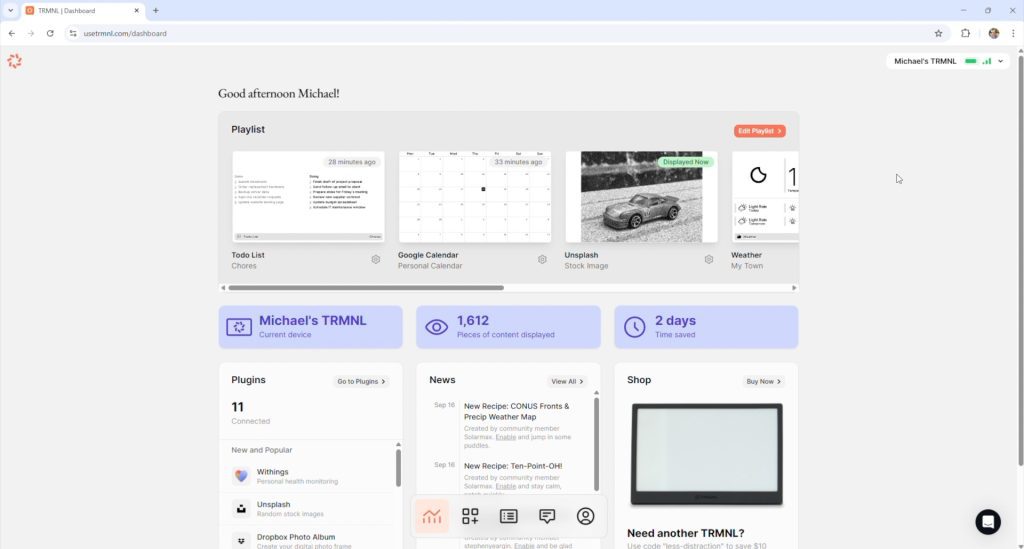
There are basically three components to what is displayed:
- Playlists
- Plugins
- Recipes
Plugins and Recipes are essentially the apps that provide the content to be displayed. Plugins are developed by TRMNL themselves and Recipes are community-developed.
You then load these into a Playlist which allows you to cycle through them so that you’re not limited to just running one app at a time.
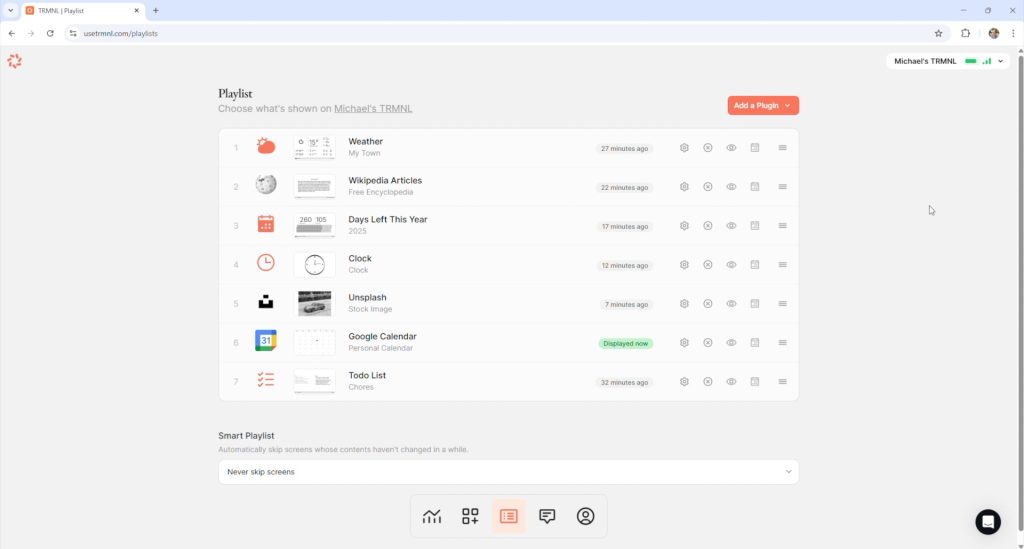
There are also a few other options, like having up to four plugins or recipes displayed at once through one of eight available layouts, so you can really get quite a lot of information onto it.
Limitations
This is not an LCD or OLED display, so you’re not getting an HD-quality image. The highest refresh rate that you can set is once every 5 minutes, but that’s the point.
It’s intended to be a minimalist display for data that doesn’t change very quickly or often, and that will run for months between charges.
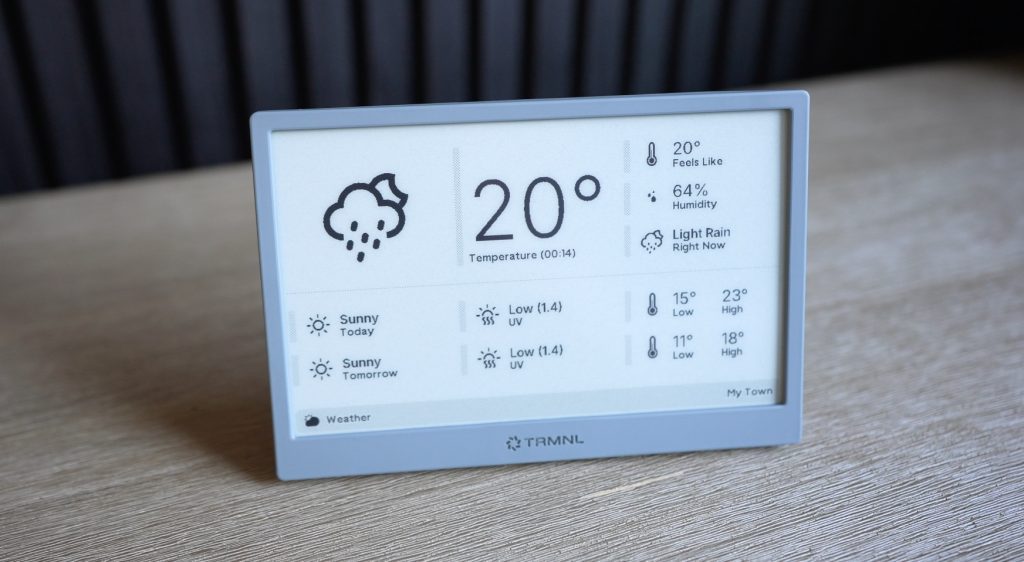
You can even set it to only update once every hour and to enable sleep mode during times when you’re not around it anyway, and that’ll extend battery life to over 10 months.
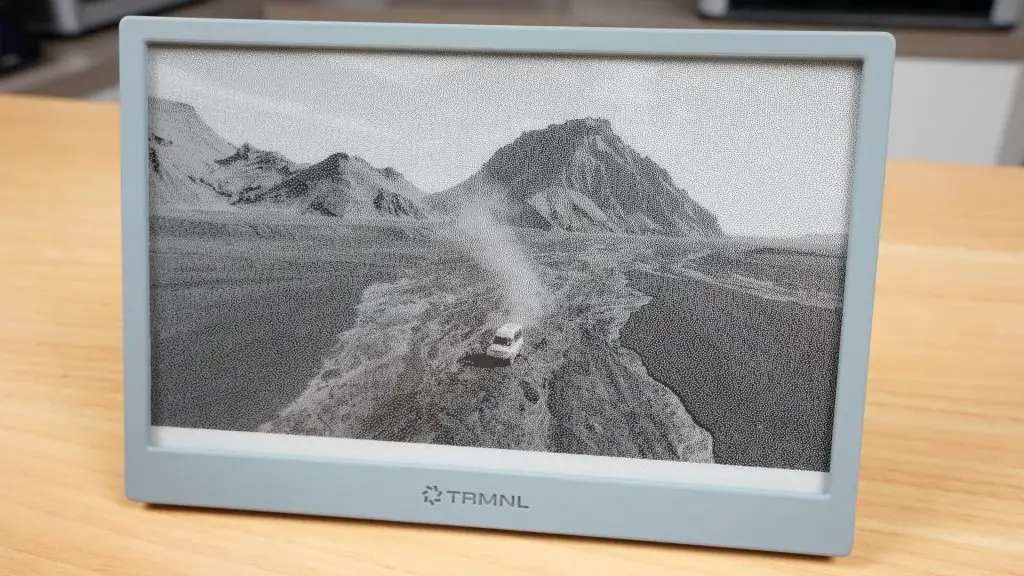
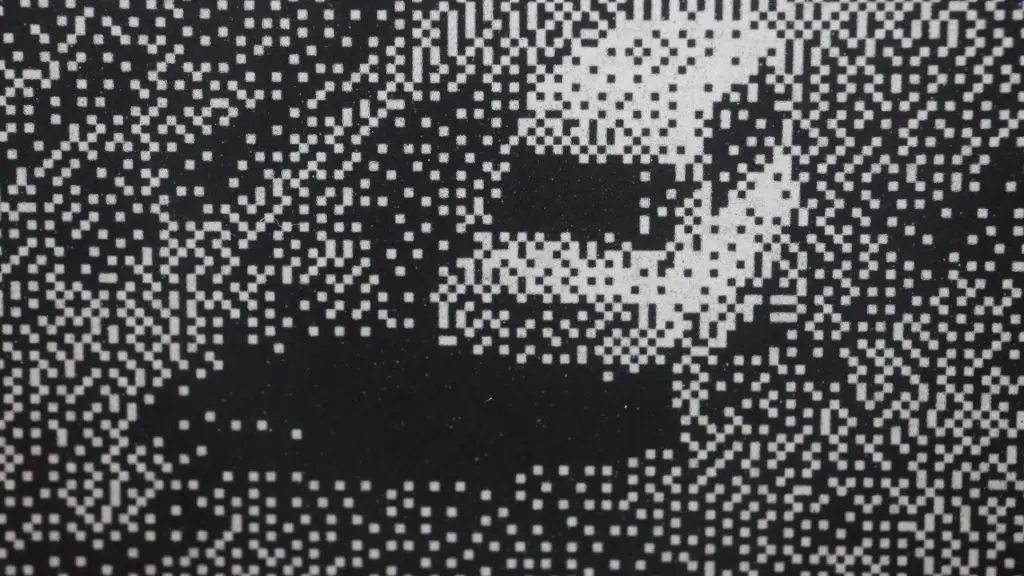
You can use it to display images, and there are a couple of plugins for photos which get the job done, but it’s not what this screen is intended for. The rendered image is quite grainy. It’s far better suited to displaying sharp text and simple graphics.
At the time of making this post, there are over 500 plugins and recipes available for TRMNL, so you should easily be able to tailor it to your needs.
Building A DIY Version
Now let’s move on to the DIY version.
Since the team behind TRMNL have made it completely open source, they’ve also published everything you need to build your own version. You can even register DIY devices on their server to use their web platform too.
They say that their retail price is often cheaper than building your own, and that may be true depending on where you get your components. But I found it to be a tiny bit cheaper.
DIY Component Costs
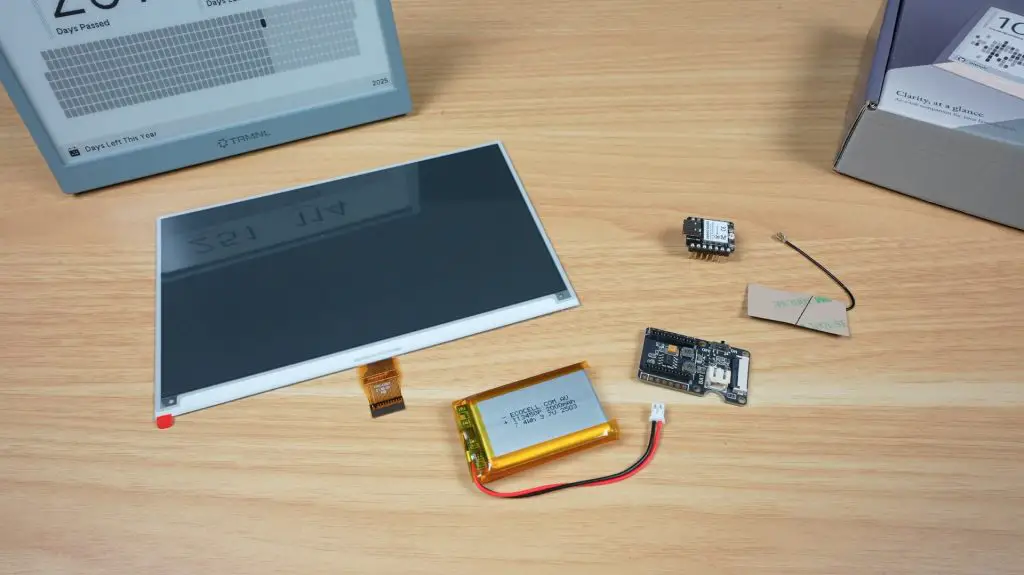
Here’s what I used:
- 7.5″ e-ink display – $35
- ESP32 with antenna – $6
- E-ink Display breakout board with built-in battery charger – $5
- 2000mAh battery – $10
That’s just $55 for the components, or $70 including shipping.
This is quite a bit cheaper than TRMNL’s $139 price tag. But that’s before adding their $50 one-time device fee (BYOD License) to use their server, and without an enclosure, which I’m going to design and 3D print myself.
So all up, I think it’s fair to say that you’ll be in for a similar price either way.
Server Options
You also don’t have to pay the $50 BYOD License fee to use their server. You can host your own server privately if you’d like to. This will do away with the device fee as well as keep all of your data in-house.
Personally, I like the ease of use of their website and I’d rather pay a one-off fee than have to pay a monthly subscription, so I’m glad they’ve gone with this model.
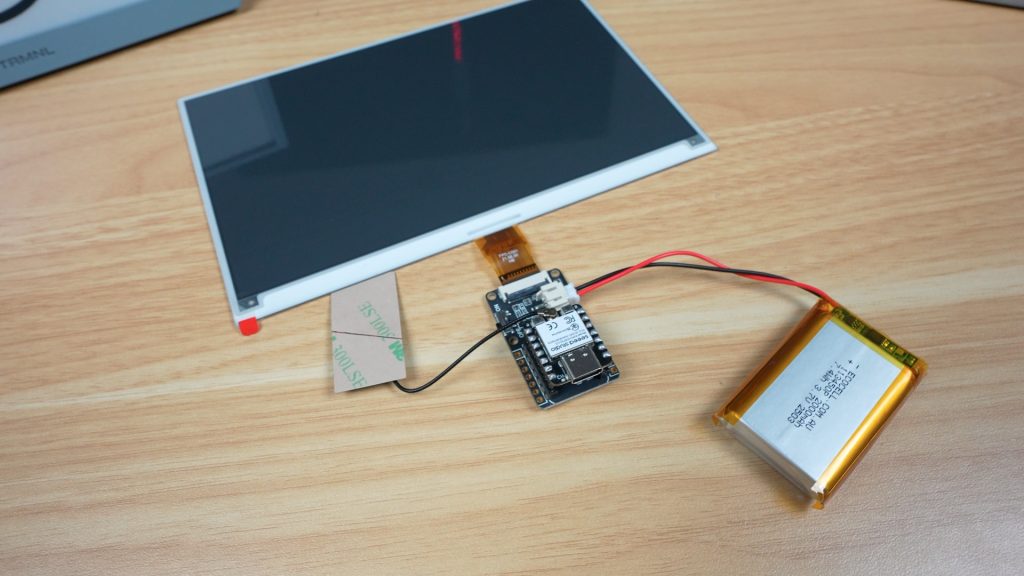
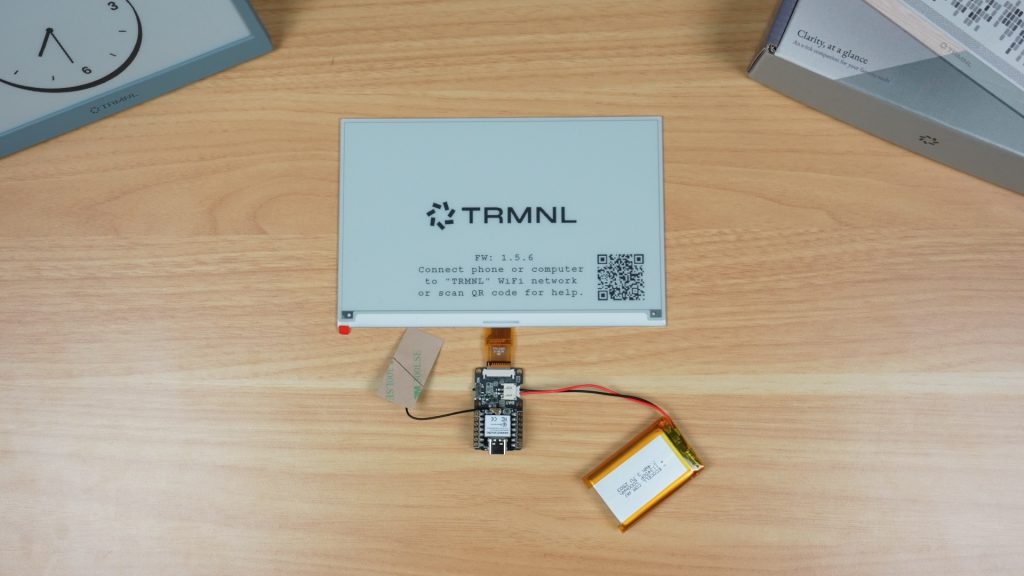
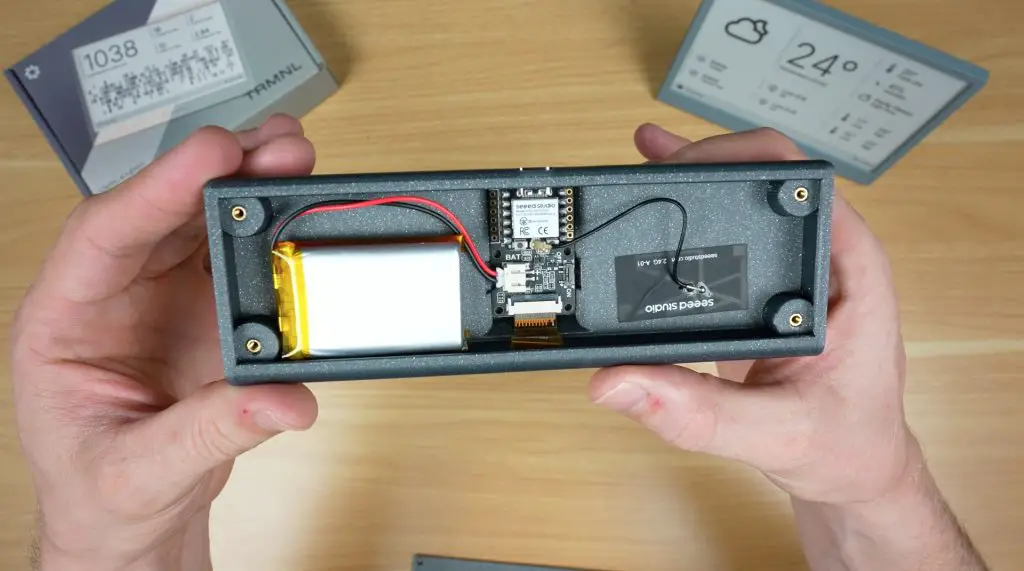
The DIY TRMNL Build
The heart of the DIY TRMNL is the little ESP32 module. This is a 32-bit RISC-V chip that operates at up to 160MHz.
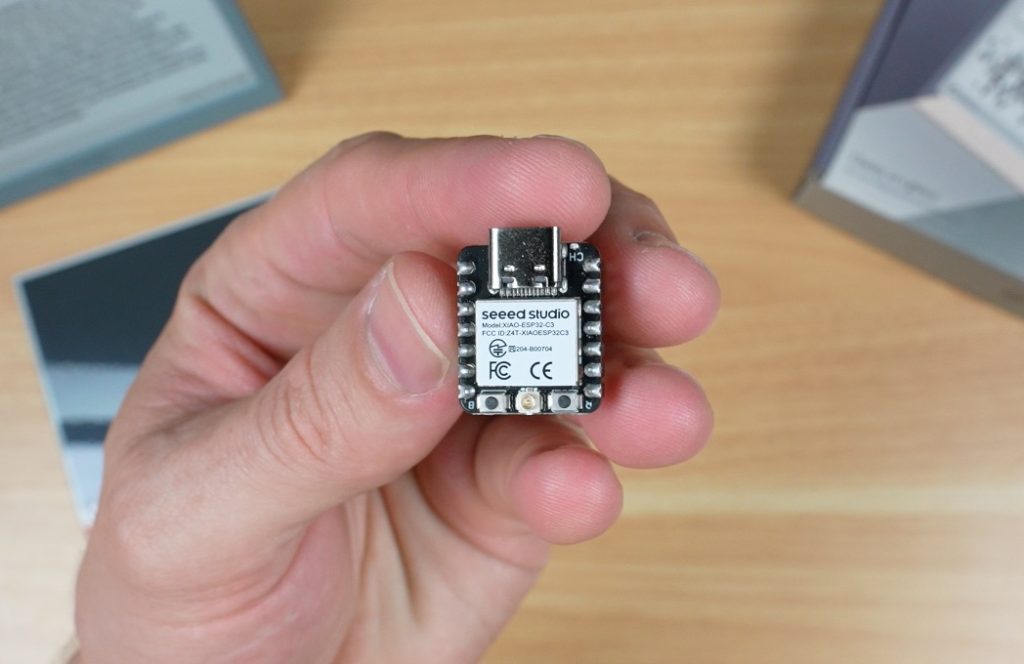
Its real strength is low power consumption, it can use as little as 44 microamps in deep sleep mode, which makes it perfect for this type of battery-powered project. It’s also got built-in 2.4GHz WiFi and Bluetooth 5.
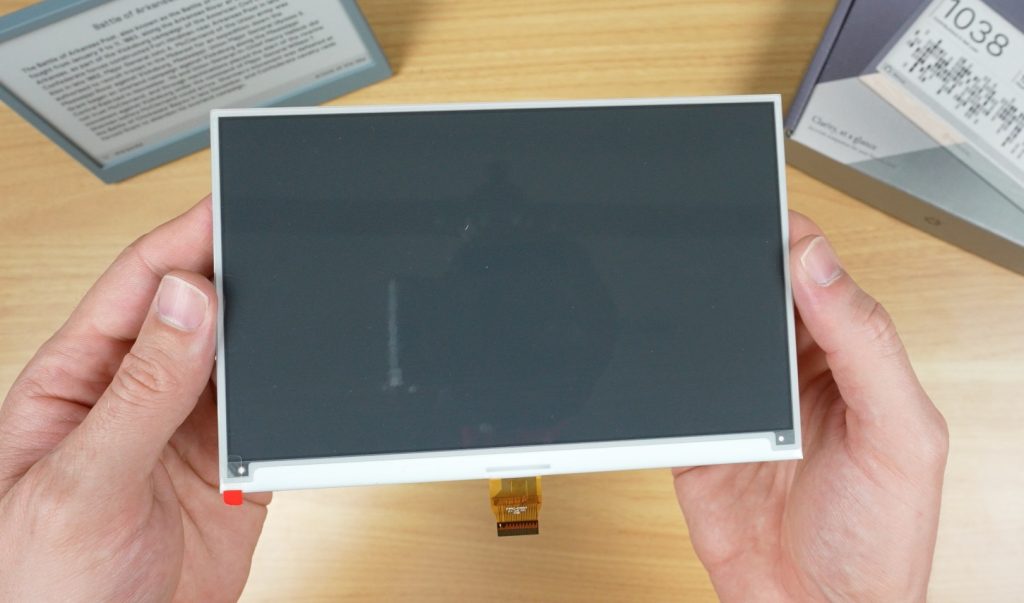
The 7.5″ display that we’re pairing it with has a resolution of 800×480 and it takes around 3.5 seconds for a full refresh of a single frame. So it’s not winning any awards for performance, but like the ESP32 it’s really good on power consumption. It uses just 8 milliamps during a refresh and doesn’t need any power between refreshes to maintain what is displayed.
To connect these together, as well as use and charge the battery, we’ve got an e-ink driver board.
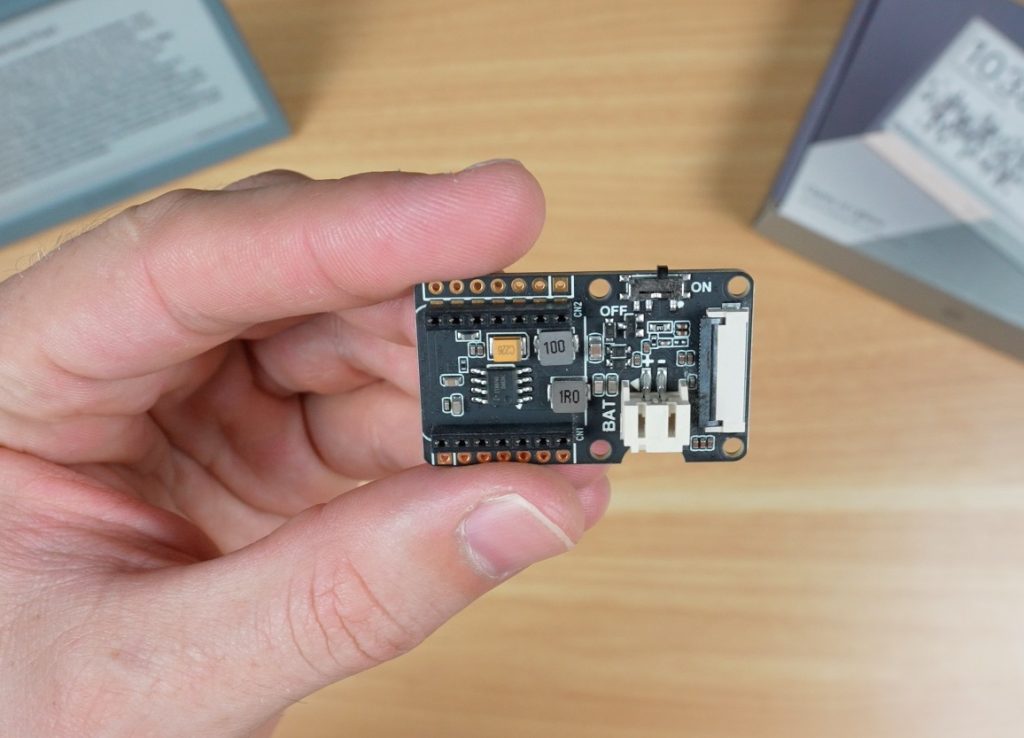
This has:
- A 24-pin FPC connector for the display
- A socket for the ESP32
- A charging circuit and port for the battery
- A power switch on the side
Because of the components I’ve chosen, there isn’t a whole lot to build. All of the components easily plug into the driver board. Some versions of the ESP32 module may require you to solder the pins onto the module beforehand.
Flashing the Firmware
Next we need to flash TRMNL’s firmware onto it.
There are a couple of options for this depending on the hardware you’re using, and these vary in complexity, from using a simple web tool to having to build the firmware from source code.
Once that’s done, you follow a similar process as before to pair it to your account, and you can then start creating playlists.
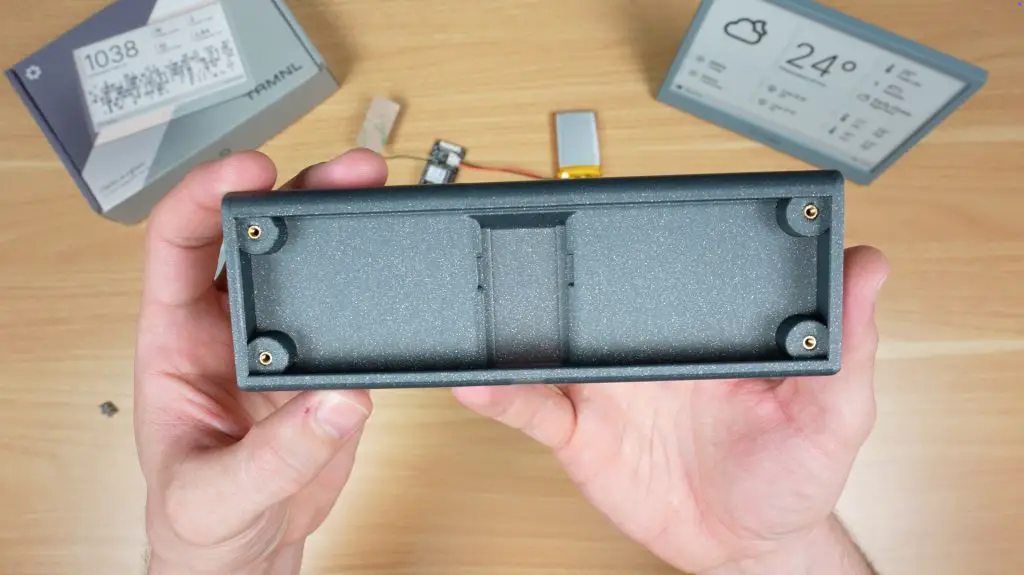
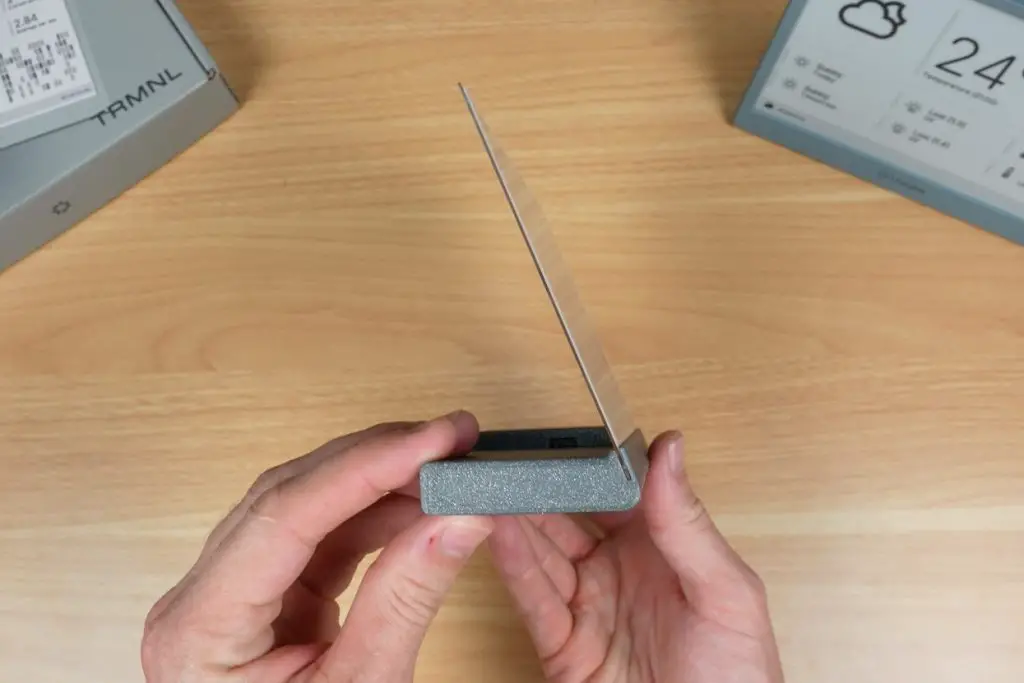
The Enclosure
I measured up the electronic components and designed a simple 3D-printable enclosure for them.
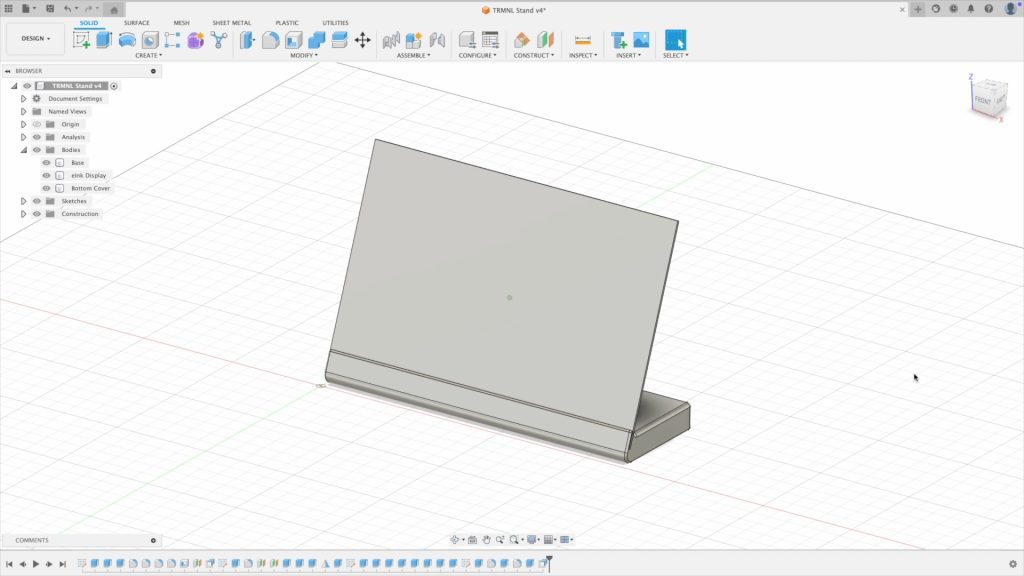
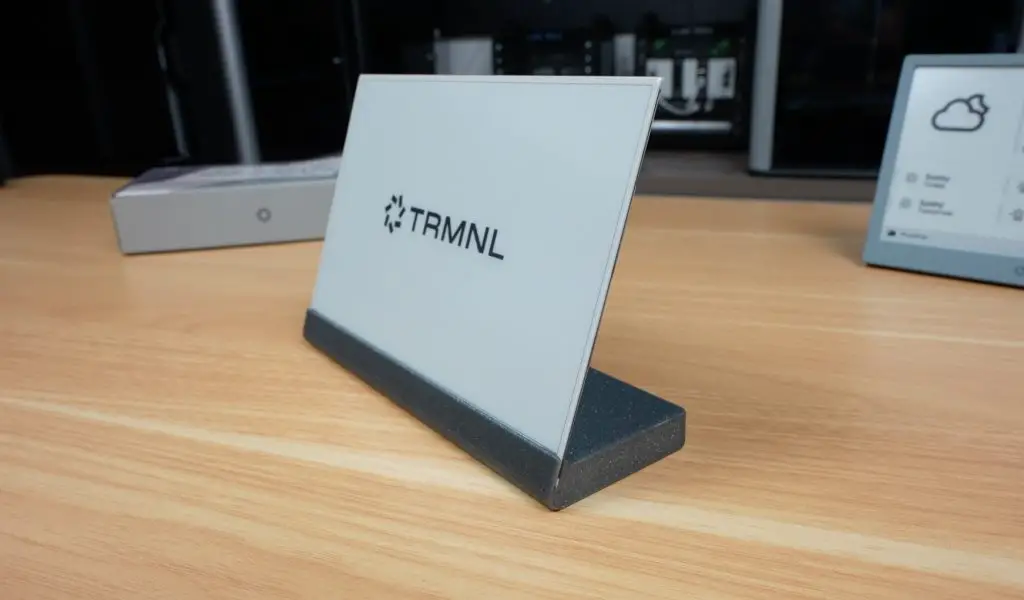
I wanted to make something a little different to the original TRMNL housing, so I went with this design which looks like it’s holding the ePaper display like a sheet of paper or card, really highlighting how thin it is while also sticking with the minimalistic theme. The electronics are then all stored in the base.
Download my DIY TRMNL Enclosure 3D print files.
Let’s get it printed out.
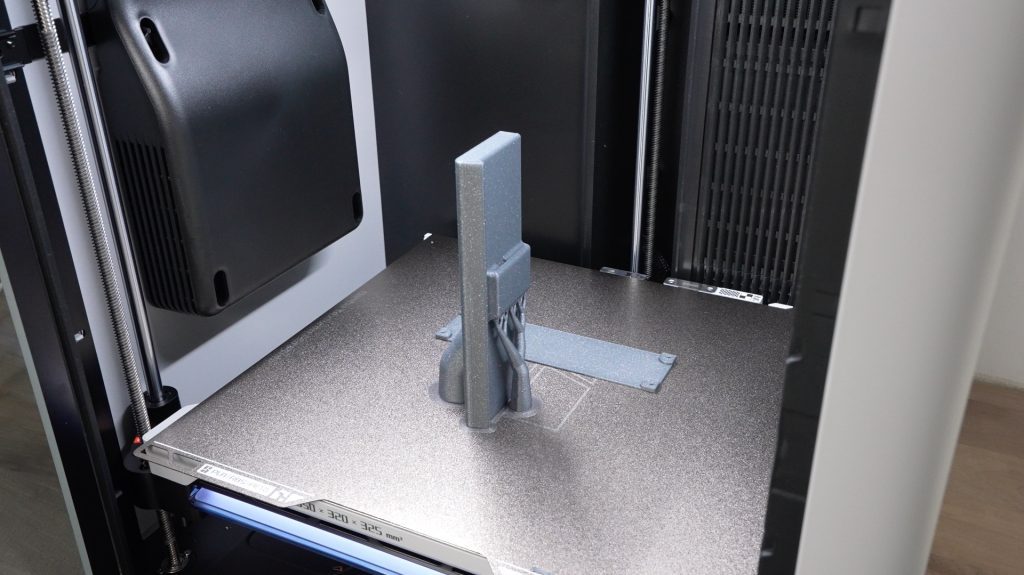
To finish it off, we just need to install some brass inserts in the base for the M2.5 screws to screw into. We can then install the display, ESP32 and battery, stick the antenna to the inside of the enclosure and then close it up.
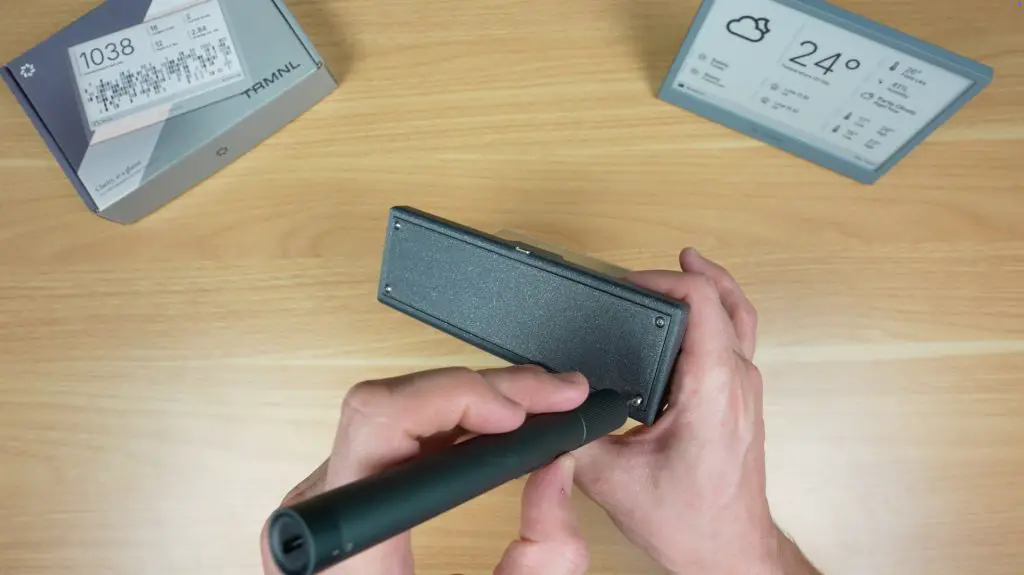
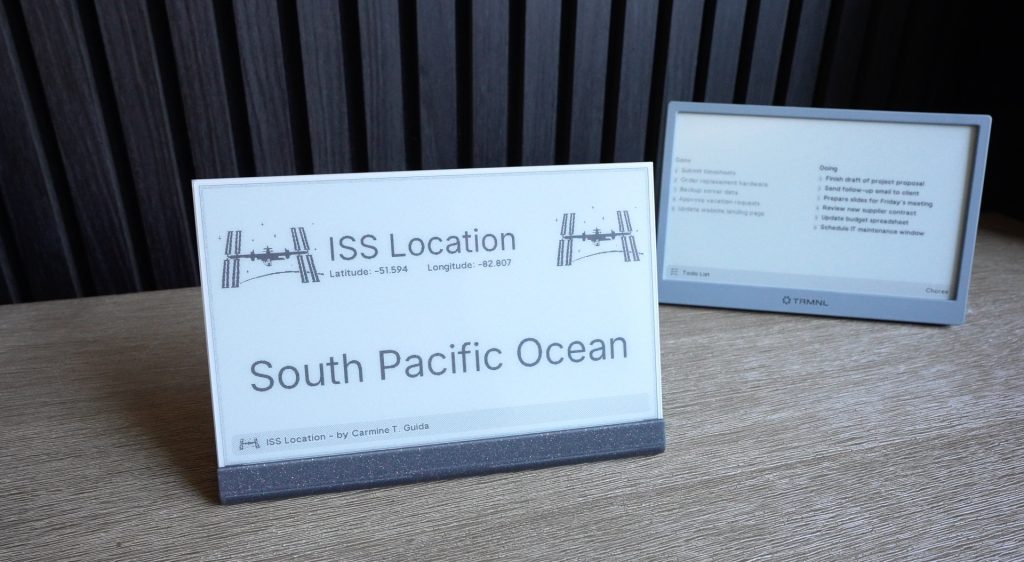
And we’ve now got a unique DIY TRMNL which provides similar functionality to the original. The only real missing feature is the button to refresh or change the display.

Final Thoughts on TRMNL
So that’s TRMNL. A minimalist smart display that you can either buy ready-to-go or build yourself.
Personally, I love that it strips away the noise and just gives you the info you actually want, when you need it.
If you’d like to get your own TRMNL, check out their website. I’ve also put my 3D printable design on Makerworld if you’d like to try build a DIY version.
I’d love to hear what you’d use TRMNL for and what you think of my DIY version, so let me know in the comments below.

Hi Michael,
again a nice project and a nice review. Thanks a lot for that one!
Unfortunately the provided link for the 7.5″ e-ink display does not work anymore/leads to nowhere. Thanks for an update on that or some further information on the used display.
Best
Gerrit
Great write up, already have the parts on the way to build my own 🙂
Just wondering, is there a beginner friendly guide to flash the firmware via Linux (Fedora)?
Hello. Michael, could you please write the exact model numbers of the parts, the Amazon links get absolete very fast and is hard to find the exact models. Thank you.
Hi, unfortunately they don’t have model numbers. The part descriptions that I’ve used are all that is listed for each. I’ve added the Seeed SKUs for each which might make it easier to find on Seeed’s website.
Hi, thanks for all steps, would it work with 10 inch e-ink screen?
Hey Michael,
I would like to know more about the 3d printed stuff, since I don’t have a printer of my own, I’m planning to use a professional service provider. I have a few questions before I proceed with that:
Aside from uploading the .stl file which you have provided, do I need to specify the exact material, or is that usually determined by the file itself? If it’s not the case, would you let me know what is the cheap option ?
Does the file contain all the necessary data for wall thickness and scale, or should I provide specific measurements to ensure a smooth print?
Thanks a lot 😉
I have the same hardware( except a xiao esp32-s3) but I’m having a tough time getting firmware for trmnl to work on it. Any advice? I’m also do BYOS/BYOD approach.