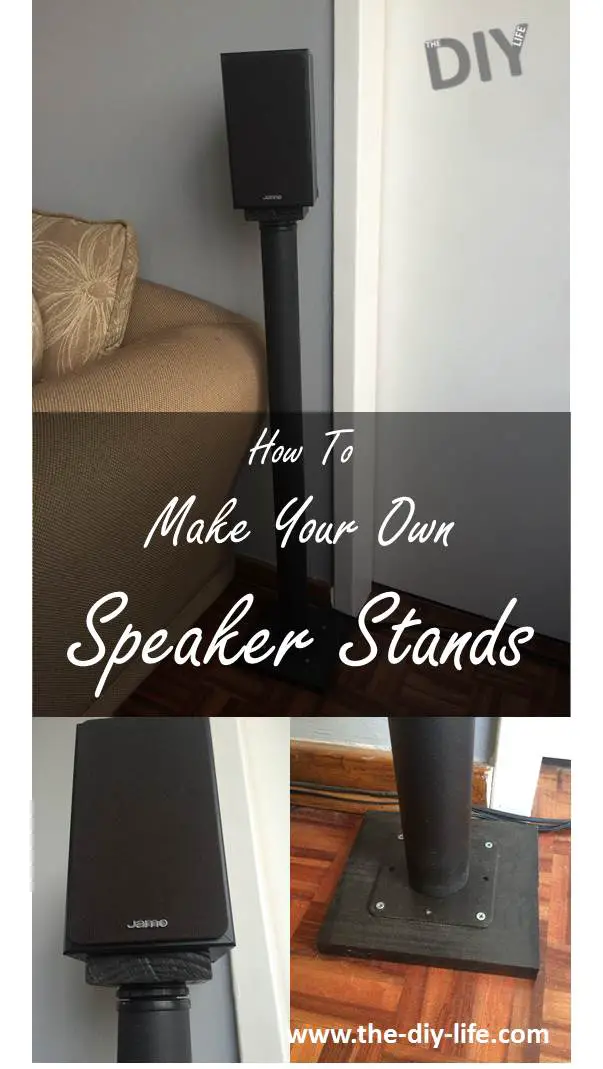
I wanted to make some stands for my surround sound speakers and this looked like an easy solution. Mounting them on the wall was an an option but having them on floor stands just seemed easier as they can be moved around and the wiring to the speaker is neatly hidden away in the tube of the stand, now I just need to hide the wiring running along the baseboards.
These speaker stands are really easy to make, I had most of what was required for them lying around in my workshop already, I just had to buy the table legs. Once you have everything together, it shouldn’t take you more than an hour or so to put them both together. So lets get started.
What You’ll Need To Build Two Speaker Stands
- 2 Table Legs – The Screw On Office Furniture Type
- 4 Pieces of Flat Wood – 20cm (8″) Long
- 2 Smaller Pieces of Wood – About 8cm (3″) Square
- 12 Small Wood Screws
- Black Spray Paint
How To Make The Speaker Stands
If the listed items seem a bit vague, I’ve left out the detail on purpose. These are supposed to be quick and easy stands and if you’ve done a bit of DIY around the house you should have some leftovers which resemble most items on this list. The only item which you probably won’t have lying around is the table legs.
To start off, we’ll make the wooden base and speaker support sections. The top speaker support is simply a small square piece of wood of about 8cm (3″). Sand the edges to get rid of any saw marks and then you can spray this piece black, top, bottom and sides.
For the wooden base, I glued two 20cm (8″) planks of flat pine together again to form a squarish base. Clamp the two sections together and allow the glue to cure, express wood glue should be dry in about 15 minutes – follow the directions on your packaging. Once the sections are glued together then spray them black as well, top, bottom and sides.
When your top and bottom wood sections are dry, you’re almost done. Center the top of the table leg on the bottom wooden base and use four wood screws, one on each corner, to attach the leg to the base. If you are planning on running your speaker wire in your tube then you may need to thread it through before securing the leg to the base, make sure you don’t damage the wire when screwing the base on. My stands had a small hole near the top (which is now the bottom) which I threaded the wire through.
Unscrew the plastic adjustable foot of the table leg all the way until it comes off. Now drill a small hole in the centre and put a screw through the end cap and into the top wooden support. You can put a second screw through the cap and into the wood if it feels flimsy. Once the wooden block is secure, screw the foot back into the table leg.
Now you just need to attached the speaker to the stand and you’re done. The attachment depends on what type of speaker you have, some have screw holes, some a base plate and others just rest on the stands. My speakers don’t have and holes or a base so I just double sided taped them onto the stands with two large strips.
Finish off threading the wire through the stand and connect it to the speaker and you’re done.
Have you tried building these or similar stands yourself? Let us know in the comments section below.
Share This Guide: