Wiring A Plug

Wiring a plug is relatively easy once you have identified the wires by their color. Household plugs around the world have either two or three wires, the two main wires being live and neutral and the third optional wire being the earth wire.

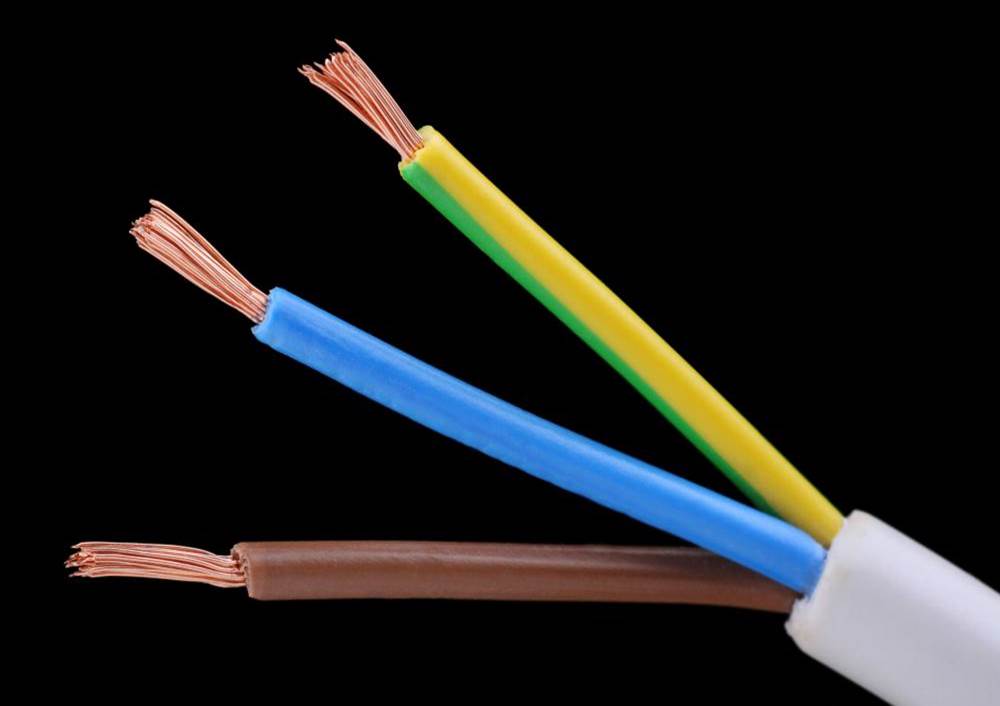
The common wire colors for each of these are:

  • Earth: Green and yellow striped, green and brown striped or green
  • Live: Red, brown or white
  • Neutral: Blue or black

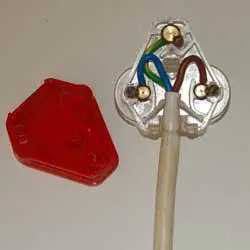
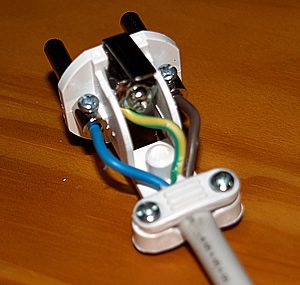
When opening the plug, there are letters marking each of the two or three terminals. These are E for earth (usually at the center top of the top), L for live and N for neutral.

stripped wire
Properly Stripped Wire

Use a wire stripper to cut off the end of the insulation on the wire to reveal the copper. Twist the copper gently together so that there are no stray strands and then insert the end into the screw terminal. Screw the terminal clamp down onto the exposed copper such that the insulation is not too far exposed. Screw both or all three wires into their respective terminals then screw cable clamp over the main cable insulation. Finally screw or clip the plug back together, depending on the plug type.

south african plug
South African Plug
american plug
American Plug
Note: Check with you local authorities on the regulations regarding doing your own electrical work. In some areas it is illegal to conduct electrical work in your home without certification.
Michael Klements
Michael Klements
Hi, my name is Michael and I started this blog in 2016 to share my DIY journey with you. I love tinkering with electronics, making, fixing, and building - I'm always looking for new projects and exciting DIY ideas. If you do too, grab a cup of coffee and settle in, I'm happy to have you here.

LEAVE A REPLY

Please enter your comment!
Please enter your name here

Latest posts

Which NVMe Hat Is The Best For A Raspberry Pi 5

If you don’t know already, I’ve been selling these 3D printed cases for Raspberry Pi’s online for a few years now. With the launch...

Track Aircraft In Real-time With Your Raspberry Pi Using The FlightAware Pro

Have you ever seen a flight overhead and wondered where it is going? Or seen a unique-looking aircraft and wondered what type or model...

Pi 5 Desktop Case For NVMe Base or HatDrive! Bottom

Today we're going to be assembling a 3D-printed case for the Raspberry Pi 5 and Pimoroni's NVMe Base or Pineberry's HatDrive! This is an...

Related posts