Building a Raspberry Pi cluster usually means dealing with messy cables, stacks of boards, and a tangle of power supplies. But what if you could shrink all of that into a single, compact board?
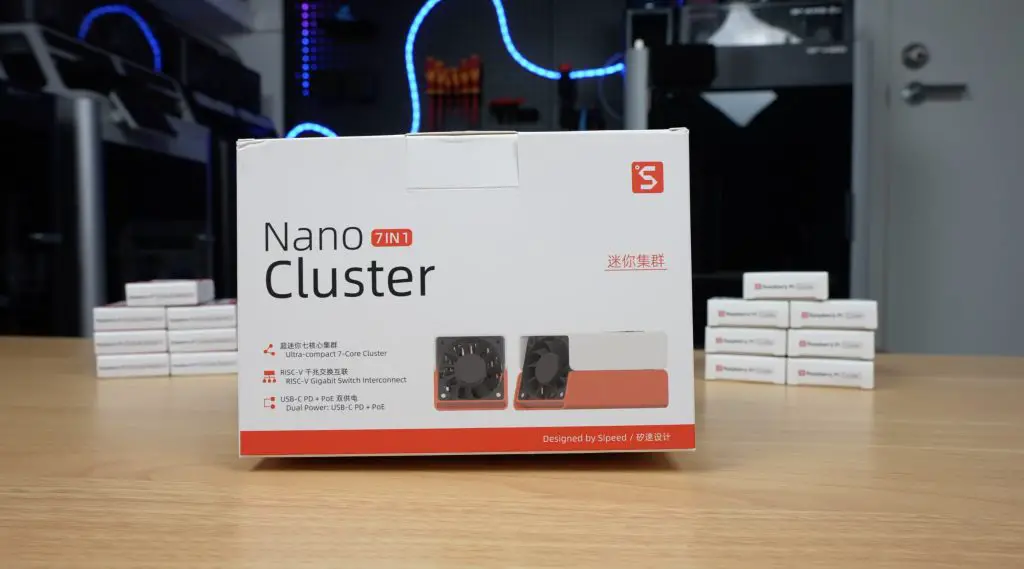
That’s exactly what the Sipeed Nanocluster does. It’s a small board and enclosure that lets you run multiple Raspberry Pi Compute Modules together as a compact cluster computer, and it literally fits in the palm of your hand.
Here’s my video review of the Sipeed Nanocluster, read on for the write-up;
Where To Buy The Sipeed Nanocluster
- Sipeed Nanocluster Preorder – Buy Here
- Raspberry Pi CM5 Lite Modules – Buy Here
- Sandisk Ultra MicroSD Card – Buy Here
Tools & Equipment Used
- Video Capture Card AVerMedia GC513 – Buy Here
- Infiray P2 Pro Thermal Camera – Buy Here
- Sound Level Meter – Buy Here
- Power Meter – Buy Here
- USB C Pencil Screwdriver – Buy Here
Pricing and Packages
The Sipeed Nanocluster is still in development, but you can preorder it from Sipeed’s website. Pricing depends on the configuration you choose. The basic package, which includes the barebones board and fan, starts at $49, while the fully loaded version with four of Sipeed’s M4N modules and adapters goes up to $699.
That might sound steep, but when you consider what’s included, an 8-port managed gigabit switch, eight power supplies, and all the necessary cabling and cooling, it’s actually quite good value. You’re getting everything you need to build a clean, functional cluster for less than the cost of a single Raspberry Pi Compute Module 5.
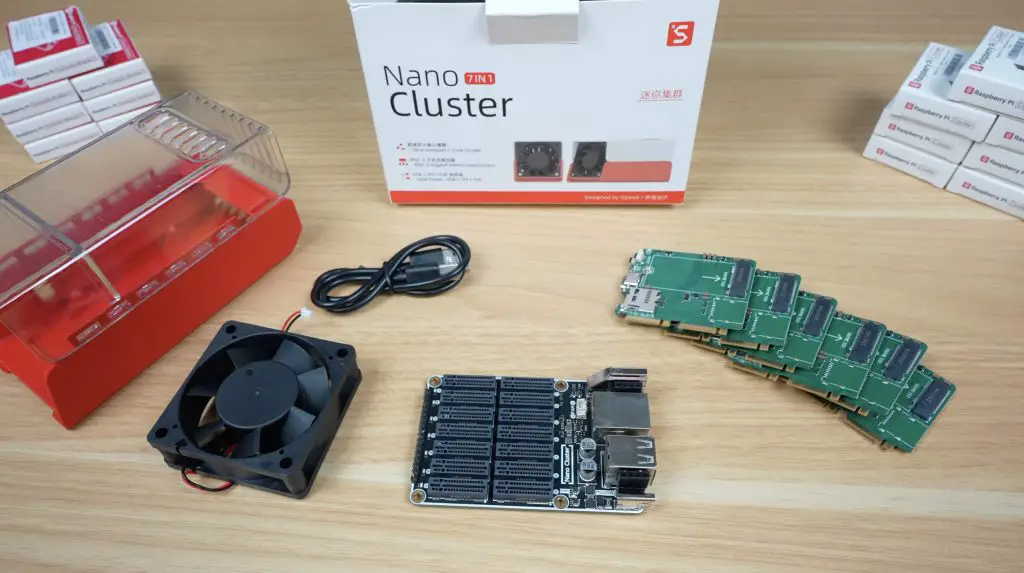
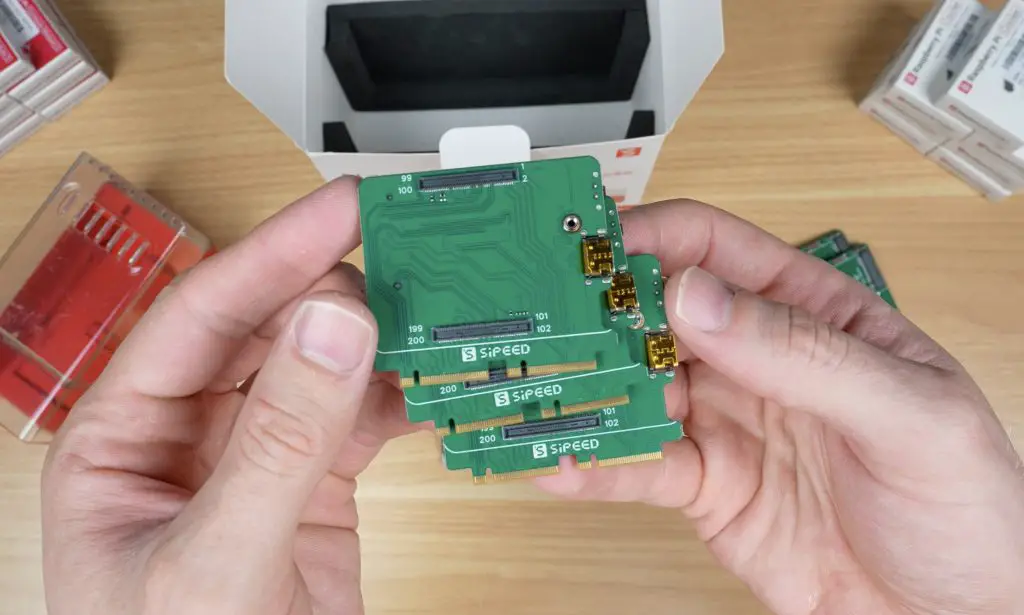
Sipeed sent me what appears to be their CM45 package, which includes the Nanocluster board, fan, and seven adapter boards for Raspberry Pi CM4 or CM5 modules (with a small caveat I’ll get to later). This kit sells for $99. They also included a 3D-printed two-part enclosure with clear and white top options. It doesn’t seem to be part of the preorder packages yet, but Sipeed has shared the 3D print files on Makerworld, so you can print your own if you’d like to.
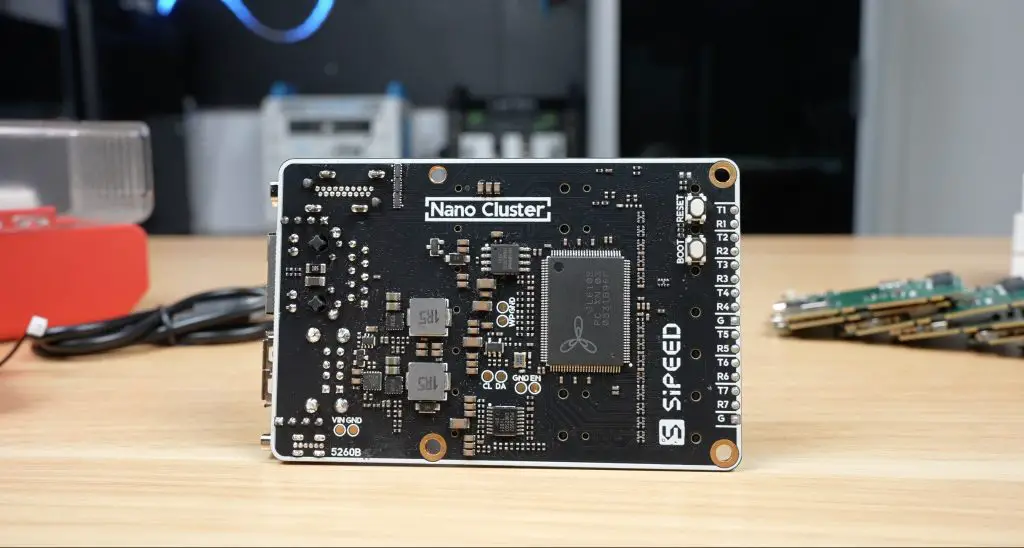
Exploring the Nanocluster Board
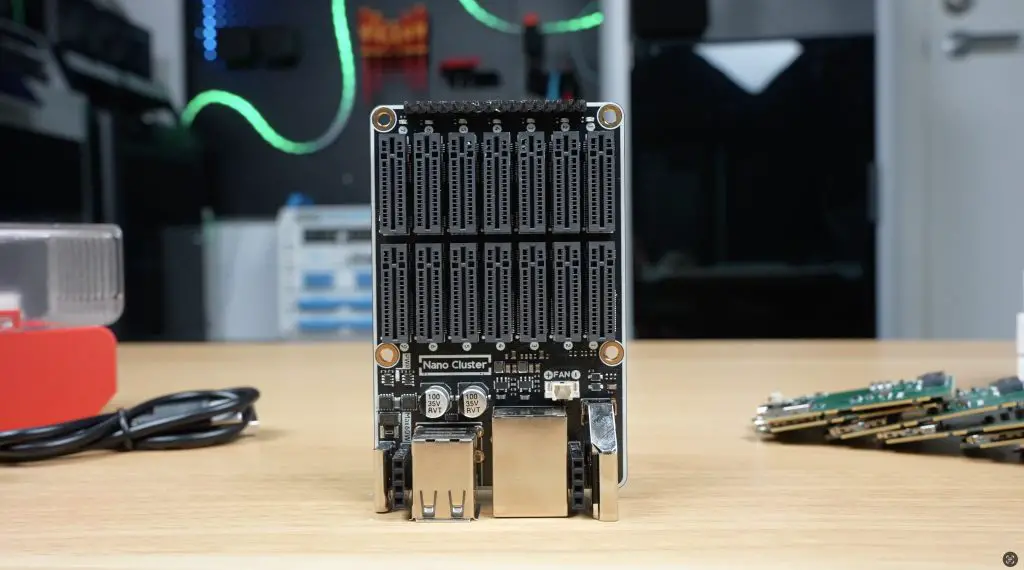
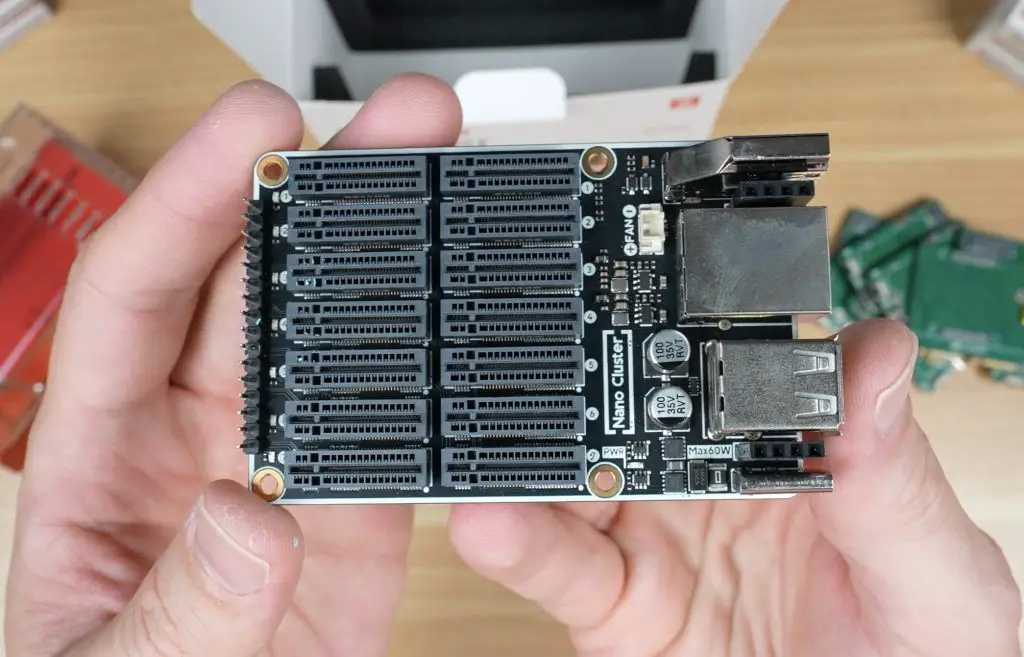
The Nanocluster board itself features seven SOM (System on Module) slots, each using dual M.2 M-key vertical connectors. These connect to an 8-port RISC-V-based gigabit managed switch located at the bottom of the board. The switch includes a web dashboard for configuration, somethingthat’s quite nice to see in such a tiny setup.
The slots are directly compatible with Sipeed’s Longan 3H as well as their M4N module and Raspberry Pi CM4 and CM5 modules via the included adapter boards. You can even mix and match different module types if that suits your project.
For power, the board uses a USB-C port supporting up to 20V (65W) or an optional PoE expansion module (up to 60W). Both can be connected simultaneously for power redundancy, so your cluster keeps running even if one source drops out. It’s a thoughtful design that eliminates the usual mess of cables and power bricks. With your modules installed, you just plug in a power supply and Ethernet cable, or a single PoE cable, and you’re ready to go.
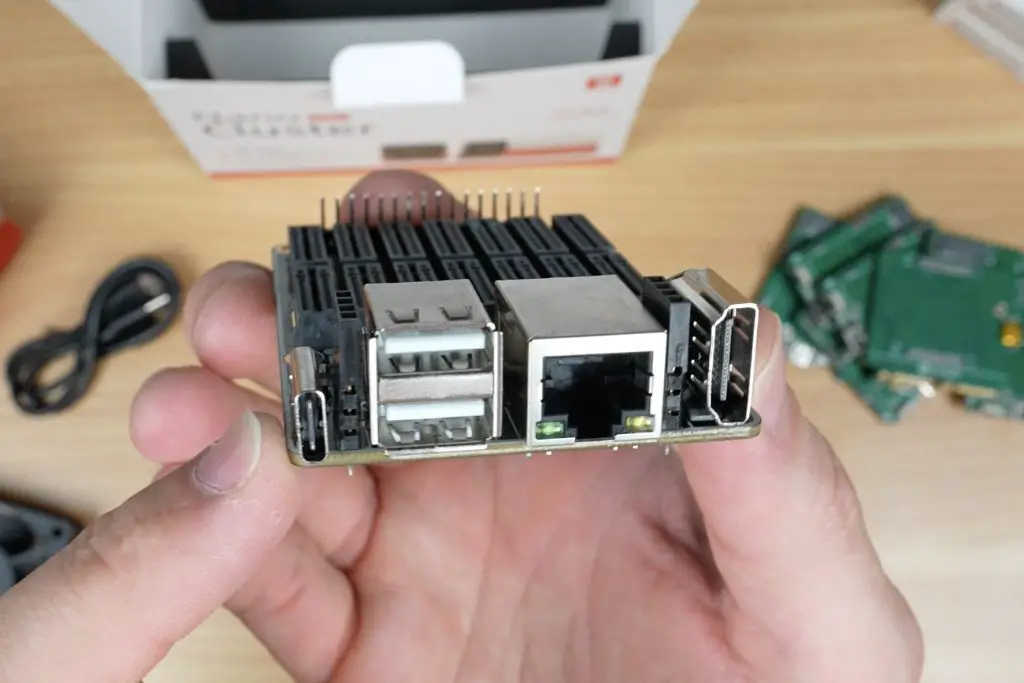
Alongside the USB-C port, you’ll find two USB 2.0 ports, a gigabit Ethernet port, and an HDMI port. These are all connected to slot 1, which acts as the master node and can manage power for the other slots too.
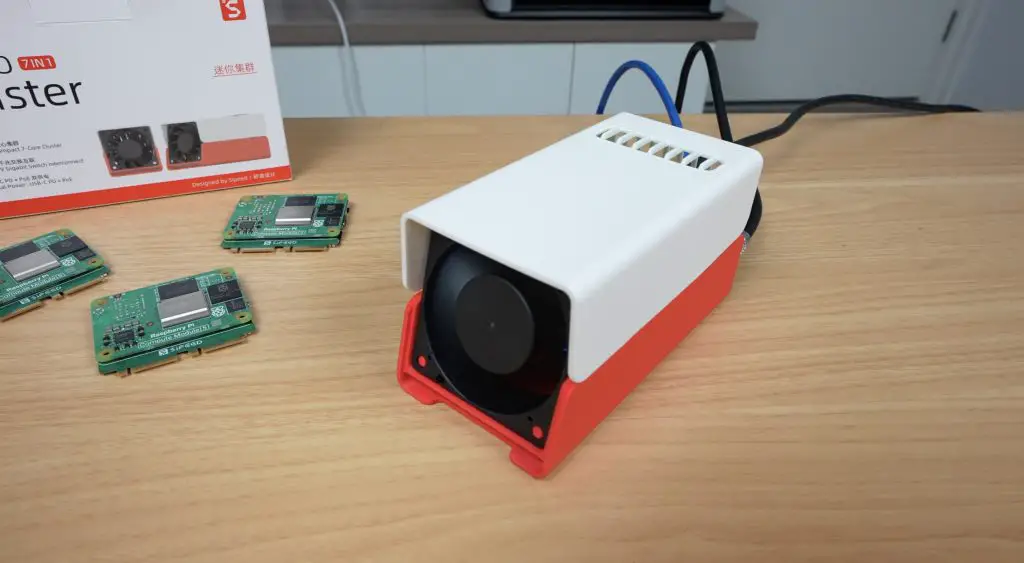
Cooling and Connectivity
Mounted to the back of the enclosure is a 60mm 5V fan. It’s a simple two-pin fan that runs at full speed permanently, it’s not PWM controlled, so it’s a bit noisy, but it ensures all modules stay cool regardless of what’s running.
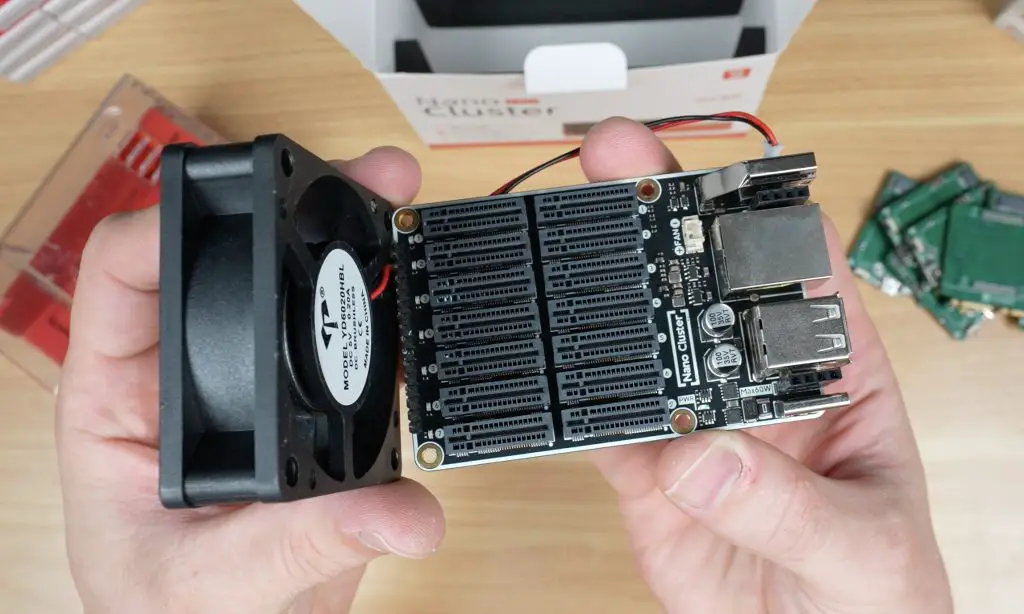
In front of the fan are seven indicator LEDs showing the status of each node, and seven UART ports for debugging and control.
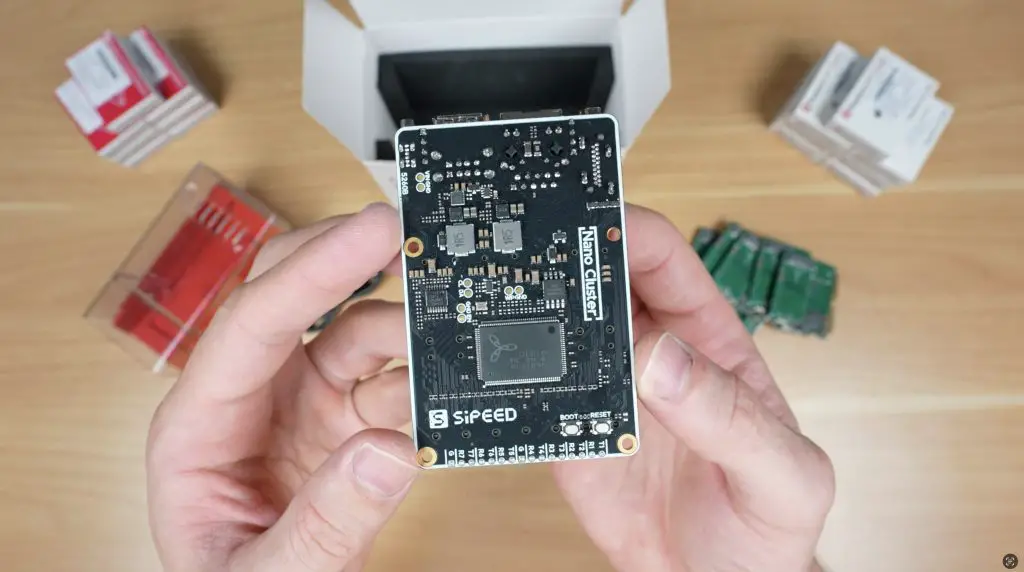
The board measures just 88 x 57 mm, or the whole assembly is roughly 100 x 60 x 60 mm with the fan and modules installed.
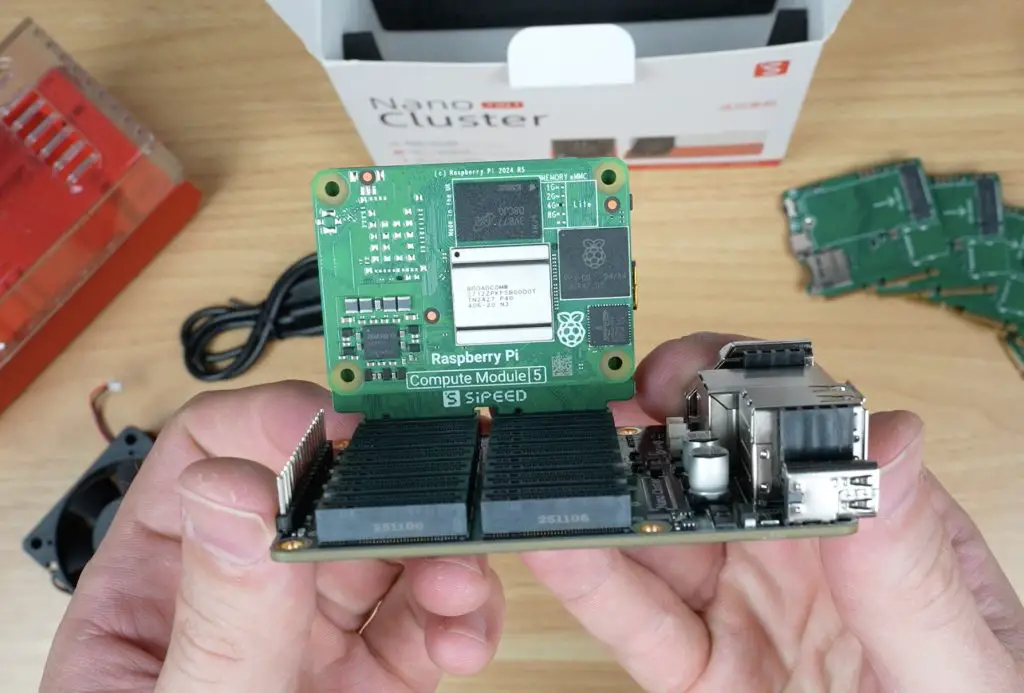
Computer Module Adapter Boards
If you’re using Sipeed’s LM3H modules, you don’t need adapters. But if you’re running Pi CM4, CM5, or M4N modules, these adaptor or carrier boards are required.
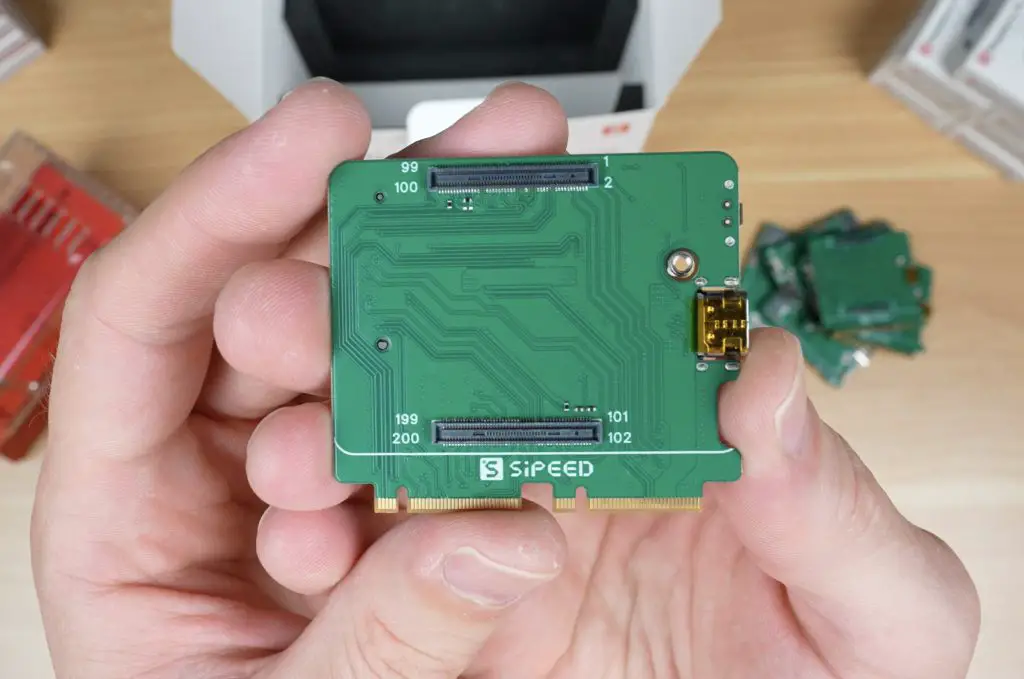

Each adapter board includes:
- A connector for the compute module
- A USB-C port for flashing
- A boot button
- A microSD card slot for the OS image
- An M.2 slot (2230/2242) for an NVMe SSD
In terms of performance, the LM3H modules are the most affordable option, while the M4N modules offer the most processing power, featuring up to eight cores.
Power and Thermal Limits
As compact as the Nanocluster is, there are some limitations. Because of its 60W power limit and small form factor, you can’t populate all seven slots with high-power modules.
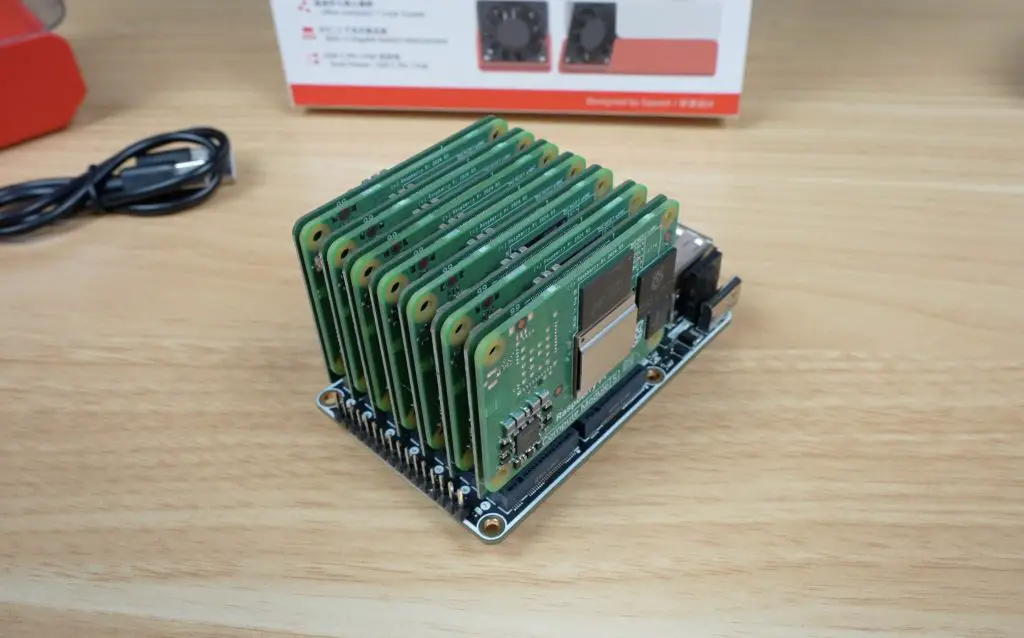
Sipeed recommends:
- Up to 4 CM5 or M4N modules (especially with SSDs or PoE)
- Up to 6 CM4 or LM3H modules
- All 7 slots only if you’re using CM4s without SSDs and powered via USB-C PD
Space is also a factor, if you’re using heatsinks and SSDs, you’ll likely only fit four modules comfortably, skipping every other slot for airflow.
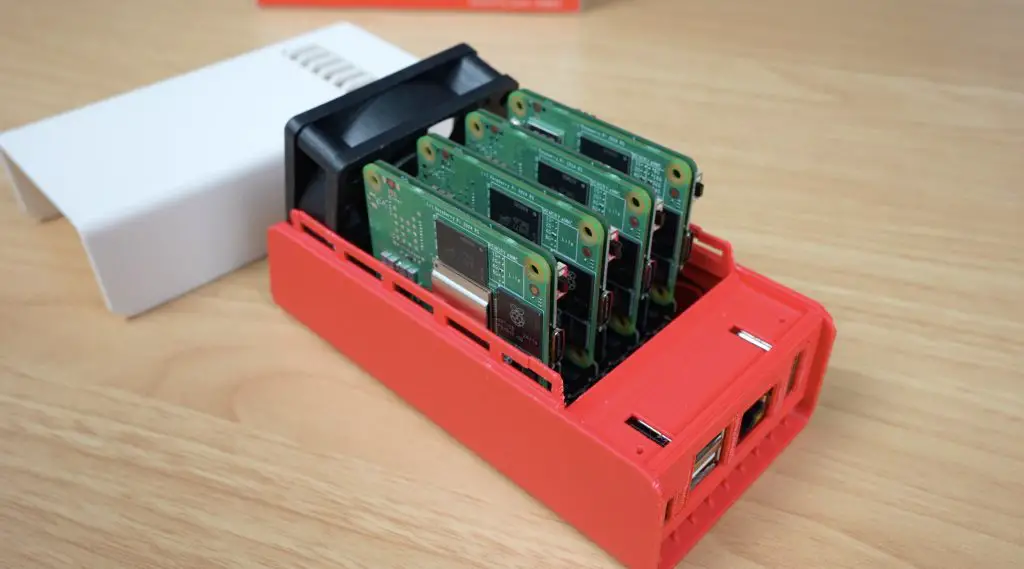
Setting Up the Cluster
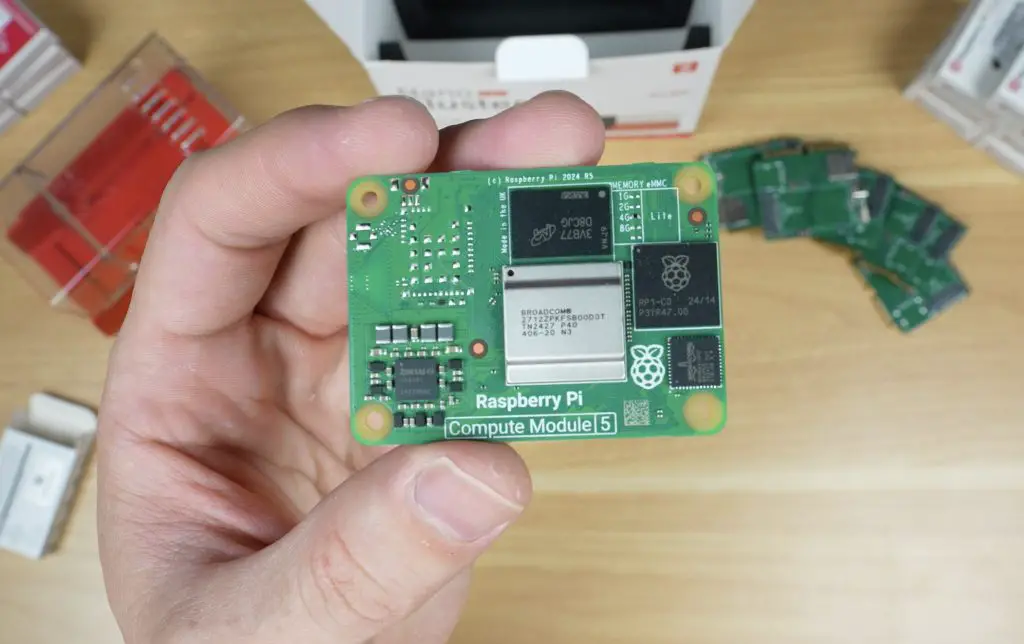
For testing, I used four Raspberry Pi CM5 Lite modules (no Wi-Fi or Bluetooth) and microSD cards for storage. I also tried to use the official CM5 heatsinks, but they were too thick to fit, so I ran the tests without them. More on this during my thermal tests.
Once the modules were installed in their adapters and plugged into the board, I set up the cluster in the enclosure and prepared for some benchmarks.
Performance Testing
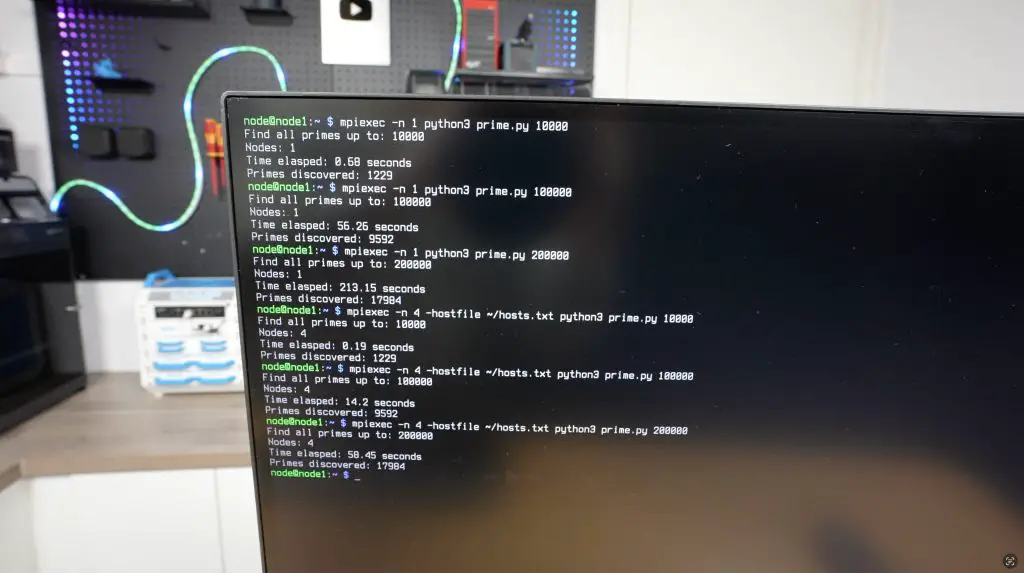
To test the cluster, I ran the prime number test script I used a few years ago on my 8-node water-cooled Pi cluster. The Python script checks each number up to a defined limit to see if it’s prime. It’s intentionally inefficient and CPU-intensive, perfect for testing performance scaling.
I ran the test three times per setup (single node vs. 4-node cluster), with limits of 10,000, 100,000, and 200,000.
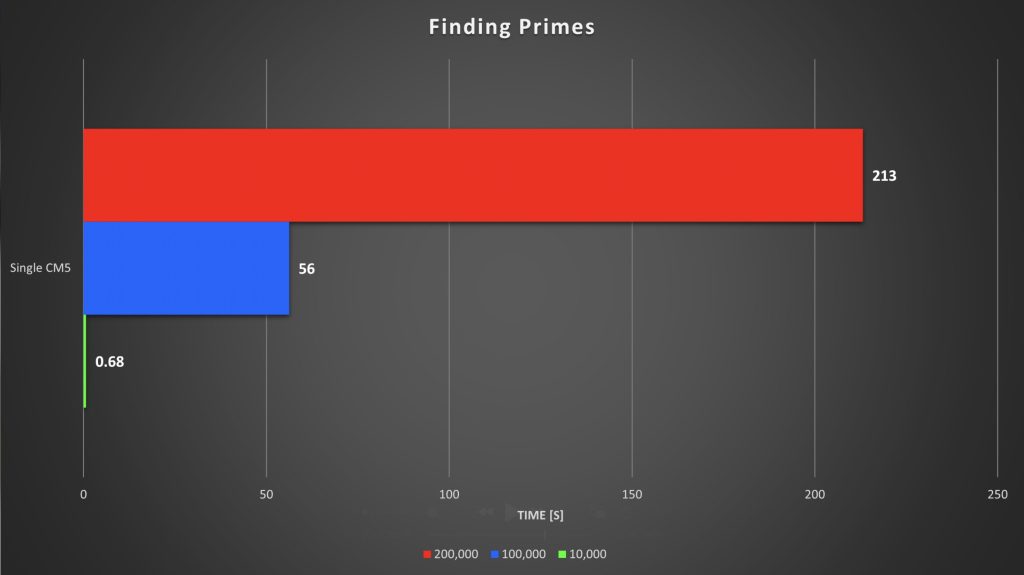
Single Node Results:
- 10,000 → 0.68s
- 100,000 → 56s
- 200,000 → 213s (≈4 minutes)
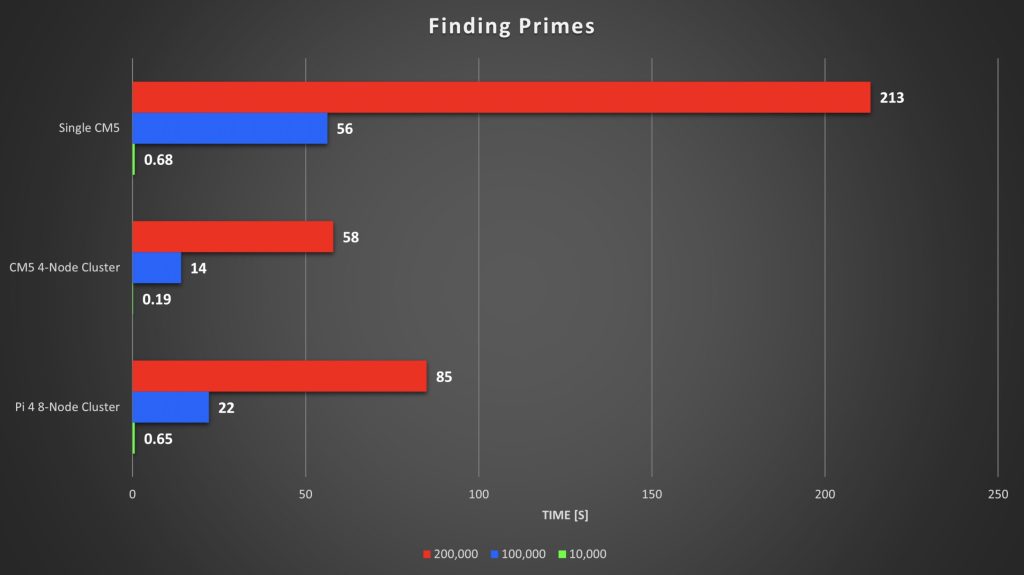
4-Node Cluster Results:
- 10,000 → 0.19s
- 100,000 → 14s
- 200,000 → 58s

Each test ran roughly four times faster across the cluster, and the 4-node Pi 5 cluster even beat my old 8-node Pi 4 cluster, despite the Pi 4s being overclocked to 2.0GHz. The Pi 5s, running at stock 2.4GHz, showed how much progress the hardware has made.
Thermal and Power Tests
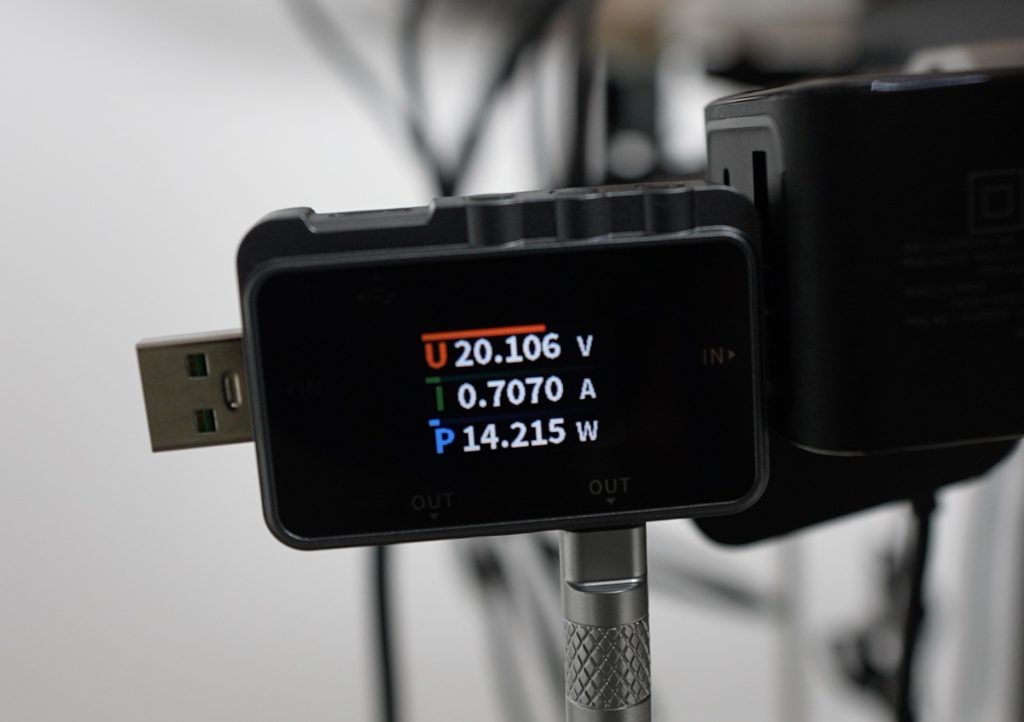
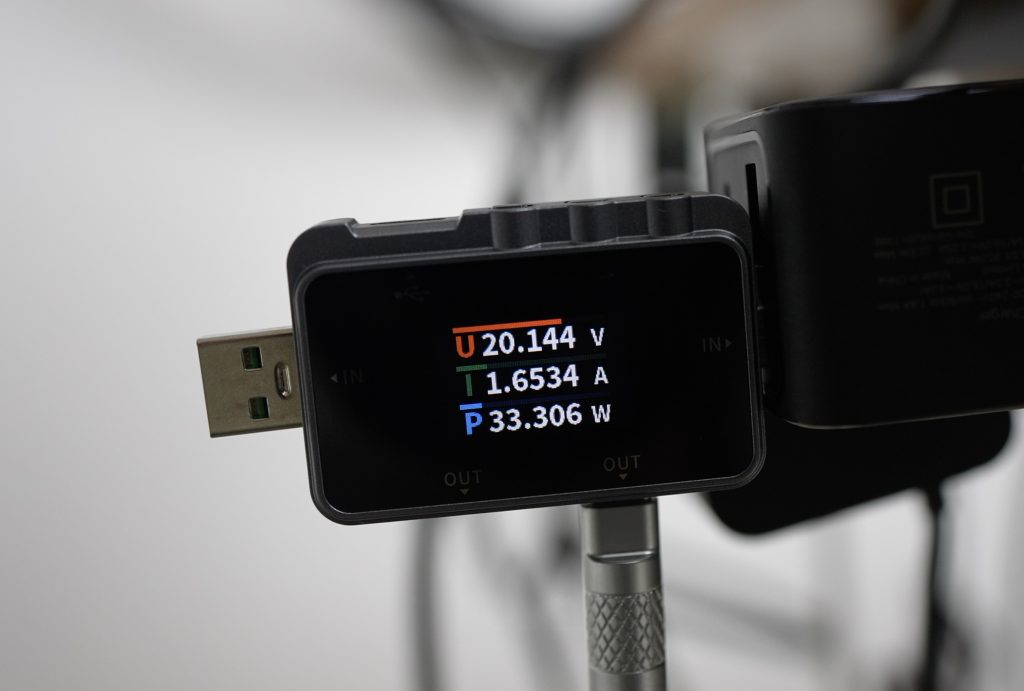
At idle, the cluster drew about 14W, which is around 2.5W per Pi, plus 3.5W for the board. Under full CPU load using cpuburn, total consumption rose to 33W, which is an increase to around 7.5W per Pi.
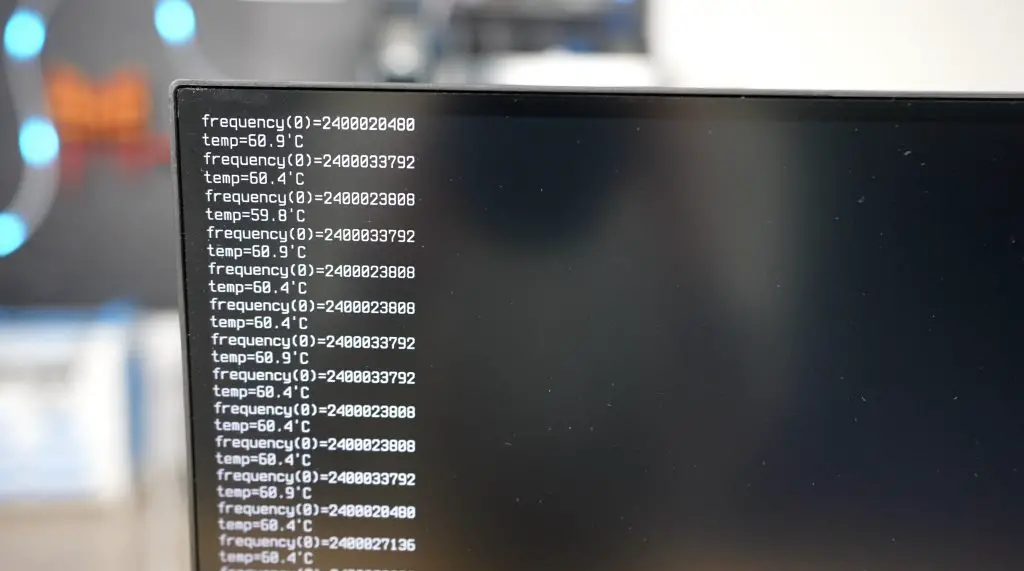
Thermally, the results were excellent. Even without heatsinks, temperatures started around 26–29°C and stabilised at around 60°C after 30 minutes of full load. The large fan does a great job pushing air across the exposed CPU heat spreaders, keeping all nodes within safe limits. The outer modules ran a bit warmer, but still comfortably low.
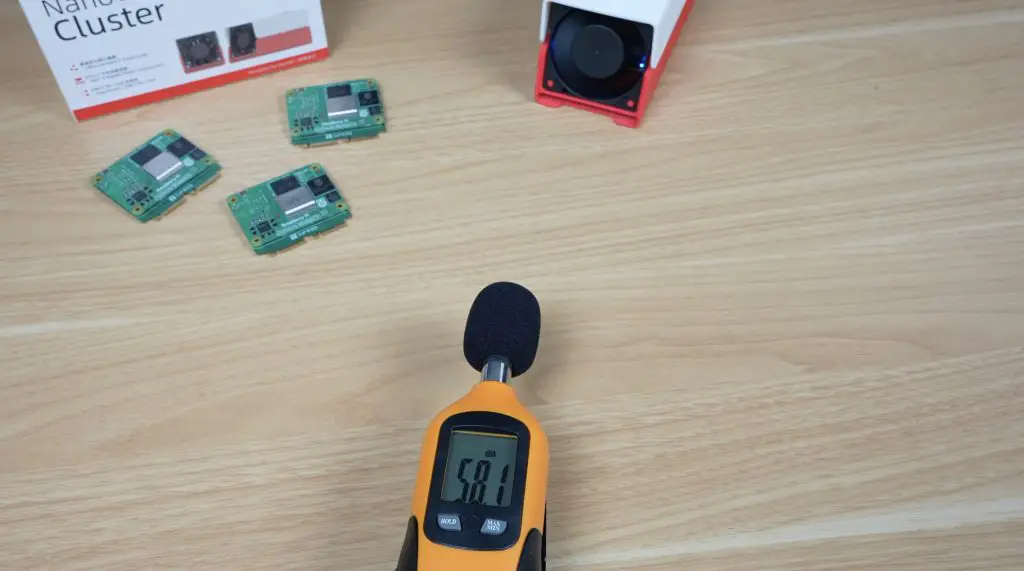
Fan noise measured about 58dB, which is noticeable but not unbearable for a lab setup.
Network Performance
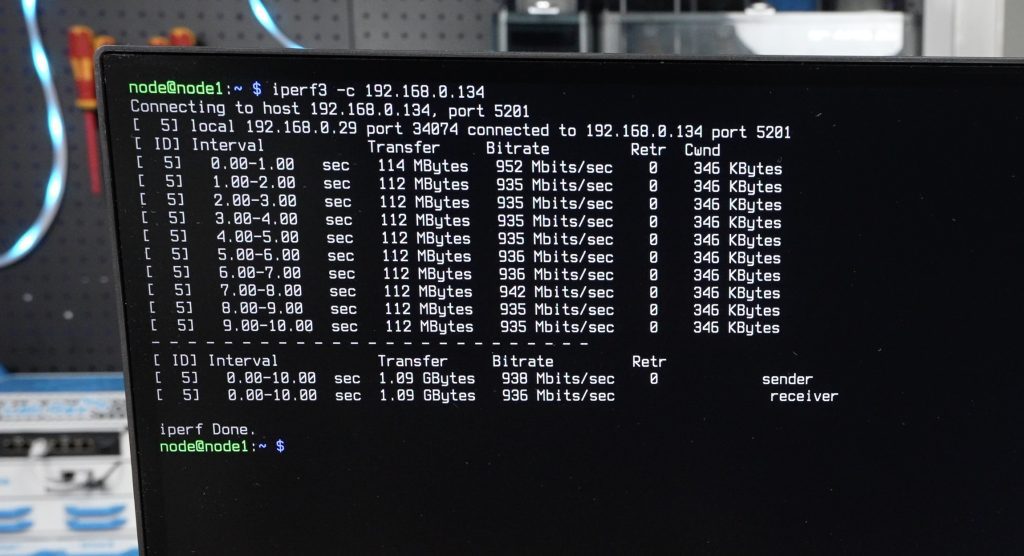
I also ran an iPerf network test between nodes, and each link hit around 950 Mbps, which is right on target for gigabit networking.
Final Thoughts
The Sipeed Nanocluster is an impressive little system that makes cluster computing accessible and tidy. It packs power delivery, cooling, and an integrated managed switch into a form factor smaller than your palm.
I really appreciate that Sipeed thought about practical usability, power redundancy, active cooling, and clean integration all make this much easier to work with than a DIY setup full of cables and adapters.
It’s obviously not going to replace your cloud server or main NAS, but as a learning platform, IoT hub, or compact homelab, it’s a brilliant piece of hardware. And at under $100 for the board and adapters, it’s hard to beat.

What would you run on your own Nanocluster? Let me know in the comments section below and if you’re curious to see it in action, check out the video on my YouTube channel.