Do You Struggle to Keep Track of Your Family’s Schedule?
Today, I’m going to show you how to build a simple, smart family planner using a Raspberry Pi 5, a touchscreen display, and a 3D-printed stand! It features a calendar, weather updates, and even plays back photos that sync from your family members’ phones, all powered by free software.
There are some commercial versions of these family planners available, but they’re quite expensive. On top of that, they often hide important features like photo playback behind monthly subscriptions, so there’s an ongoing cost to consider too.
So, let’s get started building our own!
Here’s my video of the build, read on for the write-up.
What You Need To Build Your Own Family Planner
- Raspberry Pi 5 – Buy Here
- MicroSD Card – Buy Here
- SunFounder 10.1″ Touch Display – Buy Here
- M2.5 x 12mm Button Head Screws – Buy Here
- M6 x 50mm Hex Head Bolts – Buy Here
- M6 x 40mm Hex Head Bolts – Buy Here
- M6 Hex Nuts – Buy Here
Tool & Equipment Used:
Some of the above parts are affiliate links. By purchasing products through the above links, you’ll be supporting my projects, at no additional cost to you.
Components Used To Build The Family Planner
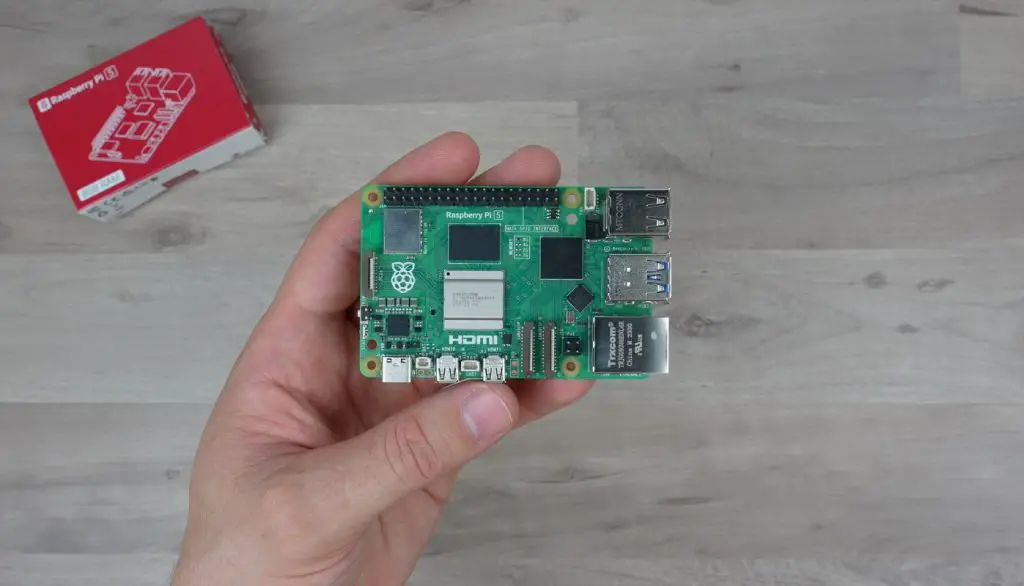
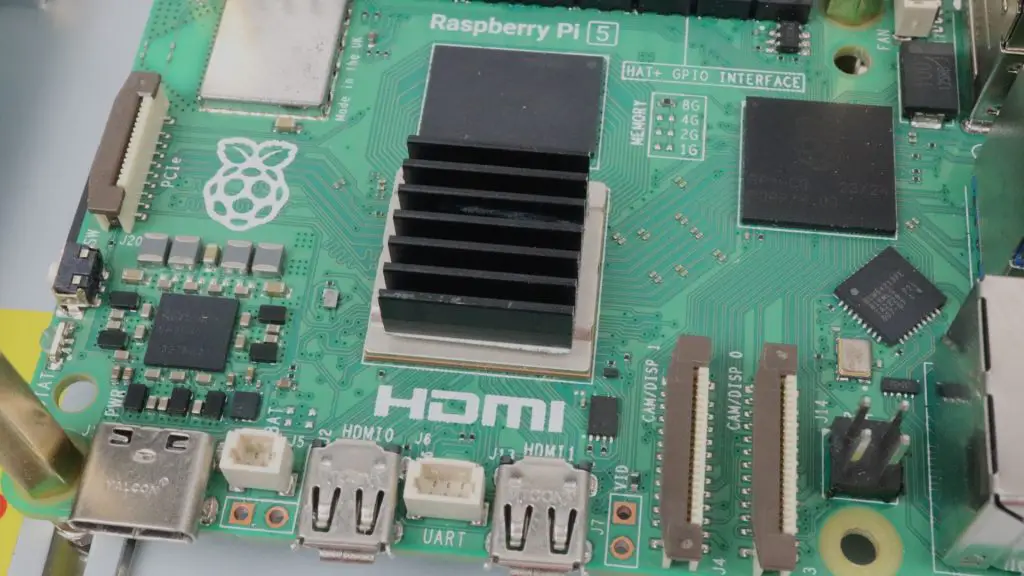
As the brains behind the planner, I’m going to be using a Raspberry Pi 5. This is a little overkill for this project, but I intend to use the same device for a separate Home Assistant dashboard and some other tasks running in the background, so I’d like to have the extra power available. If you’re just using the planner functionality, then a Pi 3, 4, or even a Pi Zero 2 W will work too.
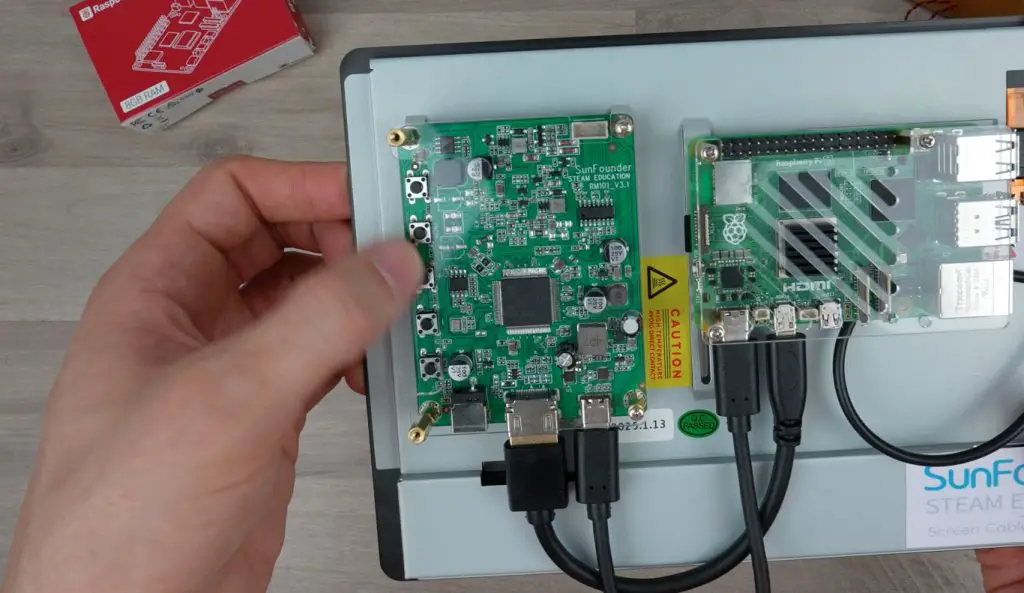
Next, we need a display, and for that, I’m going with this 10.1″ touch display by SunFounder. This is a 1280×800 IPS display with a 178-degree viewing angle, so it’s a good fit for this type of project.
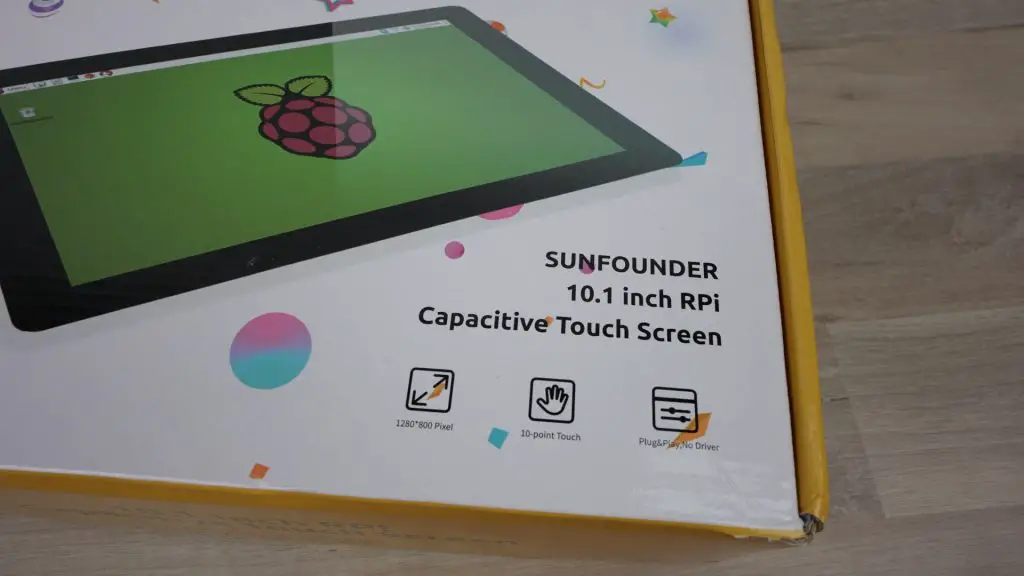
This particular model is nice and easy to use because it’s designed specifically for the Pi 5, so it includes all of the necessary cables to connect the Pi to the display.

It also caters for the Pi 5’s 5V 5A power requirements, so you don’t need to run separate power supplies. It even includes speakers, so you can make use of audio prompts or voice feedback if you’d like to.
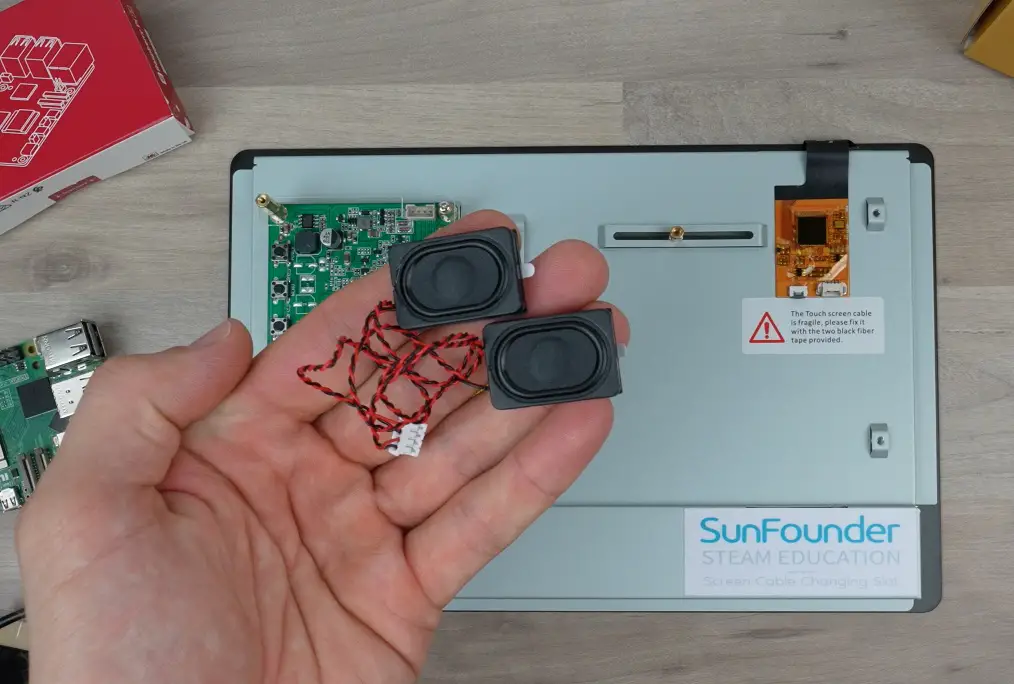
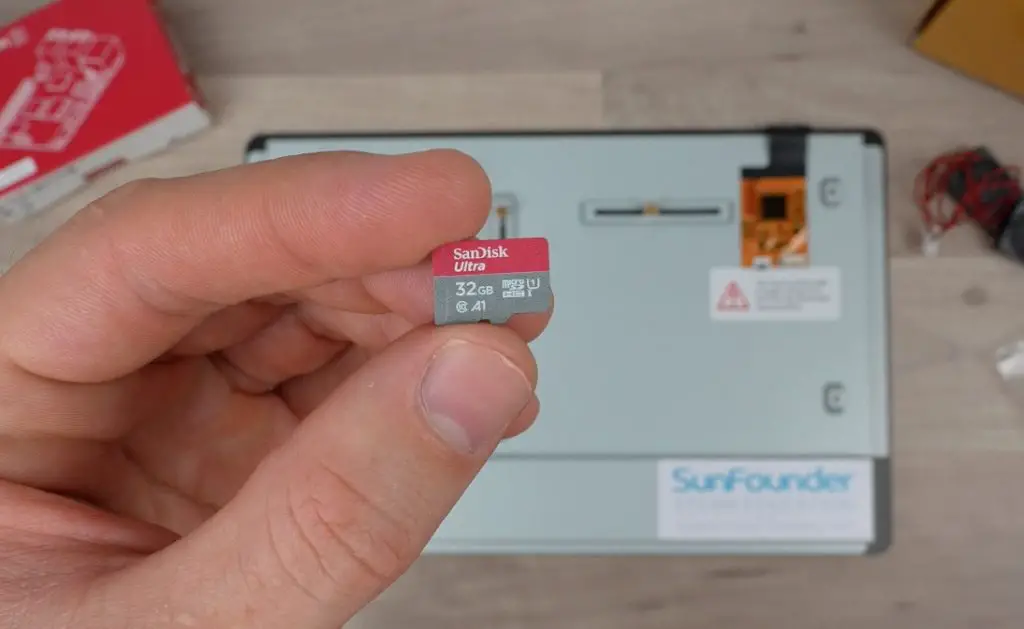
Because the display package includes the power supply and all of the cables we need, the only other item required is a microSD card for the operating system. I’m using a 32GB Sandisk Ultra card, which is more than enough for this project.
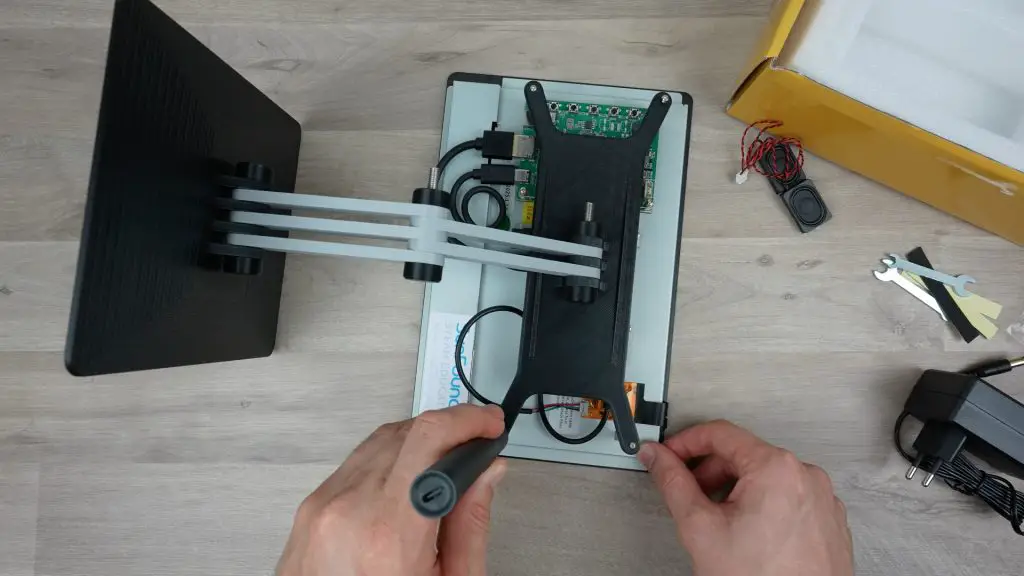
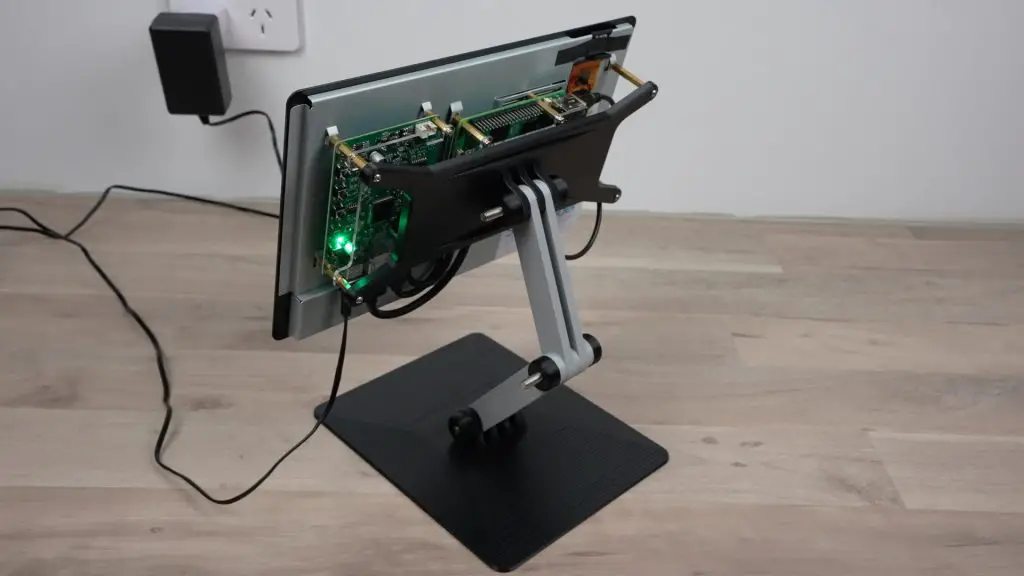
I’ve flashed Raspberry Pi OS onto the microSD card and configured it to connect to my home WiFi network. We can put that straight into the Pi and then mount the Pi onto the back of the display. This is done using little standoffs on adjustable rails, so you can mount any SBC with a square bolt pattern onto it.
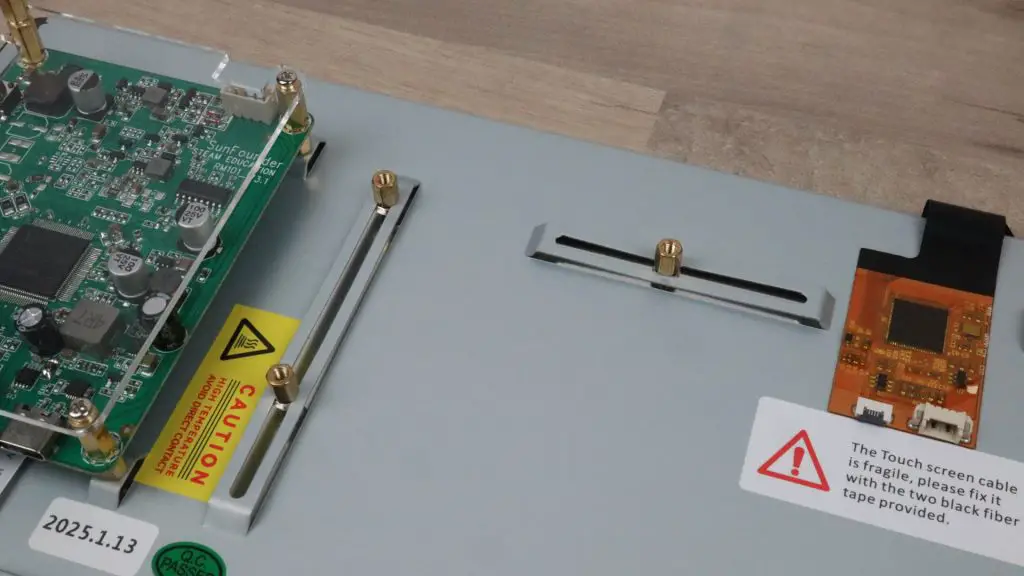
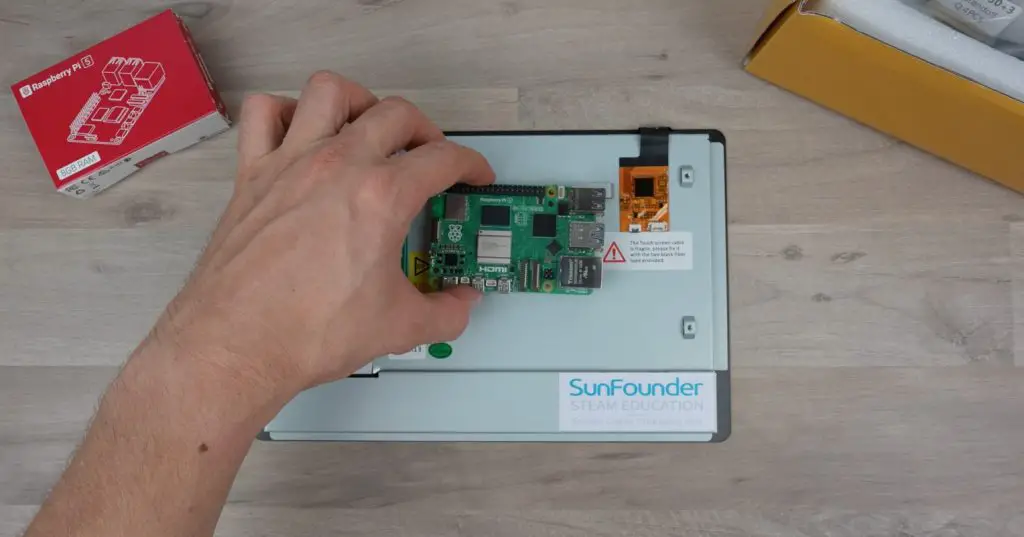
The Pi is secured with three M2.5x18mm brass standoffs, and a clear acrylic cover plate goes over it.
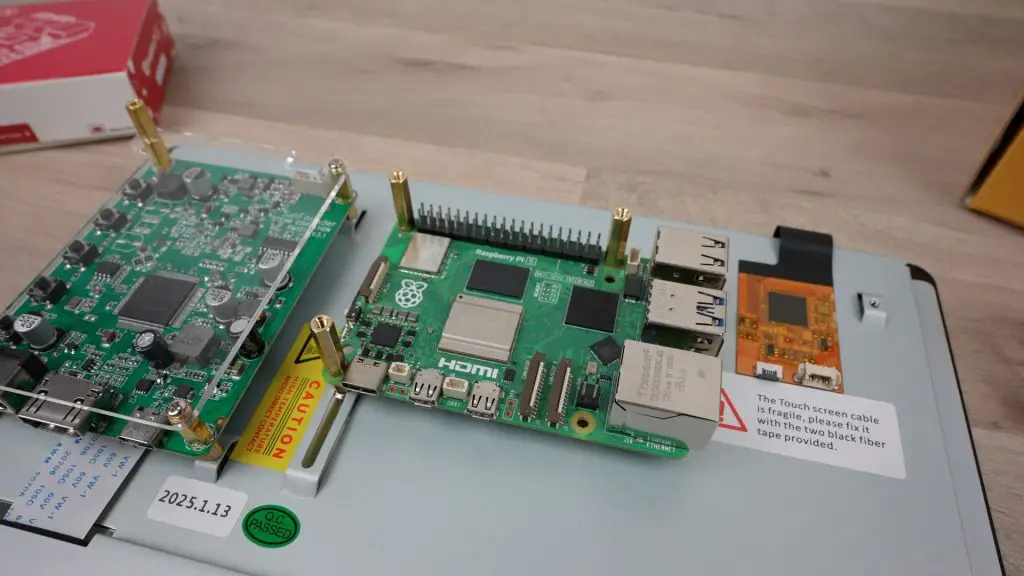
I’ve added a small stick-on heatsink. I’m not sure if this is going to provide enough cooling to the Pi yet, but it’s easy to replace if needed. The acrylic cover has a place to mount a 40mm fan as well.
We can then plug in the HDMI cable, the power cable, and the USB cable for the touch display.
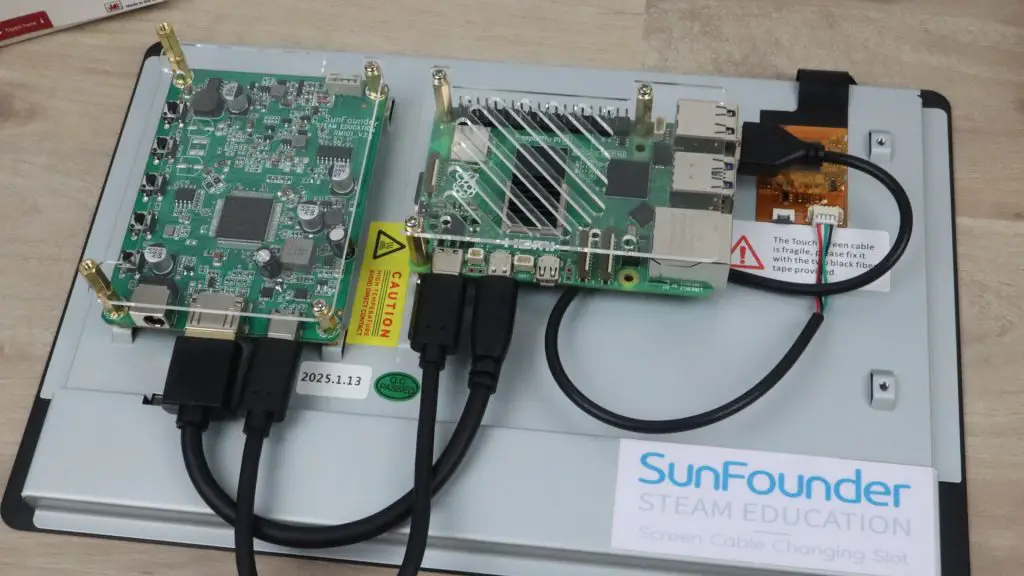
The board on the back of the display has buttons to control the display menu and speaker volume, as well as a power button that turns off the display and power to the Pi.
And that’s the hardware basically done!
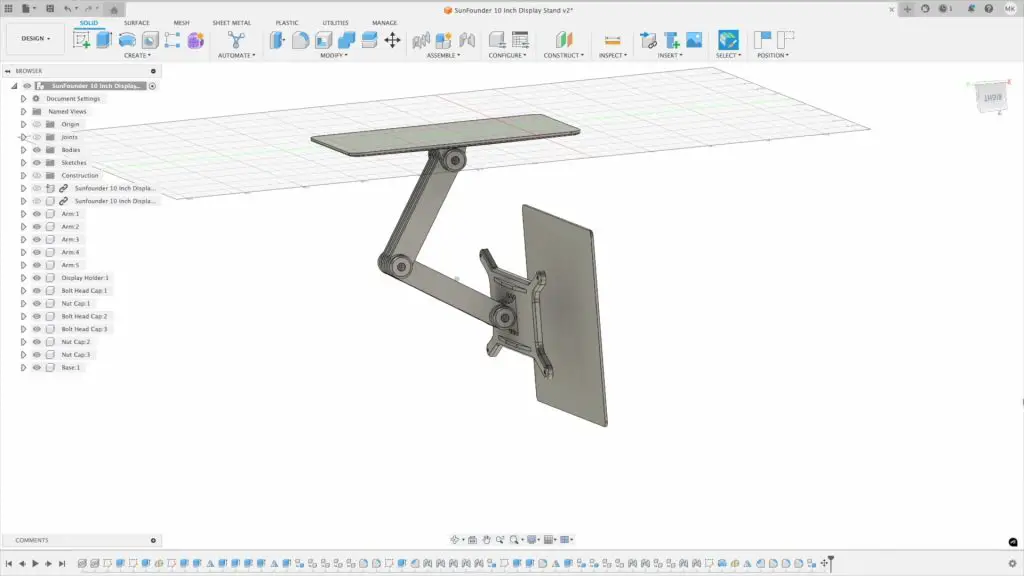
Assembling the Family Planner’s Stand
SunFounder has a 3D-printable stand and an enclosure available for this display, but the stand doesn’t suit my needs, and I think the enclosure makes the display look quite bulky.
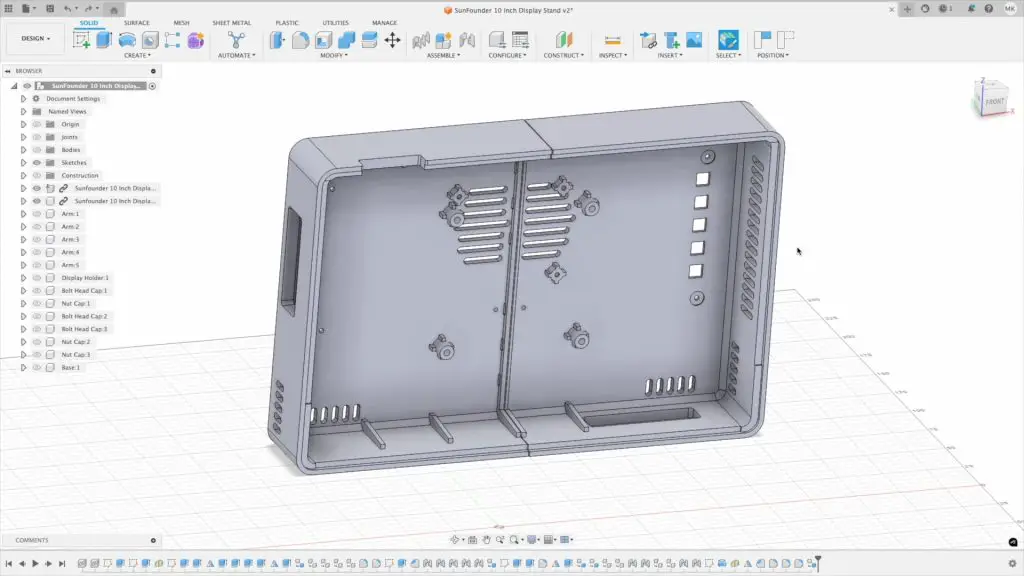
So I decided to design my own stand with an adjustable arm to position it exactly where I want it. The stand can also be hung from the underside of a surface like an overhead kitchen cabinet, which is how I’ll be using it long-term.
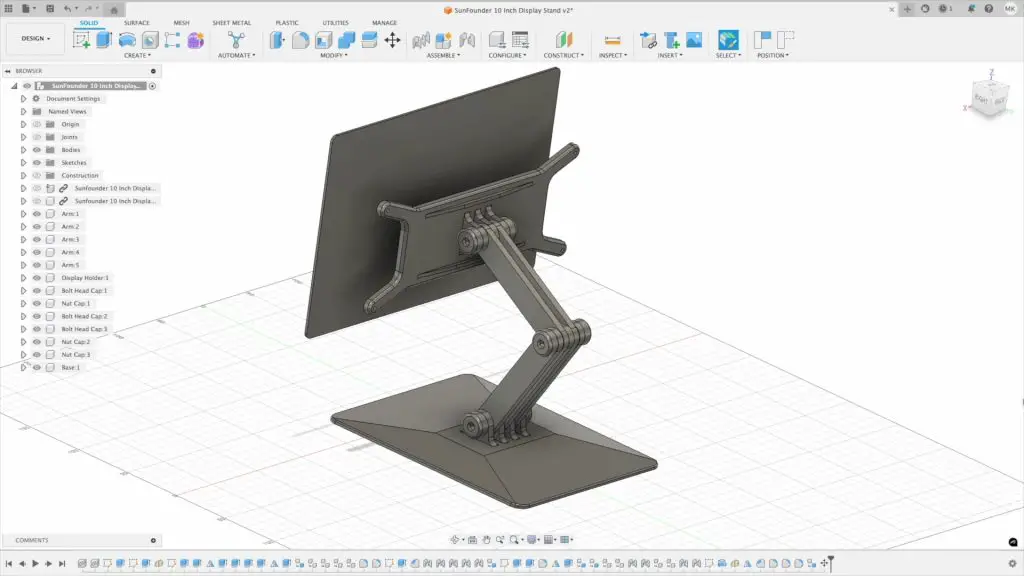
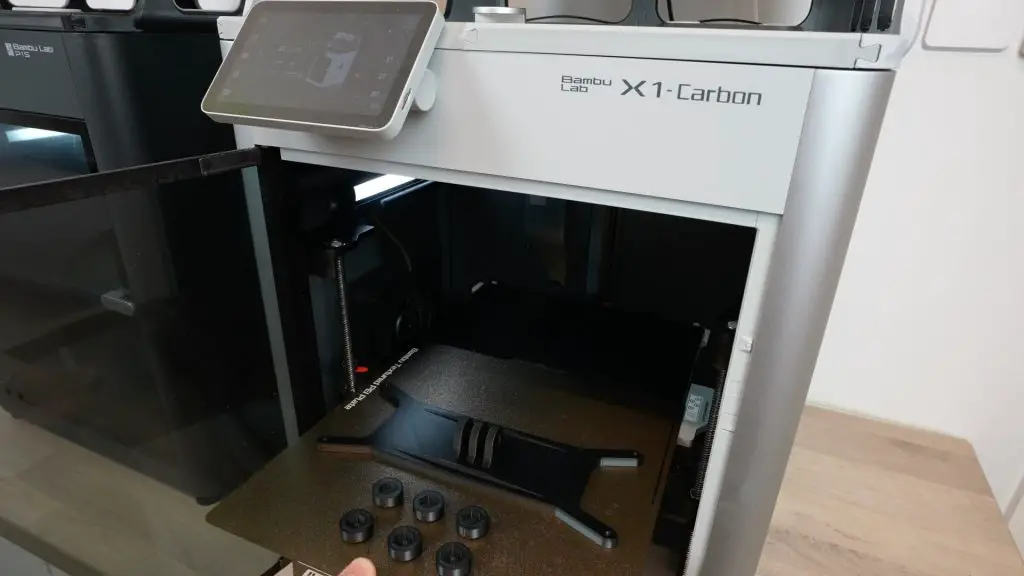
I’ve put the 3D print files up on Makerworld – Download print files
I printed the components in black and grey PETG. I used PETG rather than PLA to provide better long-term strength.
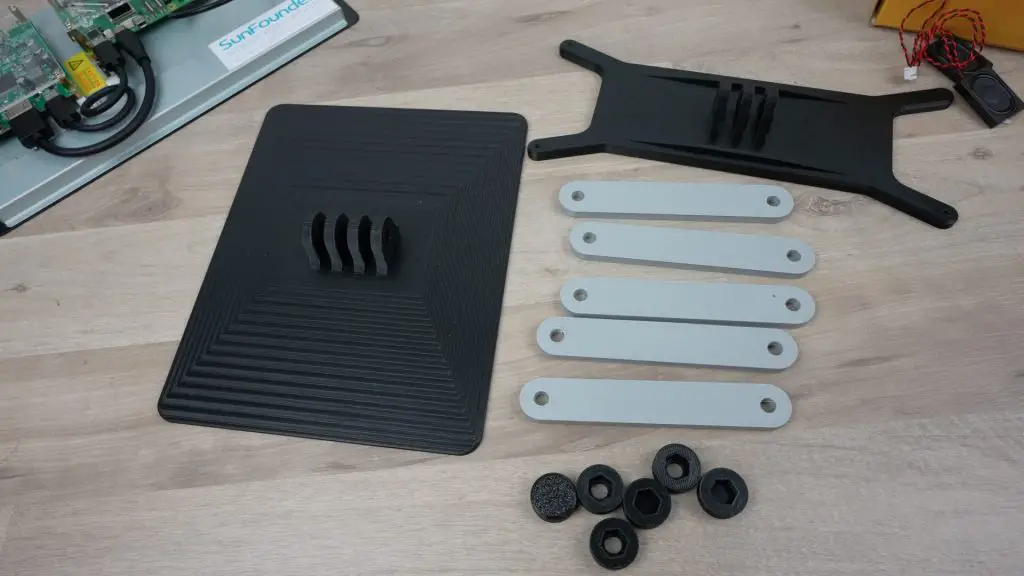
The stand goes together easily with just three M6x50mm bolts holding the joints together. These can be adjusted and tightened using the 3D-printed end caps.

It would actually be best to use two 40mm bolts and one 50mm bolt, but rather than buying two sets, I’ll cut the longer ones down or put caps on them afterwards.


The stand attaches to some brass standoffs on the display with four M2.5x12mm button head screws.
Setting Up The Family Planner Dashboard Software
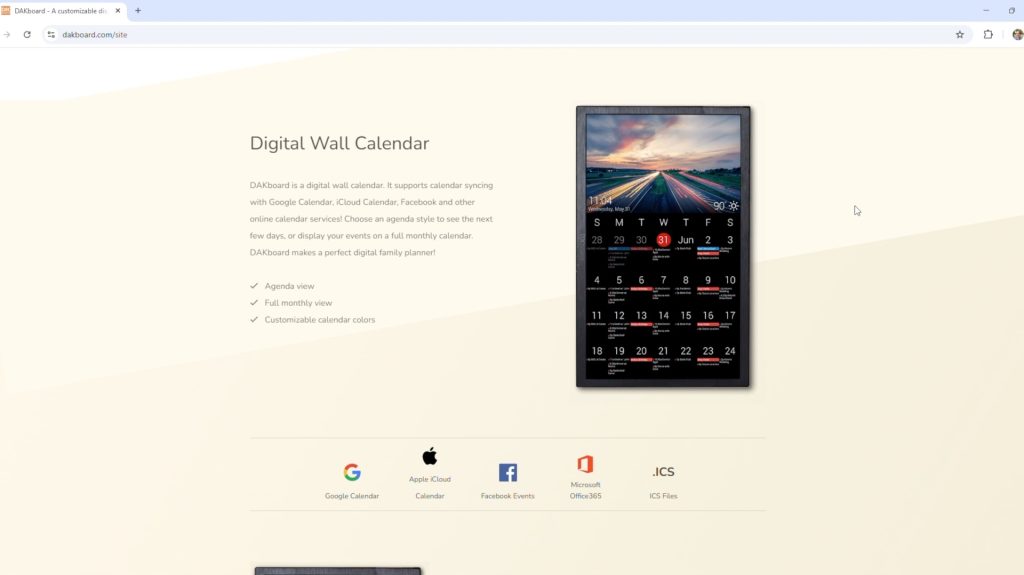
The two software options that I like are Dakboard and MagicMirror.
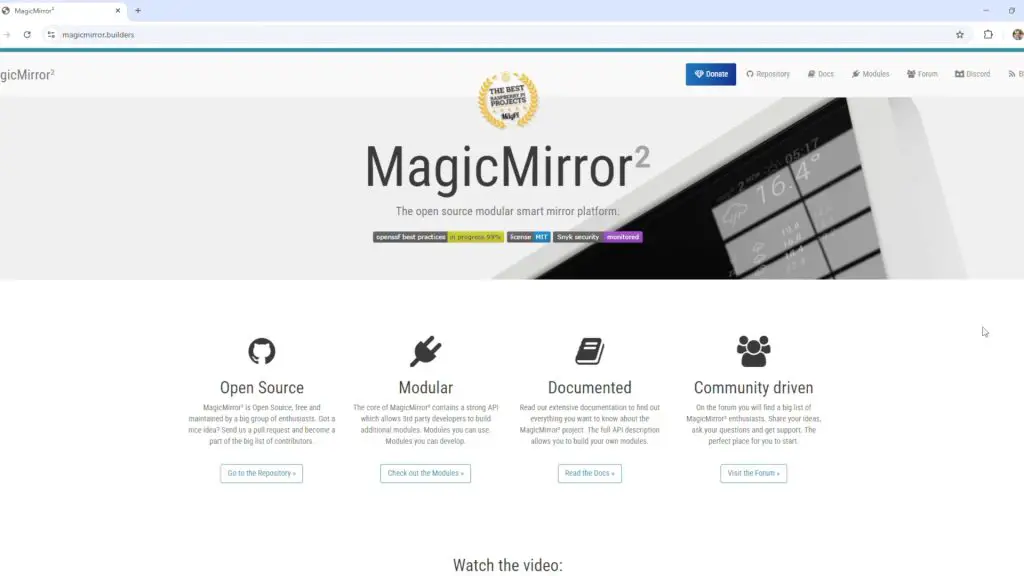
Dakboard is much easier to set up and run, but it is a bit more limited than MagicMirror. MagicMirror is open-source, free, and has a large community behind it, so it has hundreds of available modules and a lot of flexibility. However, this also means that it takes much longer to install, set up, and run.
Dakboard is great if you want a simple calendar interface with a few basic add-ons. The base features are free to use, including up to two calendar integrations, a choice of predefined layouts, and integration with photos, weather, and a news feed.
Additional calendars, custom layouts, and more integrations are available through two paid tiers. While these aren’t particularly expensive, they defeat the purpose of building our own device. If you feel like the free version of Dakboard isn’t enough for you, then I’d encourage you to try MagicMirror as an alternative.
I’m going to use the free tier of Dakboard as I primarily want to have a shared family calendar available to view.
To get set up, create an account, and you can then work through setting up your predefine screen by running through these tabs.
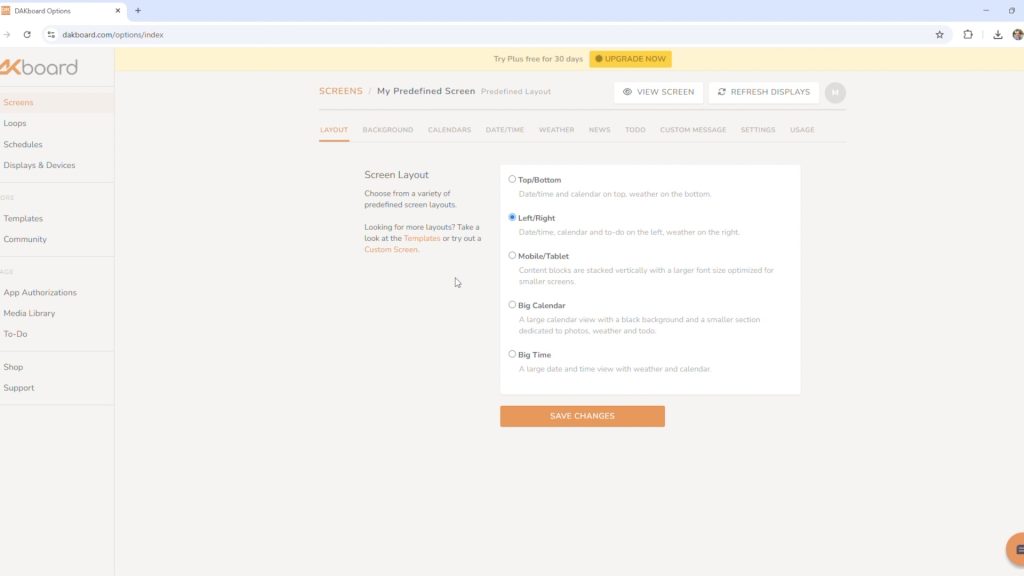
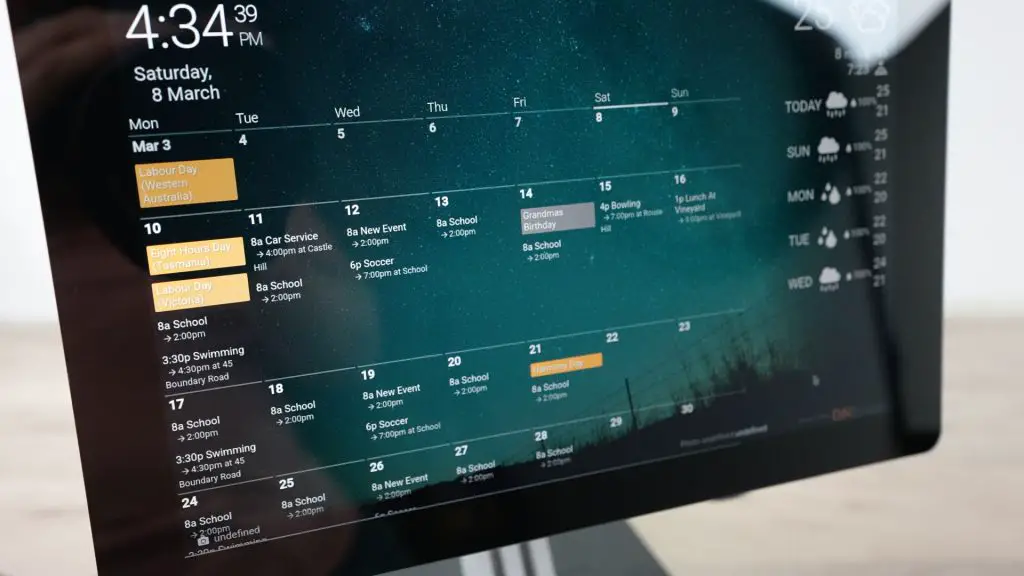
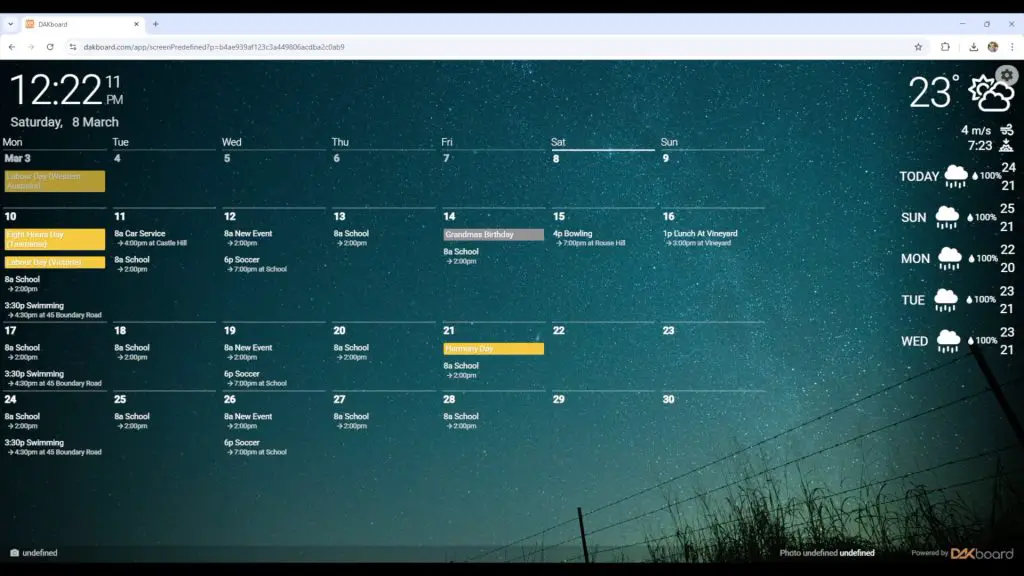
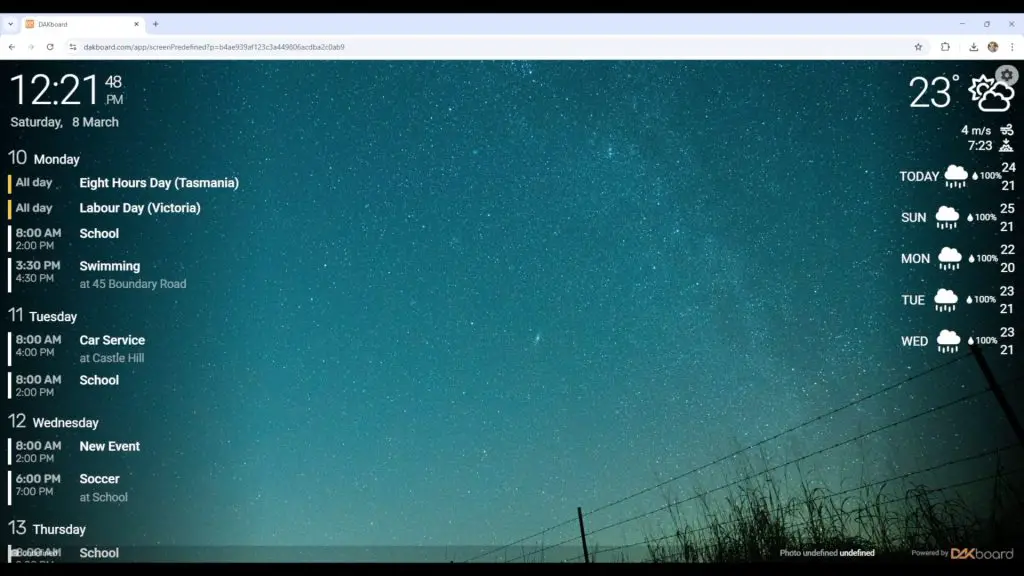
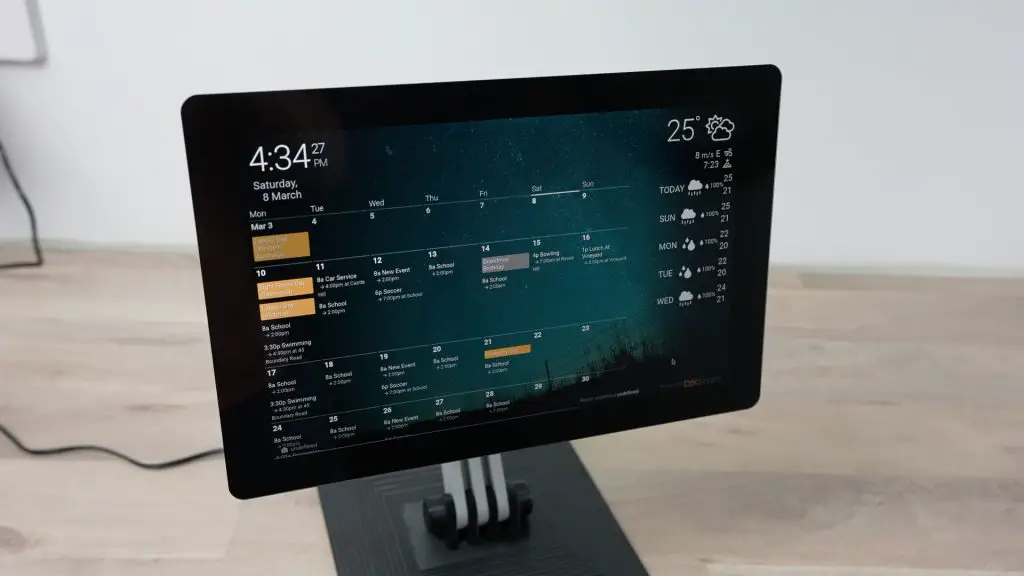
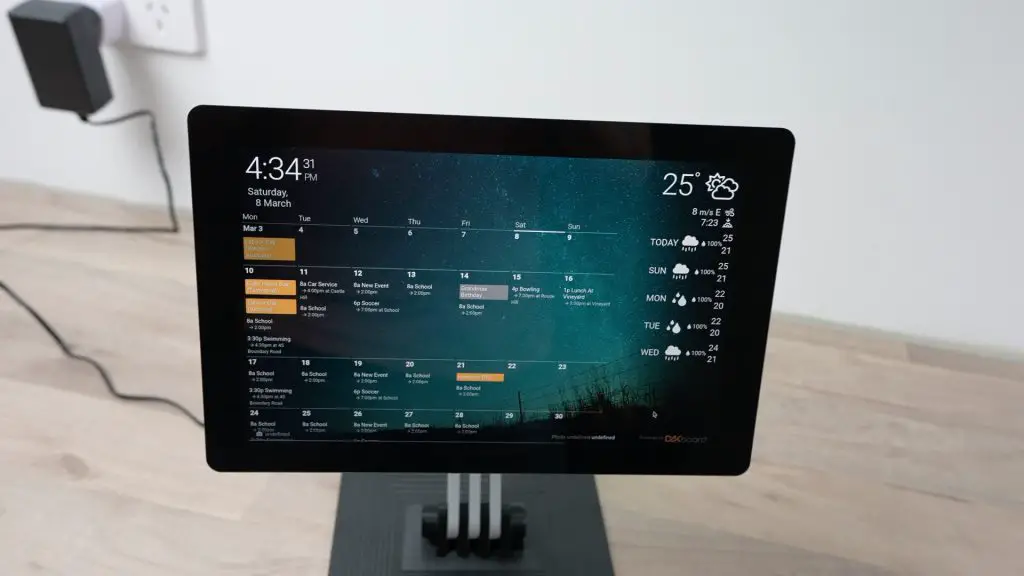
First, choose a layout. I like the calendar on the left and the weather on the right.
Then, choose a background. There are options for integrations with Apple Photos, Google Photos, OneDrive, Dropbox and a host of other services too. You can even set a Youtube video as the background if you’d like to.
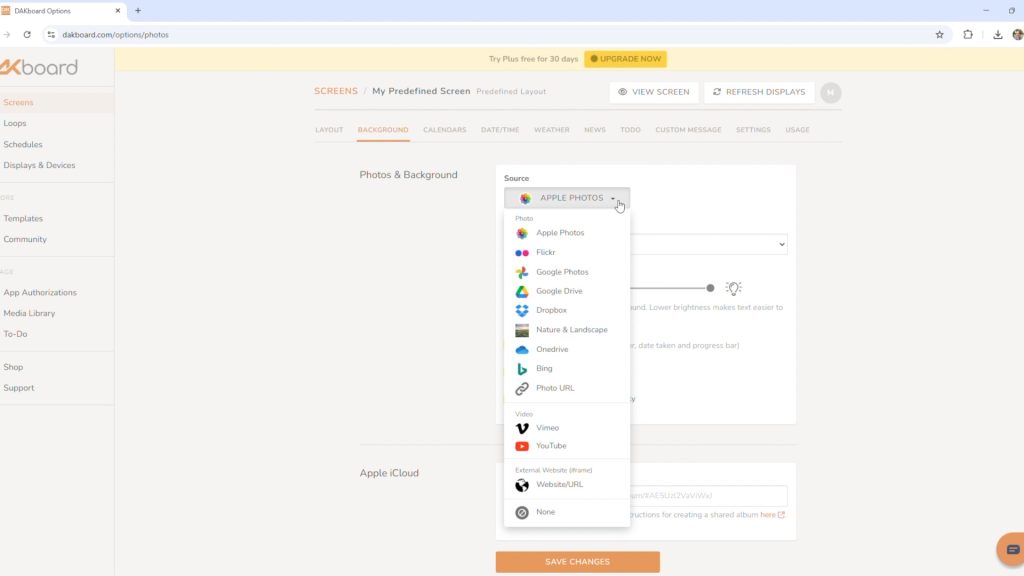
I’m using a shared Apple Photo album that is set up on my family members’ phones.
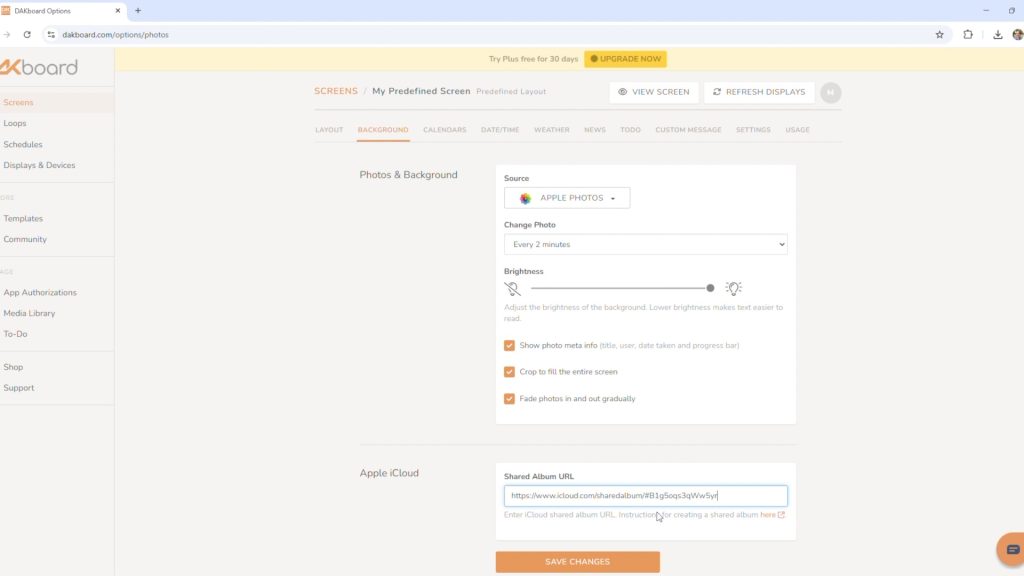
Shared albums are quite easy to make. You just go into the Photos app on your device, scroll down to shared albums, then hit create, give it a name and invite participants that can contribute photos to the album.

To make it accessible through Dakboard, you need to go to Shared Album Details, then make sure that Public Website is enabled and then press Share Link to get a link that you can copy over to Dakboard.
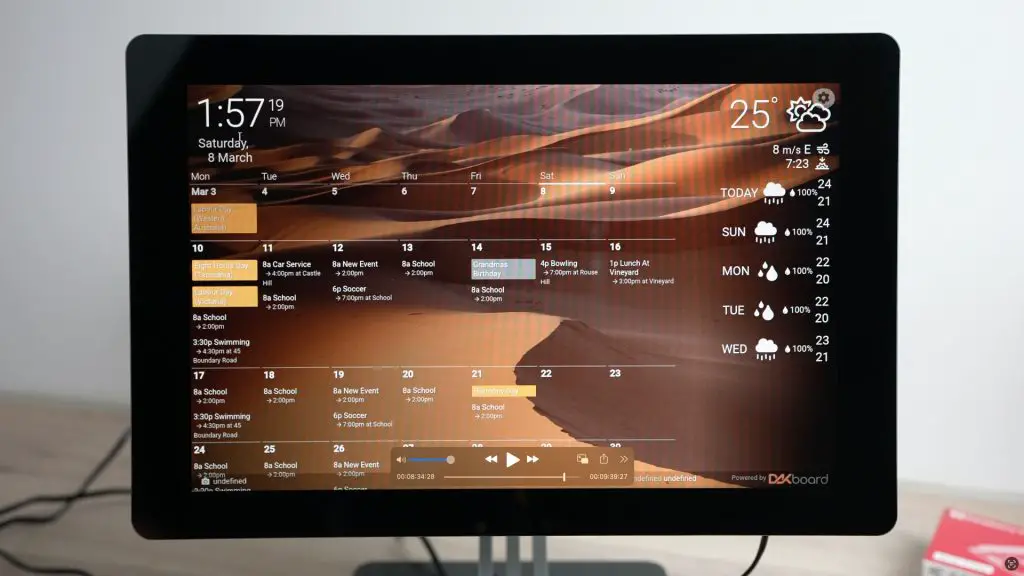
We’ve then got some calendar display settings that affect the way your calendar shows up. I’ll show you both the monthly and agenda views. I like the standard monthly view and the agenda view across 7 days. I also like including the event location and end times.
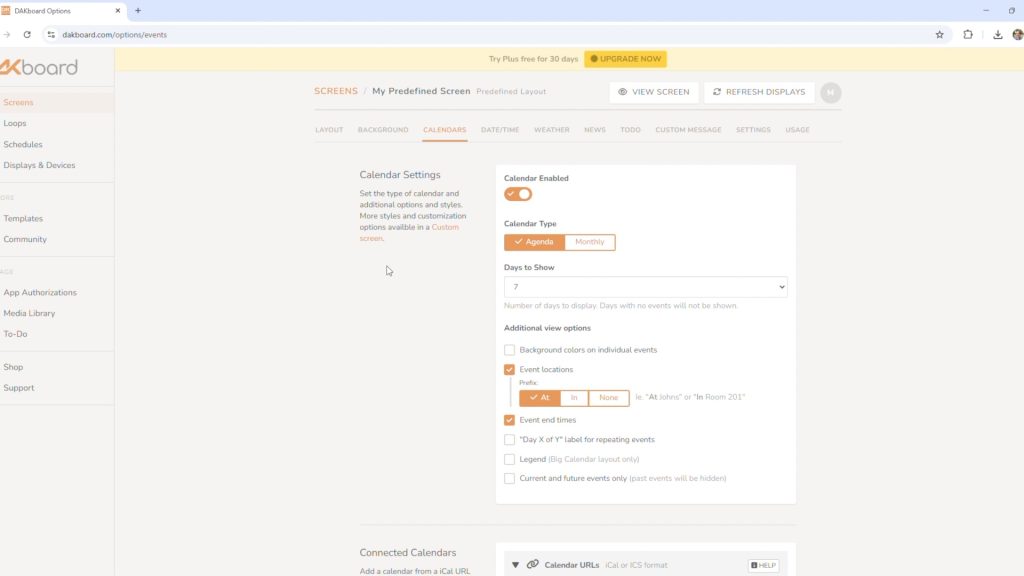
With the free tier, you can connect two calendars. You only really need one as we run a shared iCloud calendar across our family phones, and we can add, change or remove events from any device. There are also similar options available with Google Calendar.
Setting this up is also quite easy to do. First, you need a Calendar to link. You can use an existing calendar or create a new shared calendar with other family members.
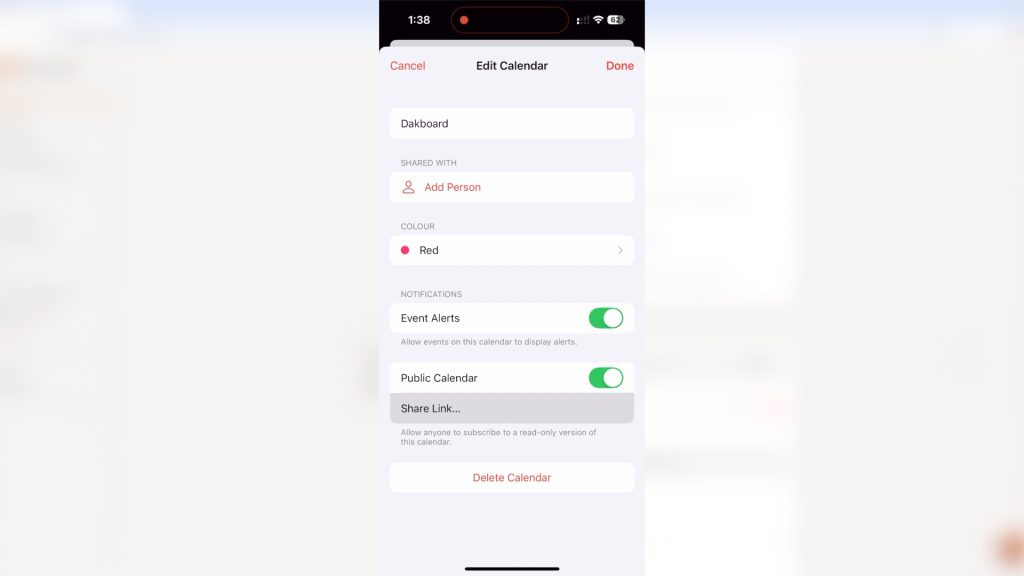
Once you have created your calendar, click on the i alongside it to edit it. In this menu, you can enable it as a Public Calendar and then get a share link like we did with the Photo Album. We then copy this URL across to Dakboard.
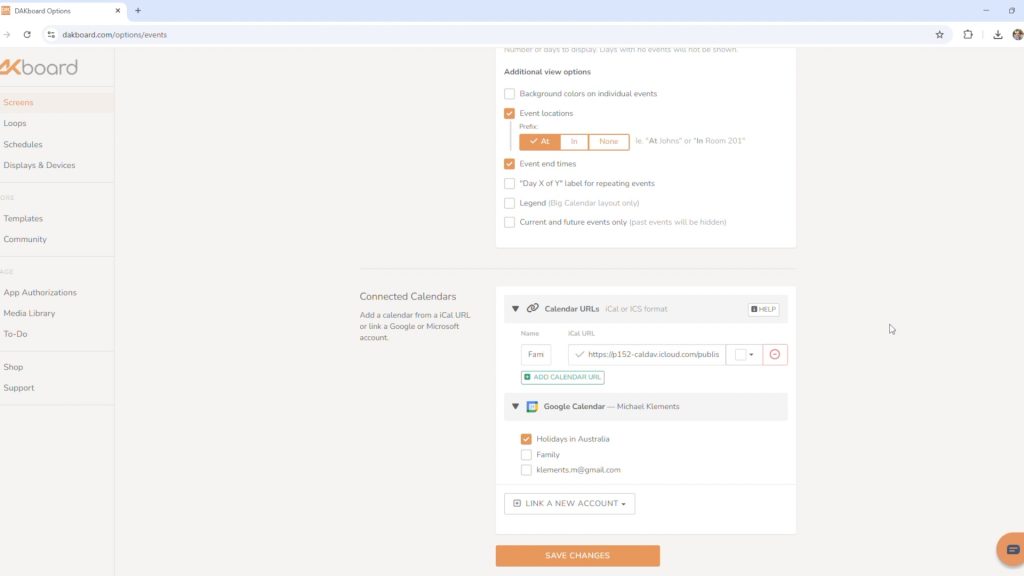
I added a second calendar link to a Google Calendar showing the Australian public holidays, just as an illustration.
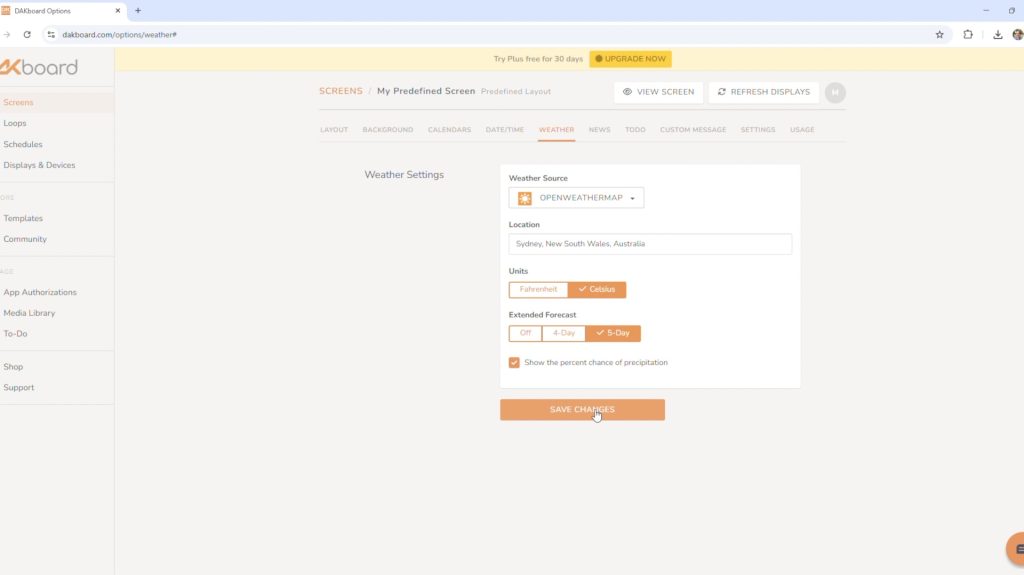
That’s the basic set-up done. You can also add the date and time, weather, news, a to-do list, and some custom text.
To view the screen, we then click on this link at the top.
Try playing around with different settings to customise the screen to your needs.
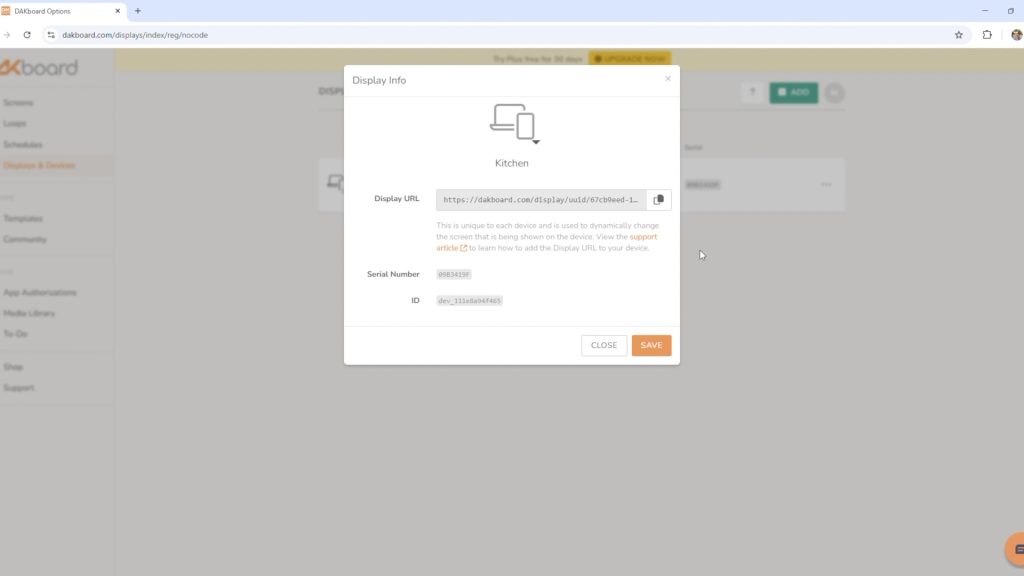
Once you’ve got it set up the way you like, we can link our Raspberry Pi to our account. Go to displays and devices, then create a new display. I’ve called mine Kitchen. Then go to this web address in the Pis browser to link it.
With that set up, your Pi should now be able to display your family planner dashboard.
Automating the Family Planner Functions
Rather than opening up the browser and then the link each time the Pi boots up, we can set it up to do this automatically.
First, we need to create an autostart directory by entering this command:
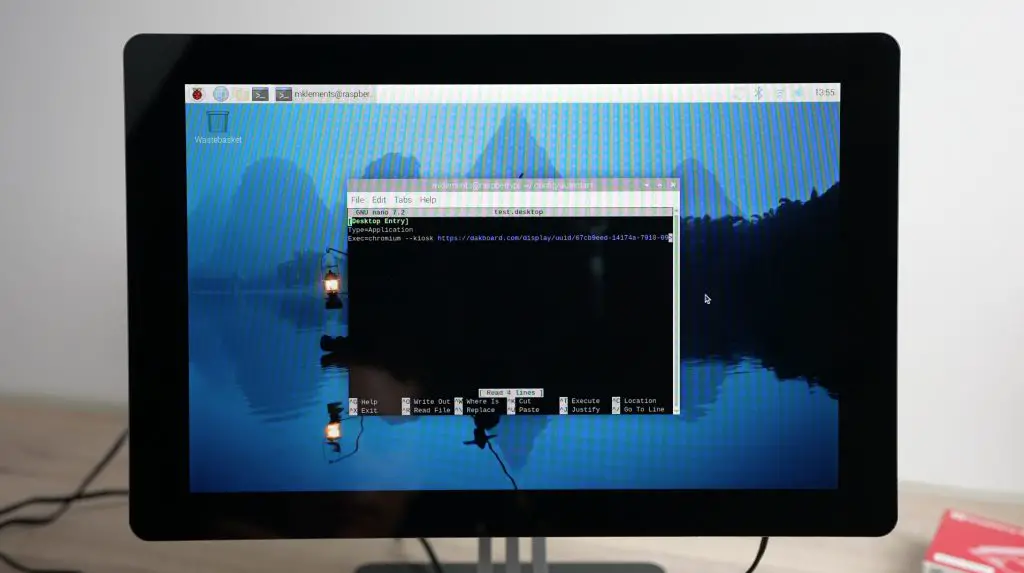
mkdir -p /home/pi/.config/autostartThen make sure that you’re working in the directory by entering:
cd /home/pi/.config/autostartThen, create a new text file in this location with these lines:
nano test.desktopAdd the following lines to the file and then close it by pressing Ctrl + O:
[Desktop Entry]
Type:Application
Exec=chromium --kiosk https://dakboard.com/display/uuid/<replace with your url>Exec=→ This is used in.desktopfiles to specify the command that should be executed when the application runs.chromium→ This launches the Chromium web browser.--kiosk→ Runs Chromium in kiosk mode, which means:- It opens in full-screen without any toolbars, address bars, or buttons.
- The user cannot close or navigate away using normal controls.
https://dakboard.com/display/uuid/<replace with your url>→ This is the URL that Chromium will open in kiosk mode.
Let’s reboot the Pi and see if it works.
Now, we’ve got a family planner running on the Pi, displaying our shared family calendar and cycling through the photos from a shared album on our phones.
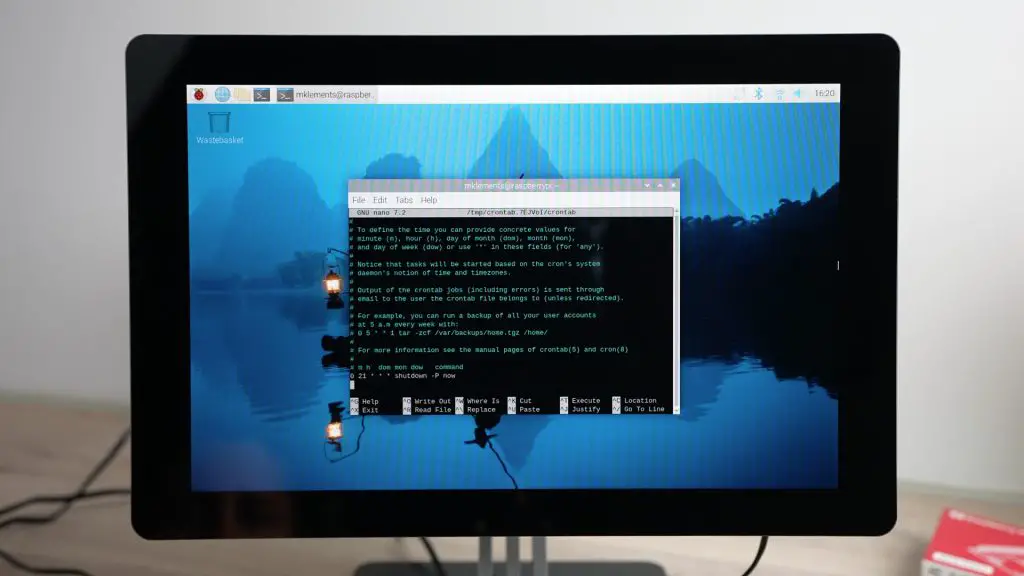
The last thing you might want to do is set the Pi to shut down at night to save power and increase the lifespan of the display. You can do this by adding a shutdown line in crontab, which will turn the Pi off every night at a set time.
Enter this command to open up crontab:
sudo crontab -eThen, add this line to the end of the file:
0 21 * * * /sbin/shutdown -H now0→ Minute (Runs at minute 0)21→ Hour (Runs at 21:00, or 9:00 PM)*→ Day of the month (Runs every day)*→ Month (Runs every month)*→ Day of the week (Runs on all days of the week)/sbin/shutdown→ Calls the system shutdown command-H→ Halts the system after shutting down (stops hardware but does not power off)now→ Executes the shutdown immediately when the cron job triggers
The Pi doesn’t have an easy way to wake up again, but I’ve worked around this by using a smart plug. The plug turns off 10 minutes after the Pi is scheduled to shut down and then turns on again in the morning, which in turn boots the Pi back up.
Final Thoughts On The Family Planner
Building a smart family planner with a Raspberry Pi 5 is a fun and practical project that helps keep everyone organised without relying on expensive commercial options. With a bit of DIY effort, you get a fully customisable dashboard that suits your family’s needs, whether it’s tracking schedules, displaying photos, or checking the weather. With Dakboard and MagicMirror, you can tailor the experience to fit exactly what you’re looking for.
Let me know what you think of this project in the comments section below, and let me know if you’ve tried MagicMirror or any other software that you’d recommend for a home planner!
Very nice idea and clear instructions. Can it be done when family members have both iOs and Android phones?
Building your own family planner sounds awesome! I’m curious, how did you come up with the idea to sync photos from family members’ phones? Any funny photo sync fails? 😜
This is super cool! I love the idea of building a family planner from scratch. Using a Raspberry Pi 5 is like bringing a tank to a knife fight, but hey, extra power never hurt anyone. I’m curious, how did you come up with the idea to include photo playback? Have you tried syncing photos from different phones with different operating systems? That could be a fun challenge! Can’t wait to see the final product.
How big monitor can I use ?