Over the past few years, I’ve built several Raspberry Pi-based NAS (Network Attached Storage) devices. These range from a dual-drive setup using a Pi 4, a budget-friendly Pi Zero NAS for under $35, and more recently, an all-SSD NAS running on a Raspberry Pi 5. While each project had its advantages, today’s build takes things up a notch — we’re going for a more practical, fully-featured 4-bay NAS that resembles a traditional commercial unit.
Here’s my video of the build, read on for the write-up;
What You Need To Build Your Own 3.5″ Pi NAS
- Raspberry Pi 5 – Buy Here
- Radxa Penta SATA Hat – Buy Here
- SATA Cable Extensions – Buy Here
- 32GB Sandisk MicroSD Card – Buy Here
- 4TB WD Red NAS Drives – Buy Here
- 12V Power Supply – Buy Here
- Barrel Jack Extension – Buy Here
- 80mm Slim Fan – Buy Here
- Molex Fan Adaptor – Buy Here
- M3 Brass Inserts – Buy Here
- Twenty (20) M3x8mm Button Head Screws – Buy Here
- Four (4) M3x16mm Button Head Screws – Buy Here
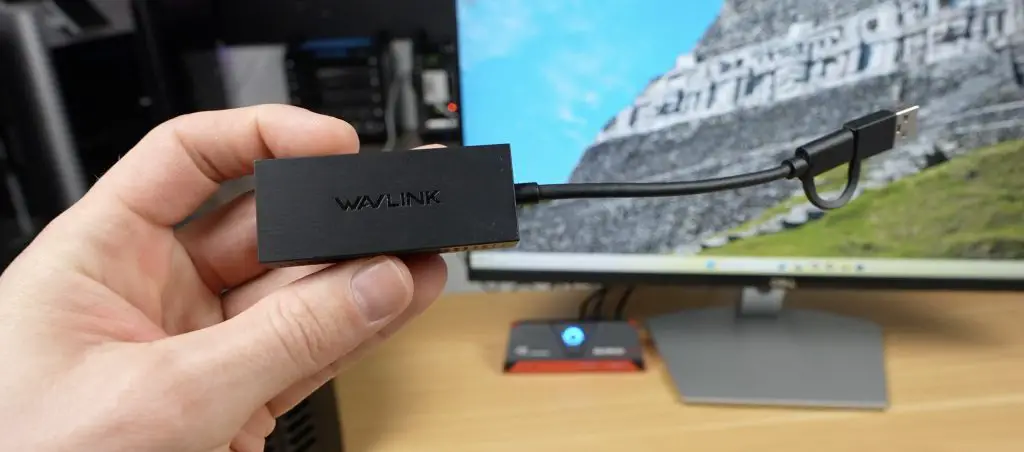
- 2.5G Network Adaptor (Optional) – Buy Here
Tools & Equipment Used For This Build
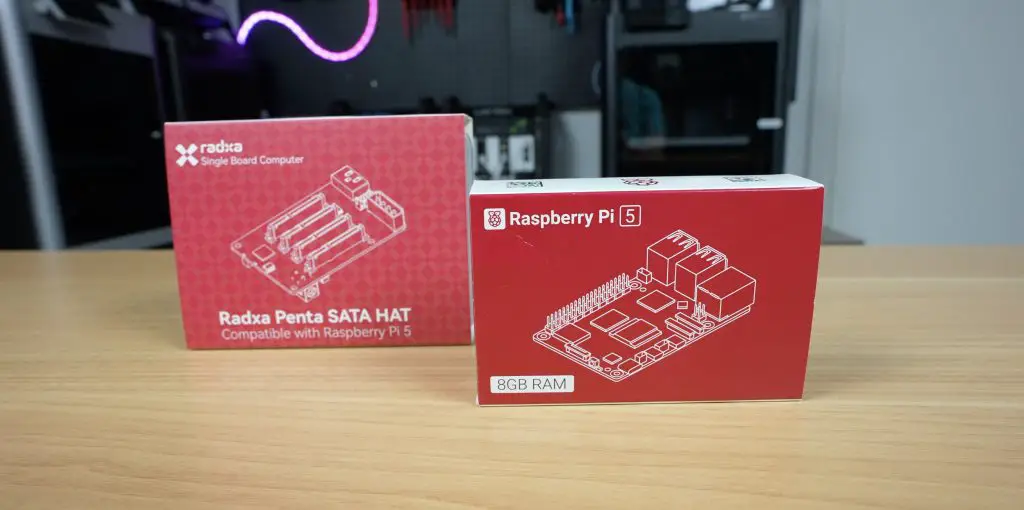
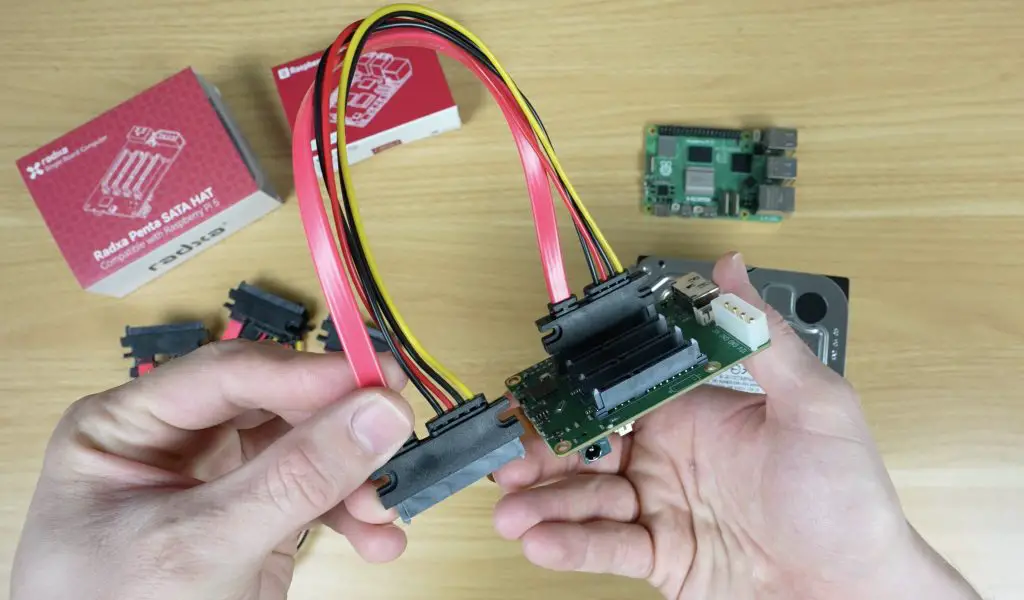
Hardware Overview
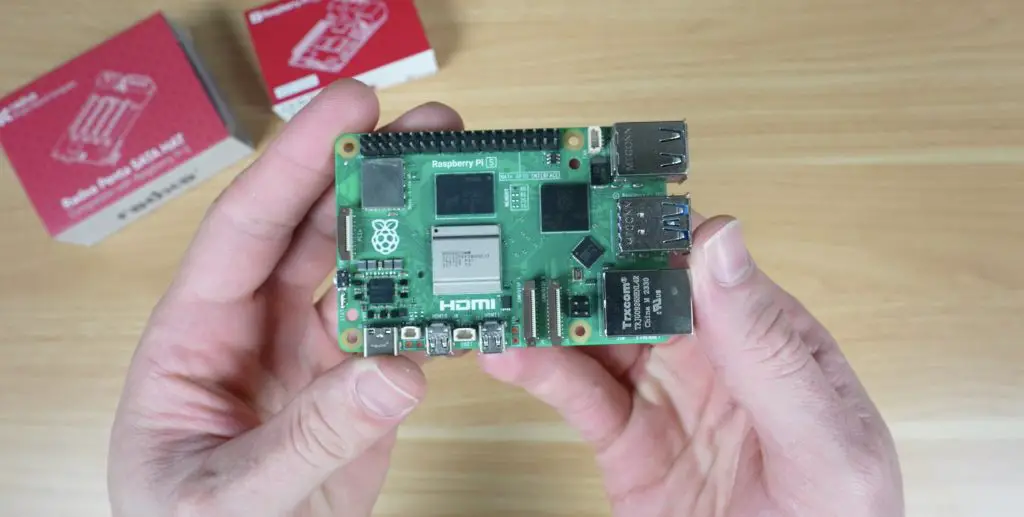
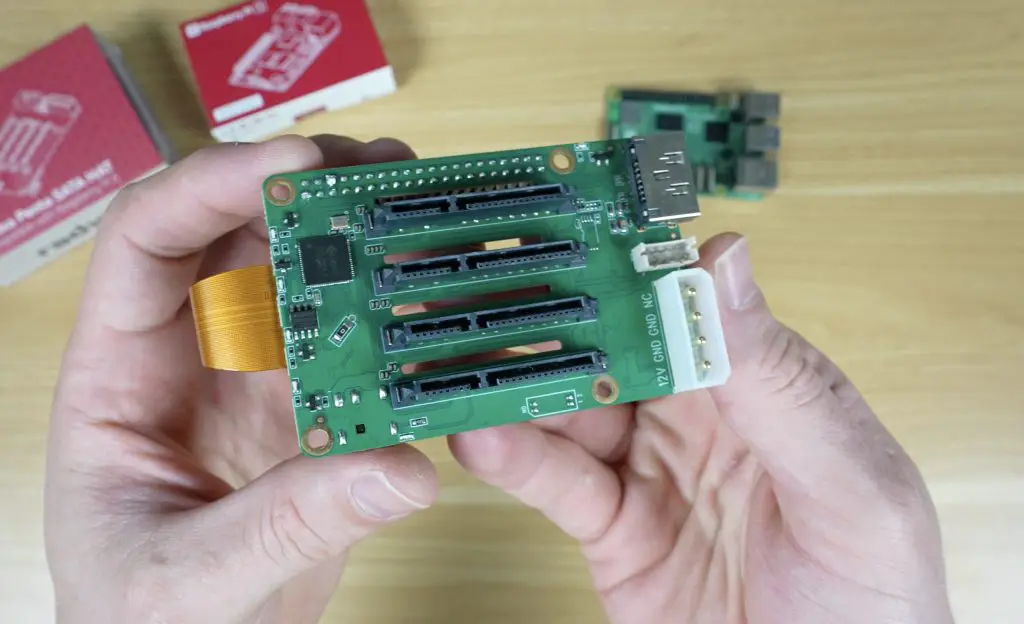
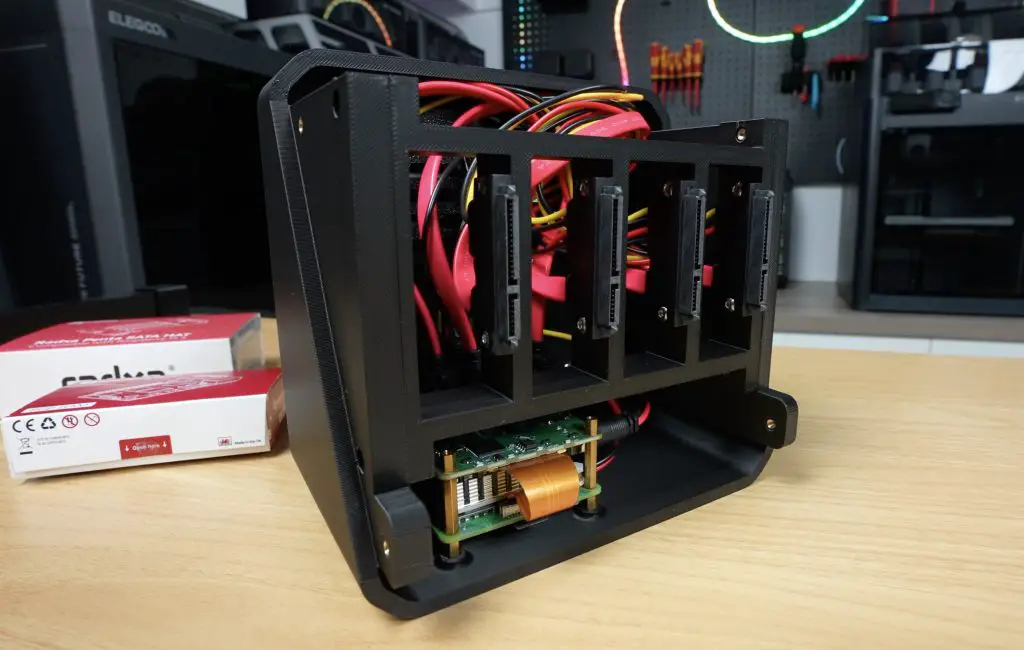
For this project, I’m again using the Raspberry Pi 5, making full use of its PCIe port by attaching the Radxa Penta SATA Hat, which provides four SATA ports. Technically, the hat includes a fifth port (hence the penta SATA name), but it uses a different connector and is inconveniently positioned, so I’m sticking with four.
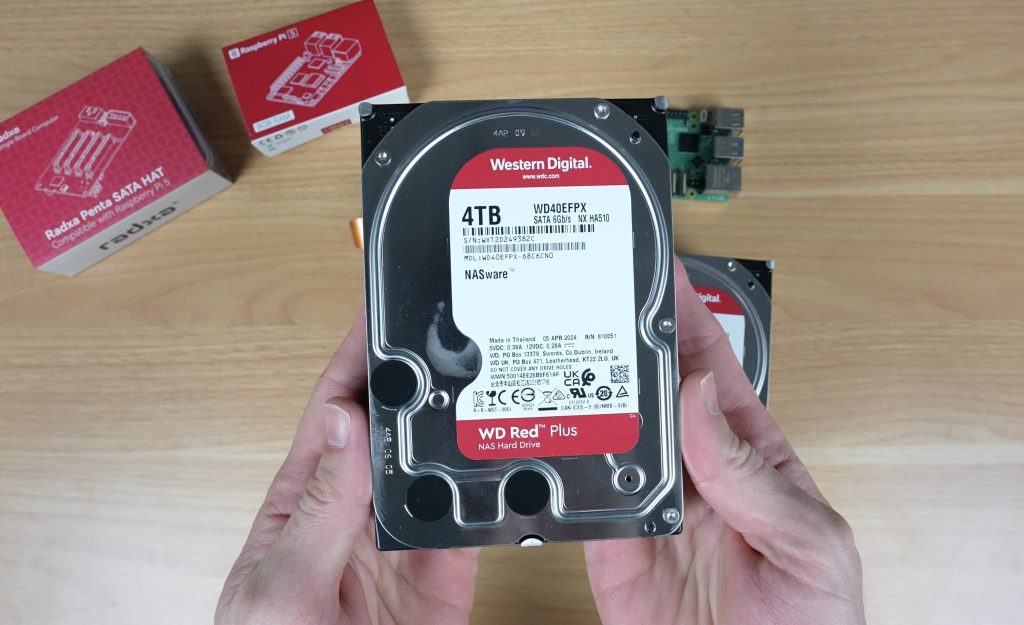
For storage, I’m using four 4TB WD Red NAS drives, providing a good balance of capacity and reliability.
Because 3.5″ drives are too bulky to plug directly into the Radxa hat, I’m using SATA extension cables. The particular ones I’ve chosen have mounting holes, allowing me to design a custom bracket to align them properly with the drive trays.
To complete the setup, I’m using:
- A Pi 5 active cooler for CPU thermal management
- A microSD card to run the operating system
- A 12V 40W power adapter to power the NAS
- A slim 12V 80mm fan to cool the drives and internal components

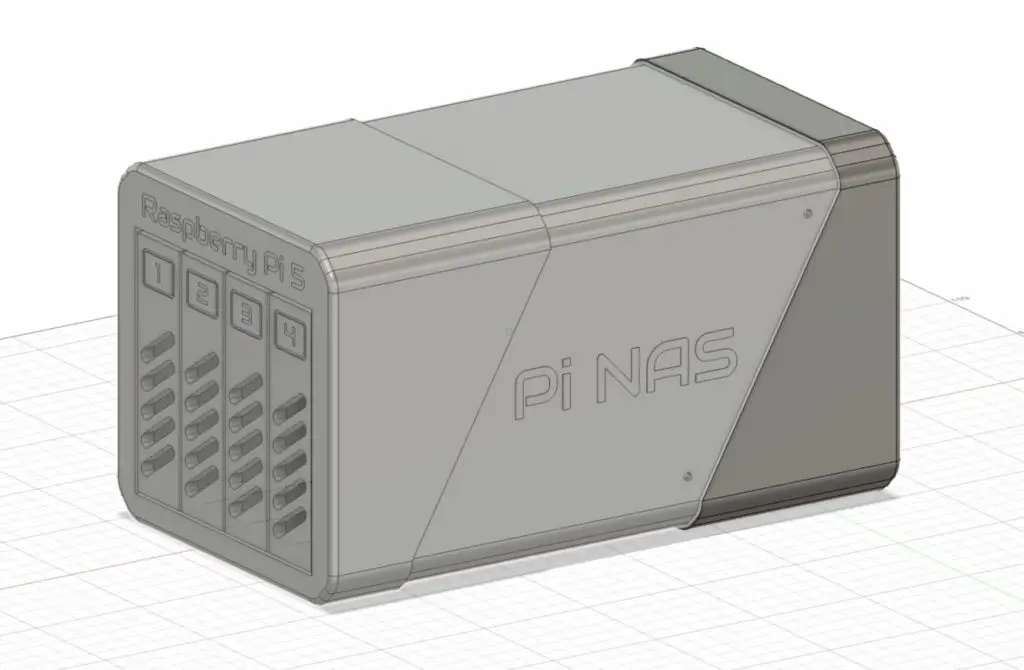
Designing the NAS Enclosure
I designed the custom 3.5″ Pi NAS enclosure in Fusion 360.
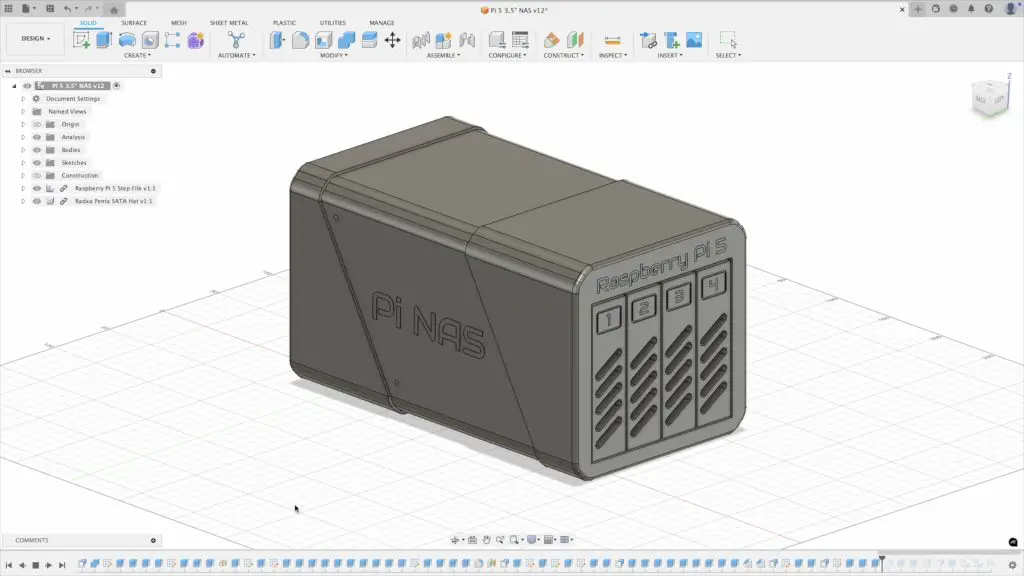
The design features:
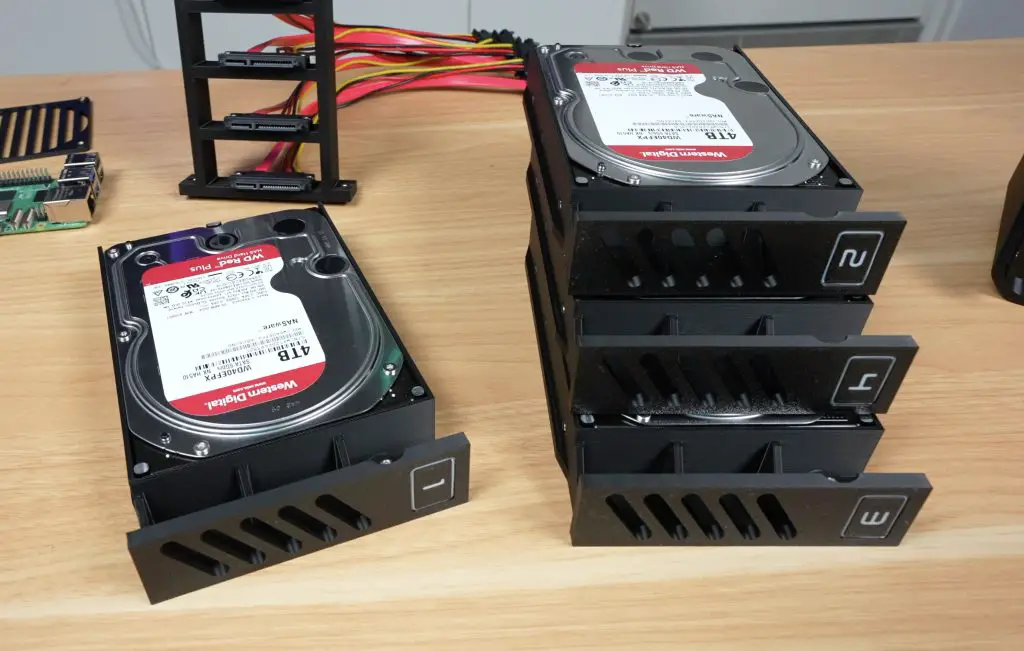
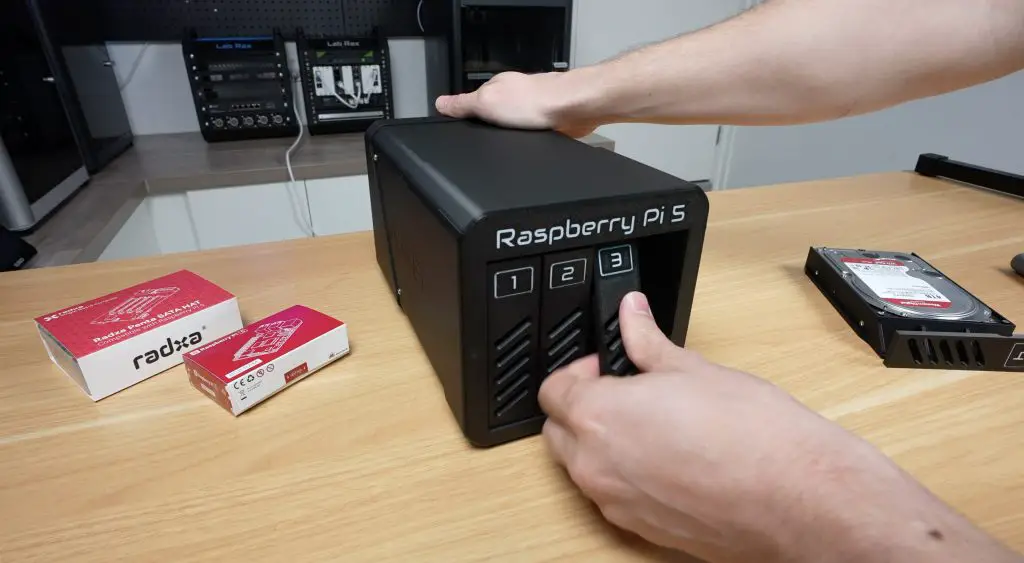
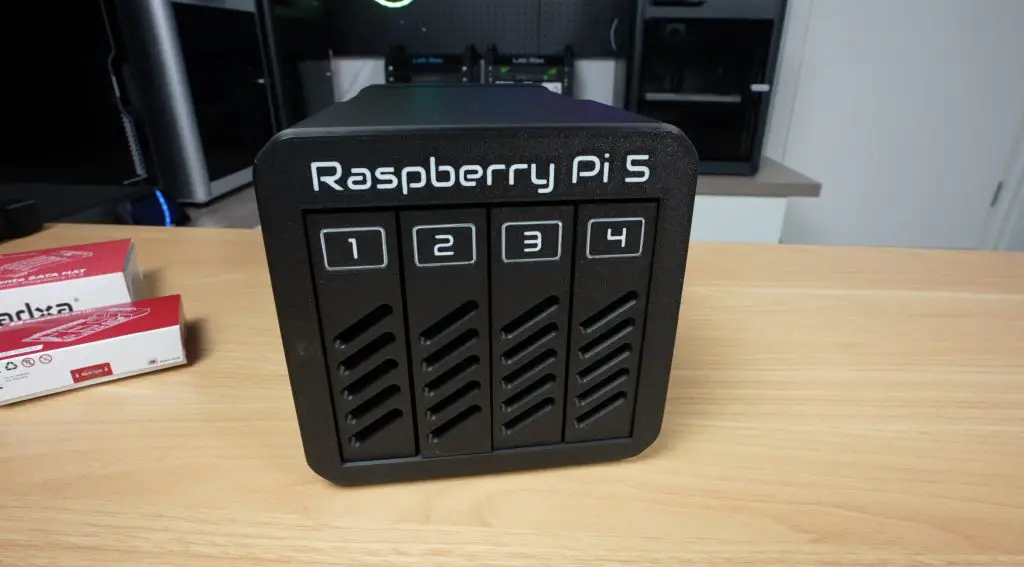
- Individual drive trays with pull-out levers for easy access
- A mounting bracket for the SATA extension connectors so that drives can slide in and plug directly.
- The Pi and Radxa stack behind the drives, as we don’t need HDMI or USB-C access
- A barrel jack extension for clean power supply routing to the Radxa hat
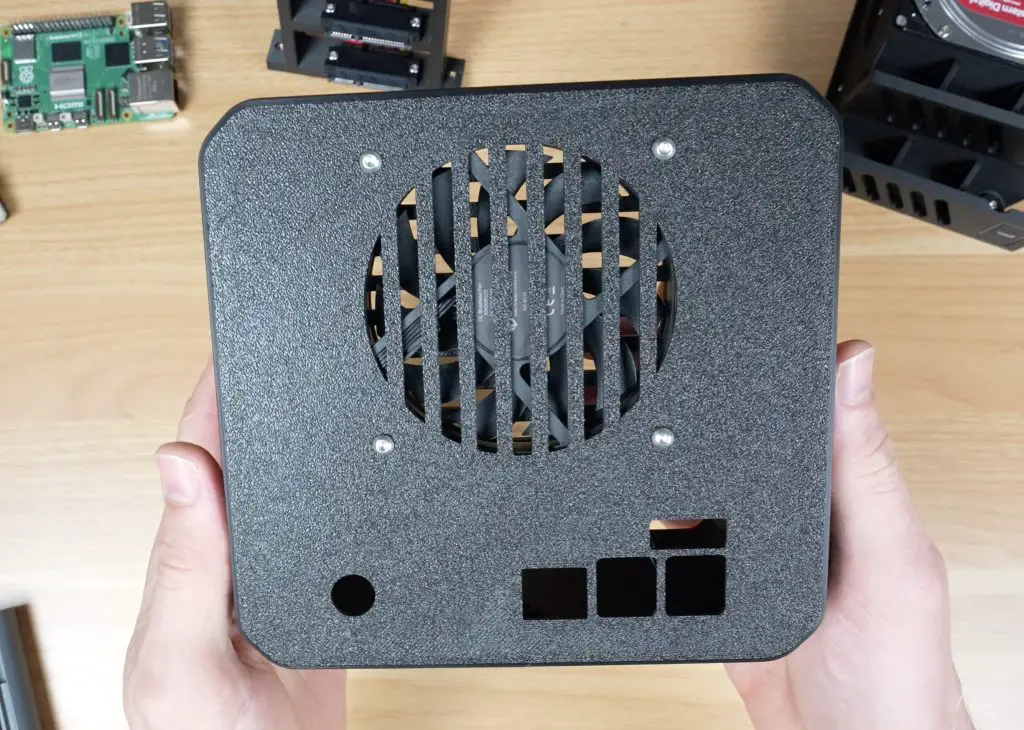
- An 80mm fan mount above the Pi to draw air through front vents and exhaust it at the back
- A vented fan guard to prevent cables from catching in the fan blades
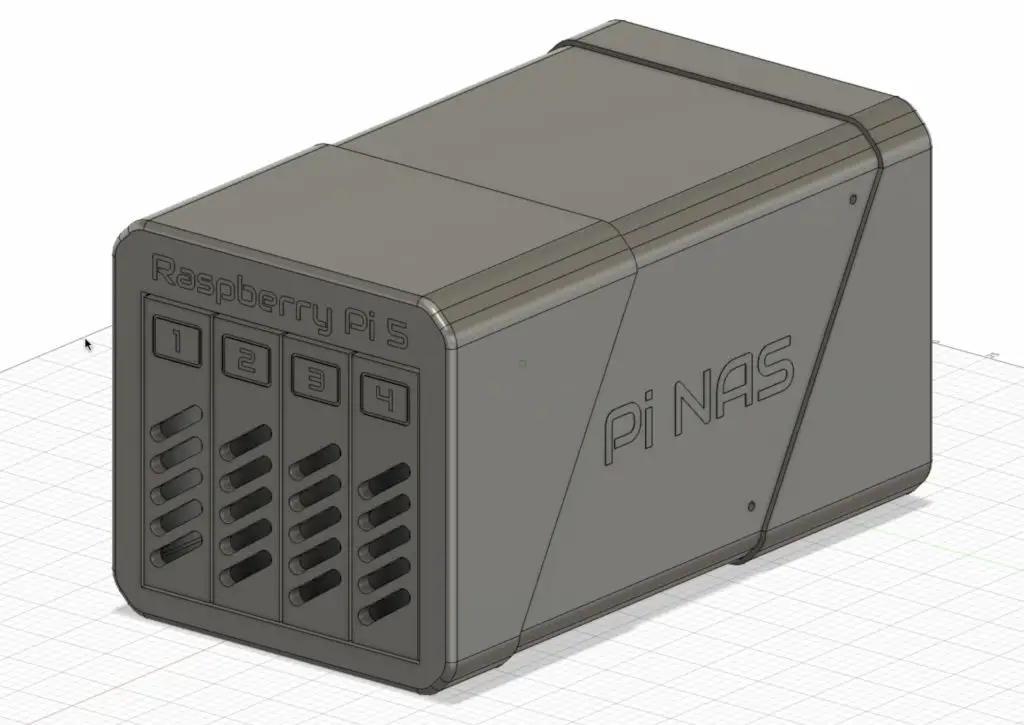
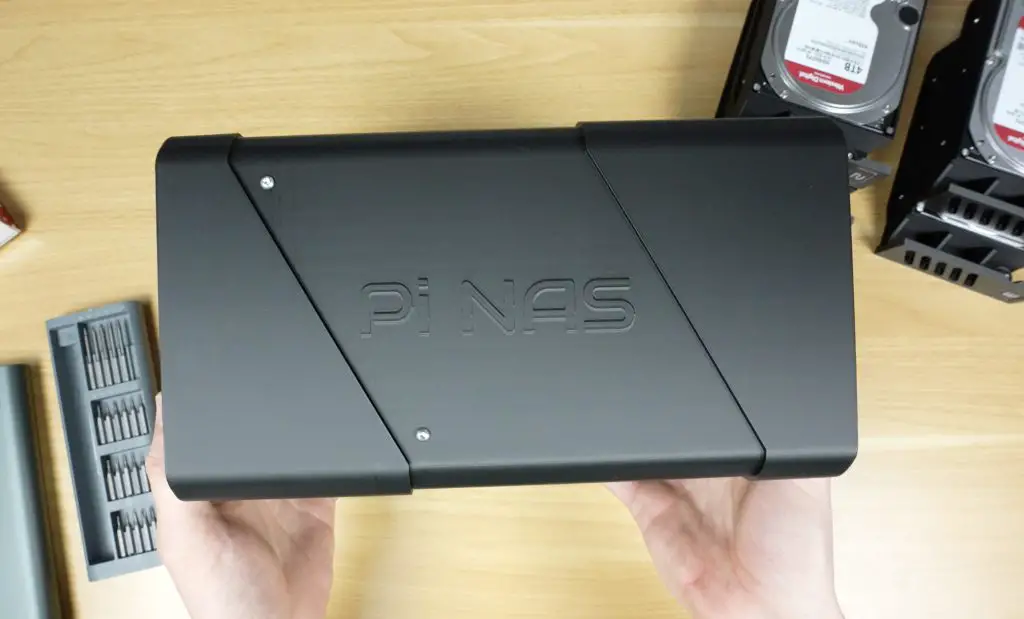
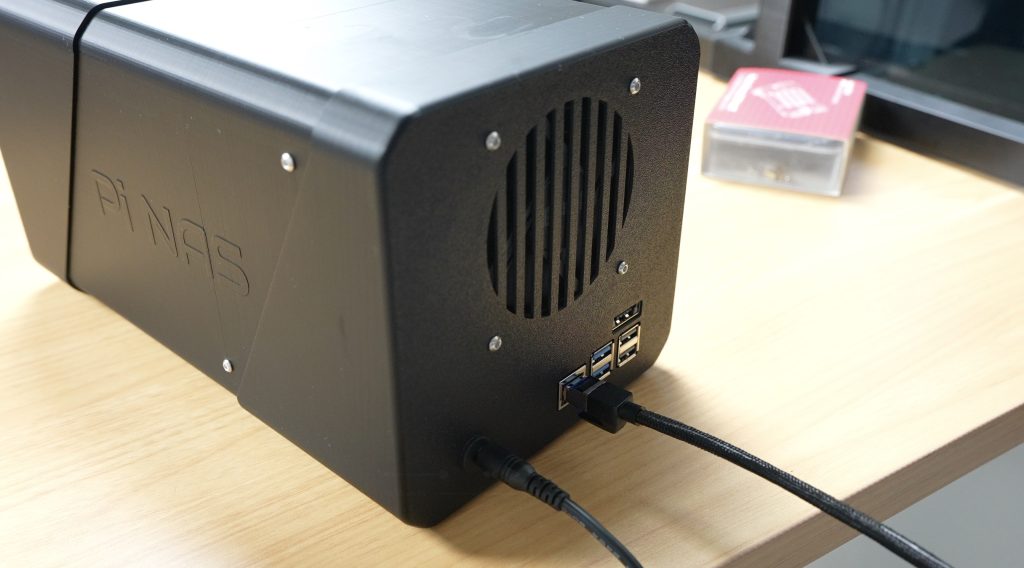
All of the components are enclosed in a housing that closely resembles a traditional 4-bay NAS.
You can download the 3D Print files from Makerworld.
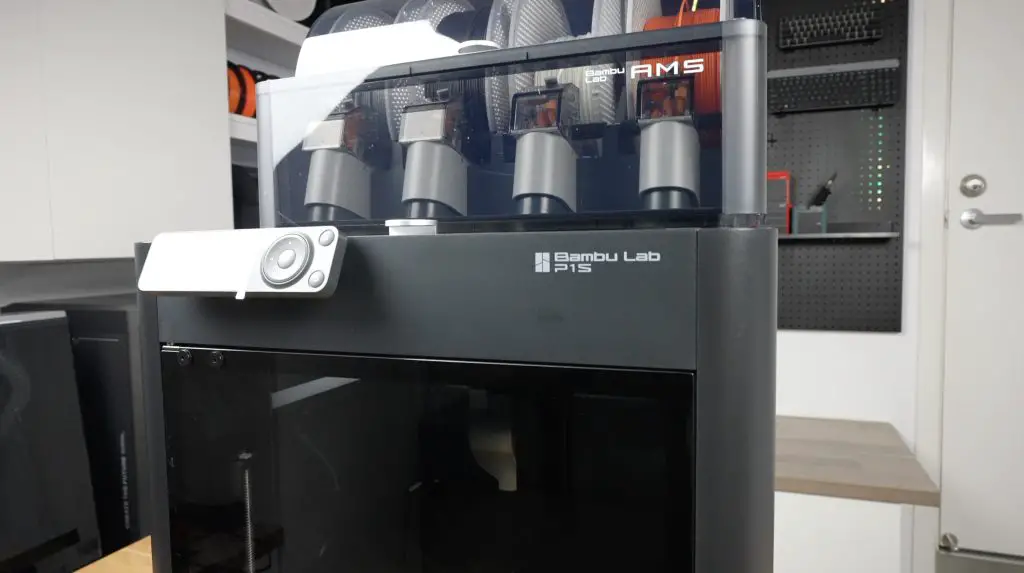
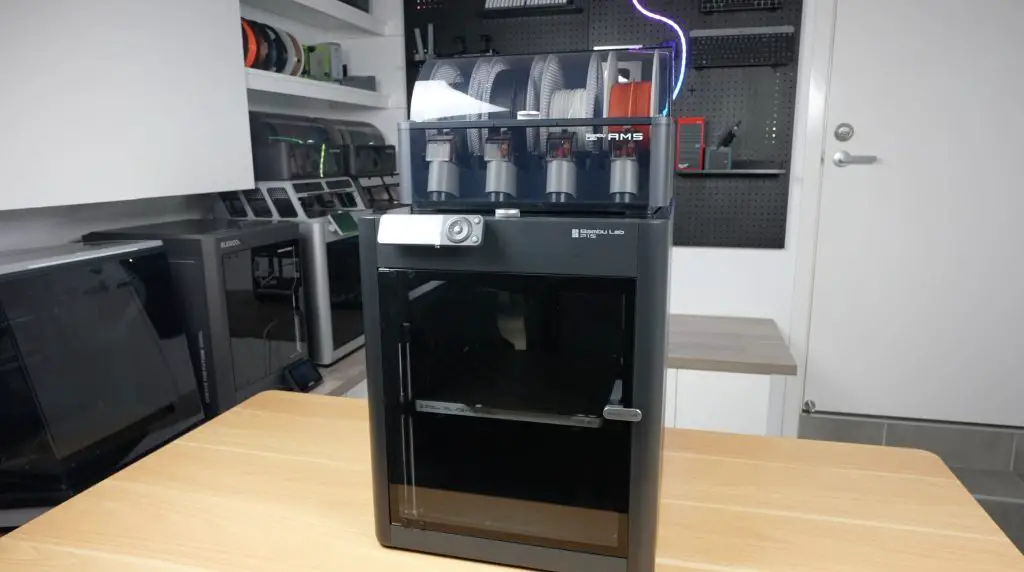
3D Printing the Case with the Bambu Lab P1S
To bring the 3D model to life, I used the Bambu Lab P1S Combo, one of Bambulab’s mid-range CoreXY printer with:
- High-speed enclosed printing
- Multi-material support through the AMS (Automatic Material System)
- Reliable out-of-the-box performance which is perfect for a functional project like this
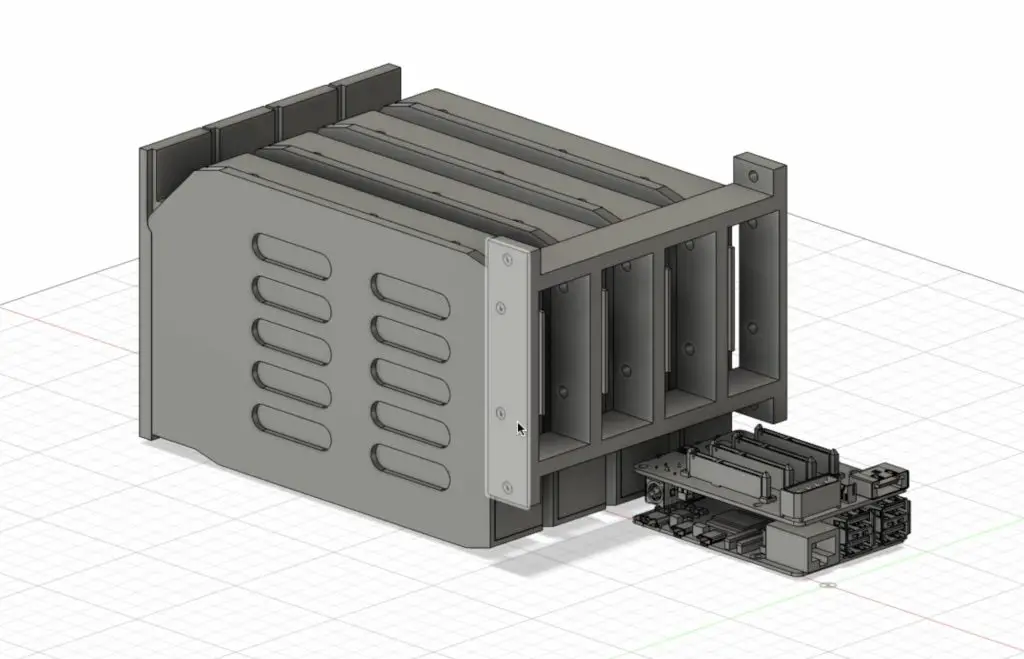
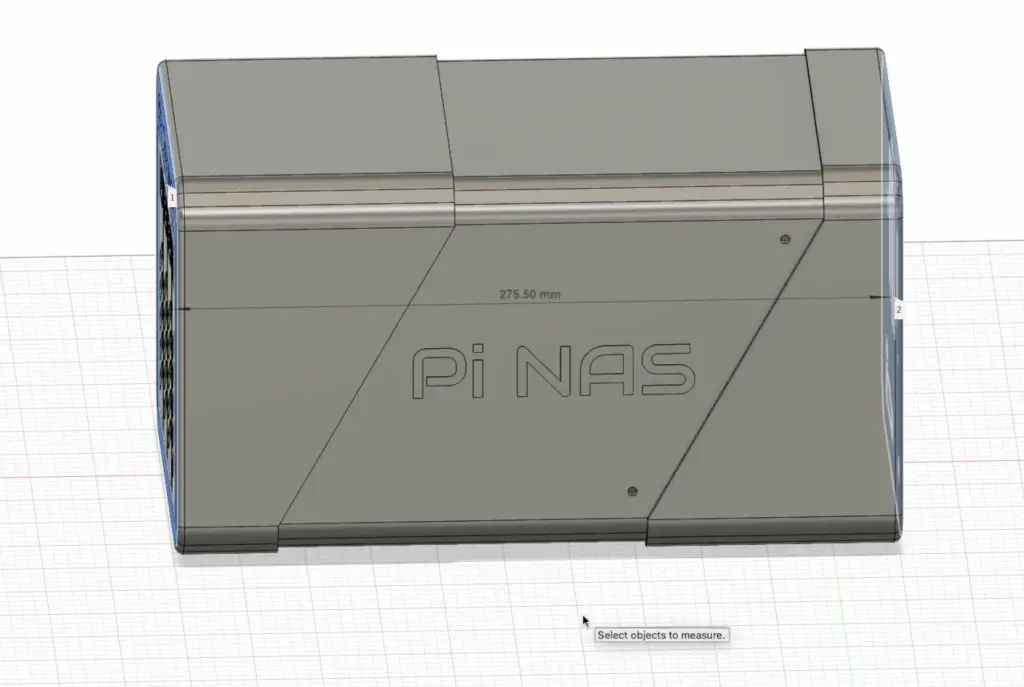
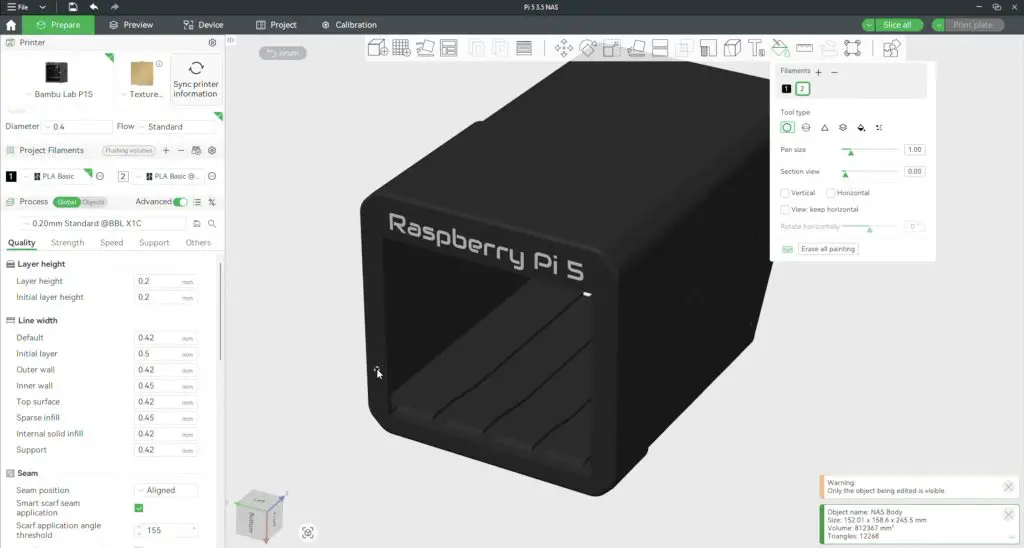
Handling the Large Print Size
One challenge with the design is its length. The full enclosure is 275.5mm long, while the P1S has a 256mm max build volume along each axis. To work around this, I split the enclosure along a diagonal. This hides the seam as part of a design accent and, as a bonus, eliminates the need for print supports.
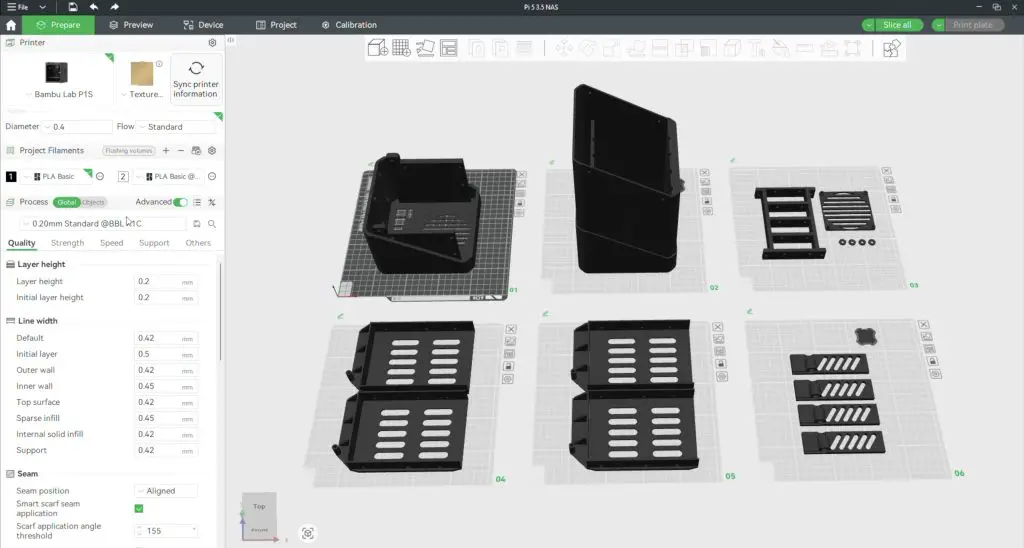
The enclosure was then exported and sliced across six build plates using Bambu Studio, and printed in:
- Black PLA Basic for the enclosure
- White PLA Basic for the front panel and tray lever text
I also used all default settings/presets for the textured PEI build plate, 0.2mm standard print profile and PLA Basic.

The entire enclosure uses nearly 1kg of filament and is going to take just under 24 hours to print. Because the text is only a couple of layers deep, we only have 5g of filament waste for the two-color prints on the front panel.
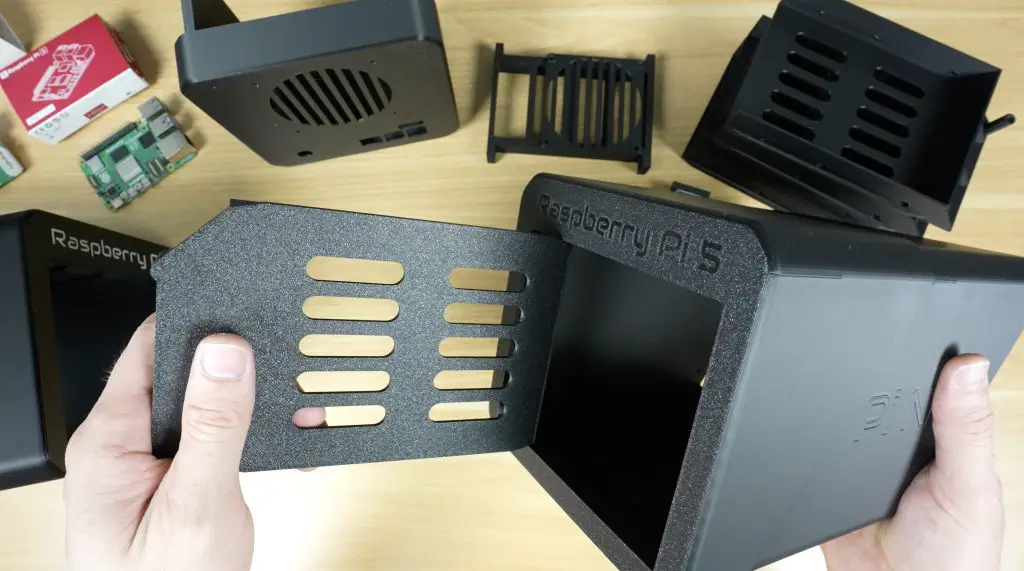
Print Results & Design Adjustments
The Bambu P1S produced high-quality parts straight off the printer. There was no warping or stringing, and the parts had accurate tolerances. This was especially impressive since it was the printer’s first large print out of the box with just basic setup and auto-calibration.


I did need to reprint the enclosure halves to add clearance for the drive tray guides and mounting holes for the Pi which I forgot about. Both small fixes, but worth mentioning.
Assembling the 3.5″ Pi NAS Enclosure
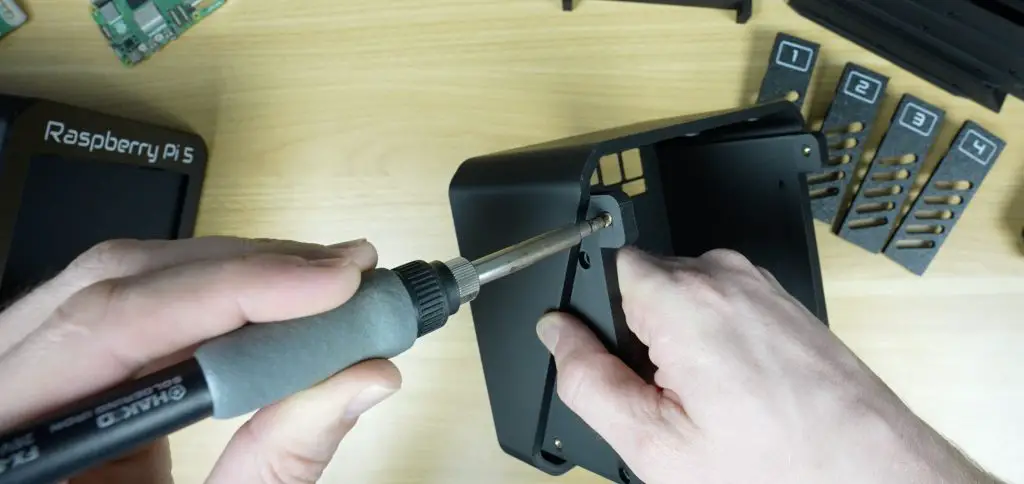
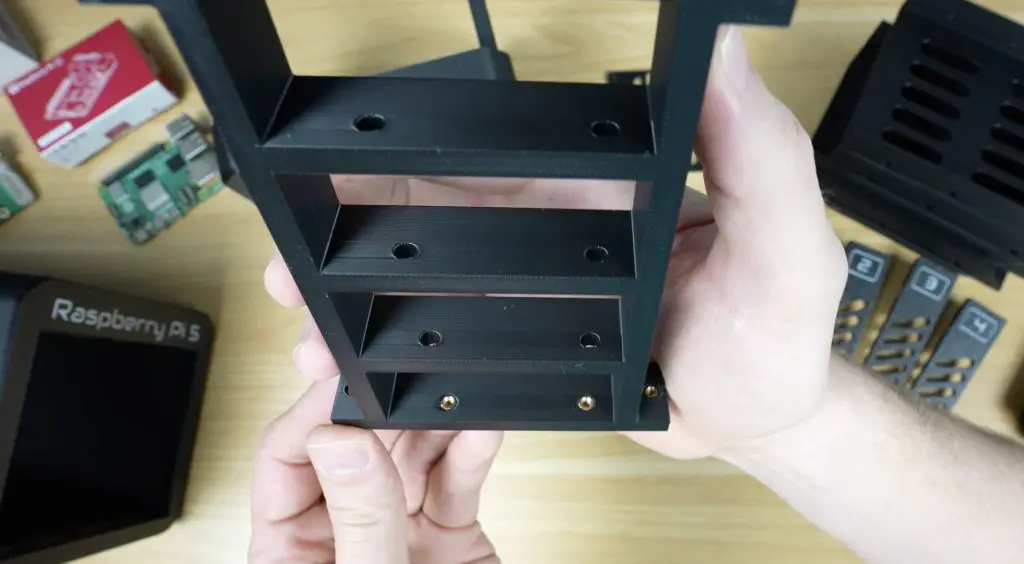
Adding The Brass Inserts
The 3D printed components are held together with M3 screws into brass inserts, so we need to get those installed using a soldering iron;
- Four go into the back half of the enclosure for joining the two parts together
- Four go into the SATA cable holder to mount it to the case
- Eight more go into the cable holder to secure the SATA connectors to the holder
- One for each drive tray to mount the tray lever with a 3D printed washer
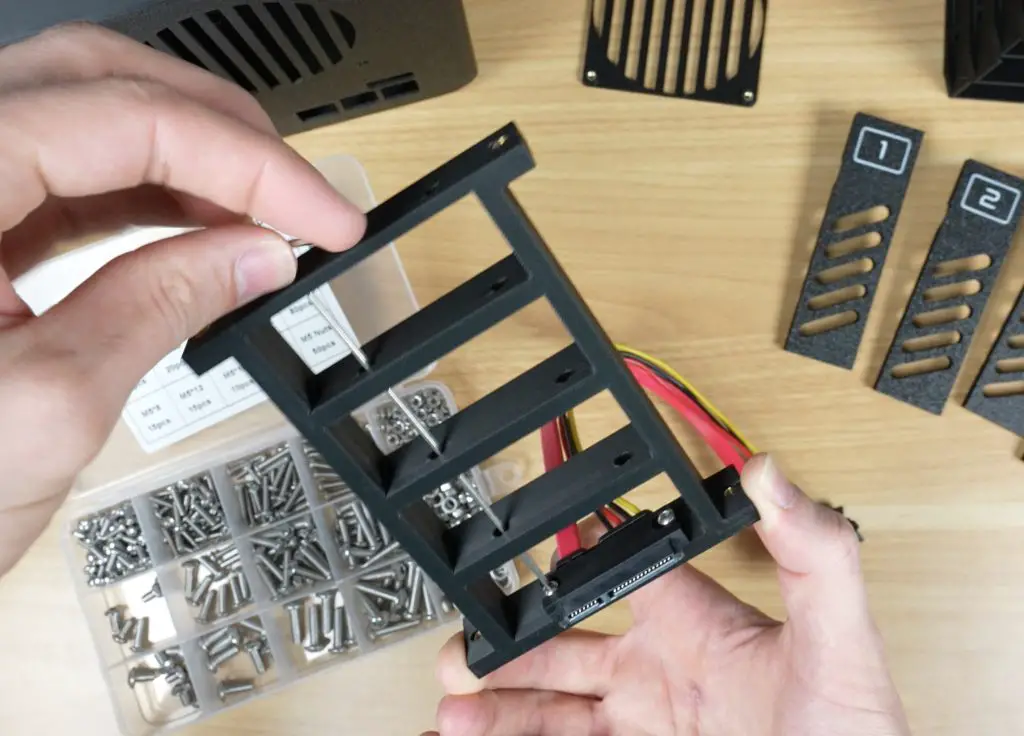
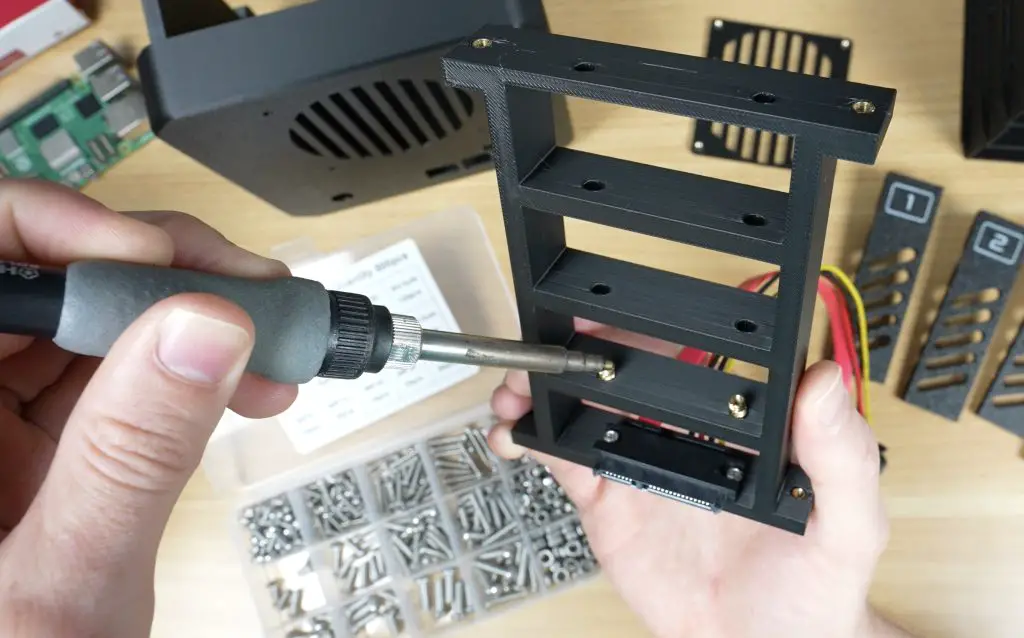
Installing the SATA Cable Connectors On The Bracket
Each SATA connector is fastened with two M3x8mm button head screws. I added two brass inserts and installed the one on the end first, I then used a long hex key to secure them through the holes made for the subsequent inserts. This makes it easier to get to each set of screws, since its quite compact. This process was repeated for all four connectors.
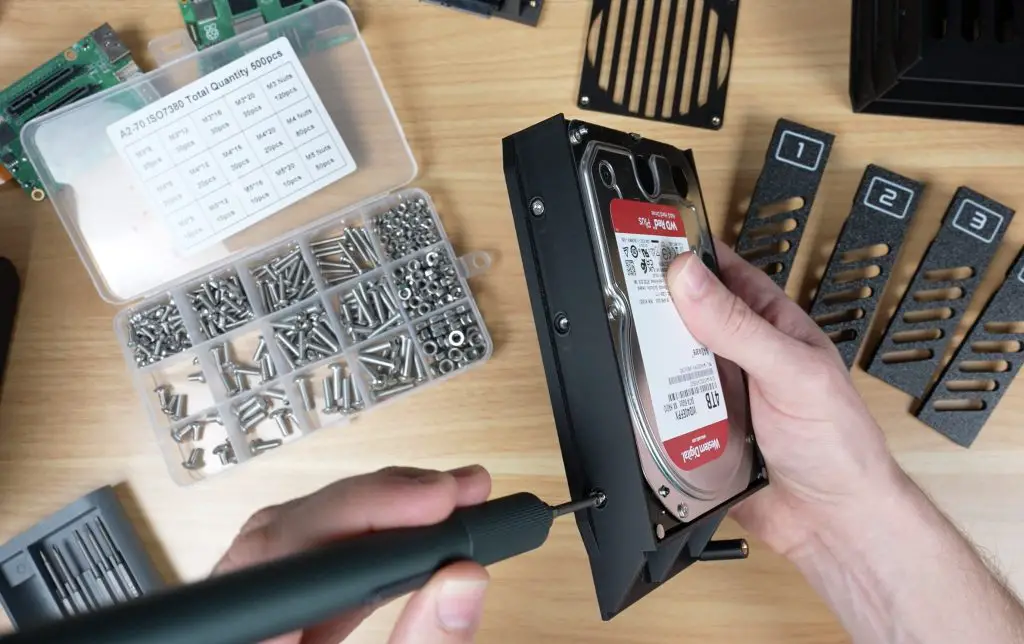
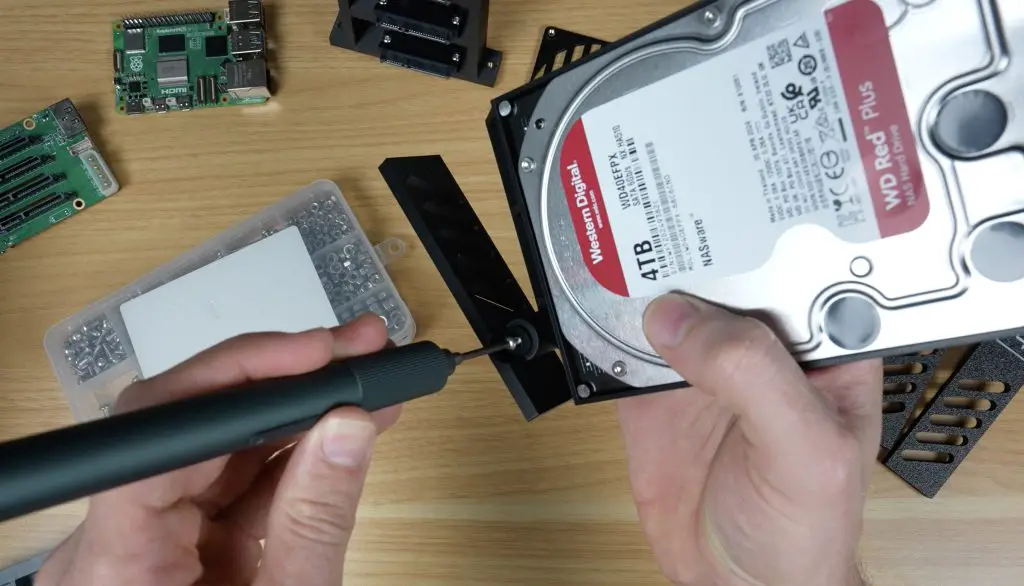
Assembling the 3.5″ Drive Trays
Each 3.5″ HDD is mounted using four countersunk drive screws. The tray lever is then attached with an M3x8mm screw and a 3D printed washer, allowing it to pivot between the pulled out and stowed positions. This process is repeated for all four trays.
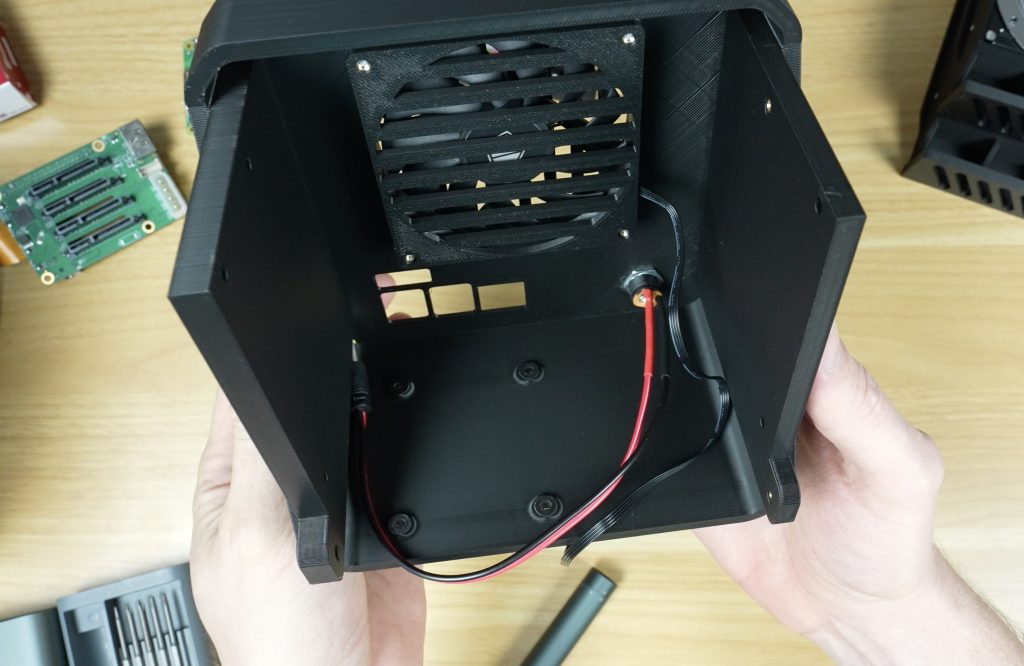
Installing the Fan & Power Jack
The 80x10mm 12V slim fan is mounted to the rear of the case using four M3x16mm screws. Make sure that it is aligned to push air out of the enclosure. I oriented the vent guard slots horizontally to minimize cable interference.
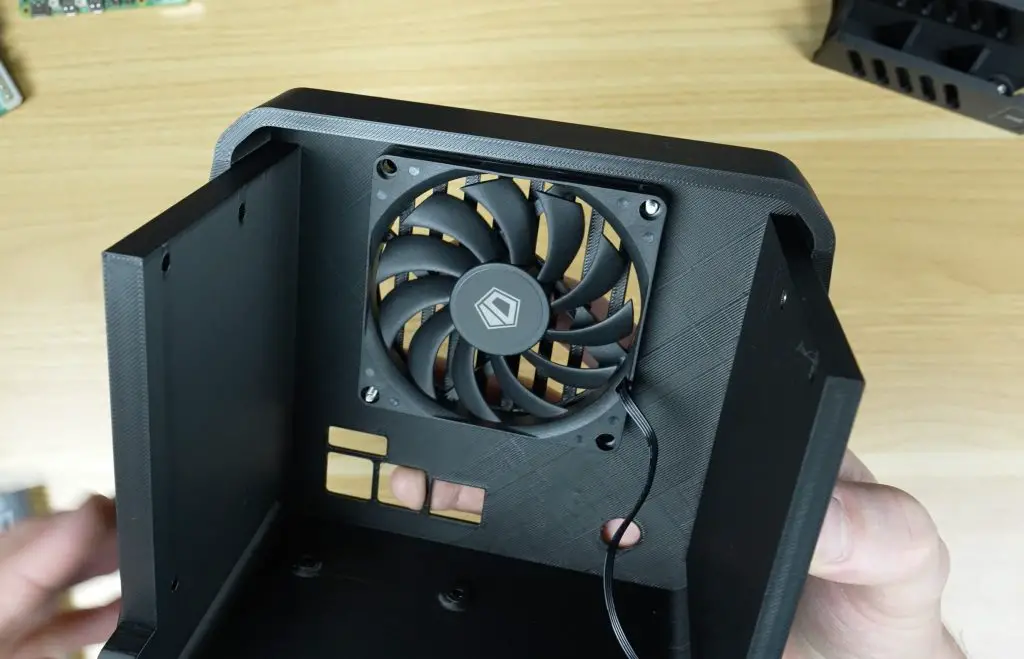
I also installed the barrel jack extension for the Radxa hat’s power input.
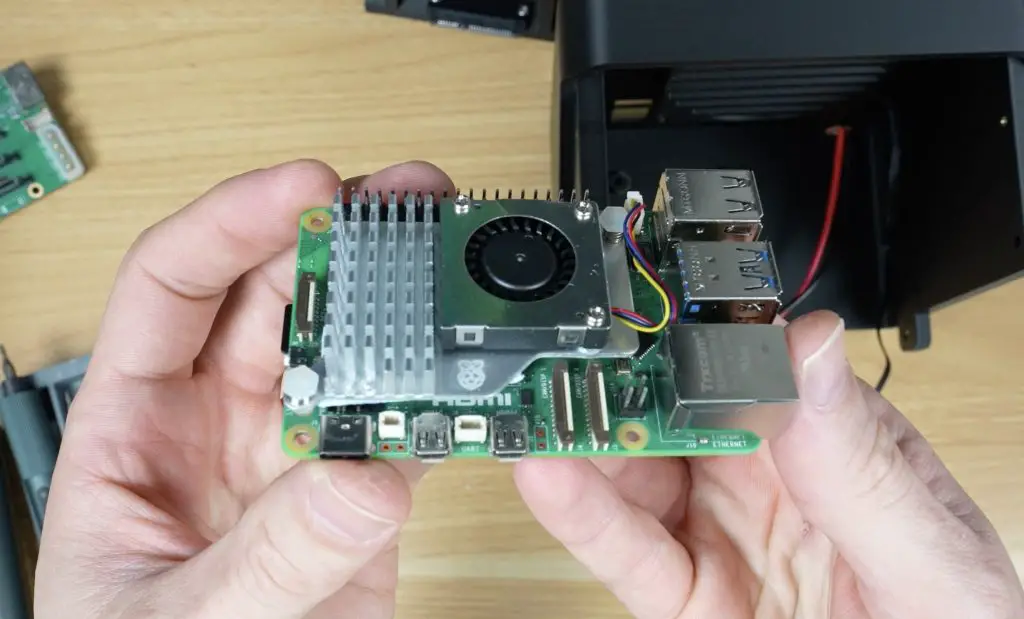
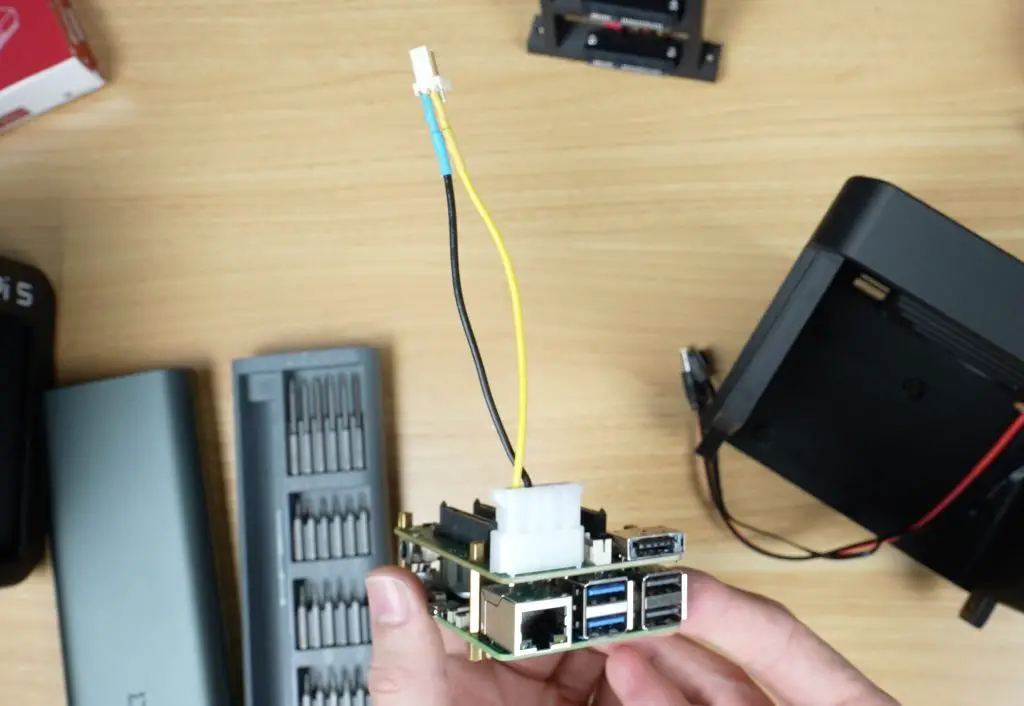
Pi Stack Assembly
Next we can assemble the Pi stack to install it into the enclosure. OMV (Open Media Vault) is the software package that we’re going to be running and that requires Raspberry Pi OS Lite to be flashed onto the microSD card – so get that done before installing it.
To assemble the Pi stack, we need to;
- Plug the prepared microSD card into the Pi’s card reader.
- Install the active cooler on the Pi. You’ll need to remove three heatsink fins to clear the Radxa hat’s barrel jack. This is a bit of a design flaw with the hat.
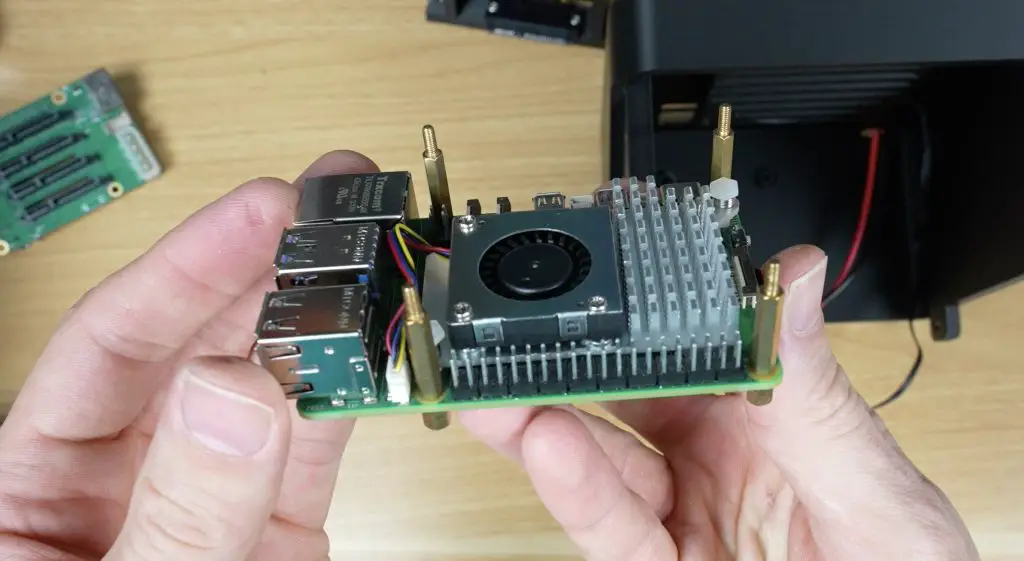
- Install the included standoffs from the Radxa kit onto the Pi with the threads facing upwards
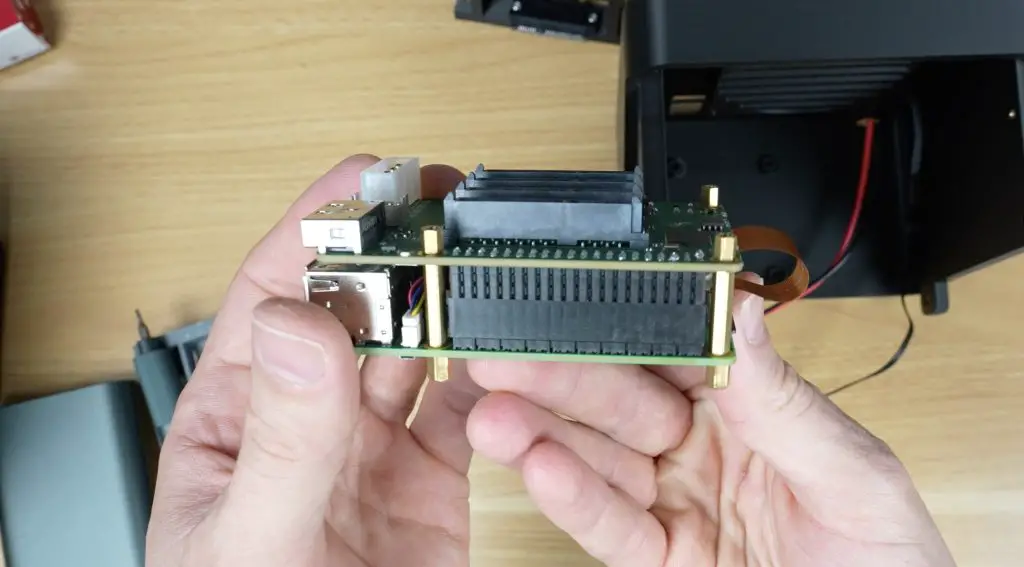
- Connect the PCIe ribbon cable to the Pi.
- Mount the Radxa hat onto the Pi’s GPIO header and secure it.
- Plug in the Molex fan power cable before installing the stack, as there’s not enough clearance to plug it in once installed.
- Secure the Pi stack in the case with four included M2.5 screws
- Connect the fan and power cables
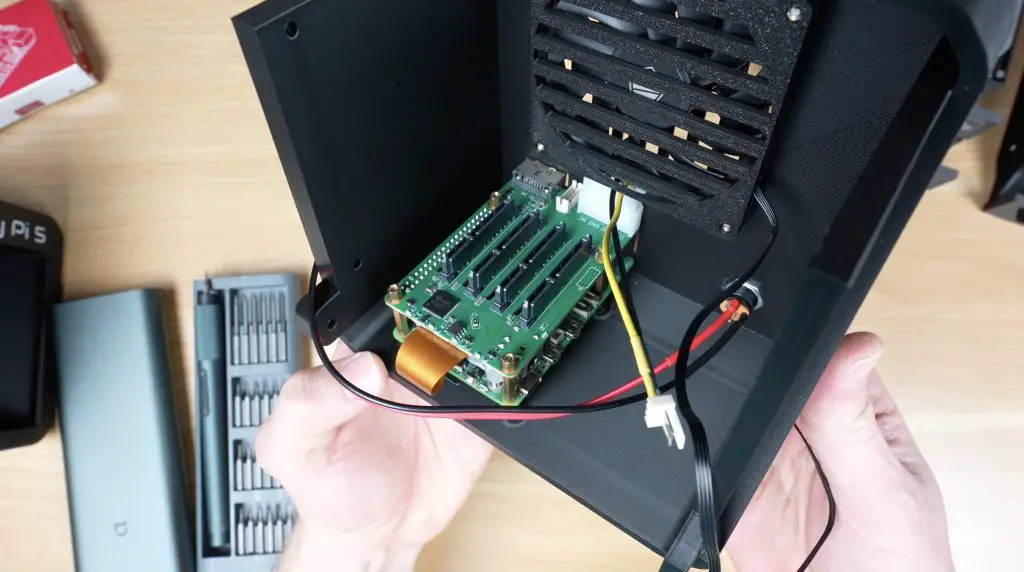
Next we need to install the SATA power cable assembly above the Pi. Start by plugging each of the connectors into the Radxa Penta SATA hat. Then align the bracket with the holes in the back enclosure half. Make sure the SATA cable holder is installed with the data connectors on the bottom — I initially installed it upside down by mistake. Secure it with another four M3x8mm button head screws.
Do one more check to make sure that there isn’t too much pressure on any of the SATA connectors going into the Radxa hat and also check that the fan is still able to rotate freely and doesn’t have any cables caught up in it.
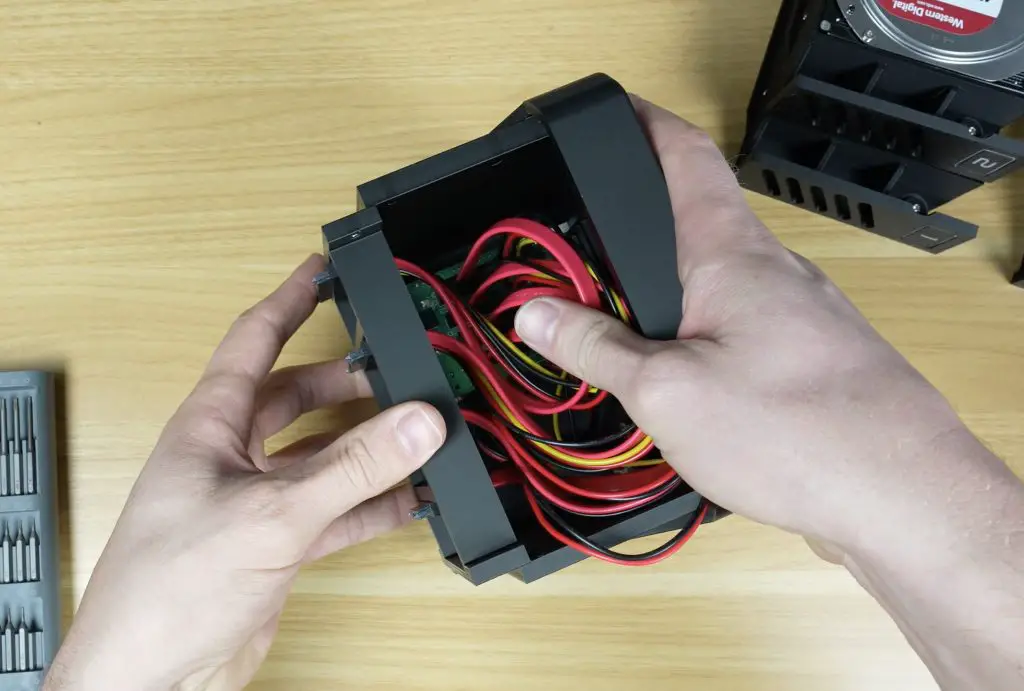
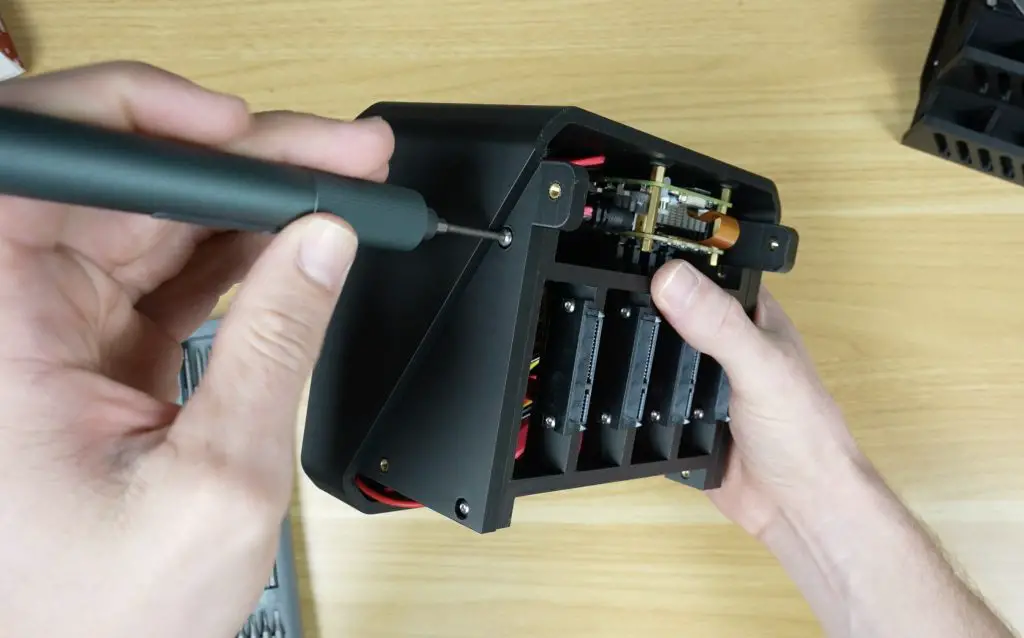
Final 3.5″ Pi NAS Enclosure Assembly
Slide the two enclosure halves together and secure them with four M3x8mm button head screws. You can also use black screws for a cleaner finish if you’d prefer.
I finished it off with some small rubber feet on the bottom of the case for vibration isolation, and the NAS is readyto install the drives. These each slide into place until you feel them plug into the connectors at the back.
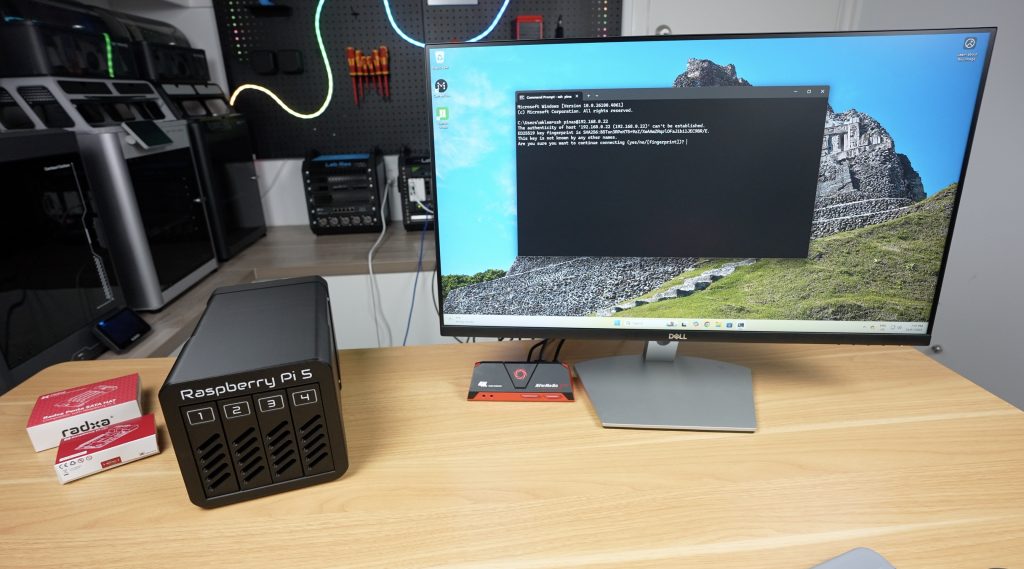
Booting Up the NAS & Installing OMV
To boot up the NAS, we first need to plug in an Ethernet cable and then the 12V power supply.
Give the Pi a few minutes to boot up and then, find its IP address through your router’s DHCP table or using a utility like Angry IP Scanner.
Use SSH to access the Pi and then update the Pi and install OpenMediaVault (OMV) with the following commands:
sudo apt updatesudo apt upgrade -ywget -O - https://github.com/OpenMediaVault-Plugin-Developers/installScript/raw/master/install | sudo bashThis script takes about 5 minutes and you’ll need to reboot your Pi when you’re done.
Enable The PCIe Port
Before drives will show up, we need to enable the PCIe port on the Pi. Add the following lines to the Pi’s /boot/firmware/config.txt:
dtparam=pciex1
dtparam=pciex1_gen=3
And again reboot the Pi.
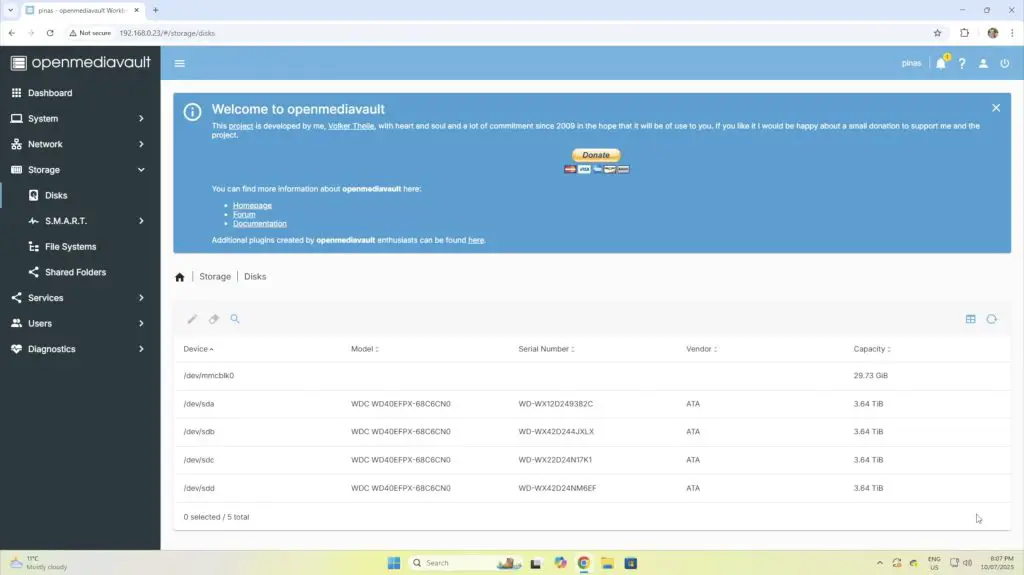
Once the Pi has rebooted, the drives should show up and you can confirm this by entering:
lsblkYou should see something like (one for each drive):
sda
sdb
sdc
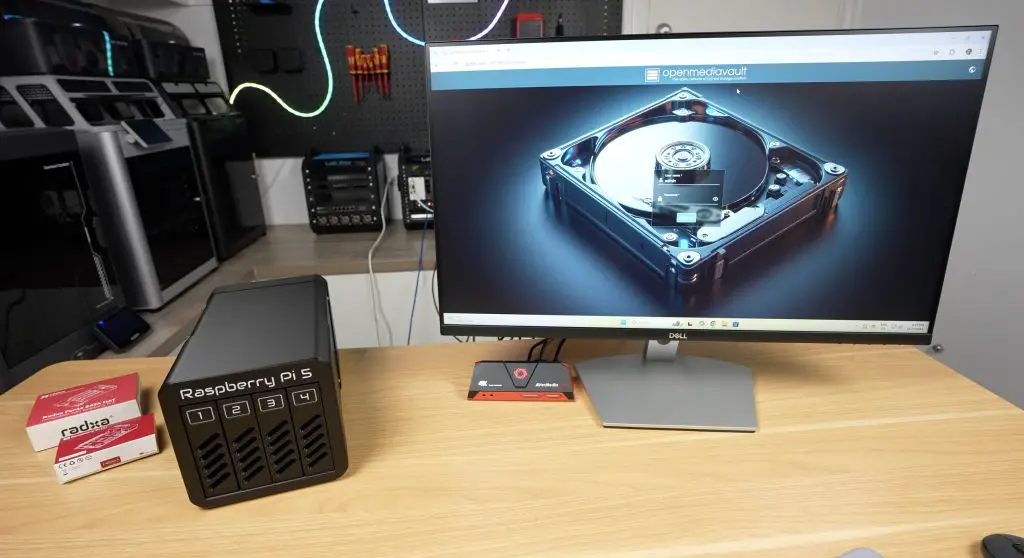
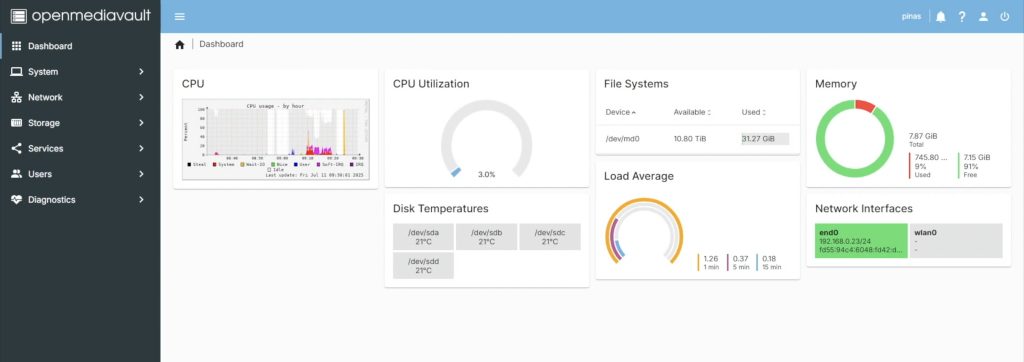
sddConfiguring OMV
Once we’ve got OMV installed and the PCIe port enabled, we can acess the OMV web dashboard by entering the Pi’s IP address in our browser. The default login is:
- Username: admin
- Password: openmediavault
Be sure to change these credentials after logging in.
I’m not going to go into too much detail on setting up OMV since there are loads of guides available already. Essentially I’ve followed the following steps:
- Set up the drives in a RAID 5 configuration, providing 12TB of usable space with redundancy.
- OMV 7 on a Pi doesn’t allow you to create a RAID array, you’ll need to do this through the terminal.
- Create a Storage Volume
- Created a Shared Folder on the Storage Volume
- Create a User Account with permissions to access the Shared Folder
- Enable the SMB service
Testing The 3.5″ Pi NAS
Transfer Speeds
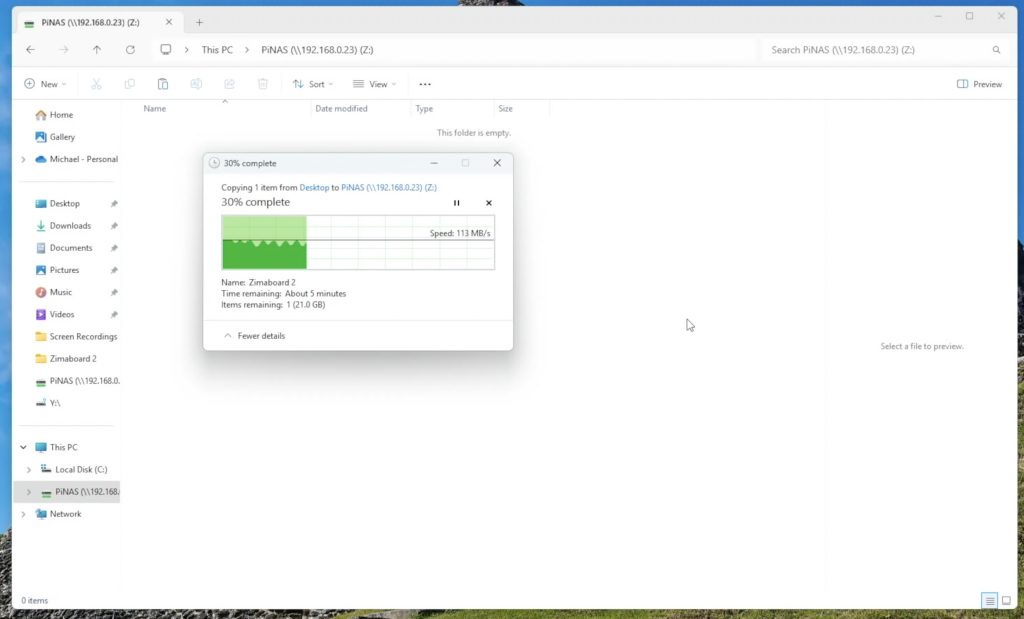
To test the Pi NAS’ transfer speeds, I’ve mapped the network drive to my Windows 11 PC. I then tried copying a large 30GB video file across to the NAS. I got an average write speed of about 110MB/s with some short dips along the way. This is around 900Mb/s, so we’re likely saturating the gigabith Ethernet port on the Pi.
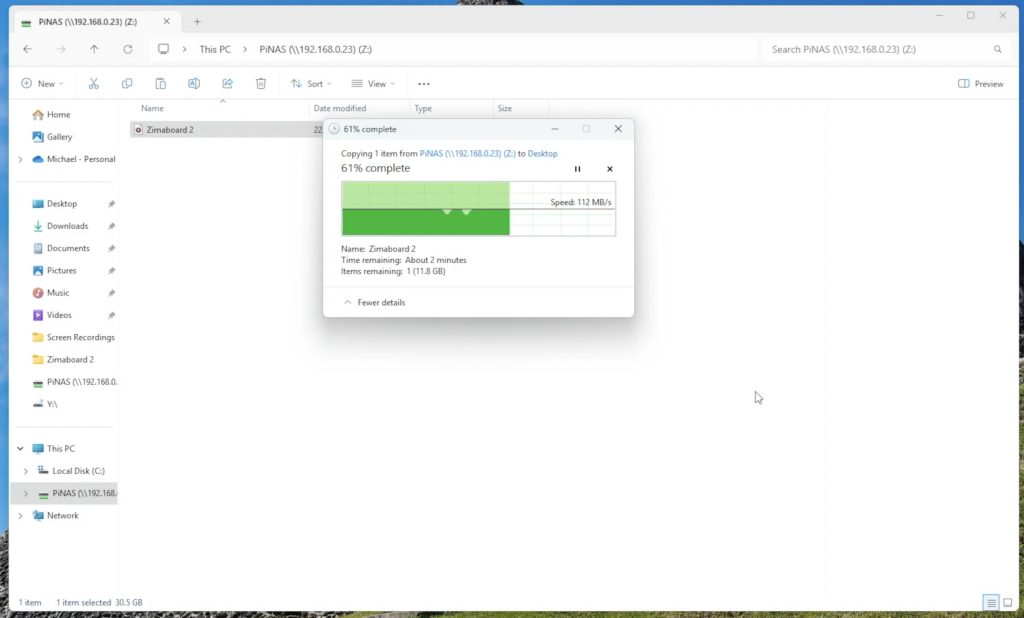
I then tried copying the same file from the NAS back to the PC. This is a bit faster and more consistent, I got an average speed of 113MB/s.
I then tried an automated tested using a 1GB file size got similar results again. Writes were around 110MB/s and reads around 110MB/s.

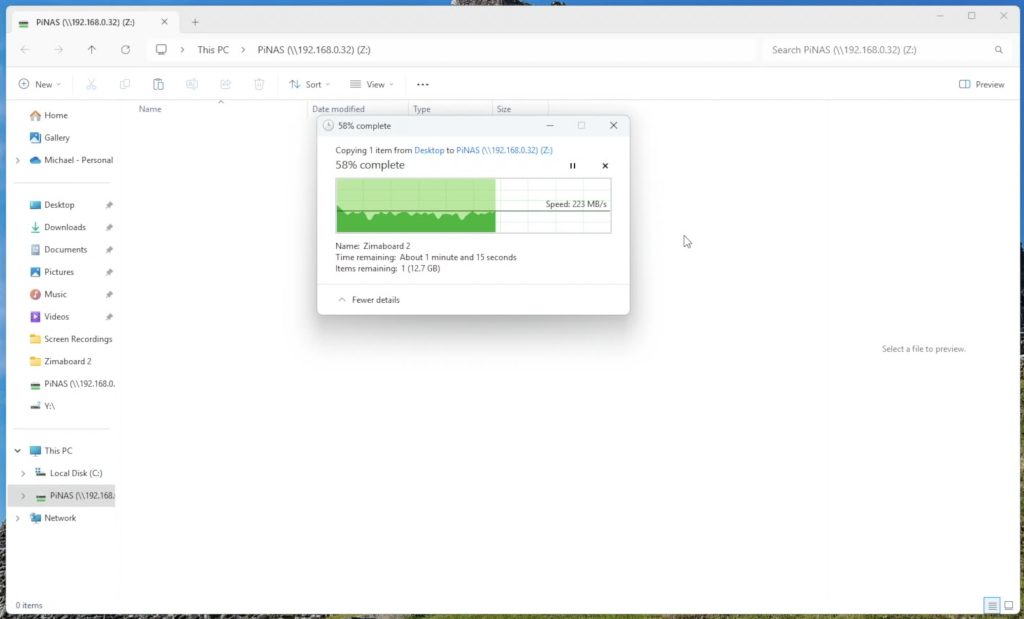
Like with my SSD Pi NAS, because it looked like we were saturating the Ethernet port, I then tried using a 2.5G USB Ethernet adaptor plugged into one of the Pi’s USB 3 ports.
This improved writing to the NAS to an average of around 200MB/s, again with a few dips, and reading from the NAS I got a faster 250MB/s. So writing to the NAS is now likely being nottlenecked by the software RAID parity calculations being done on the Pi’s CPU.
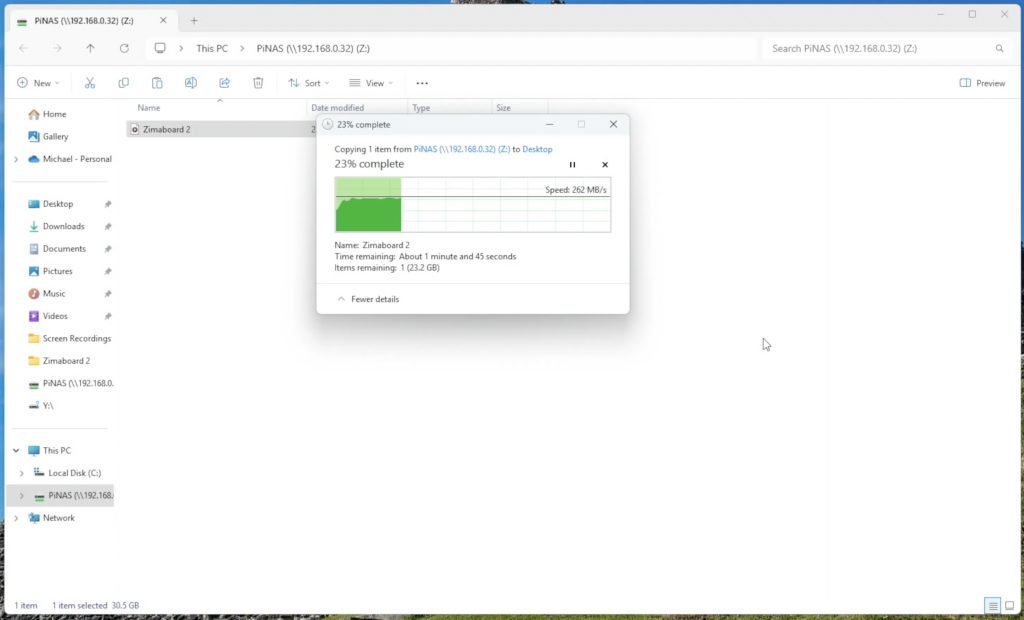
This makes the 2.5G network adaptor an easy and worthwhile upgrade for less than $20. It makes a big difference to the NAS’ performance, especially when large amounts of data are being transferred.
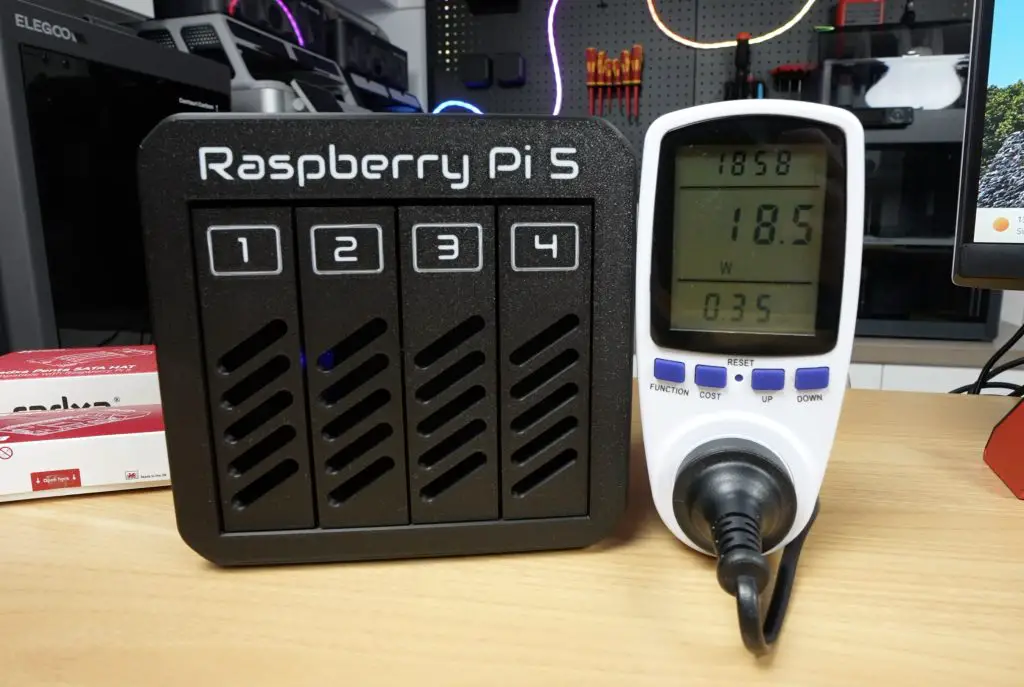
Power Consumption
I used an AC power meter to measure the NAS’ power consumption under a full writing load and at idle.
- Idle: ~18W
- Under Load: ~30W
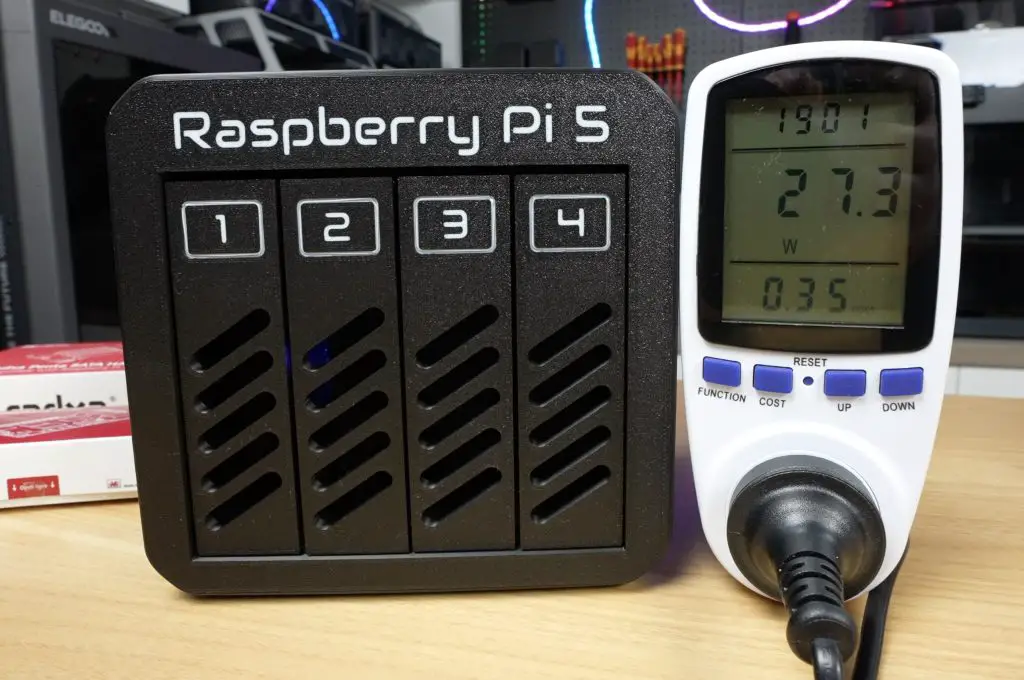
This is higher than my SSD Pi NAS (~9–12W), but is reasonable for a NAS have four large mechanical drives. For comparison, my Asustor NAS idles at around 18W with the drives spun down, so this NAS does great with them still running.
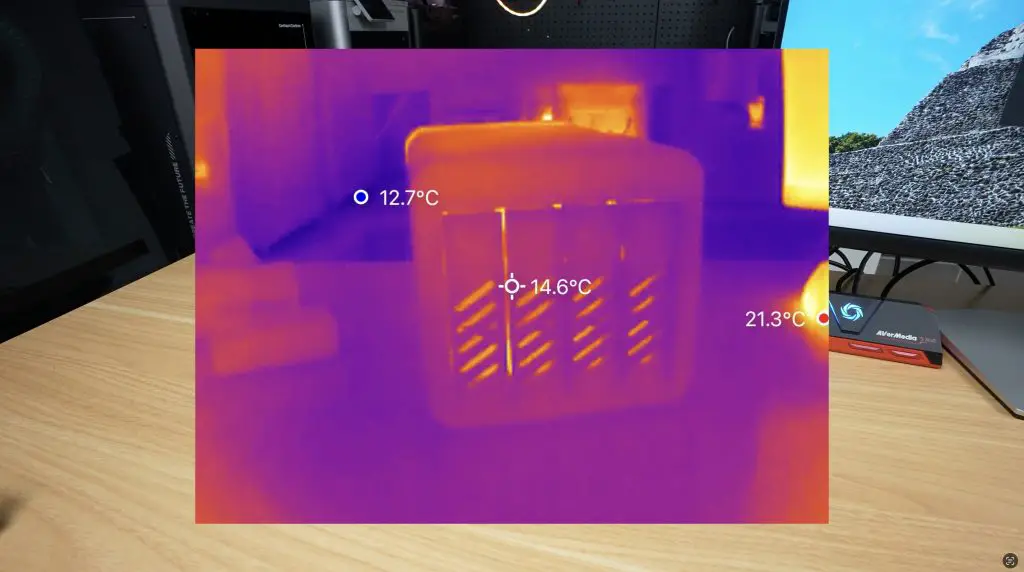
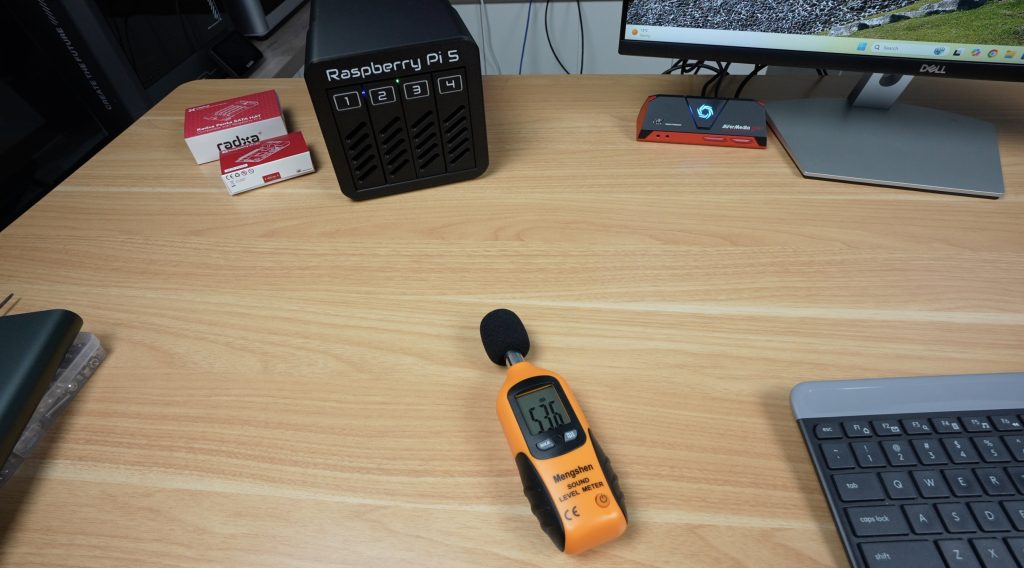
Thermals and Noise
Thermally, the ventilation ports on the front and the 80mm fan at the back do a great job at keeping the NAS cool, even under a full load.
The only real negative for this build is that it is quite noisy. With the 80mm fan running, we get a sound level of about 54dB at 20cm.
Final Thoughts on my 3.5″ Pi NAS Build
That wraps up the build of my 4-bay 3.5″ Raspberry Pi 5 NAS. It offers solid performance, a functional and aesthetic 3D printed design, and the flexibility to use OMV or another NAS OS for your home NAS needs.

I’ve uploaded the 3D print files to MakerWorld. If you’ve got a Bambu Lab A1, P1S, or X1C, you can use my preconfigured print profiles to start printing directly from the Bambu Handy app. If not, download the files and slice them in your own slicer.
If you’re considering getting a 3D printer, the Bambu Lab P1S is a fantastic option. It’s fast, supports multi-material printing, and its enclosed design handles a wide range of materials. It’s perfect for makers and you won’t outgrow its capabilities any time soon.
Let me know what you think of my Pi NAS build in the comments section below.
Bonjour, Encore un nouveau projet qui a l’air vraiment très sympathique, vous expliquez super bien, tout est bien traduit en français avec la voix synthétique de l’intelligence artificielle
Hello, would you have an option for printing on a BambuLab A1 mini?
I believe that the Bambu A1 Mini has a bed size of 128x128x128 therefore Plate 2 would not fit as the main body of the NAS is 152.01×158.6×245.5.
There is a profile for: https://makerworld.com/fr/models/1605027-raspberry-pi-5-based-4-bay-nas?from=search#profileId-1872529
What about creating a NAS with NVMe drives?
Are you able to access this NAS from outside your network?
Great write up.
Hey there, super grateful for this guide and appreciate all the thought and effort you put into it. I found the tiniest error in the setup steps, the OpenMediaVault install command should be `wget -O …` instead of `wget -o…`
Just wanted to point that out. Thanks!
Hello working on this build. Do you have a link for the “barrel jack extension” that you used?
Also my HAT didn’t come with M2.5 screws to mount my PI to the case. So I needed to order some.
I’m also trying SSD drives just cause I have a few on hand already.
Greetings, do you offer to print and sell this product for those whom don’t have a 3d printer setup?
FYI, I believe the 12v Molex to fan plug adapter cable you specify in your BOM is the incorrect part (https://amzn.to/3TzNloS). That part will give you two same gendered plugs that won’t fit together. Believe you need to change that part to something like this one: https://www.amazon.com/dp/B07DMV4ZFZ.
Robert
Hi Robert, good catch thank you. The one you’ve sent has the correct fan plug but the wrong gendered molex connector. I’ll find an alternative.
I am guessing you updated the link in your documentation. I bought that one and tried it, but it does not fit the clearance you built for the fan. I can’t find an alternative. The one the Robert posted doesn’t work either as that is a male molex connector and we need a female connector for the hat.
Details, details… 😁. I hope readers appreciate the effort required to get all of these details correct…I sure do. Thank you!
there is no option for the barrel jack extension in the BOM… also maybe a good idea to add some temp control for the fan? ive seen some 12v temp controlled fan thingimajigs wich i’m going to implement in my build i guess.
Hi, do you have any links? I’m interested in doing this project, but I also noticed that something is missing to regulate the fan speed, but I don’t know how to fix it myself, as I’ve never used a Raspberry Pi.
Jake, thank you, this N00B could not get this to work with the wrong syntax.
Hi, I saw the video on YouTube. I’d like to build your project, but I have a question: does the fan connected like this have a fixed speed? Will it always be on full power? Because I live in a studio apartment, and having something that makes that noise even when it’s idle is a problem for me.
6 Sets 5.5 x 2.1mm DC Power Jack Threaded Female Panel Mount Barrel Connector Adapter Kit with Cover Cap OLA012
You can run the fan at 5 or 7 volts to lower the speed. Just using different pins from the molex. Or get a temp sensor to control the fan. The standard connector won’t do that for you automatically.
Yes, as designed the fan runs full speed 24×7. I added a cheap fan speed controller to mine, which is a huge improvement. Check out this one on Amazon as it works perfectly! Single 12V 0.8A DC PWM 2-3 Wire… https://www.amazon.com/dp/B0DDBX55PC?ref=ppx_pop_mob_ap_share
Any update on this? I’d like to buy the correct molex to 2 pin adapter!
Hey All!
Just an update, but I found the correct power extension to buy:
https://a.co/d/5fy9yvc
As for the molex to 2 pin, I just made my own, by sacrificing a molex adapter (connected to an old PSU cable) and soldered it to the fan wire; works perfectly.
Hi,
awesome project. I’m gathering all the stuff to build this.
I have a noctua fan which hopefully will be quiet, but it’s 80x80x25. will it fit? being 25 mm thick? I know my way around fusion for modifications but less so when using STLs
Hey @Carmel!
Were you able to try the Noctua fan? I’m considering buying one.
That took longer than I care to admit, but it’s up and running now
I used a Noctua 80x80x25 (https://aliexpress.com/item/1005003964911336.html)
It just barely fits, but it does. I needed to replace the M3x16 with M3x35 but that’s the only change I had to do. The fan is dead quiet, I only hear the HDDs. I’ve also added silicone feet stickers to dampen any vibration, I might try and quiet it more, but for now it’s not that loud at all
Hello , does any one made a 5 bay nas with this setup ?
Hi @JD, I’m still waiting on some parts, but everything is printed and the fan seems to have enough room. I’m also waiting on a speed controller for the fan so we’ll need to find a place for this, though with the noctua it may not be necessary, noise-wise.
With respect to noise levels, don’t expect quiet from this box! I’ve had mine running for a couple months now and it is LOUD. I have a high quality dual ball bearing fan running through a PWM fan controller and the fan is dead quiet running outside the enclosure. However, at least with mine printed with Overture Pro PLA, the box itself acts as an amplifier/speaker that blasts out every vibration just like a loud speaker. The spinning HDDs sound like jet airplanes when put into this enclosure. The 3D printed case is just not rigid enough to dampen out the slight vibrations a spinning HDD generates. I would love to hear the experiences from others who may have printed your cases with denser or just different filament to see if you get less noise. As it stands it seems like PLA was a VERY poor choice due to the extreme noise amplification it causes.
Maybe the designer would chime in with his thoughts?
Thanks @Caramel! Keep us up to date!
@Robert I have rubber feet on the bottom of mine (from Cisco switches) and don’t hear the hard drives. I do, however, have enterprise drives, so I’m not sure if that’s a difference or not.
Thanks, JD. What filament did you use?
For the sake of completeness my enclosure is Overture PLA Pro printed at 35% infill and .8 mm wall thickness throughout. I also have rubber feet installed. The drives are WD Red 5400 RPM with the highest noise abatement setting applied in OMV.
Wondering if PETG would give better results. Or, maybe higher infill percentage. When the drives are spinning and being accessed the noise level is terrible.
I may try narrowing the HDD carriers and adding a TPU pad to each edge to help dampen vibrations.
Simple question, what font did you use?
I used Audiowide
Thank you for this. this pushed my Ender 3v2 to the limits, the one item I’m running into at the moment is that I have 2 additional hats (PCIE splitter and nvme one for by boot drive), so ran into an issue with the SATA Holder is in the way. so my drives don’t lock up and I’m using a atx power supply for right now.
As always Michael, a well thought out project to provide an almost commercial standard NAS using a Pi 5. Love the design!
80mm fans are almost always very noisy.
Have you thought about dropping in a 100mm or larger Noctua fan? Or would the case not allow fitting?
Anyways, great work as always. I know why I keep you on my list of sites to visit!
Hello!
Would you be able to share the .step or .f3d file for the 3D model. I really like your project, but I’d like to modify the enclosure.
Would this also work with a Raspberry Pi 4B?
I wasn’t able to Check the possiblity…
Thanks for this, it’s a great project. I’m going to build one as well.
However, has anyone tested this setup with higher-capacity HDDs? I am considering using 12 TB drives. While the 120 W power supply should be sufficient, I am unsure whether the Penta Hat can safely handle the corresponding current.
Any insights would be appreciated. Thanks.
What’s the total cost for a build like this?
209 € + 1Kg filament (~10 €) + 4 HDD
The HDDs are extremely expensive at the moment, so I would wait if you want to buy new ones.
FYI I was able to get temperature based PWM fan control working via the expansion header to the right of the molex header.
Steps:
1. Attach the PWM expansion header pin to the PWM fan input
2. Run this systemd service: https://github.com/AaronMartin78/radxa-pi5-fan-fix
Diagram:
| * * |
| * * |
__________ | * * | ____________
| molex header | PWM Pin -> | * * | | esata connector |
|__________| | * * | | __________ |
ty!!! this work with my Arctic P8 Slim fan
Ascii art got messed up lol. The PWM pin is on the left, one row up from the bottom.
great project, I am missing just one tiny info:
which Raspi model (ram) did you use? Is the 2GB version sufficient?
Very cool design – many thanks! I’ve built a Bitcoin PoCX (Proof of Capacity) miner with it using 4×8 TiB SATA drives, and the performance is excellent. I’m pretty sure the Pi 5 could even handle 4×16 TiB.
Right now I’m experimenting with adding another 4×8 TiB via USB by using a second chassis with two USB-to-SATA controllers – basically a small JBOD-style expansion. Since the Pi 5 has dedicated lanes for each interface, the performance might even scale nicely.
Would this work on a Raspberry Pi 4?
No, unfortunately the Pi 4 doesn’t have a PCIe port.