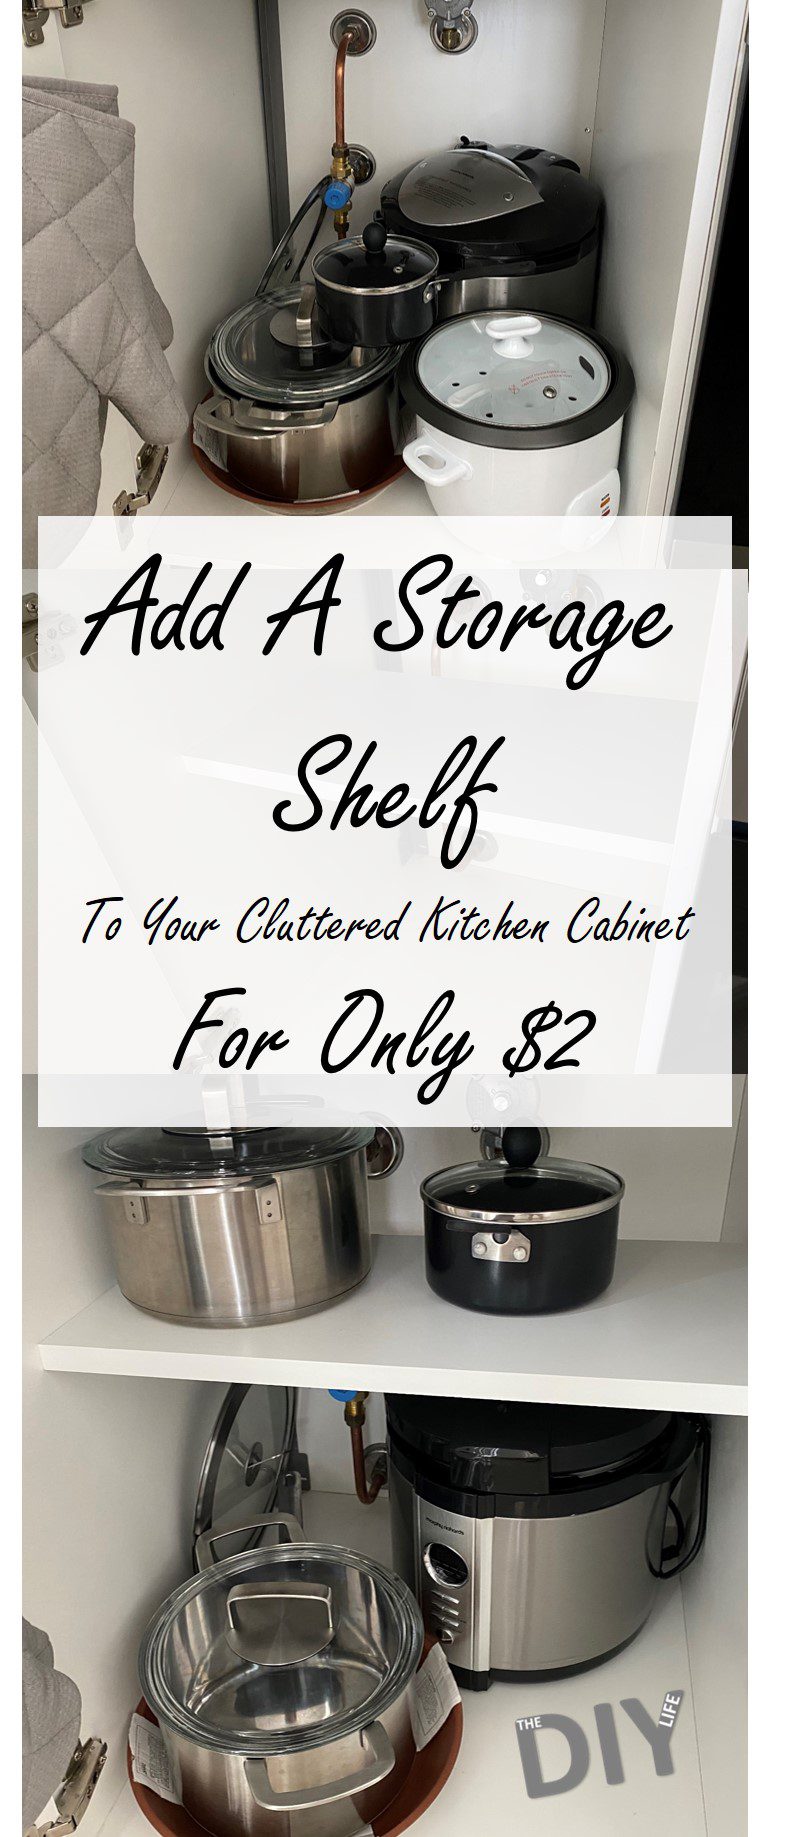
You’ll probably never feel like you have enough storage space in your kitchen but there are ways you can maximise the space available to you. One of these ways it to add extra shelving to your existing cabinets to make use of any wasted space above the items you usually pack into them. We’ve found an easy and really cheap way to add an extra storage shelf to your cluttered kitchen cabinet for less than $2 and it looks like it was always supposed to be a part of the cabinet, not like an afterthought.
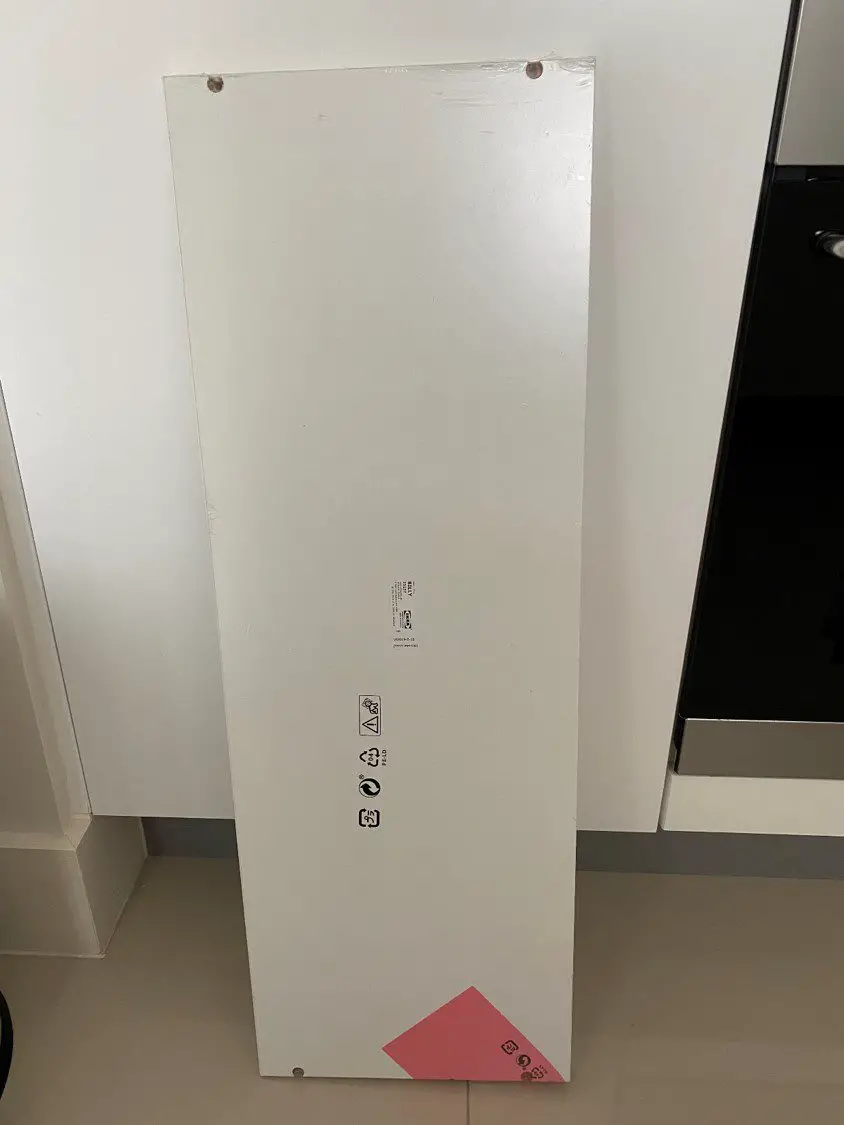
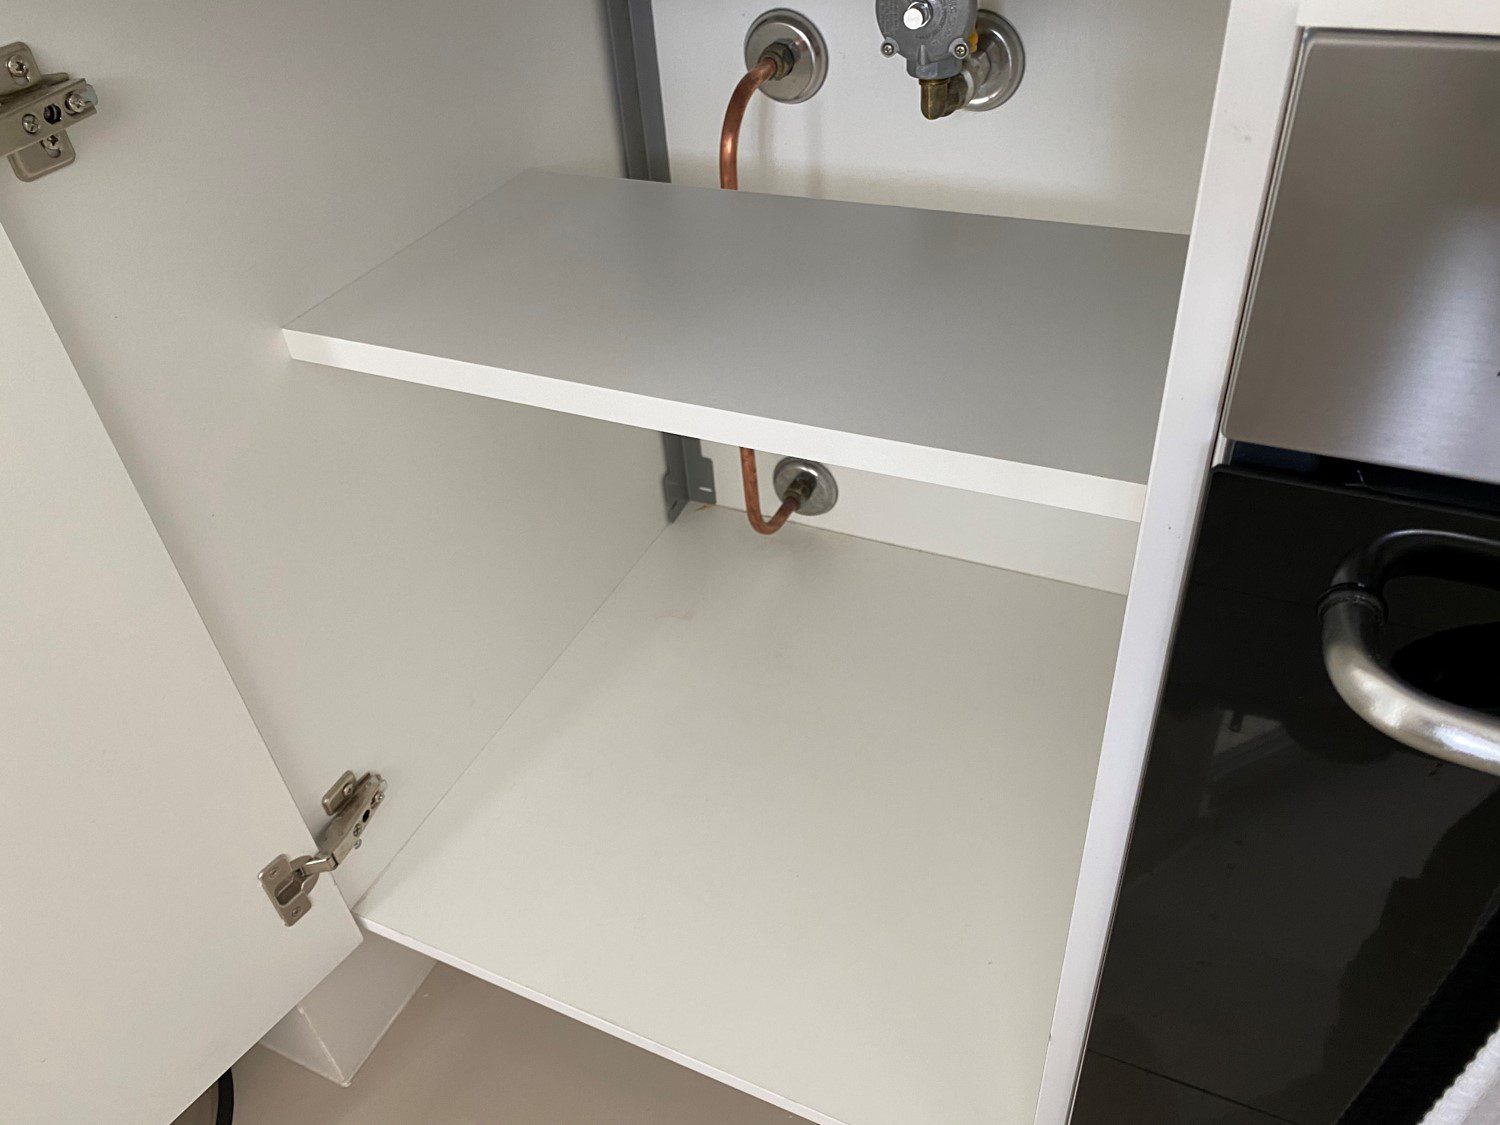
Have a look around your kitchen for any cabinets which have a lot of wasted headroom, like this one we use for storing pots and pans etc..
Take a measurement of the width and depth of the cabinet before you go out shopping for a new storage shelf. This way you’ll have an idea of what length and width shelf to look for.
Now finding a new shelf is where our handy tip comes in. If you head down to your local hardware store and get a shelf cut to size, you’ll probably pay around $15-$30 (depending on the type and size of shelf) for the shelf and the mounting hooks/pegs. Rather than doing this, have a look if your local hardware, kitchen or furniture store (IKEA is where we went) has a returns, clearance or damaged goods section. Most larger stores have some form of clearance section to get rid of their unwanted goods for a fraction of the usual retail price.
We managed to find the below white shelf for just $2, and it was amongst another 20-30 shelves of various sizes and colours. This shelf had been returned from a delivery and had it’s packaging damaged, there was literally nothing wrong with the shelf and it was marked down from $12 to $2 and it includes the four shelf supports/pegs.
When looking for a bargain shelf, don’t worry about the length. As long as the width is roughly correct, although it must be smaller than your depth, you’ll be able to trim it to size without any hassle. Also keep in mind that the depth doesn’t need to be the full depth of your cabinet. Our cabinet had gas pipes in the back, so we could only install the shelf in the middle area of the cabinet, with a gap behind it.
You could also put a smaller auxiliary storage shelf along the back for spices, tins, bottles etc.. Just try to find one which suites the depth of your cabinet and what you’d like to store on it and is a bit longer than the length of your cabinet. You could also try find one which is more than double the length and make two shelves from it.
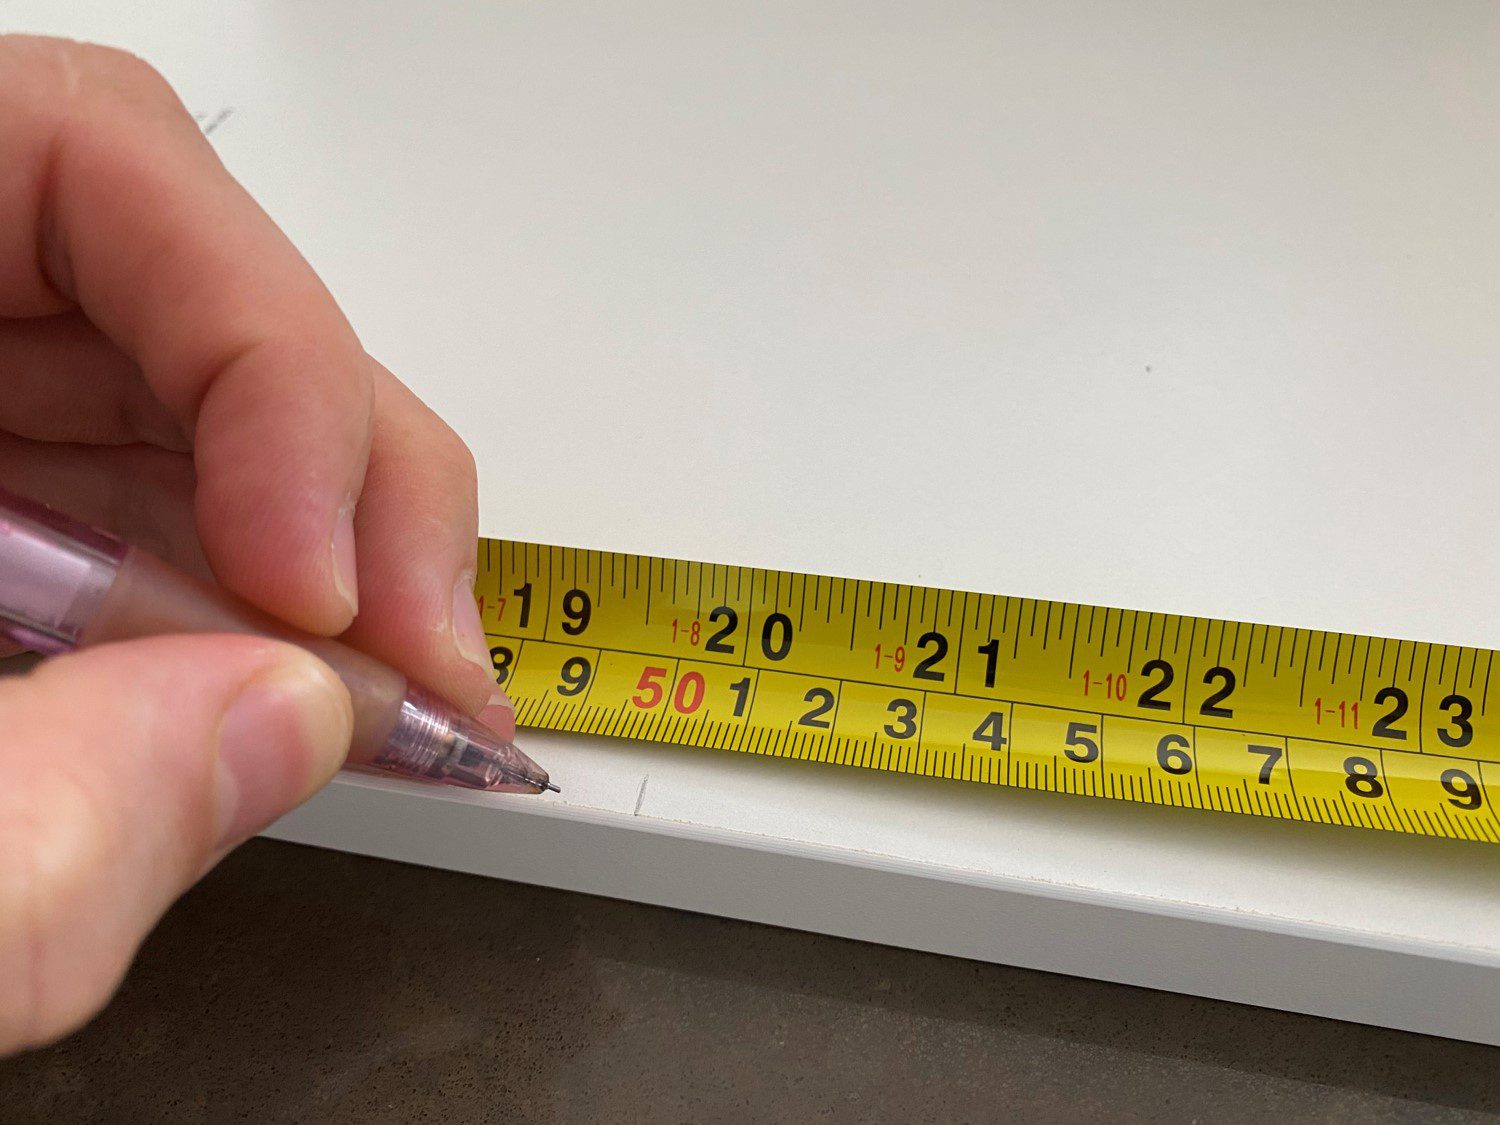
Once you’re home, unpack your shelve and mark off the length of the inside of your cabinet. You’ll probably want to cut it around 1mm (1/20″) shorter for some clearance so that it’s not tight.
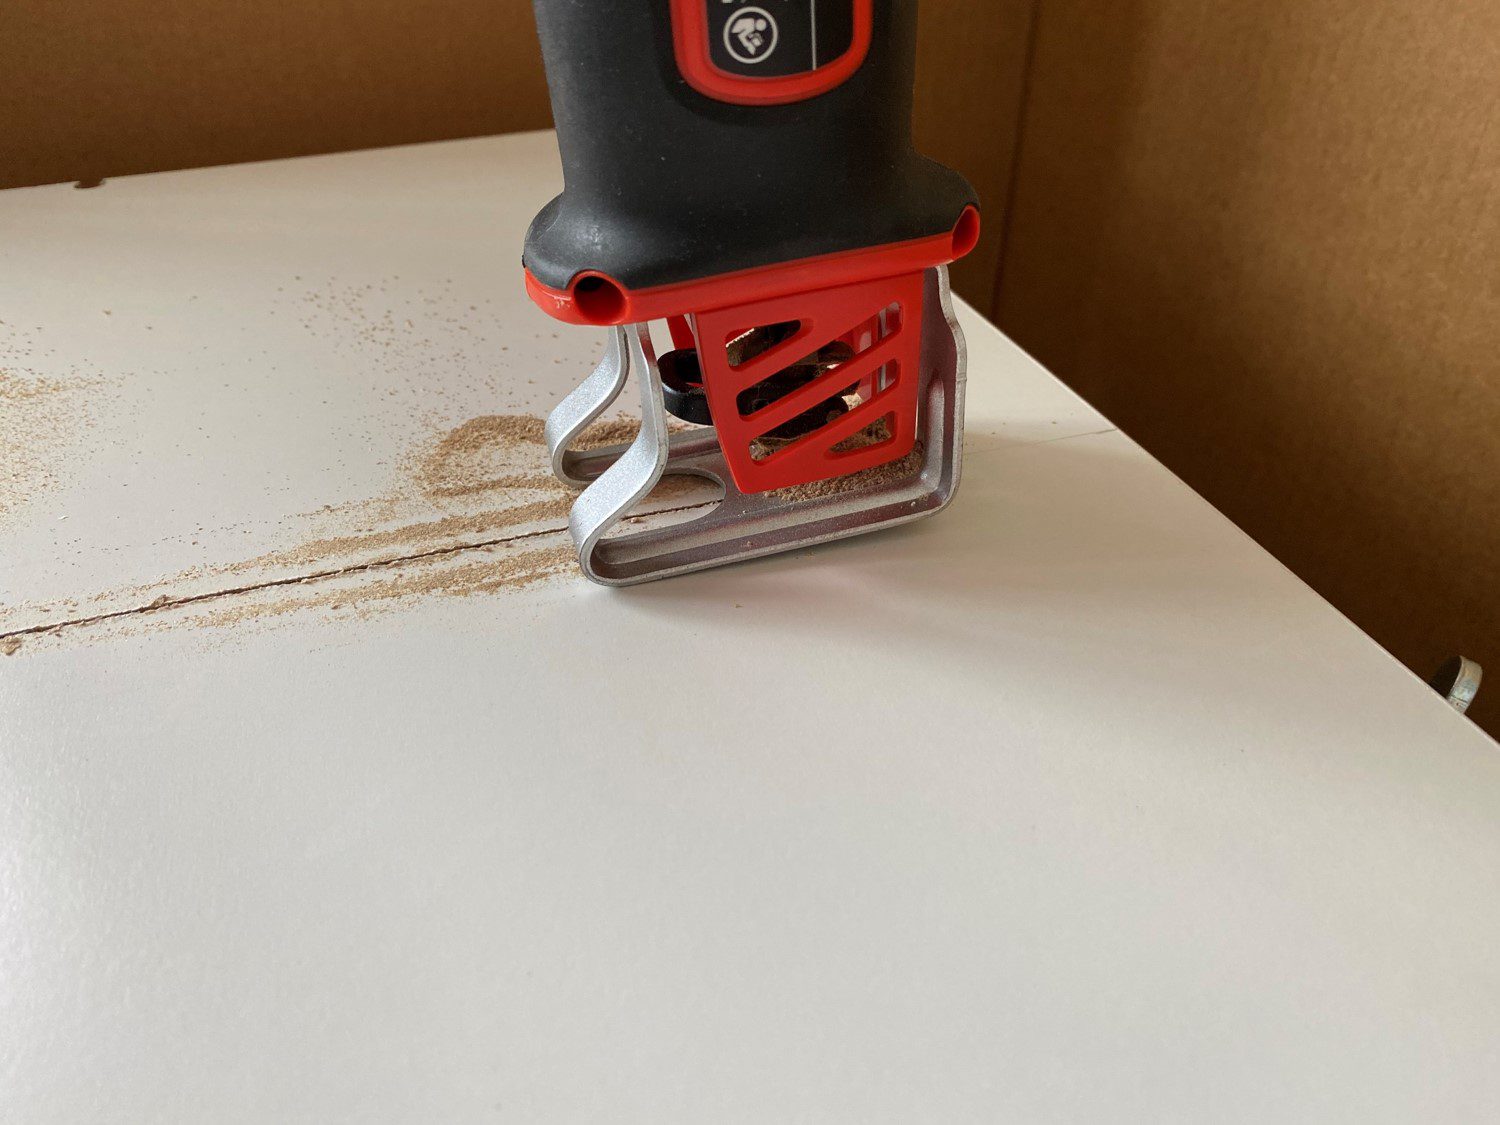
Use a circular saw (for the best cut quality) or a jig saw (more people seem to have one of these), band saw or hand saw to cut the shelf to the correct size.
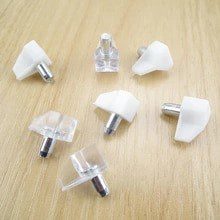
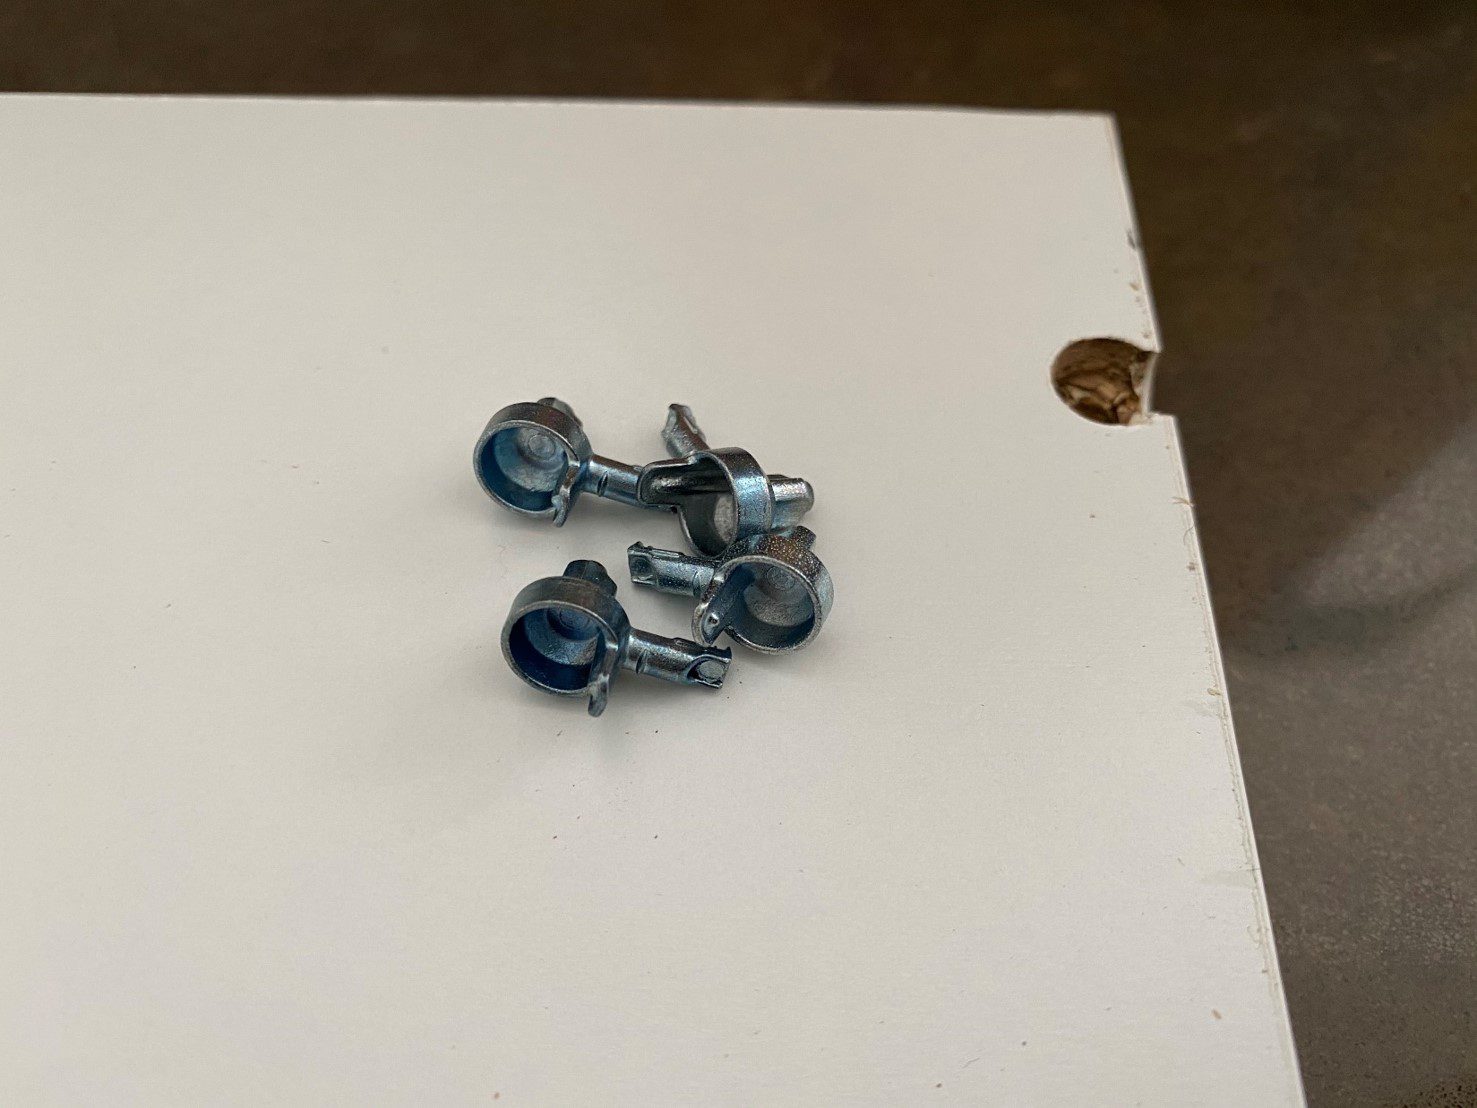
There are typically two different types of supports, one which is simply pressed into or screwed into the walls of the cabinet, like these:
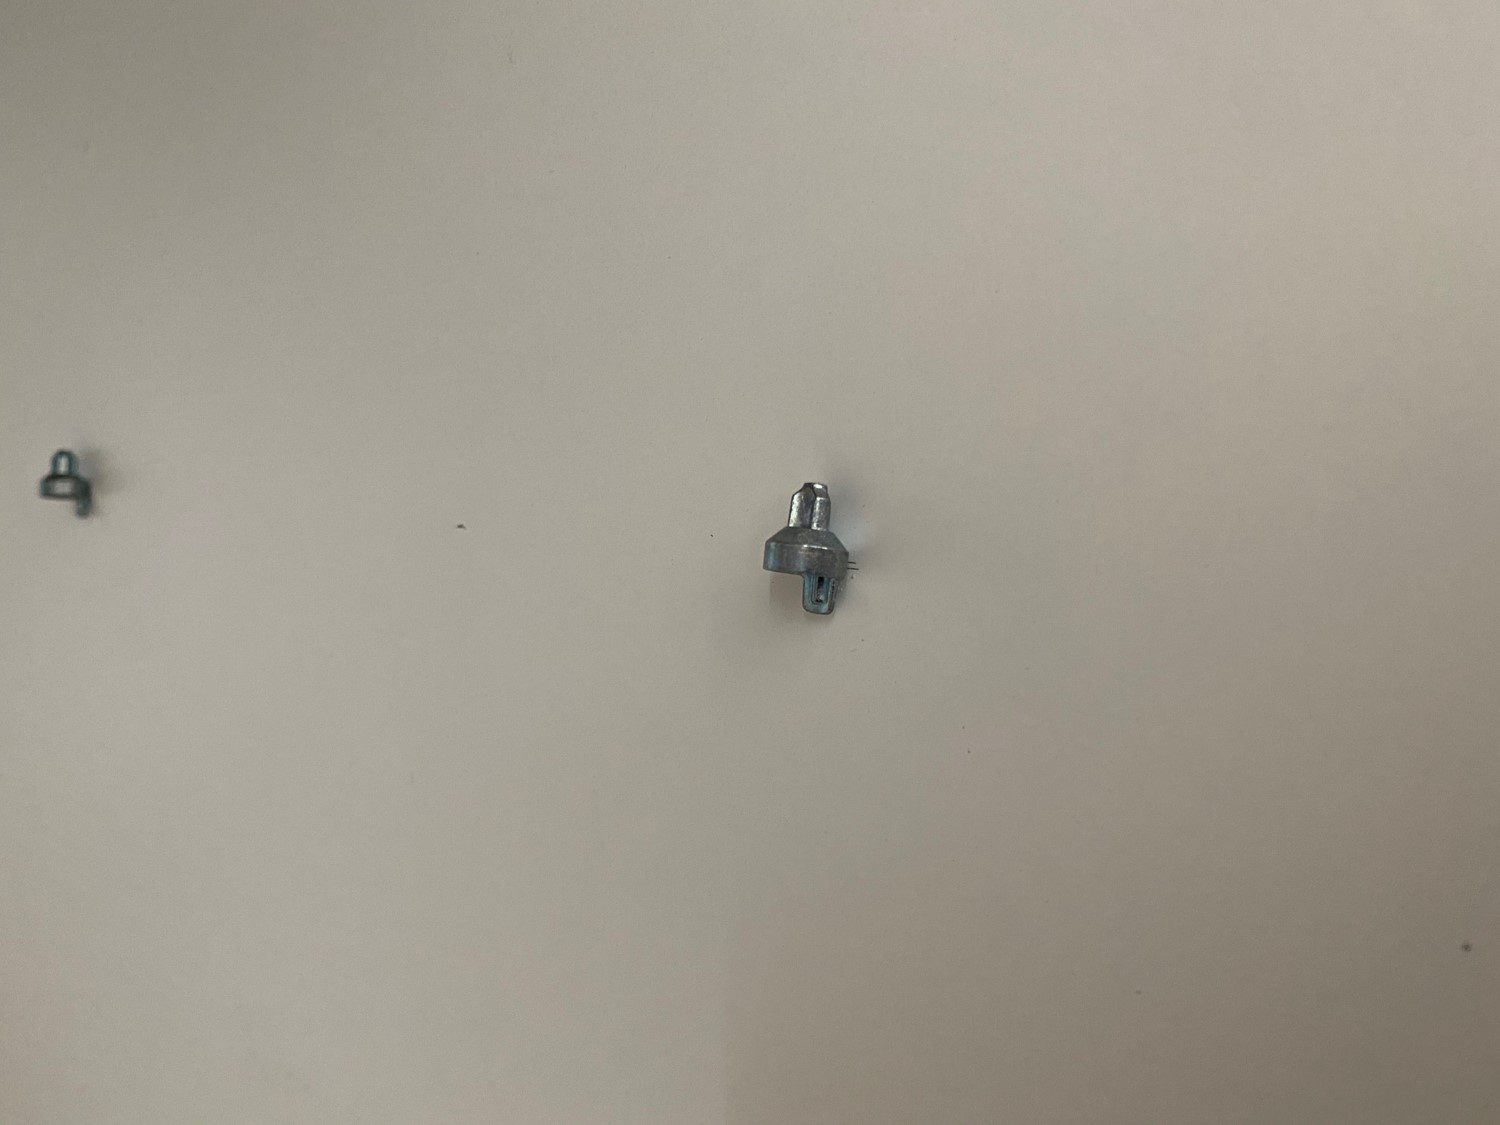
And then another, which is what we had, which fit into the actual shelf like these:
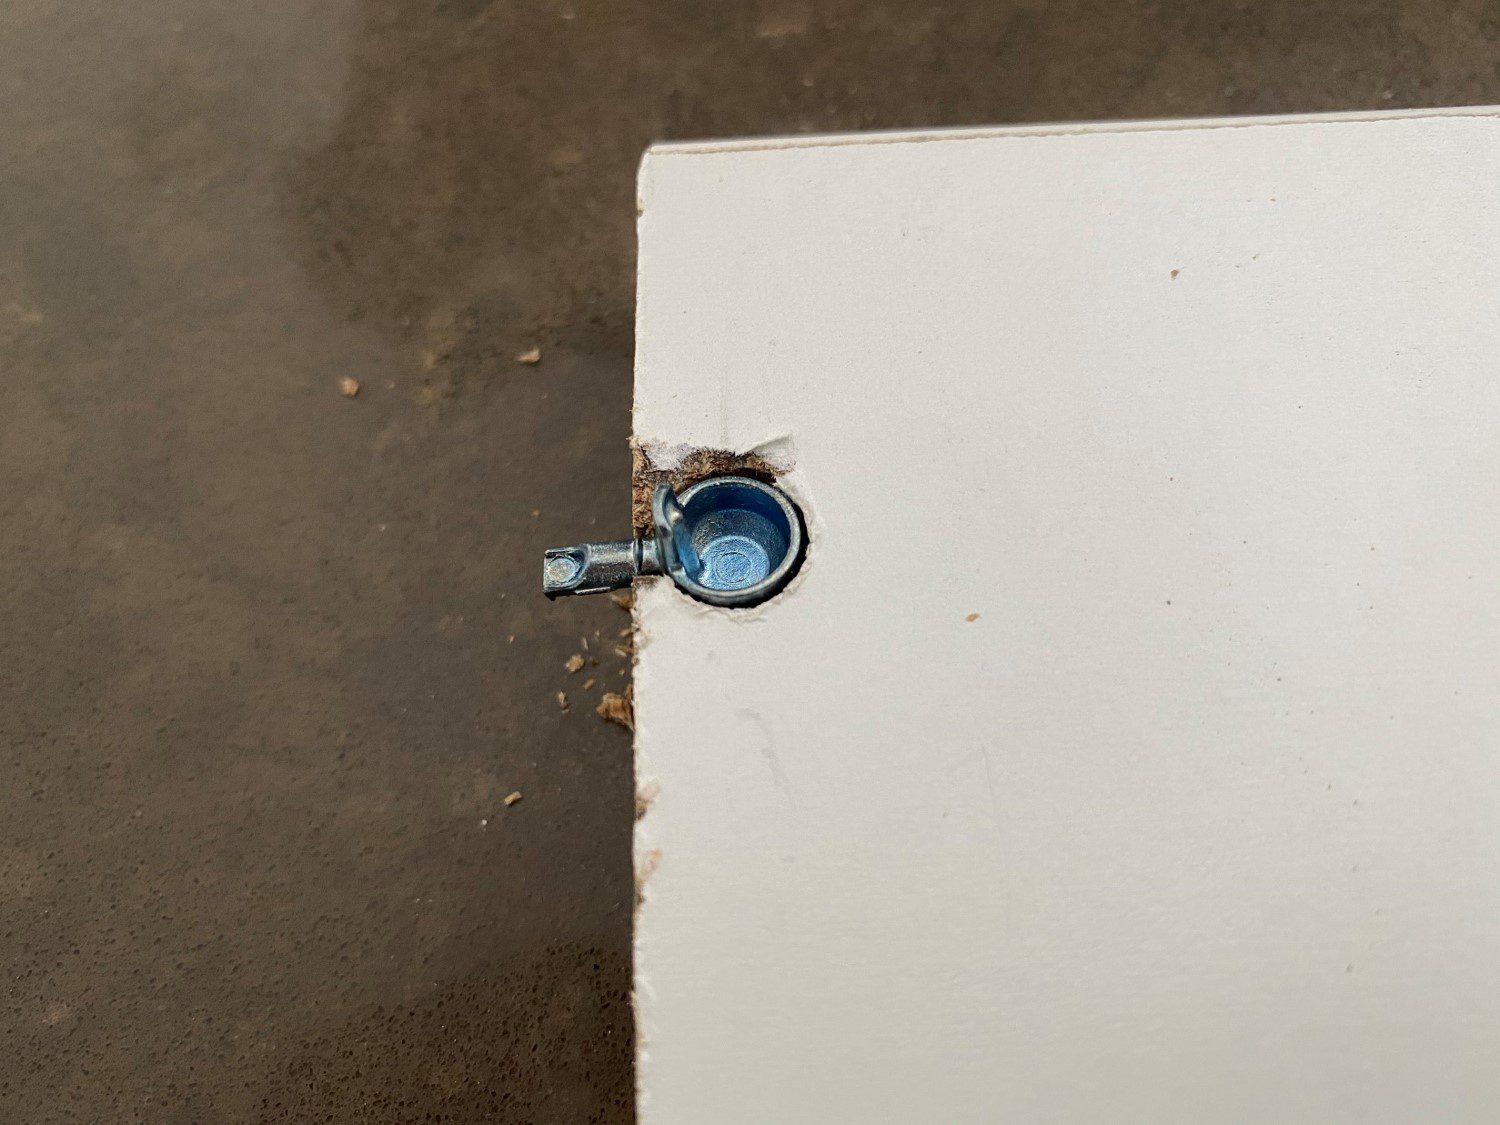
If you’re going to be using these then you’ll need to match the cutouts on the side you’ve trimmed.
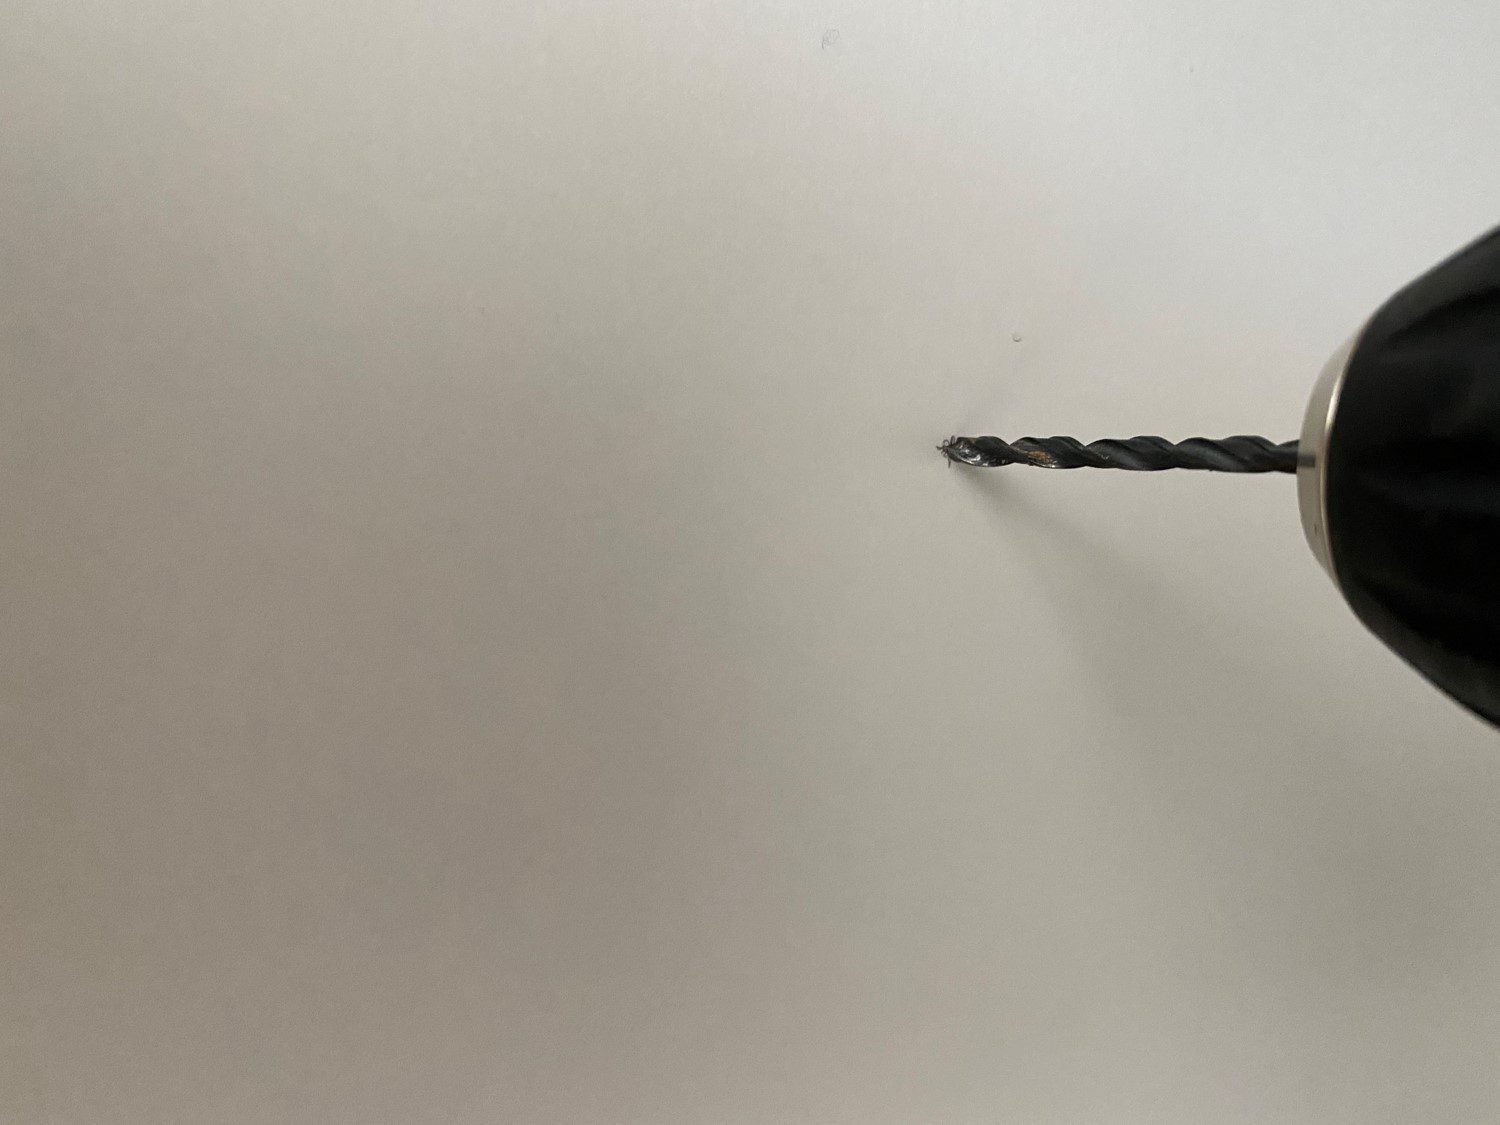
Ours required two different sized holes to be drilled, followed by a cross drilling. It doesn’t need to be perfect, its on the bottom side of the shelf and can easily be covered up afterwards with a small white sticker or piece of tape if you need to hide it. These cutouts are typically machine produced and are difficult to neatly replicate with hand tools, but you should be able to create something which works.
Next you’ll need to drill the holes into the sides of the cabinets for the supports. Measure the height from the top or bottom of the cabinet to each of these holes to ensure that they’re all the same height so that your shelf is level. Then measure the distance from the front of the cabinet to the front support hole and then the distance between the front and back support holes, checking them against the cutouts drilled into the shelf. This is less important if you’re using the first type of support but will still produce a neater result if done properly.
Check all of your measurements again before drilling the holes. Make sure that the height is consistent on each side and that the support spacing is correct.
Drill your four support holes.
Push or screw the supports into the holes.
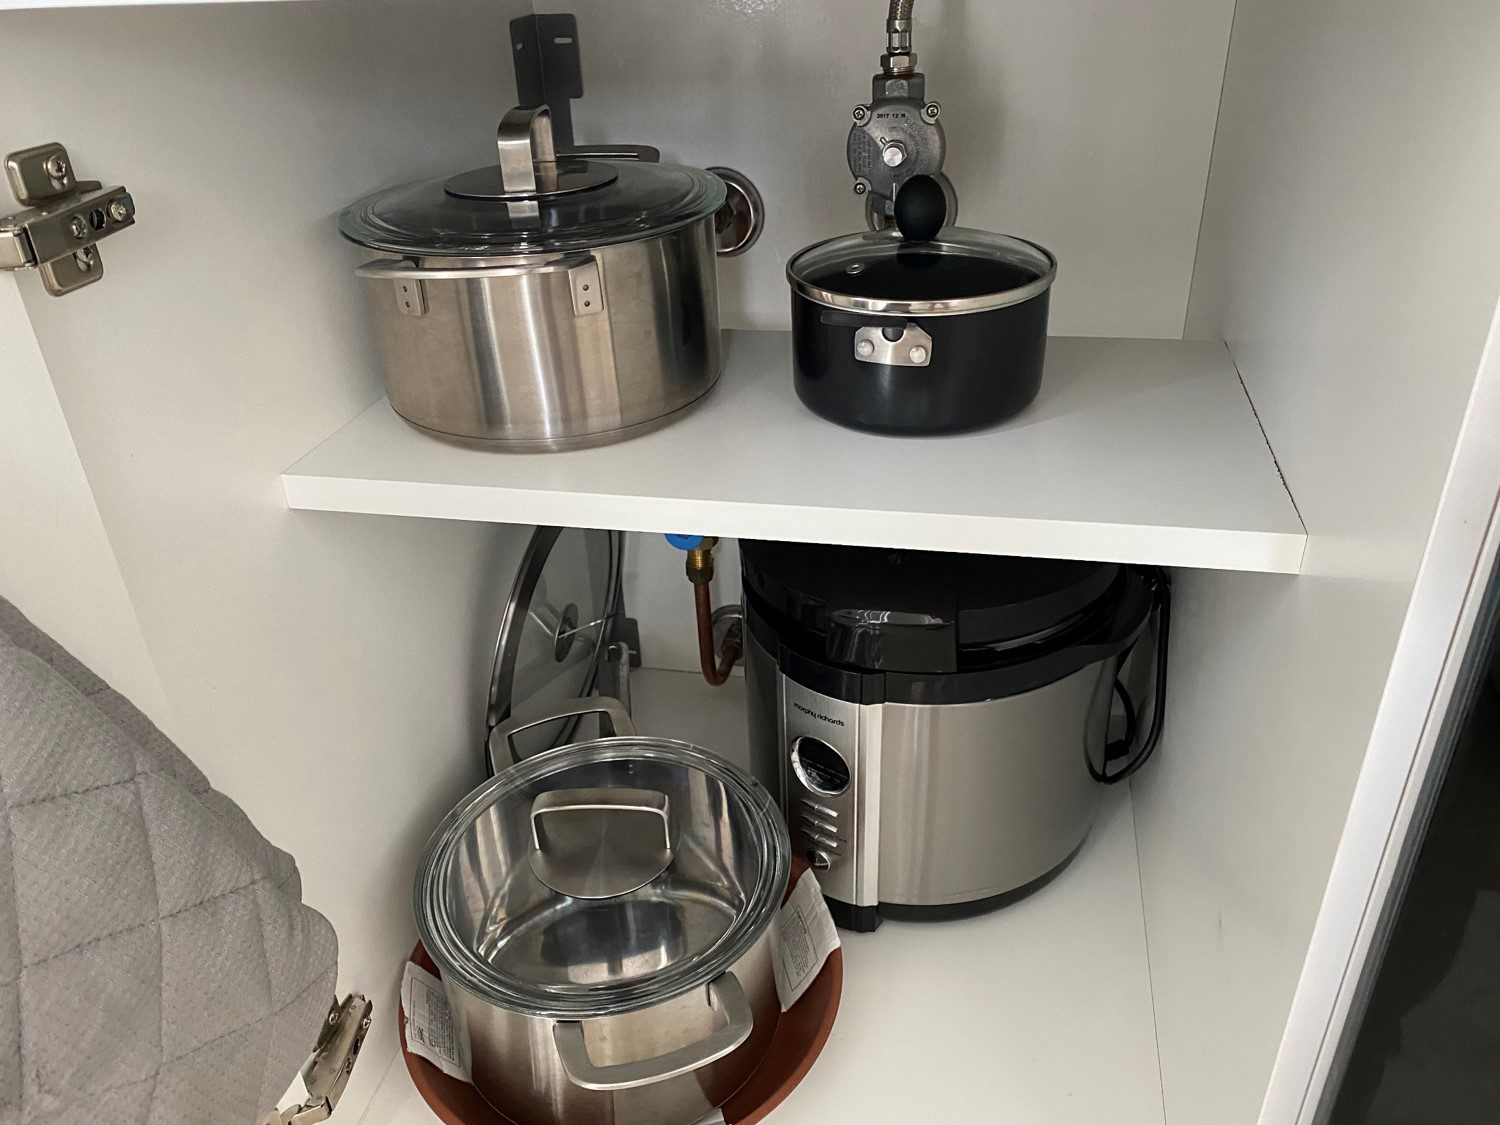
Lastly, install your shelf and press it onto the supports to secure it.
You can now repack your new kitchen cabinet storage shelf and re-organise your cluttered cabinet. Keep in mind that the best way to reduce clutter is to get rid of any appliances, food or items which you no longer need or use.
You can also get your cabinets looking great again by properly adjusting the hinges on your cabinet doors so that they’re straight and are able to open and close freely without bumping into the surrounding doors.
Have you added your own storage shelf to your kitchen cabinets? Let us know in the comments section below. We’d love to hear your tips and tricks.
Everyone should aspire to becoming better at living a greener and more sustainable life and your home is great place to start. Simply making a few changes in and around your home can go a long way towards reducing your carbon footprint, reducing your household waste and using energy and water more sparingly. It’s easier than you think, and usually starts with just becoming more mindful of your activities around your home. So we’ve put together a list of 20 ways in which you can make your home a bit more eco-friendly. We hope you try a few of them out!
Get a reusable coffee mug. If you’re somebody who enjoys a takeaway coffee on your way to work in the mornings, consider buying a reusable takeaway coffee cup instead of throwing a paper or plastic one away every day.
Get a re-usable water filter system rather than buying bottled water.
Go paperless by starting to read electronic versions of books, newspapers and magazines. Ask for electronic receipts and bills and stop unnecessary printing.
Start buying more sustainable products. This is a really easy one to implement and it just revolves around making better decisions when you’re out shopping. Next time you need a new cooking spoon, buy a bamboo one. Look for food products packaged in paper, cardboard or glass rather than plastic etc.
Take your own grocery bags with you. Instead of using single use bags every time you go shopping, buy a few re-usable ones and remember to take them with you on your next trip.
Buy longer lasting groceries and consumables in bulk to reduce packaging wastage.
There are a number of homemade cleaning products which you can make yourself which don’t contain harsh chemicals.
Buy a couple of recycling bins to keep in your laundry or garage to encourage you to start recycling your used glass, paper and tins/cans.
Start using biodegradable beeswax food wrap instead of plastic wrap.
Try growing your own veggies. This doesn’t have to be a full on greenhouse or farm in your garden, simply dedicate a small patch of soil in your back garden to be used for planting some easy to grow herbs and veggies. You can even buy small seedlings and start by growing them into full size plants using a DIY windowsill greenhouse.
Start composting your old veggie peels, scraps and garden trimmings to use around your garden. Your plants, and especially your veggie patch, will love the nutrients. Coffee grounds also make a great fertilizer for your plants.
Get into a habit of switching off your appliances and lights when you’re not using them, here are some ways to save on your electricity bill around your home and make your home more eco-friendly in the process.
Buy better quality shoes and clothing so that you don’t need to replace them that often.
Check that your home is adequately insulated and that your doors and windows are sealed properly so that you’re not wasting energy used in heating or cooling your home.
Consider installing a small array of solar panels to supplement your home’s energy usage.
Replace your traditional water heater with a heat pump or gas heater. They only heat up the water which you’re actually going to use, saving energy and saving you loads of money in the long run.
Conserve water in and around your home by installing water saving shower heads and toilets, these are usually the biggest users of household water.
Repair and upscale old or damaged furniture rather than throwing it out. You’ll be surprised at how well an old dresser or coffee table can turn out with just a fresh coat of paint.
Donate your old items instead of throwing them out. Instead of dumping your old furniture, clothes and appliances, rather donate them to local charity shops for others to use, repair or restore.
Start buying fewer things and live a more minimalist lifestyle, you’ll be surprised at how much happier and less stressed you feel living in a home with less clutter.
Implementing some of these tips will not only make your home more eco-friendly, but many of them will actually save you money as well.
What are some of the ways in which you’ve become more eco-friendly in and around your home? Let us know your tips and tricks in the comments section below. We’d love to hear from you.
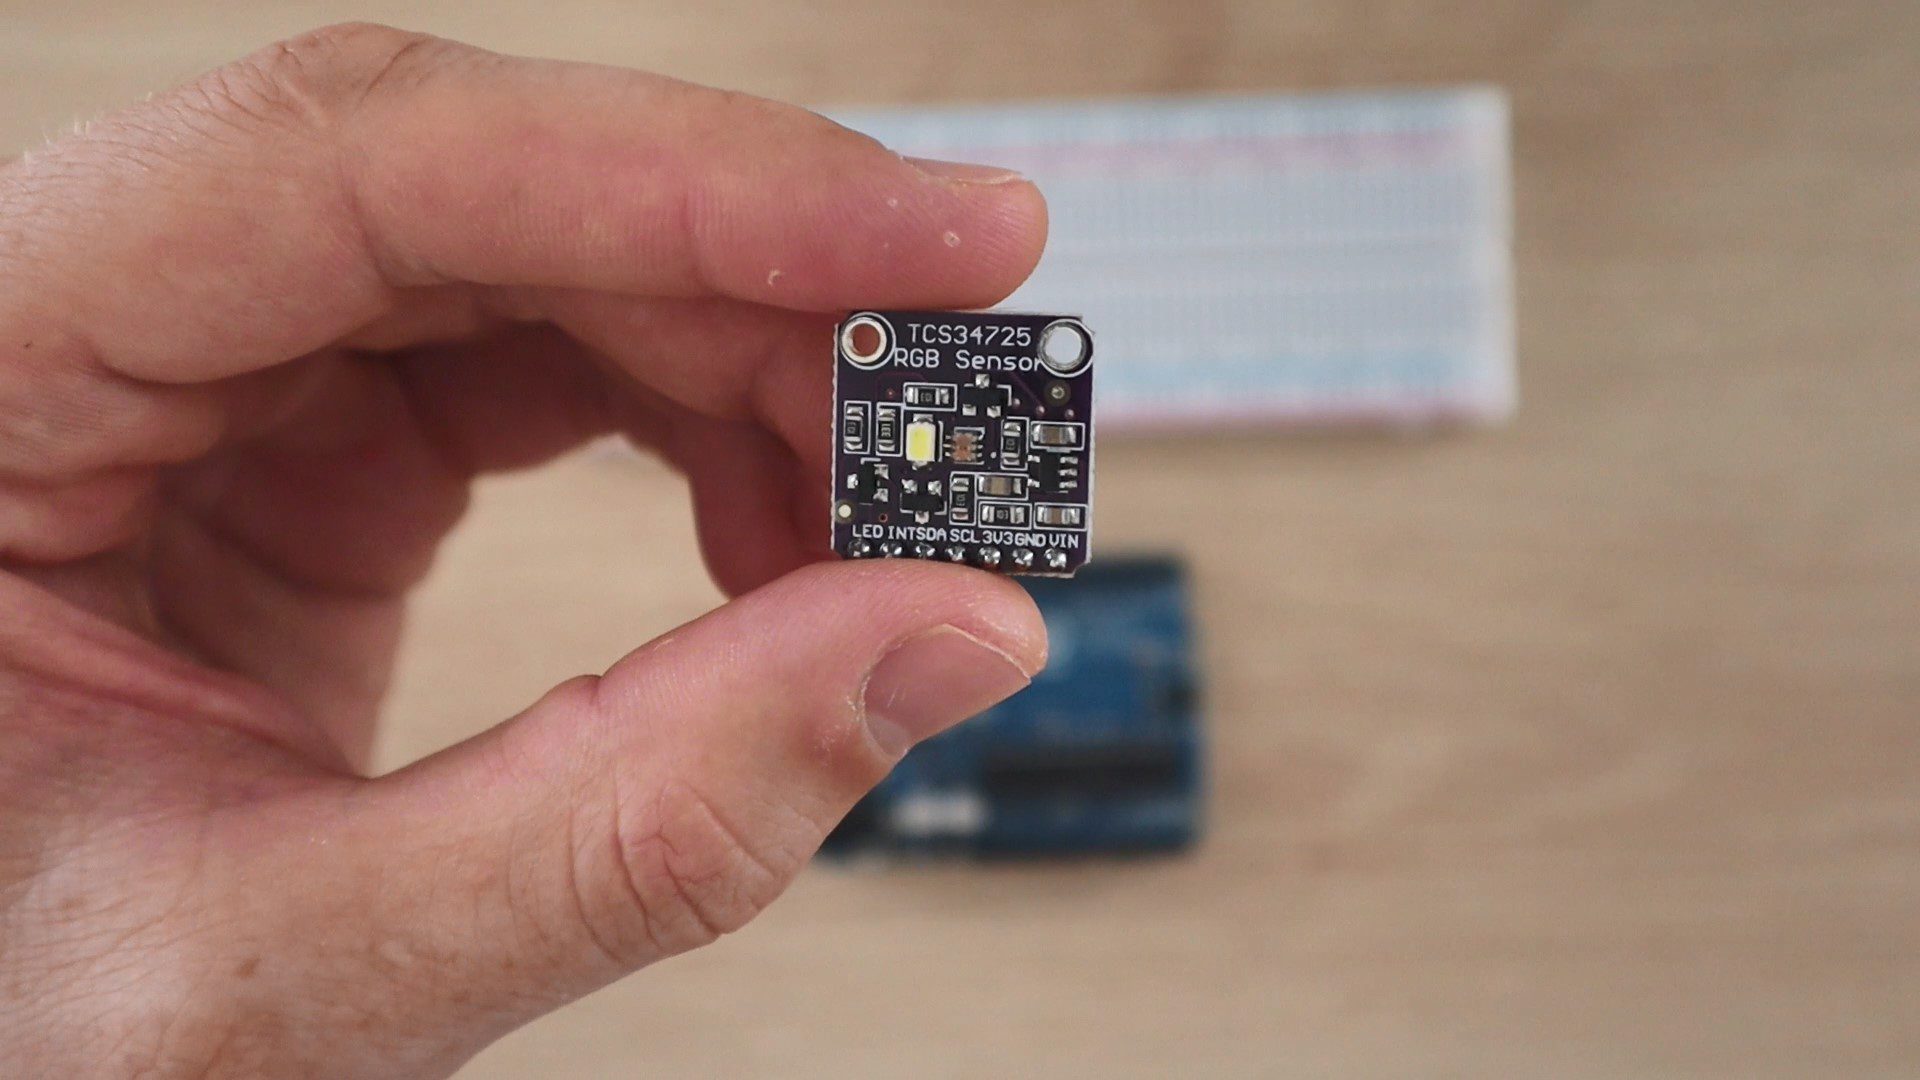
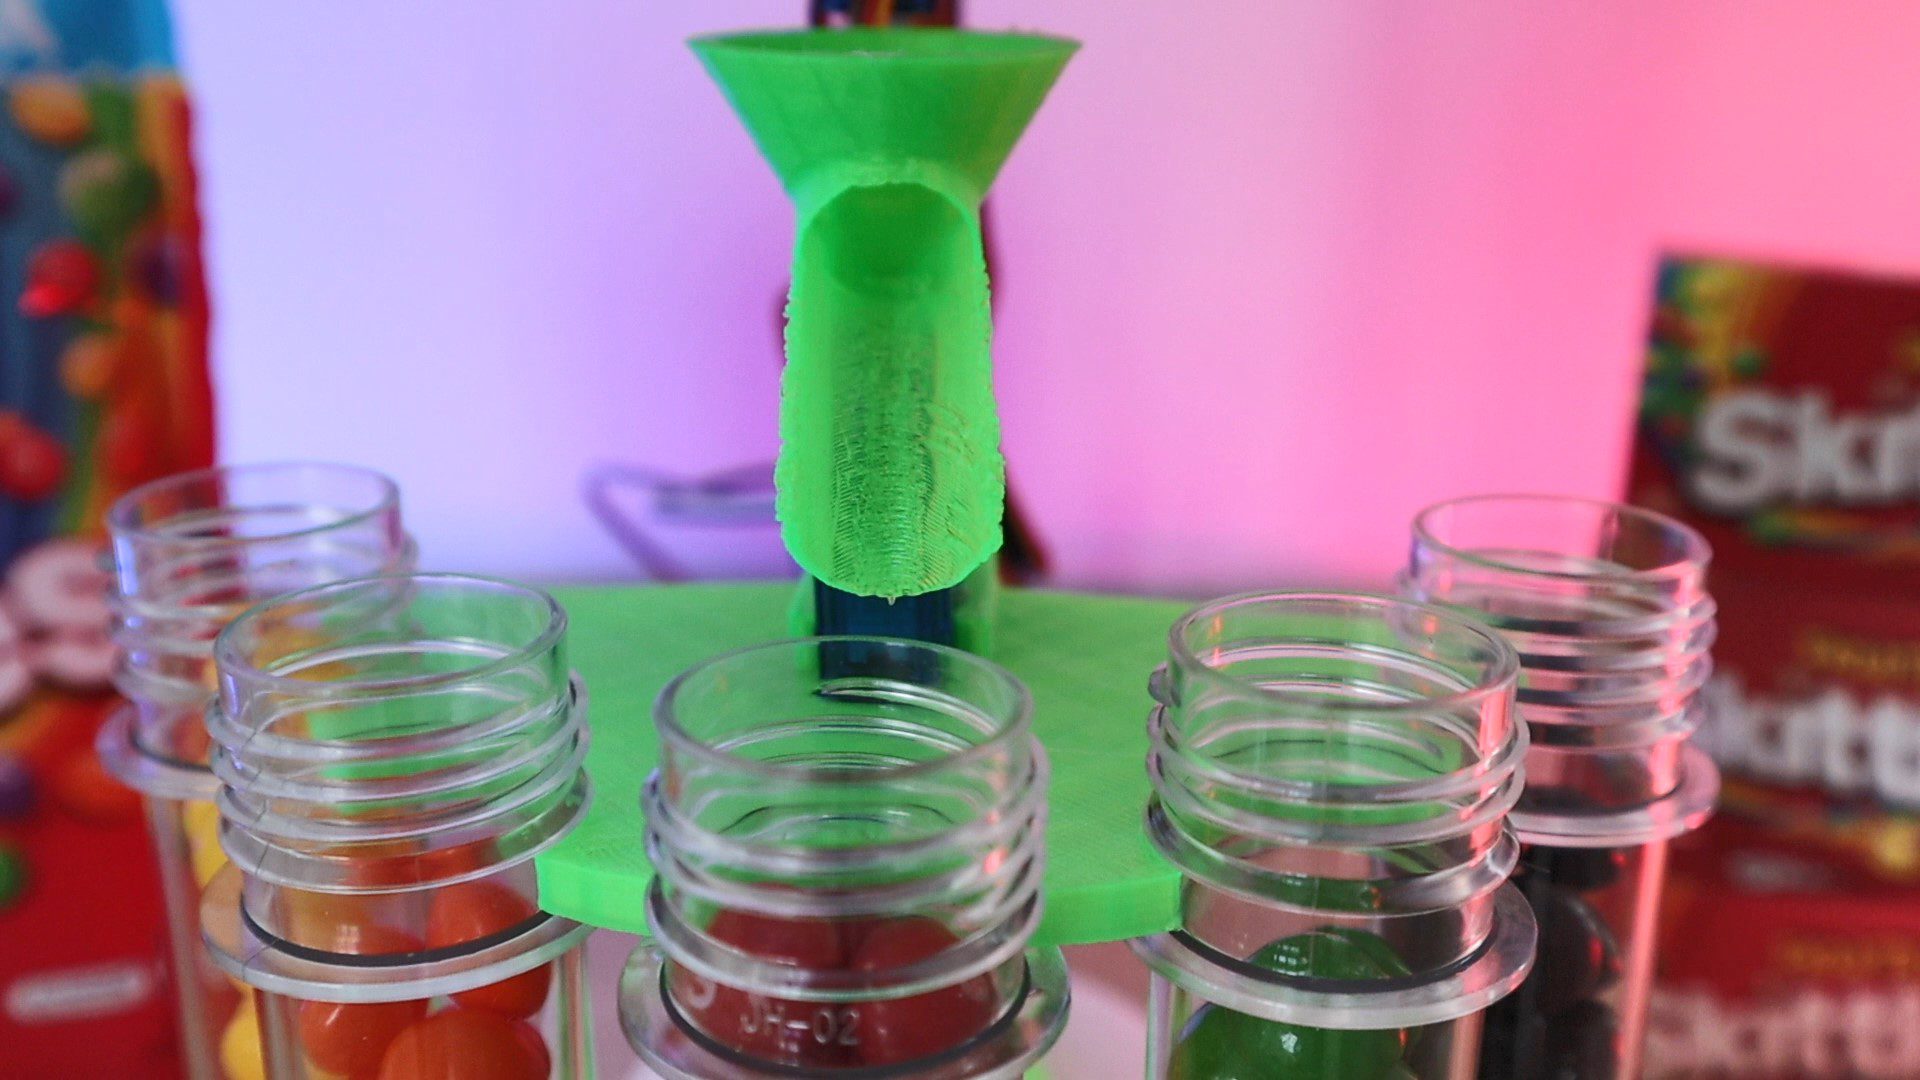
I’ve designed this simple Arduino based automatic colour sorter which allows you to easily sort Skittles, M&Ms and other small coloured candy. Simply fill up the hopper and switch it on to sort your Skittles into five plastic test tubes. The sorter uses a cheap TCS34725 colour sensor module and a decision tree algorithm to sort the Skittles.
I’ve designed a few basic 3D printed components which you’ll need to print out in order to make your own sorter. The rest of the components are all widely available standard parts which I’ve linked in the materials list.
This guide assumes that you’ve worked with an Arduino micro-controller before and know the basics of programming an Arduino. If you do not, follow the linked guide for more information on creating and uploading your first sketch.
Here’s the video guide if you don’t feel like reading through the build:
What You Need To Build Your Own Arduino Based Skittles Colour Sorter
In addition to these, you’ll need basic tools for working with electronics and a glue gun or epoxy adhesive to assemble the components.
Assembling the Arduino Based Skittles Colour Sorter
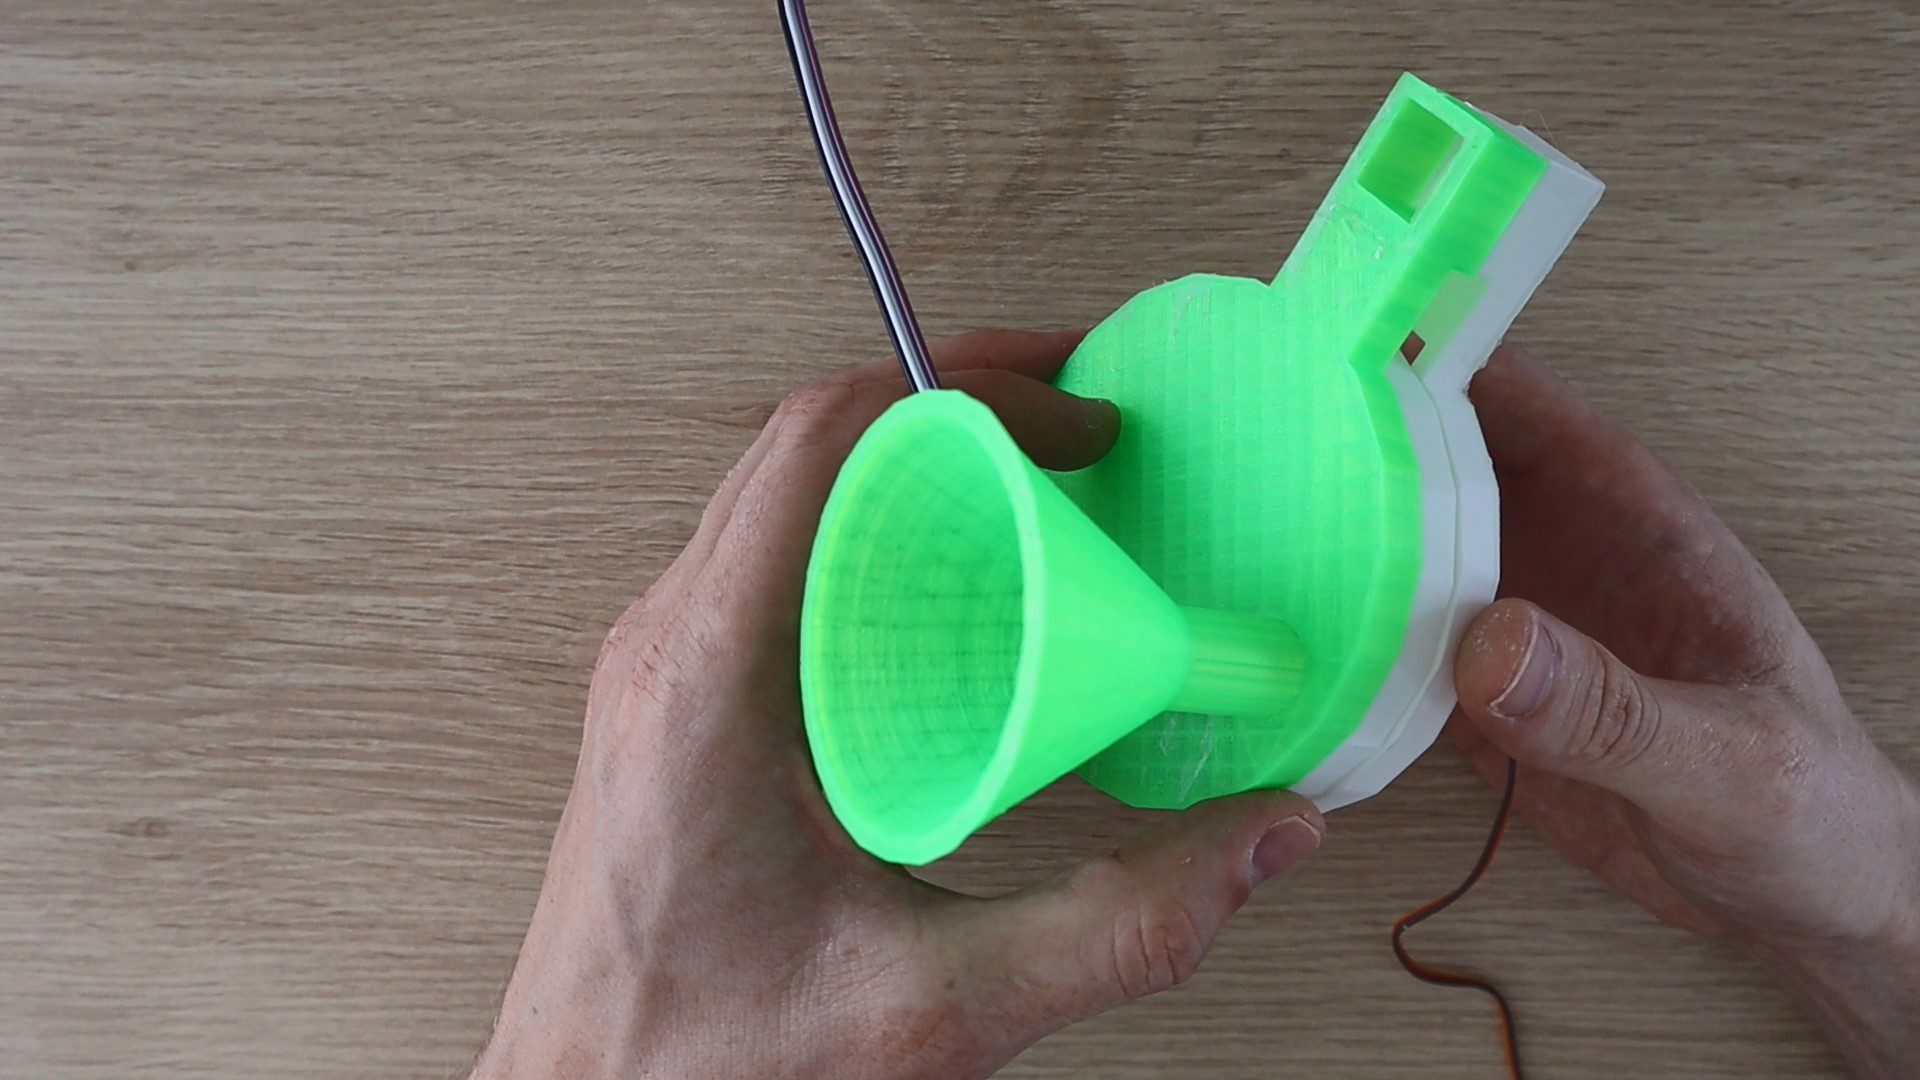
The sorter is designed as two separate assemblies, the selecting assembly which selects a Skittle from the hopper/funnel, moves it to the colour sensor for identification and then moves it on to a hole which allows it to drop into the sorting chute. The sorting assembly holds the sorting tubes in place and supports the servo driving the sorting chute to direct each Skittle into the correct tube.
I have designed the selector and sorter assemblies to sort Skittles, so the components have been designed around the size of an average Skittle. But you can quite easily customise either of these assemblies to accommodate your own candy and make adjustments for materials which you may already have at home. If you’d like to sort M&Ms then you’ll need to add a 6th test tube, or you could change the test tubes for plastic cups if you already have them at home etc.
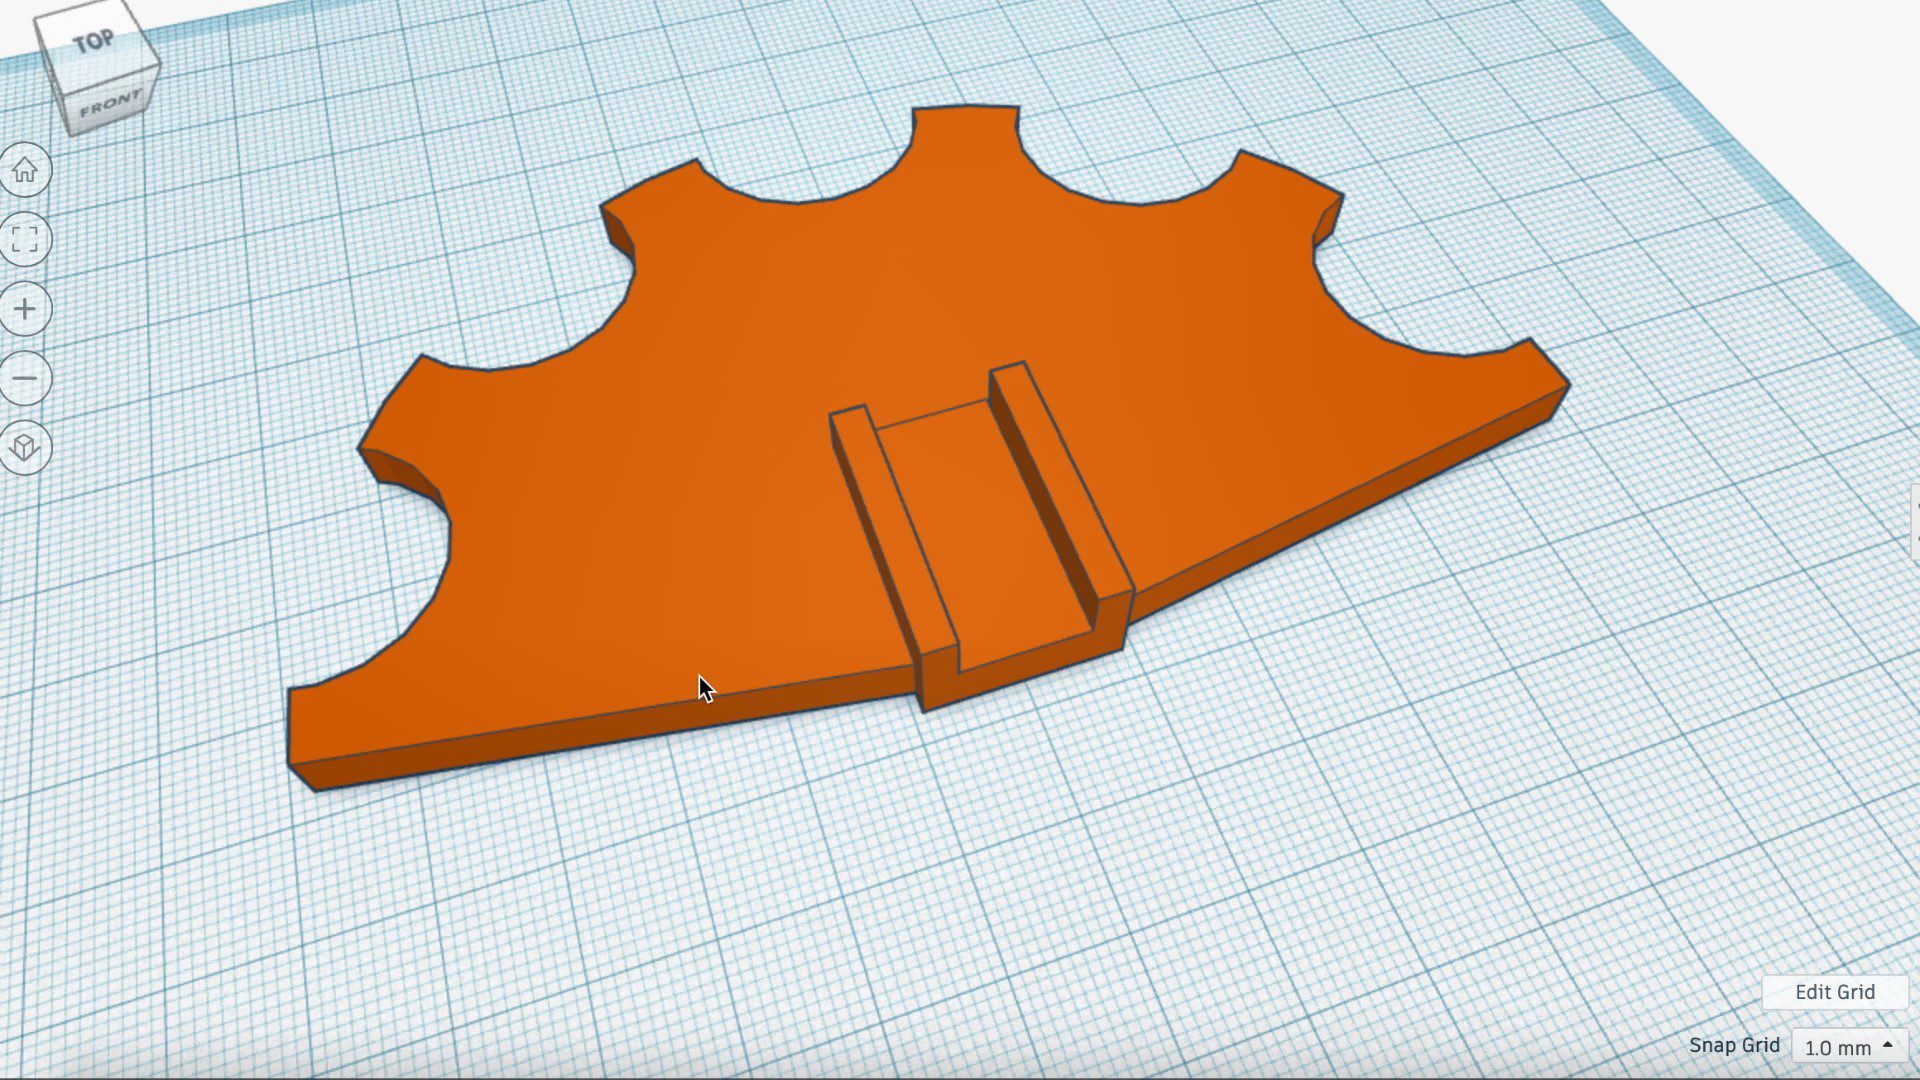
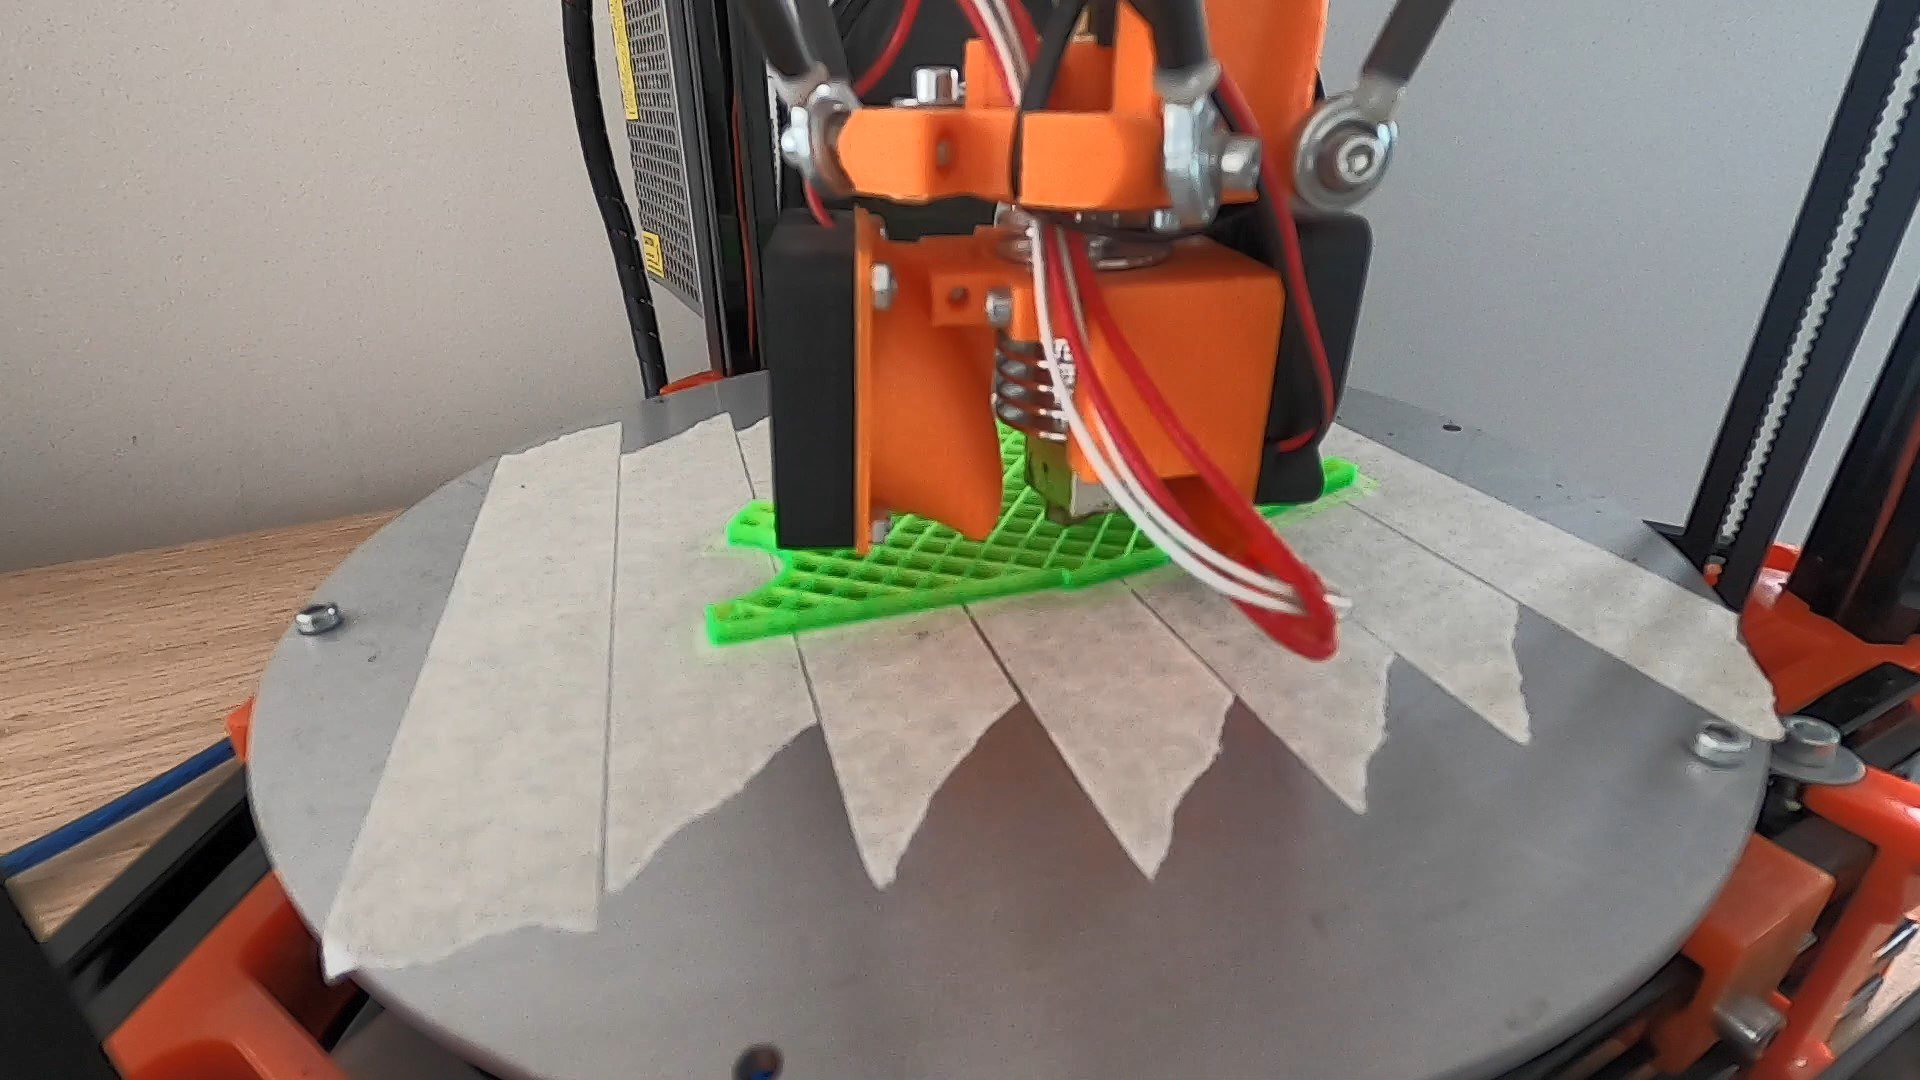
3D Print the Sorter Components
You’ll need to start off by 3D printing your components, the 3D print files can be downloaded here: Colour Sorter 3D Print Files
I used white and green PLA for mine and printed them at 15% infill. You can use any colours you like but I’d suggest using black, white or grey for the selector bottom and middle plates to avoid introducing reflected colour to your sensor module.
After 3D printing, make sure that you trim off or sand any stringy or warped areas and check that your Skittles are able to easily pass through the openings otherwise you’ll have continuous problems with Skittles getting stuck in the selector.
You’ll need a print bed of around 150mm (6”) to 200mm (8”) in order to comfortably print all of the components, the tube holders are the largest (longest) components in terms of lay-down area.
Assemble the Components
Once your components are 3D printed, you can begin assembling them.
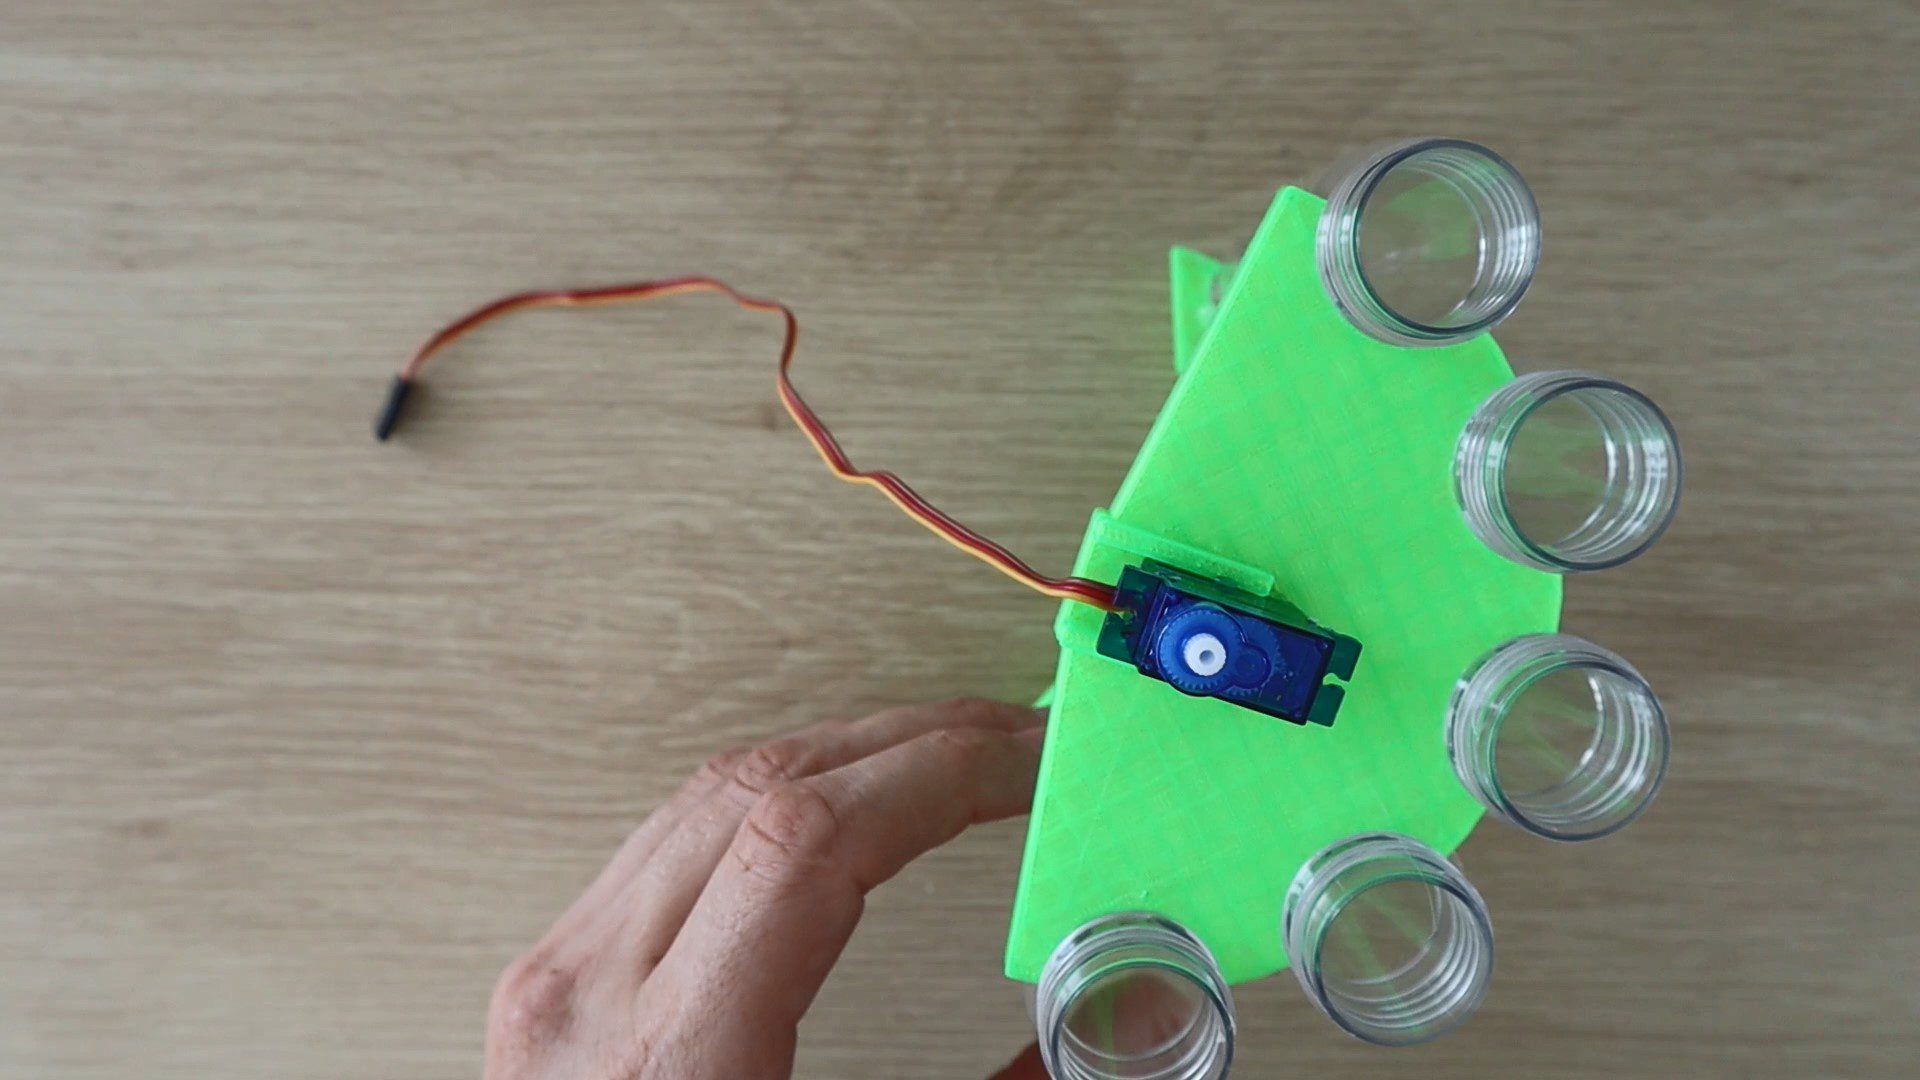
Glue the two base pieces together and then insert your square tubing into the pocket in the base and glue it to secure it.
The tubes get glued into place on the top and bottom sorter pieces, you could also use a hook and loop cable strap to hold them in place if you’d like to be able to remove the tubes individually afterwards.
Then glue the servo arm into the pocket in the bottom of your sorting chute.
Finally, push the sorting chute onto the servo and glue the servo into place in the slot on the top sorting section. Try to ensure that your servo is in the middle of its travel range and that your chute is facing the centre tube. This isn’t critical as you can easily re-position the chute once your servo is powered up – see the calibration step at the end. Position it so that there is a small gap of about 3mm (0.1”) between the end of the chute and the centre tube. If you put it too close then your chute may catch on the tubes or the Skittles will overshoot the tubes and if you put it too far away then the Skittles will fall into the gap between the end of the chute and the tube.
Next you’ll assemble the selecting mechanism.
Push your TCS34725 RGB sensor into the recess in the top plate such that the pins stick out of the top of the plate. The recess should be a tight fit around the sensor so that you don’t have to glue it into place.
Plug your jumper leads into the pins on the back of the sensor module, then install the hopper/funnel.
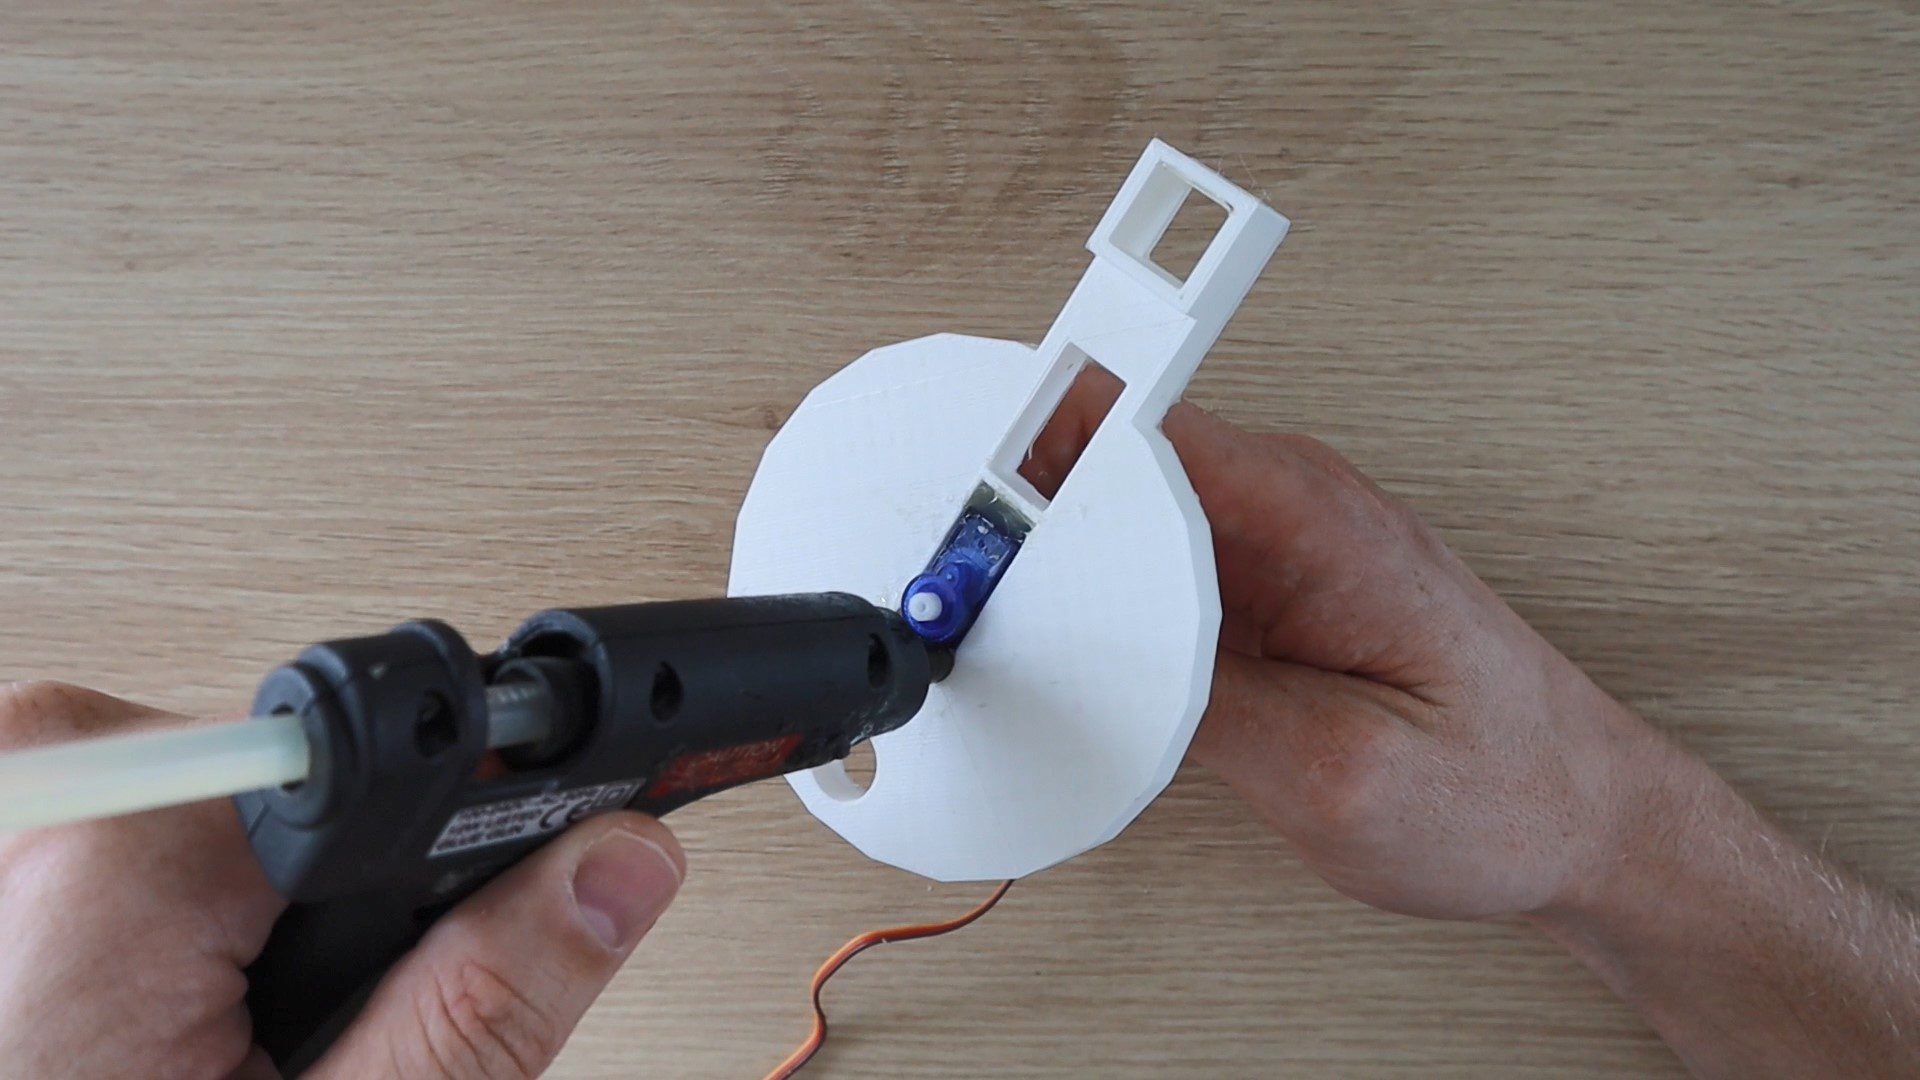
Glue the selecting servo into the cutout in the bottom plate so that the center or rotating point of the servo arm is in the center of the plate.
Next, glue the servo arm into the middle plate and then push the plate onto the bottom plate. Make sure that your servo is in the center of its range of movement and try to position the hole roughly where the colour sensor module will be. This way you’ll avoid having to re-position the disk once you’ve powered on the servo and found that the holes are out of the travel range.
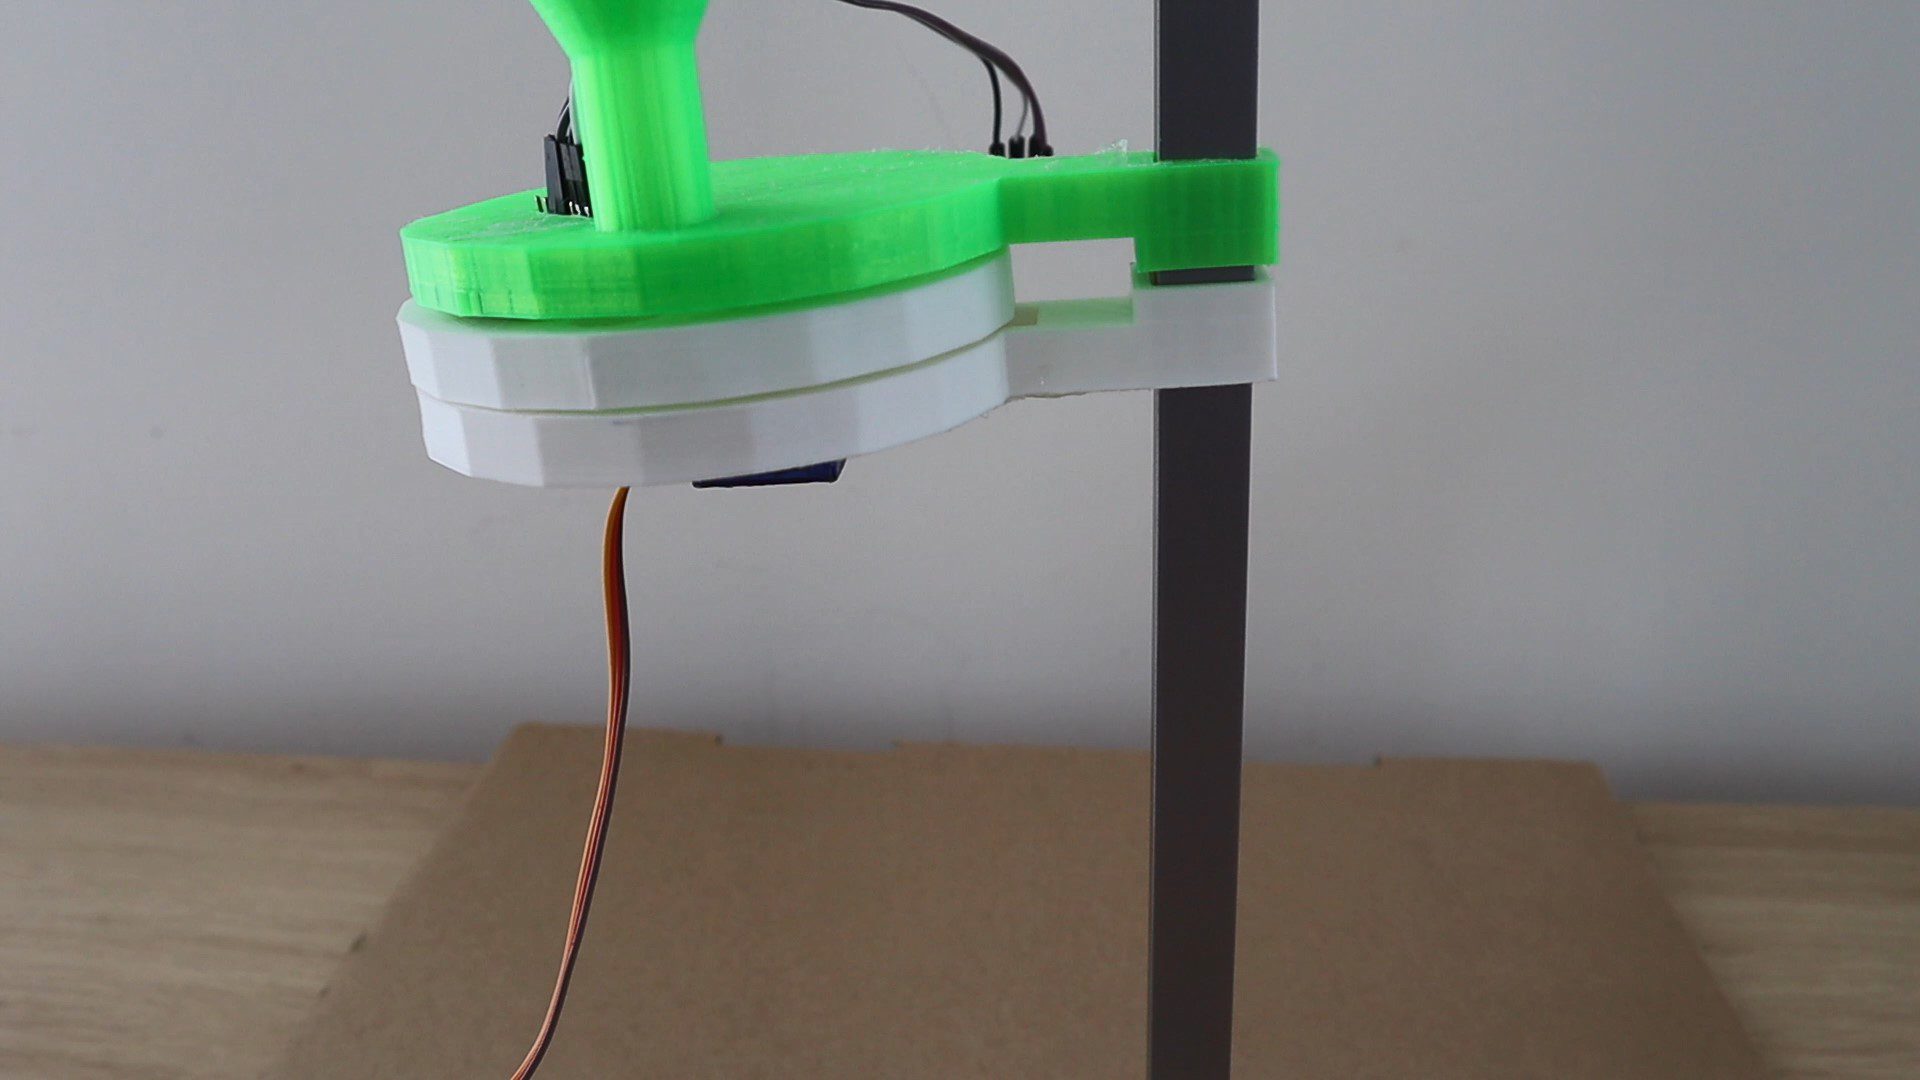
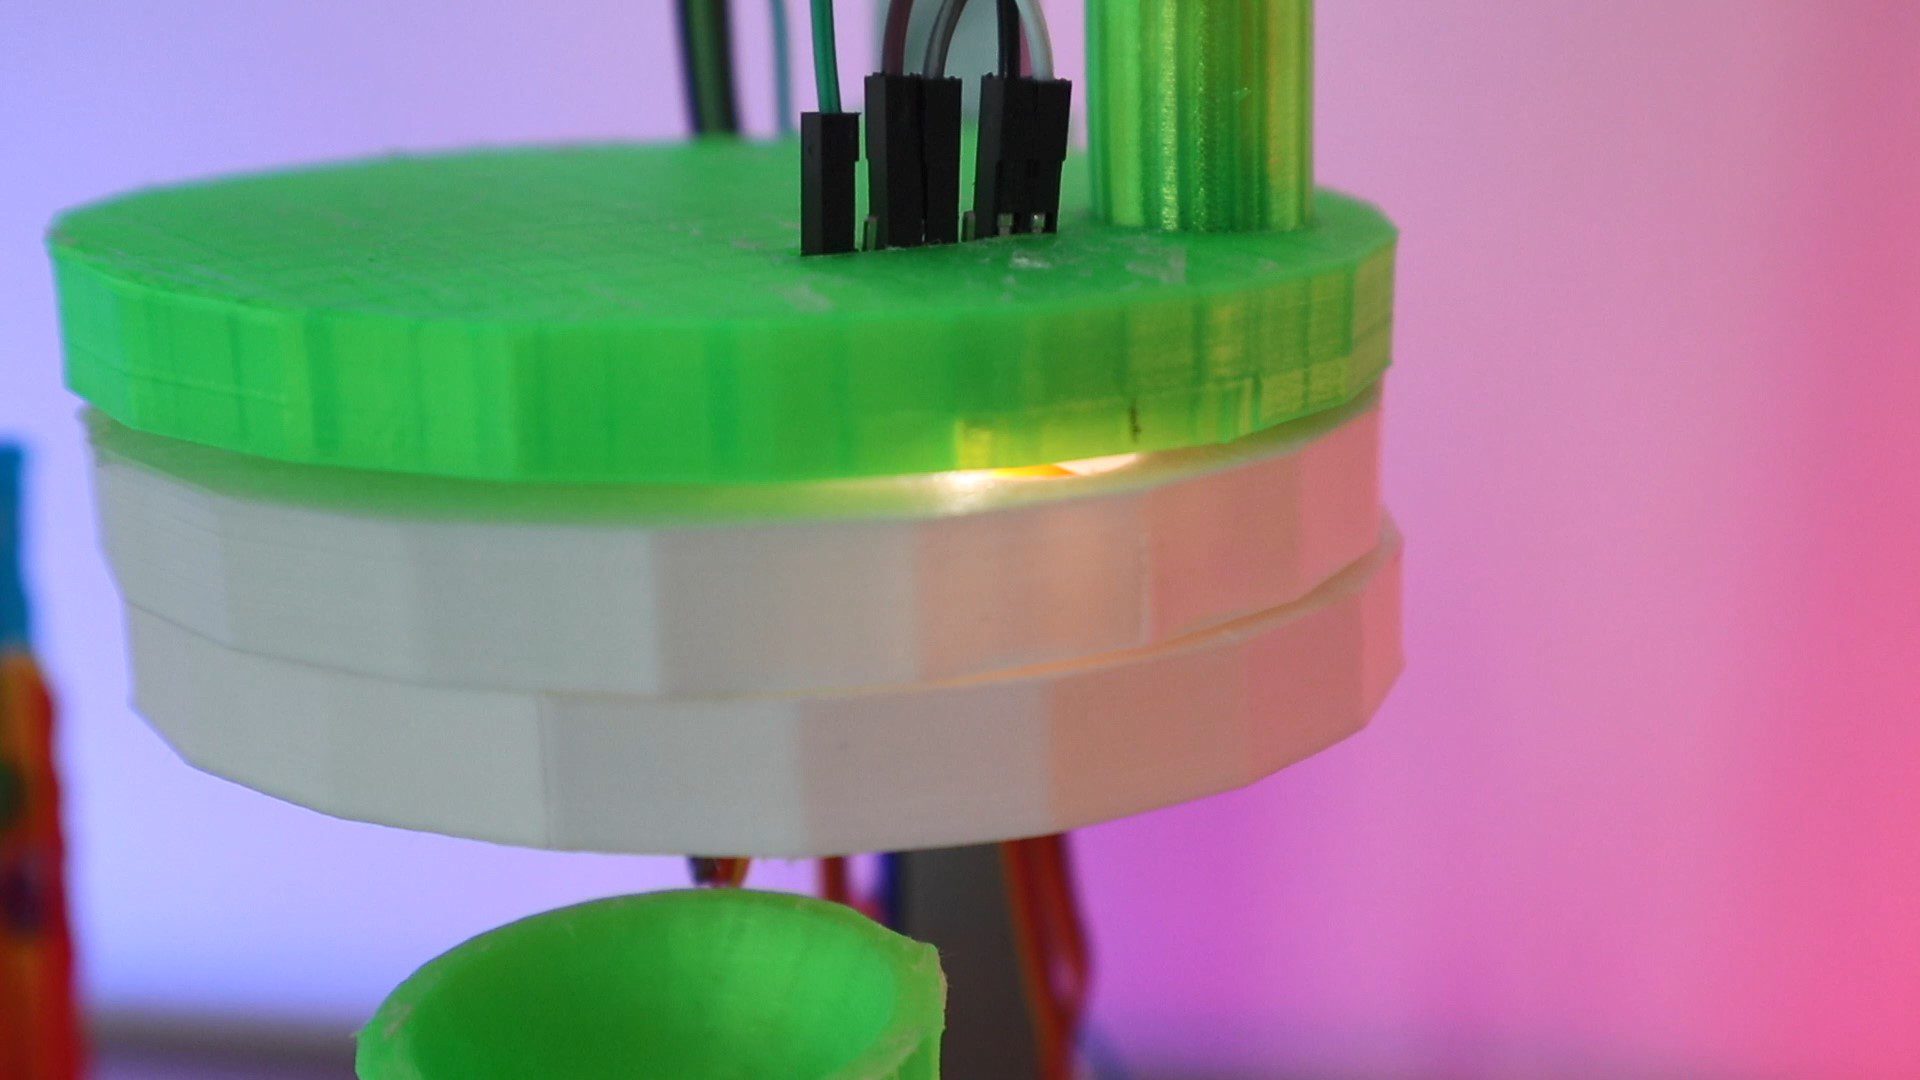
Push all three plates onto the aluminium tube stand and position them so that there is a gap of about 15mm (0.6”) – 20mm (0.8”) between the bottom plate hole and the top of the sorting chute before gluing the bottom plate into place on the stand. Don’t glue the top plate into place as you’ll need to be able to open it up for calibration and troubleshooting.
Depending on how long your servo extensions are and where you choose to position your Arduino, you may need to add jumper extensions onto them in order to reach the pins.
Connecting the Skittles Colour Sorter Circuits
The connections to your Arduino for this project are quite straight forward, shown in the below diagram:
We’re simply connecting a servo for the skittle selector to Arduino Pin 5, another servo for the sorting chute to Arduino Pin 9 and then the colour sensor to your Arduino using the I2C interface on Pins A4 and A5 with an optional connection to Pin 4 to control the onboard LED (otherwise the LED just stays on permanently).
If you’re going to be using a different Arduino board, make sure that the I2C pins are correct as these are different on different boards. For example the Pro Micro uses Pins 2 & 3 for SDA and SCL respectively, not A4 and A5 as in this project on the Uno.
All 3 of the connections (the two servos and colour sensor) require a 5V supply. This is easy to connect using a breadboard as shown in the diagram. I made a small adaptor which plugs into the 5V and GND pins on the Arduino and expands them to 3 female pins each, allowing me to remove the breadboard for my final assembly.
You’ll also need to connect a dedicated power supply or battery to your Arduino as the two servos draw too much power for the USB connection. You may find that your sorter works intermittently when using only the USB connection but it’ll be much more reliable with a stable power supply as the servos will be stronger and make more firm movements.
Programming Your Skittles Colour Sorter
Now that you’ve assembled your sorter and made the connections to your board, you can load the code onto your Arduino and check that the components work correctly.
// Michael Klements
// Skittles Colour Sorter
// 11 January 2019
// www.the-diy-life.com

#include <Wire.h>               //Include the required libraries
#include "Adafruit_TCS34725.h"
#include <Servo.h>

Adafruit_TCS34725 tcs = Adafruit_TCS34725(TCS34725_INTEGRATIONTIME_50MS, TCS34725_GAIN_4X);   //Setup the colour sensor through Adafruit library
Servo selector;
Servo sorter;

int pinLED = 4;      //Assign pins for the colour picker LED, push button and RGB LED

int colourRedSP = 85;                           //Setpoint for Red to determine Yellow, Orange, Red from Green & Purple
int colourGreenSPGP = 97;                       //Setpoint for Green to determine Green from Purple
int colourGreenSPY = 91;                        //Setpoint for Green to determine Yellow from Orange and Red
int colourGreenSPO = 81;                        //Setpoint for Green to determine Orange from Red

int selectorPosition[3] = {26,80,130};    //Selector positions for Drop Area, Sensor and Hopper
int selectorSpeed = 15;                   //Speed to move selector

int sorterPosition[5] = {8,42,82,120,157};   //Sorter colour positions for Yellow, Orange, Red, Green and Purple
int sorterSpeed = 5;                         //Speed to move sorter
int sorterPos = sorterPosition[2];           //Stores current sorter position

void setup()
{
  pinMode (pinLED, OUTPUT);     //Assign output pins
  selector.attach(5);
  sorter.attach(9);
  tcs.begin();                //Connect to the colour sensor
  digitalWrite(pinLED, LOW);  //Turn off the sensor's white LED
  selector.write(selectorPosition[0]);  //Set selector to drop position to start
  delay(500);
  sorter.write(sorterPos);            //Set sorter to middle position to start
  delay(500);
}

void loop()
{
  moveSelector(0,2);                    //Move selector from drop position to hopper
  delay(200);
  moveSelector(2,1);                    //Move skittle from hopper to sensor
  delay(200);
  float red, green, blue;
  digitalWrite(pinLED, HIGH);           //Turn the sensor LED on for identification
  delay(50);
  tcs.setInterrupt(false);              //Start measurement
  delay(60);                            //Takes 50ms to read
  tcs.getRGB(&red, &green, &blue);      //Get the required RGB values
  tcs.setInterrupt(true);
  delay(100);
  digitalWrite(pinLED, LOW);            //Turn off the sensor LED
  moveSorter (chooseTube(red,green));   //Move sorter to desired colour position
  moveSelector (1,0);                   //Drop skittle
}

int chooseTube (int red, int green)
{
  int tempPosition;
  if (red >= colourRedSP)                      //If red is high
  {
    if (green >= colourGreenSPY)               //If green is high
    {
      tempPosition = sorterPosition[0];        //Colour is yellow
    }
    else if (green <= colourGreenSPO)          //If green is low
    {
      tempPosition = sorterPosition[1];        //Colour is orange
    }
    else                                       //Else green must be medium
    {
      tempPosition = sorterPosition[2];        //Colour is red
    }
  }
  else                                         //Red must be medium or low
  {
    if (green >= colourGreenSPGP)              //If green is high
    {
      tempPosition = sorterPosition[3];        //Colour is green
    }
    else                                       //Else green must be medium or low
    {
      tempPosition = sorterPosition[4];        //Colour is purple
    }
  }
  return tempPosition;
}

void moveSelector (int pos, int target)
{
  if (pos < target)                            //Determine movement direction
  {
    for (int i=selectorPosition[pos]; i<=selectorPosition[target] ; i++)
    {
      selector.write(i);      //Move servo in 1 degree increments with a delay between each
      delay(selectorSpeed);
    }
  }
  else
  {
    for (int i=selectorPosition[pos]; i>=selectorPosition[target] ; i--)
    {
      selector.write(i);     //Move servo in 1 degree increments with a delay between each
      delay(selectorSpeed);
    }
  }
}

void moveSorter (int target)
{
  if (sorterPos < target)      //Determine movement direction
  {
    for (int i=sorterPos; i<=target ; i++) //Move servo in 1 degree increments with a delay between each
    {
      sorter.write(i);
      delay(sorterSpeed);
    }
  }
  else if (sorterPos > target)
  {
    for (int i=sorterPos; i>=target ; i--) //Move servo in 1 degree increments with a delay between each
    {
      sorter.write(i);
      delay(sorterSpeed);
    }
  }
  sorterPos = target;           //Update current sorter position
}

void calibrateSorter ()
{
  for (int i=0; i<=4; i++)
  {
    moveSorter (sorterPosition[i]);
    delay(2000);
  }
}

void calibrateSelector ()
{
    selector.write(selectorPosition[2]);
    delay(2000);
    moveSelector (2,1);
    delay(2000);
    moveSelector (1,0);
    delay(2000);
}
The code contains comments to guide you through each line their purpose.
The color identification is based on the Adafruit colorview example code. You will need to have the Adafruit libraries installed. This is easily done by clicking on Tools -> Manage Libraries in your IDE and then typing in “Adafruit TCS” in the search bar and installing the found library.
Some things to look out for in the code:
You don’t have to use the LED control pin on the colour sensor, connected to Pin 4 in the code. You can remove this connection and the lines in the code relating to this Pin and your colour sensor module will still function correctly, you’ll just have the LED on permanently.
Don’t worry too much about the set points and positions in the code at this stage, we’ll go through the set up process in the next step. Just make sure that the components move as expected and that the colour sensor LED is illuminated, or at least illuminated periodically.
The code initializes the sensor and servos and then begins with the continuous loop.
The loop then runs through moving from the drop position to the hopper to select a Skittle. It then moves the Skittle to the colour sensor to take a colour reading, then decides which colour the Skittle is, moves the chute to the correct tube and then moves the selector to the drop position to drop the Skittle into the sorting chute and onward into the correct tube.
The sorting algorithm, called chooseTube, only requires the measurements for the red and green values in order to provide accurate sorting so we don’t send it the blue value as well.
The chooseTube algorithm is structured as a decision tree which is based on the levels of measured colour as follows:
The servo movement functions work on two different principles but are both used to slow down the movement of the servos to make the movement more reliable and stable.
The moveSelector function is based on a position and target reference, either 0, 1 or 2 based on where the selector needs to move next. This is done because the selector moves in a predicable sequence – always from hopper to sensor, sensor to drop and then from drop to hopper again.
The moveSorter function is a bit more complicated because the chute can be in any of the 5 positions and may be required to move to any of the other 4 positions. For this reason there is a global variable sorterPos which keeps track of the sorter’s actual current position and we simply send the function a target position and the function then decides how to move the servo to get to the target position.
It’s just important for troubleshooting or to make adjustments to the code to understand that the one method works on being sent a position reference referring to the array position number 0,1,2 and the other method is sent an actual servo position from 0 to 180.
Setting Up Positions & Calibrating The Colour Set Points
You’ll need to calibrate and set up three things in the code before your sorter will work correctly, we’ll do them in order of increasing complexity.
The first is setting up the sorting positions, or more specifically, the positions of the chute towards each of the tubes. These positions are defined in the array sorterPosition for Yellow, Orange, Red, Green and Purple respectively.
You can test the positions by running the function calibrateSorter in your setup code. This will move the chute to each of the five positions with a two second delay between each movement. You can then make adjustments in the sorterPosition array to get the chute lined up with each tube at each position. This code adjustment will only work if your chute is roughly positioned around the middle tube when it is set to position 90 (the servos midpoint of travel). If not then position your servo at 90 and then reattached the chute so that it’s facing the center tube. You’ll also need to re-upload your code between each adjustment to see the effect it has on the position.
Your next set up is with the selector. You’ll need to do the same as you’ve done above for the chute but now for the selector disk by running the calibrateSelector function.
Check that at position 2, the hole in the selector plate should be aligned with the hopper/funnel hole. At position 1, the hole in the selector plate should be positioned in the middle of the sensor module and at position 0, the hole in the selector plate aligns with the drop hole in the bottom plate. You can test the travel out by placing a Skittle into the hopper and checking that it is picked, moved along to the sensor and then dropped out of the selector after the full travel movement.
Your final calibration is with the colour set points. These are required to ensure that your sorter correctly identifies each colour according to the decision tree. So you need to tell the sorter which values to use to compare the measured colour with. The only way to do this reliably is to test a range of Skittles and see what your sensor measures for each.
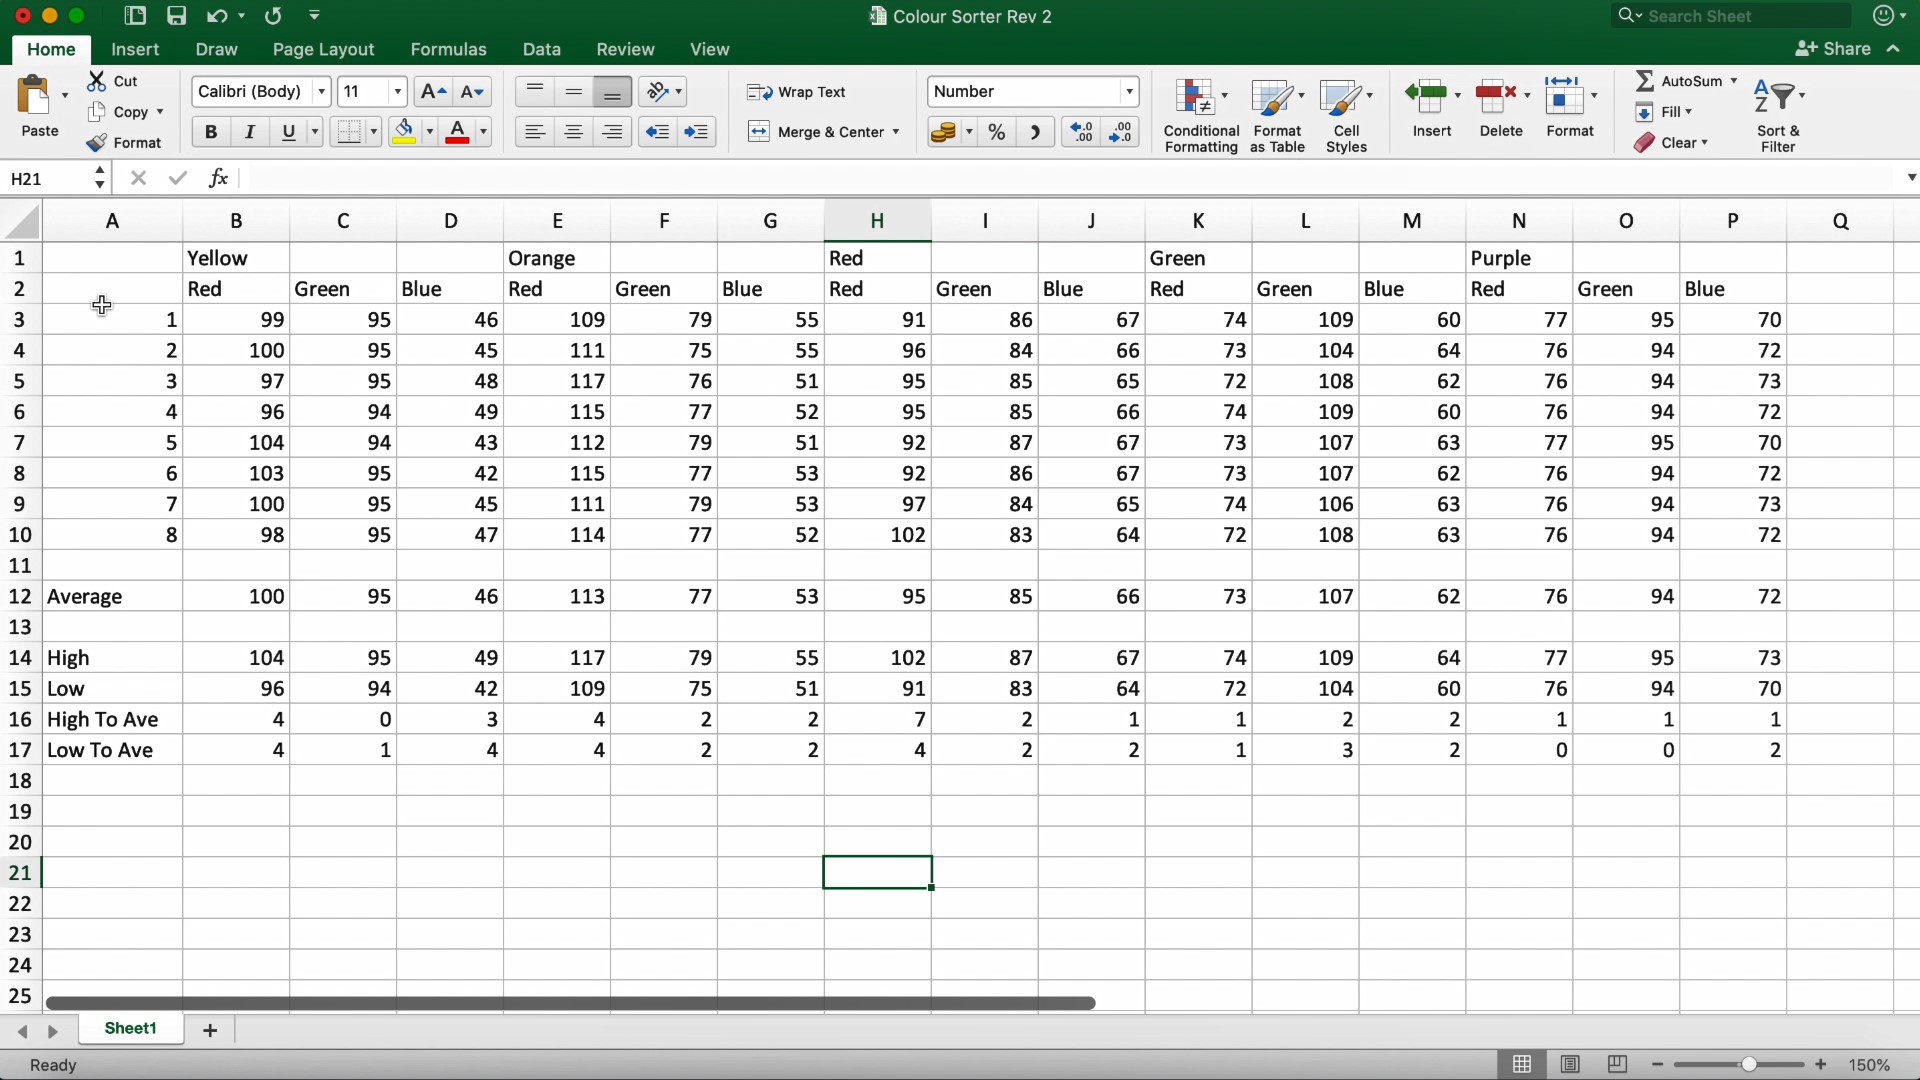
I took a sample of 8 of each different colour Skittle, put them into the sorter and displayed the red, green and blue values for each on the Serial monitor, also recording them on a spreadsheet as shown below.
You don’t really need to record the blue values as these were not required in the code. This decision was only made after seeing the values for blue and then adapting the sorting algorithm to suit.
Once you’ve recorded all of your values, you’ll need to look at the recordings and decide on values for the below set points:
colourRedSP – This should be a value which is lower than the lowest red value recorded for the yellow, orange and red Skittles but higher than the highest recorded red value for the green and purple Skittles. This set point allows you to separate the yellow, orange and red Skittles from the green and purple Skittles.
colourGreenSPGP – This should be a value between the lowest green value recorded for the green Skittles and the highest green value recorded for the purple Skittles. This value allows you to separate the green Skittles from the purple Skittles.
colourGreenSPY – This should be lower than the lowest green value recorded for the yellow Skittles and higher than the highest green value recorded for the red Skittles. This value allows you to separate the yellow Skittles from the orange and red Skittles.
colourGreenSPO – This is the final set point and should be lower than the lowest green value recorded for the red Skittles but higher than the highest green value recorded for the orange Skittles. This value allows you to do the final separation of the orange Skittles from the red Skittles.
Once you’ve chosen these values and put them into your code, you’ll be ready to upload the code to your Arduino again and see how your sorter performs.
You may need to make adjustments to your selector and sorter servo positions as you go if Skittles are getting stuck in the hopper or selector or if they’re missing the tubes. You may also need to make adjustments to the set points if you land up with incorrectly sorted Skittles in each tube.
My one initially mixed up Green and Purple skittles quite often as well as Yellow and Orange ones. Playing around with the set points has now resulted in it never getting them wrong, well at least not while sorting a full family sized bag of Skittles.
Skittles do occasionally get stuck in the funnel/hopper, I’ll be trying to design a servo agitator which agitates the Skittles between each sort to ensure that the hopper doesn’t get blocked up.
Have you tried making your own Skittles colour sorter? Let us know in the comments section below or send us your pictures. We’d love to share you designs, tips and tricks.
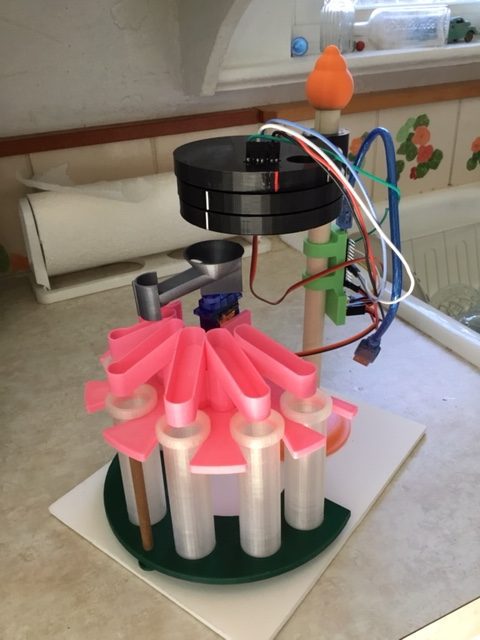
Community Builds
Have a look at this great build by Jeff Trionfante. He added on a 6th tube to sort M&Ms and made some neat additions to the chutes to better guide the M&Ms and Skittles into the correct tubes.
If you’re planning on selling your home in the near future, you should start with some preparation work and this can often prove to be challenging. It’s easy to get overwhelmed when you see the end product of professionally flipped and staged homes for sale but you need to know that this process takes a lot of time and money.
However, this doesn’t mean you can’t do similar to boost the value of your home and make a good sale. You just need to focus on doing the crucial upgrades and repairs before selling your home and the profit will be guaranteed.
Take Care of Any Structural and Mechanical Issues
Taking care of the structural and mechanical issues is surely more expensive than other upgrades but it’s also of fundamental importance. If your potential buyers learn that they will need to pay for fixing the roof or faulty plumbing, it will surely put them off from buying.
Make sure you have the roof inspected as its condition can impact the value of your home. Appraisers often insist on roof replacement as a loan condition and even if it’s not always necessary, it will significantly boost the value of your home.
Also, your home needs to be in working order so taking care of plumbing and electrical wiring and fixtures are imperative. Also, it’s recommended you install energy-efficient appliances and have the HVAC serviced, repaired or replaced, if necessary, before selling your home.
Ask the Professionals
It’s always a smart move to consult the professionals so you could start by arranging a pre-sale home inspection. This can be very helpful in identifying issues and fixing them before you put it on the market. As a homeowner and layperson, it’s easy to miss a few crucial points which can impact the sale of your home.
Also, most lending companies around the world, including Australia, list a home inspection as one of the conditions for approving the loan for purchasing a home. Moreover, if you don’t deal with problems in the beginning, you’ll be forced to deal with them later which can prove to be very inconvenient and expensive. This is another opportunity to turn to pros for help and consult a real estate agent in Northern Beaches who can give you a better insight into what areas of your home need the most attention and how to go about organizing the inspection.
A Fresh Coat of Paint
One of the easiest and cheapest ways to start updating your home is by adding a fresh coat of paint. This can also be a DIY project which can help you save money. Browse online to pick up a few painting hacks and find the color palette and you’ll be on your way!
Refinish Hardwood Floors
Hardwood floors are undoubtedly the most popular flooring choice in a home and the way they look has a great impact on the appearance of a home. You need to make sure they look their best so refinishing them is a safe investment.
Nothing ruins a home sale more than shabby looking hardwood floors that have changed color, have scuffs and scratch marks and have lost their original shine so be sure to take care of your flooring before selling your home.
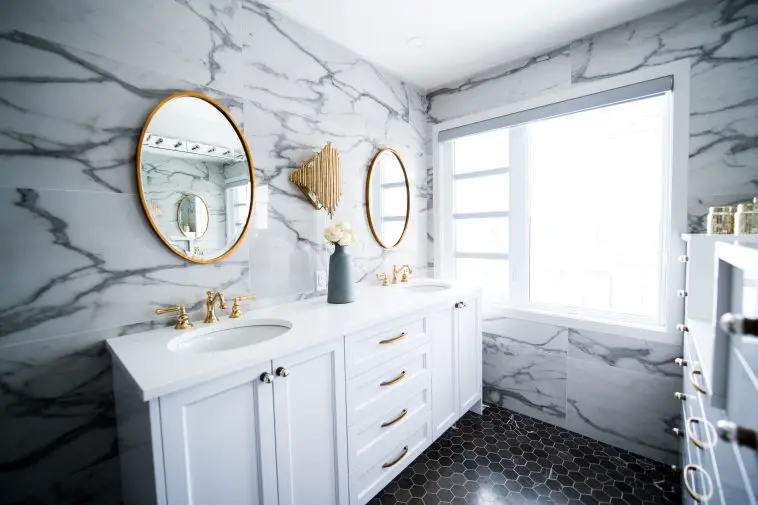
Update the Kitchen and Bathroom
Everyone loves a beautiful kitchen as it’s the heart of the home. Unless your agent advises so, don’t do a complete renovation. There are various minor repairs that can be very effective in making a great impression – a fresh coat of neutral paint, new countertops, replaced fixtures and hardware, and updated lighting.
As for the appliances, they need to be functioning properly but if they’re also outdated and not in sync with the renovation, you should replace them with newer models to appeal to buyers.
When it comes to bathrooms, a clean and sparkling bathroom always works. It’s a good idea to clean or replace grout, replace missing or chipped tiles and repaint the walls to make the room appear brighter, cleaner and bigger.
If there are any more serious issues such as a leaky faucet, clogged drain or a running toilet, it must be immediately fixed. Both bathrooms and the kitchen are very important spaces in every house that buyers always focus on so investing in these areas will surely increase your chances of making a sale.
Spruce up the Exterior
The exterior of your home is the first thing people see so you need to make sure it all looks neat. A great curb appeal can do wonders in attracting potential home buyers.
Start by mowing the lawn and taking out weeds. Add sod in worn-out patches of the yard. Plant colorful flowers in the beds, add a few potted plants by the front door and clean up any accumulated junk in the backyard and around your storage shed. Also, fix the crooked fence, remove moss on the roof and missing shingles and install new energy-efficient outdoor lighting that will cast new light on your spruced-up home!
Everything matters when it comes to selling your home, so consider implementing these upgrades to improve your chances of a quick and successful home sale. Whether you start with bigger issues and leave the details for the end or the other way round, all the improvements you make will boost the value of your home and make it more attractive for potential home buyers.
People living in apartments and more densely populated areas are facing increasing rules and regulations regarding what can be done common property and one their balconies. BBQs are a popular discussion point and the majority of apartment buildings already prohibit the use of coal and wood fires. Weber’s attempt at addressing some of these issues comes in the form of the Weber Pulse, an all-electric full size BBQ with their iGrill Bluetooth grill assistant built in.
The Weber Pulse comes in two models, the 1800W Pulse 1000 and the slightly larger 2200W Pulse 2000. The primary differences between the two being the size of the grilling surface and the fact that the 2000 has two independently controlled elements where the 1000 only has one. One other consideration is that the 2000 has four iGrill temperature probe inputs while the 1000 only has two.
The Weber Pulse is by no means an entry level BBQ. It may be a smaller sized BBQ and one of only a handful of all electric BBQs available but its price puts it quite high up the line-up.
Weber Pulse Initial Set Up
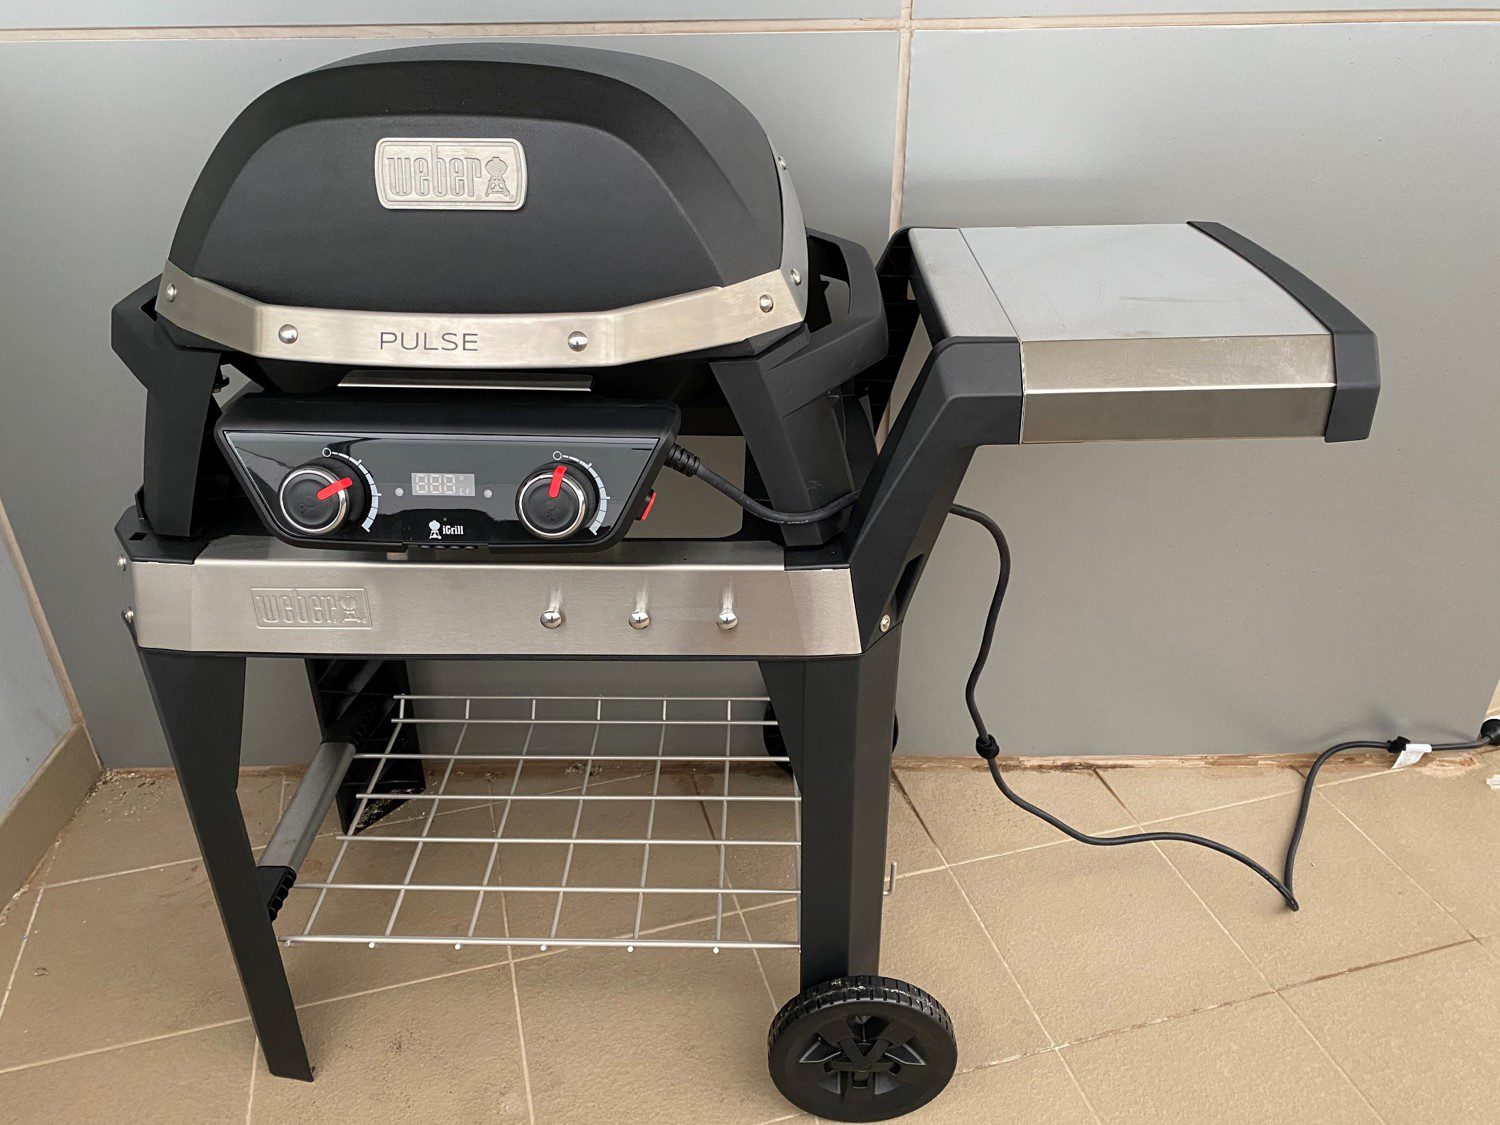
There isn’t really a whole lot to set up with the Weber Pulse. It comes almost entirely assembled in the box and all that you need to do is put the grill in place, push in the front control panel and you’re ready to go. The Pulse grill is sold separately to the cart, so if you’ve got an outdoor bench, work surface or table then you’ll be good to go with the Pulse only. If you’re look for a free standing BBQ or a little mobility, then you’ll want to get the cart as well.
The Pulse has a really good quality, premium feel to it. It is heavy for it’s size and this is largely due to the construction being a combination of thick cast iron and aluminium with a premium porcelain-enamelled cast iron grill. The handles and legs are plastic but they also have a heavy duty, sturdy feel.
The cart, unlike the grill, comes flat packed and is in a number of pieces. You’ll need to set aside around 15-30 minutes to assemble it and you’ll need a screwdriver to get the job done. The instructions are well documented and clearly marked, also pointing out any commonly made assembly mistakes and things to look out for.
The cart is mostly made from plastic, it has plastic legs and supports with stainless steel accents. The detachable side table slips in an out of place using stainless steel pegs into stainless steel slots to prevent wear. There are some cleverly thought out additions like the hooks on the front to hang your Weber grill tools, a shelf on the bottom for storage of accessories, a cable holder on the bottom to storage your extension cable and the removable side table making it more compact for storage. The only part of the cart which feels a bit flimsy are the wheels. They are entirely plastic and rattle around a bit when you move the cart, I feel like they would have felt a bit more like the rest of the BBQ if the hub was steel and perhaps incorporated a bearing or two.
The iGrill App
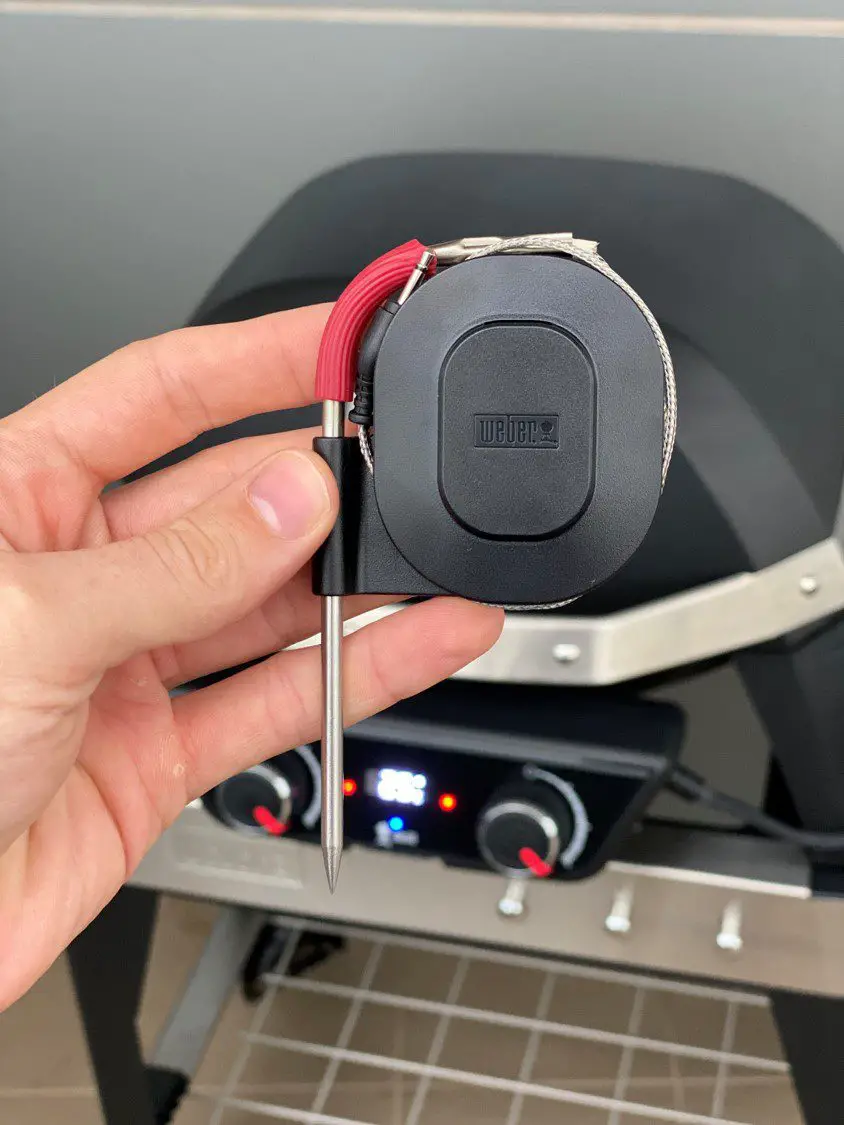
The Weber iGrill temperature monitoring system and app is the Pulse’s party trick and while you don’t have to use it to use the BBQ, it definitely helps with getting your meat cooked to your liking, even more so when you have people wanting their meat done differently, and it’s even better for larger roasts.
The system uses up to four connected temperature probes (two on the Pulse 1000) to monitor the internal temperature of the meat on the grill and can be set up against a range of presets for different meats and likings to ensure that each is cooked to perfection.
It is available for download for free from the App Store and on Google Play, making it compatible with the majority of smartphones.
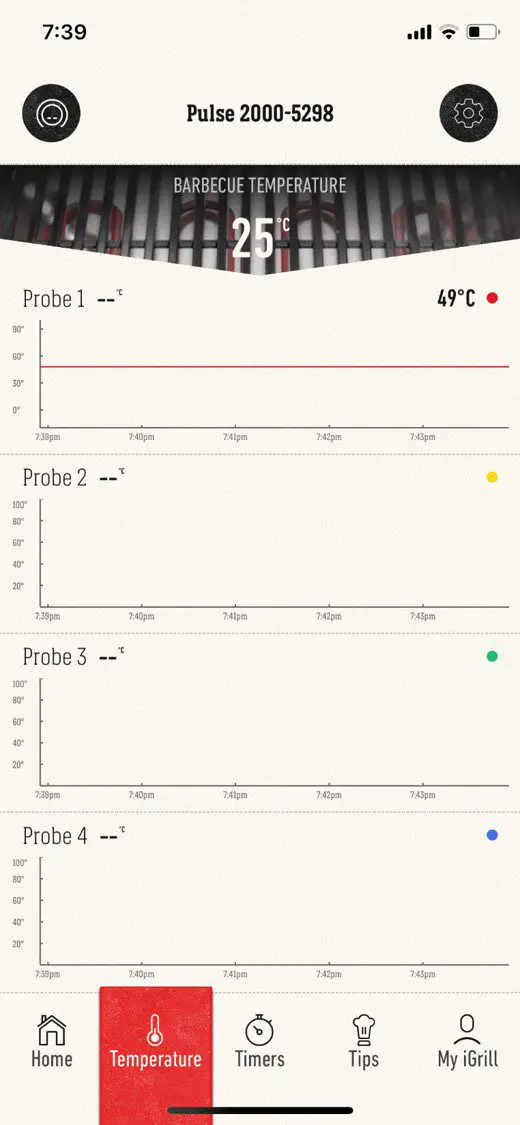
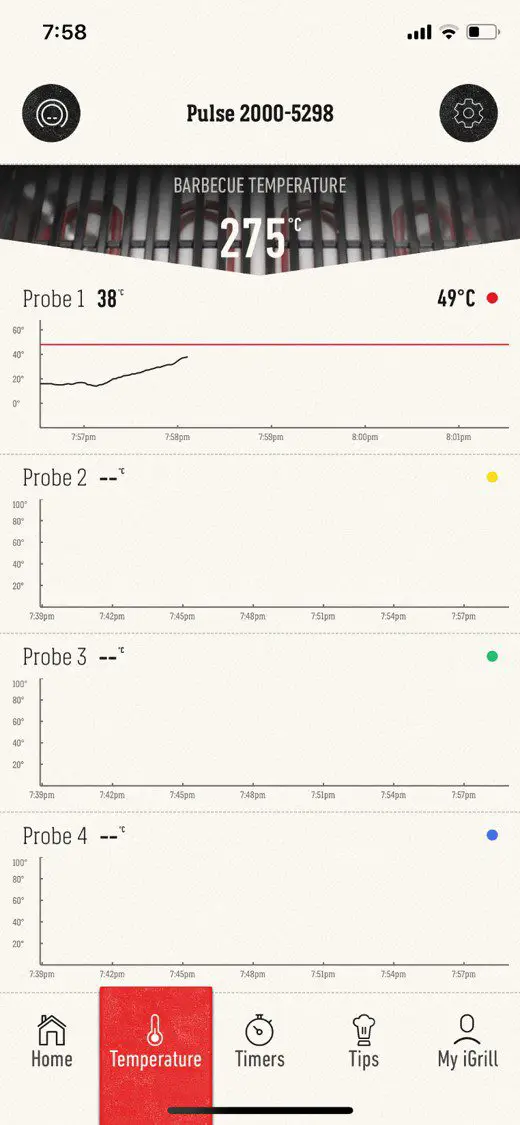
The app automatically detects any nearby iGrill devices and after asking you to confirm your BBQ, it paired pretty quickly with mine. It then provides you with a temperature reading for the inside of your BBQ as well as a graph for each of your systems available probe inputs.
When you hit the start barbecuing button, you’ll need to choose between two options, one to set the desired internal temperature for your meat or another to select your meat’s “doneness” (as it calls it) which lets you choose your type and cut of meat, how well you like it done and then automatically sets the desired internal temperature.
It seems to be pretty comprehensive for meat, allowing you to choose from an extensive range of cuts for red meat, pork, poultry, lamb and fish. There aren’t any vegetarian options, and while I’m not really one for throwing veggies onto the grill, there certainly would have been some opportunity to put commonly grilled veggies onto the list, things like sweet potato, butternut, corn etc. could have been a nice addition.
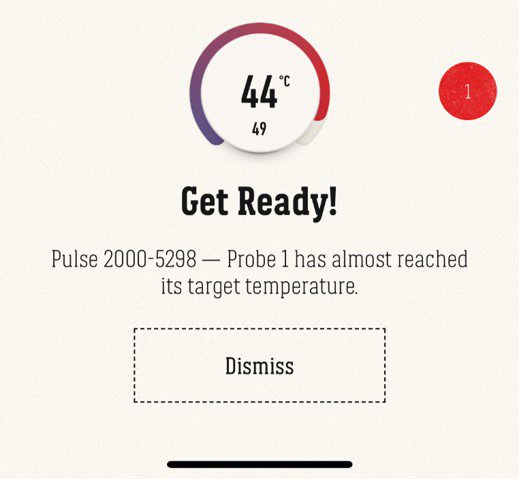
You can set up different meats, cuts or temperatures for each probe and they’ll be loaded into the temperature screen which then allows you to monitor the cooking process for each individually. You’ll get alerts through the app, even if your phone is locked, which notify you when your meat is almost done and then again when it is done, for each probe.
You can also just view the BBQ and probe temperatures without setting up any alerts.
Some other features of the iGrill app include customisable timers and alerts, grill advice and recipes and a full log (history) of your previous grill sessions.
How Well Can You Cook A Steak?
So now it’s time to try it out and see whether the BBQ can produce the wonderful smoky flavour that comes from cooking over traditional coals or gas and whether the iGrill app can help us to cook it to our liking.
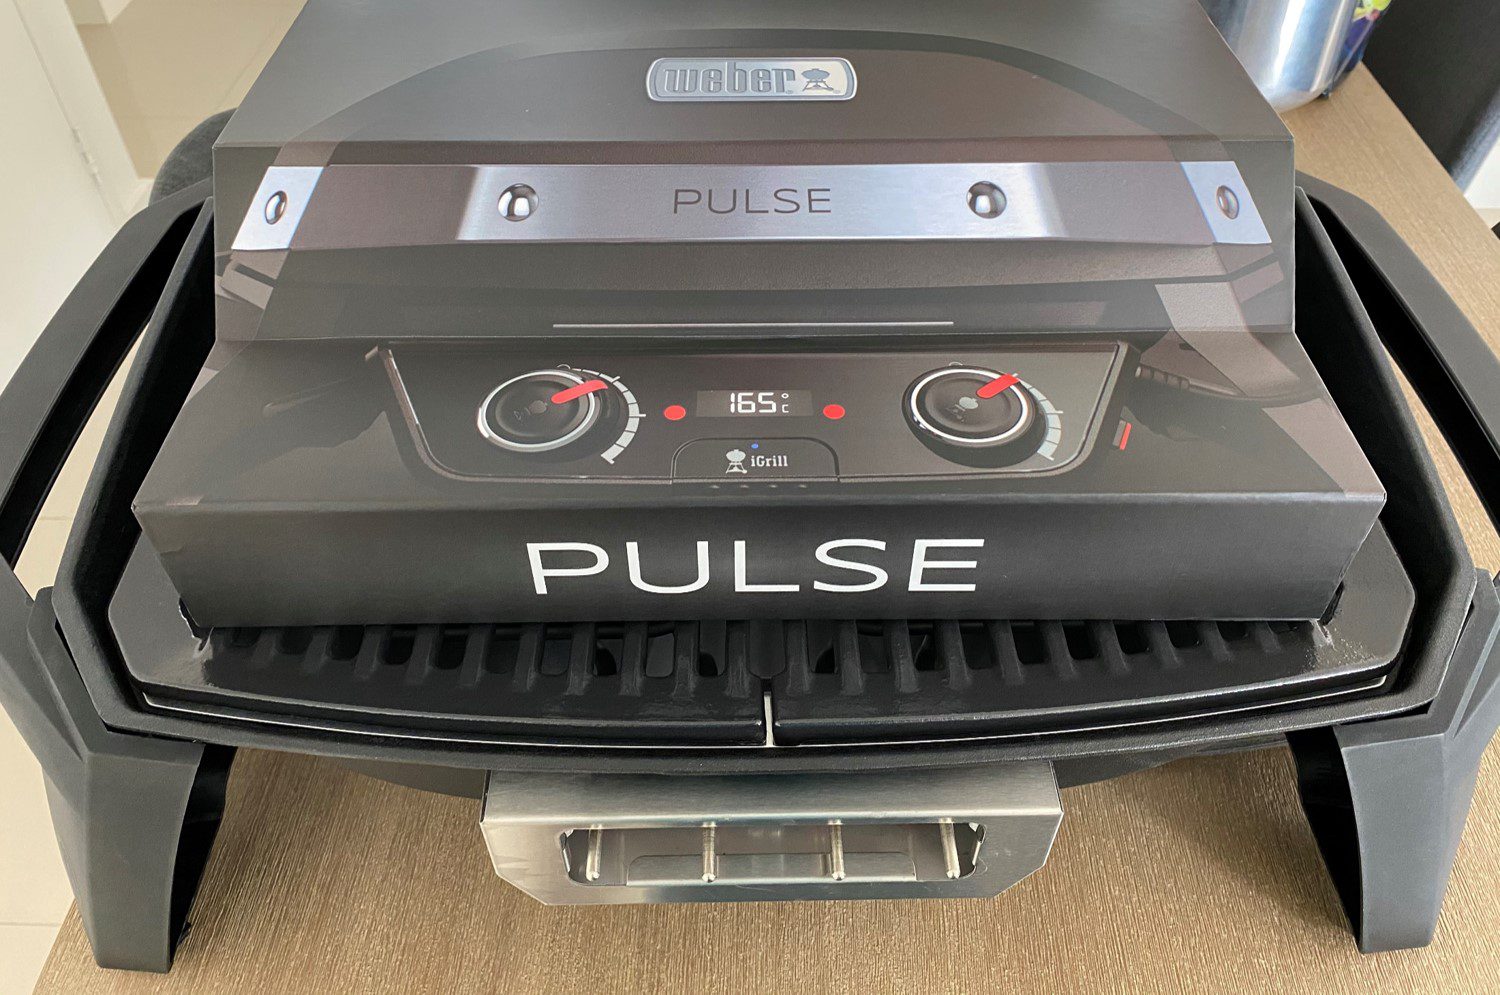
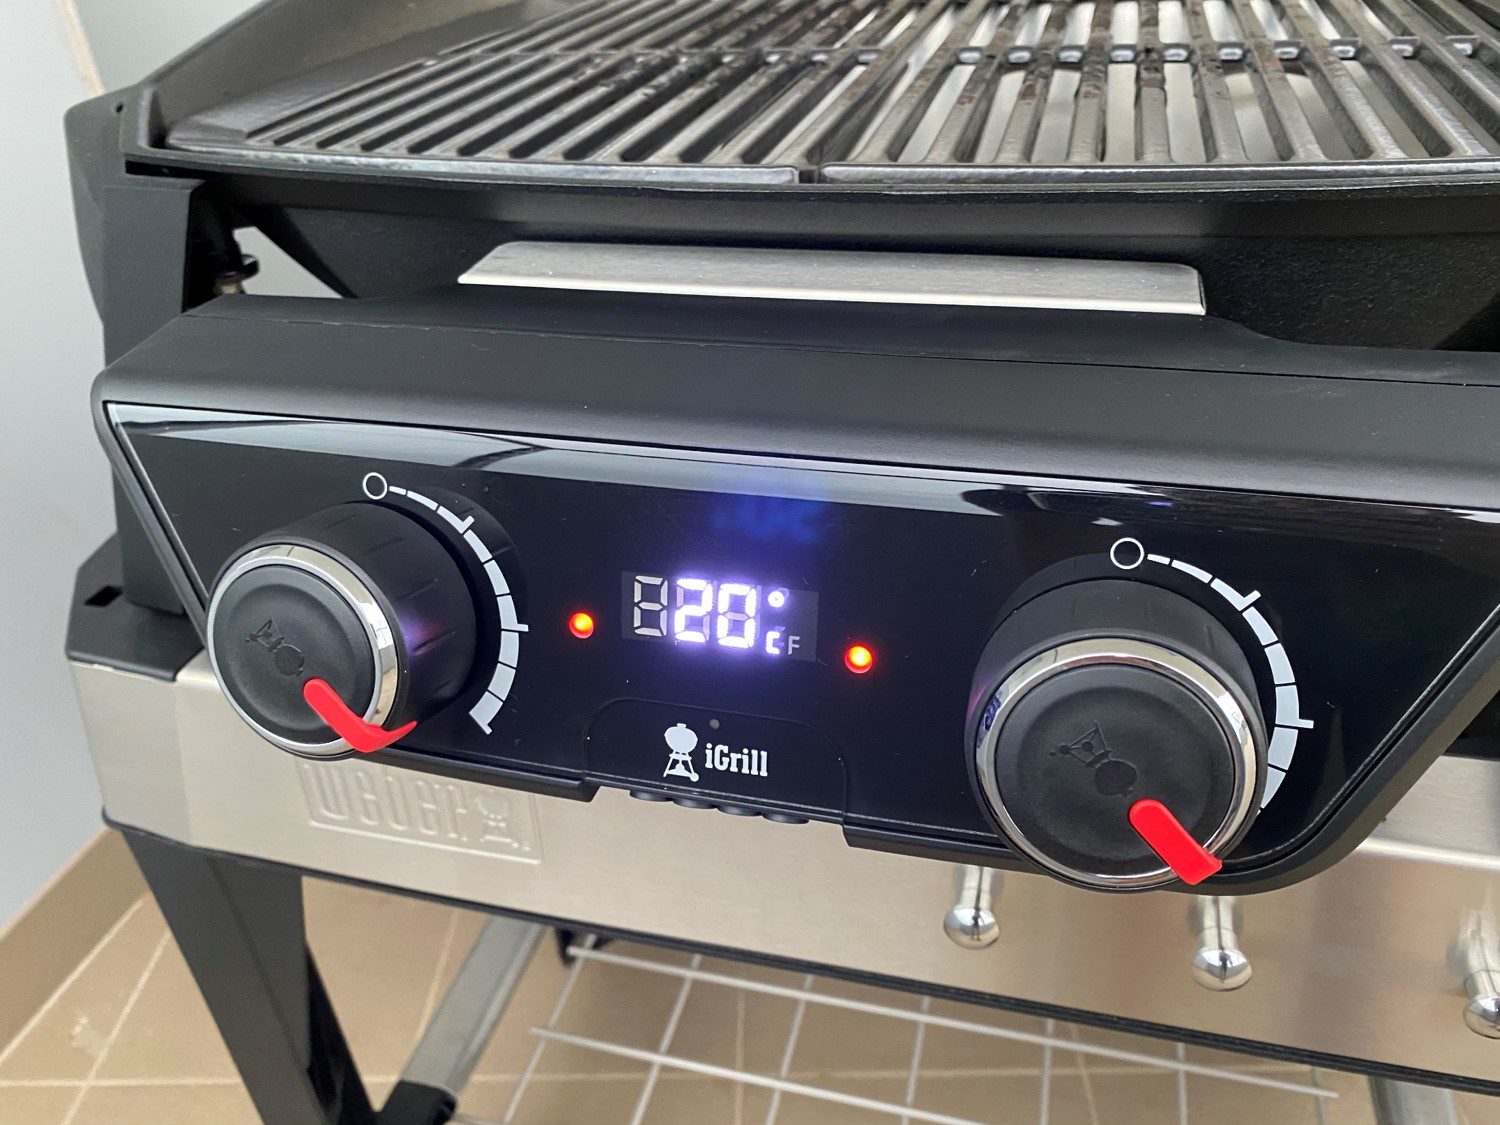
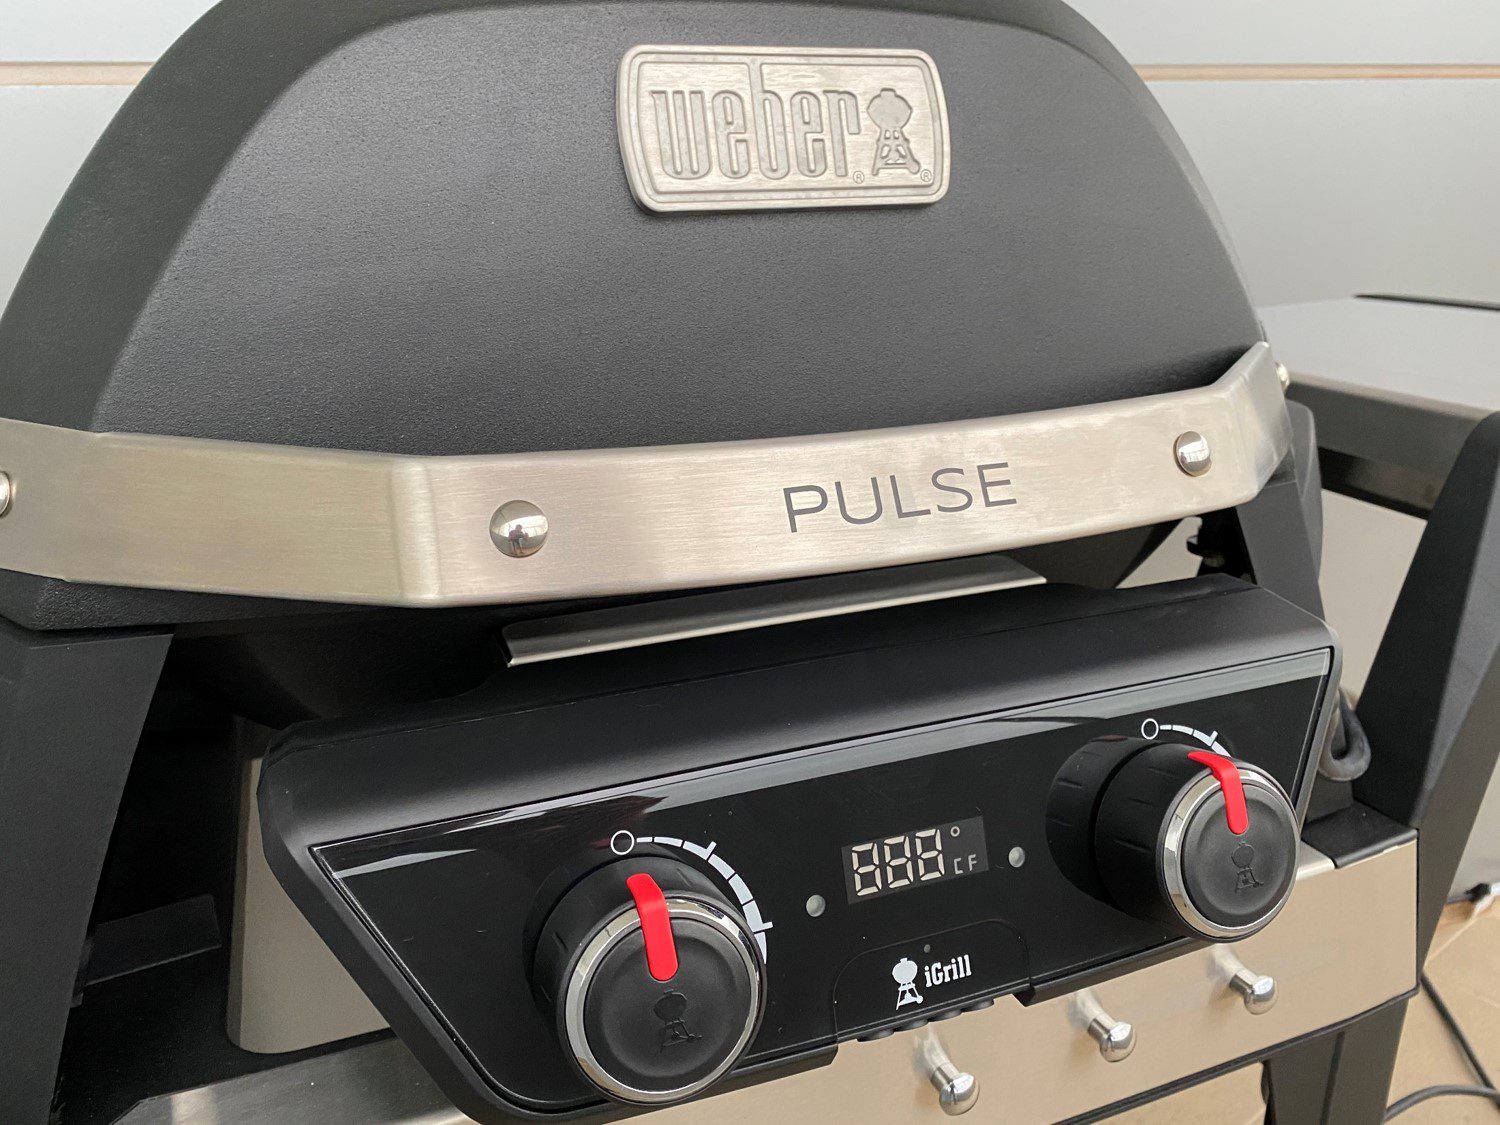
To start off, you’ll need to plug the grill in and power it up by pushing the power button on the side of the control panel. The panel beeps and then displays the internal temperature of the BBQ.
We then turned the two control dials to maximum and closed the lid to allow the grill to preheat, recommended in the Pulse manual and on all of Weber’s other BBQs we’ve used. You’ll want to preheat to at least 260°C (500°F) but we wanted to get it extra hot for steak and ensure that the meat doesn’t stick to the grill.
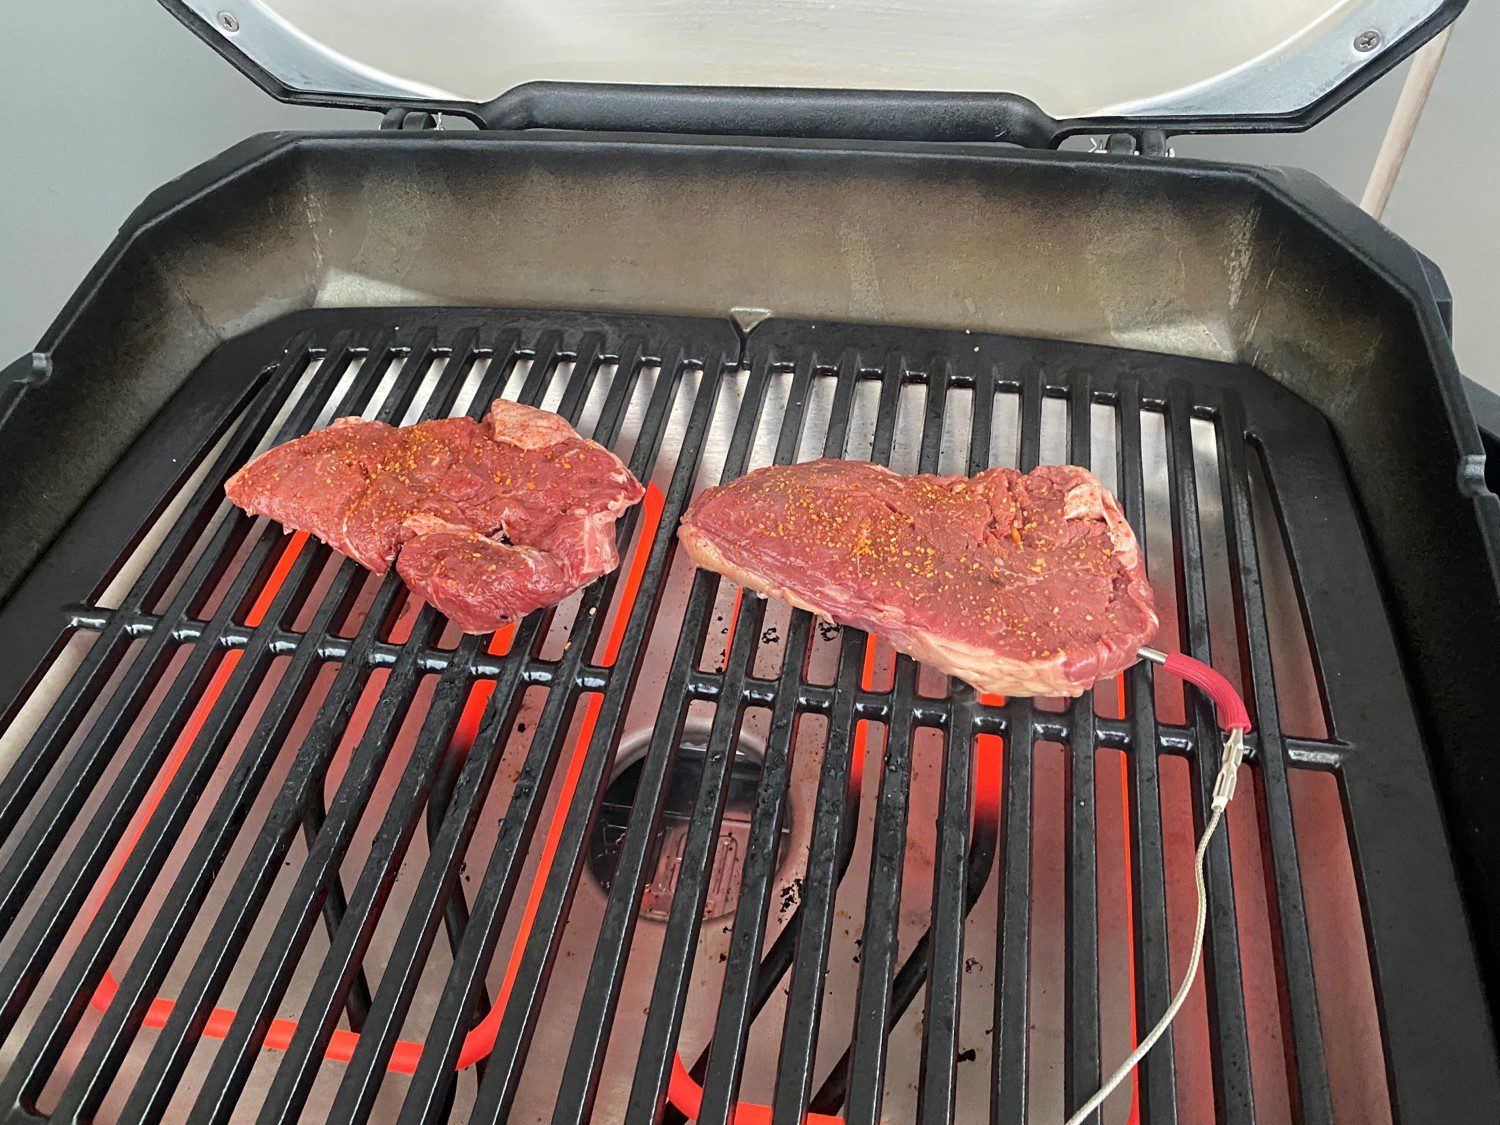
We stuck a temperature probe into one of the steaks as they were both similar sizes, thicknesses and we both like our steak done a little over rare.
Once our grill had been preheated, I placed the steaks onto the grill above the now glowing elements, lightly seasoned them and closed the lid to trap the smoke and give the meat an extra smoky flavour. Weber recommends keeping the lid closed while grilling to keep the heat in and to develop a more full-bodied flavour.
While the 2200W element is more than adequate to get your BBQ hot and steak sizzling, the temperature does drop off quite quickly if there is any wind blowing over it. Just something to keep in mind if you’ve got a full grill and you find yourself turning meat quite often.
After just under a minute, the steak was halfway to its target temperature, so I decided to flip them over.
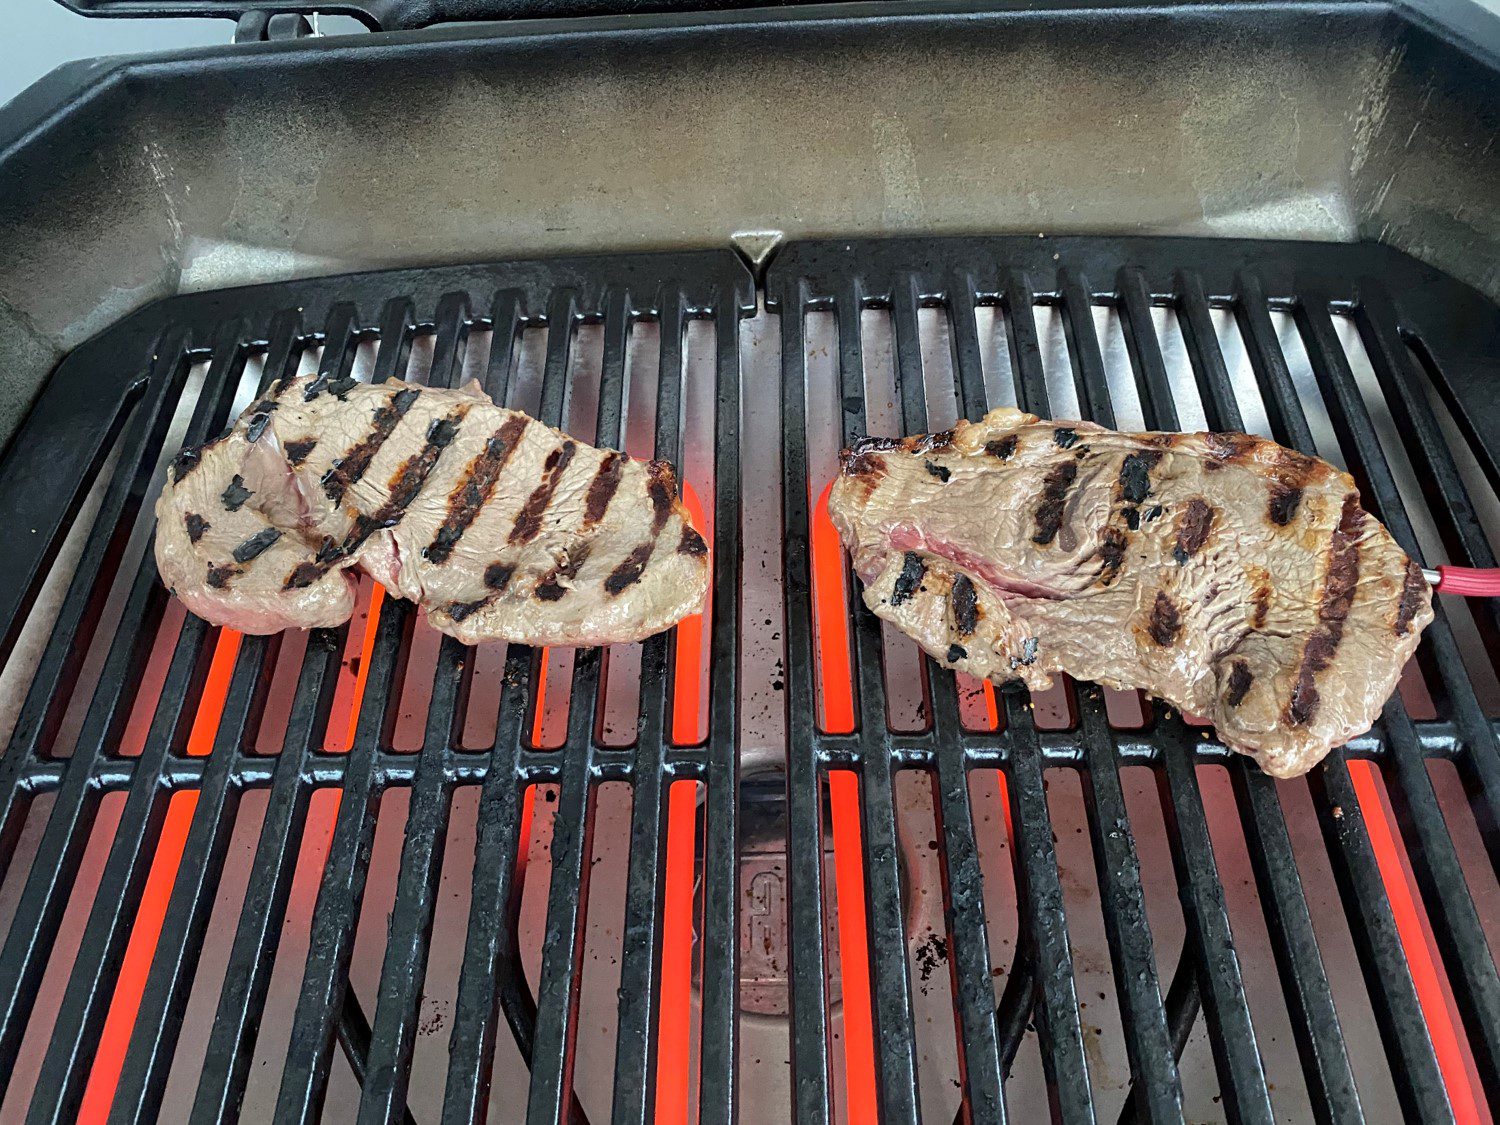
The hot cast-iron grill had left perfect caramelised grill lines on the steak and they came off the grill effortlessly, no sticking at all.
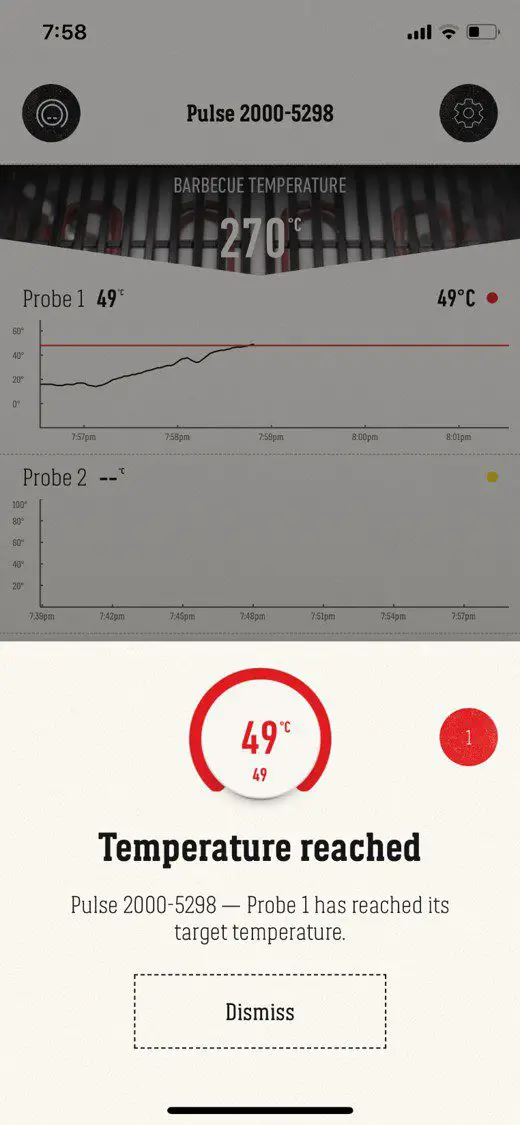
After another 30 seconds or so my phone buzzed and the Pulse’s Control Panel beeped to tell me that probe one had reach its target temperature and that my steak was done. I left them on for a couple more seconds to get them a little over rare.
You can see on the temperature graph that the temperature stabilised and even dropped off slightly when I turned the steak over.
The steaks certainly looked good off the grill, let’s see what they look like inside.
The steak was impressively well cooked, especially for its thickness. It’s quite difficult to get a really thin or really thick cut of meat cooked perfectly and this was as close to perfection as you could get and literally spent less than two minutes cooking.
The taste was also great. The smoky flavour is definitely not as fully developed as you’d get from cooking over coals but it’s definitely comparable to gas and far better than any steak I’ve had out of a pan or skillet.
Cleaning Up Afterwards
The Weber has really been well designed when it comes to cleaning. The grill is made in two halves, making it really easy to clean in a smaller apartment sink or even to put into the dishwasher. There is also a standard drip tray underneath the main body with a throw away foil tray. You’ll want to give your Pulse a wipe down with a damp cloth once it’s cool and that’s it for your everyday cleaning.
To give your Weber Pulse a deeper clean, the element is removable with a single screw, and this allows you to remove the entire aluminium heat deflector to give it a proper scrub, use some of Webers BBQ Cleaner as a proper de-greaser to make it easier to clean. The one in the lid is also removable with four screws.
The front control panel simply slides out again and can be stored inside if you don’t have a cover for your BBQ and are worried about it getting wet.
Available Accessories
As with most of Weber’s other BBQs, they have a wide range of accessories to assist you in cooking, cleaning and expanding on the versatility of your BBQ.
The most obvious ones are probably the fitted cover which protects your grill and cart from the sun and rain as well as the grilling tools and grill cleaning brush.
The Pulse 1000 comes with a single temperature probe and two inputs, the Pulse 2000 comes with two probes and four inputs, so you’ll probably want to get an extra probe or two down the line. I’d also imagine that they may eventually break. Don’t get me wrong, they are well made and the lead is fairly well protected with a breaded steel outer sheath but the weak points are always the connections between the lead and the plug or probe itself which eventually fail.
They also sell a range of cleaning products, a pizza stone to make your favourite pizza in your Pulse and a rotisserie attachment similar to the ones available for the Baby Q range.
Final Say – Should You Get One?
If you live in an apartment or a heavily regulated area then this is definitely a BBQ to consider getting. Like any Weber product, it is good quality and really well made, it’s also easy to use and clean and because there isn’t any actual fire used for cooking, it’s a really safe option as well.
The biggest reason not to get the Pulse is the price. While it is well made and will probably last for a number of years, you’ll still have to part with between $500 and $1000 to get one, depending on the model and accessories you choose to get and there are definitely some better gas and coal options for this price range.
But if you’re prohibited from using coal fires or you don’t want the hassle of carrying, storing and exchanging gas bottles then the Weber Pulse is a fantastic all electric option which yields cooking results as good as gas without any of the hassles or safety concerns.
Have you tried cooking on a Weber Pulse? Let us know in the comments section below, we’d love to hear your experiences, tips and tricks.
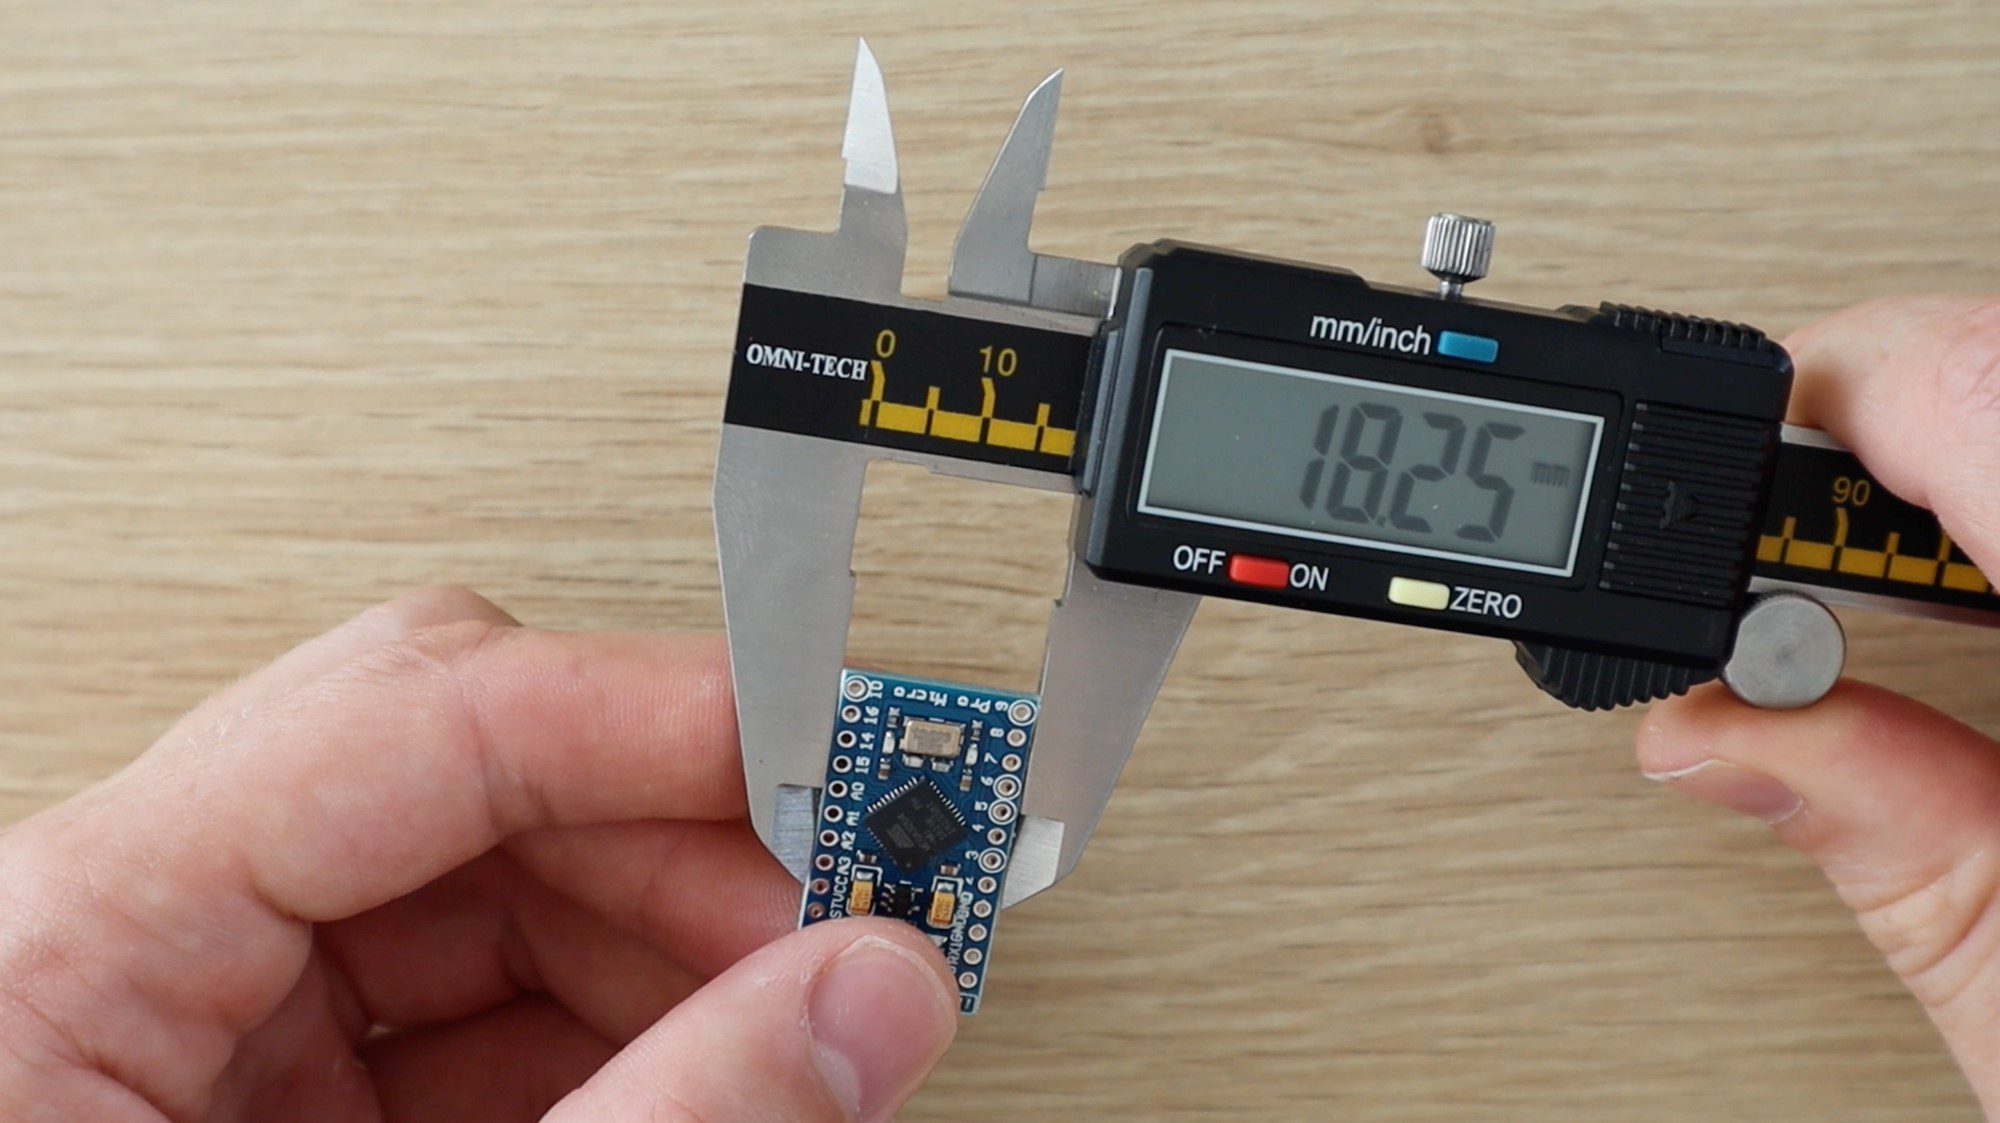
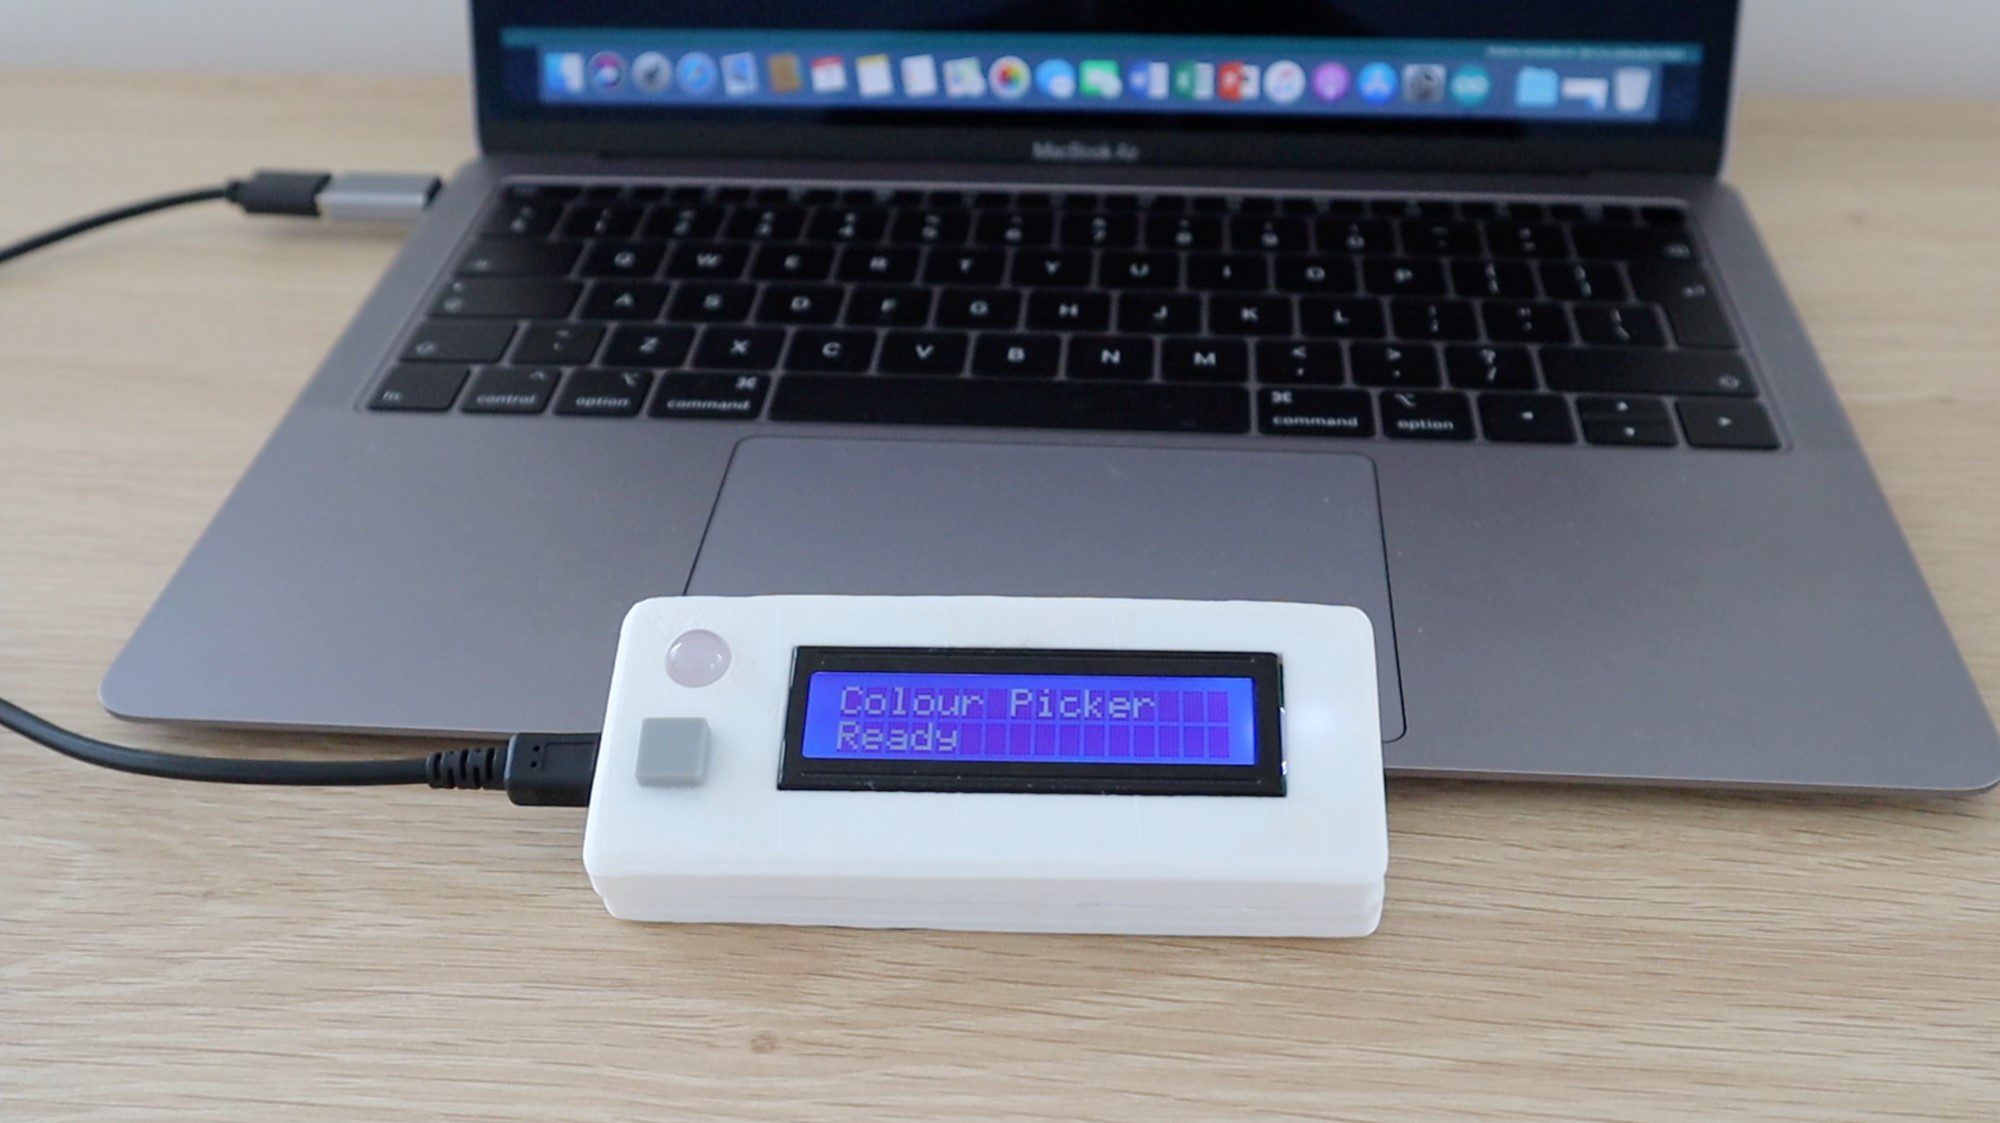
Easily pick colours from physical objects with this Arduino based RGB colour picker, enabling you to recreate the colours you see in real life objects on your pc or mobile phone. Simply push a button to scan the colour of the object and you’re given the RGB colour values as well as an indication of the measured colour on an RGB LED.
I’ve designed a simple 3D printed enclosure for the electronics to make the device portable, simply plug it into a USB port, charger or power bank to power it up.
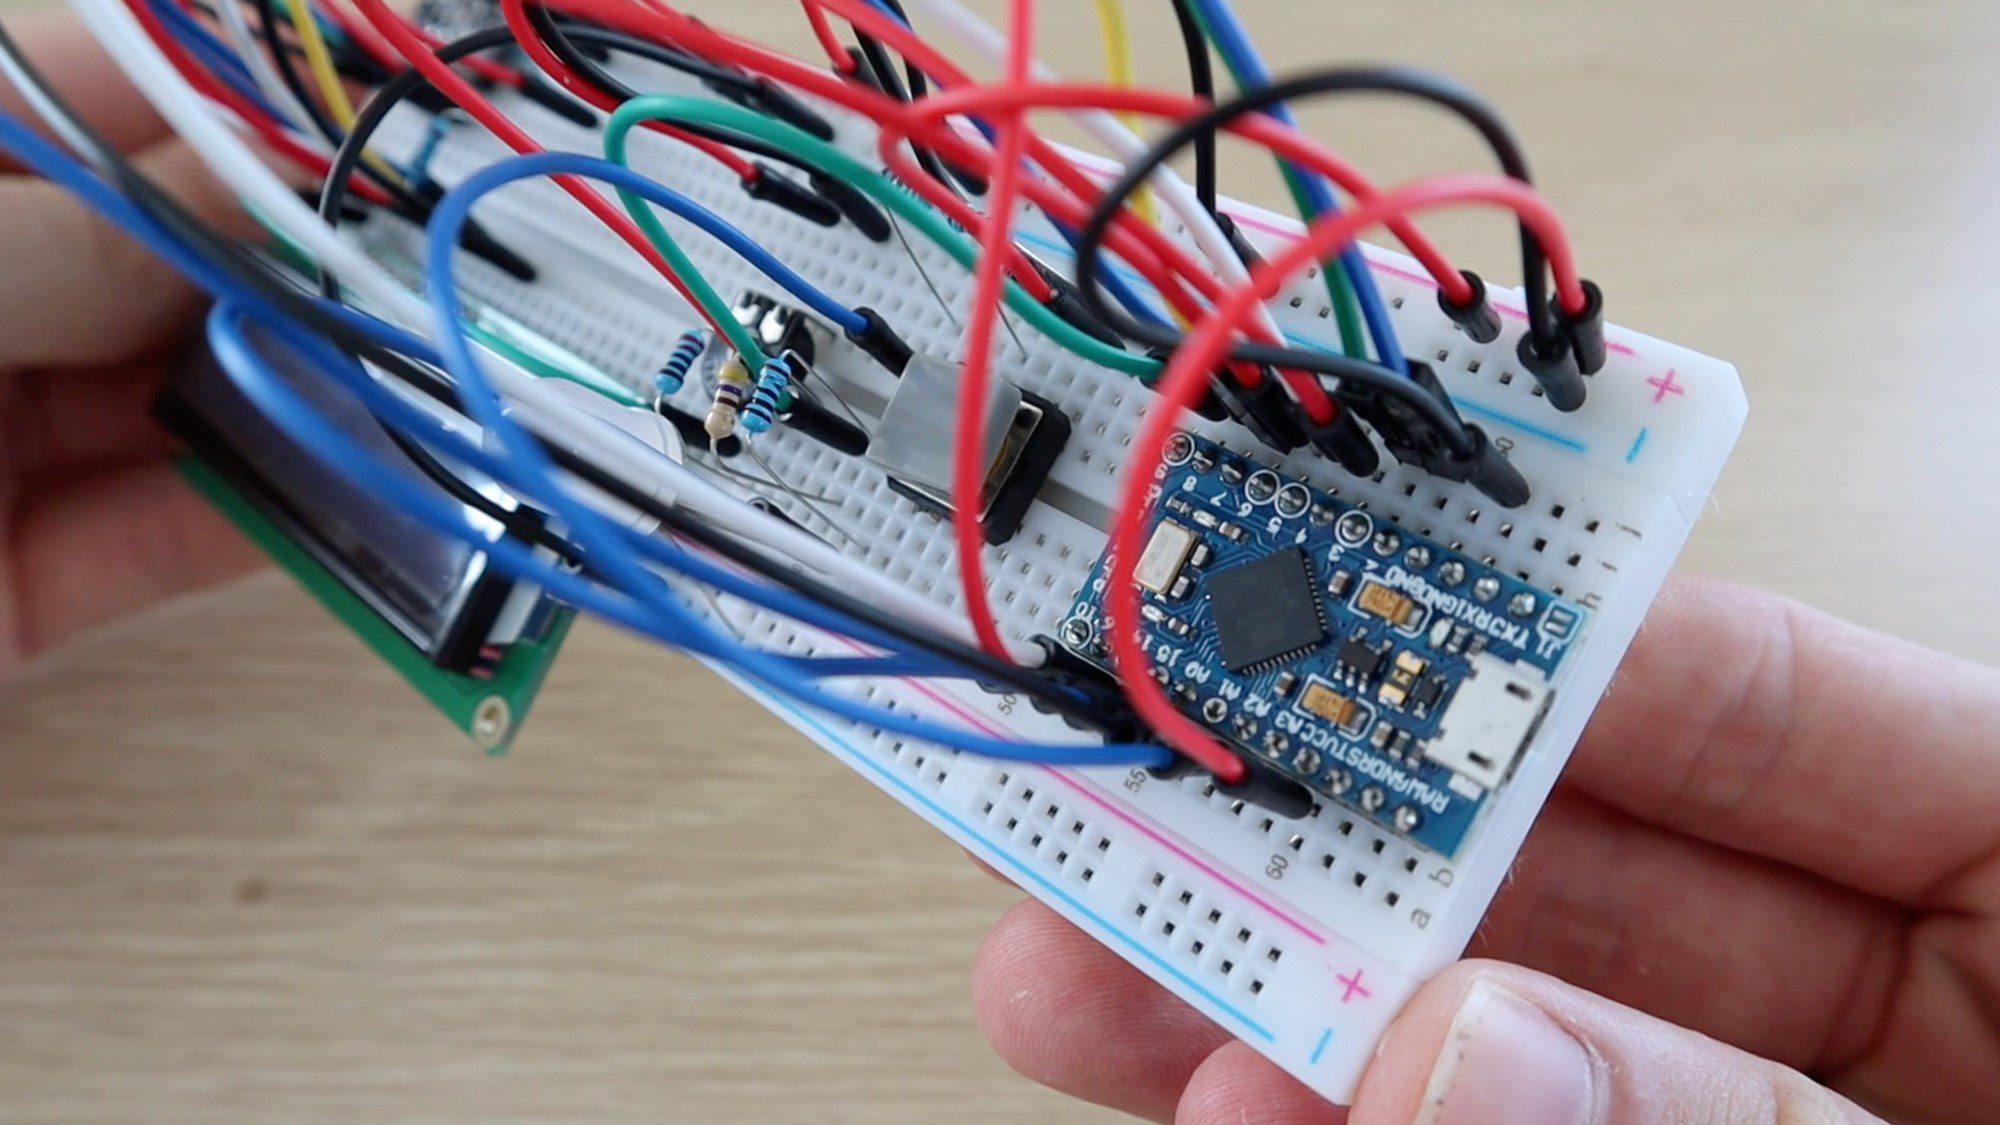
I usually try to use an Arduino Uno as this is one of the most widely used Arduino boards, but to make this device portable, it has been designed around an Arduino Pro Micro board. It can however be easily adapted to run on most of the other Arduino compatible boards with enough IO, such as the Uno, Leonardo or Mega, you’ll just need to build it into a larger enclosure.
This guide assumes that you’ve worked with an Arduino micro-controller before know the basics of programming the Arduino and connecting an LCD panel to it. If you do not, follow the linked guides for more information and in-depth explanations.
Here is a summary video of the build, otherwise read on for the full guide to make your own.
What You Need To Build Your Own Arduino RGB Colour Picker
3D Printer & White/Black Filament (Optional for Housing) – This One Used
In addition to these, you’ll need basic tools for working with electronics, including a soldering iron if you’re permanently building your circuit for use in an enclosure as well as a PC for programming your Arduino.
Connecting the RGB Colour Picker Test Circuit
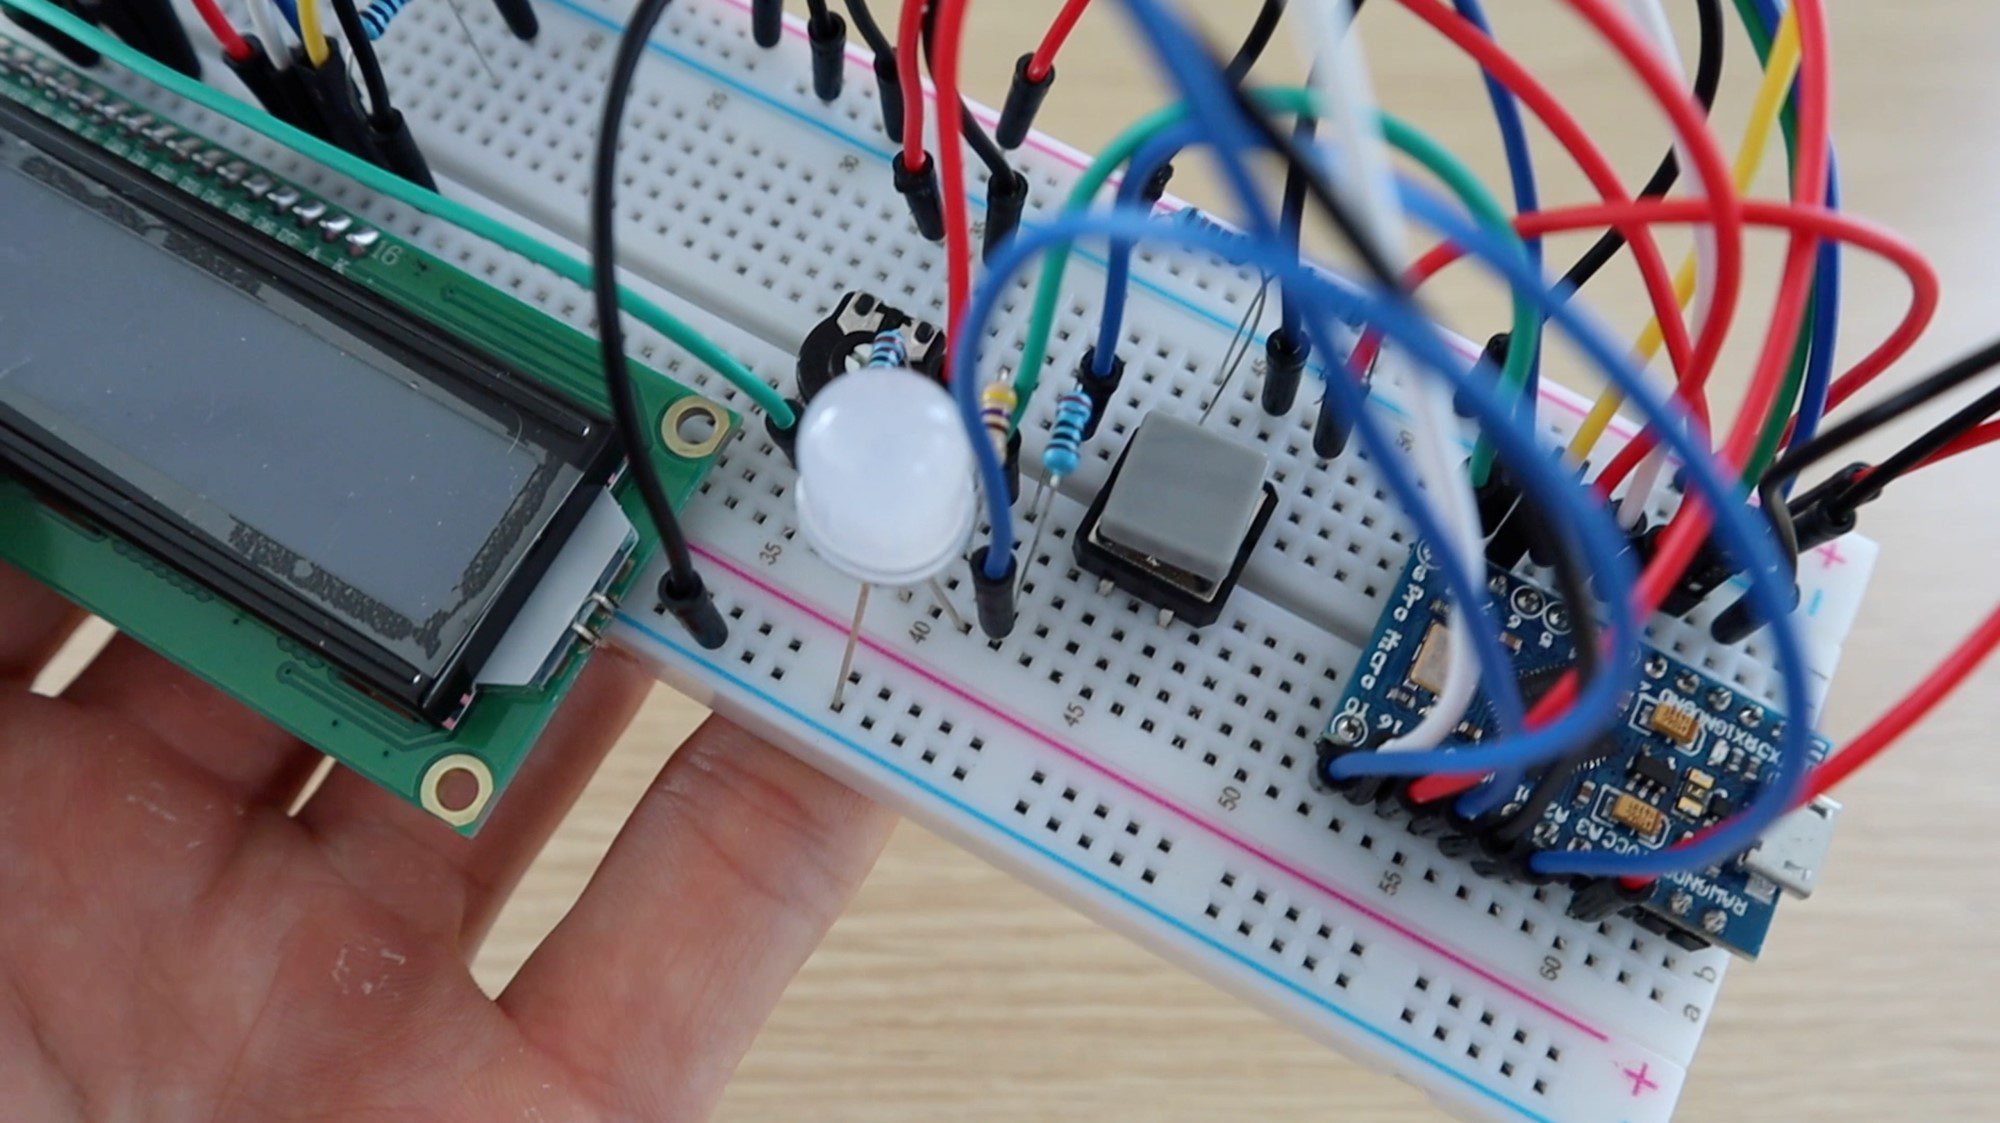
It’s always a good idea to assemble your components onto a breadboard first to test them and make sure that your circuit and software are working correctly before making any soldered connections.
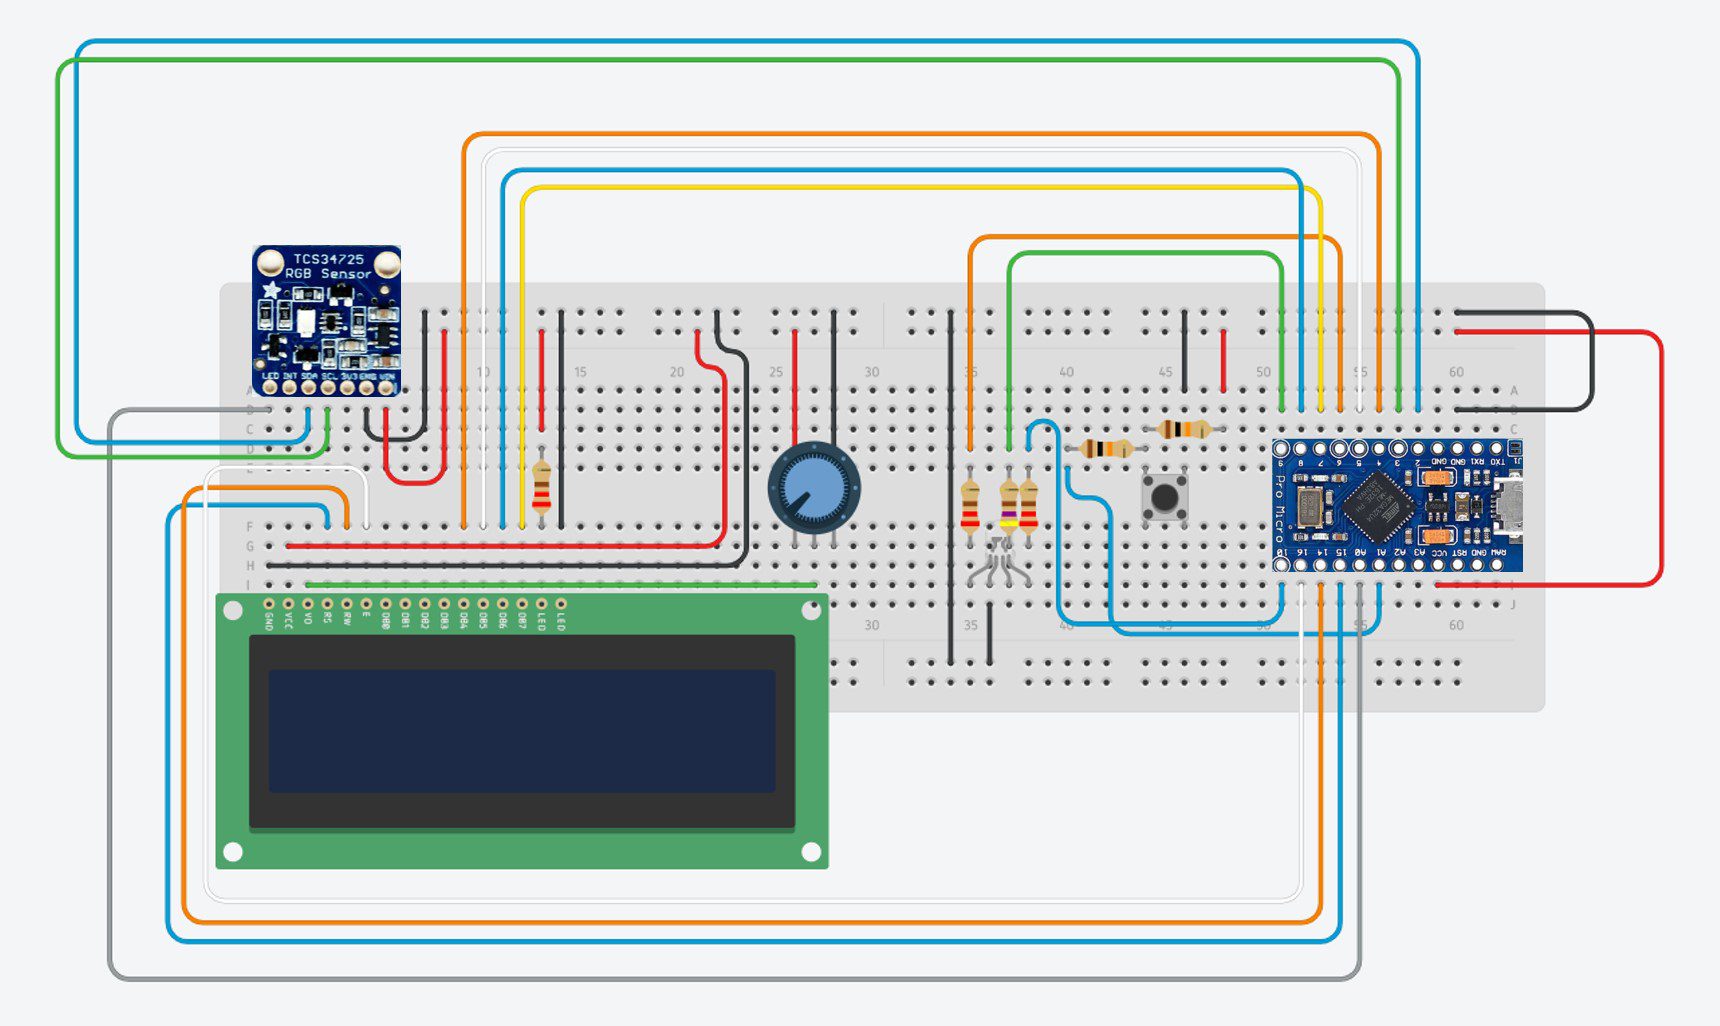
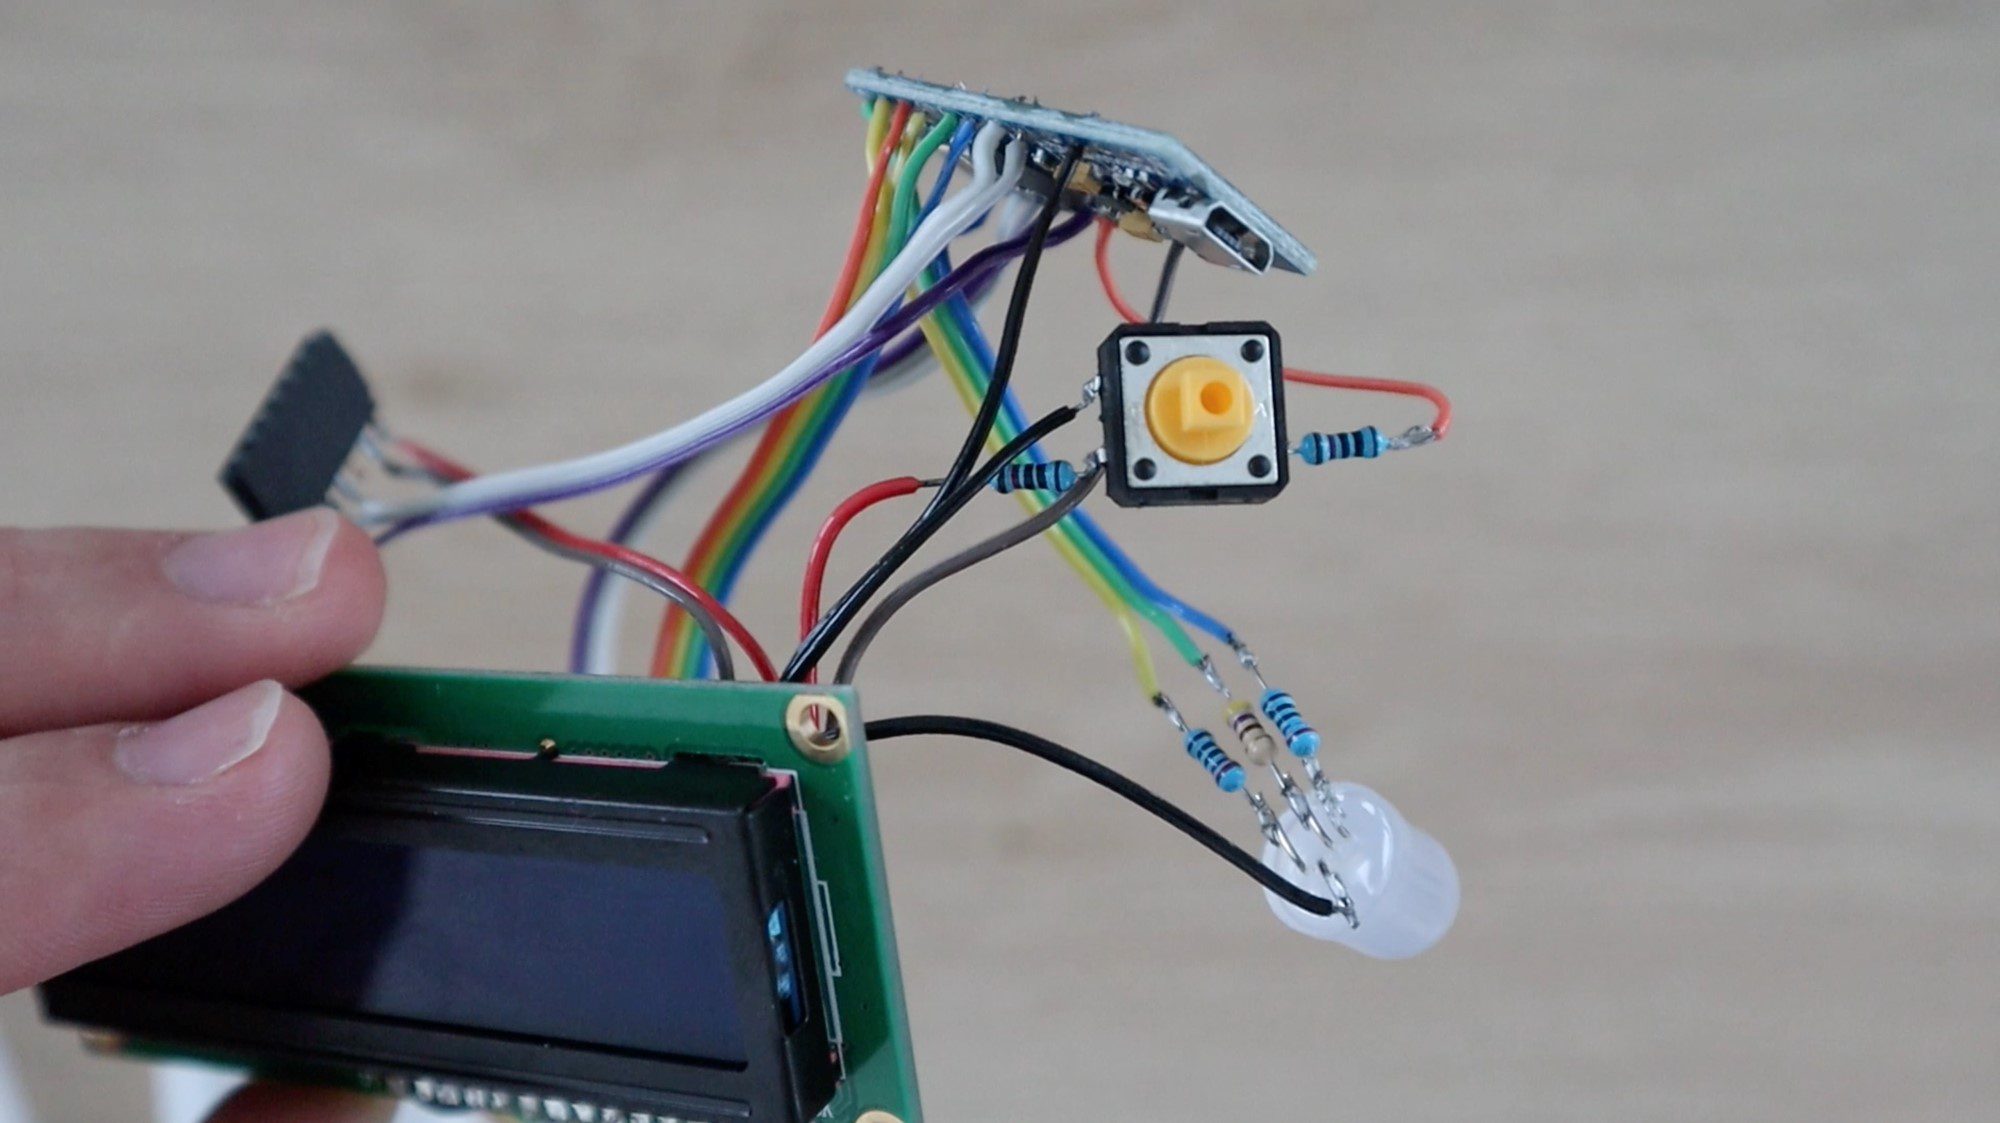
The components are connected onto the breadboard as shown below:
There is nothing particularly unique or strange in any of these connections between the components and the Arduino, they are typical basic circuit configurations for connecting the LCD, push button and LEDs to the Arduino.
The 10K resistors are used for the push button connection and the 220Ω resistors for the colour sensor LED and the red and blue legs of the RGB LED. The 470Ω resistor is used for the green leg of the LED to reduce its brightness a little to create more realistic looking colours.
The 10K potentiometer is connected to control the contrast of the LCD display, if you are not getting any characters displayed on your LCD and no errors uploading your program, first try adjusting this potentiometer. You may find that the characters are actually being displayed, they’re just too dim to see.
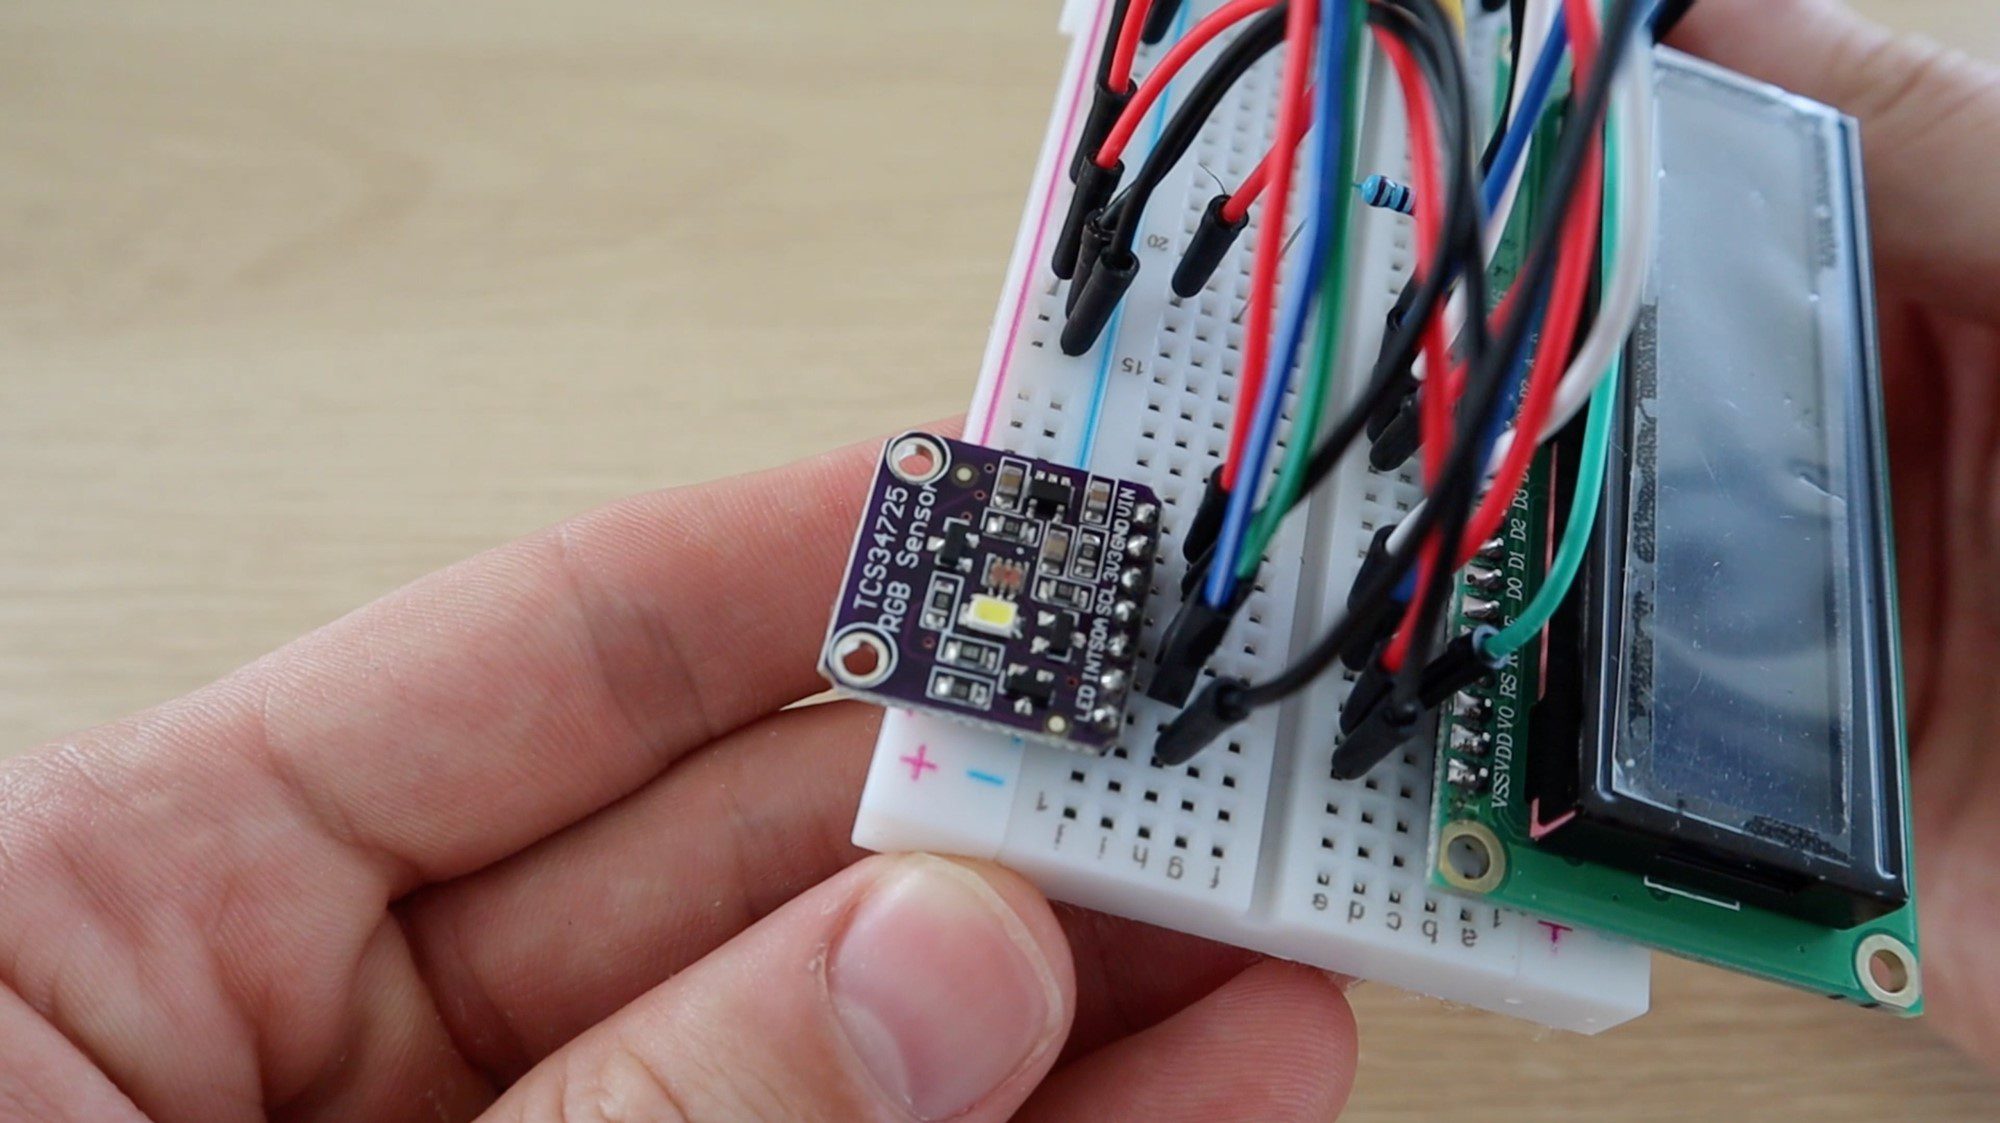
The RGB colour sensor is connected to the Arduino using a simple I2C interface. Make sure that you’re using the correct pins on your Arduino for this interface if you’re using a different board.
If you are using a different Arduino board, make sure that you have the same functionality on each pin used on the Pro Micro. For example, you need PWM enabled pins for the control of the RGB LED in order to simulate the picked RGB colour.
Here are some pictures from the assembly of the components onto the breadboard:
And the final completed breadboard:
Programming Your Arduino RGB Colour Picker
Now that you’ve assembled your components onto the breadboard and made the required interconnections, you can load the code onto your Arduino and check that the components work correctly.
Before plugging the USB cable into your Arduino, check all of your connections again to make sure that they are correct. The USB cable supplies power to the board and connected components which may damage them if not connected correctly.
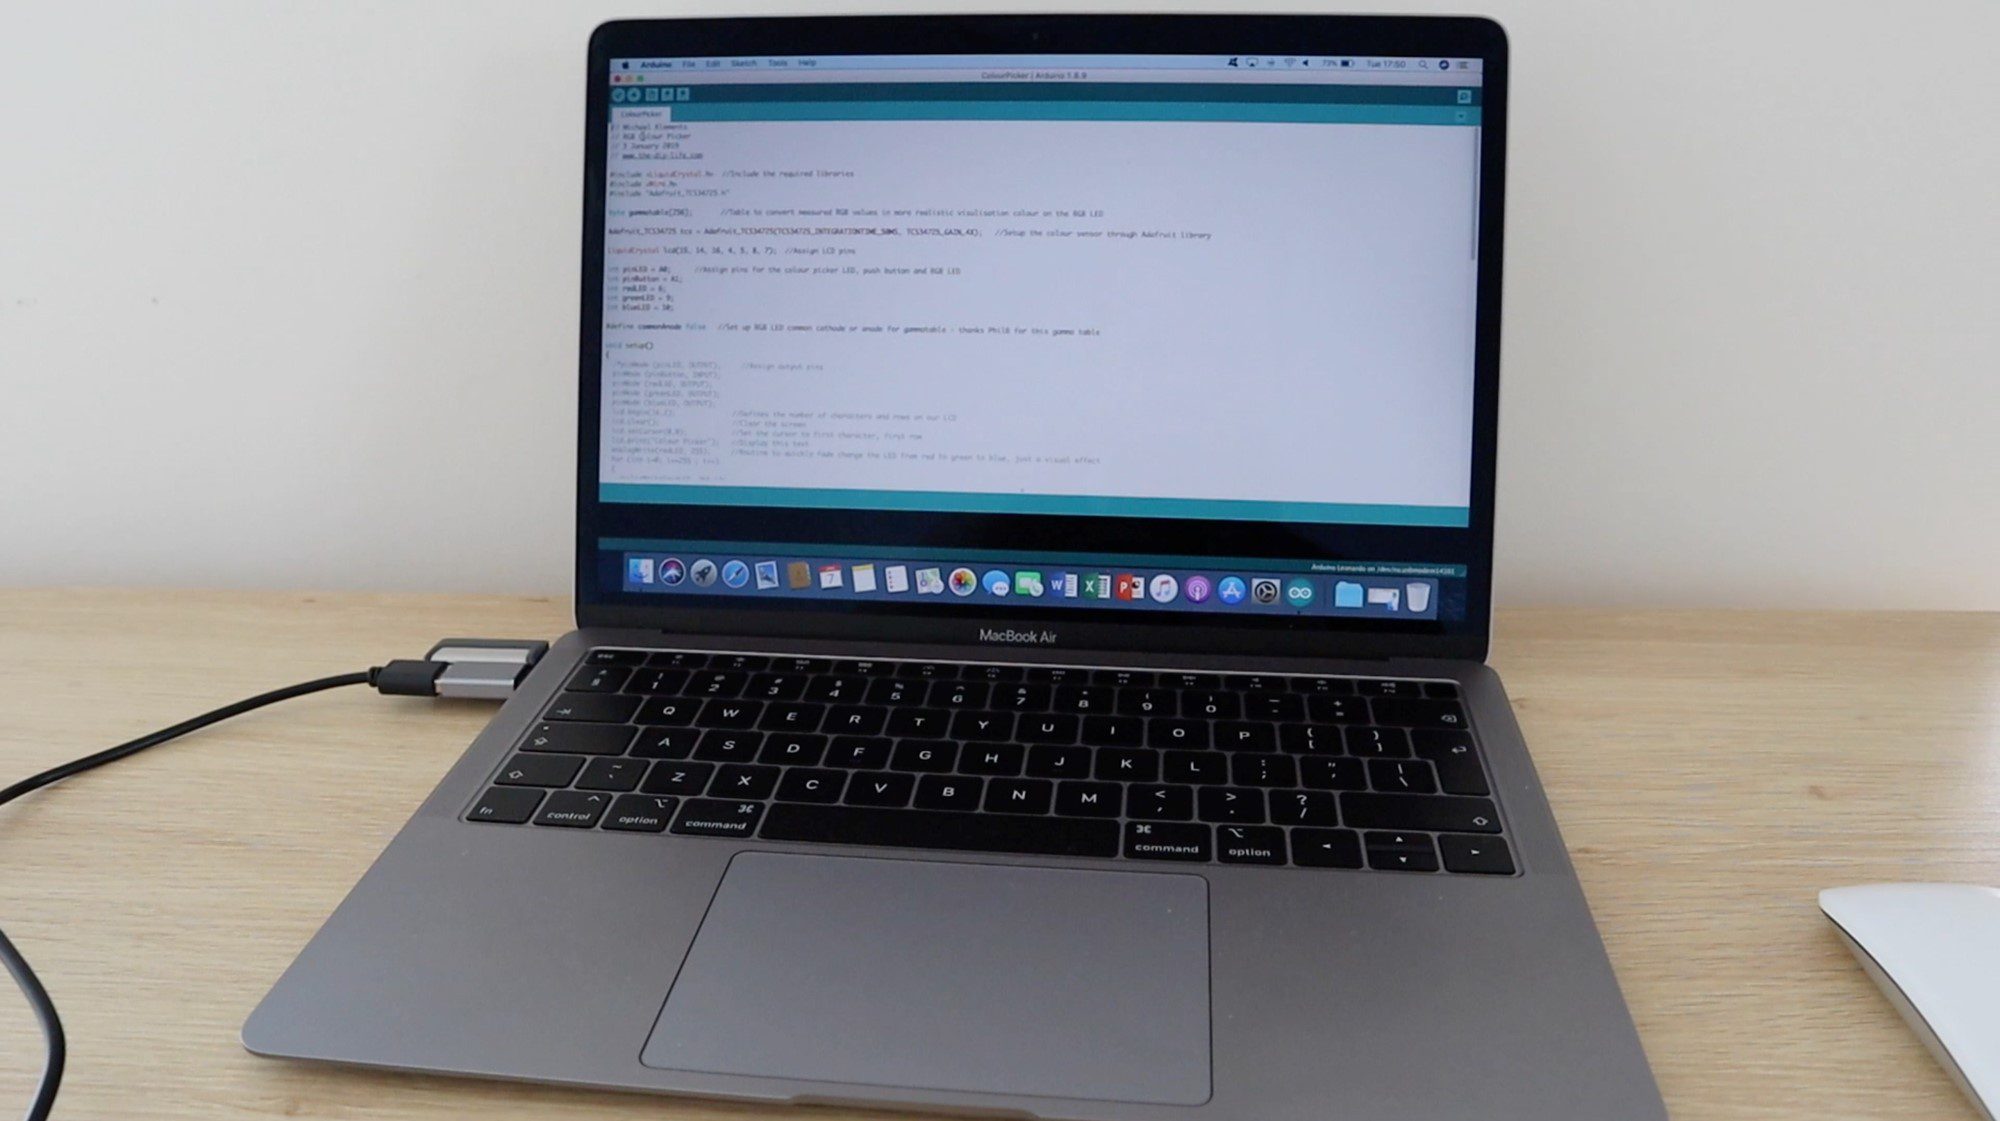
This particular board, the Arduino Pro Micro acts as a Leonardo board when connected to your PC, so make sure to select the correct board type in the Arduino IDE.
Here is the code:
// Michael Klements
// RGB Colour Picker
// 3 January 2019
// www.the-diy-life.com

#include <LiquidCrystal.h>  //Include the required libraries
#include <Wire.h>
#include "Adafruit_TCS34725.h"

byte gammatable[256];       //Table to convert measured RGB values in more realistic visulisation colour on the RGB LED

Adafruit_TCS34725 tcs = Adafruit_TCS34725(TCS34725_INTEGRATIONTIME_50MS, TCS34725_GAIN_4X);   //Setup the colour sensor through Adafruit library

LiquidCrystal lcd(15, 14, 16, 4, 5, 8, 7);  //Assign LCD pins

int pinLED = A0;      //Assign pins for the colour picker LED, push button and RGB LED
int pinButton = A1;
int redLED = 6;
int greenLED = 9;
int blueLED = 10;

#define commonAnode false   //Set up RGB LED common cathode or anode for gammatable - thanks PhilB for this gamma table

void setup()
{
  pinMode (pinLED, OUTPUT);     //Assign output pins
  pinMode (pinButton, INPUT);
  pinMode (redLED, OUTPUT);
  pinMode (greenLED, OUTPUT);
  pinMode (blueLED, OUTPUT);
  lcd.begin(16,2);              //Defines the number of characters and rows on our LCD
  lcd.clear();                  //Clear the screen
  lcd.setCursor(0,0);           //Set the cursor to first character, first row
  lcd.print("Colour Picker");   //Display this text
  analogWrite(redLED, 255);     //Routine to quickly fade change the LED from red to green to blue, just a visual effect
  for (int i=0; i<=255 ; i++)
  {
    analogWrite(redLED, 255-i);
    analogWrite(greenLED, i);
    delay(3);
  }
  for (int i=0; i<=255 ; i++)
  {
    analogWrite(greenLED, 255-i);
    analogWrite(blueLED, i);
    delay(3);
  }
  analogWrite(blueLED, 0);
  lcd.setCursor(0,1);
  if (tcs.begin())          //Connect to the colour sensor
  {
    lcd.print("Ready");
  }
  else
  {
    lcd.print("Sensor Error");
    while (1);
  }
  digitalWrite(pinLED, LOW);  //Turn off the sensor's white LED
  for (int i=0; i<256; i++) //Set up the gamma table for RGB conversion
  {
    float x = i;
    x /= 255;
    x = pow(x, 2.5);
    x *= 255;
    if (commonAnode)
    {
      gammatable[i] = 255 - x;
    }
    else
    {
      gammatable[i] = x;
    }
  }
}

void loop()
{
  if (digitalRead(pinButton) == LOW)  //If the button is pressed
  {
    float red, green, blue;       //Create variables for the measured RGB values
    digitalWrite(pinLED, HIGH);   //Turn the sensor LED on for measurement
    delay(500);                   //Delay to allow any movement from the button press to stop
    tcs.setInterrupt(false);      //Start measurement
    delay(60);                    //Takes 50ms to read
    tcs.getRGB(&red, &green, &blue);  //Get the required RGB values
    tcs.setInterrupt(true);
    delay(500);                   //This delay and delay at end just allow time for the button to be released, avoids repeated readings
    digitalWrite(pinLED, LOW);    //Turn off the sensor LED
    lcd.clear();                  //Clear the LCD display
    lcd.print("Colour Picked");   //Display the results
    lcd.setCursor(0,1);
    lcd.print("R:");
    lcd.print(int(red));
    lcd.print(" G:");
    lcd.print(int(green));
    lcd.print(" B:");
    lcd.print(int(blue));
    analogWrite(redLED, gammatable[(int)red]);      //Set the RGB LED to reflect the measured colour with gammatable conversion
    analogWrite(greenLED, gammatable[(int)green]);
    analogWrite(blueLED, gammatable[(int)blue]);
    delay(500);
  }
}
The code contains comments to guide you through each line and what its purpose is. The colour identification and LED portion is based on the Adafruit colorview example code.
You will need to have the Adafruit libraries installed. This is easily done by clicking on Tools -> Manage Libraries in your IDE and then typing in “Adafruit TCS” in the search bar and installing the found library.
Some things to look out for in the code:
The LCD assigned pins are in a weird order (15 ,14 ,16 ,4 ,5 ,8 ,7). I usually try and keep the pins sequential but in this example they’re a bit mixed up for two reasons, one because I needed to work around the available PWM pins for the LED and the second because the pins on the Pro Micro are not all in sequential order.
The colour sensor LED (pinLED) and push-button (pinButton) are connected to the Pro Micro’s analogue inputs, being used as digital IO, as there were not enough digital IO pins available.
There is a brief routine to fade the LED between red, green and blue when starting up. This is just a visual effect and can be removed if you’d like your colour picker to start up quicker. It takes about 1.5 seconds to run through.
The program won’t progress past the setup if it does not establish a connection with the colour sensor, this will show up as “Sensor Error” on your LCD. If the LED is coming on, indicating power to the sensor then check your SDA and SCL connections.
The gamma table simply converts the measured RGB values from the sensor into values which will result in a more realistic LED representation of the actual colour, this is just to improve the LED visualisation effect and doesn’t have an affect on the measured RGB values displayed.
The code then waits for the push-button input to take a reading from then sensor and display the values on the LCD and through the LED. The three delays in the loop if statement are simply to allow and movement from pushing the button to stop and then to avoid taking repeated readings before the button is released again as the actual reading and cycle time would be about 100ms. You can adjust these values for faster colour picking.
Installing the Components into the Housing
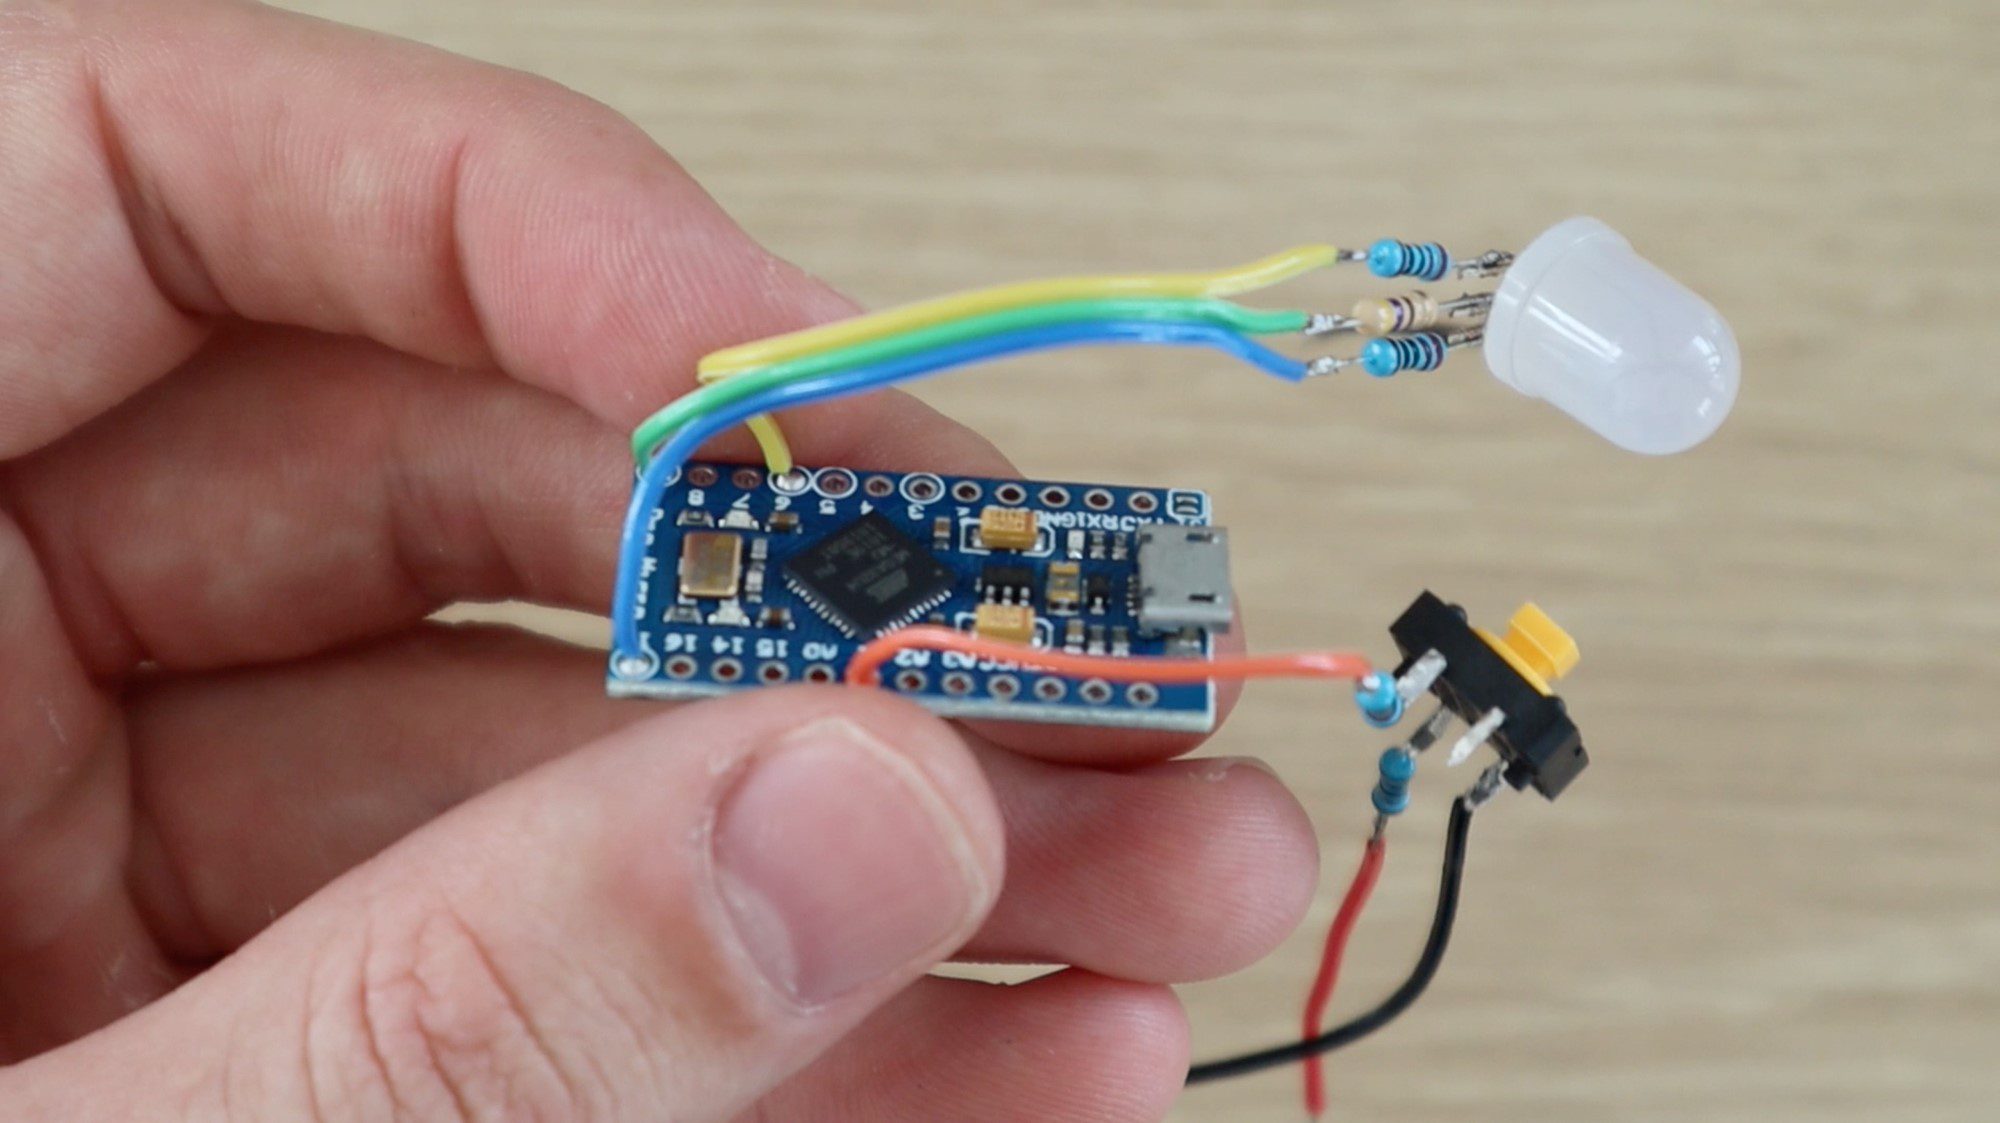
In order to make a useful and portable device, I decided to solder the components together and mount them into a housing.
A circuit of this complexity should probably be designed onto a PCB to make it easier to handle and more robust inside the enclosure, but most people don’t have access to PCB manufacturing services so I’ve stuck with soldering the components together with sections of ribbon cable.
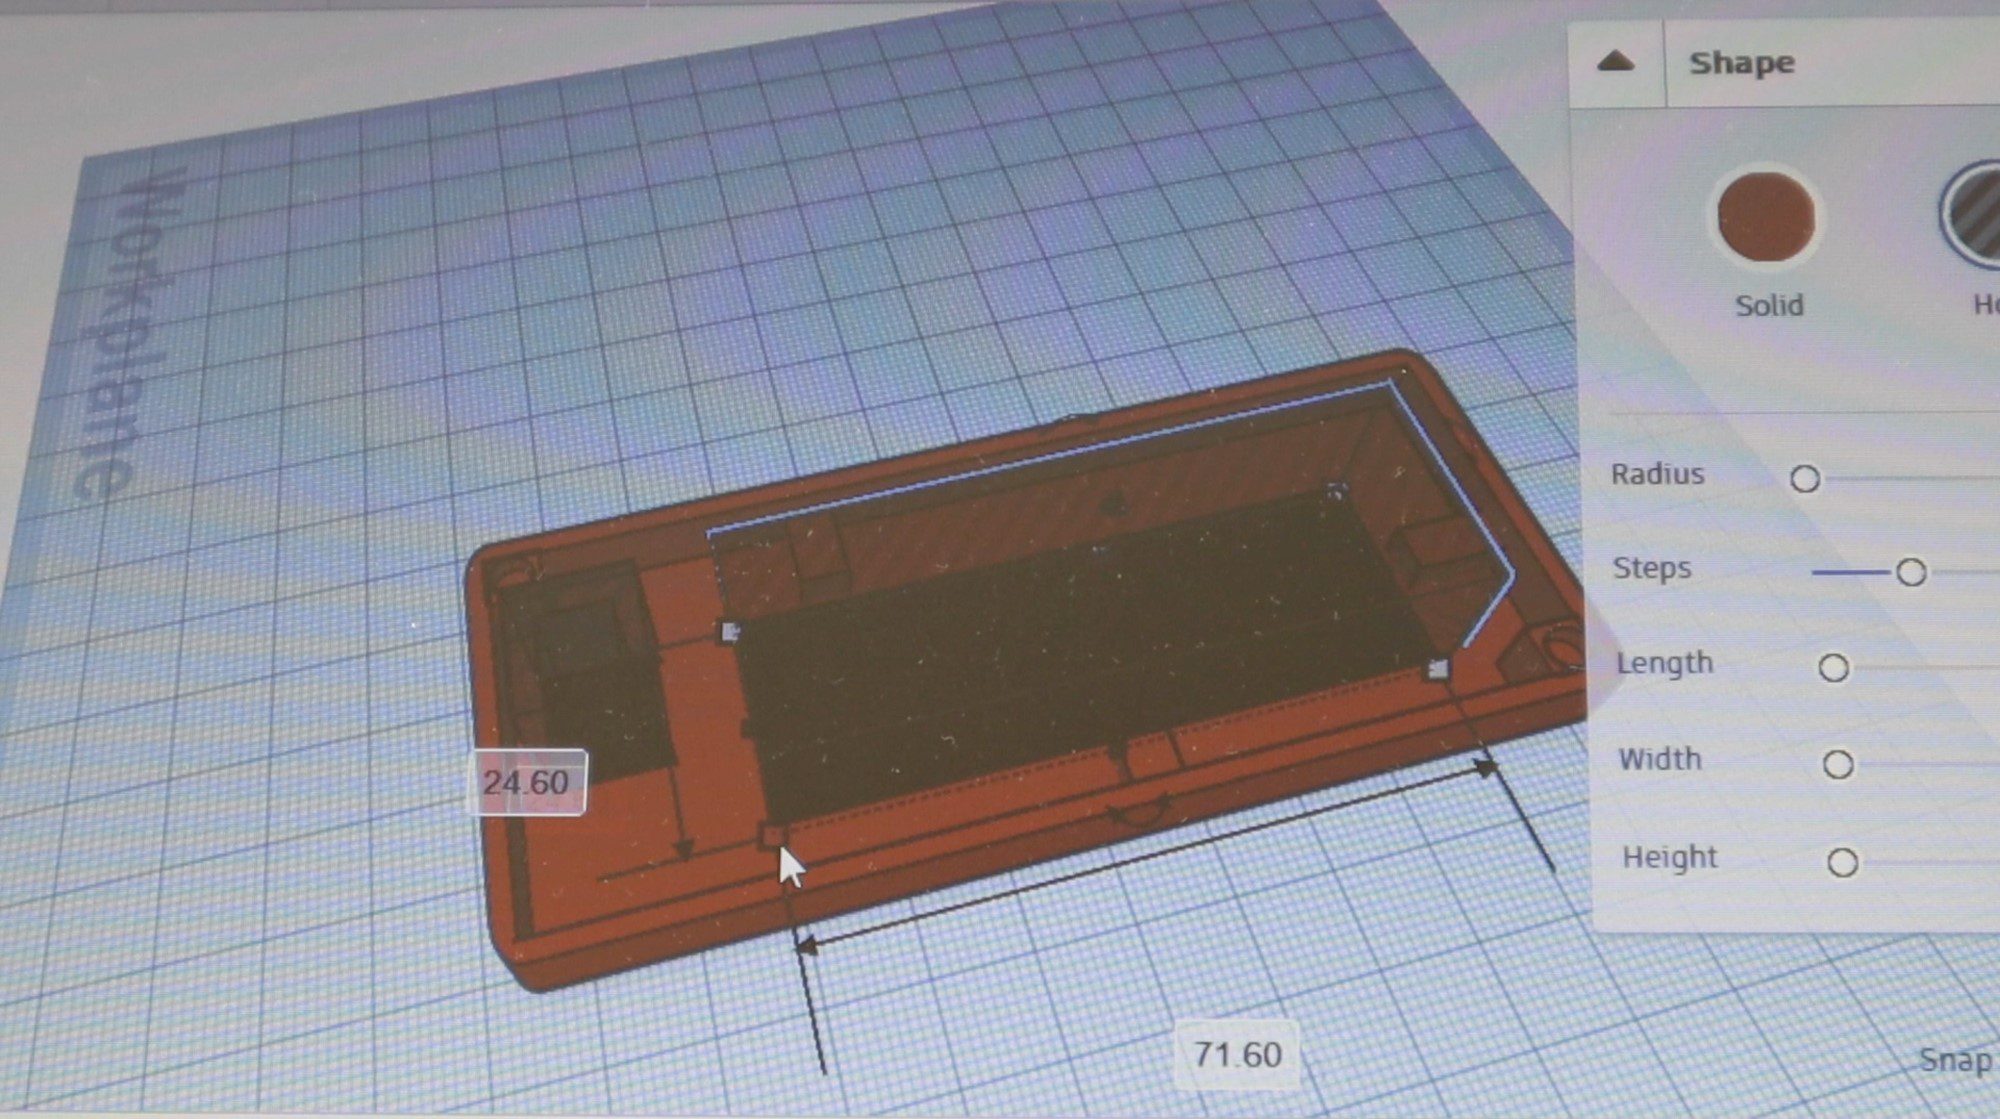
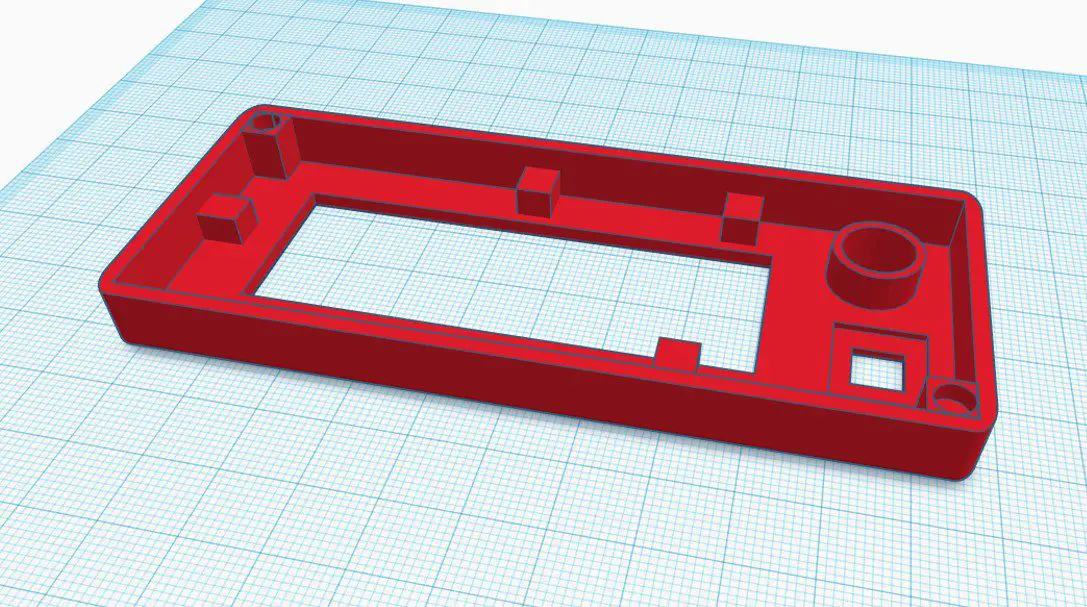
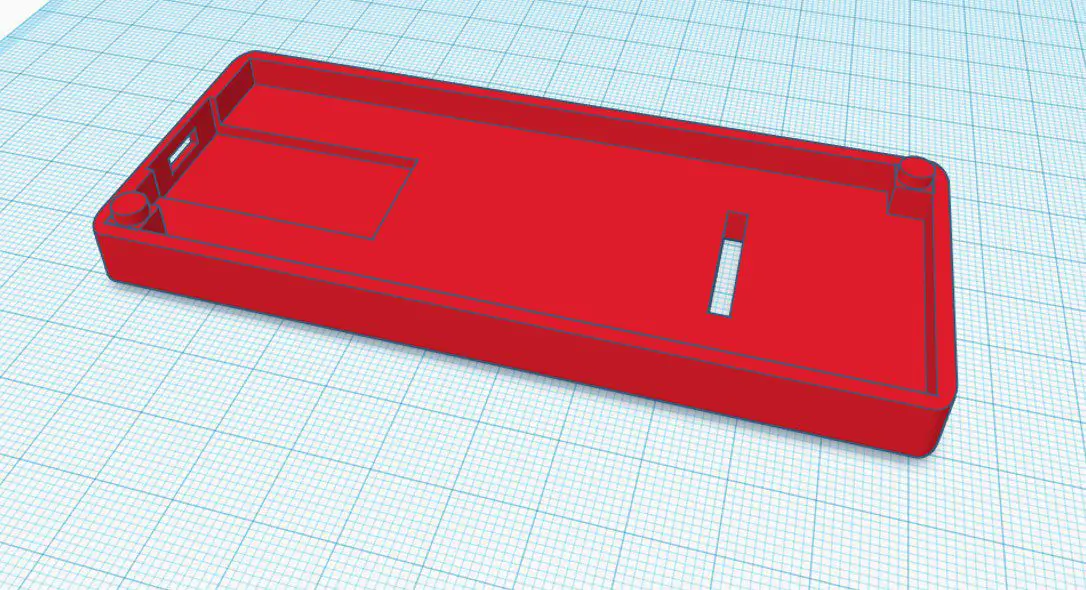
3D Print the Housing
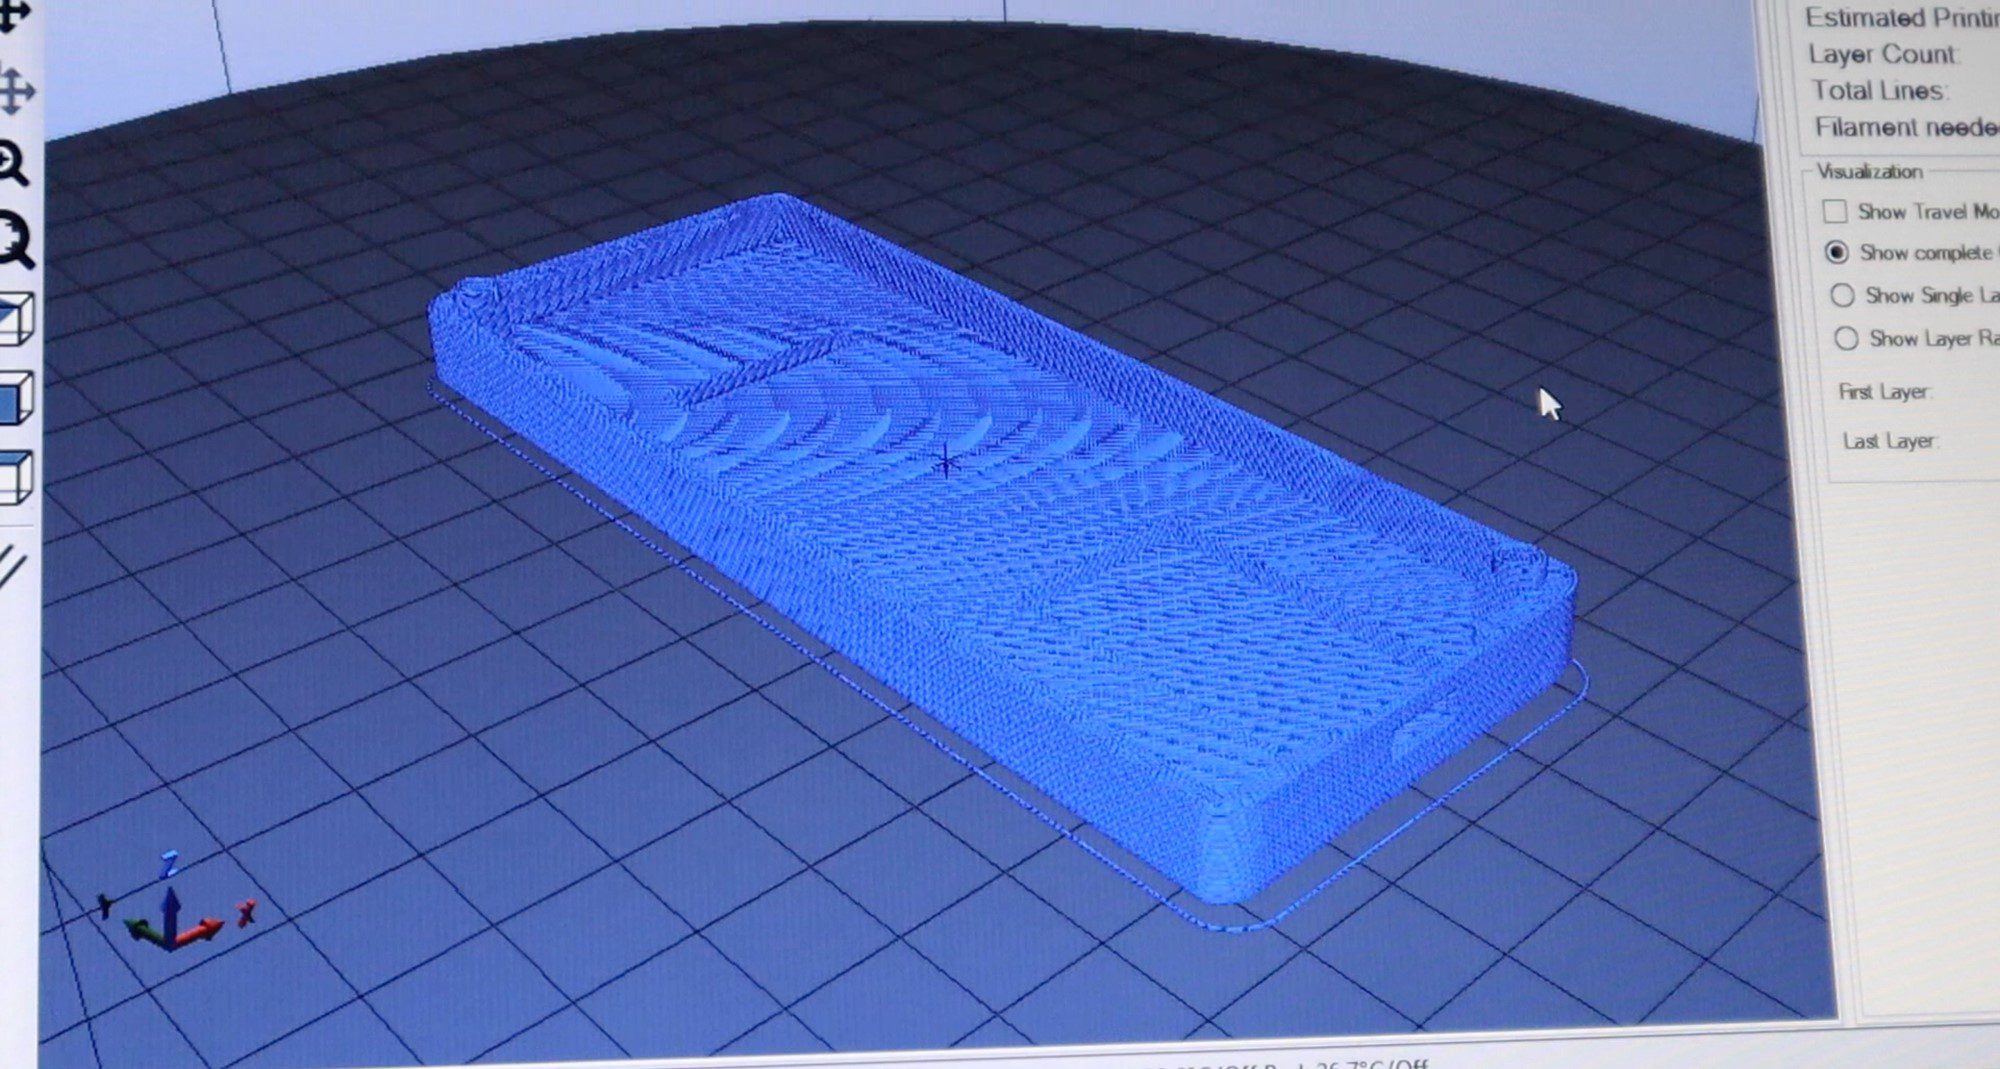
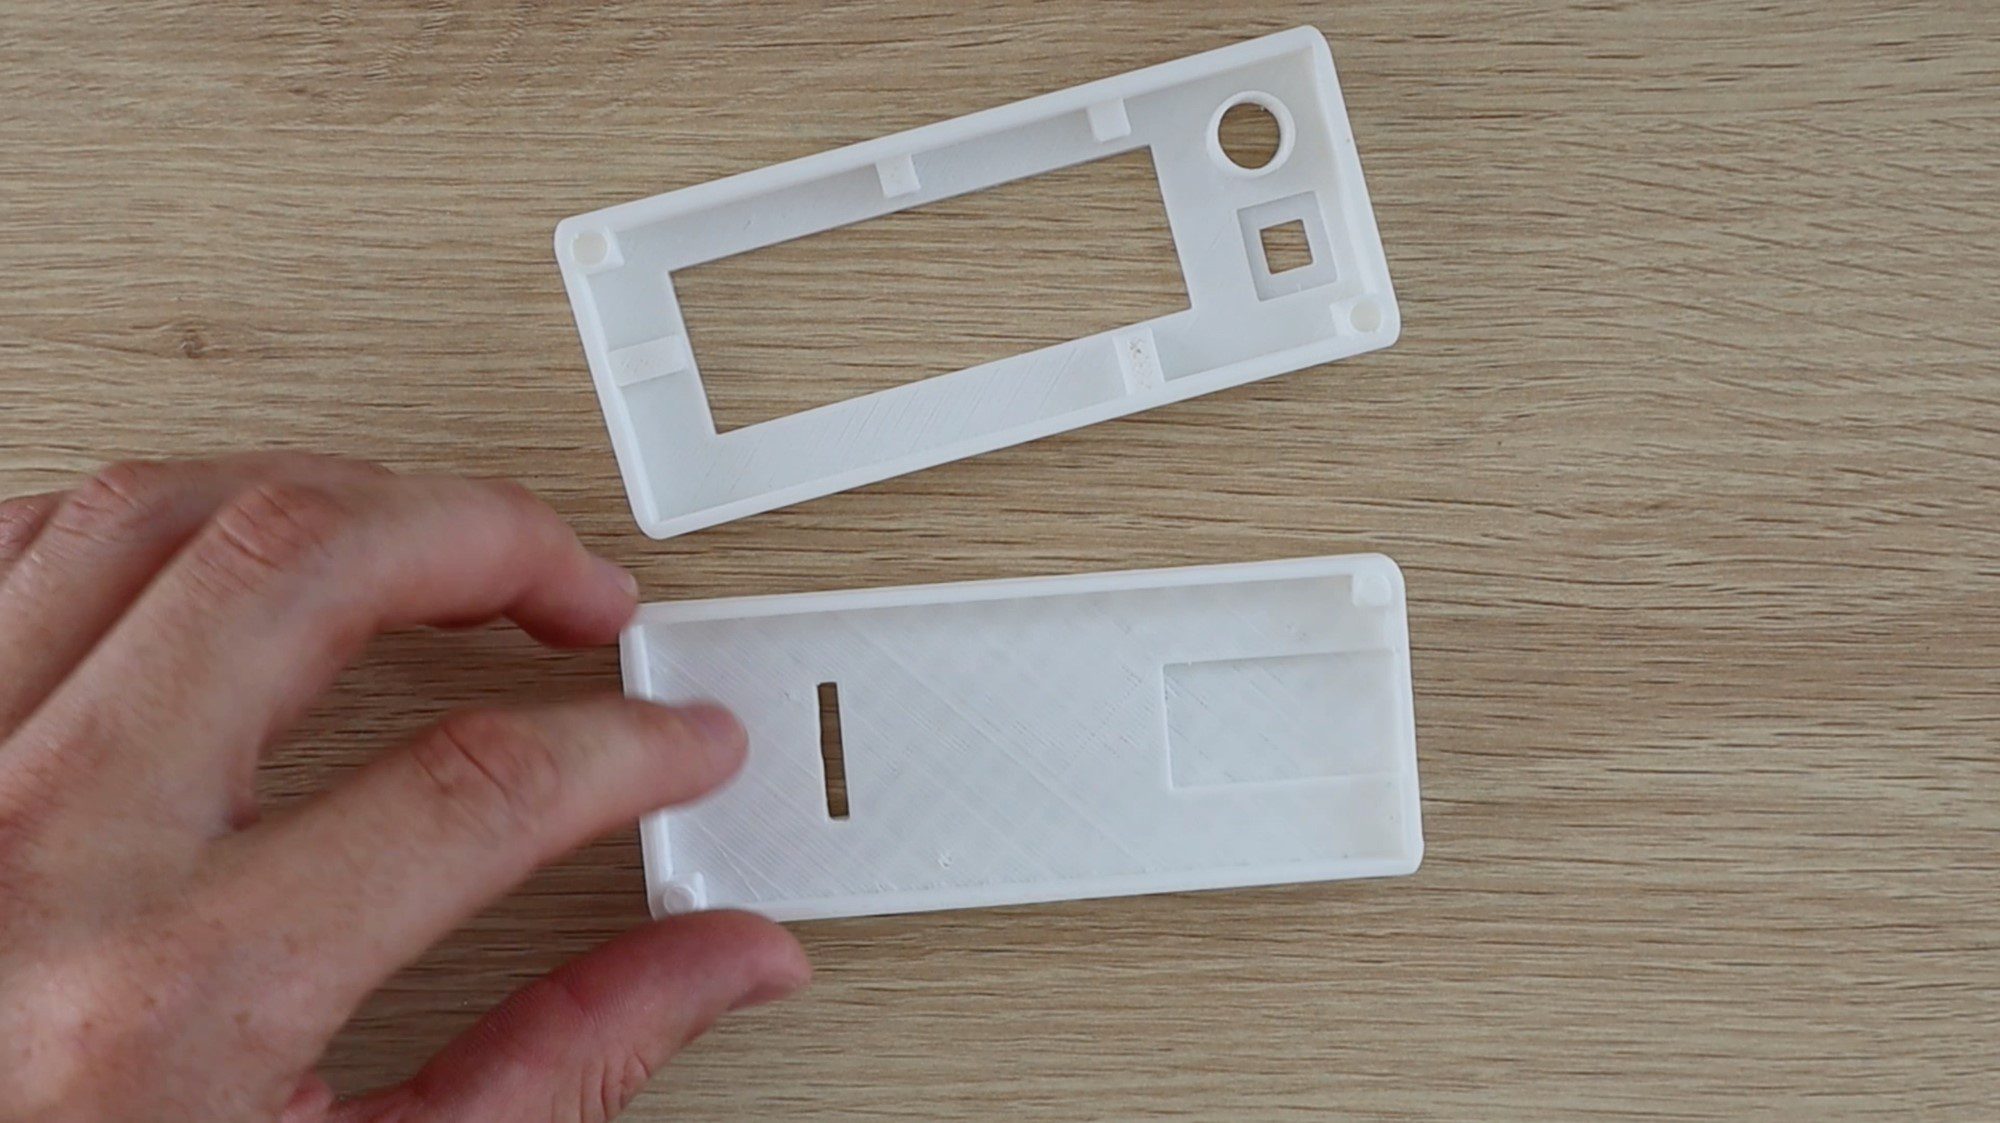
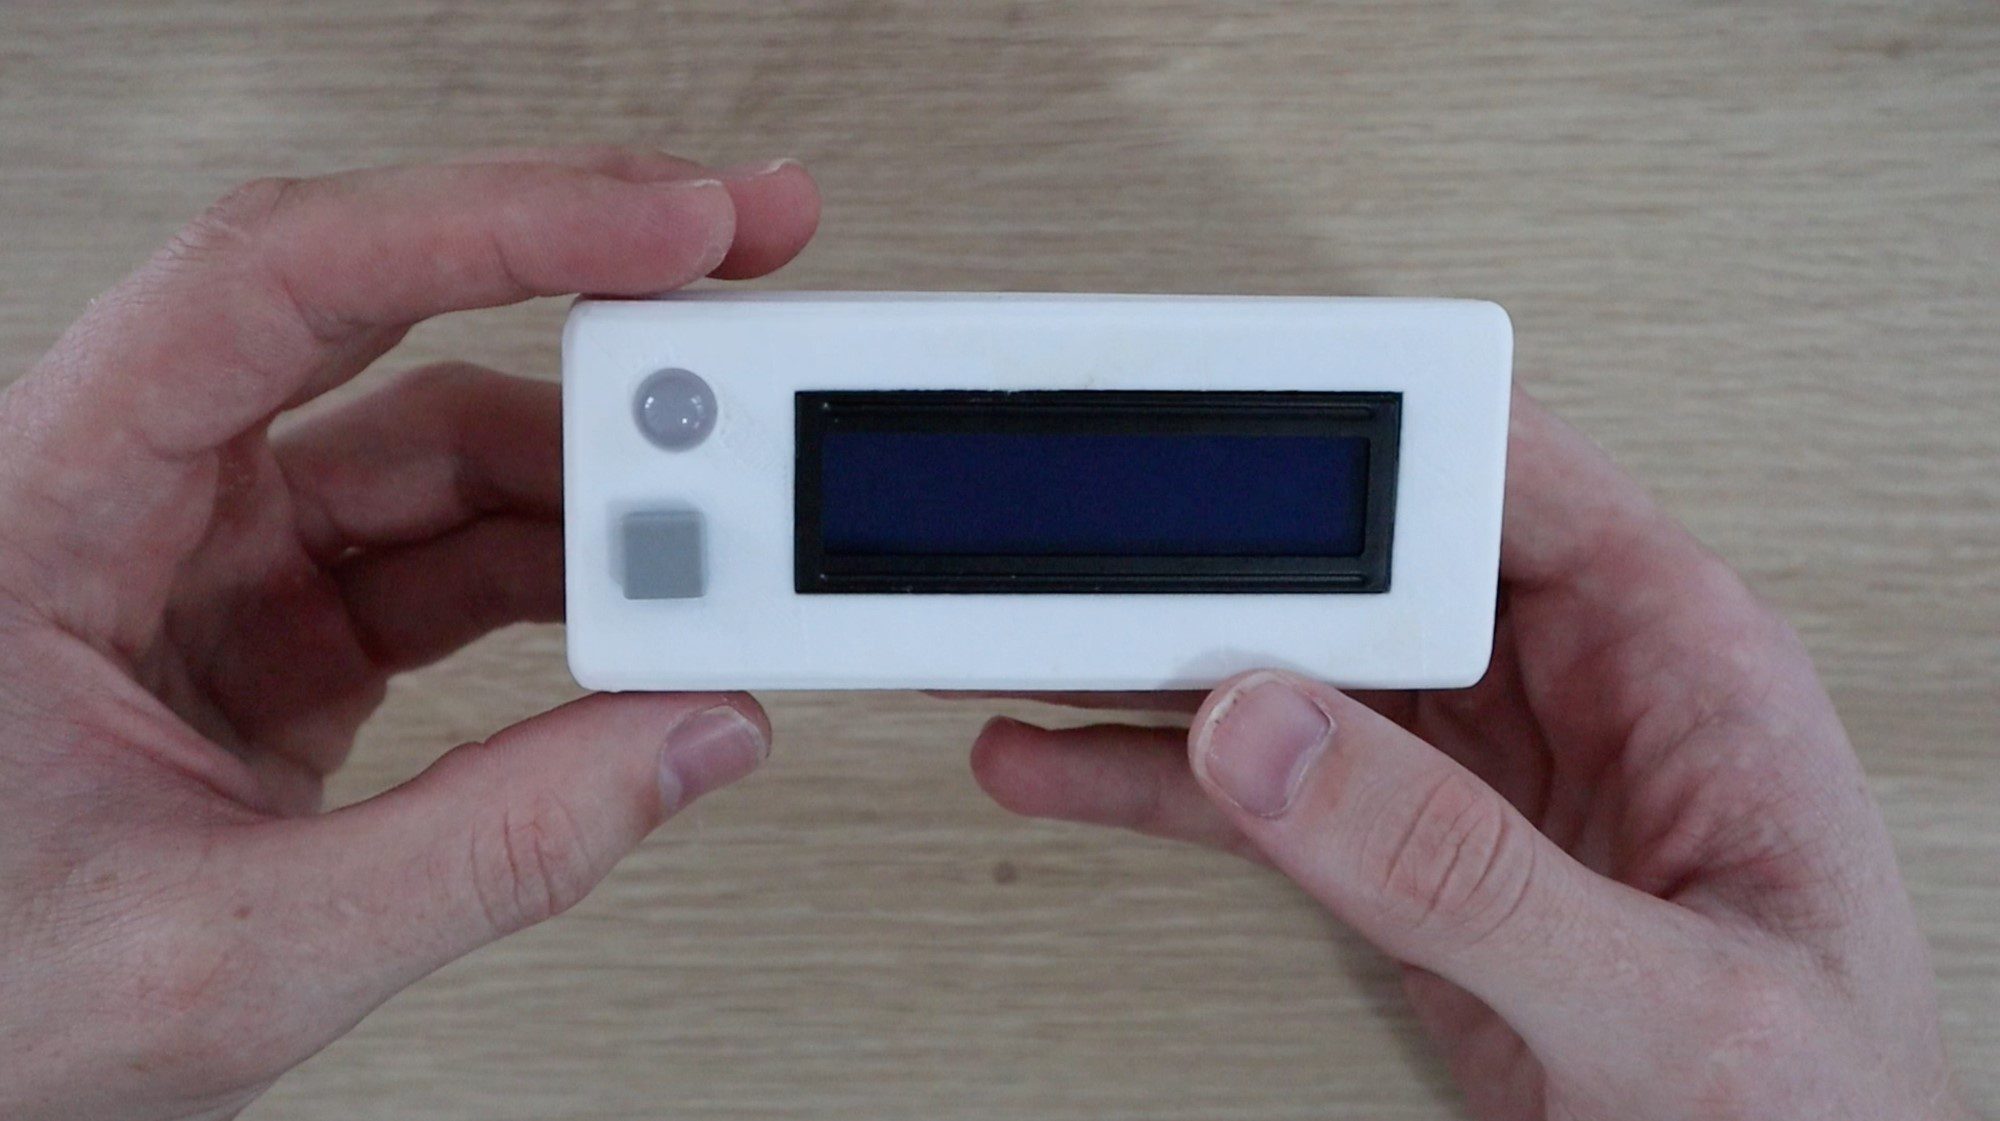
I designed a basic rectangular housing for the colour picker, the 3D print files can be downloaded through the link provided after the images.
The colour sensor is on the back so that you can hold the device over an object and pick the colour with the readout shown on the front.
I printed the housing using white PLA and 20% infill, I would avoid using a coloured filament for the back panel as you don’t want to introduce reflected coloured light onto the surface being picked. Stick with either black or white.
The housing dimensions are approximately 110mm (4.3”) x 46mm (1.8”) x 20mm (0.78”) with both halves assembled. Each half is 10mm (0.39”) high.
Solder the Circuit
Once you’ve 3D printed the housing, you’ll have an idea of where all of the components are mounted and how long to make the interconnections.
Start by soldering each component to your Arduino as you remove it from the breadboard and try to only remove components to make up a full circuit at a time.
For example, start with the push-button circuit and solder the resistors to the push-button and then connect them to the Arduino before removing the LED components. This way you’ll be able to keep track of the components and make sure that you’re connecting them individually to the correct Arduino inputs and outputs.
Take care with the LCD panel and the colour sensor to make sure that you make the connections to the correct Arduino IO ports.
The colour sensor connections should be soldered onto the 7 pin female header strip (cut an 8 pin or longer header strip down to 7 pins) to enable it to be plugged in through the back section of the housing. This just enables the two halves to be properly separated if you need to. You can also solder directly to the colour sensor with a section of ribbon cable, just make sure that the ribbon cable runs through the slot in the housing before soldering the connections.
There are a number of connections to be made to GND and 5V and it makes things easier to connect them to larger central points rather than trying to solder them all onto the two Arduino pins. I connected them all onto the two outside legs of the LCD potentiometer as this is roughly in the centre of the housing and has the largest surface area to make the connections.
Once you’ve made all of your connections and you’re happy with the connection lengths. Try powering up your circuit again to verify that everything is working correctly before mounting the components into the housing. Be careful and ensure that none of the components or exposed terminals are touching each other, which may lead to a short circuit.
If your circuit is working correctly then you can mount your components into the 3D printed housing.
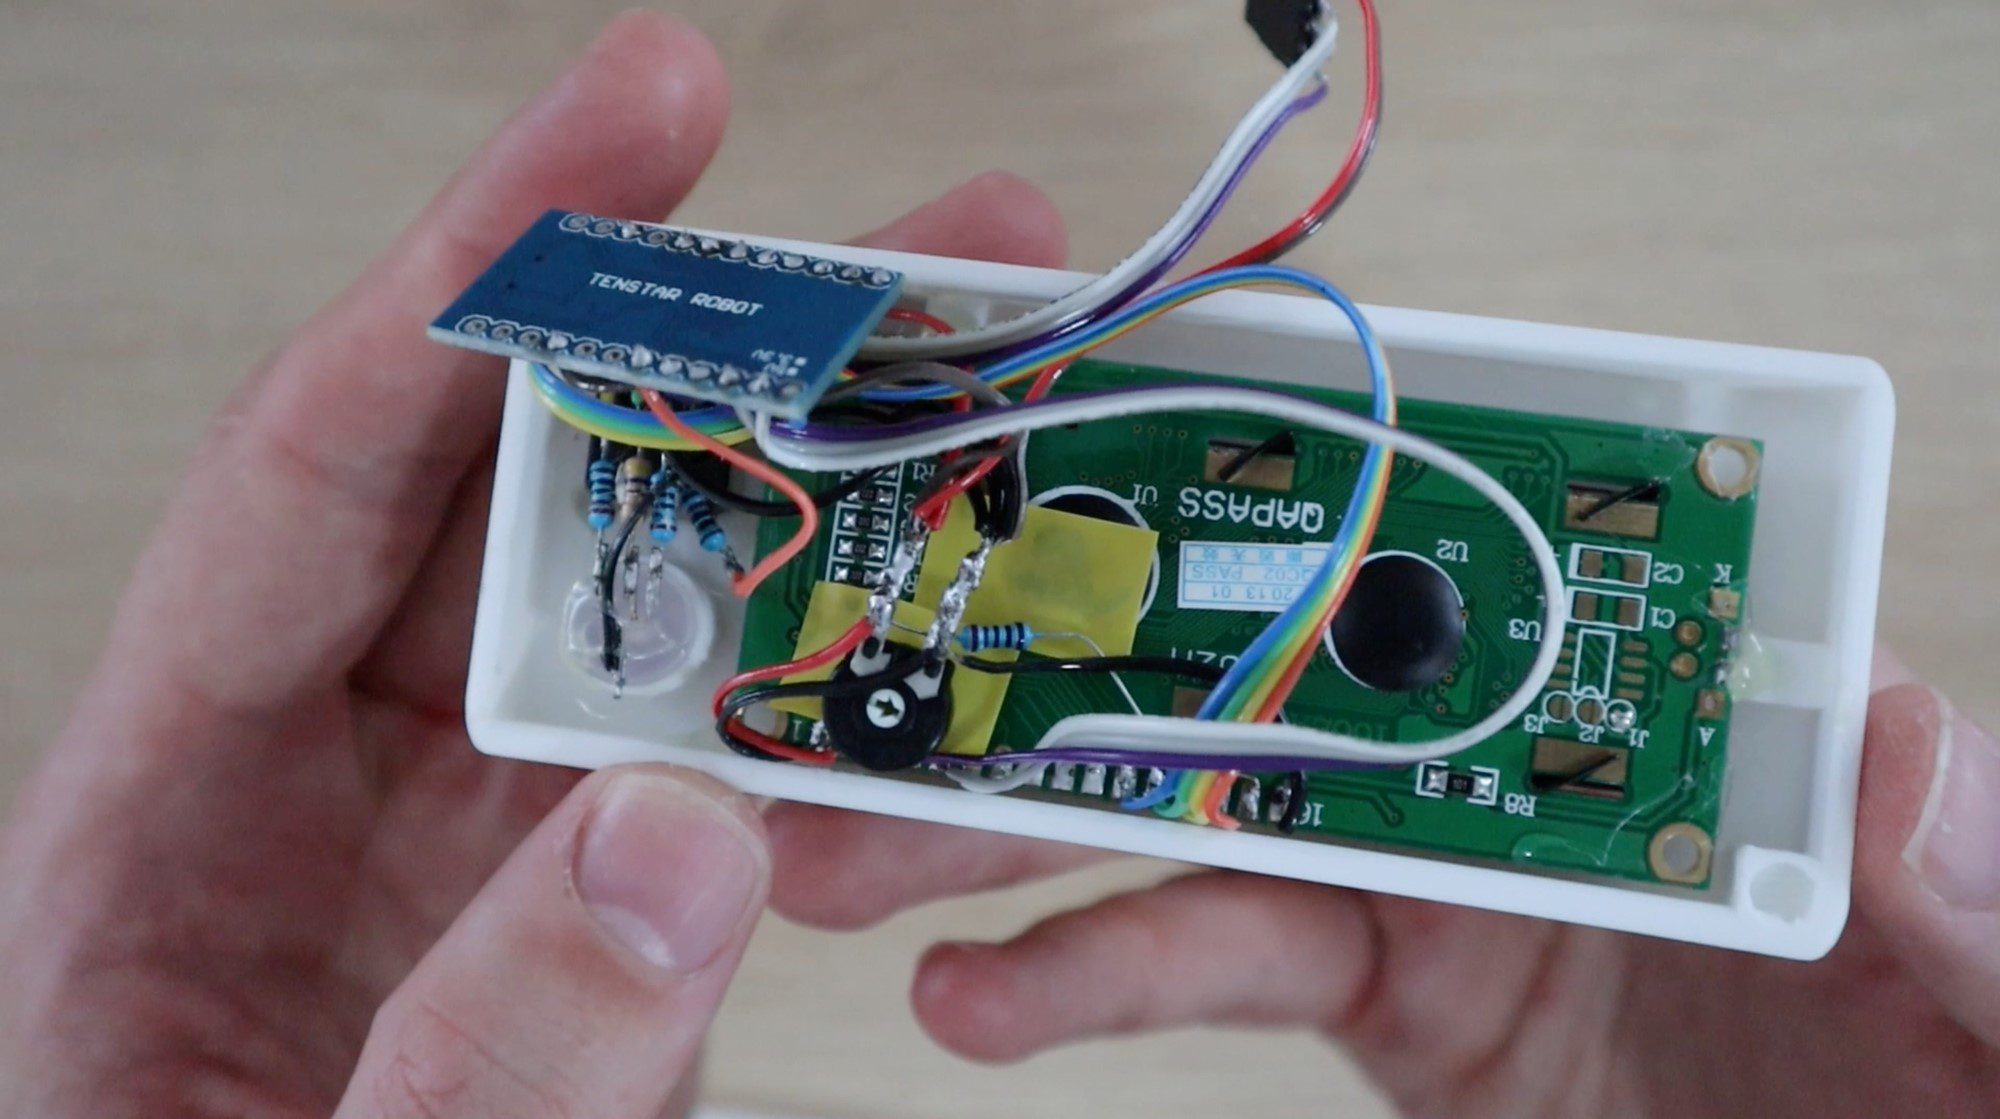
Mount Components into the Housing
The last step is to mount your components into your housing. I used a hot melt glue gun to mount the components, you can also use epoxy or small amount of superglue.
The colour sensor can be glued into the cavity on the back of the housing with the pin header strip sticking through to the inside of the housing. The female header strip will then be used for the sensor to plug into the circuit.
Mount the push-button, LCD and LED through the holes in the front panel and glue them into place on the inside of the housing. If your push-button has a press-on cap, install that piece as well.
Your Arduino should fit snuggly into the slot in the base and shouldn’t require any glue to hold it into place but if it does, make sure you don’t put glue on any components on the back of the board. Rather glue it in place along the edges.
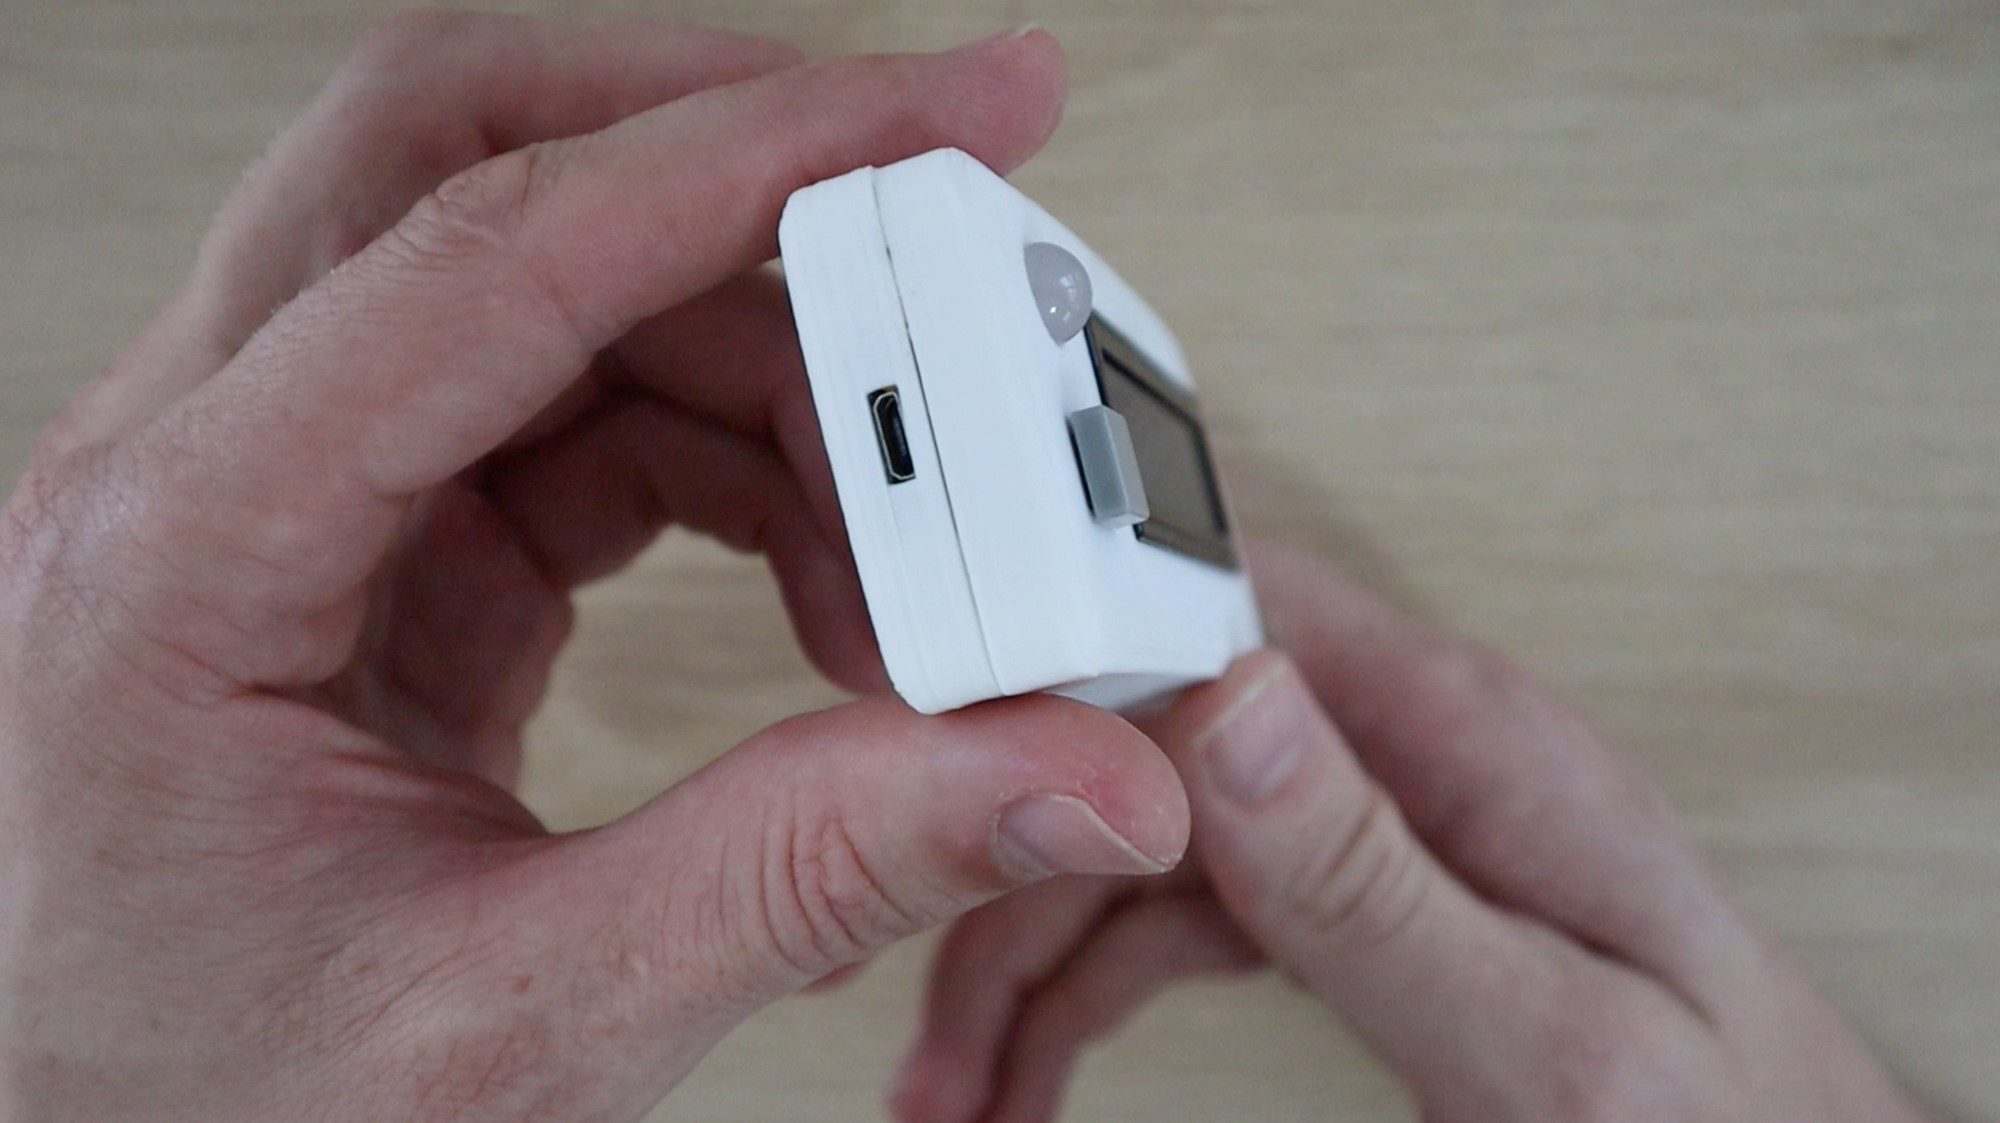
The micro USB port should now be easily accessible through the side of the housing.
Glue the two halves together, using the pegs on the two corners as a guide. These should press together tightly and assist in holding the two halves together. Make sure that none of your exposed terminals or leads on your resistors, LED or potentiometer are touching anything else in your circuit. If they are, use a bit of insulation tape or paper to separate them or cover them up to prevent short circuits.
Lastly, test your colour picker and make any final tweaks you’d like to the software.
Using Your RGB Colour Picker
To use your colour picker, plug a micro USB cable into the port on the side of your colour picker and connect it to a powered USB port on a PC, charger or power bank to power it up.
The startup sequence should run and then you’ll be able to pick a colour.
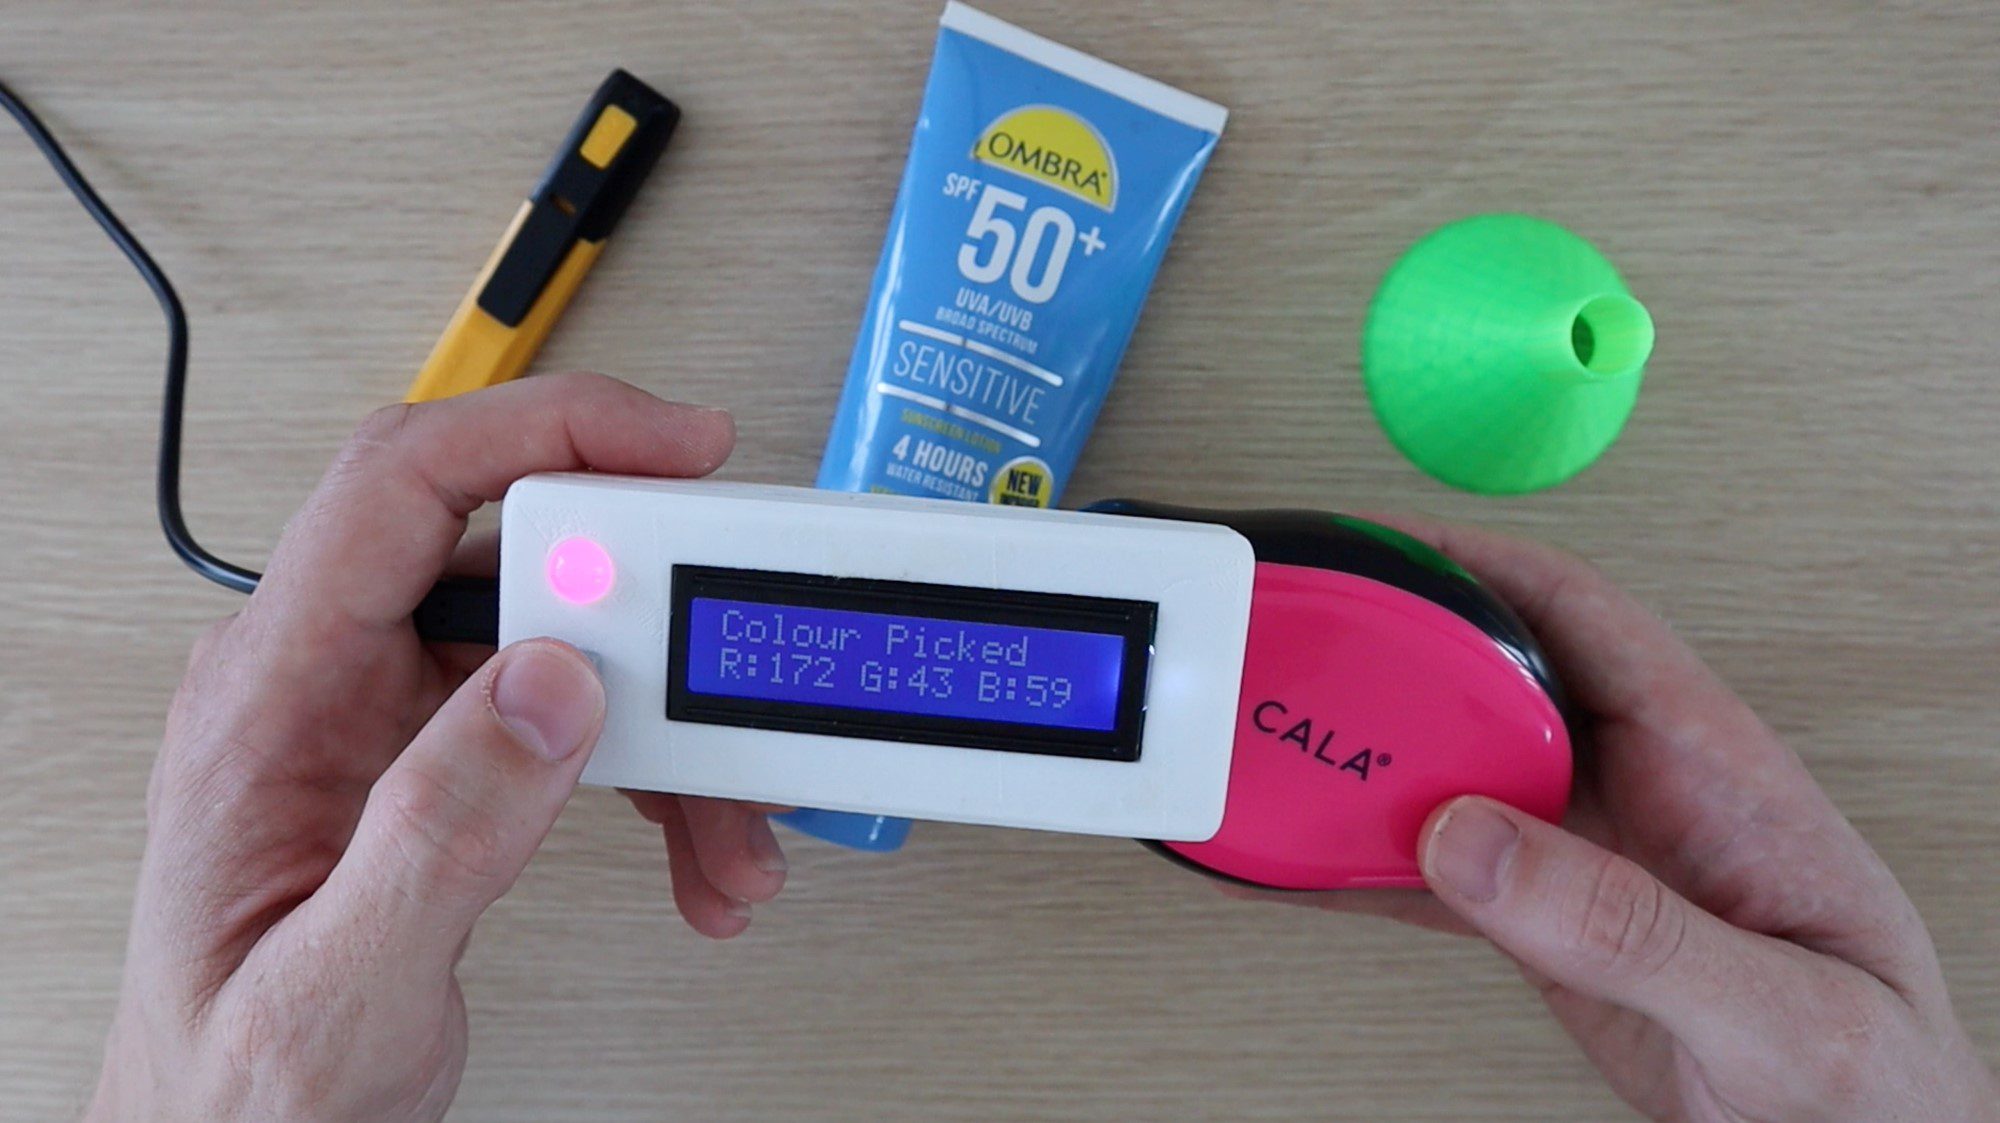
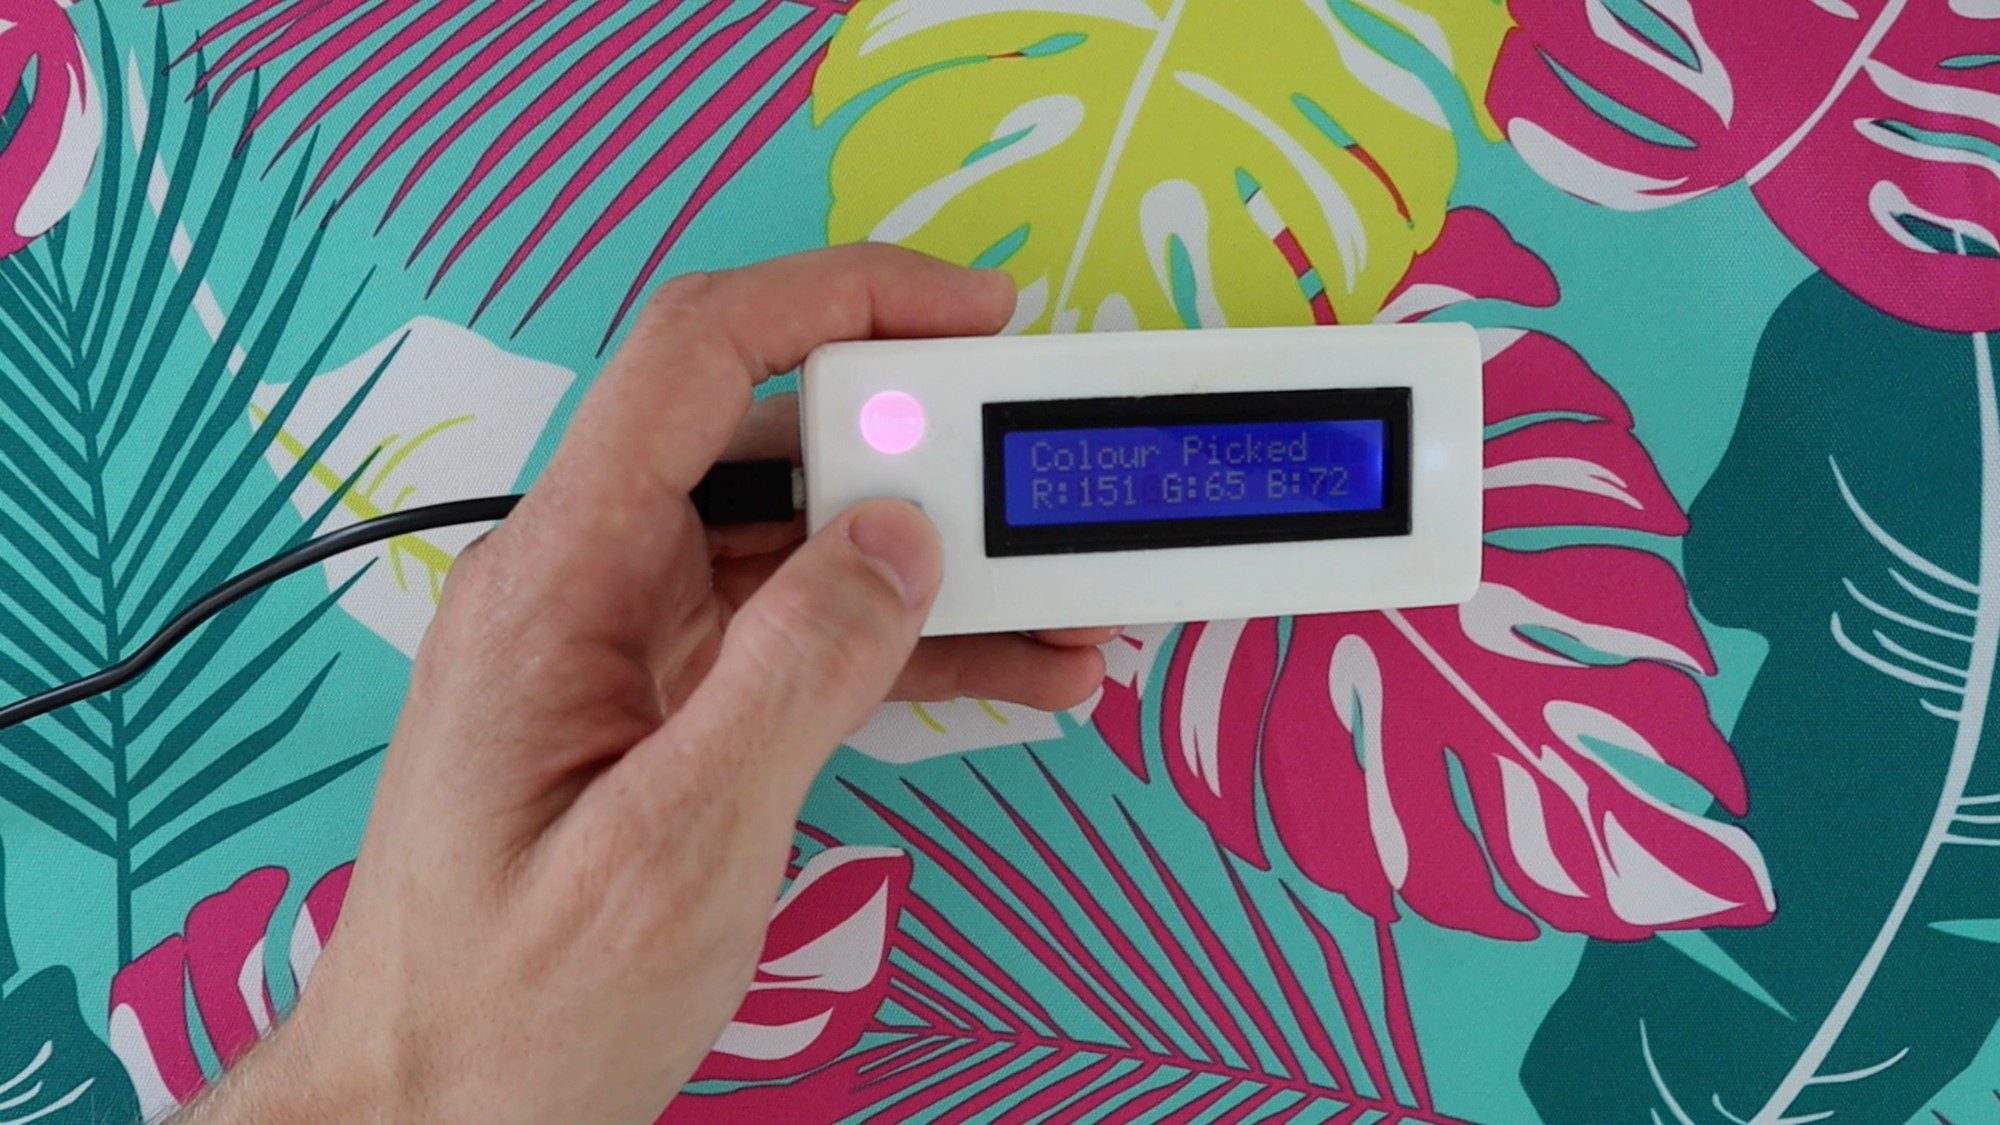
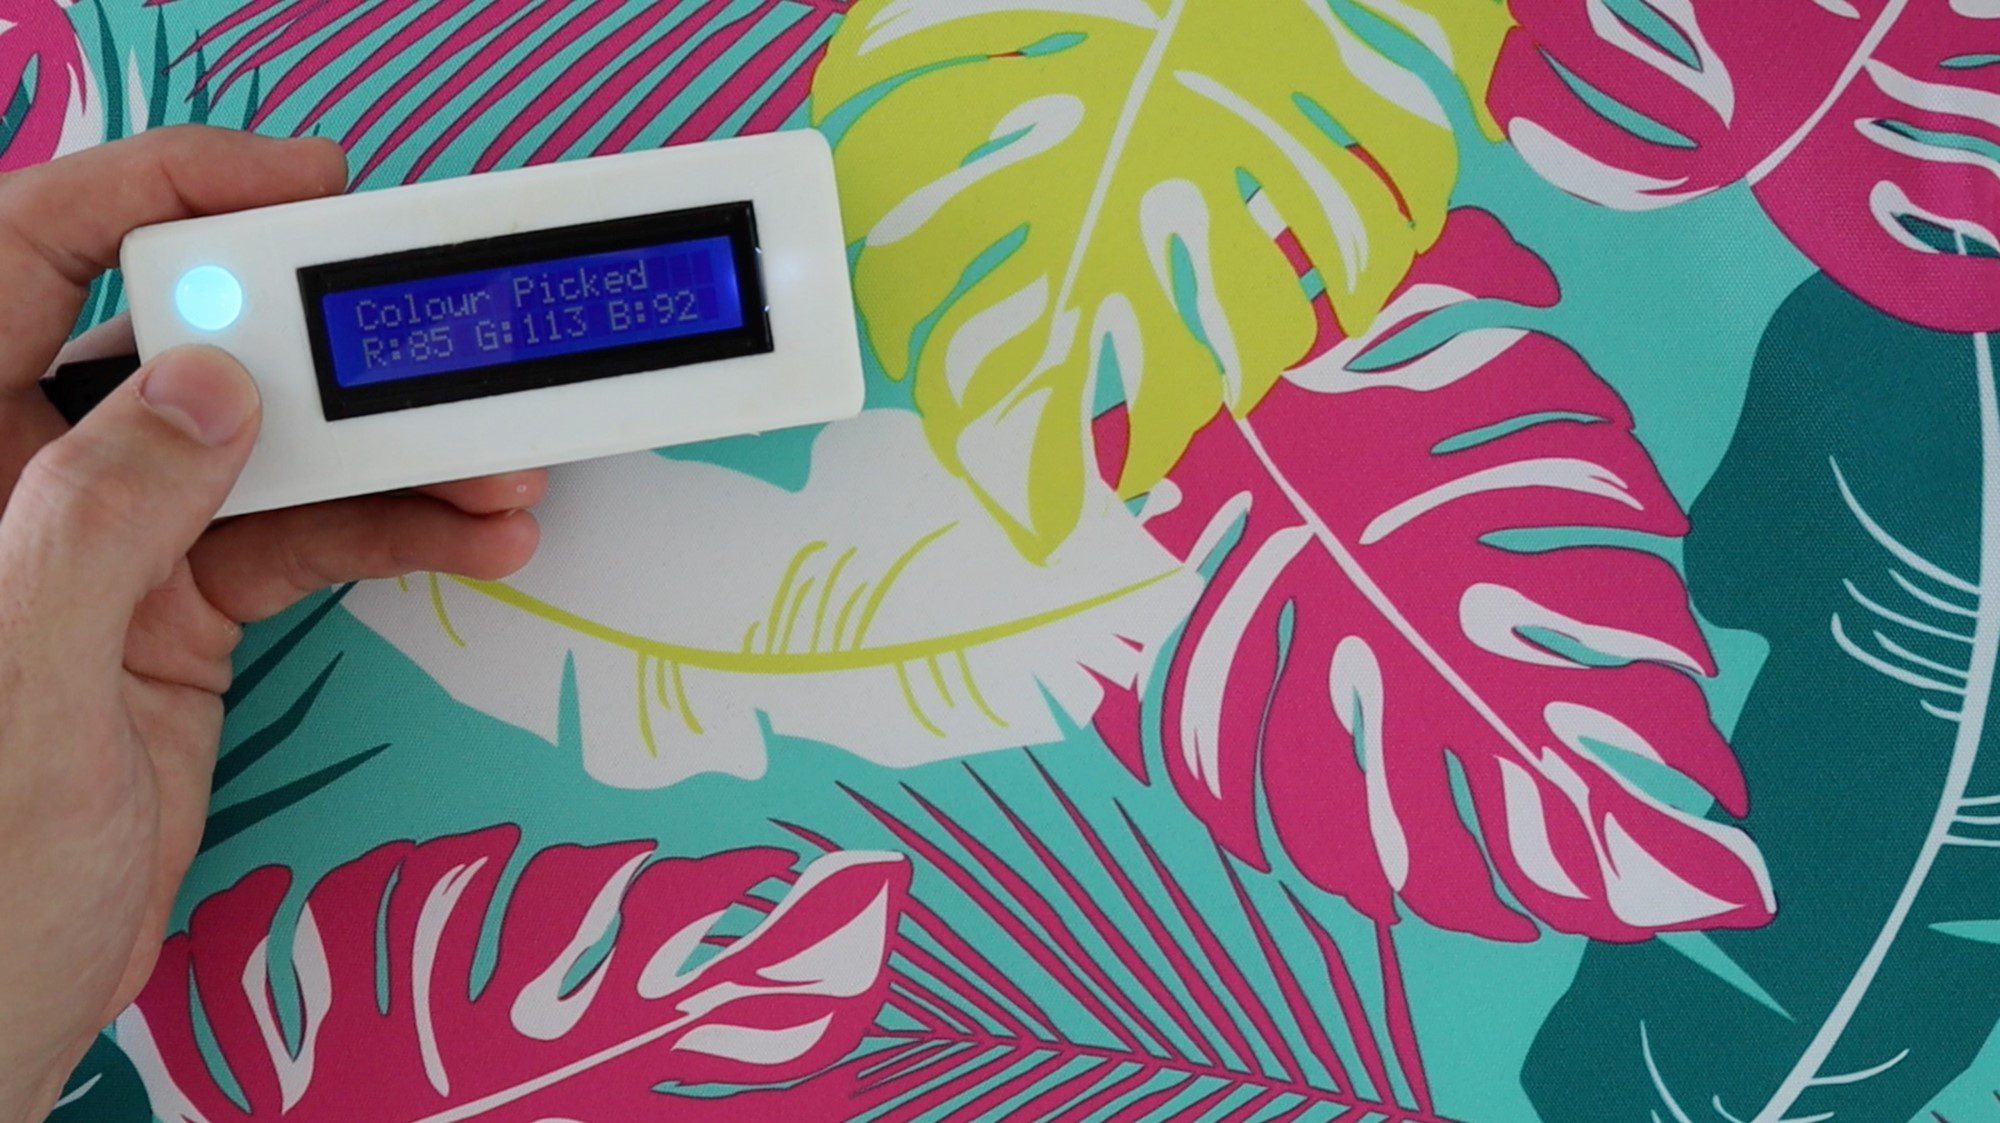
Place the sensor over the colour you’d like to pick and then push the button to pick the colour. The LED light on the sensor should come on momentarily, after which you’ll get an RGB readout on the LCD and the LED will change to reflect the colour which has been picked.
The coloured feedback LED is meant to give you an indication of the colour which has been identified. This is just a quick way for you to check that the sensor has picked up on the correct surface and is not always an accurate representation of the colour due to limitations with the way in which these LEDs work. For example, they can’t show blacks or greys as the actual LED diffuser material is white and can only produce light in order to create colours. For this same reason, darker colours also don’t show up well on the LED although the measured RGB values are correct.
Have your tried making your own RGB colour picker using an Arduino and the TCS34725 sensor module? Let us know how it went in the comments section below. We would love to hear your tips, tricks and any changes you’ve made to the design.
It’s long been the belief that taking a shower uses less water than a bath and that one of the steps in going-green was to save water and money by simply taking a shower more often than bathing. But new research into the bathroom habits of 100 families has revealed that showers can actually land up using more energy and water than your bath, up to twice as much in some cases. It all depends on how long your typical shower lasts.
With an ordinary shower head (non-water saving or regular flow rate) the magic number is around 8 minutes. If your typical shower routine takes longer than 8 minutes with the water running then you’re using as much water as you would have if you had taken a bath. So next time you’re in the shower, try to be mindful of how long you’re spending in there and consider doing things like shaving or washing your hair in a bath rather as you’ll likely end up using less water.
You can also reduce your shower’s water consumption by installing an eco-friendly or low flowrate shower head, it’s really easy to do, all you need is a spanner or plumbing wrench.
Data shows that an individual’s water usage has been on a steady upward trend since the middle of the 20th century. People are living in smaller households and there are more and more single people living on their own. People used to wash a load of clothing once a week, where washing machines are now used every two or three days. People are also taking multiple showers per day, especially those who enjoy a daily workout.
Estimates vary quite significantly, but on average, individuals tend to use around 150-200 litres of water per day.
Here is where all that water is going:
Down the Toilet – Literally
Nearly a third (30%) of all of the water piped into domestic homes lands up being flushed straight back into the sewer. According to Waterwise, a typical household flushes their toilets around 5,000 times a year. While water saving toilets with less water capacity and dual flush mechanism are becoming more and more common, there are still a significant number of older toilets being used. Once of the best way’s to save water in your home is by upgrading your toilets or simply the flushing mechanisms.
Baths and Showers
The next biggest water use is on bathing and showering, which accounts for around a quarter (25%) of your typical household water use. Save water by installing reduced flow shower heads and limiting your showers to 5 minutes or less.
Washing Clothes
Washing your clothes accounts for around 15% of your household water consumption although the amount of water you use on washing depends heavily on your washing habits as well as the technology used in your washing machine. Modern washing machines use less than a quarter of what older machines use and only washing full loads also presents an opportunity for saving.
Other Water Uses
The next few items account for less than 10% each but there are still opportunities for savings with each of them.
Washing up the dishes uses up around 8% of your daily water consumption, with most modern dishwashers actually using less water and energy than washing dishes by hand. So you can save water and energy by using or getting a dishwasher.
Watering gardens and your lawn accounts for around 7% of the average household’s water consumption.
Drink water accounts for just 4% of the water coming out of your tap.
Simply being more aware of your water usage is a good start to becoming more environmentally conscious. What are some of ways you’ve managed to save water in and around your home? Let us know in the comments section below.
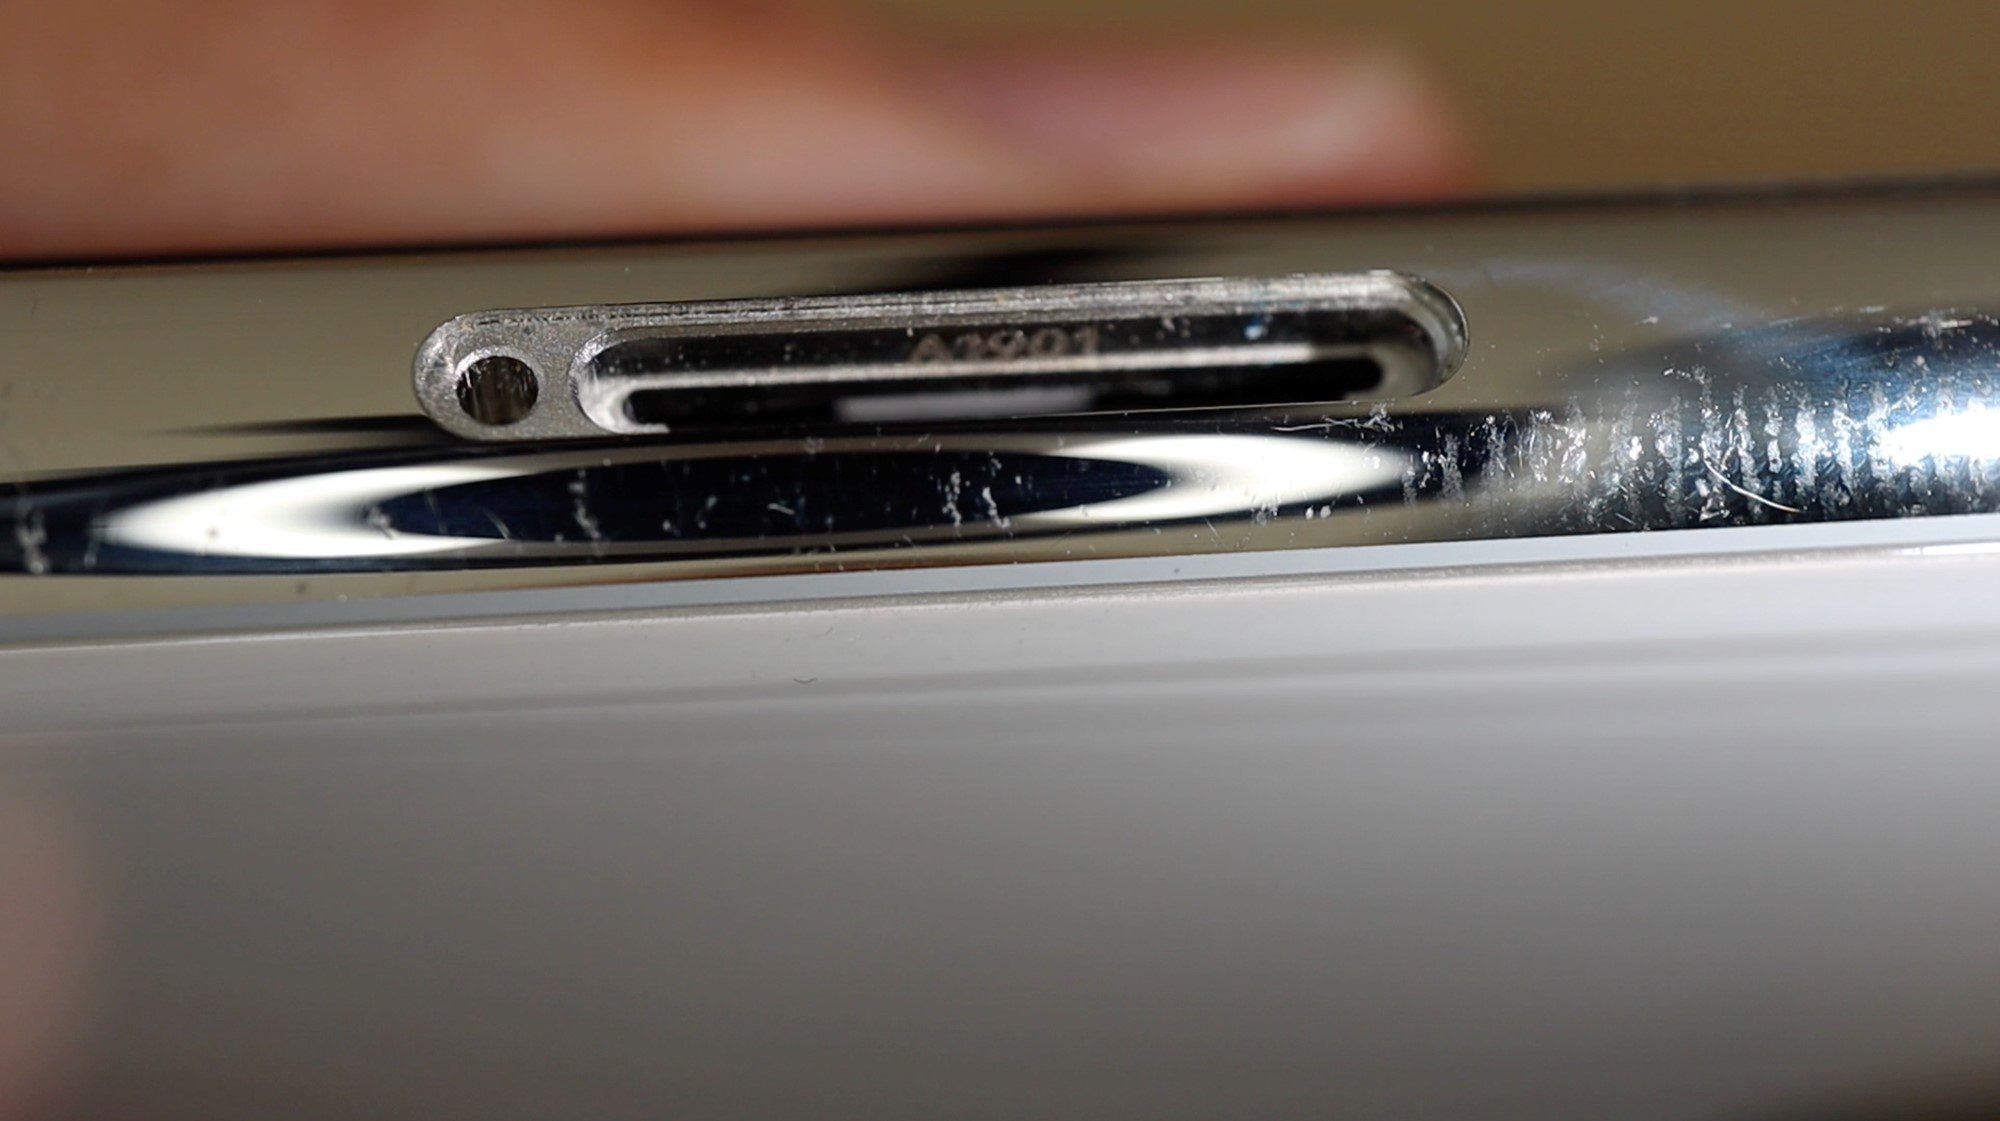
Let’s have a look at how to tell if your iPhone X, iPhone XS or iPhone 11 has been water damaged by looking at the water damage indicator sticker hidden inside the SIM card tray. We’ll also have a closer look at this sticker by opening up the phone to see where it is and how it works.
This water damage indicator is what Apple uses to tell if your phone may have been damaged by water, even if it is dried out again. Once the indicator has been turned red, it remains that way. So opening up the tray and allowing your iPhone to dry out again won’t turn the indicator white again and won’t prevent your phone from being declined for repair due to water damage.
Here’s what the indicator looks like inside the sim card tray. The water damage indicator or liquid damage indicator (LDI) is initially white and will turn red if it comes into contact with water, indicating that the phone may be water damaged. You may need to shine a light or torch into the tray in order to see the indicator, it is not immediately visible when you look into the phone.
Unfortunately, even with water resistant ratings on iPhones, Apple won’t repair or replace any water damaged phones as this is not covered by their warranty. This is because Apple has no way of knowing if the phone was misused when the damage occurred. They don’t know how deep the iPhone was submerged or for how long. The water resistance on iPhones is intended as an additional measure to protect your iPhone from damage due to rain, air moisture or an accidental drop into a pool or puddle etc. and is not designed for you to take your iPhone swimming or diving for extended periods of time.
If you live in an area which receives a lot of rainfall, there’s potential for you to save some money and play your part in easing the strain on the environment by harvesting rainwater for use around your home and garden. While the harvested water won’t usually be suitable for drinking, it can be easily used for watering your garden and lawn as well as topping up your pool. If your home is designed for it, you can also direct this water to your toilets for flushing.
Before you start harvesting rainwater, make sure that it is legal in your area. While this might sound bizarre, there are some areas which prohibit the private collection of rainwater.
Know Where You Want To Use It
Rainwater is generally clean and pure and can be good to drink if harvested correctly, problems emerge when it’s been running over your roof and through your gutters. While the harvested water may not look dirty, it’ll most likely taste terrible and will be filled with dirt and toxins from your roof tiles as well as the dirt and leaves which have collected on and around it.
The best use for rainwater is going to be in and around your garden, it’s great for watering your plants, filling your pool and washing your car. You’ll be surprised to find that you can save around 20-30% of your annual water bill by simply using rainwater in and around your garden. The untreated water is also better for your plants and is great for growing your own organic vegetables.
Depending on how your home has been piped up, you may even be able to pipe some of the water into one or two of your toilets or to your laundry area for use with your washing machine or laundry basin.
Get The Right Equipment
Getting the right equipment up-front is going to save you a whole lot of time and money down the line and make sure that your water is safe to use. For a simple rainwater collection system, you’ll need a collection surface (your roof), a storage tank or barrel and a hose or pump to distribute it.
Choose A Collection Surface (Roof)
Most people dive into this aspect head first and assume that you need to collect water from your entire roof. This is not necessary and you can actually harvest a fair amount of water from a single unobstructed side of your roof. In order to save money and complication when getting started, look for a single gutter downpipe which has the largest collection area on your roof, bearing in mind that some gutters may divert water from multiple roof surfaces. This will be the easiest place to simply divert your gutter into your tank without having to run long lengths of additional piping.
A single 90 square meter (1000 square feet) roof can supply around 2500 litres (660 gallons) of water off of 1 centimetre (0.5 inches) of rainfall.
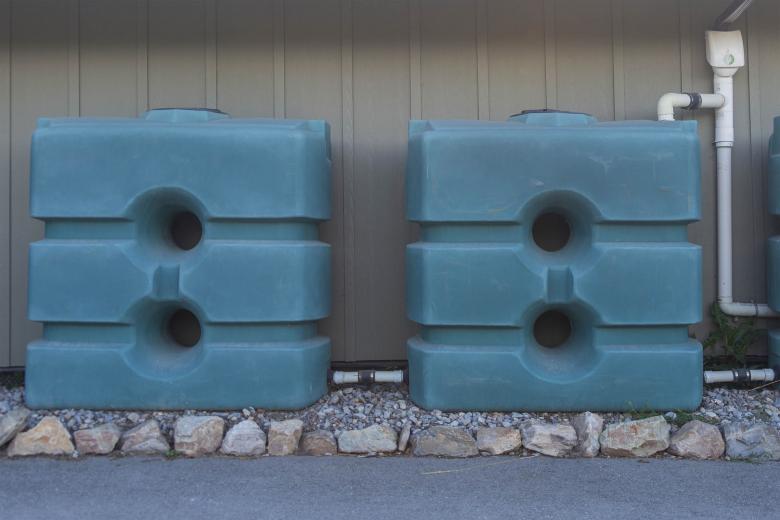
It may be tempting to use an old cheap container for water storage, but many of these may leach dangerous chemicals and toxins into your water. Get a barrel which has been purpose built for rainwater collection. You may even be able to find some second hand ones available online for much cheaper than new ones. Don’t underestimate the amount of water you use and how much can be collected in a single downpour, also make sure that your collection tank is adequately sized for your application. You’ll want to get at least a 2,000 litre tank to get started and you’ll probably find that a tank of 5,000 to 10,000 litres is more suitable for a medium sized garden.
Decide How To Use The Water
You’ll also need a system to get the water out of your tank. If you’re just going to be using it to water your plants with a watering can or bucket then you may be able to get away with a simple tap on your storage container, but if you want to have proper water pressure for an irrigation system, hose pipe or washing your vehicle, then you’ll need to get a booster pump as well. This pump essentially pumps the water from the tank into your water distribution system at a similar pressure to your main water supply and usually has an automatic switch to turn it on and off as water is needed.
Get Started With An All-in-1 Solution
If you’re keen to experiment with harvesting rainwater without having to source the individual components and put the system together yourself, there are a few all in one solutions which can simply be installed onto a gutter downpipe and they’re ready to be used. Have a look at these compact home water booster pump and tank solutions for some ideas. You can also pipe a larger storage tank directly onto your downpipe and then feed the water into the smaller tank in one of these solutions.
Have you tried harvesting rainwater for use around your home? Let us know what you’ve tried and how it has worked out for you in the comments section below. We would love to hear from you.
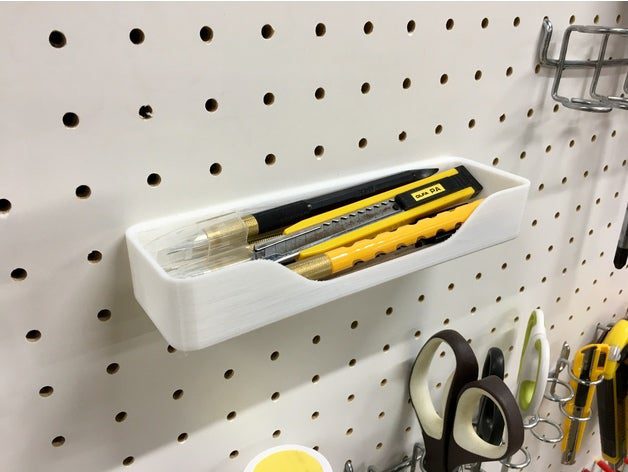
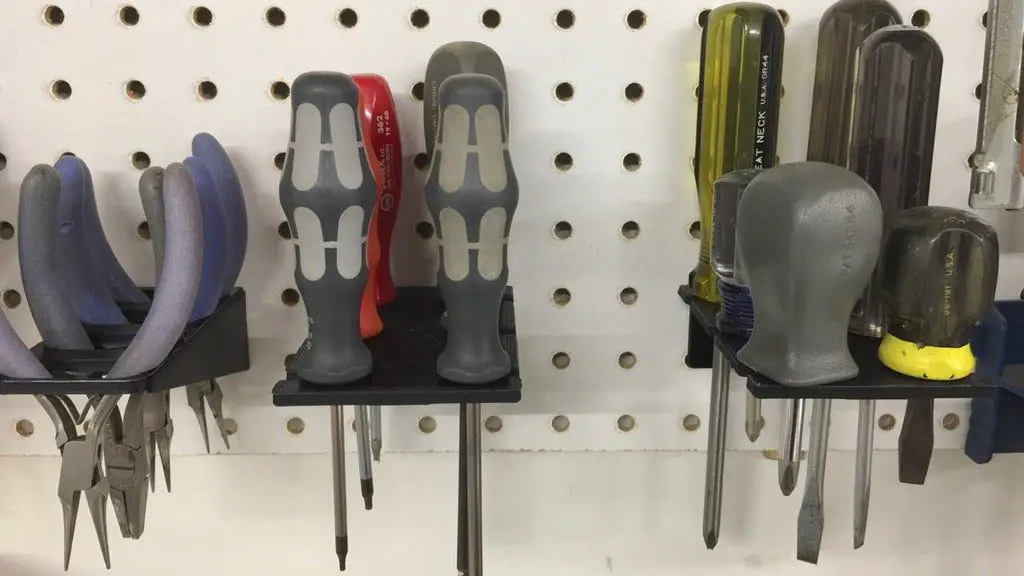
The combination of a 3D printer and a pegboard leaves you with infinite possibilities for storage and organisation in your workshop, garage or study. We’ve found 10 of our favourite 3D printed pegboard accessories to help you out with getting your work space organised and to inspire you to design your own pegboard accessories.
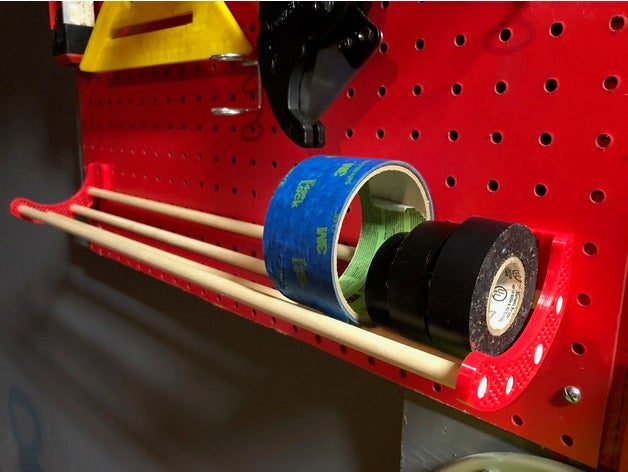
Instead of keeping your rolls of tape lying around in a box or drawer, arrange them on this useful shelf made with 3D printed shelf ends by Rordaz and some wooden dowels.
Avoid getting your sunglasses or safety glasses scratched and damaged in your drawer by keeping them out of the way on a pegboard glasses holder by 5hp .
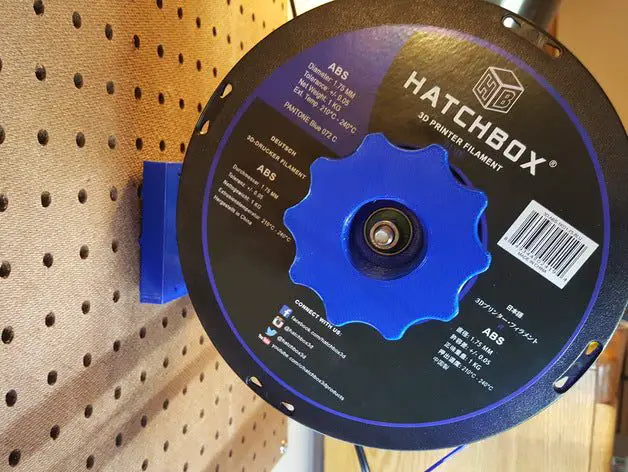
Great for a workshop bench with a 3D printer, keep your filament spools organised and ready to be used with these universal spool holders by Jterranella. You’ll be able to print straight off of the holder.
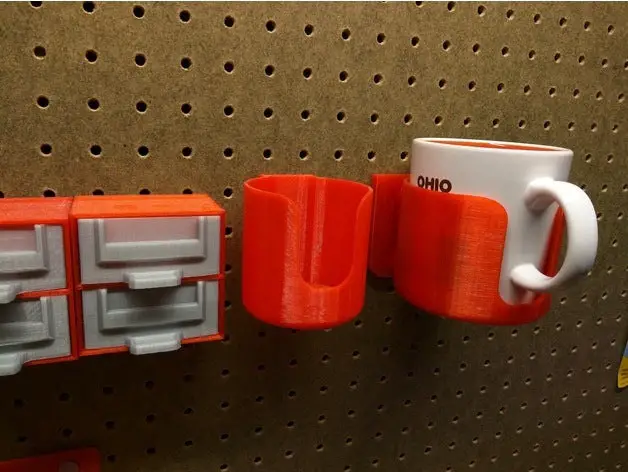
Keep your coffee, or your mug when you’re not using it, in a safe place and away from accidental bumps and spills which may ruin your next project by hanging it on your pegboard with this coffee cup holder by NerdAlert3D.
Have you 3D printed your own pegboard accessories, storage or organisational tools and holders for use around your home and workshop? Let us know what you’ve made in the comments section below.