We are used to going to the swimming pool in the summer, so once we decide to build one in our garden, we naturally assume that we will only have to maintain it during the summer. In reality, the time you use the pool is only a small proportion of your annual maintenance procedure which runs the full length of the year. This is why it is important to have a maintenance plan for each season in particular so that it will be properly maintained.
Fall or Autumn
Temperatures might plunge during winter time, but it is the fall weather that ensues after the pool is no longer in use which often poses the biggest problem. You will be tempted to take a dip once or twice more, so you will leave it uncovered. This is however the perfect time for home maintenanceas it is for a pool cleanup, when nearby trees start to shed their leaves which end up in your pool. Removing them from the surface is not that big of an issue, but problems occur once they become soaked in water and sink. They often lead to clogged pipes, filters and sometimes even the pump, so you will need to clean the pool more thoroughly.
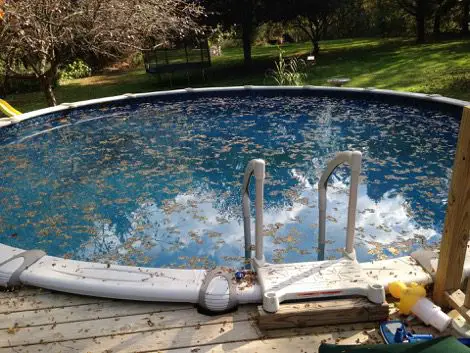
This does not mean that you shouldn’t use the pool after summer is over, only that you need to be aware of the increased maintenance which fall requires. You will need to empty the skimmer basket more often as it will start to fill up with leaves more quickly. As far as the poolside area is concerned, even if you haven’t drained the pool, you will have to bring in the garden set, so it is no longer exposed to the severe weather conditions. After all, winter is coming and you don’t want your bar stools and other stylish furniture made from wood to be exposed to the increased moisture in the air.
Winter
At the onset of winter, many homeowners falsely believe that the pool should be drained, covered and their work ends until the next swimming season. First of all, the pool shouldn’t be completely covered and not all the time. There are fine chlorine particles at the bottom which are hard to scrub, so they will start releasing toxic fumes which may build up if the bottom of the pool is deprived of fresh air. Uncovering it from time to time is necessary for the area to dry out completely.
By not keeping the pool covered 24/7 you are preventing leftover puddles of water from freezing during the night. In the morning they thaw but if this process is repeated several months in a row, this can damage the structural integrity of the concrete, so cracks will start appearing over time, increasing the cost of reusing the pool in summer. Because of freezing temperatures, you need to remove anything inside the pool and definitely not use it as a storage unit over the winter period, as many people like to do!
Spring
Once spring arrives, it is only a few months before you will be splashing in the pool once again. The spring months are ideal to check the status of the pool and fix any damage which may have occurred during the winter chills. The first thing which you need to do is to check the filter and clean it out. You’ll then need to check the operational status of the pool heating system as well. Finally, you’ll need to clean the surface of the pool from any algae which may have accumulated over time. Treat them with a phosphate remover which improves the efficiency of chlorine and is an excellent algae killer.
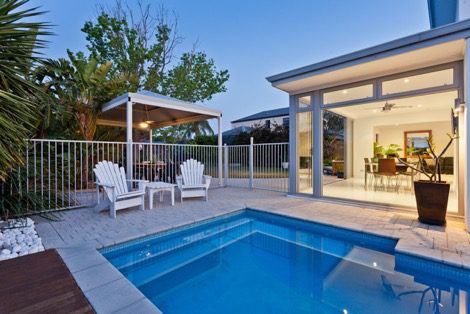
Springtime is also ideal for installing new features in and around your pool, like glass fencing or a stone barbecue. Essentially, landscaping and pool building is not something that you can do on your own, regardless of how much time and money you have at your disposal. This is why you should call in the professionals to carry out the intricate construction work for you, although you can take part in the design stage. After that, the upkeep is definitely a DIY procedure.
Summer
The hour has come for the pool to be filled and to take the first dip of the year! Before you put on a swimsuit, there are a few more things on the maintenance to-do list. After you fill the pool with water and apply the chemicals necessary for safe swimming pool sanitation, you should run a water analysis in order to check if the water is safe for use.
This is the ideal time to make sure once more that the filter is operating correctly and that your spring cleaning did the trick. The water must flow in and out at full capacity and the water inside the water should be clear. Any cloudiness or the appearance of the color green indicates that there is a problem with the filter or your chemicals and it needs to be cleaned or re-dosed once more.
During the use of the pool, you can get chlorine tablets which are placed in a floating dispenser to ensure that the water is clean all the time. This way of “infusing” chlorine in the pool is perhaps the most convenient for home use. At the height of the season, all you need to do is refill the dispenser at least once a week. Also, don’t forget to take a sample of our pool water and take it to a chemical analysis once a month. This way, you will be 100% certain that your pool is safe to swim in and you’re dosing it effectively.
All in all, owning a backyard pool should be a major source of joy for you, your family, your friends and neighbors. Don’t be put off by the alleged high maintenance cost and effort which people may be scaring you with. As you have seen, each season throws a different set of challenges at you but in the end, properly maintaining a swimming pool isn’t that difficult, regardless of the season.