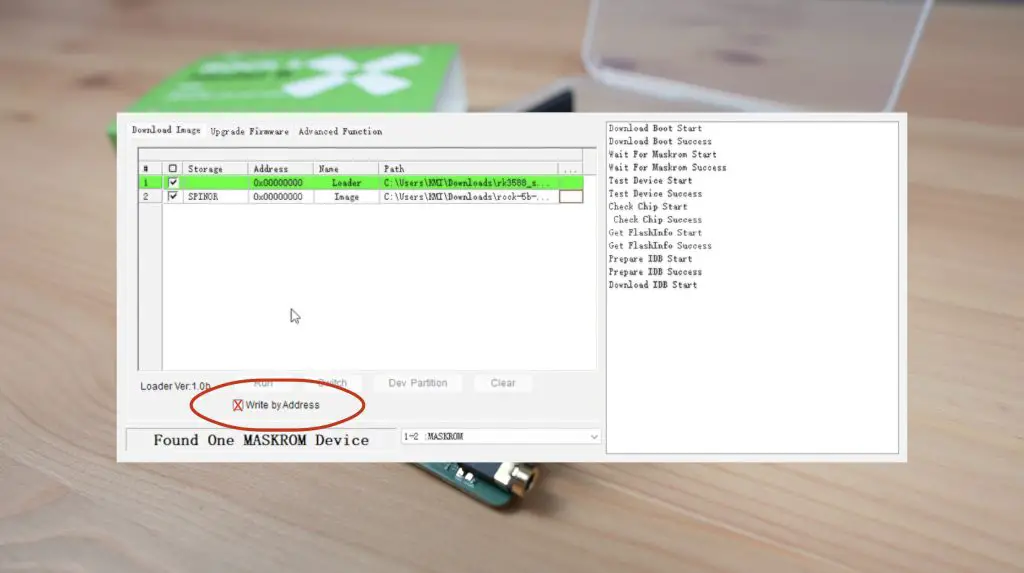
Following on from my initial review of the Rock 5 Model B, I eventually managed to get it to boot from an NVME drive. Embarrassingly this was as simple as missing a checkbox on the bootloader reflashing tool – but it now works and boots from the NVME drive really well.
So the next step is to turn it into a computer that I can actually keep on my desk without worrying about something shorting shorting out the components on the PCB or dust collecting on the surface.
Here’s my video of the build, read on for the write-up:
What You’ll Need To Make Your Own Rock 5 B Case
To make it easier for you to build your Rock 5 B into a mini desktop computer, I have put together a kit that includes the components and screws you need to house your Rock 5 B and Heatsink:
Rock 5 B Case Kit – Buy Here
Alternatively, you can make up your own case with the below hardware:
- Rock 5 Model B (Amazon) – Buy Here
- Rock 5 Model B (Allnet) – Buy Here
- Rock 5 Passive Heatsink (Allnet) – Buy Here
- 1TB NVME Drive – Buy Here
- 40mm RGB Fan – Buy Here
- EZ Fan 2 Module (Optional) – Buy Here
- M3 Brass Inserts – Buy Here
- M3 Button Head Screws – Buy Here
- M2.5 Brass Standoffs – Buy Here
- M2.5 Button Head Screws – Buy Here
Tool & Equipment Used:
- Creality Ender-3 S1 Pro – Buy Here
- Gweike Cloud Laser – Buy Here
- Electric Screwdriver – Buy Here
- TS100 Soldering Iron – Buy Here
Some of the above parts are affiliate links. By purchasing products through the above links, you’ll be supporting this channel, at no additional cost to you.
Designing The Rock 5 B Pico ITX Case
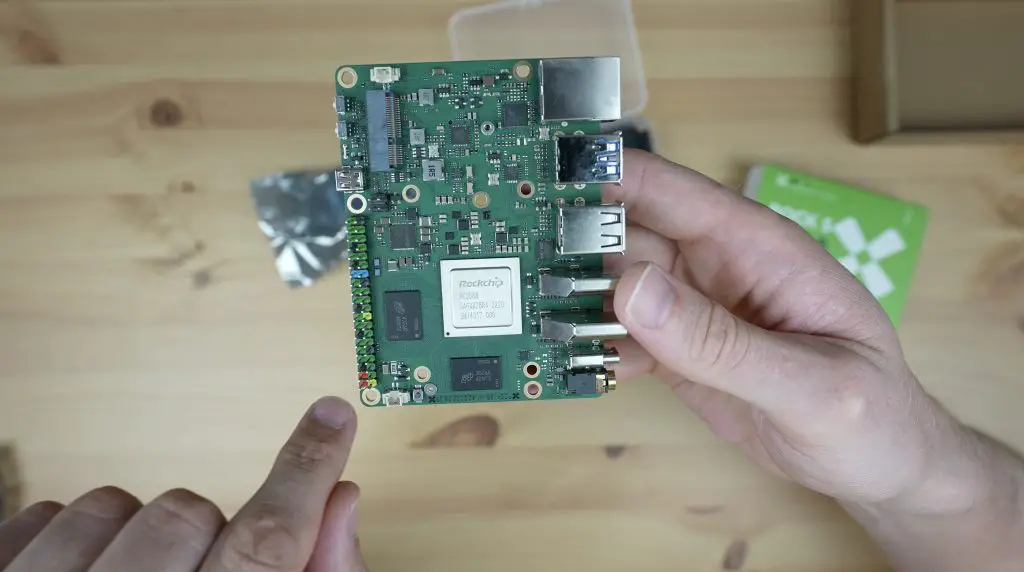
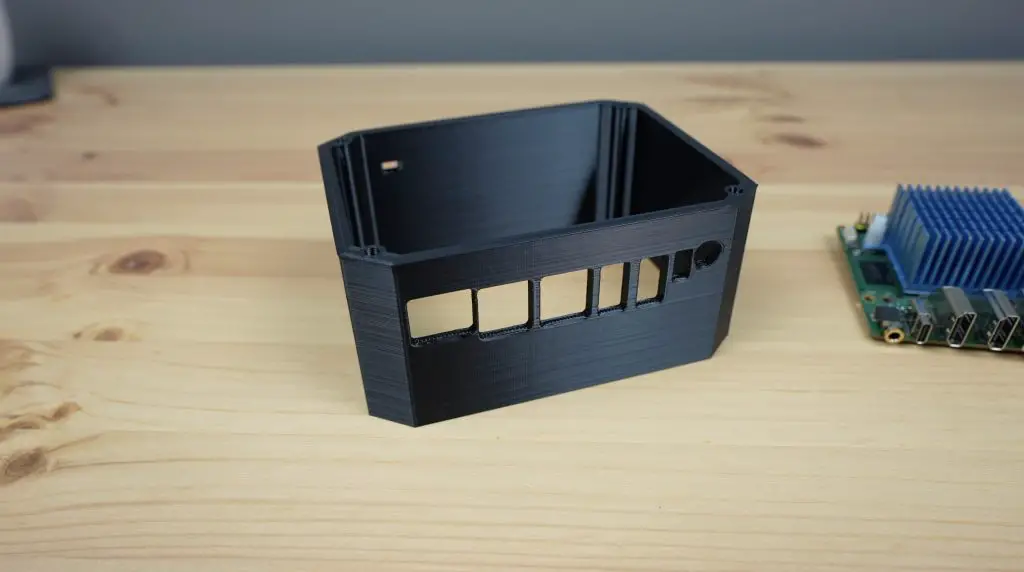
The form factor of the Rock 5 Model B is Pico ITX, so while it is slightly wider and longer than a Raspberry Pi, it’s not far off fitting into my Raspberry Pi desktop case design with a few tweaks.
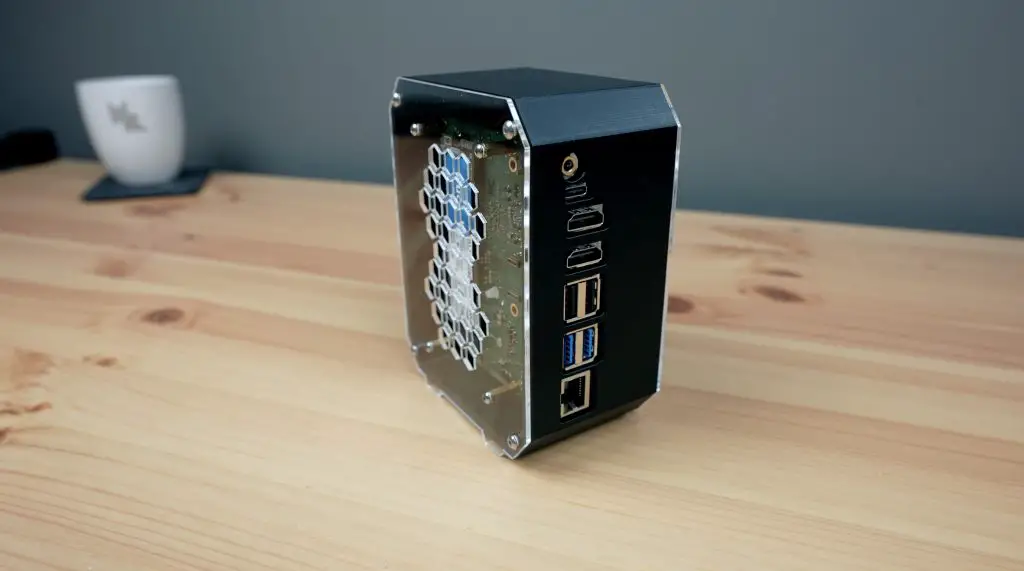
So I opened the model up in TinkerCAD and made a few changes to it so that the Rock 5 fits into the case vertically with all of the primary ports accessible through the back.
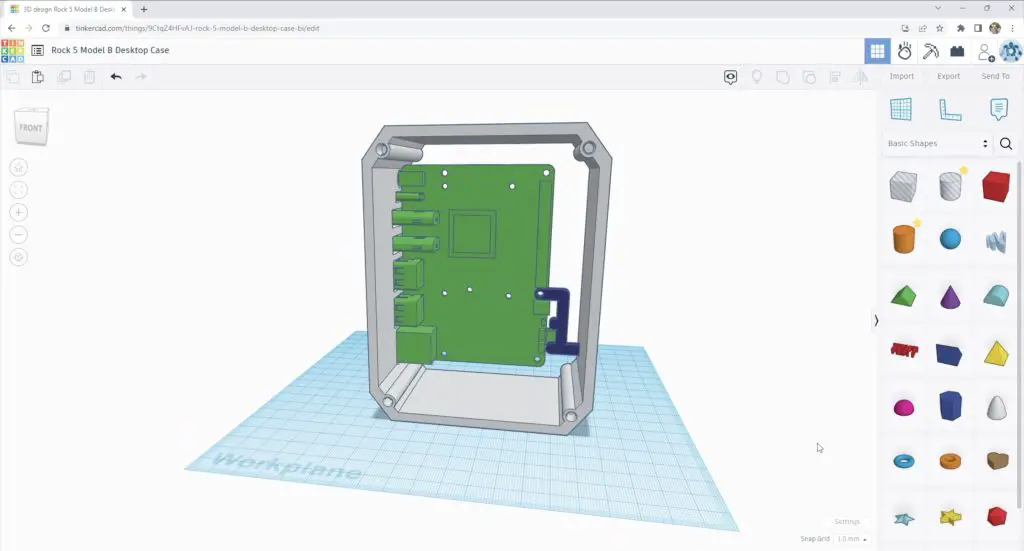
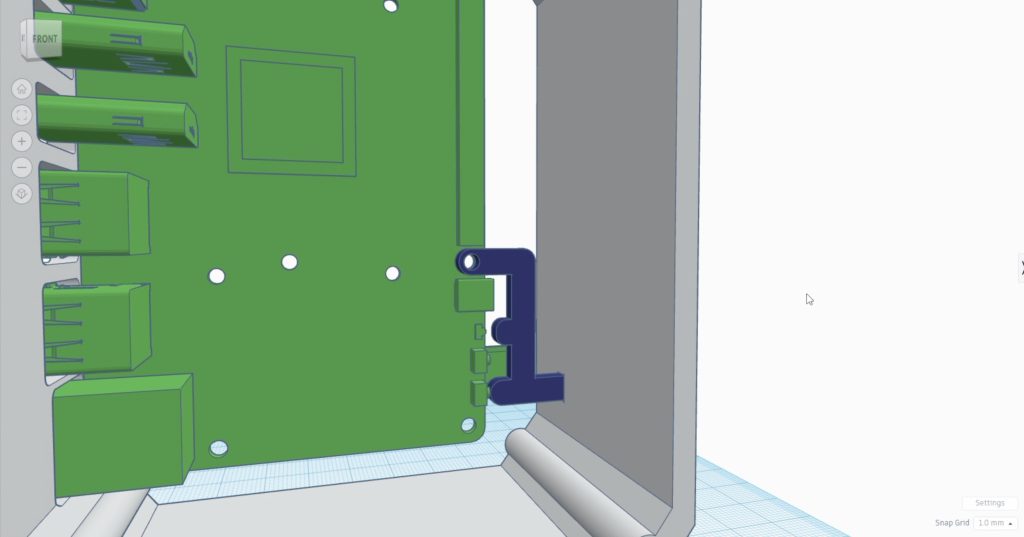
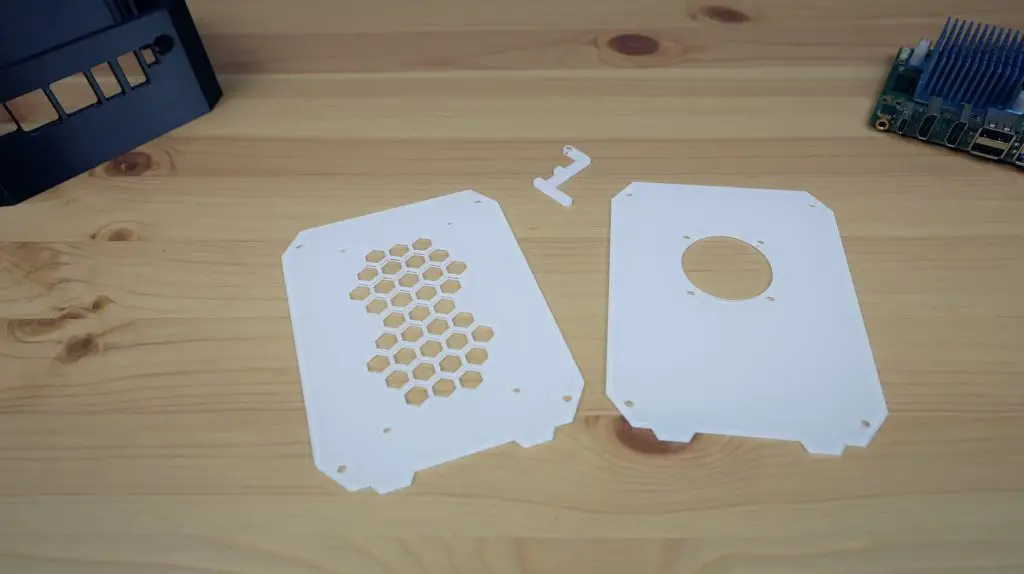
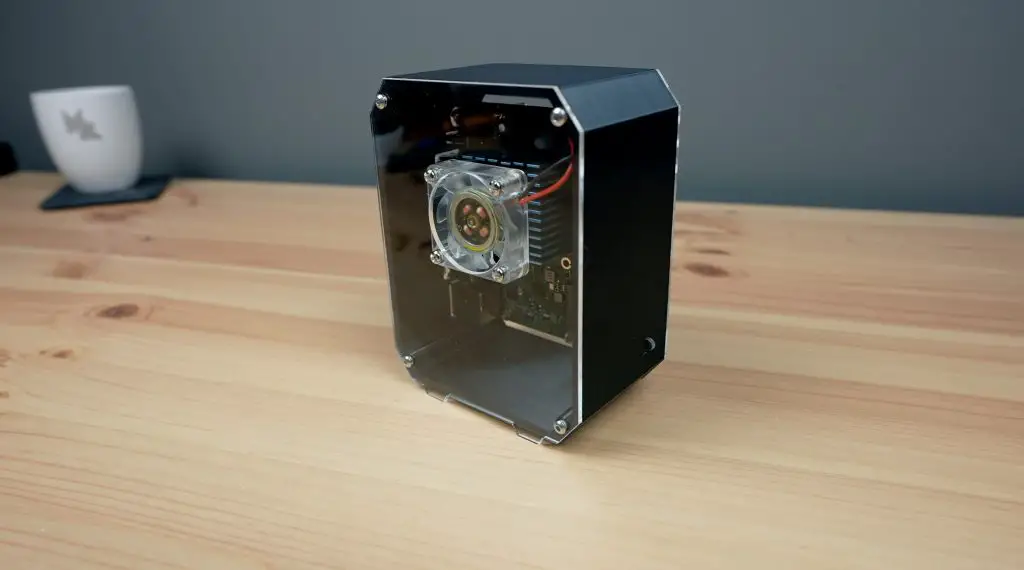
I also designed a small adaptor that will screw onto the board and allow the power button to be pressed from the front of the case. I’ve added a small extension onto this bracket in the hopes that it will pick up the light from the status LED, allowing it to serve a dual purpose.
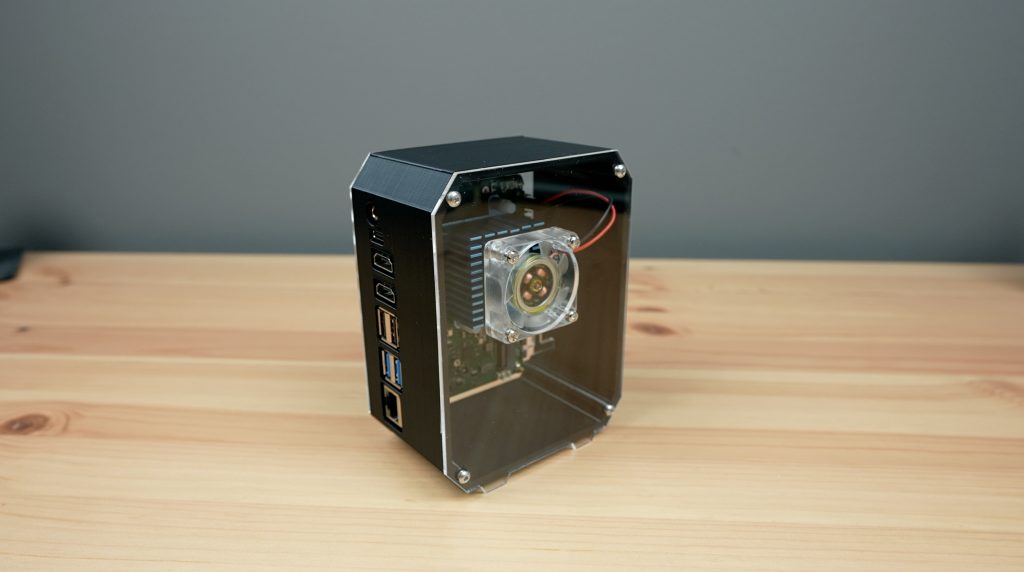
I then designed the side panels in Inkscape to be laser cut from some clear acrylic. The main side panel has space to mount a 40mm fan directly over the heatsink on the CPU for additional cooling. The opposite side panel has ventilation holes for the air to escape over the NVME drive and four holes for some standoffs to mount the Rock 5 onto.
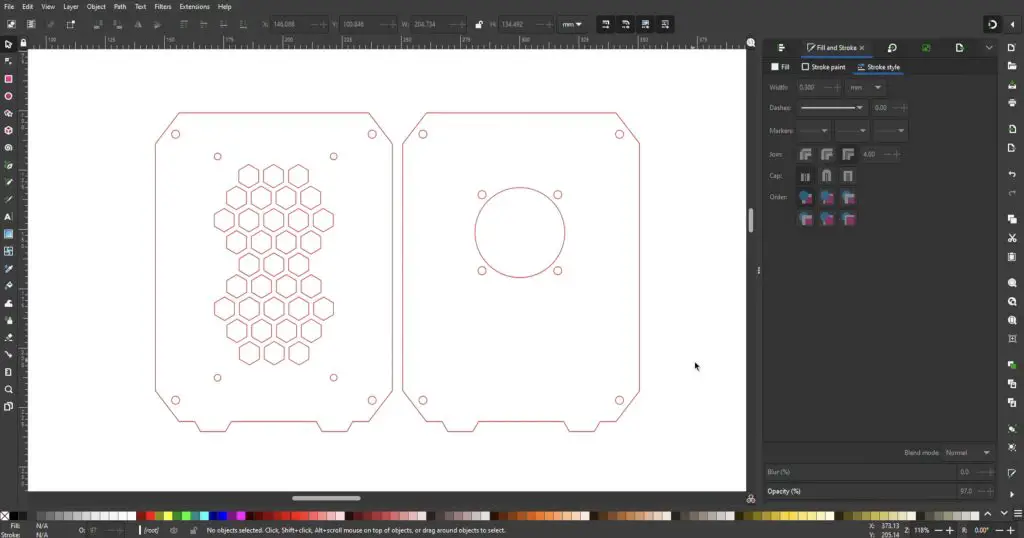
I also added the small button adaptor to the acrylic design so that it’s clear to pick up the LEDs light.
So that’s the design done, now let’s get the components made up.
Making Up The Case Components
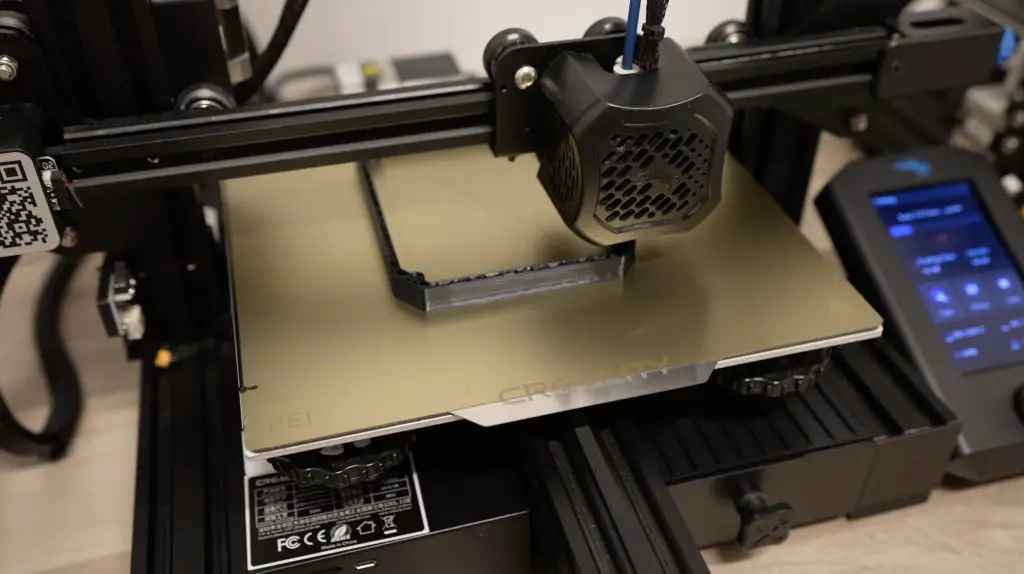
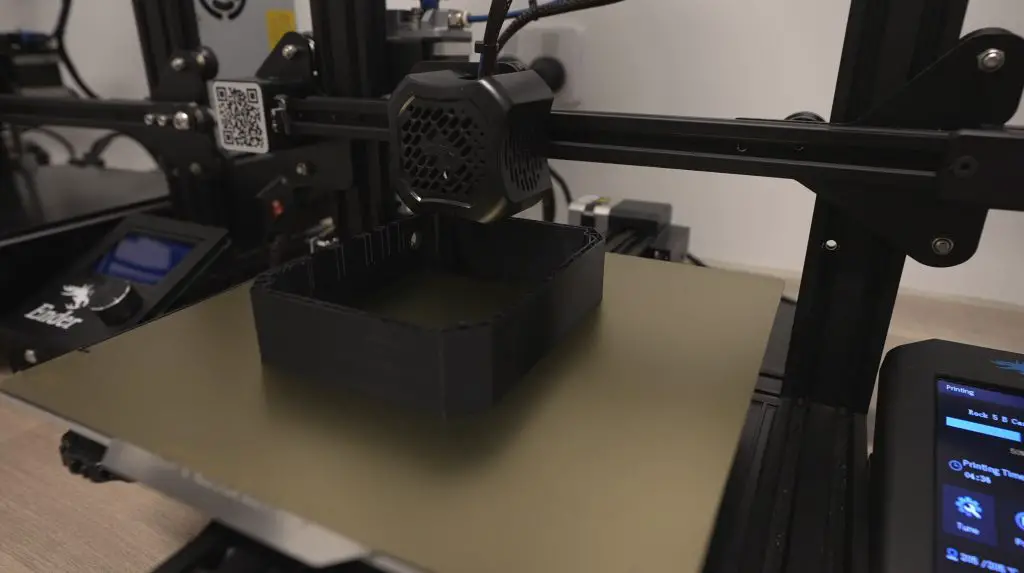
To start with, I 3D printed the case in black PLA with a 30% infill. I also sliced it on its side so that it didn’t need any supports – this will make the print cleaner and we won’t have to remove any supports afterwards.
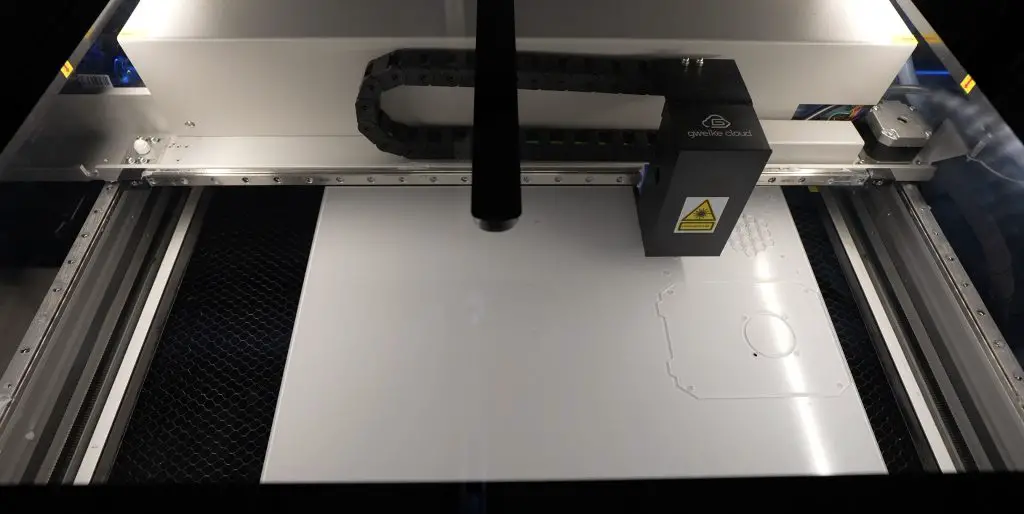
While that was printing, I laser cut the side panels and button adaptor from a sheet of 2mm clear acrylic. You could also use 3mm coloured acrylic sheets if you’d like to add some flair to the case.
After a few hours of printing, the body of the case was complete.
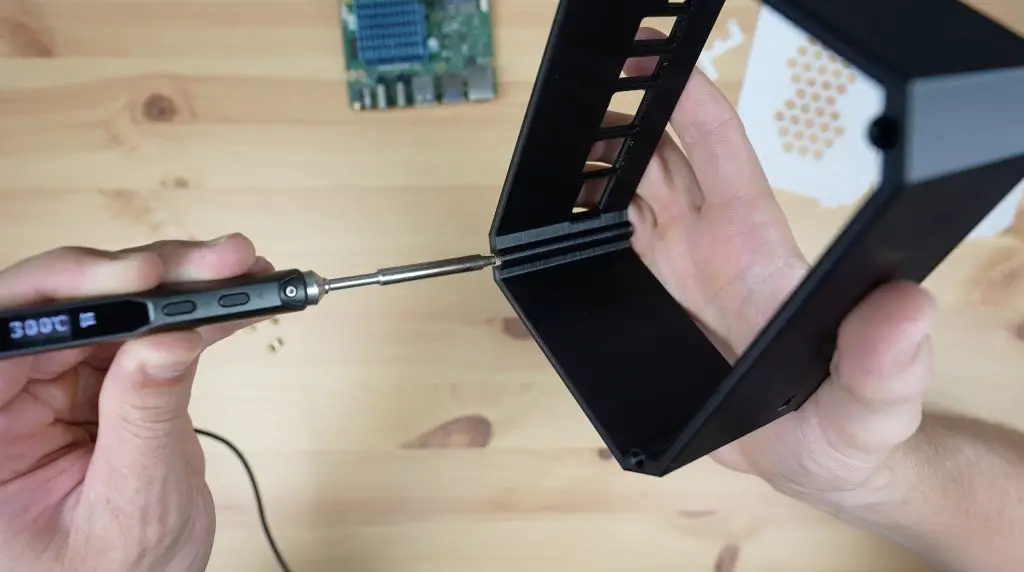
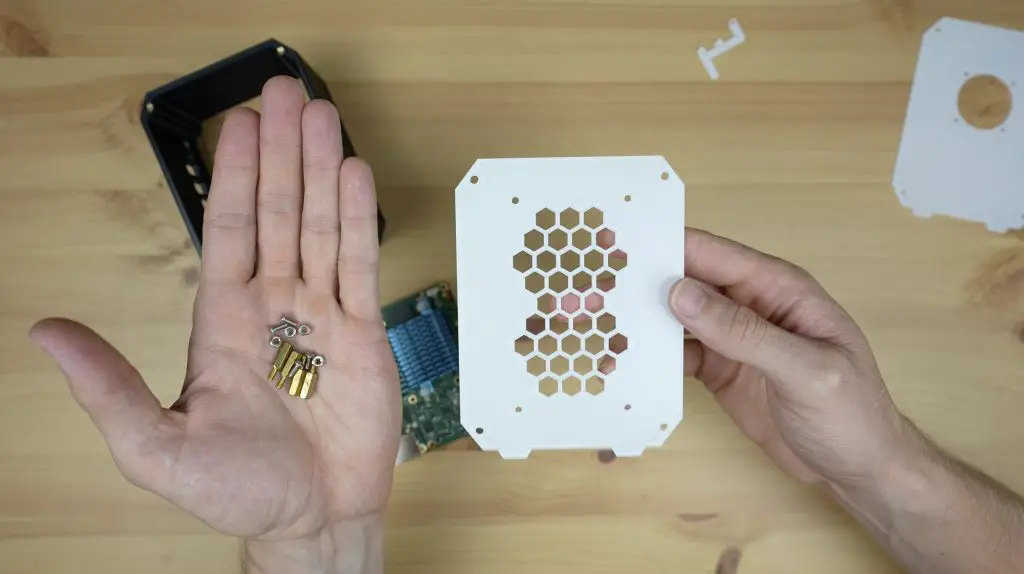
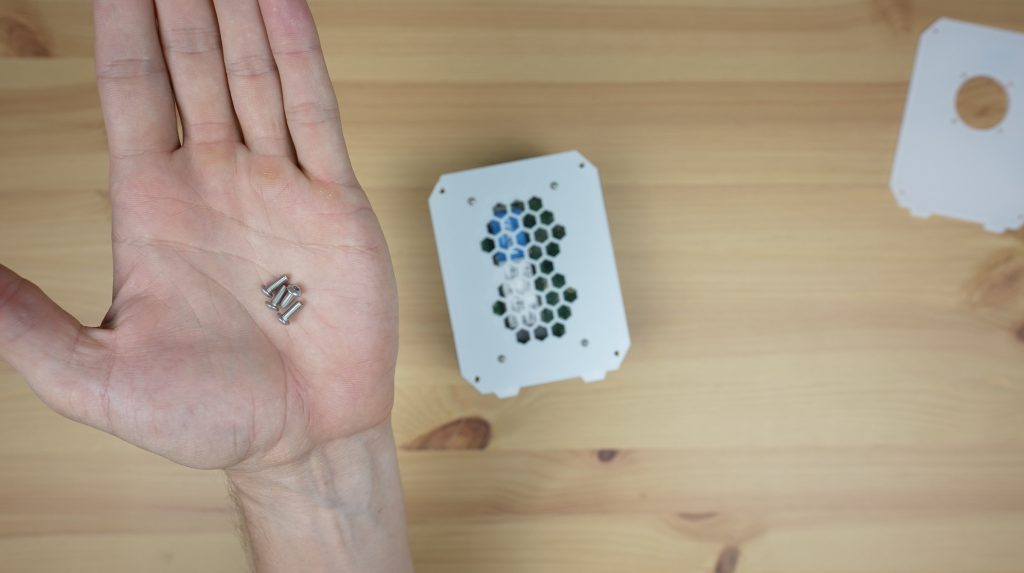
To finish it off, we need to add some M3 brass inserts to the corners for the side panel screws to screw into. These will make the holes more durable if we need to remove the side panels so we don’t have to worry about stripping the threads.
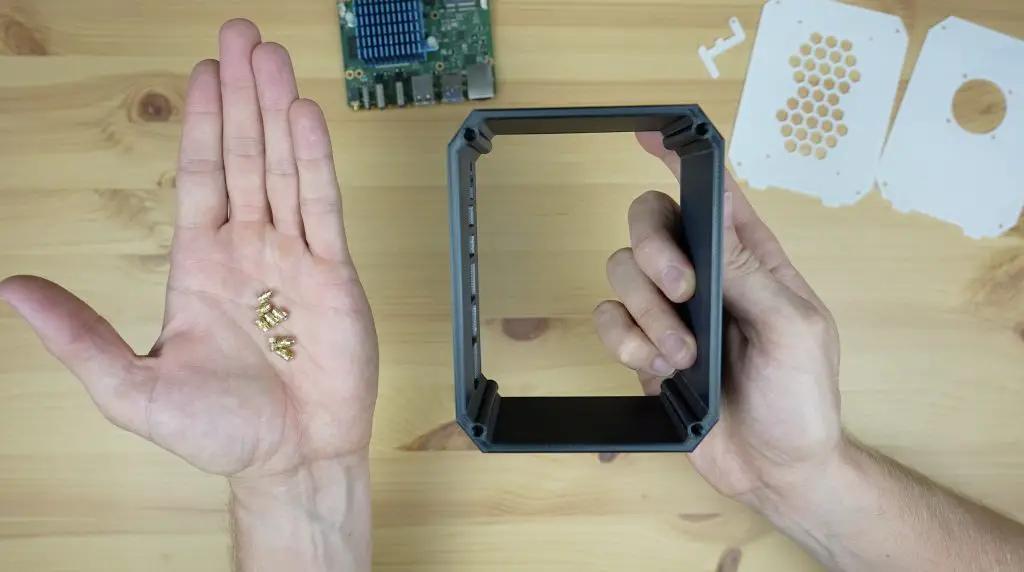
We’ll just melt these into place using a soldering iron.
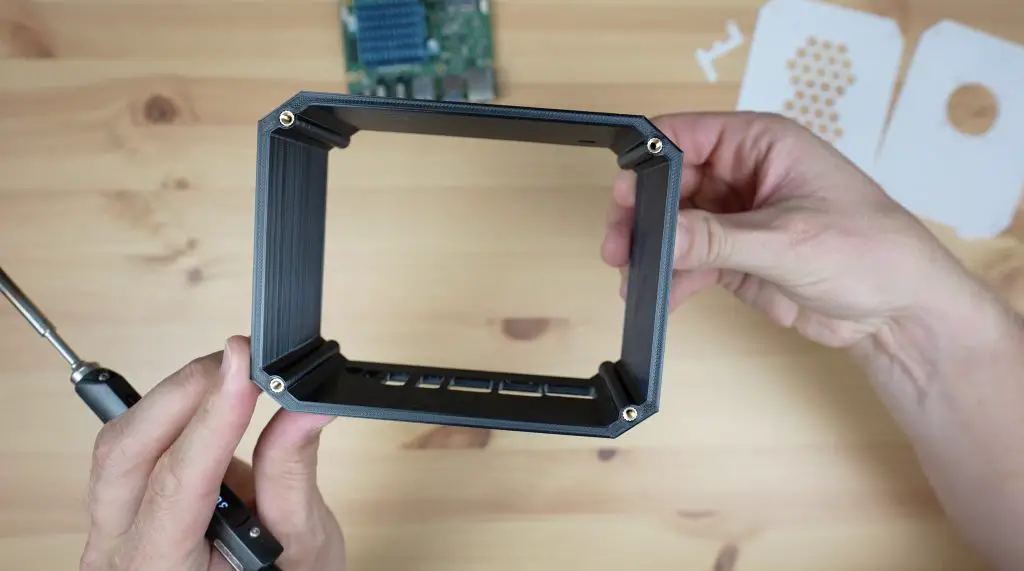
There are four on each side of the case, eight in total. The case is then ready to install the Rock 5 B into.
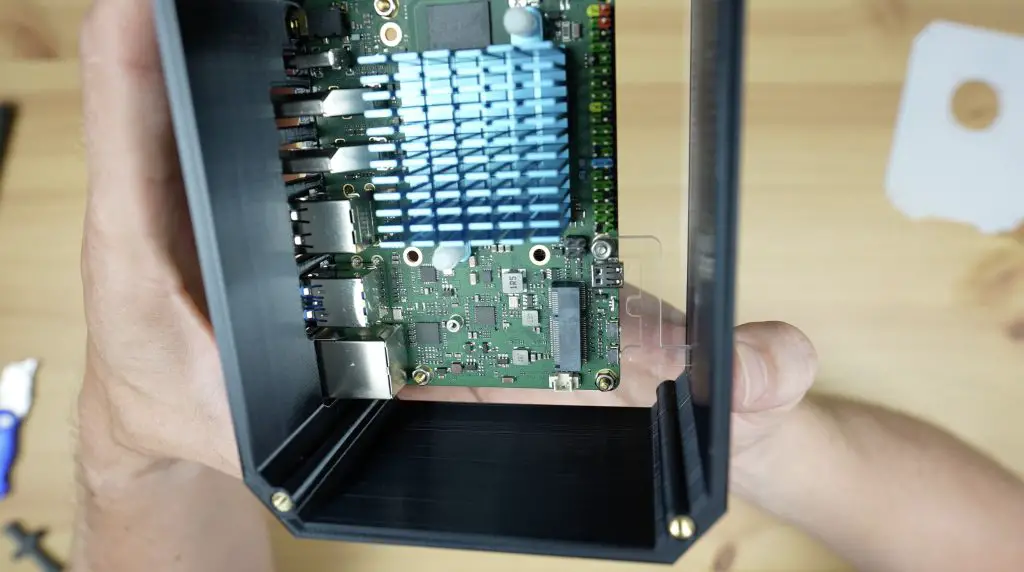
Installing The Rock 5 Model B & Fan
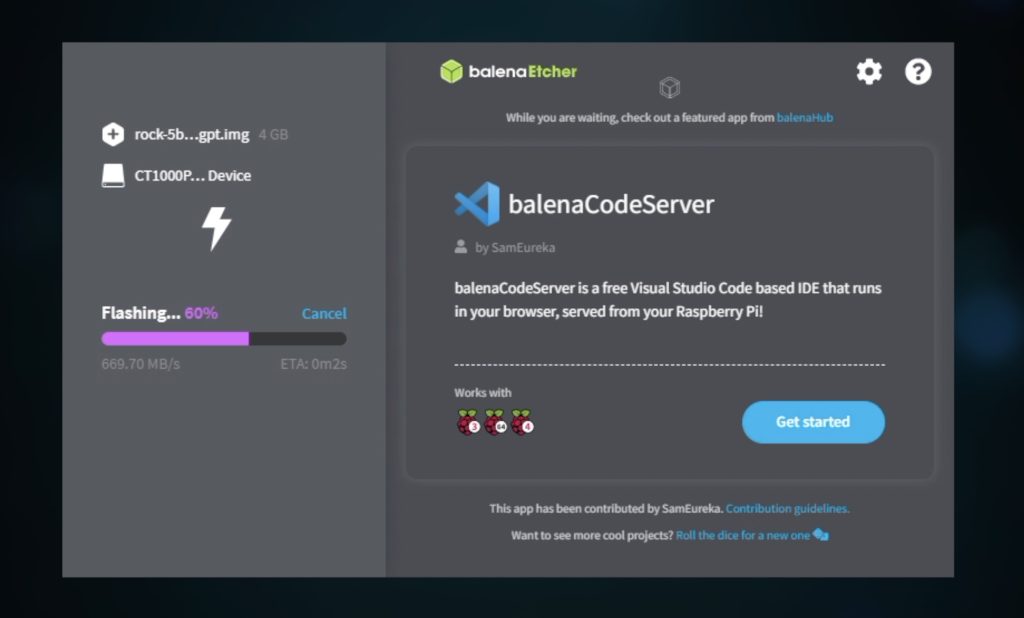
Before installing the Rock 5 into the case, I’m going to re-install the NVME drive after flashing a fresh install of Debian onto it.
Flashing the OS onto an NVME drive is so much faster than the SD cards I’m used to. It took about 5 seconds to flash the image and 7 seconds to validate it.
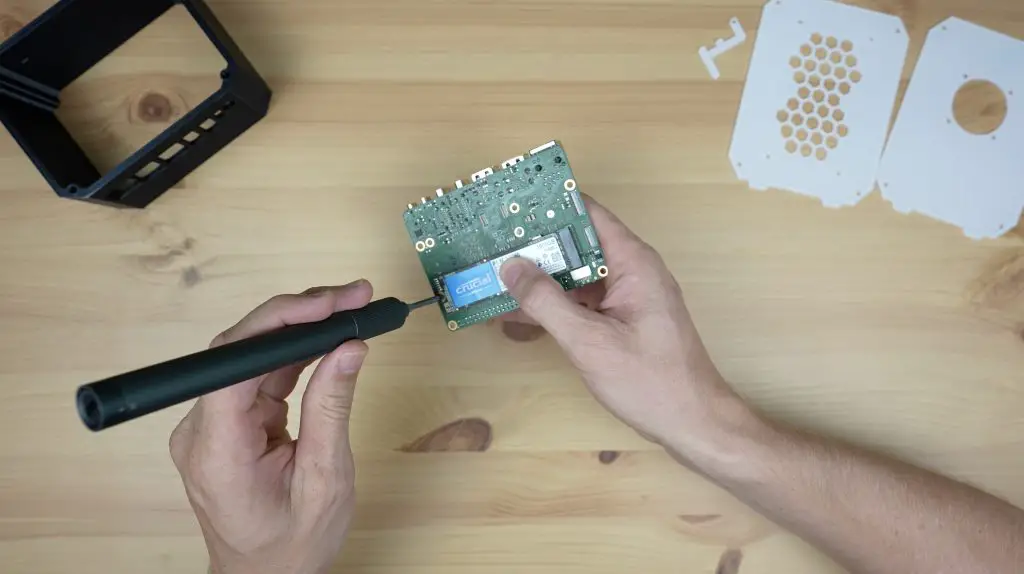
We can then install the NVME drive in the M.2 slot and secure it with a single M2x3mm screw.
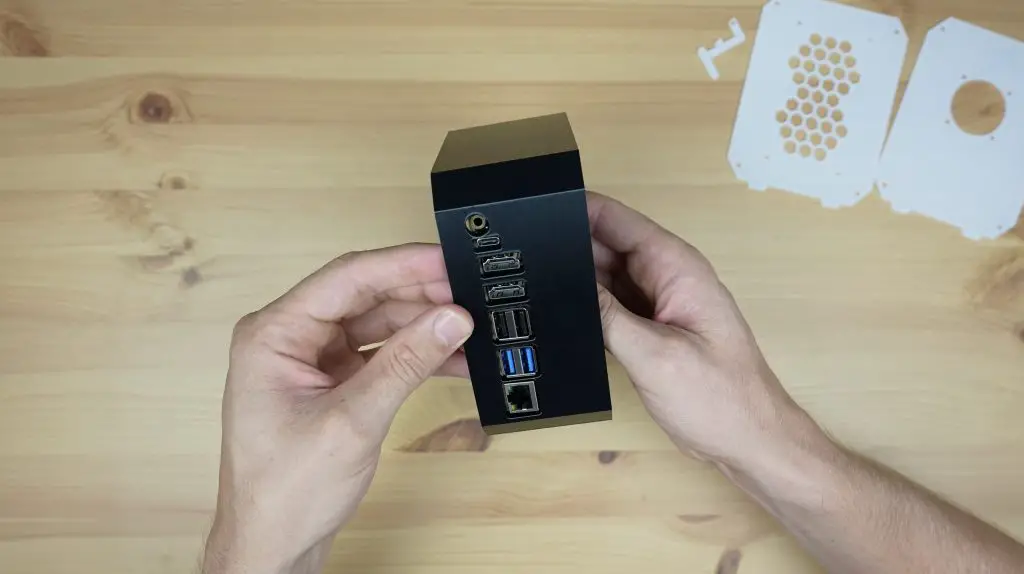
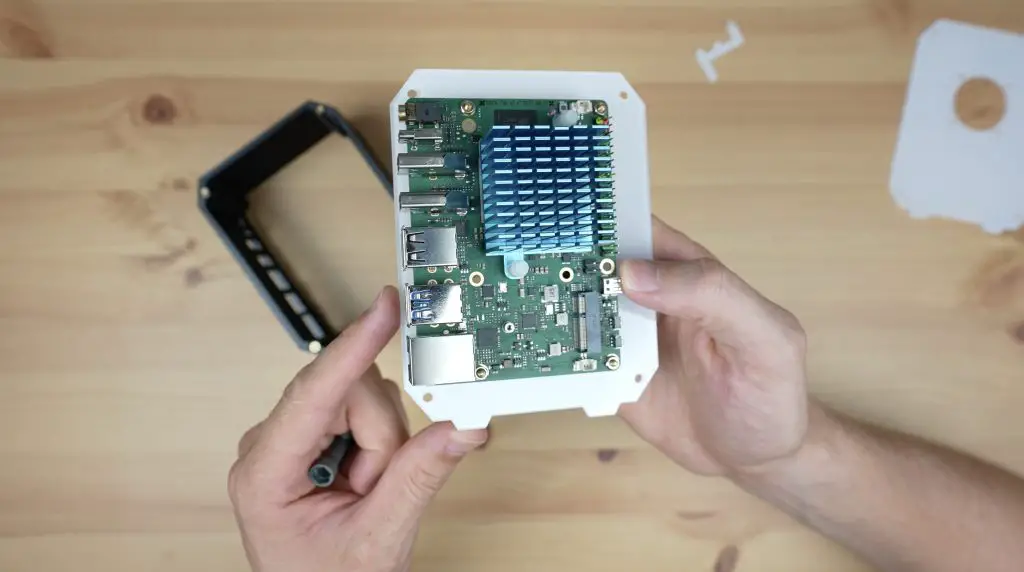
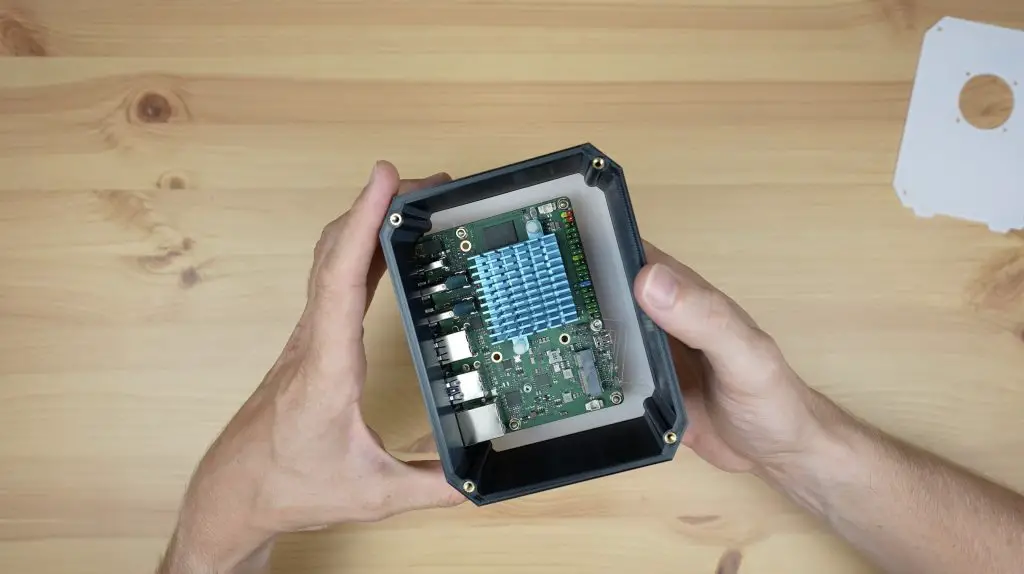
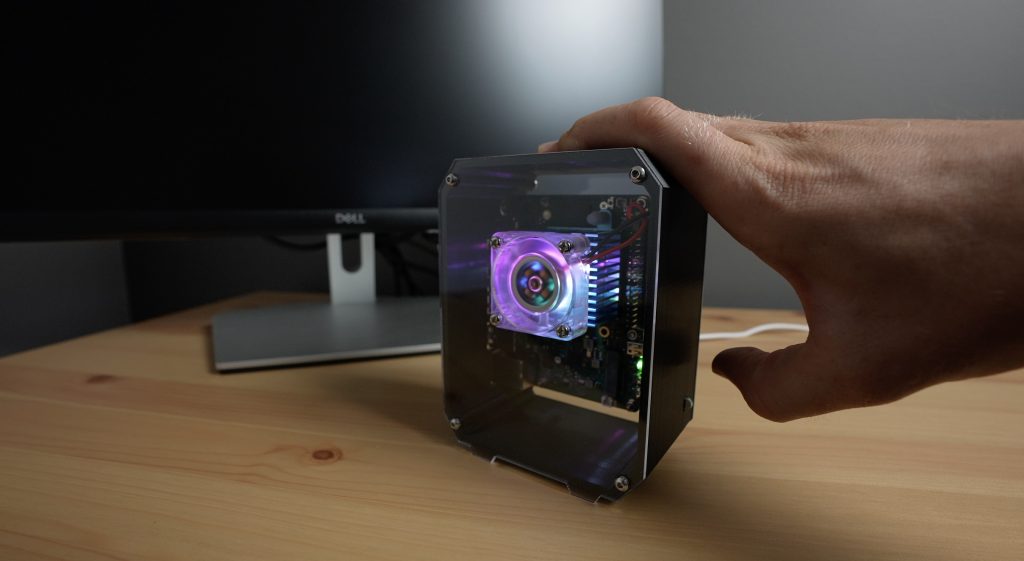
The Rock 5 looks like it fits into the housing quite nicely and all of the ports line up with enough clearance around them, so let’s get it mounted onto the side panel.
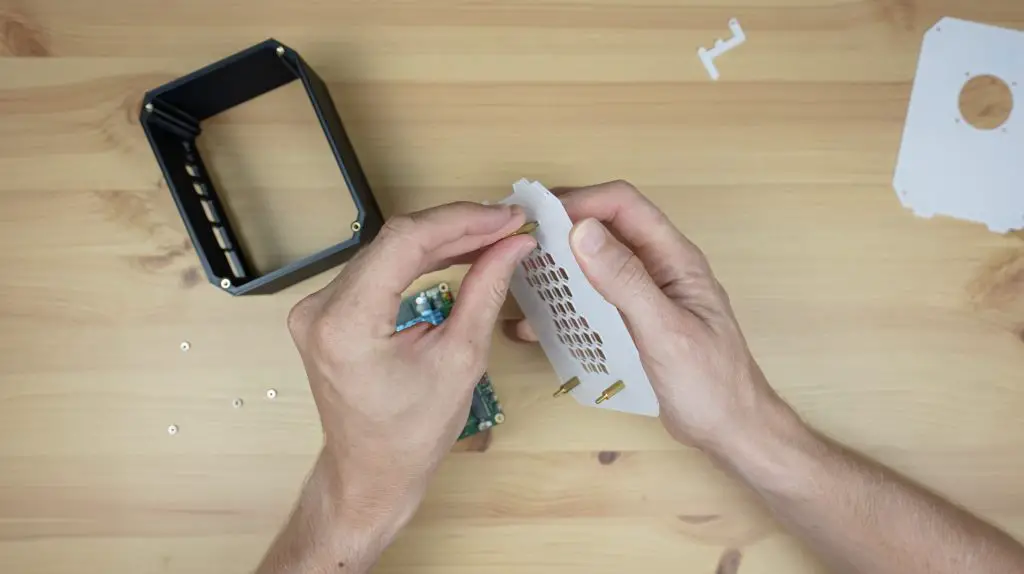
I’m going to mount it with four M2.5x12mm brass standoffs along with button head screws and nuts.
We’ll need to peel off the protective film on the side panel before installing the standoffs. I’m going to leave the outer film in place so that I don’t get fingerprints all over it while mounting the Rock 5 B.
I’m installing the standoffs with the M2.3 button head screw on the outside. This makes it easier to mount the Rock 5, by just placing it onto the male threads, and also keeps the outside of the case looking neat.
Design Update: After struggling to install the button adaptor directly onto the Rock 5, I added a 5th hole to the side panel so that an additional standoff can be used to mount the button adaptor. So make sure that you install five brass standoffs in this step instead of the four shown.
We can then place the Rock 5 B onto the standoffs and secure it with some M2.5 nuts.
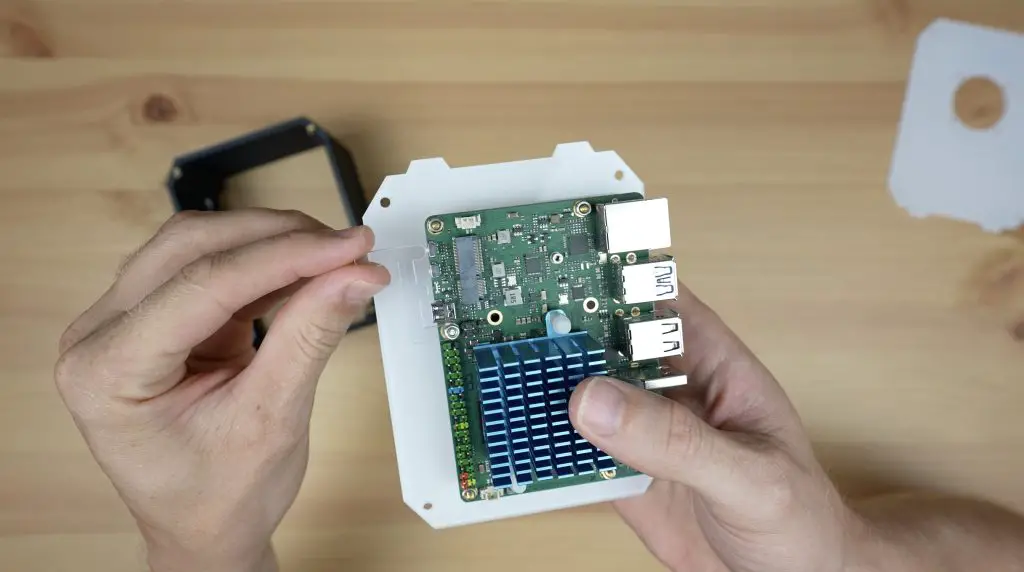
The button adaptor needs to be mounted onto the hole above the HDMI input.
This was a bit of a challenge to get a screw through the back of, but I eventually managed to get it into place. Don’t tighten the nut yet as you’ll need the adaptor to be loose to guide it through the hole in the front of the case. If you added a 5th standoff to the side panel as per the design update then this step is much easier to do.
It feels like it’s going to work well, it lines up well and is easy to push the button through the front of the case.
The adaptor needs to be moved to overlap the button while installing the side panel so that it can then be pushed through the cutout to the front of the case.
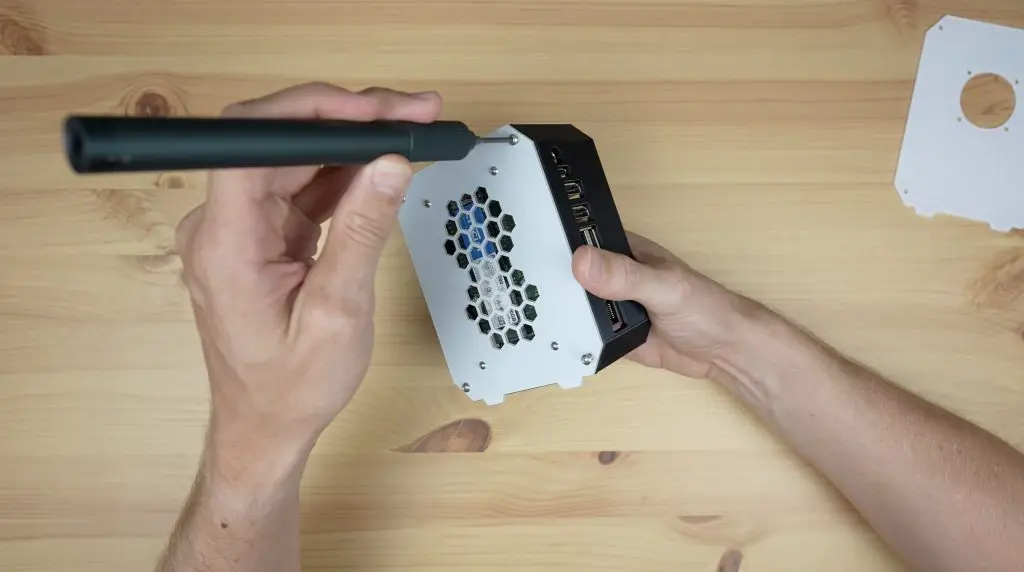
We can then hold the panel in place with four M3x8mm button head screws. Remember to remove the protective film before tightening the screws otherwise, some of the film will be caught underneath the screws and will be difficult to be peeled off.
Then we can push the button adaptor through the cutout and tighten the nut holding it in place. There is enough flex in the acrylic that this nut can be quite tight and still won’t prevent the button from being pressed. Ideally, you want the adaptor to be resting on the face of the button so that there isn’t a gap that needs to be closed to press it.
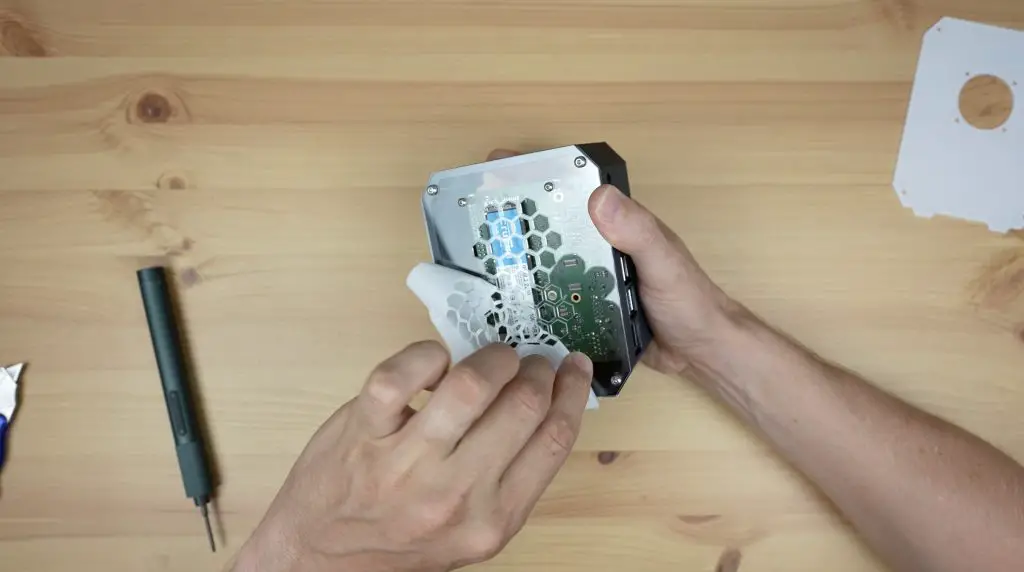
Next, let’s mount the fan onto the opposite side panel. I’m going to use the M3 screws and nuts that came with the fan for this and I’m mounting it so that it is pushing air into the case. Again, make sure that you peel the protective film off before tightening the screws or it’ll be difficult to remove.
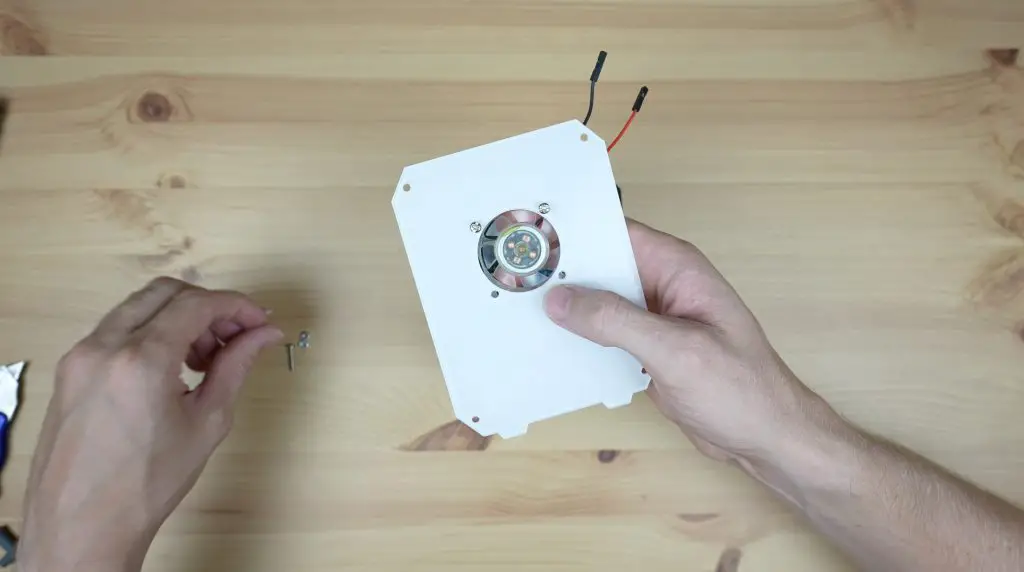
We can plug the fan into the 5V and GND pins on the Rock 5. The fan will also run on 3.3V, it’ll be quieter but will have slightly reduced performance.
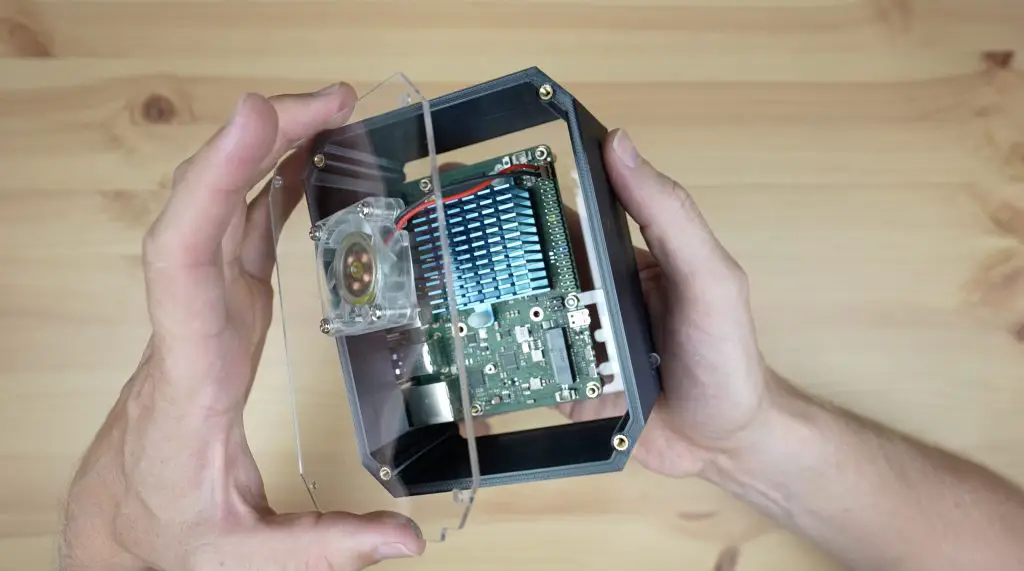
Then we can close up the main side panel with another four M3x8mm button head screws.
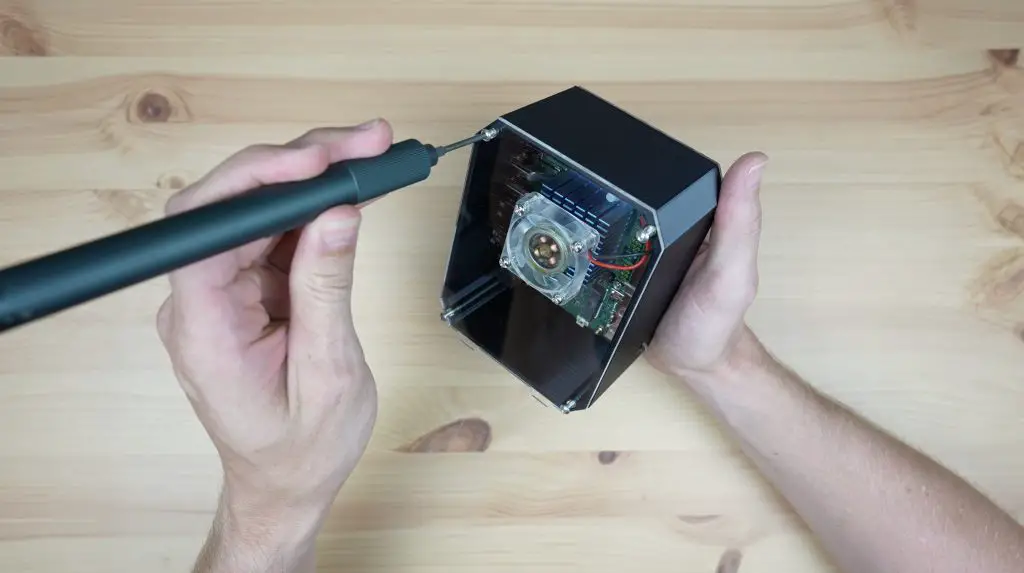
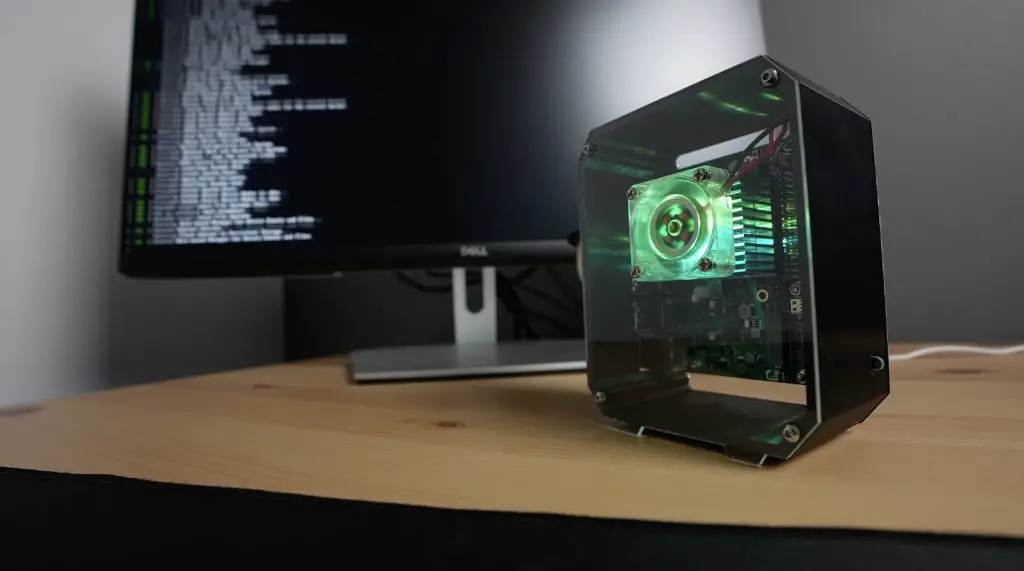
And that’s the case complete, let’s get it hooked up to a power supply and monitor to try out.
Using The Rock 5 B Desktop Case
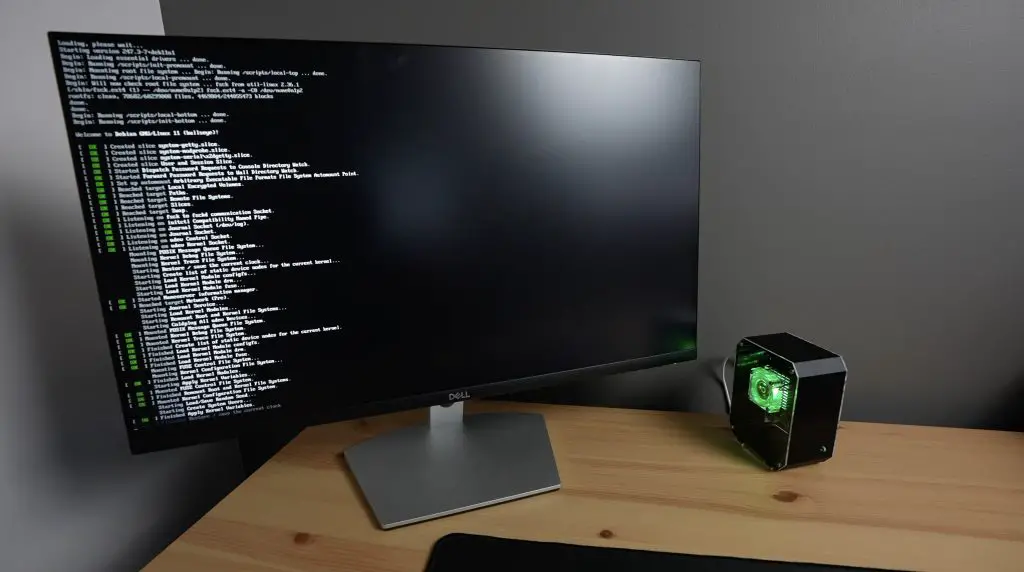
The Rock 5 B comes on automatically when it gets power, so we don’t need to push the power button to boot it up the first time.
It also boots up really quickly from the NVME drive. From the time you plug it in, it takes about 13 seconds to arrive at the login screen.
Now let’s shut it down and see if the power button works to wake it up again.
So there is a similar problem to the Raspberry Pi with this setup. Shutting down the board doesn’t remove power from the 5V pins, so the fan continues to run indefinitely. A workaround would be to use a PWM fan or one of these EzFan modules that require a GPIO pin to be pulled high to turn the fan on, that way when the board shuts down, the GPIO pin would turn the fan off as well.
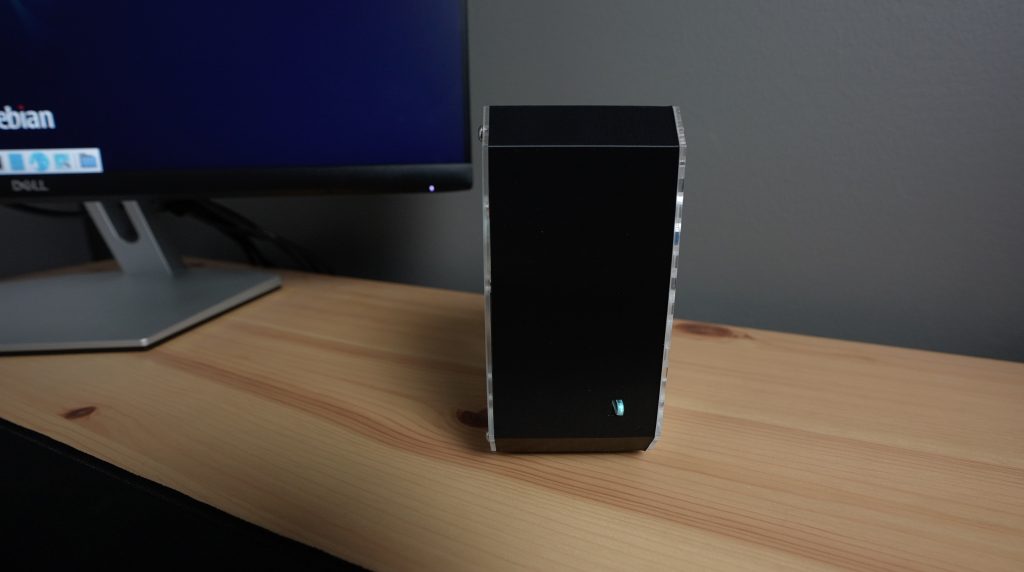
That aside, it looks like the button works correctly to wake it back up.
The button adaptor doesn’t look that bright on camera but the button lights up pretty well using the internal LED.
Let me know what you think of this Rock 5 B case in the comments section below and let me know if you’d like to see anything added or changed in the design. As with my other case designs, I’ve put a kit together for it in my Etsy store if you’d like to get one for your Rock 5 B.
This is super interesting! I had no idea you could turn a Rock 5 Model B into a mini desktop. Missing a checkbox on the bootloader tool is a classic “duh” moment. Your video of the build must be epic. I’m curious, how did you come up with the idea to modify the Raspberry Pi case design? And does the RGB fan really make that much of a difference in cooling? Can’t wait to hear more!
This is awesome! Do you have the .stl files so that I can print it myself?
(Jason 🙂 )