Laying laminate flooring is an affordable way to update a room in your home. This easy guide shows you how to lay laminate flooring to achieve a professional look without the expense of a flooring expert.
Laminate flooring can be laid over cement, brick or tiled surfaces however the floor needs to be clean, level and free from dirt. Laminate flooring is not recommended in bathrooms or laundry rooms where there is high humidity and moisture content as the boards will buckle and warp over time.
What You Will Need To Lay Your Own Laminate Flooring
- Laminate Flooring (10% More Than The Floor Area)
- Underlay (10% More Than The Floor Area)
- Quarter Round (Quadrant) Pine or Skirting (10% More Than The Perimeter Of The Room)
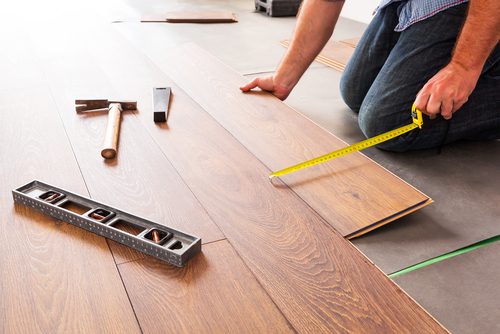
- Hammer
- Tapping Block
- Jigsaw with Course Wood Blade
- Laminate Guillotine or Circular Saw (Optional)
How To Lay Your Laminate Wood Flooring
Because laminate flooring is a wood product, it needs to acclimate before it can be installed. Leave the packaged laminate boards in the room where they are going to be installed for about 2-3 days to fully acclimate.
Next choose the lay of the floor. Decide in which direction the length of the planks will lie. Generally speaking, installing planks parallel to the longest wall in a room will make the room appear larger.
Prepare any doors which open over the laminate flooring. This is particularly important if you are laying the flooring over existing flooring such as tiles. The completed flooring will be between 10mm (1/3″) and 20mm (2/3″) higher than the previous flooring depending on what type of flooring you have bought. Check to see that the bottom of the doors in the room are high enough to clear the flooring. If they are not then use a vibratory saw to cut off the bottom section of the door to create the clearance. Alternately the door can be taken off its hinges and a circular saw can be used to cut the bottom of the door neatly.
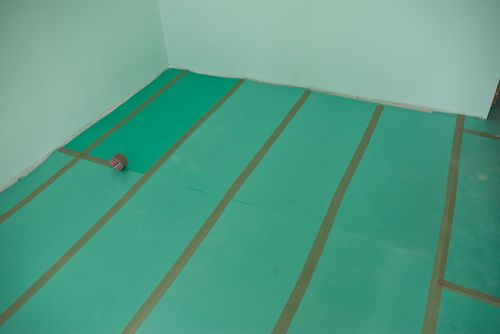
First begin by laying a section of underlay. The underlay is a foam type material which provides cushioning and sound absorption. Some manufacturers recommend taping adjacent sections of underlay with their provided tape or box tape. The underlay should cover the entire area on which the laminate flooring will be laid and should not overlap at any point.
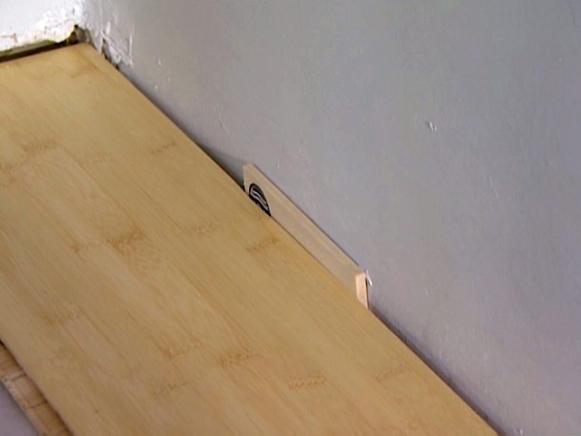
Once the underlay is done, begin laying the boards. Lay the boards length ways in rows, one row the length of the room at a time. Laminate flooring is still a natural wood product and therefore expands and contracts with the humidity in the air. You need to allow a 10mm (1/3″) gap between the flooring and the walls around the perimeter of the room. This gap will then be covered by skirting or a quarter round (quad) of pine attached to the skirting.
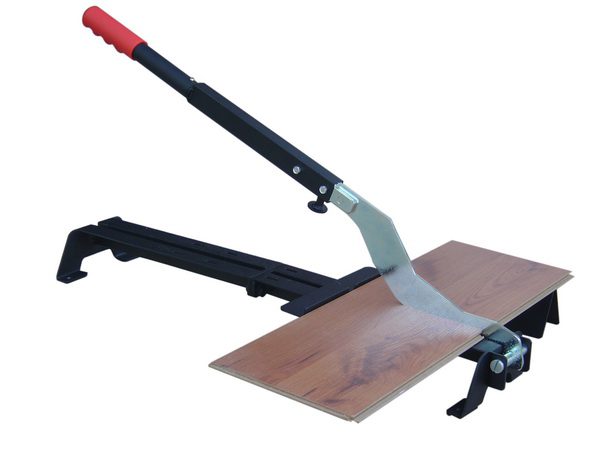
Adjacent rows should be staggered such that the joins along the boards lengths do not align in adjacent rows. To do this, cut the first plank of every second row in half using a circular saw or laminate flooring guillotine. Click each board into place as you work along completing the row.
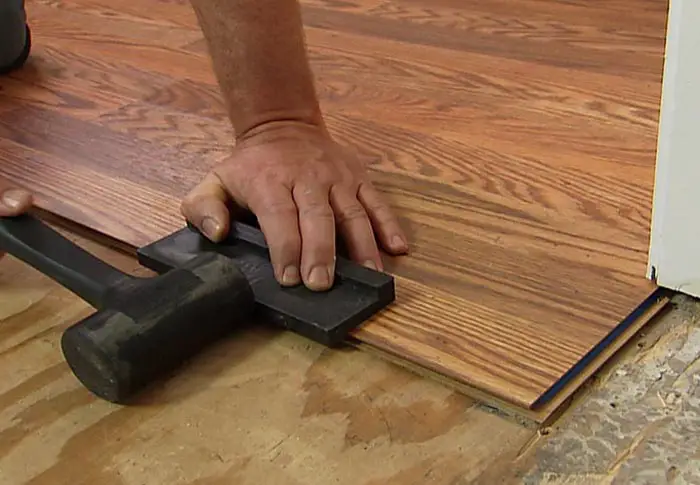
As you place boards, gaps may open up between boards and between rows. This must be checked continuously and a hammer and tapping block can be used to tap the boards back into place. The tapping block distributes the impact from the hammer along a portions of the board’s edge so that the face of the hammer doesn’t damage the edge.
At the corners, press the board up against the edge of the laid flooring and mark the width of the cut then press it up against the edge of the previous row and measure the length of the cut. Mark the cut area with a set square and ensure that a 10mm gap is left around the wall’s edge. To cut complex corners a jigsaw is the easiest tool to use as it has a narrow blade and provides visibility to the cutting area so that you can see your marked cutting lines.
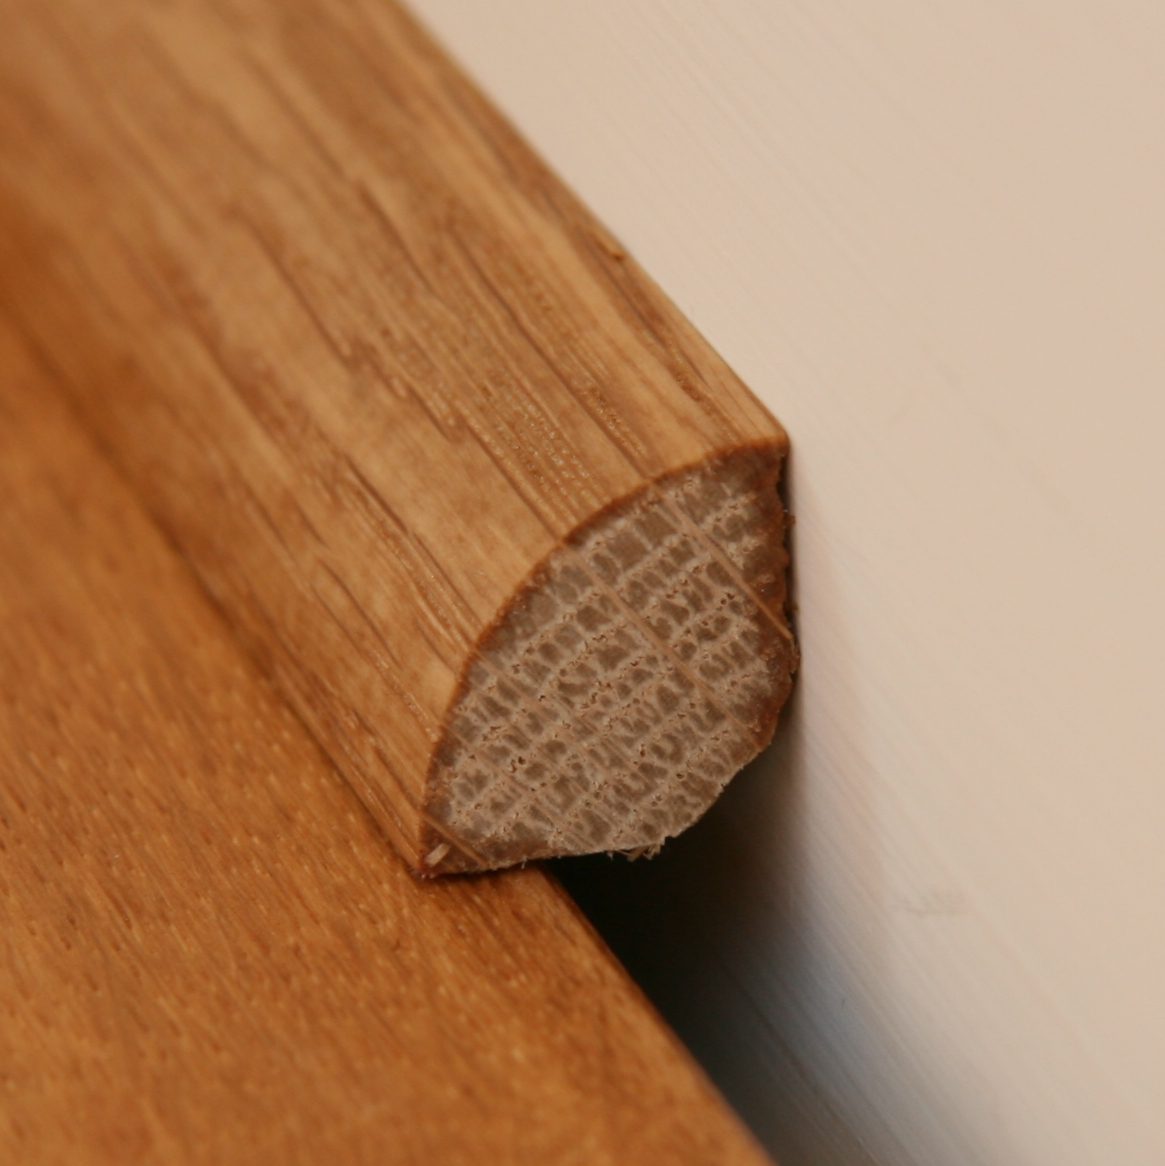
Once the flooring has been laid, install the skirting or quarter rounds of pine over the edge gaps. The skirting should just touch the top of the flooring and not be used to press down on the flooring. Cut the 45° corners with a mitre box. A nail gun can be used to attach the skirting or quarter rounds. Finish off by painting the quarter rounds the same colour as the skirting or varnishing them in the same colour as the flooring.
If you’re installing laminate flooring to give your home and update, have a look at these 8 DIY projects to increase your home’s value.
What are your experiences with this project? Please share your comments, tips and advice with us in the comments section below, we would love to hear from you.
Share This Guide

Best article I have read ever. Good information has been shared by you. Recently I have renovated my home with hardwood flooring. But some of the places are still remaining for renovation, as those are the moist area and laminate flooring will be best for those. Thanks for sharing the installation process. It is less expensive than hardwood floor installation.