Make your own gravity defying levitating top using some magnets and some common household items. This is a nice quick weekend project and is great for science projects on magnetism.
What You’ll Need To Make Your Own Levitating Top
- 13 1/2″ x 1/8″ Grade N52 Disc Neodymium Magnets
- 1 3/4″ OD x 3/8″ ID x 1/8″ Thick Ring Grade N52 Magnet
- 4″ (100mm) Square Piece of Wood At Least 1/4″ (6mm) Thick
- 1/2″ Forstner Drill Bit
- Pencil
- Electrical Tape
- Plastic or Brass Washers
- 4″ (100mm) Square Plastic or Cardboard Sheet
How To Make Your Own Levitating Top
Make The Magnet Ring Base
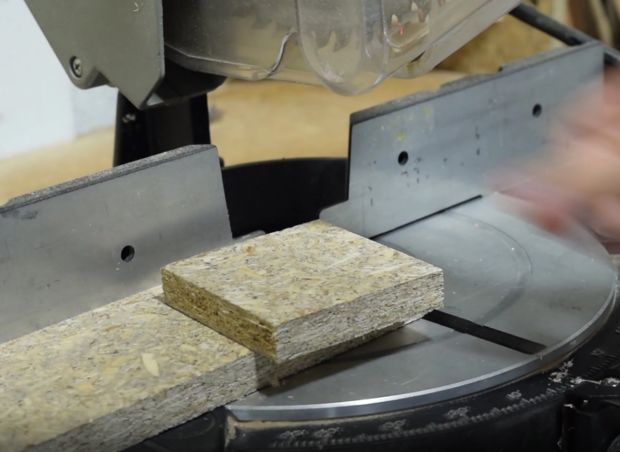
You’ll need a nice and sturdy 4″ square piece of wood. If you’re using a scrap piece of wood, use a handheld or electric saw to cut a 4″ (100mm) square from it.
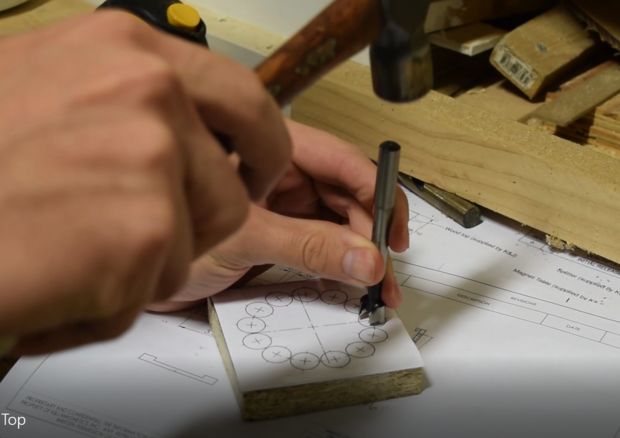
The disc magnets are going to be arranged in a perfect circle on one side of the wood. You can either measure out and mark the wood or print out the diagram below and trace the markings through the paper.

If you’re tracing out the layout, make sure that the scale you’ve printed aligns with the scale on the ruler shown in the diagram. If you have one, use a center punch to mark out the centers of the circles, this makes it easier to drill in the correct place.
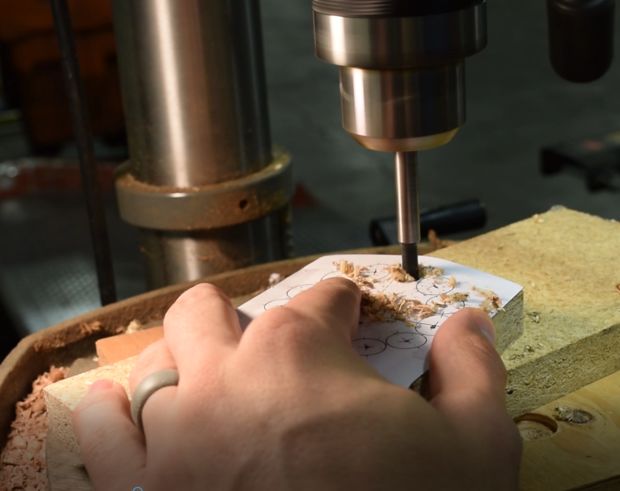
Now you can drill out the holes. Use the 1/2″ forstner drill bit to create a nice flat bottomed hole. Drill the hole as deep as possible into the wood without breaking through the other side, make sure they are all consistent. The holes side of the wood is going to be the bottom of the base.
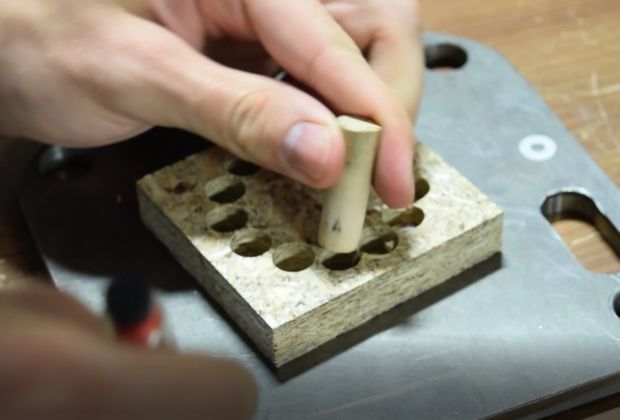
Once you have drilled all of the holes, you can insert the magnets. You want all of the magnets to be facing in the same direction, with the north pole face down in the hole. Use a small marked magnet to help you determine which is the north pole, the north pole of a magnet will be attracted to the south pole of another magnet. Press each magnet in using a dowel or pencil.
Make The Top
Cut a pencil down to around 1 1/2″ (40mm) length, keeping the sharp end as the tip of the top. Wrap some electrical tape around the pencil to increase the diameter until the ring magnet fits snugly around the pencil. The north pole must be facing down – towards the tip of the pencil.
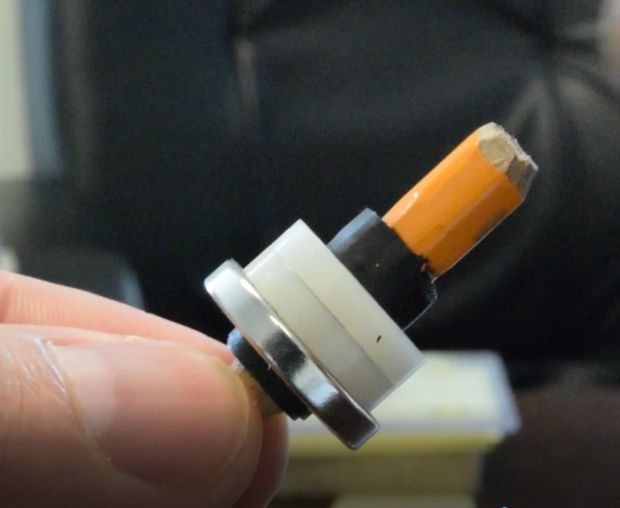
Finally, add some plastic or brass washers on top of the magnet to increase the weight of the top.
Test It Out
Cut out a piece of plastic or cardboard to create the spinning surface. You’ll place this surface on top of the base, spin the top on it and then raise it up to get the top into the “sweet spot”.

This is really tricky and can be frustrating to get right. There are a few factors which come in to get your top spinning correctly.
- The base needs to be perfectly level. Use post it notes to jack up the sides of the base to level it if the top keeps falling to one side.
- Play around with the weight added to the top until it stays in the sweet spot. If the top flies off straight away, it needs more weight. If the top doesn’t lift off the plate then it is probably too heavy.
Check out this video to see how it works:
Interested in how/why this top works? Check out this blog article.
This post is based on Levitating Top by KJMagnetics and has been adapted and used under the Creative Commons 2.5 license: CC-BY-NC-SA.
Have you made your own levitating top? Let us know in the comments section below!