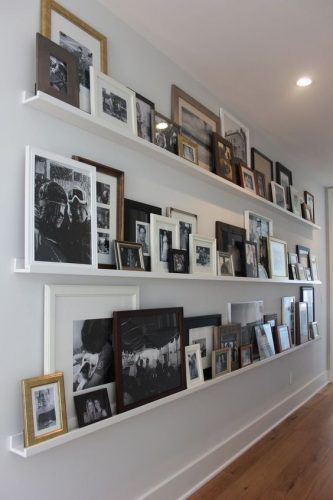
Picture frame shelves or ledges are a great way to display your collection of family photos for all to see without overcrowding a bookshelf or mantle. It’s also super easy to swap out pictures or re-arrange the wall for a fresh look. You can build your own picture frame shelf using the simple plan below for a couple of dollars using timber lengths available from your local hardware store.
If you’re looking for a more functional shelf for your home, have a look at these 6 easy DIY shelf ideas.
What You Need To Your Picture Frame Shelf
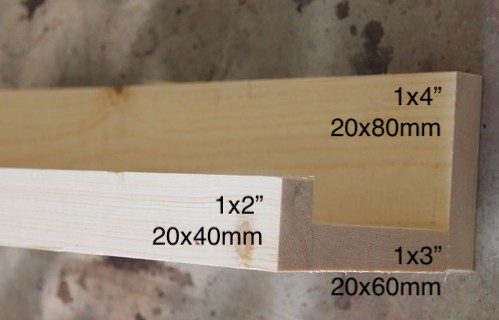
- Length of 1×4″ or 20x80mm timber
- Length of 1×3″ or 20x60mm timber
- Length of 1×2″ or 20x40mm tinber
Depending on the lengths of timber available at your local hardware store, the above will either make one long shelf or two shorter shelves if you cut the lengths in half. It looks great to have three or four shelves on a large wall as a feature.
How To Build Your Picture Frame Shelf
You can decide whether you’re more comfortable with screws or wood glue, but the basic idea is the same. Use the 4″ or 80mm section as the back of the shelf, the 3″ or 60mm section as the bottom and the 2″ or 40mm section as the front lip to keep the frames in place.
Glue or screw the pieces together to form a shelf as pictured. If you want a shelf which is shorter than the lengths of timber available at your hardware store or you’re dividing the timber lengths in half, be sure to cut them to size before assembly. It is a lot easier to cut the timber to length in individual pieces.
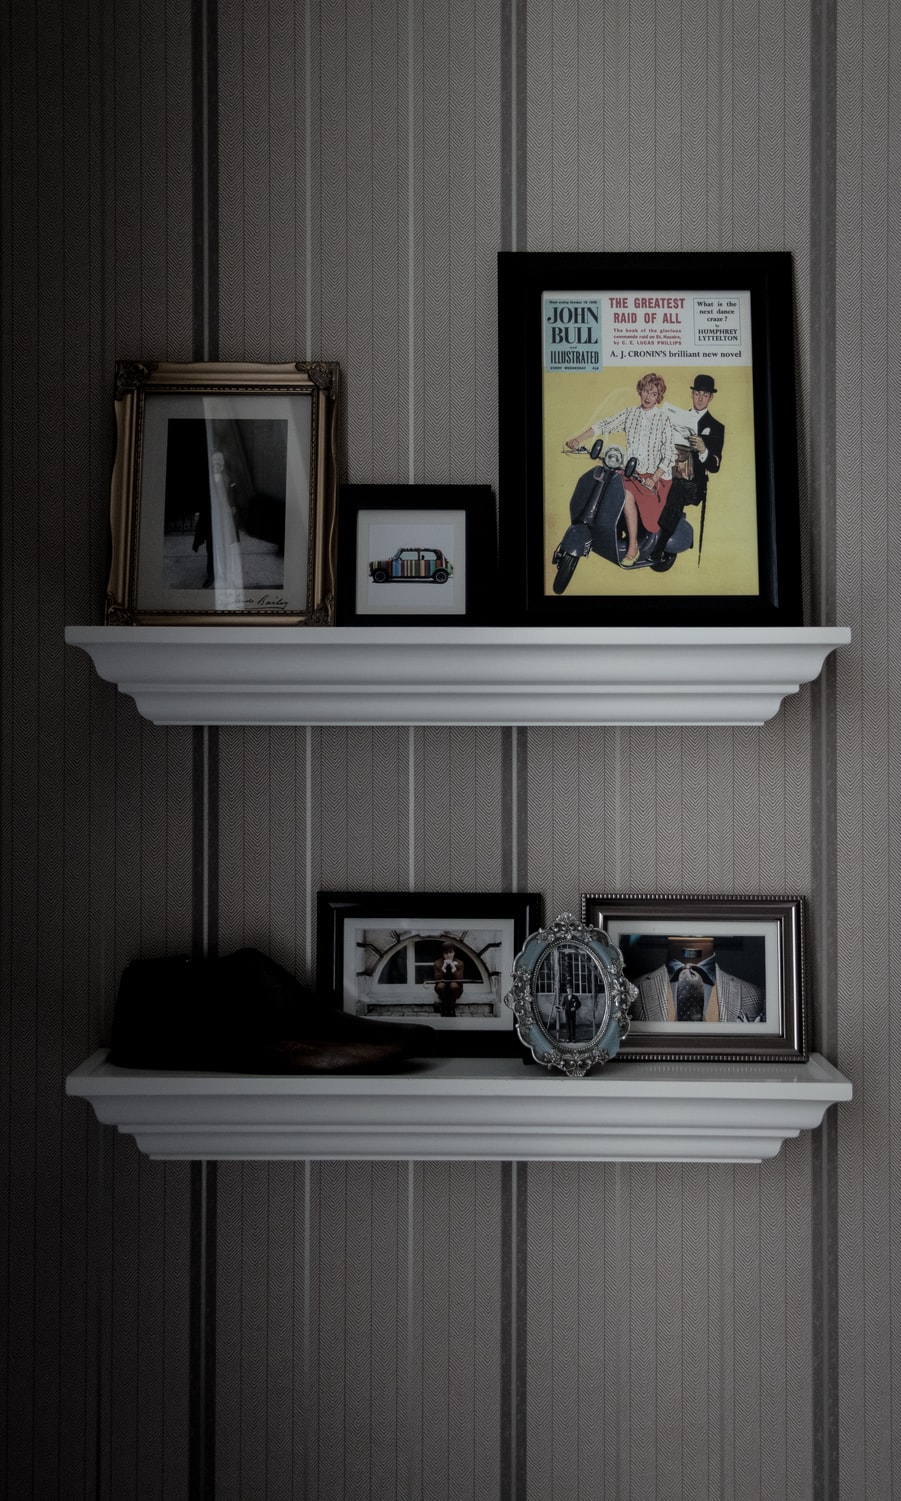
Once your shelf is assembled and the glue is completely cured, you can stain, varnish or paint the shelves to suite your decor. It often looks good to paint your shelves in white or a dark wood stain. Some people also add pieces of thin moulding to the shelves for some extra styling and detail.
Have you made your own picture frame shelves? Let us know in the comments section below. We’d love to share your ideas and pictures.