This off grid solar power information system is perfect for your van or RV. It gives you a complete view of your Van’s power consumption and solar panel generation, it also predicts how long your batteries are going to last for and how much power is being generated by your solar panels.
A quick look at the indicator lights tells you when your solar panels are charging your batteries, when they are generating more power than you are using as well as when your batteries are almost flat. An alarm sounds if your batteries are then further discharged to the point where they are at risk of being damaged.
The LCD provides you with detailed information on how much power your batteries have stored, how much is being used, how much is being generated by your solar panels and how long your batteries will last for.
If you’d like to build and energy monitor for your home or other AC installation, here is a simple Arduino based home energy meter.
The circuit is really simple to assemble and doesn’t require much soldering, it can be assembled on a breadboard if you are not confident soldering. You will need to know the basics of programming an Arduino, if you haven’t done this before – here is a useful guide to getting started with Arduino. You will also need to know roughly how to connect an LCD screen to an Arduino.
What You Will Need To Build The Power Information System
- Arduino Uno – Buy Here
- 16×2 LCD Screen Shield – Buy Here
- 2 x ACS712 30A Current Sensor – Buy Here
- 2 x 10K Resistors – Buy Here
- 20K Resistor – Buy Here
- 30K Resistor – Buy Here
- Green LED – Buy Here
- Red LED – Buy Here
- 2 x 220Ω Resistors – Buy Here
- Arduino Buzzer Alarm Module – Buy Here
How To Make The Power Information System
The control system consists of two separate parts, the power sensing circuits and the feedback and display circuits. It may be useful to separate the two within your van if your batteries and solar panel inputs are kept away from where you’d like the information displayed. This is easily done using a length of 6 core intercom or alarm wire between the sensors and your Arduino box.
The power sensing circuits for the battery and solar panel each consists of a voltage sensor and a current sensor, these two measurements combined are required to calculate the power consumption, battery life, time left etc.
The feedback circuits provide you with information on the system and includes the LCD shield which is mounted on top of the Arduino as well as the indication LEDs and alarm.
Building The Circuits
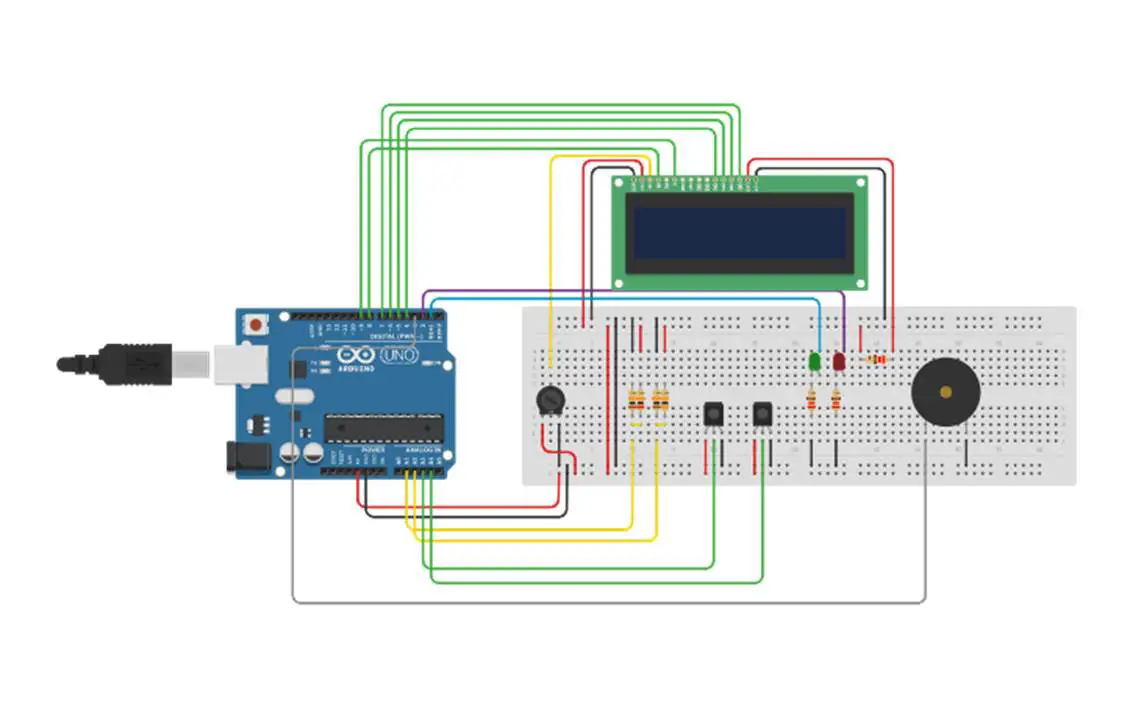
The complete circuit is shown in the diagram below. We will build the complete system up in stages in order for you to understand what each circuit is doing and how it should be connected.
Voltage Measurement Circuits
For The Batteries
The first circuit is the voltage measurement from the battery which is done through a voltage divider circuit. The Arduino’s analogue inputs can only handle up to 5V and our batteries typically have a voltage of between 11.8V when empty and 14.7 volts when charging. We therefore need to scale this voltage down to under 5V so that we don’t damage the Arduino input.
Looking at the maximum voltage of the batteries during charge, 14.7V and the Arduino input voltage of 5V, you can see that the Arduino requires roughly a third of the charging battery voltage. This means that we will need a voltage divider in the ratio 1/3 to 2/3 which in turn means that we need the one resistor to be double the resistance of the second resistor. You also want the resistors to be of a reasonably high resistance to ensure that only a small amount of current flows through them otherwise you’re simply wasting energy in the form of heat. I’ve chosen to use a 20K and a 10K resistor as these provide round values in the exact ratio I need with a high resistance.
Simply connect the resistors as shown in the circuit diagram with the centre point of the voltage divider connected to the Arduino analogue input 1 and the two legs of the bridge connected to the positive and negative terminals of the battery. Make sure you have the positive and negative on the correct side of the bridge otherwise you scale will be 0-10V instead of 0-5V which will damage the Arduino. The lower value resistor must be connected to the negative terminal of the battery and the higher value resistor to the positive terminal on the battery.
For The Solar Panels
The voltage coming from your solar panels is measured in much the same way as the battery voltage expect that the solar panels typically produce a higher voltage than your battery voltage. Most solar panels have an output voltage of 18V, this also needs to be scaled down to 5V for the Arduino’s analogue inputs.
Using the same calculation as above, the scaled voltage is now roughly a quarter of the solar panel voltage so we will need one resistor to be three times the resistance of the other resistor. If we again use a 10K resistor, we will need a 30K resistor as the second resistor to divide the voltage to give us the correct scaling.
Connect the resistors as shown in the diagram, again with lower value resistor connected to the negative lead from the solar panel, the higher value resistor to the positive solar panel lead and the centre point connected to the Arduino analogue input 2.
Current Measurement Circuits
Current Being Drawn From The Batteries
The current sensing is done using the ACS712 sensor which can measure up to 30A. This equates to roughly 350W so if you expect to have a peak power consumption of higher than 350W then you’ll need to choose a sensor which can measure higher current or alternately split up your circuits into lighting, chargers, plugs etc each with their own sensor.
The sensor connection is straightforward, it is powered directly from the Arduino using the GND and VCC/5V pins and the OUT pin is connected to the Arduino analogue input 3. The sensor terminals are then connected in series with your load onto the supply lead from your battery.
As mentioned above, you could also get more functionality out of the power meter by installing a current sensor onto each of your power circuits. For example you could have one sensor on your lighting circuit, one on your 12V charger circuit and one on your AC inverter circuit. Each of the sensors would then be connected to their own Arduino analogue input.
Current Being Supplied By The Solar Panel
As we’ve done above for the batteries, we can connect a current sensor in series with the supply from the solar panel before it goes into the solar charge controller. The output from the sensor is then connected to one of the Arduino analogue input 4.
Feedback Circuits
The feedback from the Arduino is done through an LCD which is mounted onto an Arduino shield as well as two LEDs and an alarm.
The LCD shield can simply be plugged on top of the Arduino and provides all of the functionality required to drive the LCD. The contrast may require some adjustment in order to see the text clearly on the screen.
The LCD shield uses the following pins, the rest are available for your sensors and feedback circuits:
- Analogue 0
- Digital 4
- Digital 5
- Digital 6
- Digital 7
- Digital 8
- Digital 9
- Digital 10
The LEDs are connected in series with a 220Ω resistor and are each connected to a free digital output pin. The green LED is used to indicate when the solar panels are providing more power than you are using in your van, the batteries are therefore being charged. The red LED is used as an indication that the battery is running low and you should limit your power usage or charge the battery.
The buzzer is connected to the Arduino in a similar way to the current sensors. You will need to connect the GND and VCC pins to the Arduino GND and 5V pins and the input pin to one of the unused Arduino outputs.
Your circuits are now all complete and you can move on to programming the Arduino.
Uploading The Sketch
Now you can upload your sketch onto your Arduino, if you haven’t uploaded a sketch before then follow this guide on getting started.
//Michael Klements
//The DIY Life
//7 July 2017

#include <LiquidCrystal.h>

int battVoltPin = 1;                //Assign battery voltage to pin 1
int solVoltPin = 2;                 //Assign solar panel voltage to pin 2
int battCurrentPin = 3;             //Assign battery current sensor to pin 3
int solCurrentPin = 4;              //Assign solar panel current sensor to pin 4
int greenLEDPin = 1;                //Assign green LED to pin 1
int redLEDPin = 2;                  //Assign red LED to pin 2
int alarmPin = 3;                   //Assign alarm to pin 3
double batteryKWH = 0;
double solarKWH = 0;
int battCapacity = 105;             //The battery's usable capacity in Amp Hours

unsigned long startMillis;          //Variables to track time for each cycle
unsigned long endMillis;

LiquidCrystal lcd(8, 9, 4, 5, 6, 7);  //Assign LCD screen pins, as per LCD shield requirements

void setup()
{
  pinMode(greenLEDPin, OUTPUT);  //Define the pin functions
  pinMode(redLEDPin, OUTPUT);
  pinMode(alarmPin, OUTPUT);
  lcd.begin(16,2);              //Start the LCD, columns, rows.  use 16,2 for a 16x2 LCD, etc.
  lcd.clear();
  lcd.setCursor(0,0);           //Set cursor to column 0, row 0 (the first row)
  lcd.print("Van Life");
  lcd.setCursor(0,1);           //Set cursor to column 0, row 1 (the second row)
  lcd.print("Power Info");
  startMillis = millis();
}

void loop()
{
  double battVoltage = 0;
  double battCurrent = 0;
  battVoltage = 15*analogRead(battVoltPin)/1023;            //Read the battery voltage
  battCurrent = 30*(analogRead(battCurrentPin)-511)/512;    //Read the battery current
  double battPower = battVoltage*battCurrent;
  double solarVoltage = 0;
  double solarCurrent = 0;
  solarVoltage = 20*analogRead(solVoltPin)/1023;            //Read the solar panel voltage
  solarCurrent = 30*(analogRead(solCurrentPin)-511)/512;    //Read the solar panel current
  double solPower = solarVoltage*solarCurrent;
  if(solPower>=battPower)                                   //If solar power is greater than power being drawn then battery is charging
  {
    digitalWrite(greenLEDPin, HIGH);
  }
  else
  {
    digitalWrite(greenLEDPin, LOW);
  }
  if(battVoltage<=12.10)                                    //Low voltage indication
  {
    digitalWrite(redLEDPin, HIGH);
    digitalWrite(alarmPin, LOW);
  }
  else if (battVoltage<=11.95)                              //Low voltage alarm
  {
    digitalWrite(redLEDPin, HIGH);
    digitalWrite(alarmPin, HIGH);
  }
  else
  {
    digitalWrite(redLEDPin, LOW);
    digitalWrite(alarmPin, LOW);
  }
  double battPercentage = 100*((battVoltage-11.9)/(12.7-11.9));  //Calculate battery percentage remaining
  double battTime = (battCapacity/battCurrent);               //Calculate battery time remaining
  endMillis = millis();
  unsigned long time = endMillis - startMillis;
  batteryKWH = batteryKWH + (battPower * (time/60/60/1000000));  //Calculate battery kWh used since start
  solarKWH = solarKWH + (solPower * (time/60/60/1000000));       //Calculate solar panel kWh generated since start
  startMillis = millis();
  delay (4000);
  lcd.clear();                  // Start updating display with new data
  lcd.setCursor(0,0);
  lcd.print("Battery");
  delay (1000);
  lcd.clear();
  lcd.setCursor(0,0);           // Displays all battery data
  lcd.print(battVoltage);
  lcd.print("V");
  lcd.setCursor(9,0);
  lcd.print(battCurrent);
  lcd.print("A");
  lcd.setCursor(0,1);
  lcd.print(battPower);
  lcd.print("W");
  lcd.setCursor(9,1);
  lcd.print(batteryKWH);
  lcd.print("kWh");
  delay (4000);
  lcd.clear();
  lcd.setCursor(0,0);           // Displays all battery capacity data
  if(solPower>=battPower)
  {
    lcd.print("Battery");
    lcd.setCursor(0,1);
    lcd.print("Charging");
  }
  else
  {
    lcd.print("Remaining ");
    lcd.print(battPercentage);
    lcd.print("%");
    lcd.setCursor(0,1);
    lcd.print("Time ");
    lcd.print(battTime);
    lcd.print("hrs");
  }
  delay (4000);
  lcd.clear();
  lcd.setCursor(0,0);
  lcd.print("Solar Panel");
  delay (1000);
  lcd.clear();
  lcd.setCursor(0,0);           // Displays all solar panel data
  lcd.print(solarVoltage);
  lcd.print("V");
  lcd.setCursor(9,0);
  lcd.print(solarCurrent);
  lcd.print("A");
  lcd.setCursor(0,1);
  lcd.print(solPower);
  lcd.print("W");
  lcd.setCursor(9,1);
  lcd.print(solarKWH);
  lcd.print("kWh");
}
Here’s a link to download the VanPowerInformation code.
Understanding The Code
The code is fairly simple and follows the standard Arduino sketch format. I will run through the simple things briefly and go into a bit more detail on the lines which do calculations to be displayed on the screen.
The first portion, lines 7 to 21 simply create the variables used in the code, assigns values (mostly pin numbers) and sets up the LCD pin arrangement. The battCapacity variable will need to be adjusted to suite your setup as this is the usable capacity of your battery. For example, if you have a 130 amp hour battery and you want to be able to discharge it to 20% then you have 104 amp hours of usable capacity.
The setup loop is run once when the Arduino is powered up and defines the pin modes as well as starts up the LCD communication time keeping millis function.
The loop function is then run continuously and does the calculations and updates the LCD each cycle.
The code first takes voltage and current measurements from the battery circuit and then from the solar circuit. In both cases the code is similar. The battery voltage measurement (line 41) takes a reading from the analogue pin and then scales the 0-1023 input to a 0-15V reading as this is the output our voltage divider provides.
The battery current measurement (line 42) takes a reading from the analogue pin, removes half of the scale because the current sensor reads 2.5V for zero current. and then scales the 0-511 input to a 0-30A reading as measured by the sensor.
The same two lines are repeated for the solar circuit with a scaling of 0-20V for the solar voltage measurement.
Power is then calculated for each circuit as the product of voltage and current.
The code then checks to see if the battery is charging, if the battery voltage is running low and if the battery voltage is critically low and switches the LEDs and alarm on or off accordingly.
The battery life remaining as a percentage is then calculated. Again, these values can be adjusted depending on the type of battery you are using. You may not want to discharge it below a certain voltage.
Energy used by the battery and supplied by the solar panels are then calculated as a product of the power being drawn and supplied and the time elapsed since the last measurement.
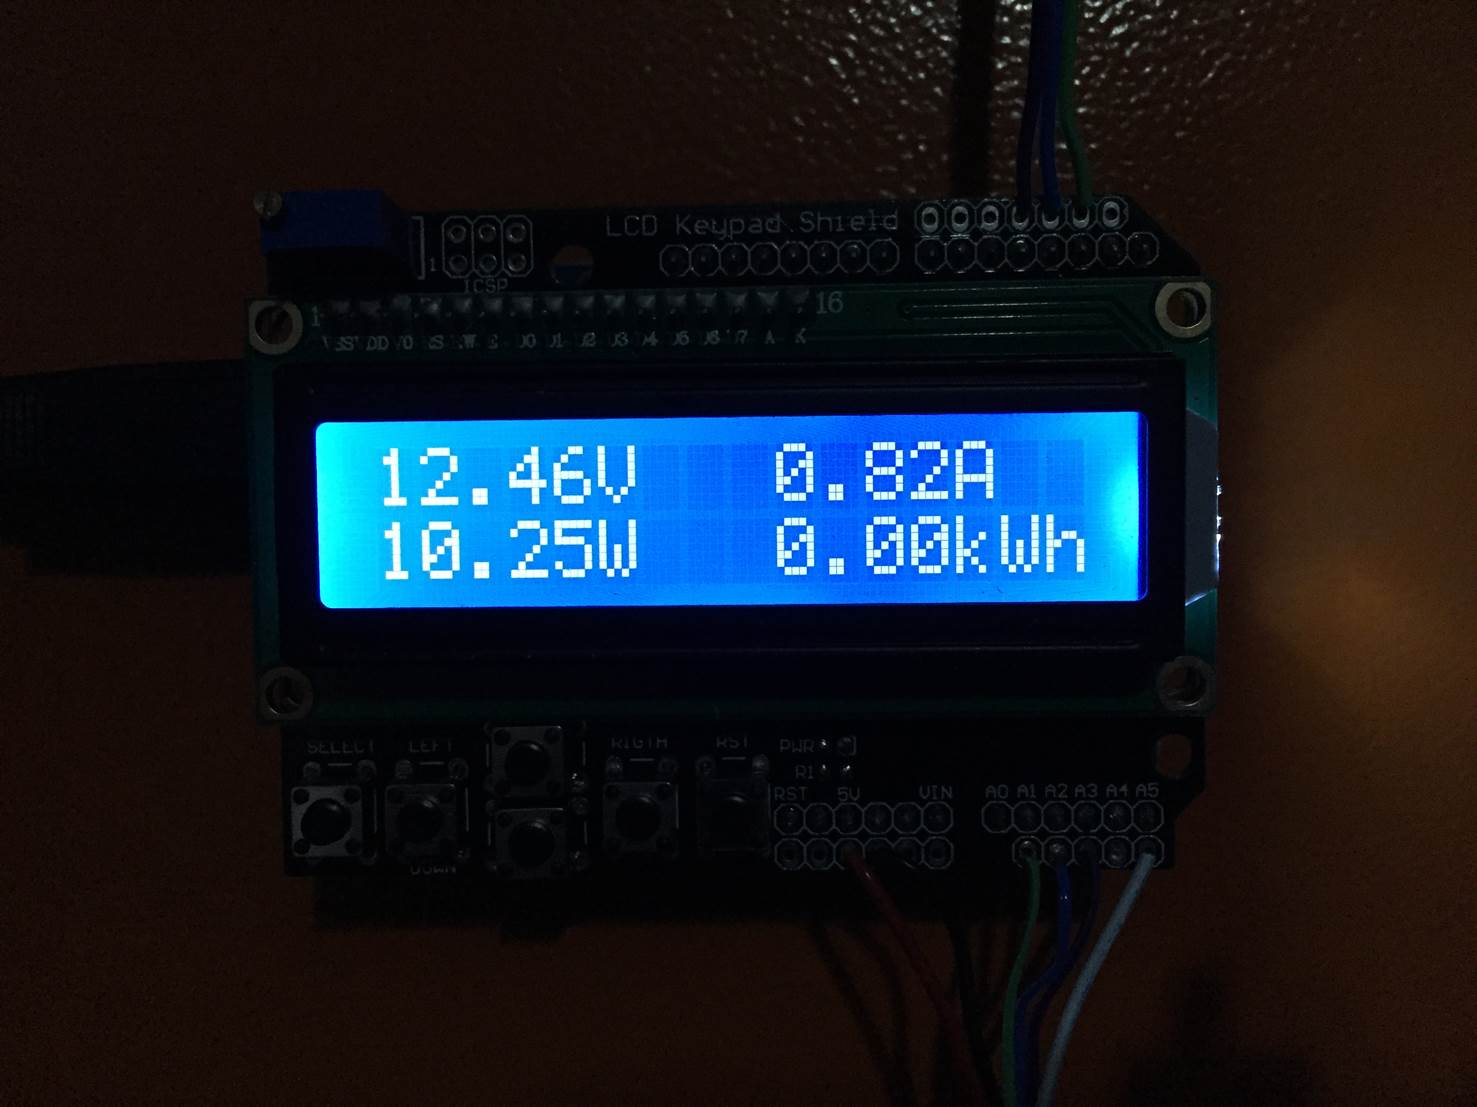
Finally, the LCD is updated by cycling through three different displays. The first displays the battery status and shows the battery voltage, current being drawn, power being used and finally the kilowatt hours consumed since start up.
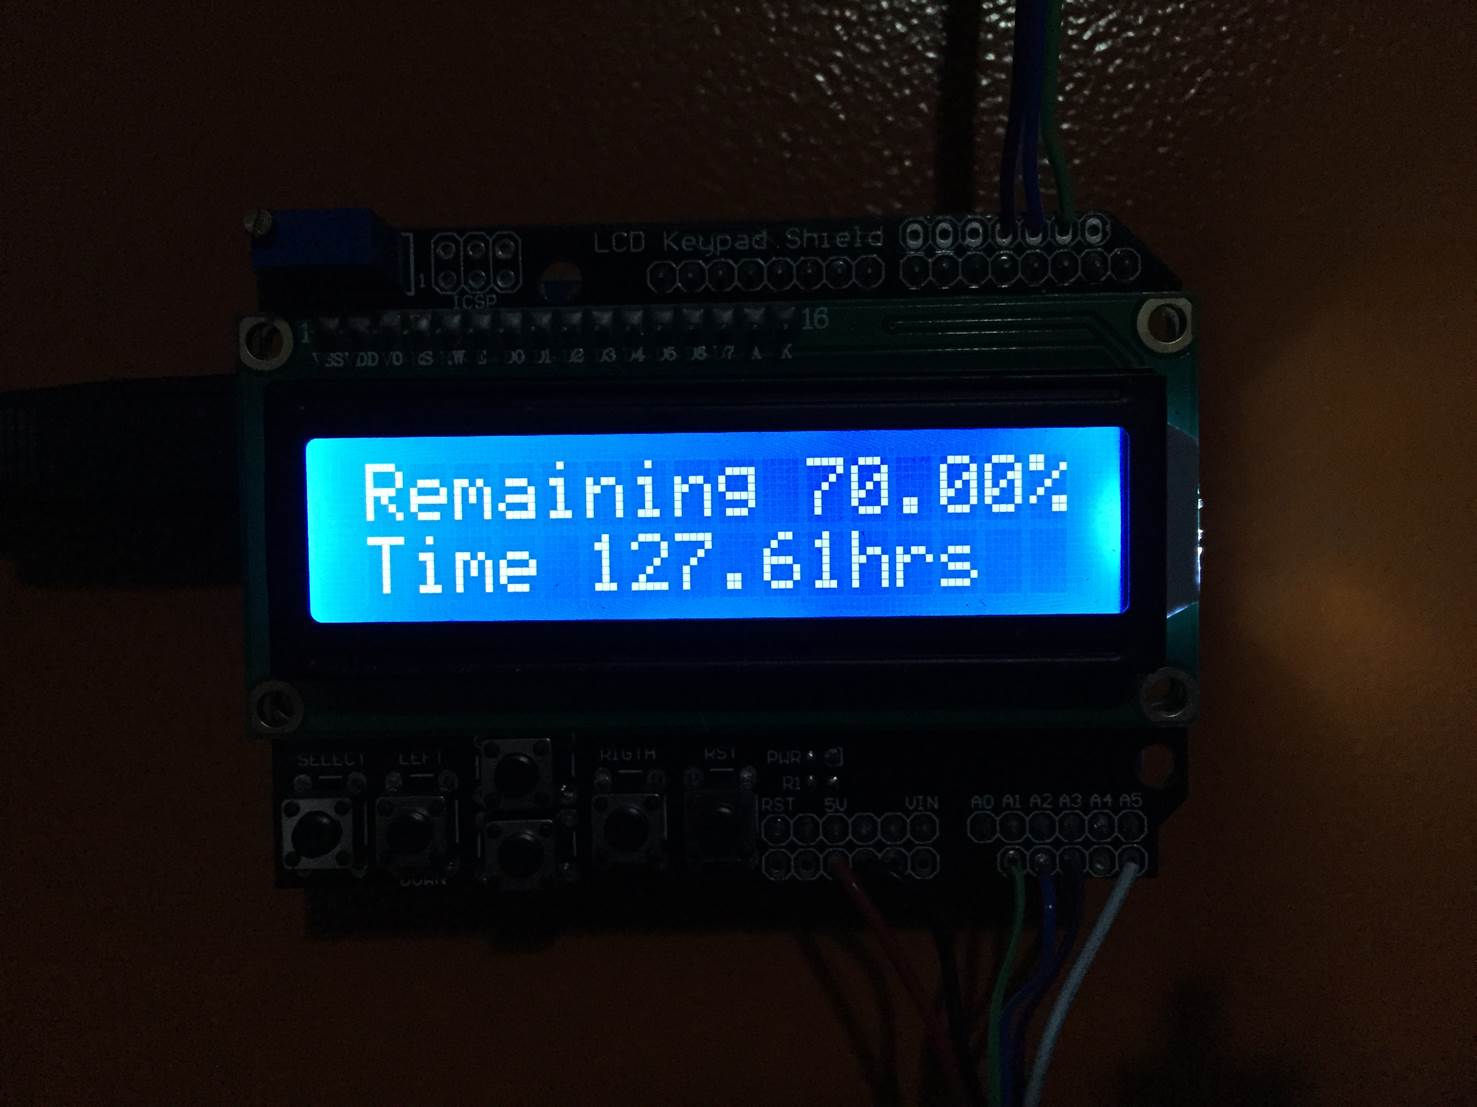
The second screen displays the battery life remaining as a percentage and then in terms of time in hours remaining at the current power consumption. This information is only displayed if the battery is not being charged. If the battery is being charged then obviously the time remaining won’t be realistic and the capacity calculation will be incorrect due to the inflated voltage measurement. In this case, battery charging is displayed instead.
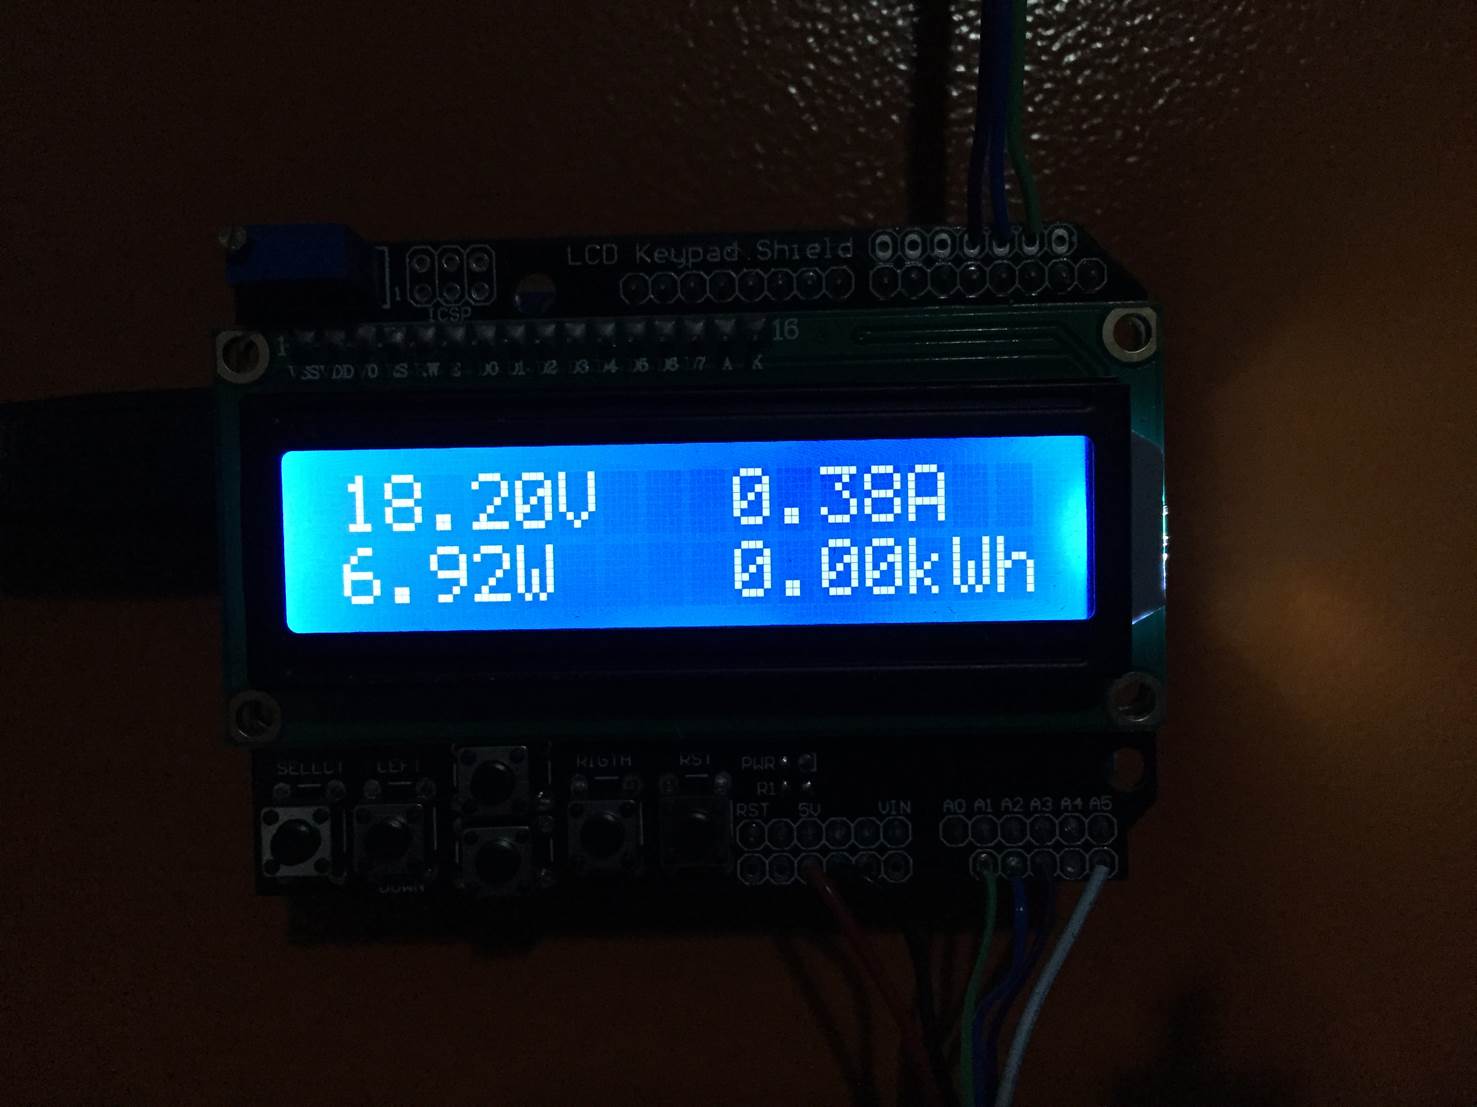
The last screen to be shown is the solar information. This screen displays the solar panel output voltage, the current being supplied and the resulting power output from the panel as well as the total energy which has been produced by the panel since startup.
Additions To The Circuit & Display
There are a couple of free inputs and outputs on the Arduino Uno which can be used to monitor a few other parameters. For example, as mentioned in the opening steps, you could separate your current measurement to your lighting, 12V DC and 100V/220V AC circuits and then create three separate displays on the LCD screen to give you information on your usage from all three.
You could also add some relay functionality to the outputs of the Arduino to cut off loads if the battery voltage becomes too low or turn off the solar panel when the batteries are fully charged etc.
If you’d like to take this guide one step further, you could also try building your own solar panels for your Van or RV. they are really easy to build and cost much less than the commercially available ones.
Have you built an energy monitoring system for your Van, RV or solar power system? Let us know your tips and tricks in the comments section below.


I’m fairly new to Arduino and I’m getting an error when I try to compile your code.
VanPowerInformation:76: error: ‘batteryKWH’ was not declared in this scope
batteryKWH = batteryKWH + (battPower * (time/60/60/1000000)); //Calculate battery kWh used since start
^
VanPowerInformation:77: error: ‘solarKWH’ was not declared in this scope
solarKWH = solarKWH + (solPower * (time/60/60/1000000)); //Calculate solar panel kWh generated since start
^
exit status 1
‘batteryKWH’ was not declared in this scope
Do you have any suggestions?
Hi Anonymous,
Have you modified any of the code? The variables need to be declared in the first section of the code, these two are declared in lines 14 and 15. Perhaps try copying the code from the webpage into your Arduino IDE instead of using the download link.
Let me know if this works otherwise I’ll have to try and compile your code.
Good luck.
Hi, I have not made any modifications at all. I’m using the ino file directly from the download. I’ve also tried copying the code from the page above.
I’ve compiled many other projects that have global variables and they all work fine, so I’m at a loss as to why it thinks these two are not in scope. It doesn’t complain about any of the other globals. I even tried changing the variable types to int just to see if it would compile, but it still gives the same error.
On a side note, do you have your code on GitHub? It’d be easier to get feedback and let others help with updates.
I’ll have a look at the code this weekend and see if I get the same error or if I can figure out what’s causing the problem. As you say, there are other global variables declared alongside those two and they don’t give an error.
I haven’t used GitHub but thanks for the suggestion, I’ll have a look at getting some of my code on there as well.
batteryKWH
solarKWH
tanımlanmamış ondan hata veriyor
double batterykWH
double solarkWH
bu şekilde degiştir düzelecek inşAllah
Very nice project. I do however, have a couple of questions about the design:
1) You mentioned that when the system is charging, the second screen which shows the battery life remaining is inaccurate and so the system just displays “Charging”. This makes complete sense, but if there is a load and no charging is taking place — wouldn’t the battery life remaing still be inaccurate due to a deflated battery voltage?
2) For the system to be accurate in measuring battery state of charge, wouldn’t your battery have to fully charged before the battery monitor is turned on?
3) And finally, is there a way to modify the system so that when the battery is being charged, the battery life remaining can be made to be accurate?
Hi ShaqMan,
1) If you’re drawing a significant amount of power from the battery then yes it would cause a drop in voltage which would cause the reading to be inaccurate. Generally speaking, solar batteries are designed to output a fairly high peak current, so you shouldn’t be drawing enough to significantly lower the battery voltage while under load, otherwise, your backup system would last a few minutes rather than hours. But yes, the only way to get perfectly accurate voltage measurements is with the load disconnected.
2) The battery empty and full voltages are programmed into the Arduino based on generalizations for the battery type/model. So no, it doesn’t require the battery to be fully charged. That said, you could improve the accuracy if you want to by measuring your specific battery’s maximum and minimum.
3) You could estimate it, but it won’t be accurate. You’d need to monitor the current going into and the current going out of the battery. If there is more going in than out then life would be infinite and if there is less then you’d need to add the amp hours in and subtract the amp hours out for the duration of charging and make a calculated guess as to how much capacity is left based on how much was started with. Another way would be to add a relay to periodically disconnect the charger and sample the battery voltage.
HI All, i am starting this project as i am keen to learn a bit more about the electronics. However, the wiring diagram is too small for me to read, is there another large diagram i could possibly have please.
I really appreciate the help.
thank you!
Andrew Broster