Pallet sconces are really easy and cheap (if not free) rustic decor items to hang on a bare wall. The sconces are made out of a few scraps of pallet wood or scrap timber which is often lying around the garage. Alternately you can find old pallets at junk yards, hardware stores and fruit and veg stores.
What You Will Need
- Pallet Wood (Two Pieces 35-50cm/14-20″)
- Wood Glue
- Wood Saw
- Miter Box (Optional)
- 80 Grit Sandpaper
- Wood Sealer, Varnish or Stain
Firstly you need to cut out the main lengths which will go up against the wall. They should be around 20-30cm (8-12″) and can be cut to the same length or different lengths for a staggered look. Use a miter box to make clean and square cuts on the ends.
Next you need to cut the ledge. The ledge needs to suite the size of your candle, 15cm (6″) is usually the correct size for a large round pillar candle. The triangular support brackets for underneath the ledge can be cut by first cutting a 8cm (3″) square piece of wood and then using the miter box to cut it at 45 degrees, making two brackets.
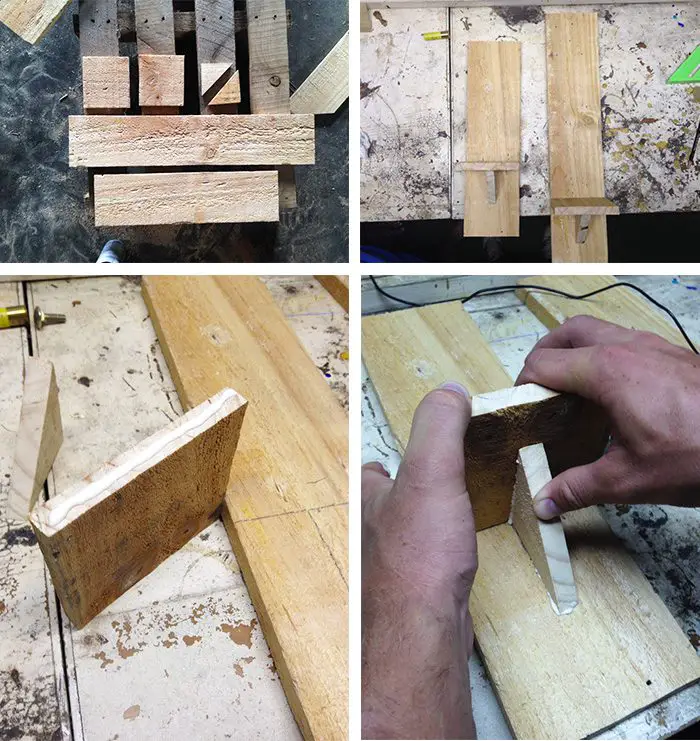
Now sand down any rough or jagged edges. You want the pallet wood to be rustic looking and not too smooth, just neaten up the edges and remove any splinters.
Glue the pieces together with the ledge roughly one third of the way up the vertical piece and the bracket underneath to support the ledge. Apply a generous amount of glue and wipe away any excess which is squeezed out when pushing the pieces together. Allow the wood glue to dry for about 5 hours or overnight.
Lastly, you can stain or varnish the wood. A dark stain makes the wood look more aged and expensive. Apply the stain to all sides of the sconces and allow to dry overnight. To give the wood and aged and distressed look you can lightly sand the dried stain to bring the rough grain out.
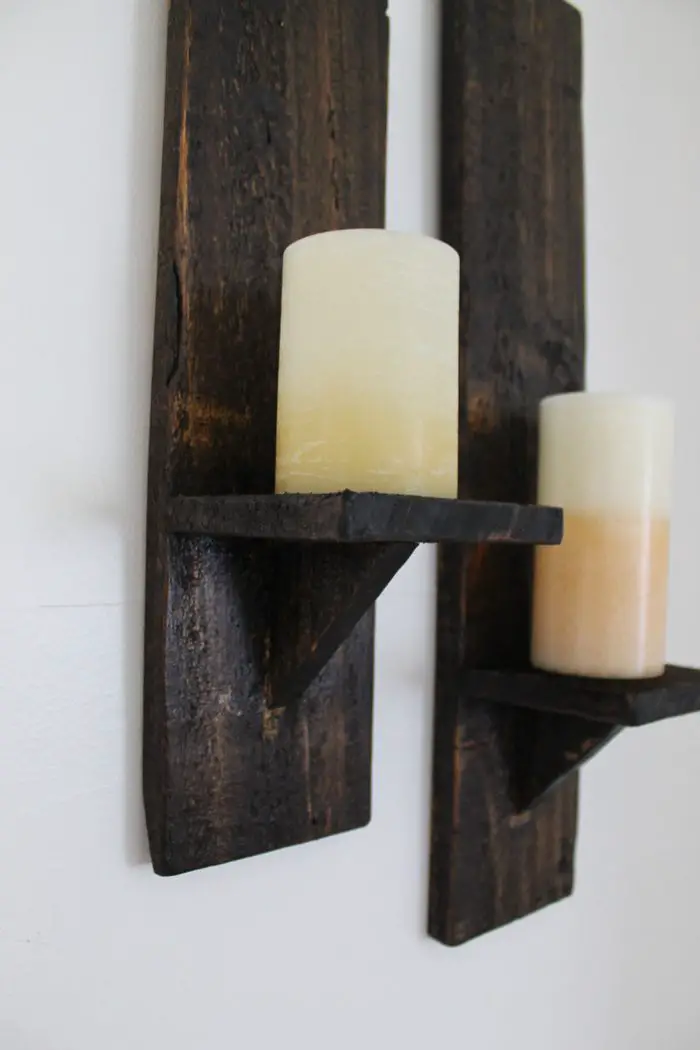
Add a picture hanging hook to the back of the sconces or screw them onto the wall from the front. Add the candles and your cheap and effective sconces are complete.


Hi,
How do you recommend to hang/attach to the wall?