Have you ever seen a flight overhead and wondered where it is going? Or seen a unique-looking aircraft and wondered what type or model it was? Well, today I’ve got something exciting to share with the aviation enthusiasts out there. We’re going to set up our own flight tracker using the FlightAware Pro USB stick and a Raspberry Pi. This is a really easy and fun project that allows you to track aircraft in your area in real-time.
Here’s my video of the project, read on for the write-up;
What You Need To Build Your Own FlightAware Tracker
- Raspberry Pi 4 – Buy Here
- FlightAware Pro – Buy Here
- Indoor Antenna – Buy Here
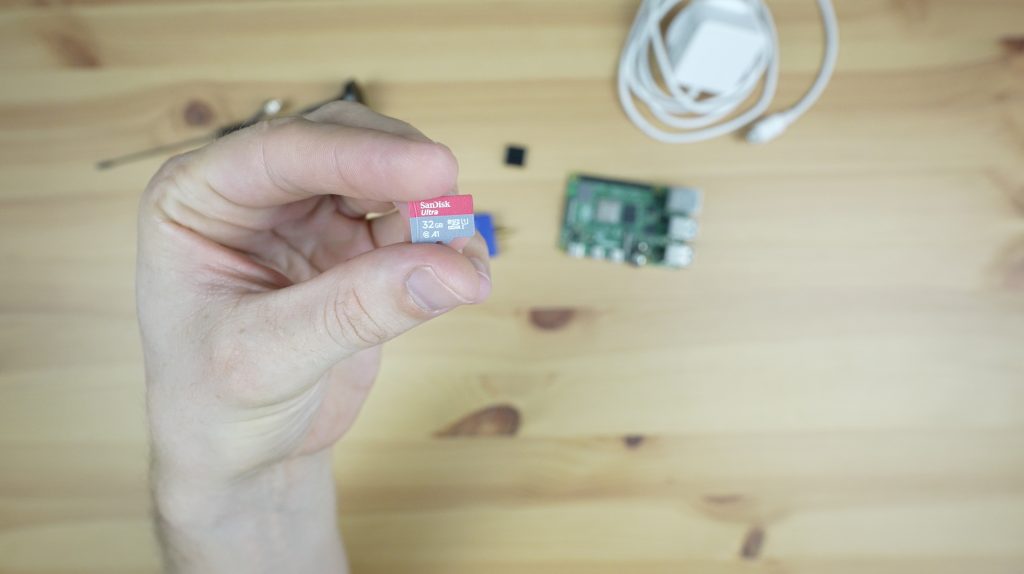
- MicroSD Card – Buy Here
- Pi 4 Power Supply – Buy Here
- Pi 4 Basic Heatsink – Buy Here
What Is A FlightAware Tracker?
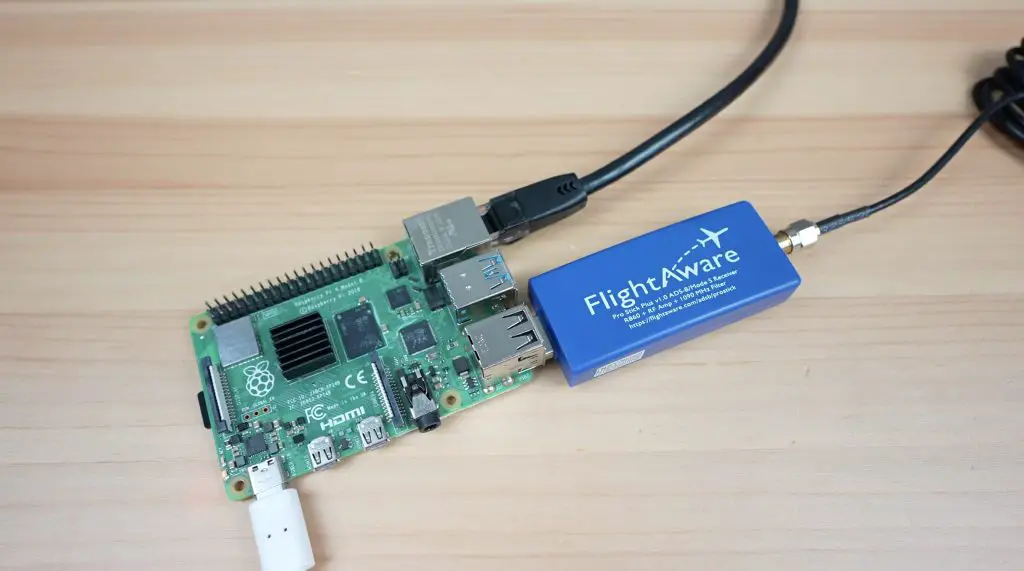
First things first, let’s talk about the FlightAware Pro USB stick. This little device is a dedicated ADS-B, or Automatic Dependent Surveillance-Broadcast, receiver that simply plugs into a free USB port on your Pi.
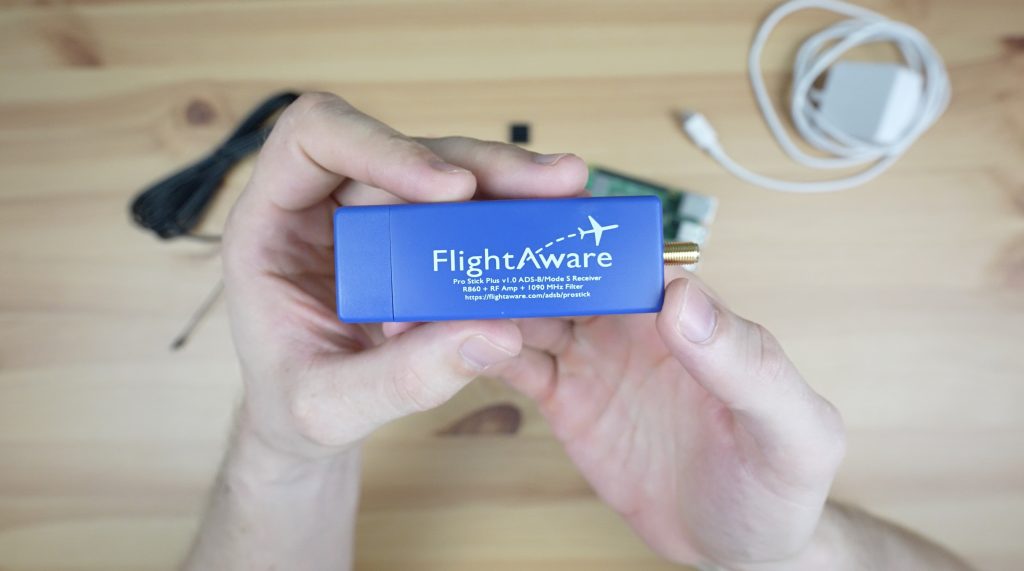
ADS-B is a technology that enables aircraft to determine their position via satellite and then broadcast it. This information can be received by ground stations, like the one we’re going to be building, and this enables aircraft to be tracked. Using an antenna with the FlightAware USB stick, you can track aircraft up to 400km or 250 miles away.
Before we jump into the assembly and setup process, let’s take a look at what FlightAware actually is. FlightAware is an online platform that provides real-time flight tracking, and not just the flight information like departure and estimated arrival time that you can find on Google, this gives you full flight tracking of airspeed and altitude, flight paths, aircraft information and historical data.
You’re also not limited to only commercial aircraft, you can track commercial and private traffic and even the occasional military aircraft. By creating your own tracker, which is called a PiAware tracker, you’re contributing to FlightAware’s network of over 30,000 ground stations, enhancing the accuracy of global flight tracking.

In exchange for this, they provide you with a free Enterprise user account which gives you full access to their platform, so you can see flights that are out of range of your receiver as well!
Assembling Your PiAware Tracker
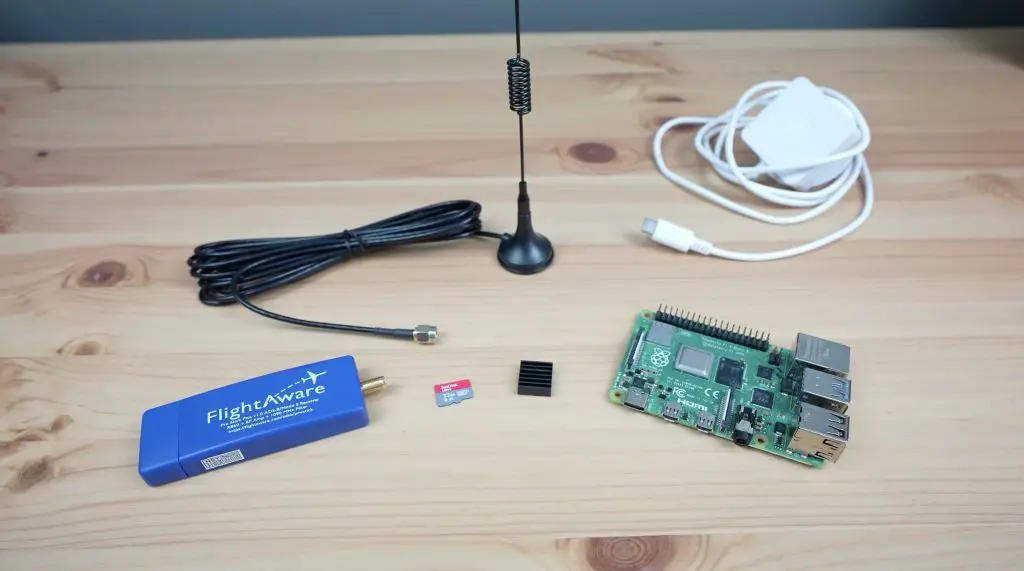
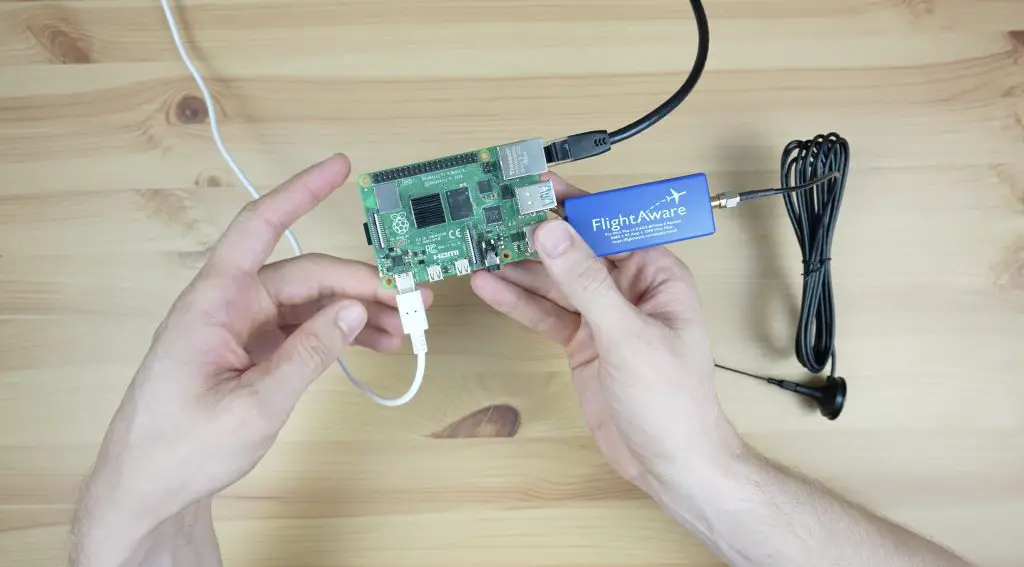
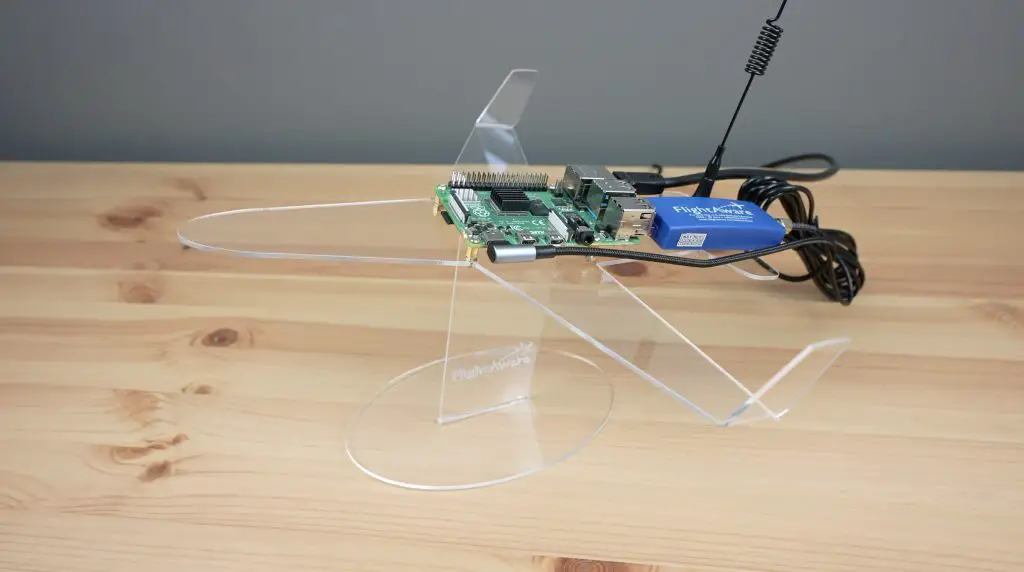
To build your own FlightAware flight tracker you’ll need to add a Raspberry Pi, microSD card and power supply to the FlightAware USB stick and antenna.
Next, let’s dive into setting one up, and there really isn’t a whole lot to it. First, we need to flash the operating system to our microSD card. This is done by downloading the prepared OS image from the FlightAware website and then burning it to the microSD card using an imaging utility like Etcher.

The image is ready to run so you don’t need to do anything else if you’re using a wired Ethernet connection like I’m going to. If you want to use WiFi then you’ll need to follow their configuration steps (under item 3) to add your WiFi network’s information to the card so that your Pi knows how to connect to it.
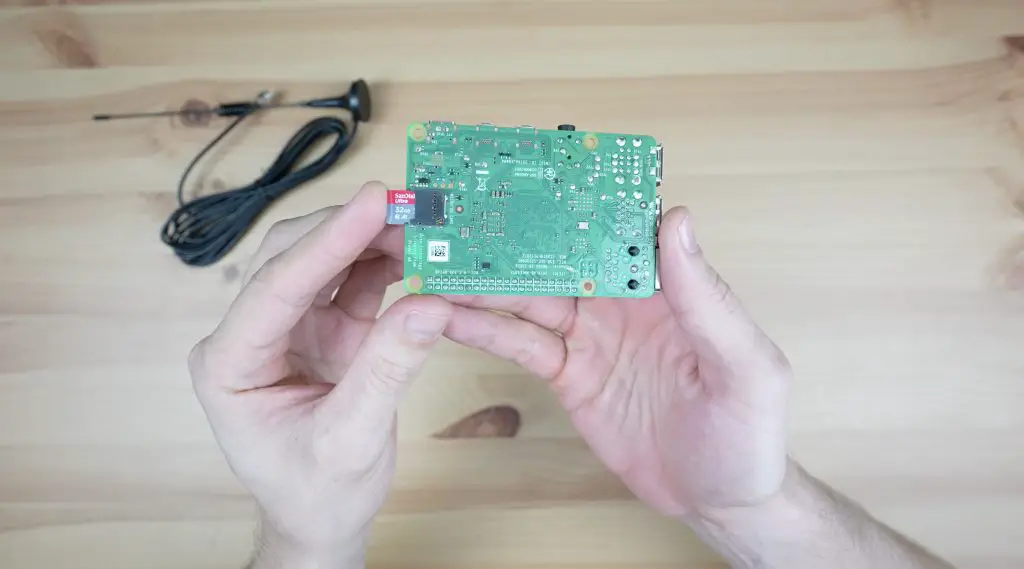
Once your card has been flashed, plug it into your Pi’s microSD card slot.
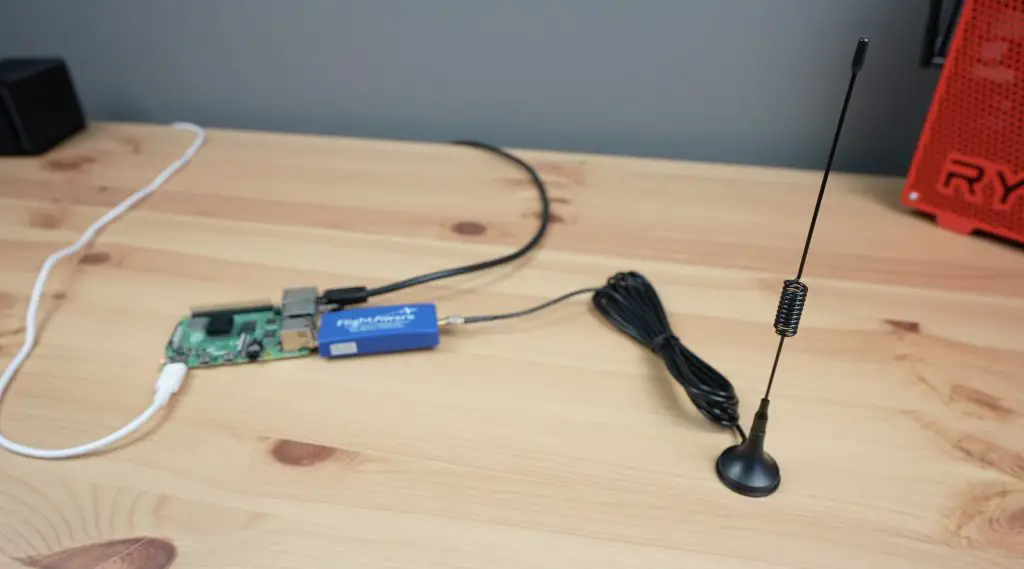
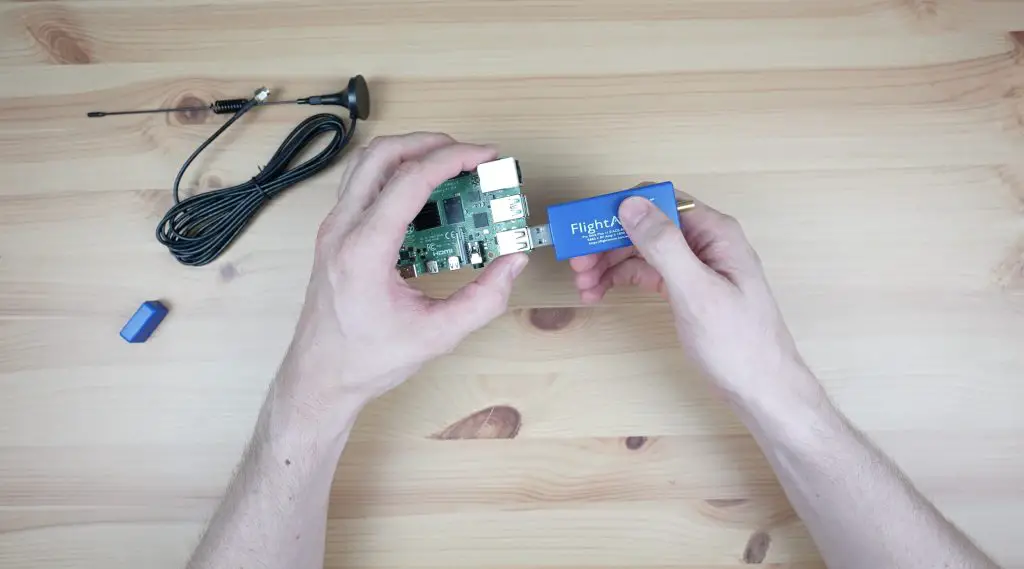
To complete the assembly, we need to plug the components into the Pi. The Flight Aware USB stick goes into one of the USB ports – you’ll need to use the USB 2.0 ports as the USB 3.0 ports are too close to the Ethernet port to allow a cable to plug in next to it.
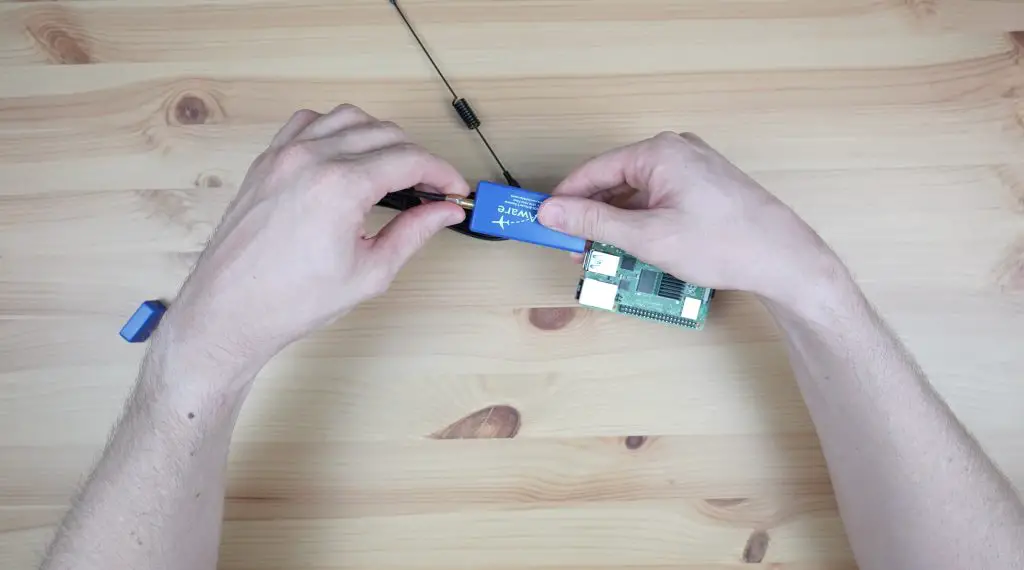
The antennae plugs into the USB stick and a little retaining nut locks it into place.
Then add the Ethernet cable and plug in the power supply to boot it up.
First Boot & Associating It With Your Account
It’ll take a couple of minutes for the first boot and while that’s happening, let’s head over to FlightAware’s website to sign up for a free account.
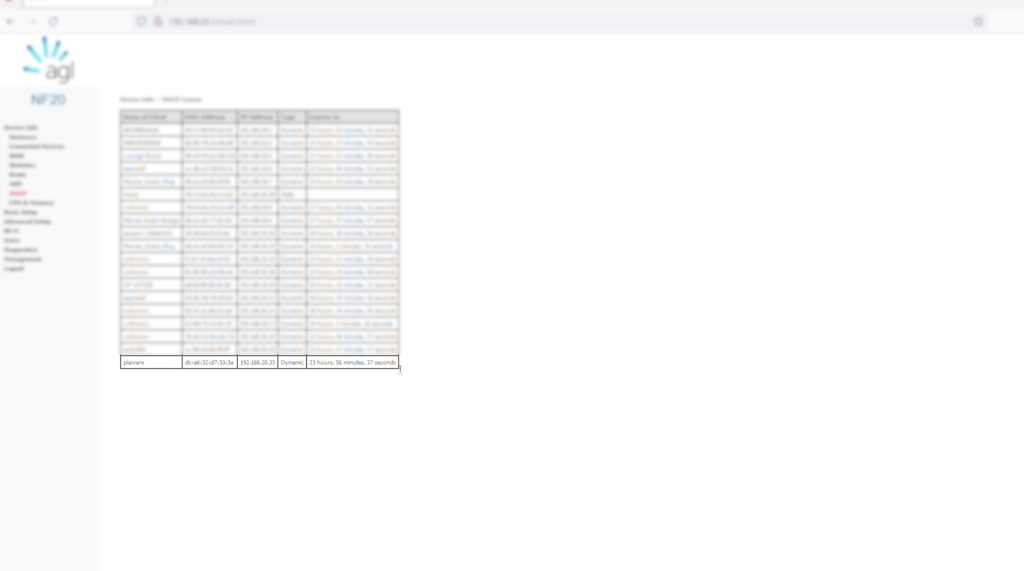
Once that is done we need to find our tracker’s IP address on our local network. There are a few ways to do this, you can use a utility like Angry IP Scanner or your can look at your network’s DHCP table. I’ve looked in my DHCP table and found my PiAware device and IP address.
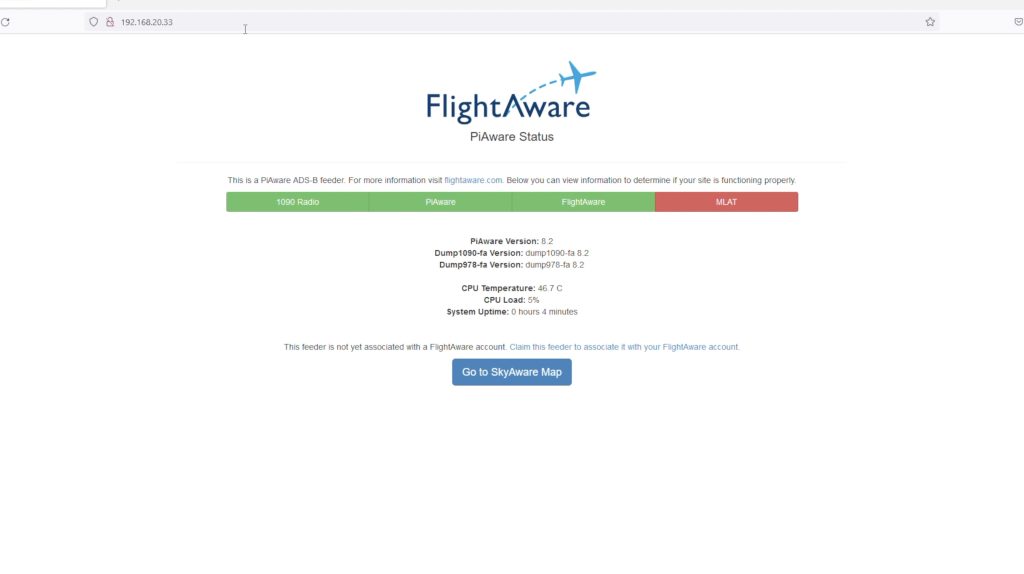
We can then enter the IP address into a browser on the same network to access the Pi. From here you’ll be asked to associate your PiAware tracker with your account by logging into it. Once you’ve done that, you’re now officially part of the FlightAware network and you’ll see your account has been upgraded to an enterprise account.
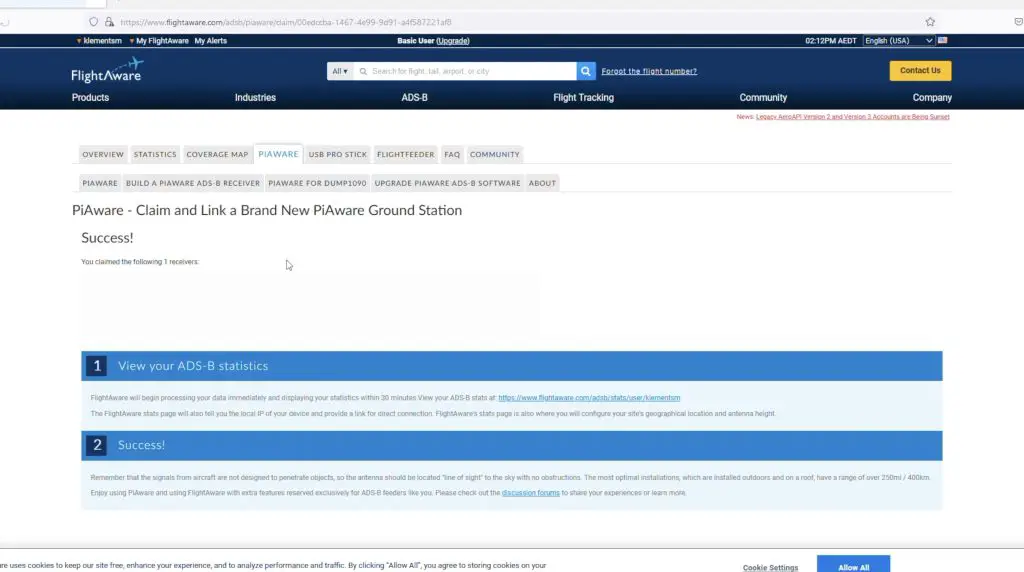
Your Pi will then immediately start contributing data to the FlightAware network.
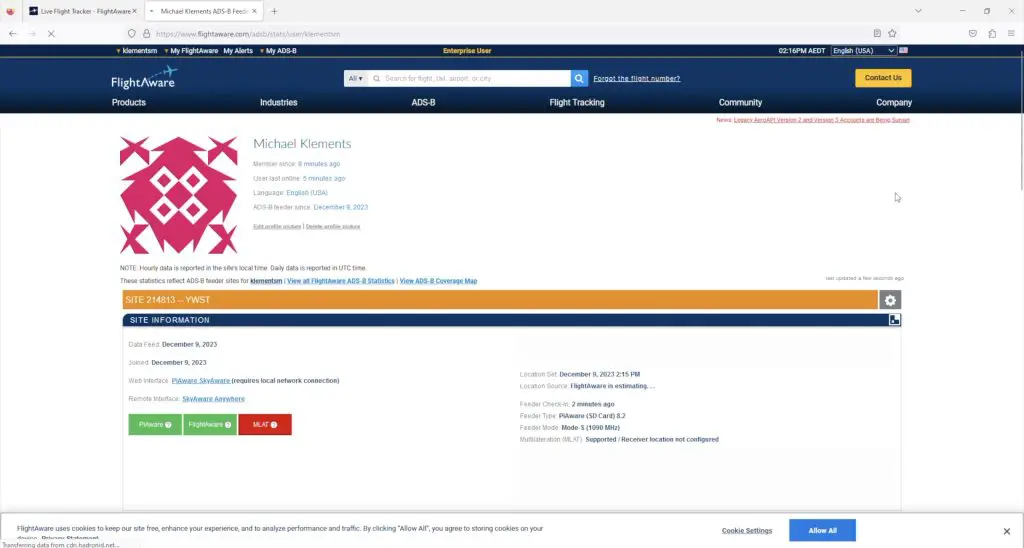
What You Can See Through The FlightAware Web Interface
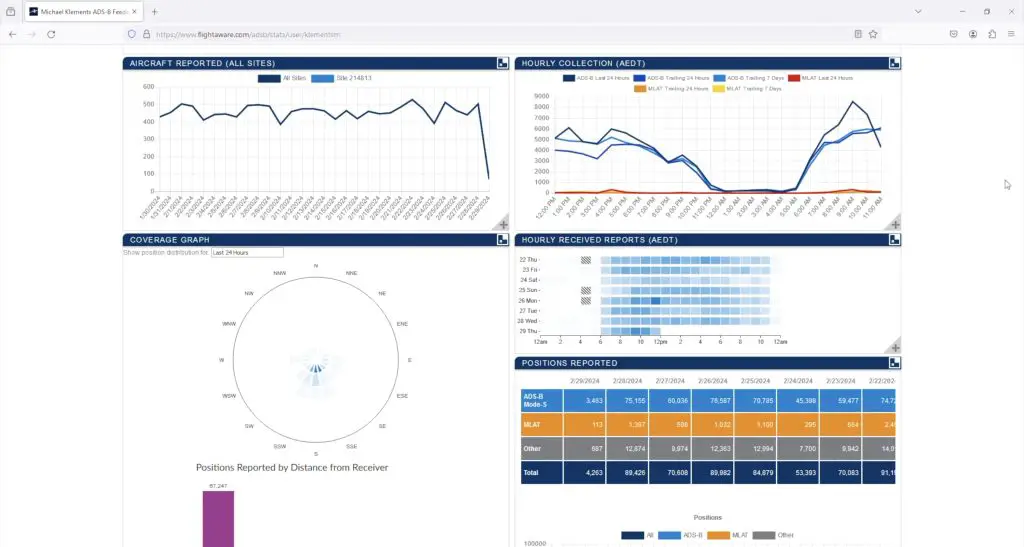
I’ve had my Pi running now for a little under three months. From the FlightAware site, you can see your feeder’s status and when last information was received from it. You can also see stats and graphs for the number of aircraft reported throughout the past 24 hours, which direction they were reported from and even the type of aircraft positions received.
They also give you a ranking that ranks your FlightAware feeder against other contributors. I’m still not too sure how they arrive at the total rank position but they give you some stats on your reported positions relative to others. Obviously, if you’re in a busier airspace then you’re going to be contributing far more to the network than others, but the network relies on having contributors in remote locations too.
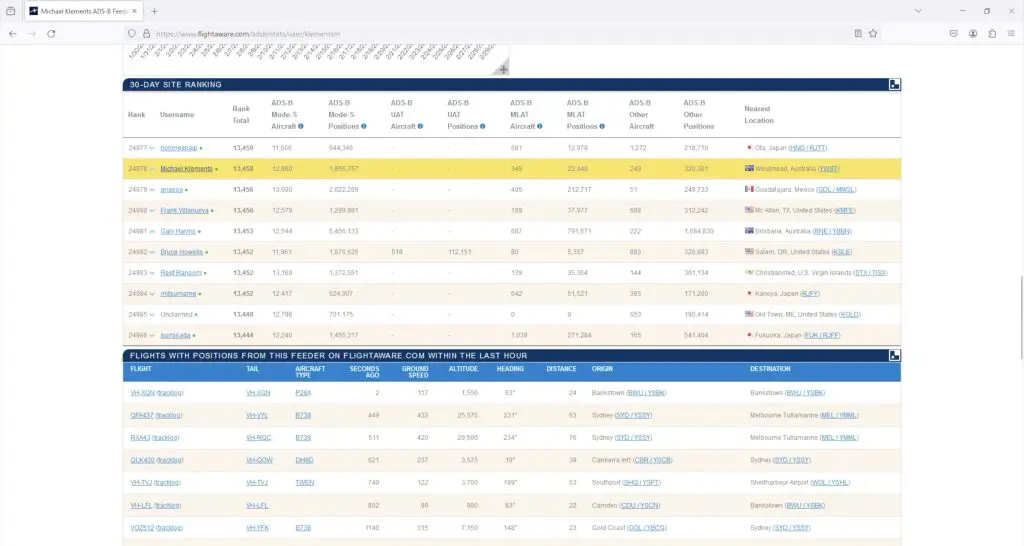
You can also see the flights that have been tracked by your feeder in the last hour and the sites around you, including when last they reported positions.
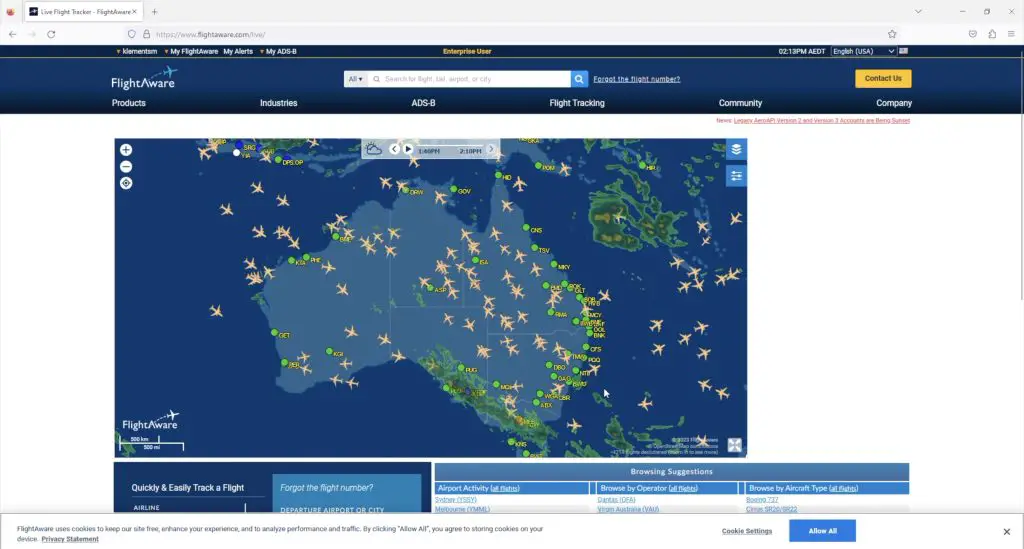
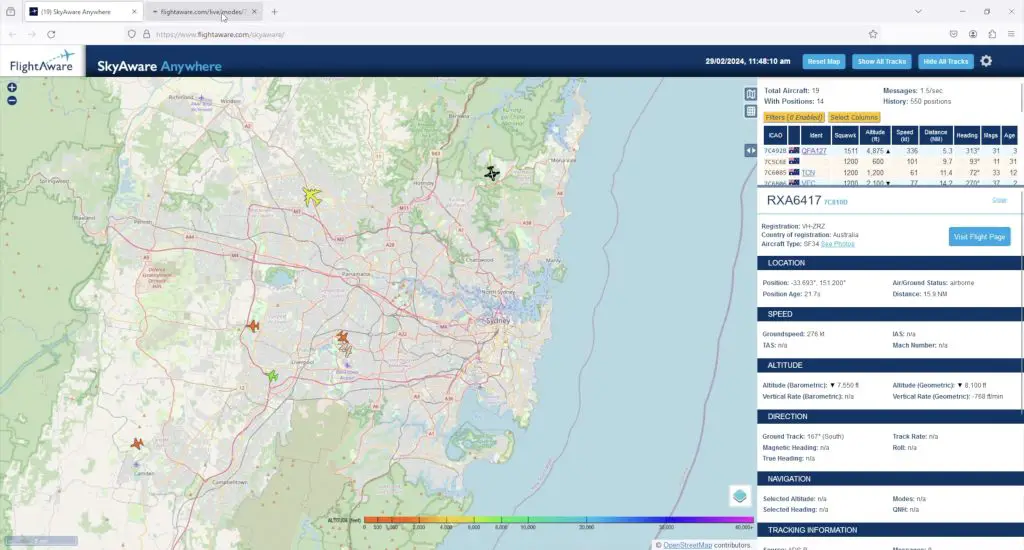
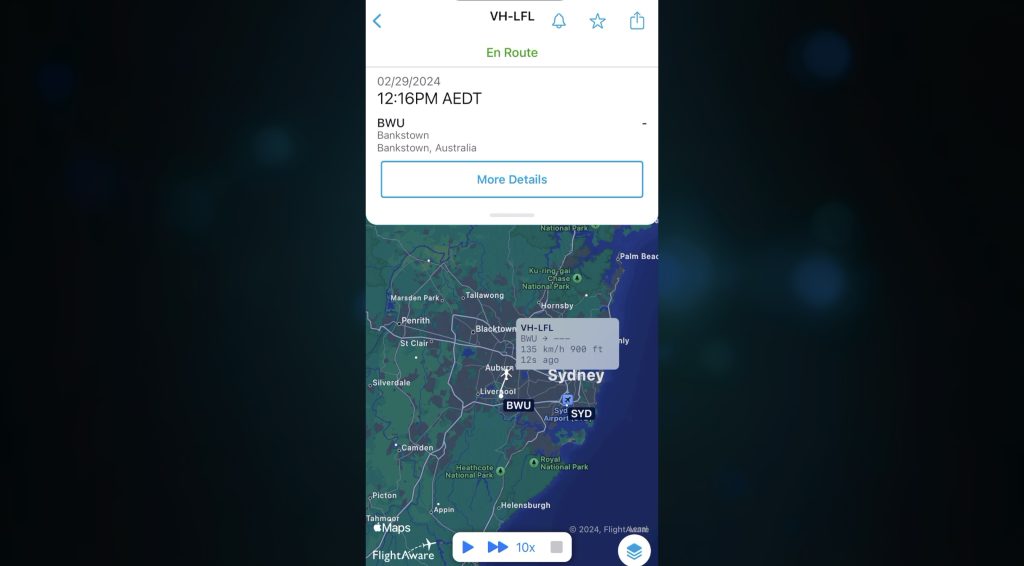
The really exciting stuff is on the SkyAware Anywhere page. Here you can watch flights around the world in real-time. This is the area around Sydney where my feeder is based and the aircraft are coloured according to their altitude.
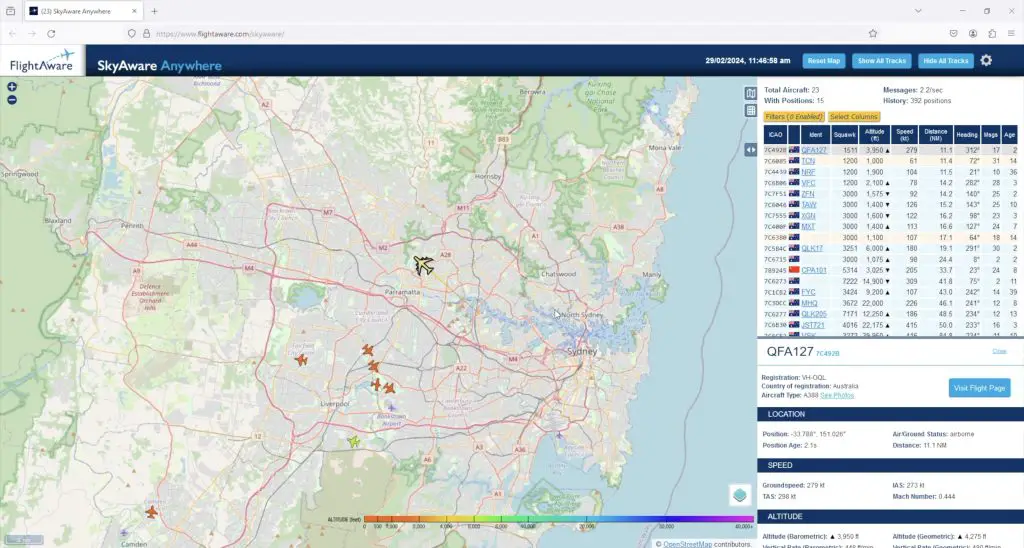
You can see a summary of those in view on the right but you can also click on aircraft to get more detailed information on them and show their flight path since you opened the window. We can also visit an aircraft’s flight page to show even more information about it.
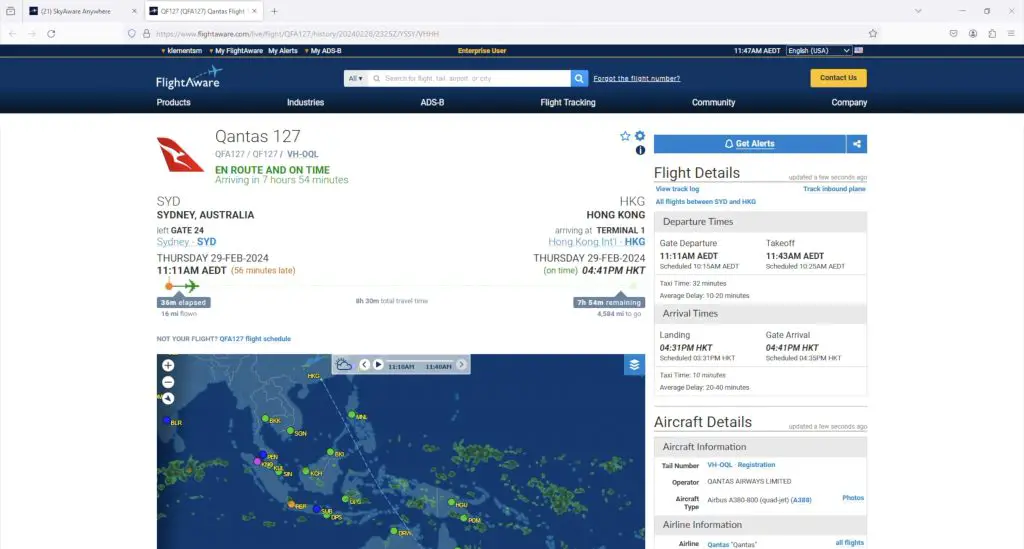
At the top of the page is the flight information that you’d typically see if you did a Google search for the particular flight number.
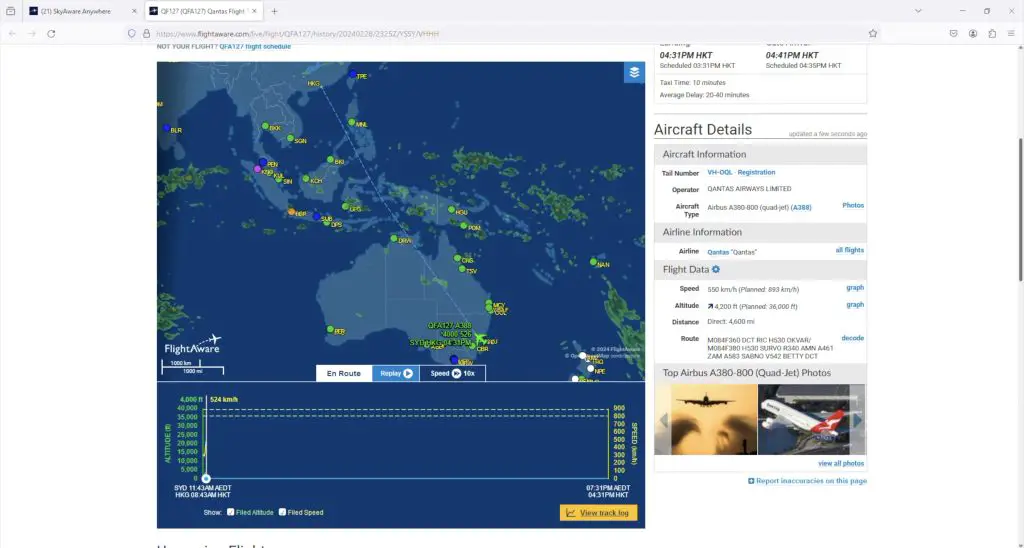
Below that is a map showing the planned flight path and the planned and actual altitude and airspeed.
The flight that I chose has only recently taken off, flying to Hong Kong. Let’s pick a different flight that looks like it is coming in to land and we’ll be able to see the altitude and airspeed history for the flight.
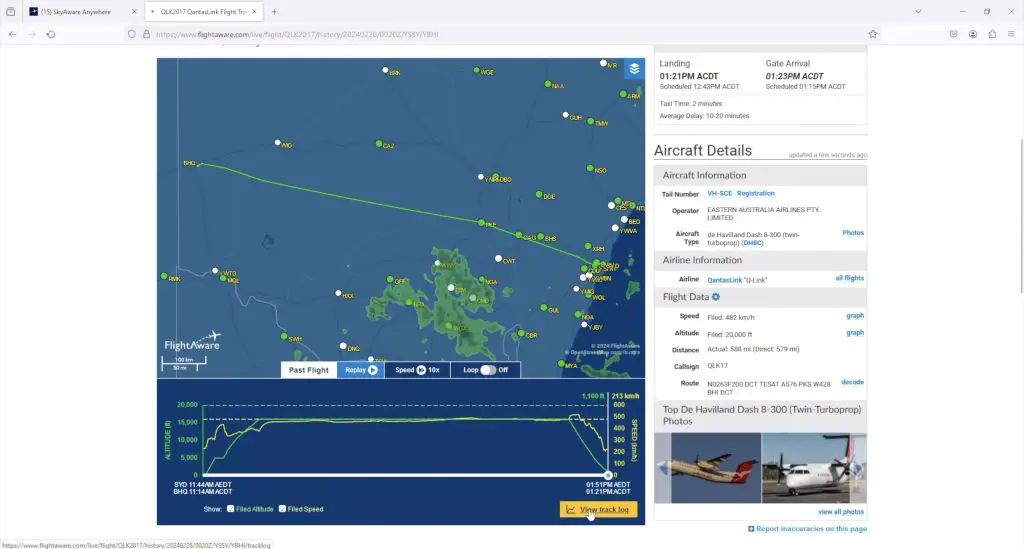
The next one that I chose is a regional domestic flight by REX from Coffs Harbour to Sydney. Now we can see the actual flight path taken alongside the plan and also the altitude and airspeed history – we can see that it is in its descent phase and coming in to land soon.
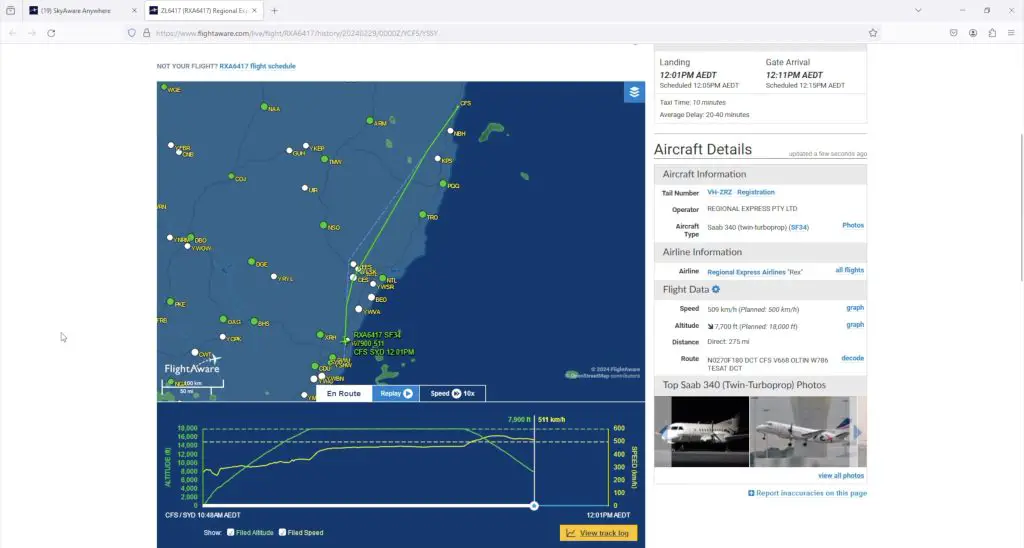
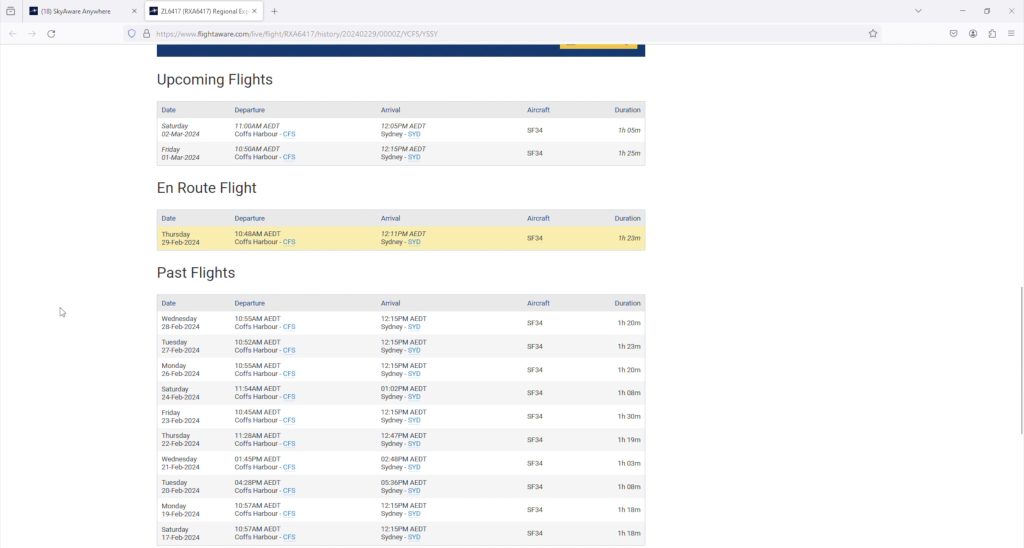
For each aircraft, you can also see its planned upcoming flights, the current flight in progress and a log of past flights. You can click on any of these to see the flight plan and/or actual flight data.
On the right-hand side are the aircraft details like the owner and operator, registration details and the current flight data. They also give you a gallery showing images of that aircraft type.
So on the top right is a similar aircraft by the same carrier but with a different tail number.

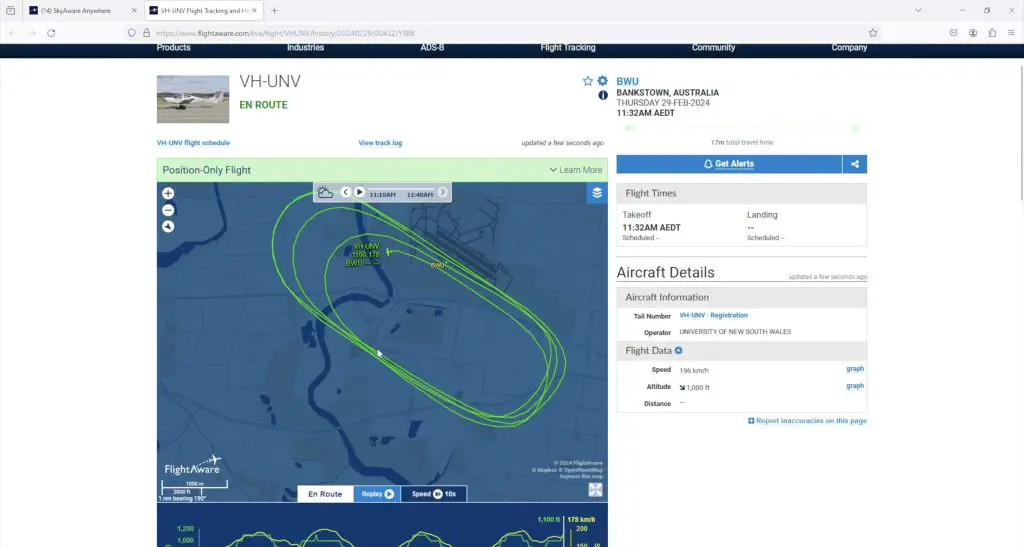
FlightAware doesn’t only track commercial aircraft, we can also see small private aircraft. Here is one doing circuits around a small airport, so it’s probably a flight training exercise.
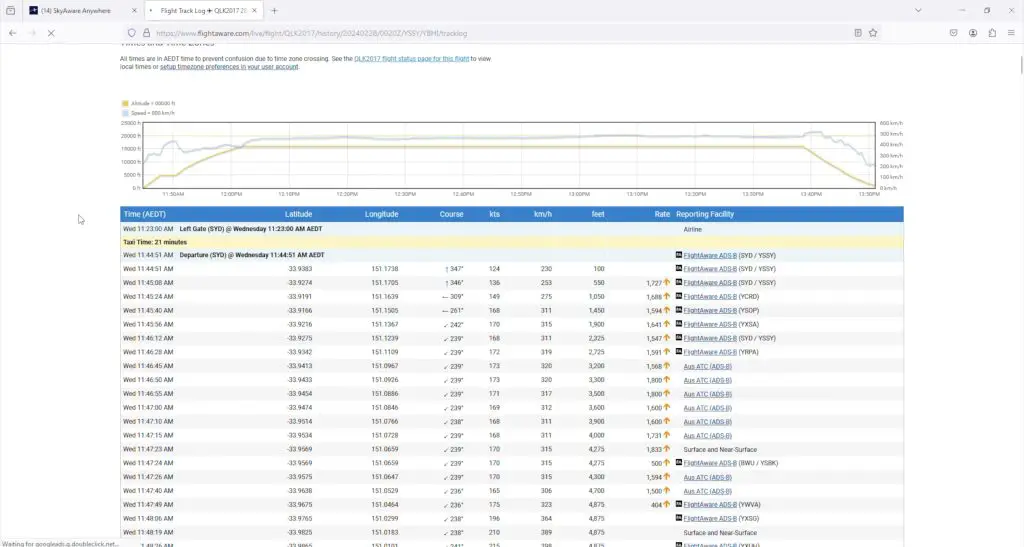
You can also go into an aircraft’s flight history and have a look at the details from any past flights. This will show the flight path taken, airspeed and altitude and you can even open up a full log and see all of the position reports and which facility reported them.
There is also a mobile app for iOS and Android that offers the same information as the web page but in a mobile-friendly format. I actually prefer using the app and find it a bit more intuitive.
Final Thoughts On The FlightAware Tracker
So this is an exciting way to dive into the world of aviation tracking and contribute to a global network of aviation enthusiasts. It is a relatively inexpensive project that can even be set up on a Pi Zero W or Zero 2 W to save costs and you get a lot out of it, especially if you have an interest in aircraft.
Mine has been running flawlessly for 3-4 months now and I’ve really enjoyed routinely hopping onto the app when I see an aeroplane or helicopter overhead and wonder what it is doing or where it is going. It’s also amazing to have access to detailed flight logs for any flight or aircraft number.
Let me know what you think of the FlightAware tracker in the comments section below and if you’ve got any questions on what it can and can’t do.
Hi there,
Where did you get the acrylic plane-shaped stand???
I’d like that for my set up too,
Thanks for the post. It’s really helpful.
Hi Eden,
Unfortunately it’s not a retail product, I custom made it with my laser cutter.
Glad you found it helpful!