Do you love chess but don’t have the time to sit down for a full game. How about making a vertical chess board which can be hung on the wall in the study, kitchen, library or bedroom allowing you to pick up where you left off whenever you have a chance?
What You Will Need To Build A Vertical Chess Board
- Mirror or Old Picture Frame for the Border
- 8 Strips of Thin Wood for the Shelves
- 1 Set of Chess Pieces
- 1 Sheet of Ply Wood (Sized to Fit Inside the Frame)
- Light Varnish
- Black Paint
- Paint Brush
- Masking/Painters Tape
- Wood Glue
- Optional – Glue Gun
How To Build A Vertical Chess Board
First start by removing the existing backing from the picture frame or removing the glass from the mirror. This can usually be done by removing the tape and staples/nails at the back of the frame. Once the glass or picture has been removed, lay this over your piece of plywood, trace out the outline and cut the plywood to the same size.
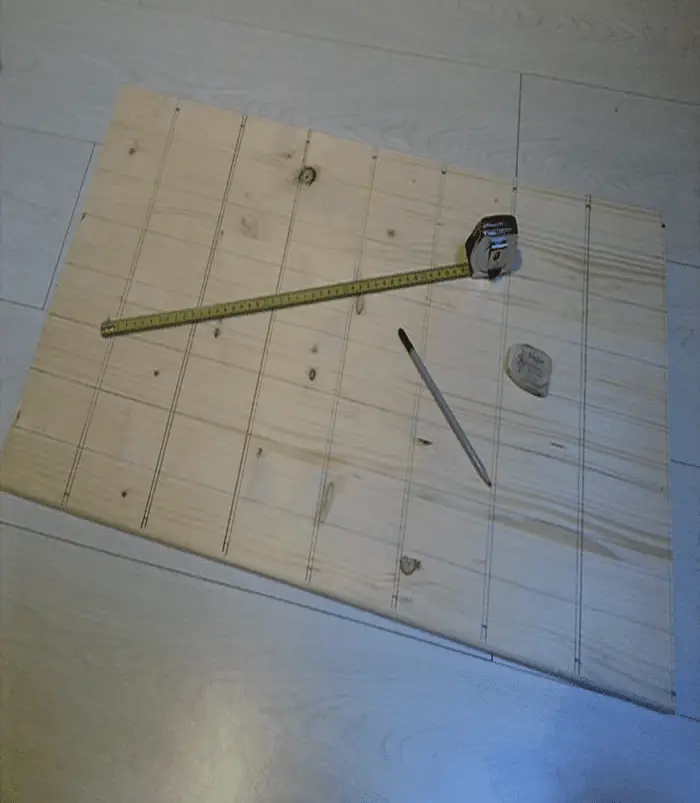
Now you need to paint the checkerboard pattern onto the board. Use a pencil to mark out equal width columns and equal height rows so that the board is 8 x 8 blocks vertically and horizontally. Ensure that the vertical height of each block can accommodate the height of the king which is usually the tallest chess piece. Use the masking tape to mark off the edges and paint the alternate blocks with the black paint to make the checkerboard pattern. This requires masking off every second row and column first, painting those and then letting it dry before masking the next set of rows and columns to get a clean finish.
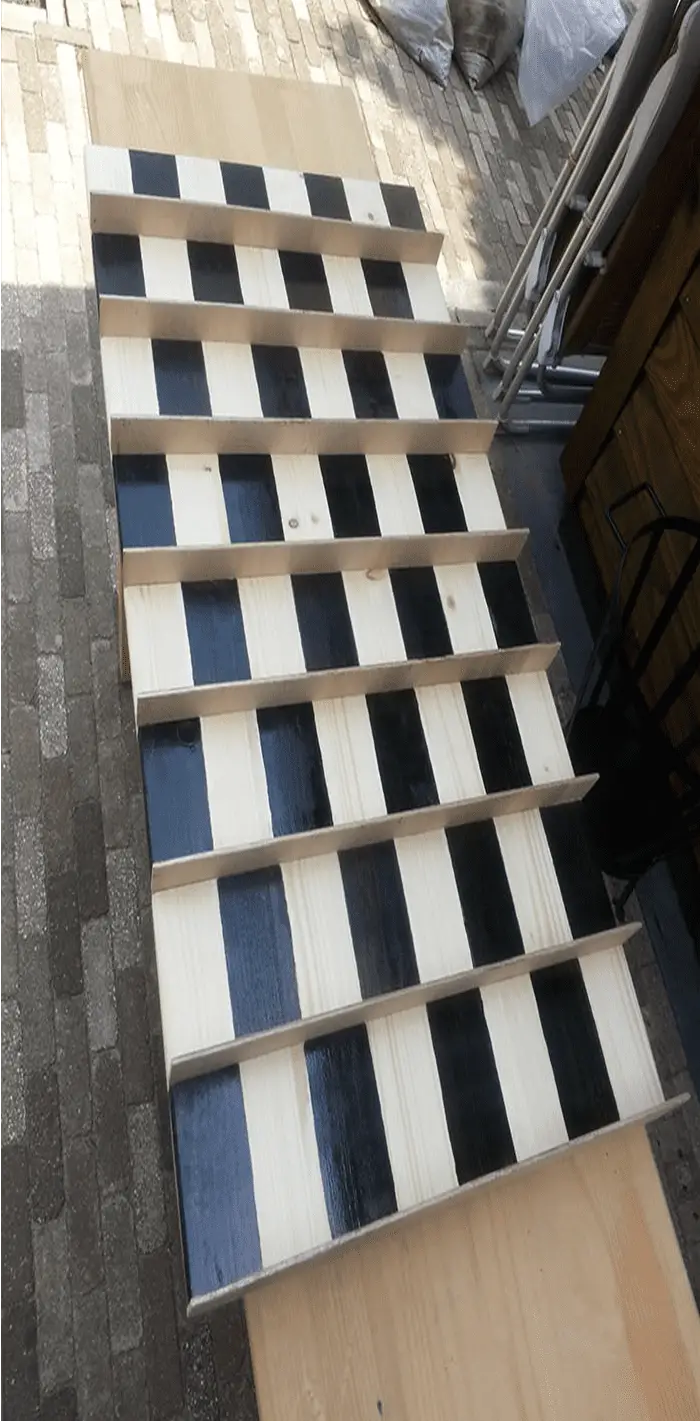
Now you need to cut and fit the shelves. Trim the 8 lengths to fit between the edges of the picture frame. Trim the widths to suite the largest chess piece, the width of each shelf should only be a little wider than the widest piece’s base. Attached the shelves to the checkerboard along each row’s line using wood glue or a glue gun. Make sure there is a good, clean contact area and use a generous amount of glue to get a sturdy shelf.
Once the board is complete, secure it to the frame with the staples removed from the picture, with wood glue or a glue gun. Once the glue has dried, paint a thin layer of clear varnish over the shelves and then board. Allow the varnish to dry before applying a second coat.
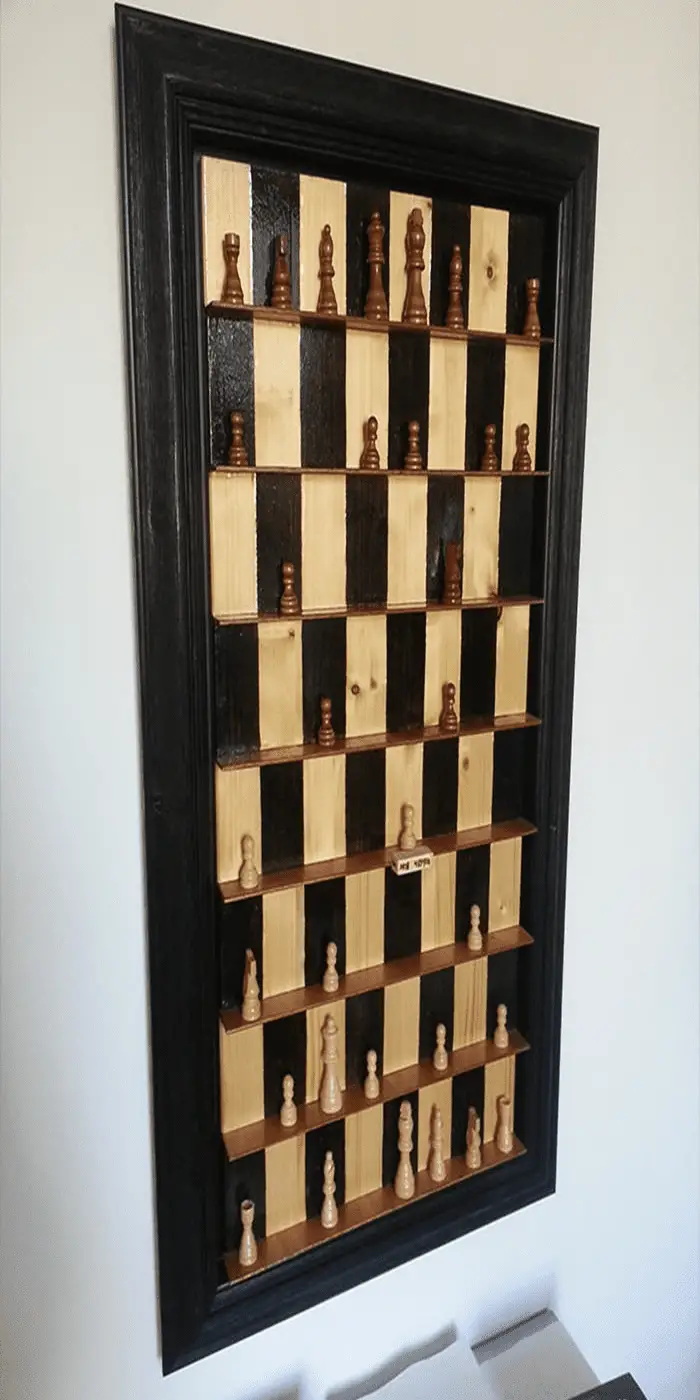
Hang the chess board up on the existing picture frame’s mounting hooks. Arrange the chess pieces and your board is complete and ready for your first match. An optional token can be left on one of the shelves which is flipped over to indicate whose turn is next. This is particularly useful when there are long gaps between play.
Have you tried this project? Let us know how it went or any improvements you have made in the comments below. We would love to hear from you.
thanks really good stuff.