Using screws to hang or mount pictures, shelves and your TV on a brick or concrete wall is the best and most secure way to attach them however some preparation work is required.
You’ll need an electric drill (preferably an impact or hammer drill), a masonry drill bit (see our drill bit selection guide) and a set of screws and plastic or wooden wall plugs.
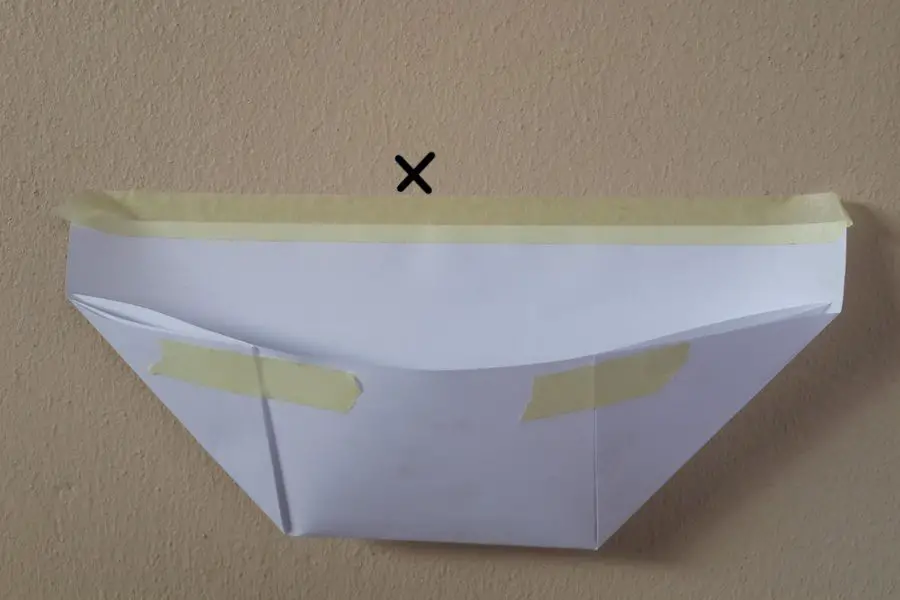
First mark the position of your holes to be drilled with a pencil or marker. If you have a vacuum cleaner then it is easiest to get someone to hold the vacuum pipe underneath the hole while you are drilling to collect the concrete dust. The other option is to make a paper collection envelope and tape it just underneath the hole to catch the dust as shown below.
Now drill the hole. Mark off on the drill bit the depth which you need to drill to, about one and a half times the length of the wall plug. Some electric drills have a depth stopper or depth gauge installed on them.
Next press the wall plug into the hole. The plug should fit snugly and may require a light tap with the back of a screw driver or a hammer. The end of the wall plug should be flush with the wall.
Now you can screw the screw into the plug. If you are hanging a shelf or bracket then the screw will go through the bracket and then into the wall plug. As the screw is screwed into the wall plug, it expands to fill the hole and the tight fit ensures that it cannot be pulled back out of the wall proving a solid anchor on which to hang heavy items.


The end of the wall plug should be flush with the wall. I must say this is very nice techniques. Thanks for sharing this with us.