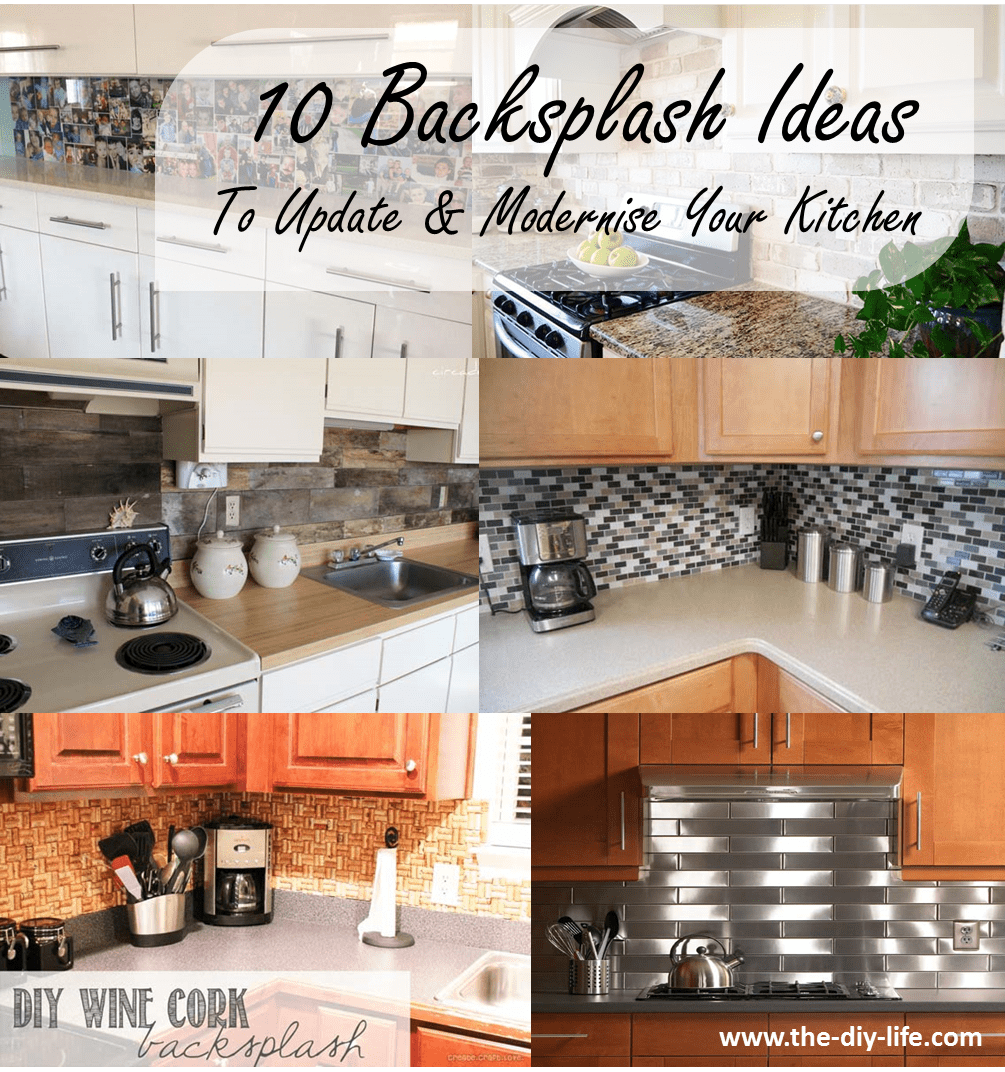
A well thought out backsplash can become a focal point in your kitchen. The main purpose of a backsplash is to protect the wall behind it, it should therefore be hard wearing and easy to clean but it also needs to draw attention to the theme of your kitchen. We have therefore put together a list of our top choices for easy to make an install kitchen backsplashes, perfect for a DIY weekend project.
A homemade kitchen island could be the final piece you need to bring your kitchen together and compliment your new backsplash. Once your are done upscaling your kitchen with a new backsplash and island, why not try organising the cupboard under your kitchen sink or become a master of your own kitchen with these tips and tricks.
The tutorial for each of these backsplashes can be found by clicking on the link each image.
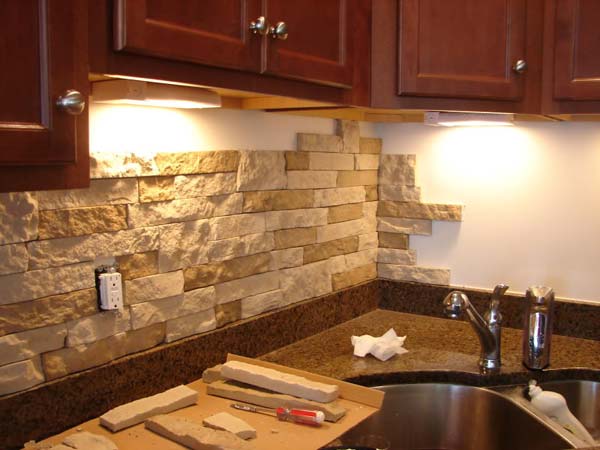
Artificial Stone Backsplash
Artificial stone is available at DIY stores and tiling outlets. They usually come in loose pieces or in ready made glued together sections. The best part about artificial stone is that you just need to stick them to the wall. They require no grout, no paint and virtually no further upkeep, a really hardy choice which is perfect for a well used kitchen.
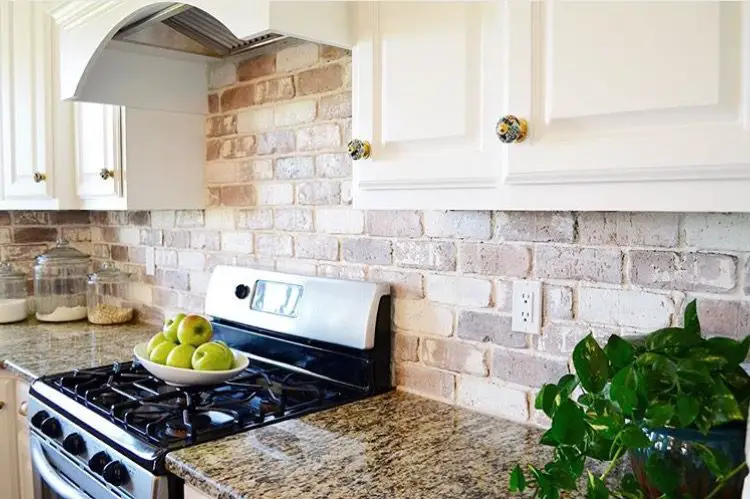
Brick Veneer Backsplash
A brick wall in the kitchen gives your kitchen a rustic farm house feel, since most modern homes are made with dry wall, you’ll need to use stick on brick veneer to get the brick wall look. Stick on brick veneers are available at home improvement stores and although quite expensive, they don’t need much else to be finished into a beautiful feature wall. They are stuck on with liquid nails and the gaps between grouted with cheap tile grout.
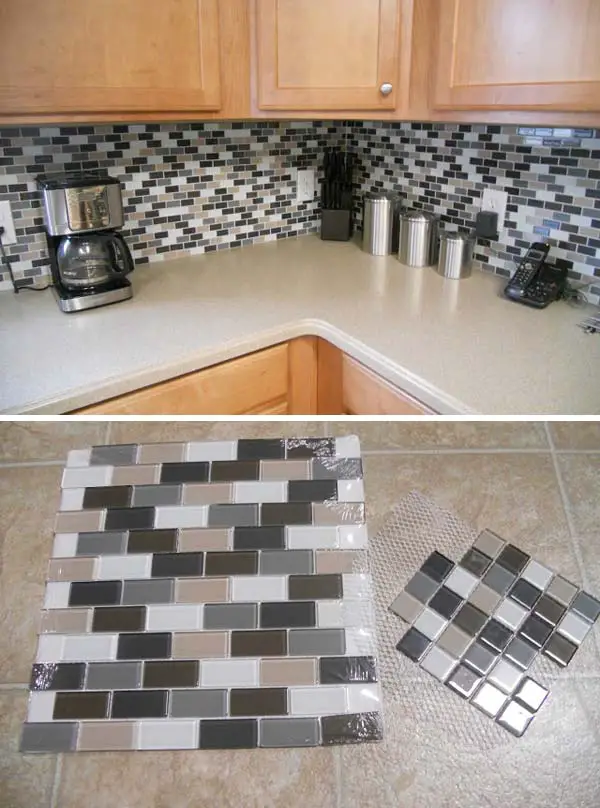
Back To Basics With Tiles
Tiling is always a good choice for your kitchen backsplash, tiles are extremely hardy and super easy to clean. Make sure that you are comfortable with tiling before taking on a vast mosaic above your kitchen counter tops, while tiling is not difficult, there is some technique involved in getting perfectly straight lines and spacing between sheets.
If you already have a tiled backsplash which is still well bedded (not falling off the wall), instead of removing it, try tiling over the existing tiles. it is easier than it sounds an gives your kitchen an immediate modern update.
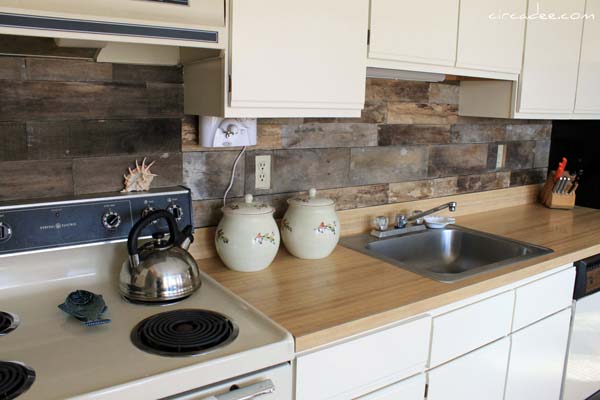
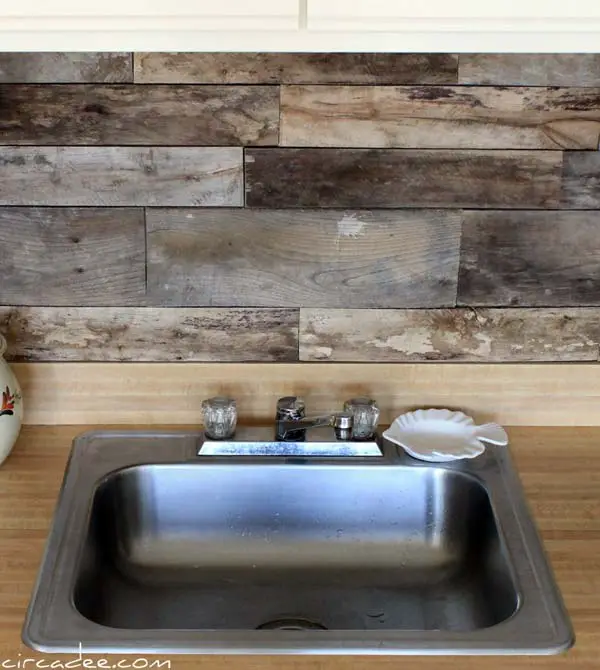
Repurpose A Wooden Pallet
Pallets have become a popular choice for the DIY’er, they offer free wood with a weathered look which fits right in with the latest trends. So for a super cheap and easy to cut and install kitchen backsplash, look no further than pallet wood.
Try to get a mixture of old, new, dark and light stained wood. Two to three pallets should provide enough variation. Cut the wood to various sizes and fit them back together, they can be nailed onto the wall or stuck on with liquid nails adhesive.
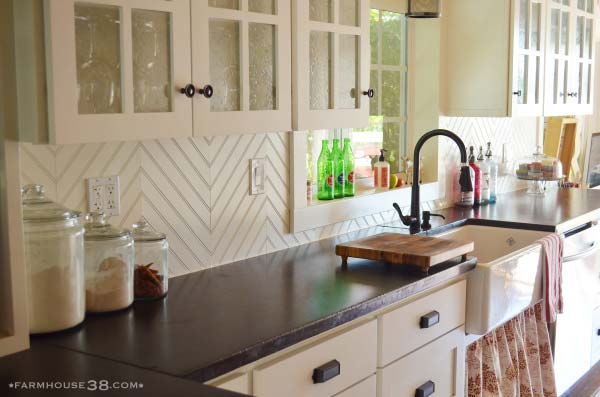
Herringbone Beadboard Backsplash
Herringbone beadboard is available quite cheaply at your local DIY store. The best part about this backsplash is that it can be painted to match cabinets, contrast counters, match the floor etc, it is just so versatile.
The beadboard is also really easy to install, a trim with a wood saw is all that is needed before sticking them on with liquid nails. Finish them off with a coat of paint and they will look professionally installed.
Herringbone beadboard tutorial
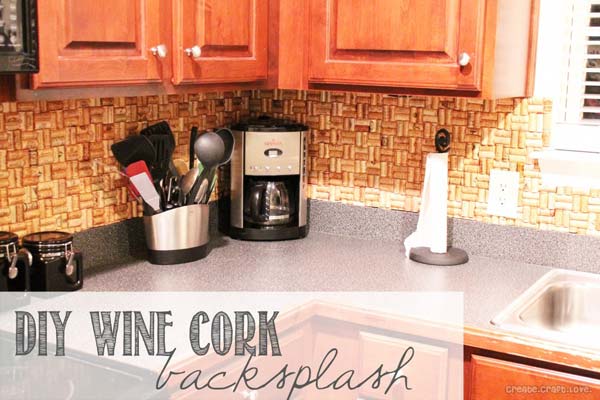
Put Your Old Wine Corks To Good Use
If you really love your wine or have been collecting corks for a couple of years, put them to good use as a backsplash. The corks are cut in half, so they cover double the area of a single cork and are then stuck on with liquid nails or contact adhesive. You can make a variety of patterns with them including squares, lines and herringbone designs.
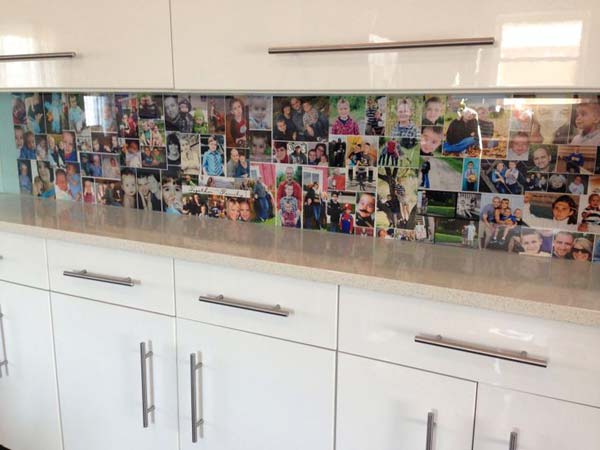
Family Photo Display
This backsplash is for the true family home, a colorful collection of your families favorite memories. The photos a simply stuck to the wall and protected with a sheet or glass or acrylic. This backsplash is perfect if your are looking at a remodeling your kitchen in a house you plan to live in for the next couple of years, we’re sure potential buyers won’t appreciate your family photo collection as much as you do.
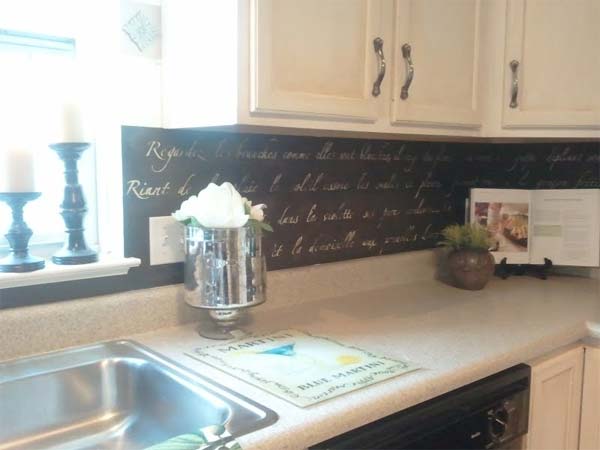
Turn The Wall Into A Chalkboard
Are you creative with sketching and writing or do you simply dream of turning your whole wall into a shopping and to do list? Then the chalkboard backsplash is for you, simply paint your walls in chalk board paint and you kitchen is now your canvas.
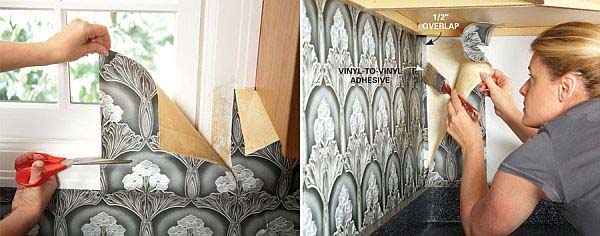
Stick On Vinyl Backsplash
Stick on vinyl is making a comeback and it doesn’t only have to be used on the floor. From tile designs to wood look a like, there is a wide range of options for all kitchen themes. The vinyl usually comes in a large sheet which is cut and stuck onto the backing wall, the vinyl is either self adhesive with a peel off backing or is stuck on with contact adhesive.
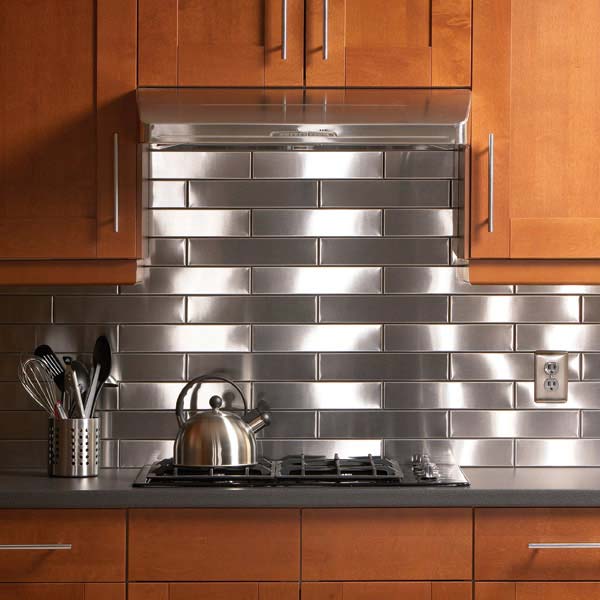
Super Modern Stainless Steel
If cost is not too important or if the area is quite small, you could consider using stainless steel tiles for a super modern finish which will match your stainless steel appliances. Depending on the brand, they may be stuck on with adhesive or have a peel and stick backing. They are also really easy to install and finish the kitchen off in a really professional manner.
Have you used any of these backsplash ideas in your home? Do you have any more unique backsplash ideas? Let us know in the comments section below and we will add them in.
Share This Tip:
All the images used on this page come from the tutorial available through the link above the image, they are not the property of The DIY Life.
I really like the look of the brick veneer example. I think something like this could be good for my home because it would be a great way to incorporate a somewhat tough design into the simple styling. It’s something to remember to make sure my kitchen has some variety without having to lay individual bricks.