Today we’re going to be taking a look at the new CrowPi-L, a Raspberry Pi 4 based laptop by Elecrow. This is essentially a slimmed-down and slightly more refined version of the popular CrowPi2.
They’ve taken some of the community feedback on the CrowPi2 onboard in producing this laptop, so it’s got a number of nice upgrades. They have included an internal 5000mAh battery, which should power the laptop for up to three hours, and have simplified the way to install and remove your Raspberry Pi.
Take a look at my review video or read on for the written review:
Where To Buy A CrowPi-L
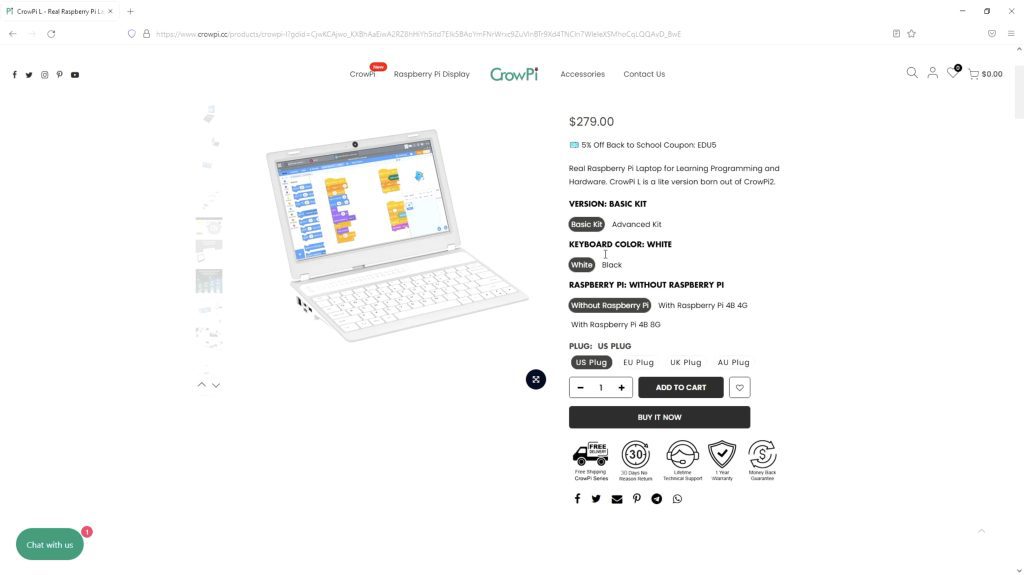
The CrowPi-L is primarily available through Elecrow’s web store. A single product page allows you to select from all of the available options for the laptop and add-ons.
First up are two versions, the basic kit which just includes the laptop and then the advanced kit which includes the laptop and the Crowtail starter kit. It’s also available with a black or a white keyboard and you can select it with an optional 4GB or 8GB Raspberry Pi. Given the price difference, I’d probably look at getting a Raspberry Pi elsewhere. You can then also select your plug type at the bottom.
I’d really like to see a slimmed-down version of the CrowPi-L for the Pi Compute Module 4, but until these are readily available again that’s probably not viable for them.
Alternately, it is also available through their Amazon store where you can select from the Basic Kit or the Advanced Kit that includes the Crowtail Starter Kit.
Unboxing The CrowPi-L
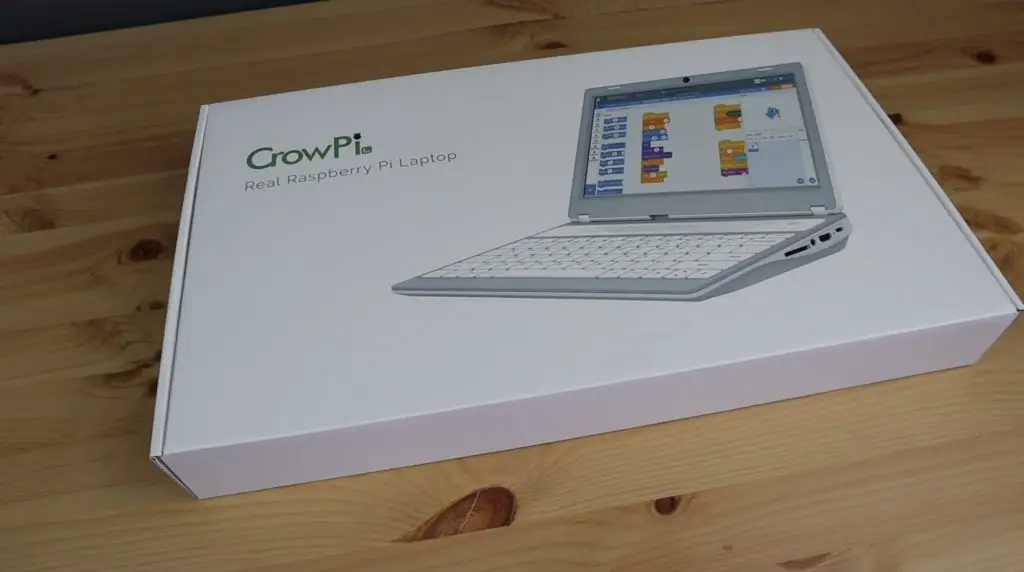
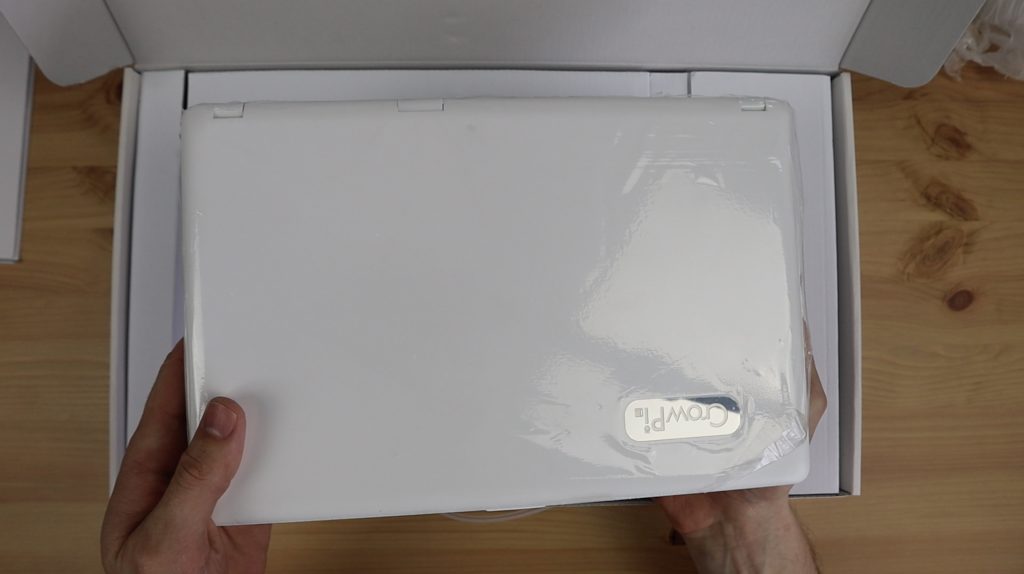
The CrowPi-L comes in a white branded box with a neat carry handle on the top.
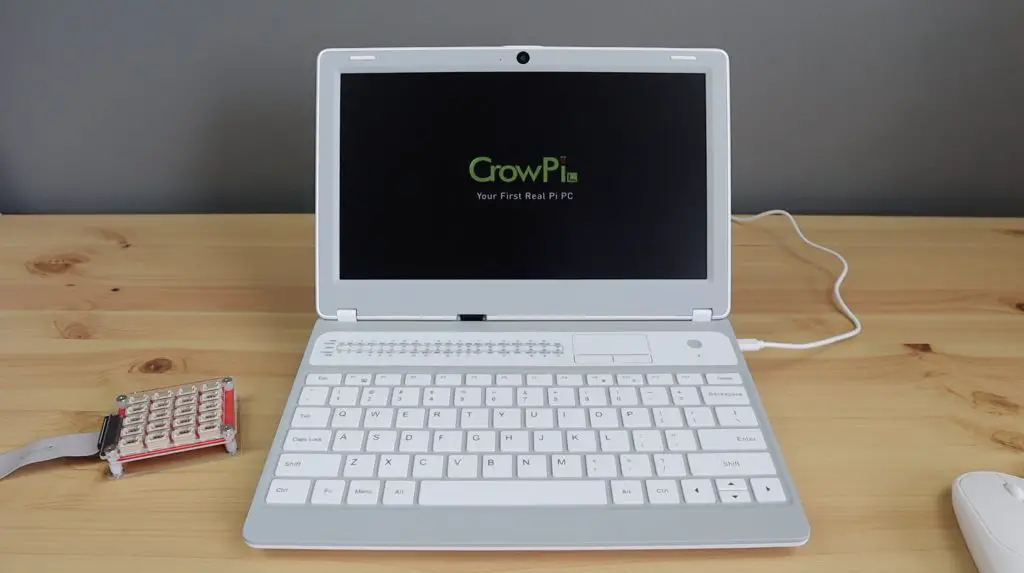
Opening up the lid, we’re greeted with the CrowPi-L.
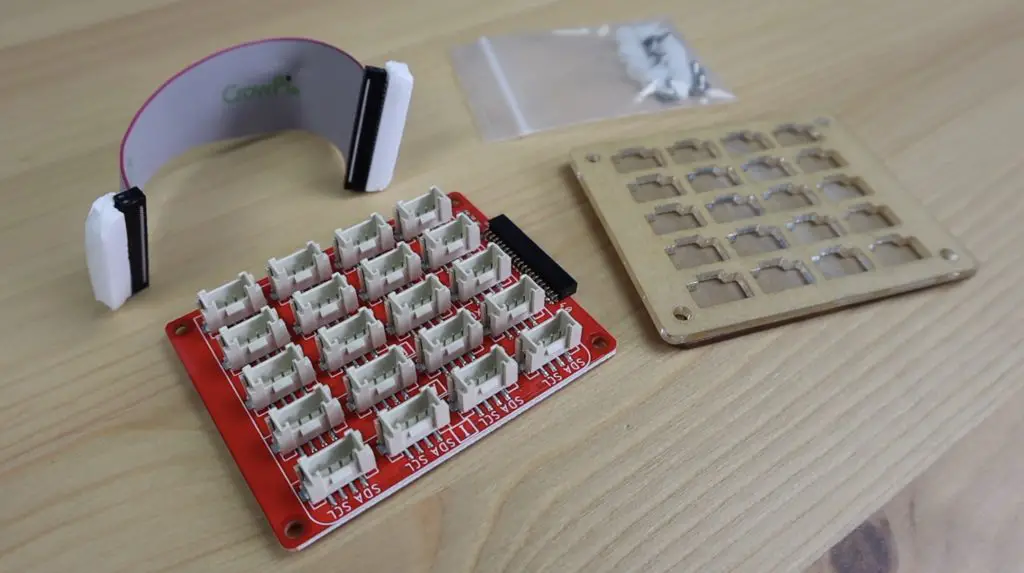
Alongside that is a white wireless mouse to match the laptop, some hardware to mount the Raspberry Pi within the laptop and then a little red adaptor board. They call this the Crowtail adaptor board and you basically use this in conjunction with the Crowtail starter kit to tinker with adding sensors and electronics to your Pi.
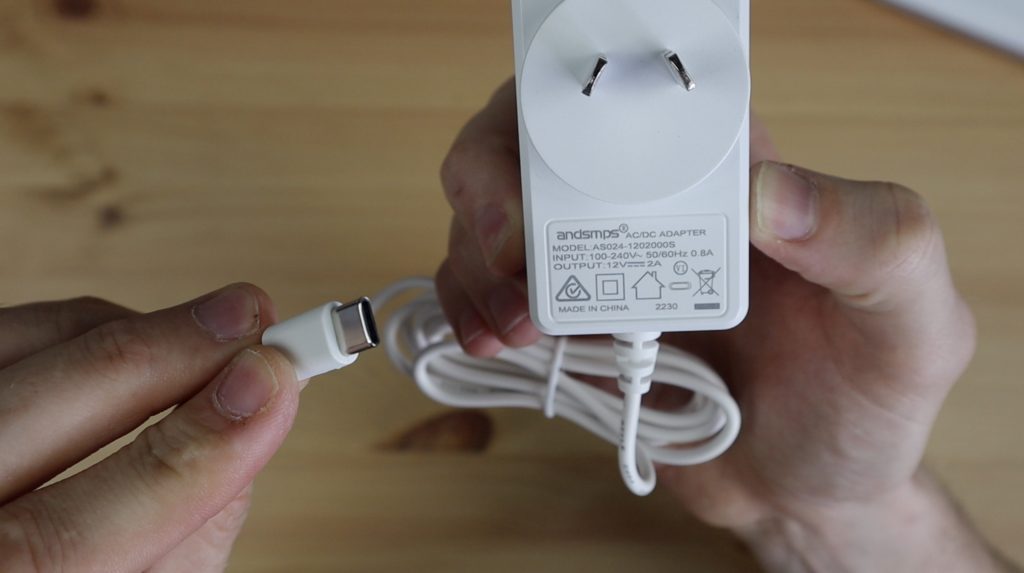
In the compartment at the top, we’ve got a power adaptor. This has a USB type C connector on it but says it supplies 12V, so I assume it’s a USB type C power delivery adaptor although it doesn’t say that anywhere and it doesn’t have any specs for the other lower voltages, so I’m not too sure. I’d probably be cautious plugging this into a standard USB type C device.
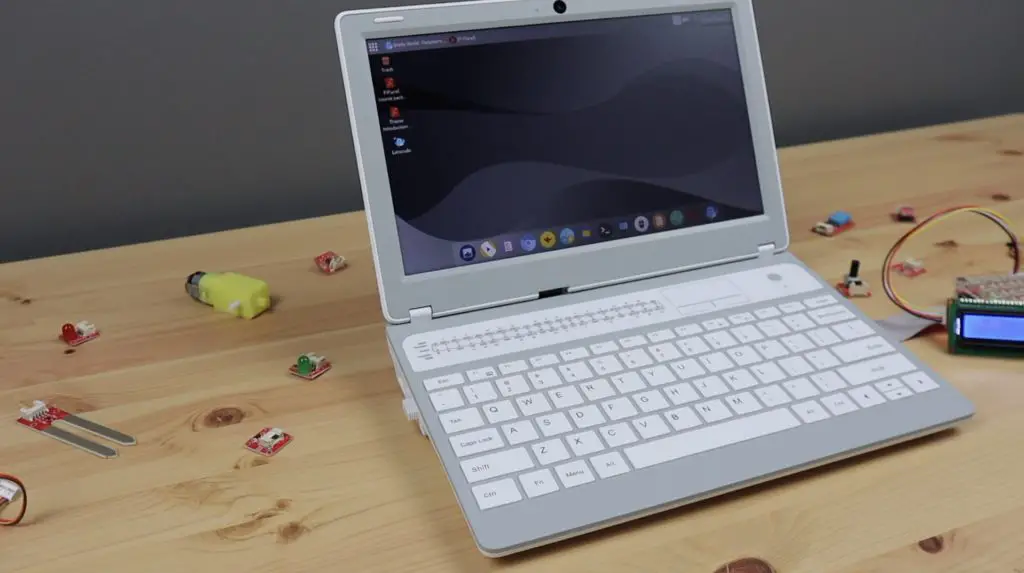
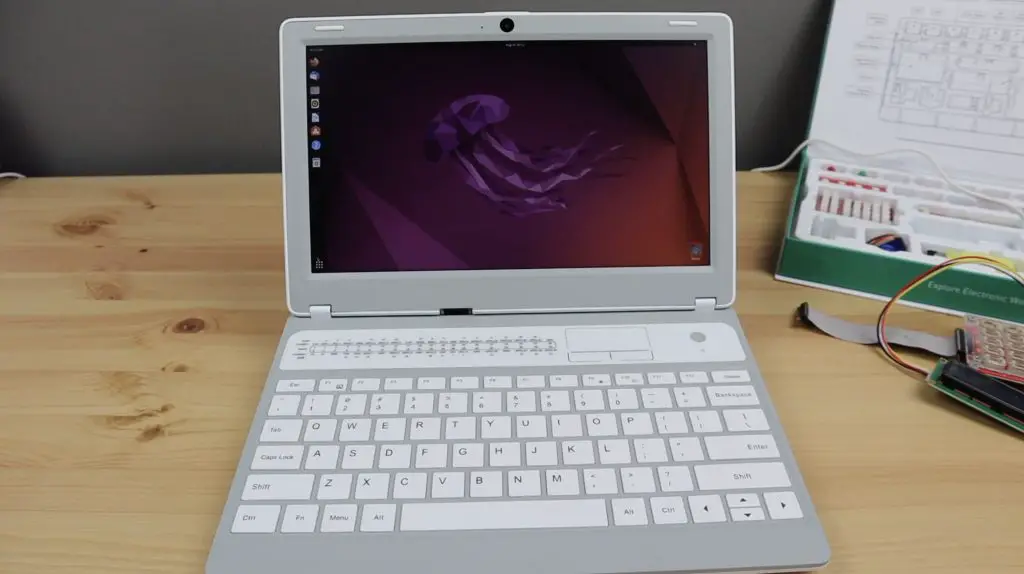
Taking a look around the CrowPi-L, we’ve got an 11.6″ IPS display with a webcam and microphone above it.
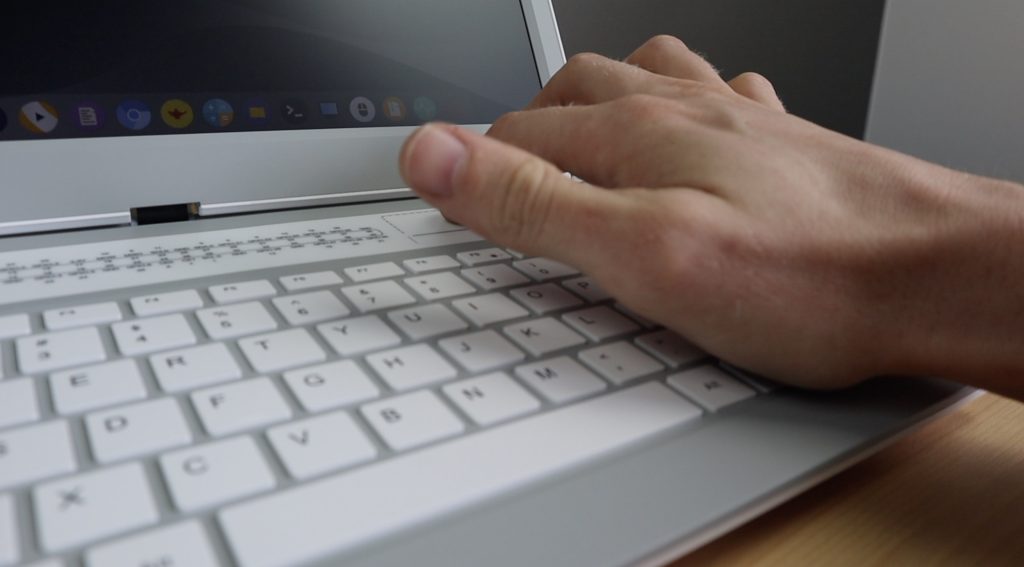
We’ve also got a nice full-size keyboard along with the power button and trackpad above it. I’m not sure why they’ve put the trackpad in this spot. It seems a bit odd to me, but at least it gives you a way to use the pointer if you can’t use the regular mouse or don’t want to carry it around. Alongside the trackpad is a GPIO pinout diagram.
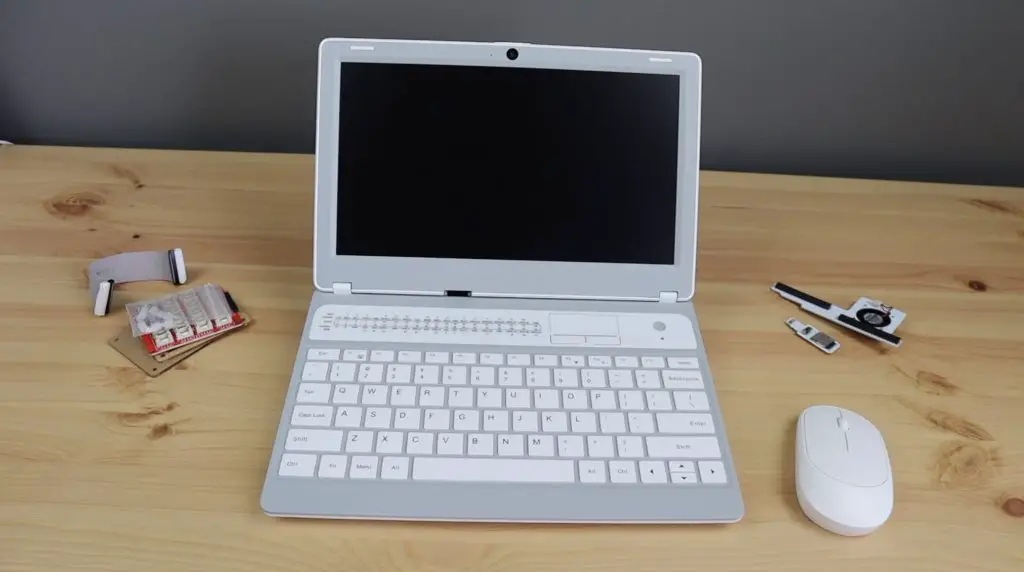
On the left side are the Pi’s ports, so we’ve got an Ethernet port, two USB 3 ports and one USB 2 port. The second USB 2 port on the Pi is used by the CrowPi-L presumably for the trackpad and keyboard input as well as the webcam.
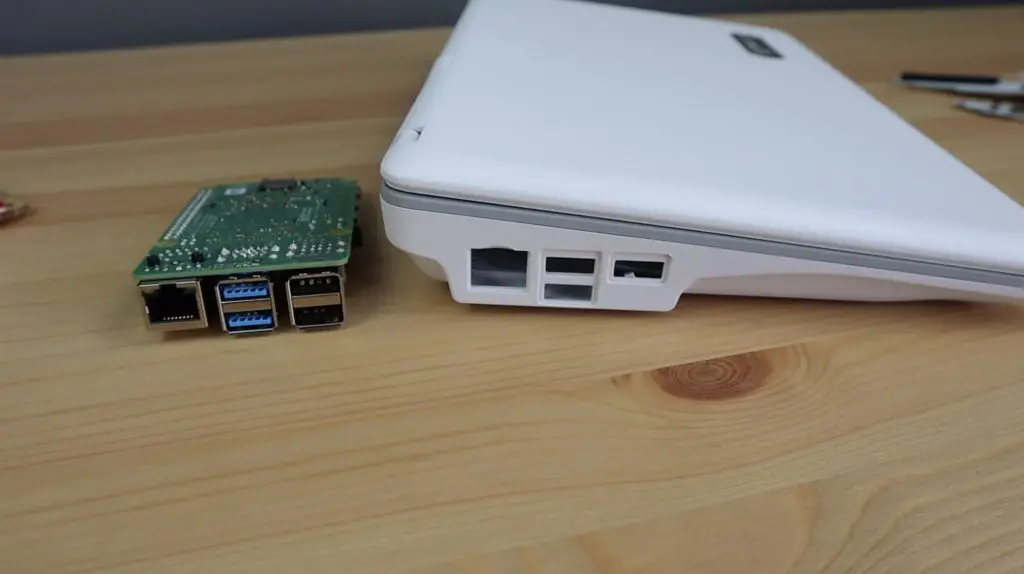
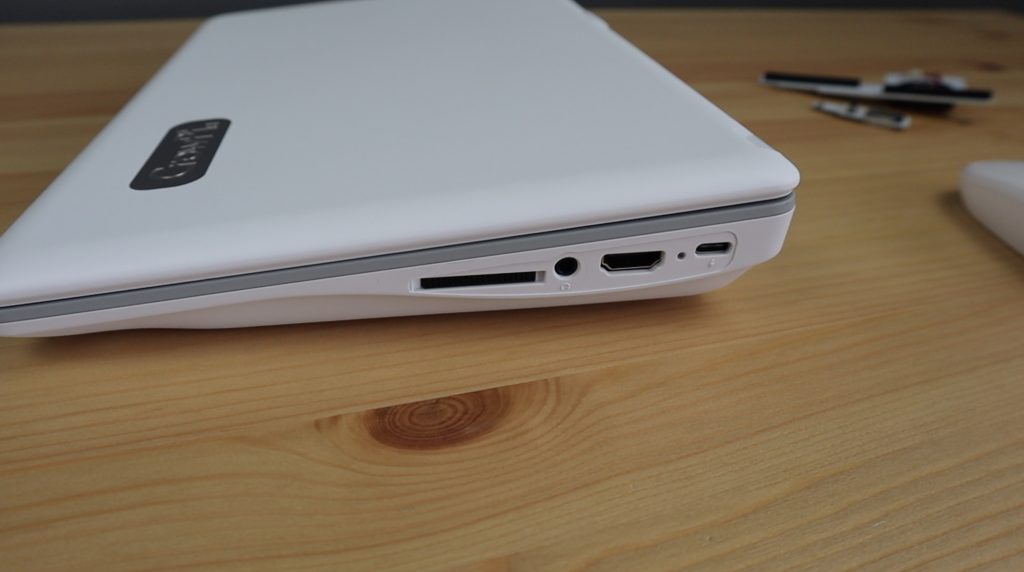
On the opposite side is a compact GPIO header, a 3.5mm audio port, HDMI port and the USB C power port.
The GPIO header is not the same size as the one on the Pi, it is a more compact version that the CrowTail adaptor board will plug into.
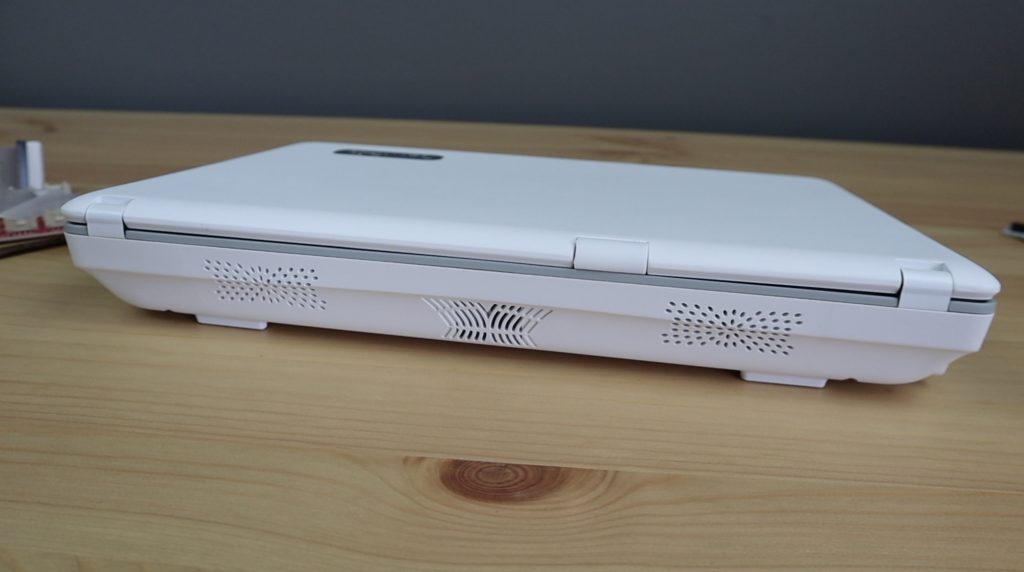
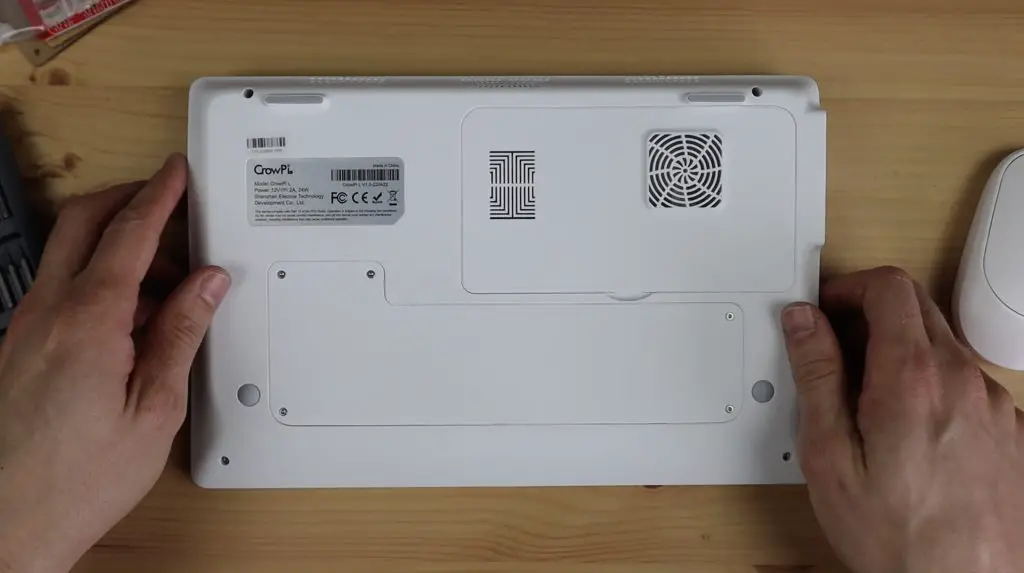
On the back, we’ve got two speakers for stereo audio and some ventilation holes in the middle.
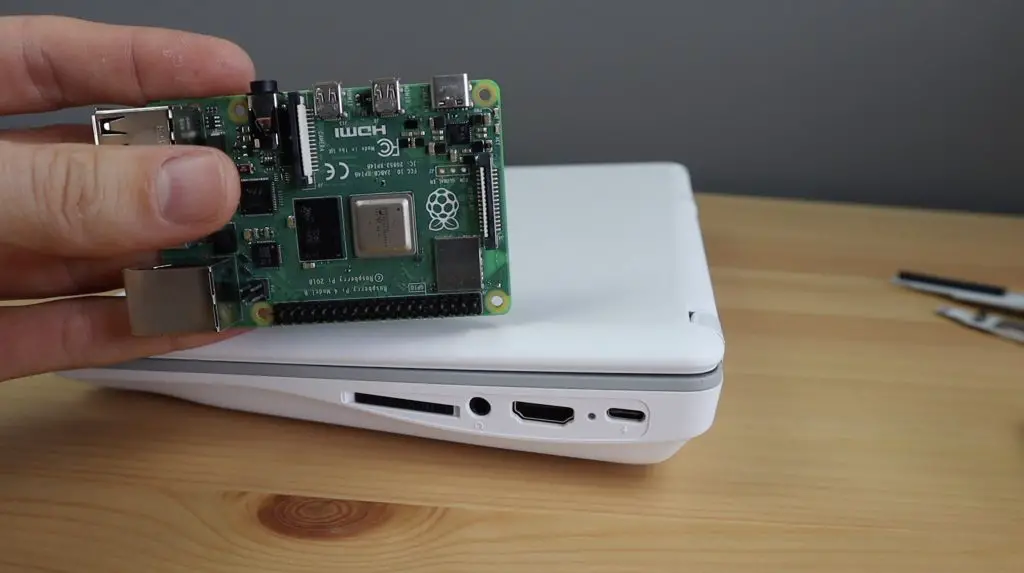
On the bottom, we’ve got two removable covers. The larger one that is held in place with some screws covers the battery compartment and this smaller one at the top is where we install our Pi. This is just held in place magnetically, to make removal of the Pi much easier – something that the community asked for on the CrowPi2. The adaptors are all designed for a Raspberry Pi 4, and you can use the 2GB, 4GB or 8GB variants.
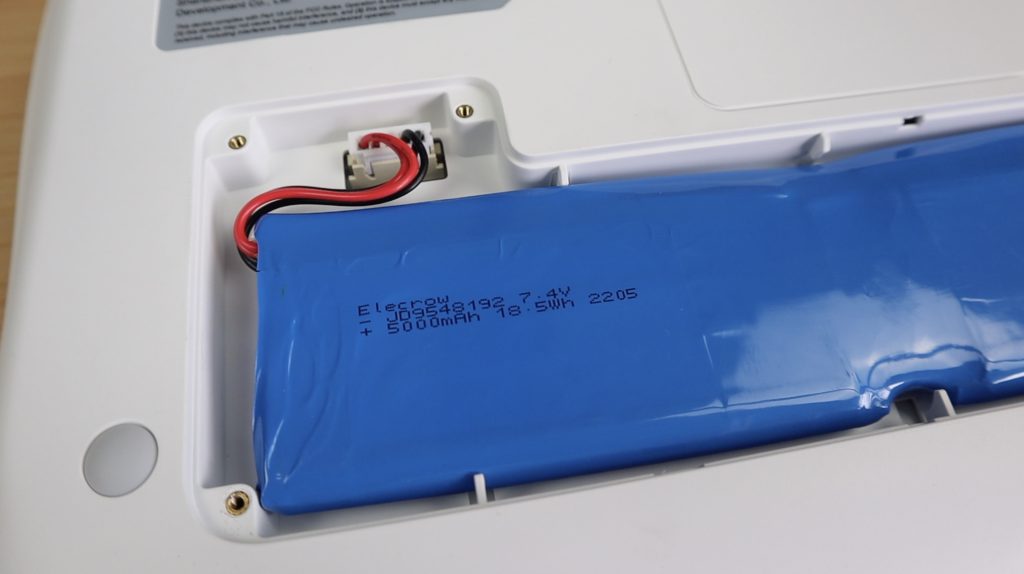
Taking a look at the battery, it looks like it’s two lithium-ion cells making up a 7.4V pack with a total capacity of 5000mAh.
Installing The Raspberry Pi
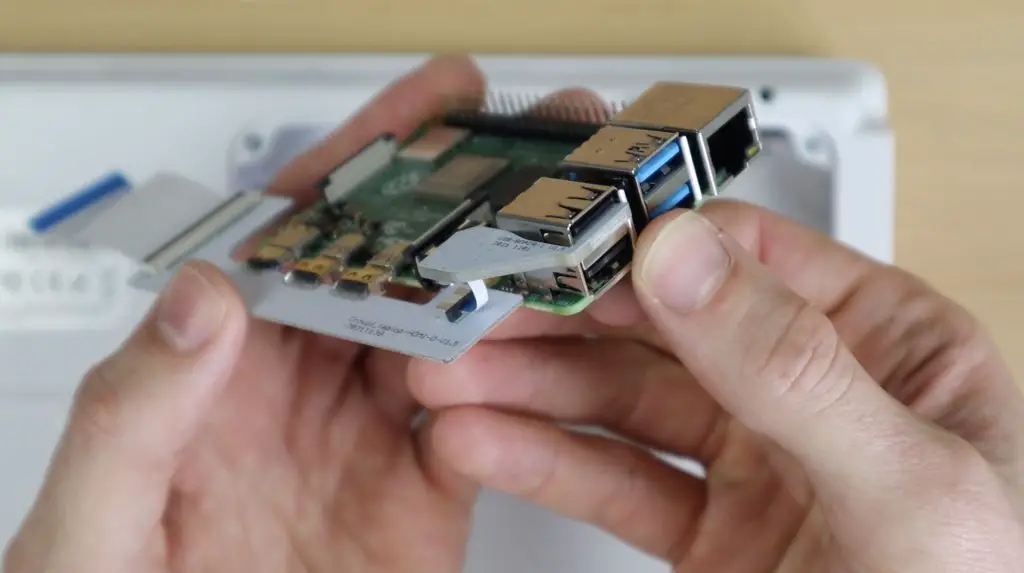
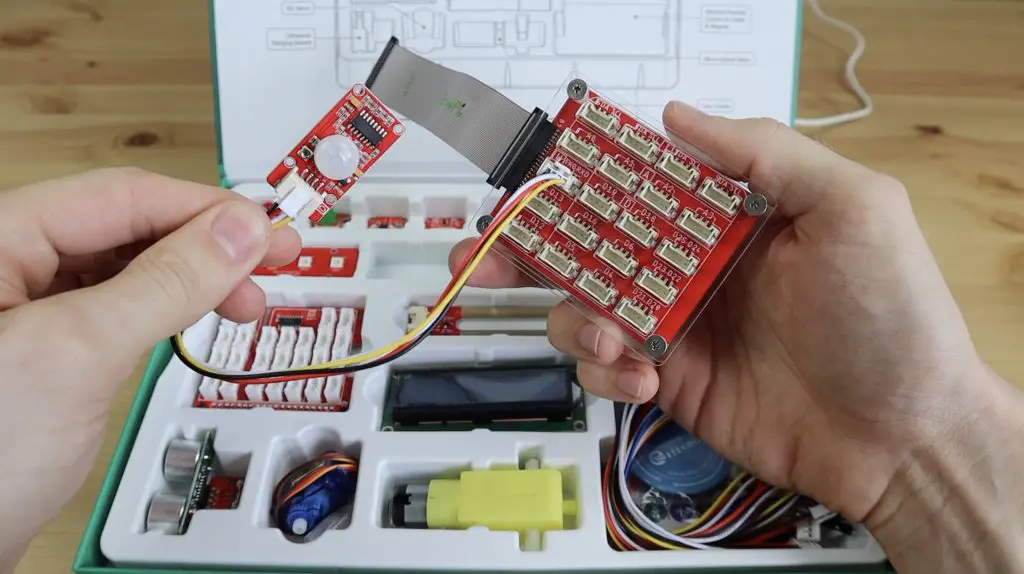
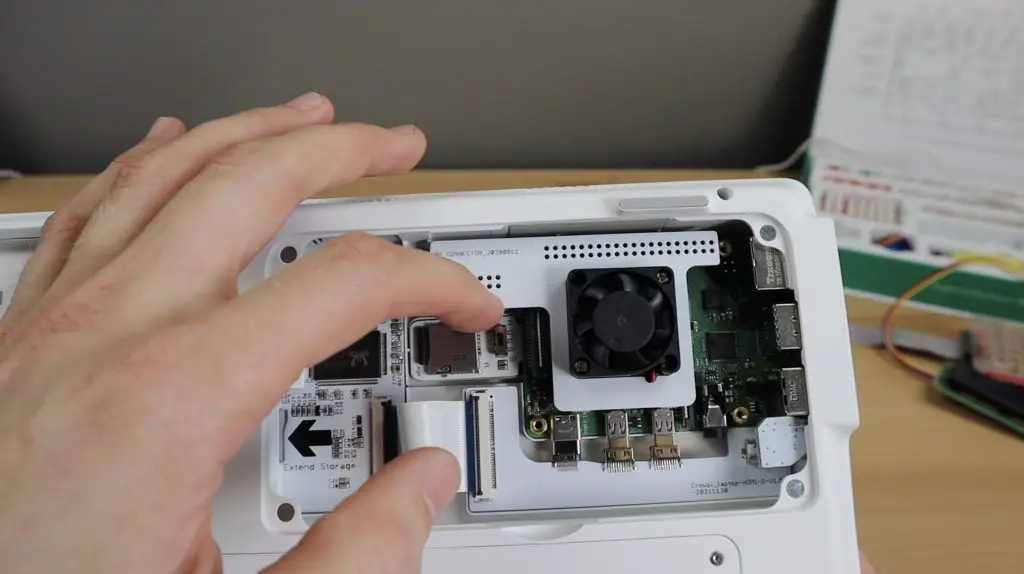
To install our Raspberry Pi, we need to plug this adaptor board into the ports on the side, and a smaller one into the top USB port. The small adaptor connects to the larger adaptor with a short ribbon cable.
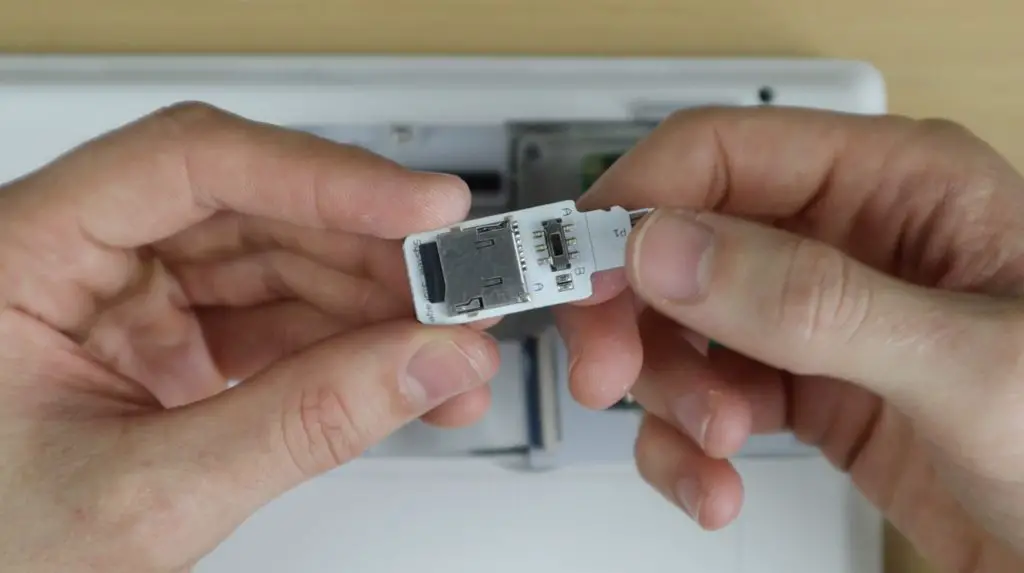
We’ve then also got this really cool microSD card adaptor. This allows you to insert microSD cards into the slots on both sides and you can then use a switch on the A side to choose which card to boot from. So you can dual boot your Pi really easily without having to swap cards. I think this is a really cool feature.
The whole assembly then connects to the CrowPi-L through a ribbon cable.
The Pi is held in place magnetically, so we need to add some included screws to the bottom for the magnets to attach to.
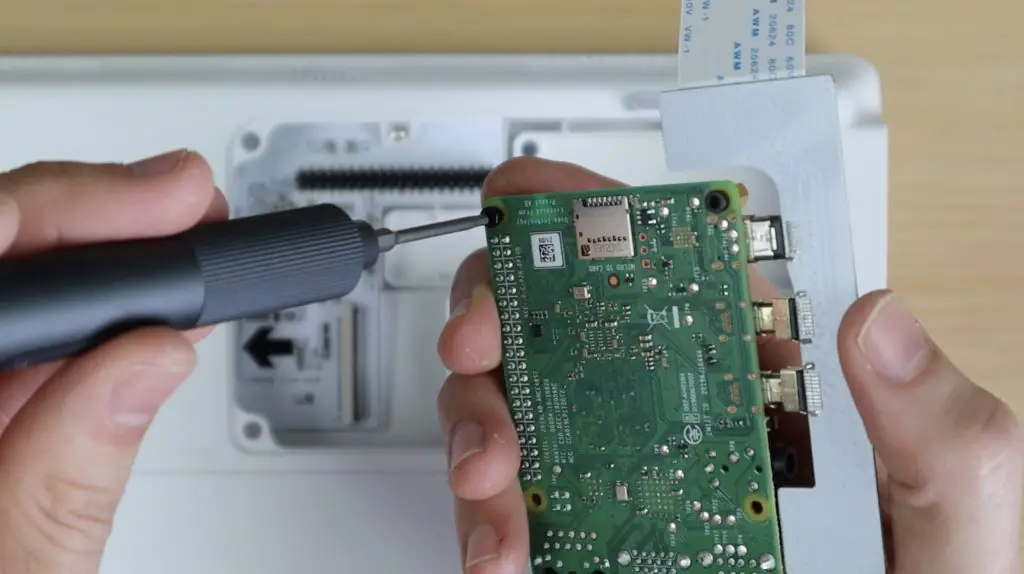
Lastly, we fit an adaptor onto the top to direct the Pi’s GPIO pins through to the port on the side of the CrowPi for the Crowtail adaptor board. This adaptor also has a fan on it to provide cooling to the CPU.
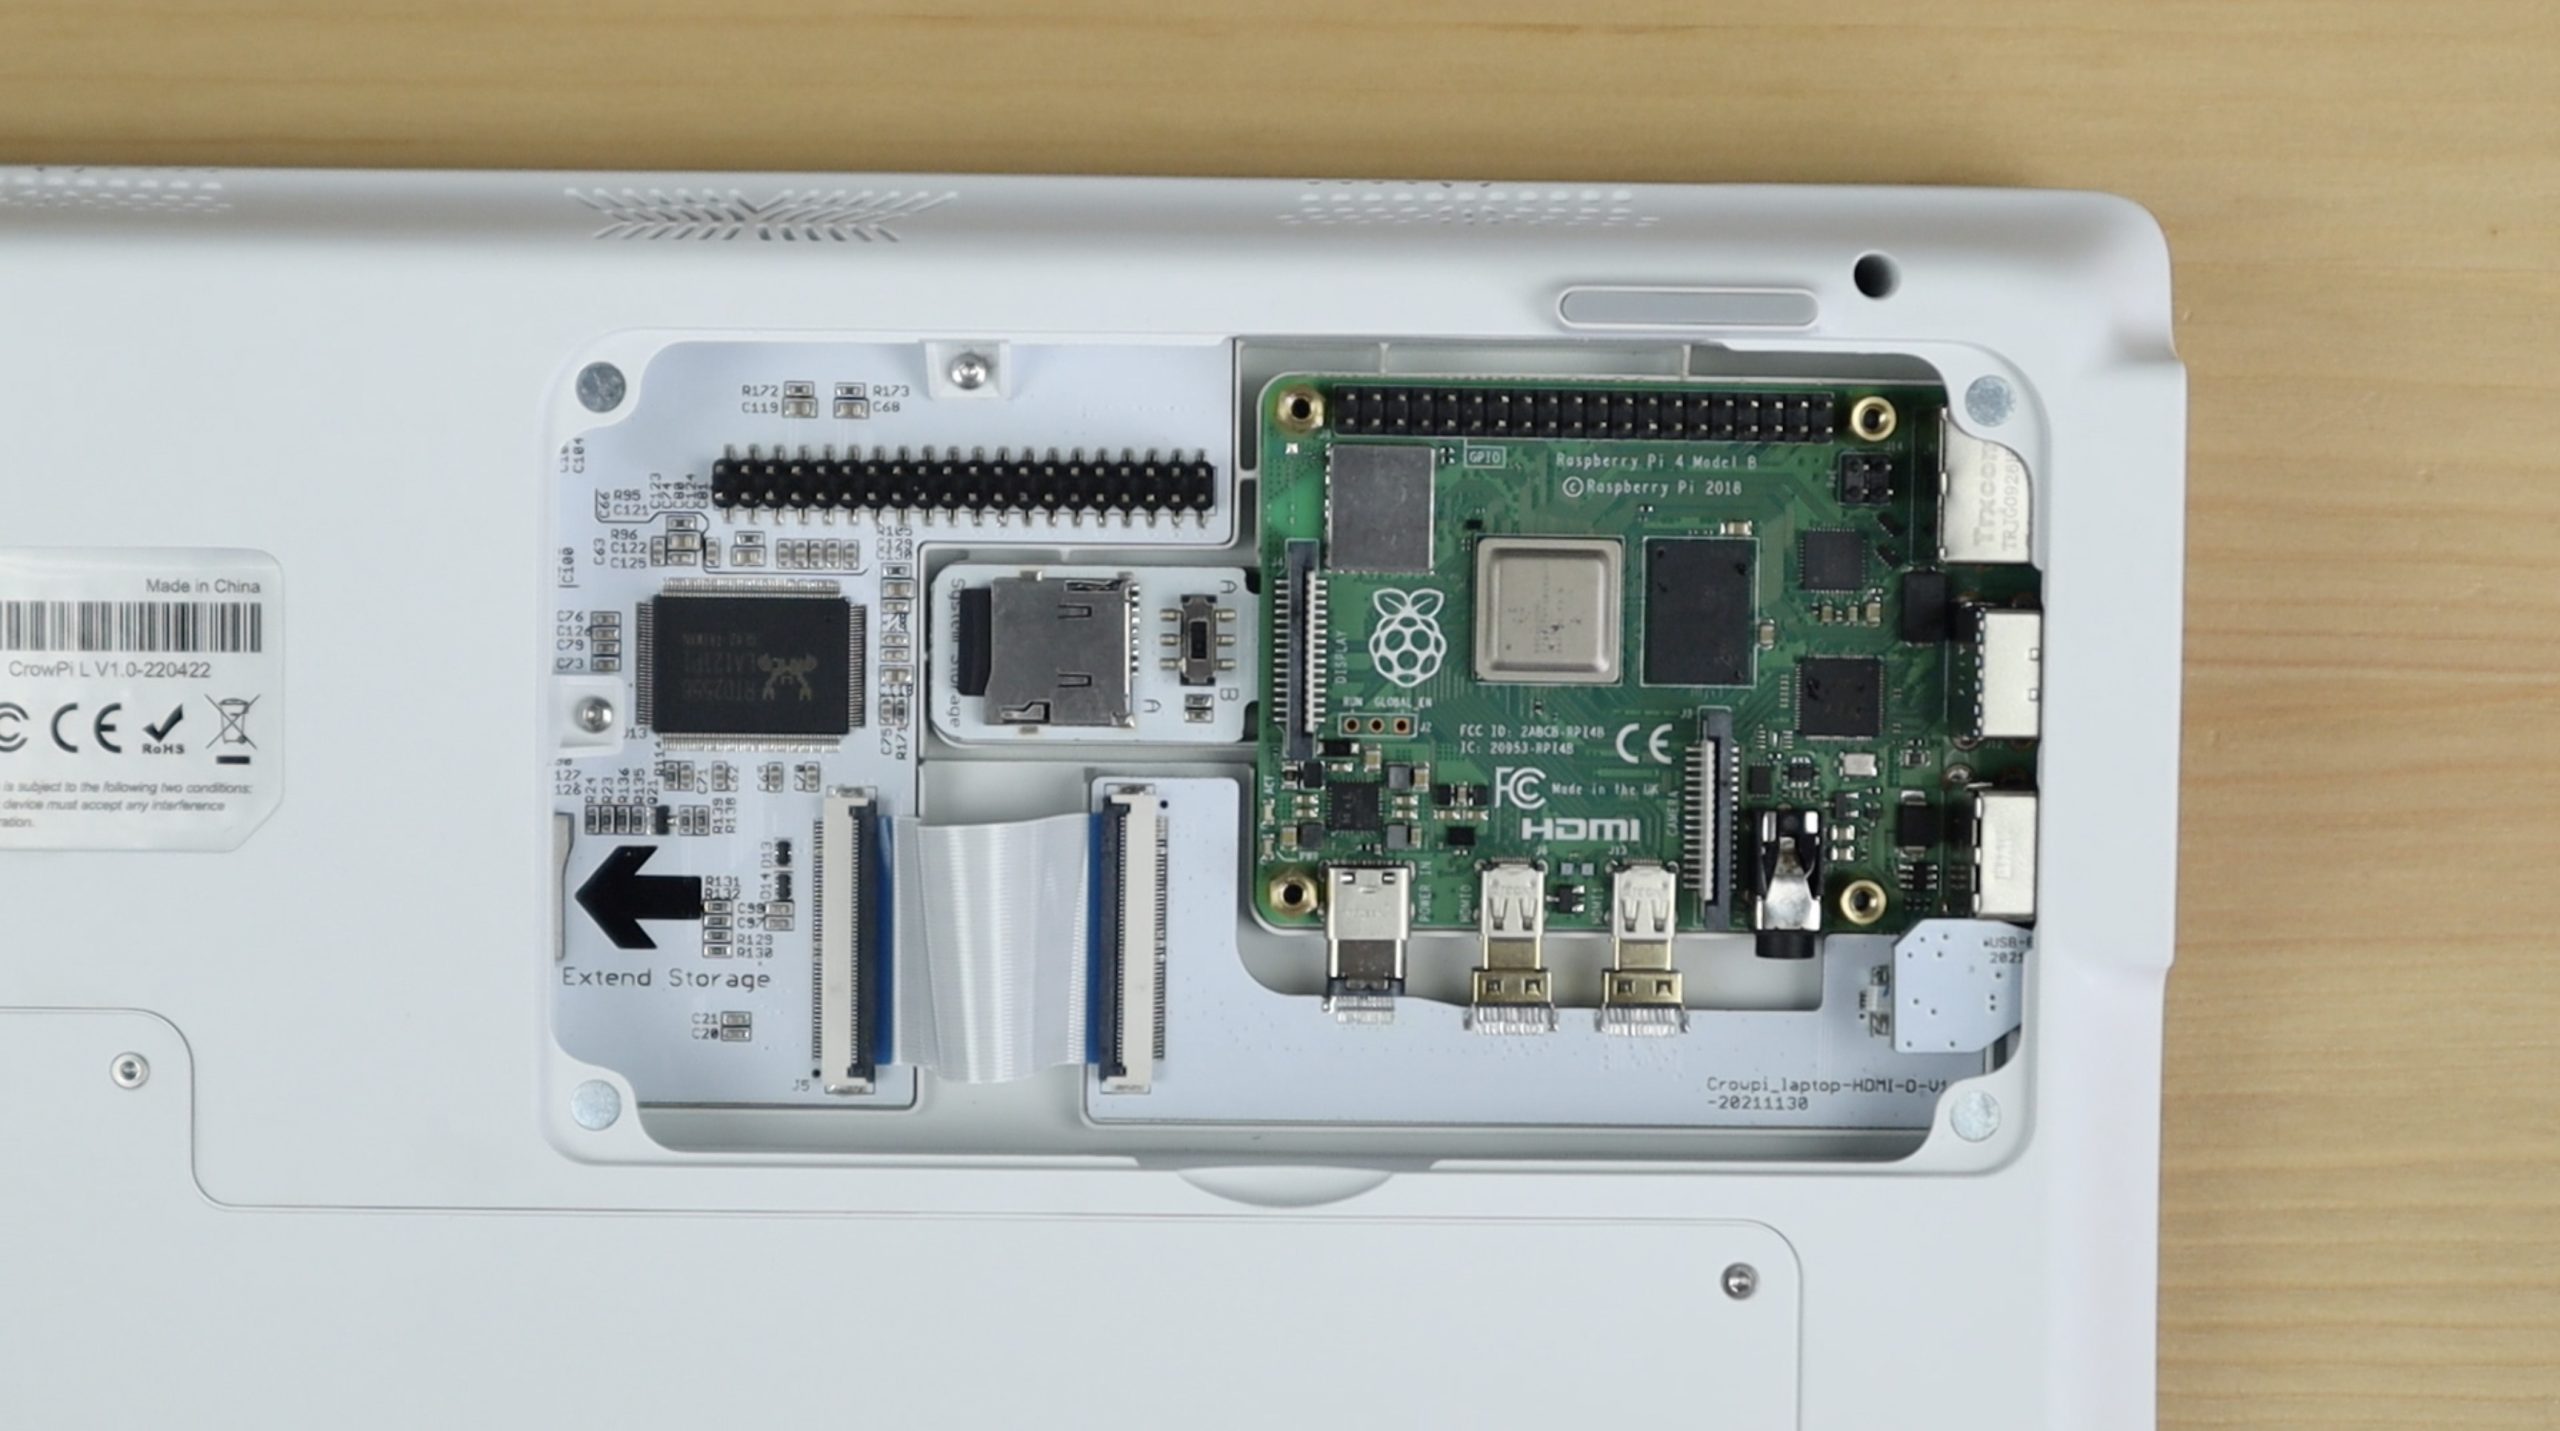
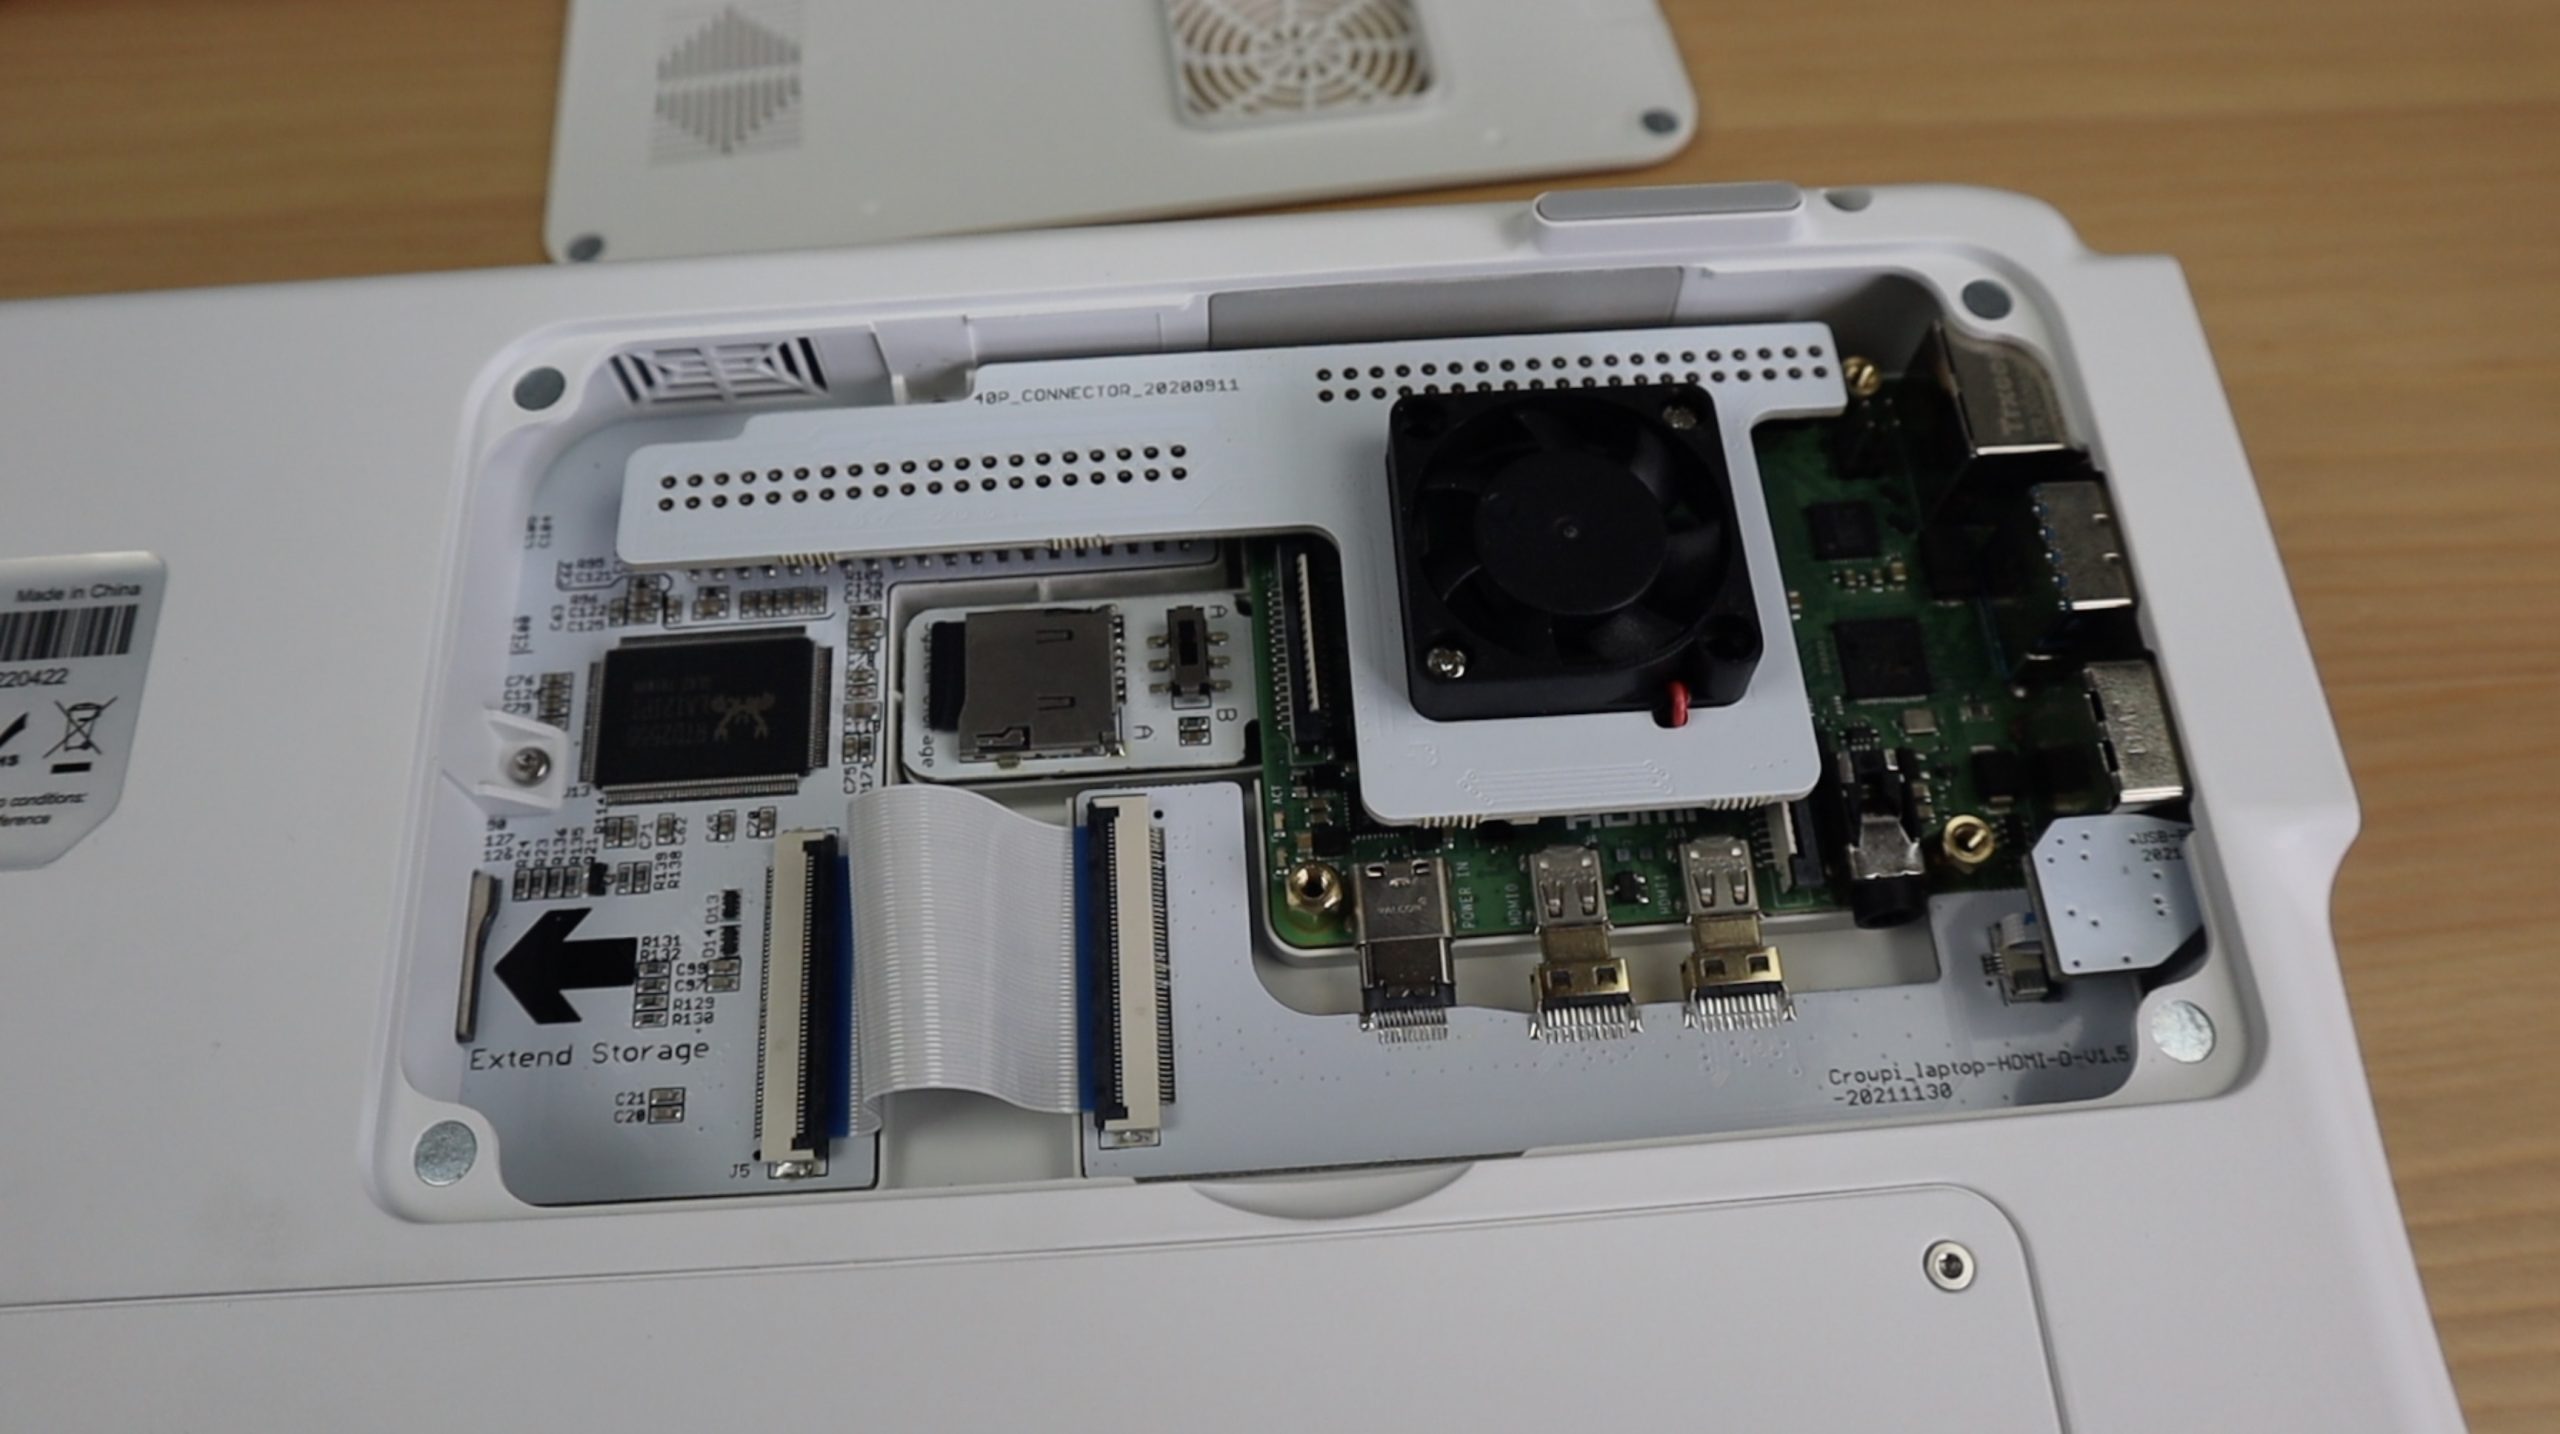
That’s our Pi installed and ready to be used. They’ve done really well with the design here, it’s one of the neatest and most functional I’ve seen. Usually, you need to connect a number of loose cables between the Pi and the laptop or tablet, so this is a really clean setup.
First Boot Of The CrowPi-L
Now that we’ve got our Raspberry Pi installed, let’s get it booted up.
The first thing I noticed is that the display is really good. The details are sharp, the brightness is great and it’s got an anti-reflective coating which really helps when working in areas with bright lights or windows. A lot of these sort of products take shortcuts with the display to keep the cost down, they definitely haven’t done so with this one.
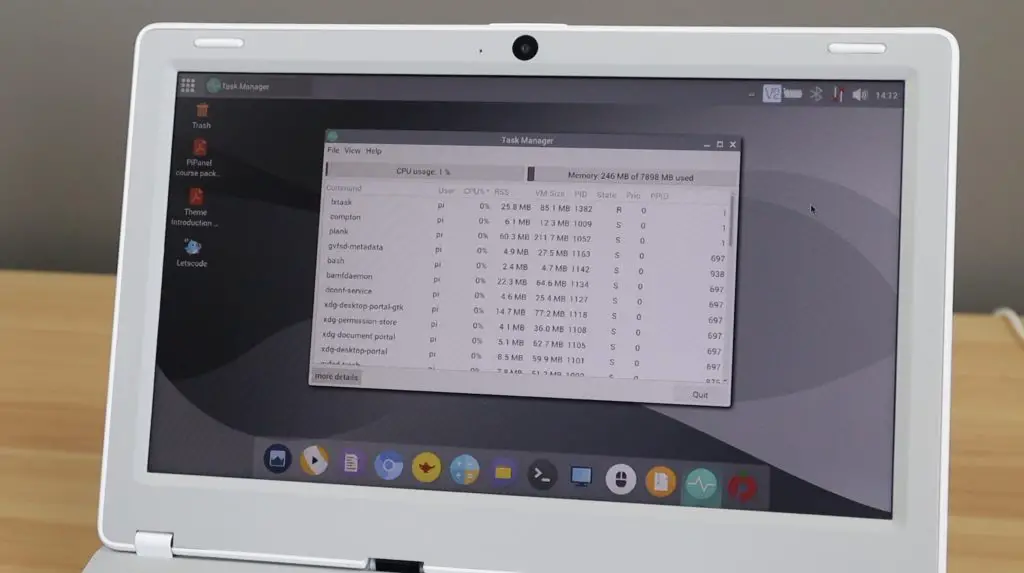
This is running Elecrow’s version of Raspberry Pi OS, so you get some nice features specific to the CrowPi-L, like the battery monitor in the bar at the top. This shows you the remaining battery capacity in quarters and indicates whether the battery is charging or being used.

The trackpad isn’t great. It is usable but you probably wouldn’t want to use it as your go-to device. You also can’t rest your wrist when using it or you’ll push keys on the keyboard, so it’s not comfortable to use for extended periods.
Performance-wise, you’re going to get the exact same performance you’d get out of a standalone Pi. This is effectively just an all-in-one package for a Raspberry Pi, so it’s not going to give you any better or worse performance than the Pi itself would by itself.
Using The GPIO Pins & Crowtail Starter Kit
If you’ve looked at the pricing, you’re probably wondering why you’d spend around $350 for this laptop (once you’ve added in your Pi) when you could get a second-hand or low-end laptop with better performance for a similar price.
The biggest benefit I see is that this is a really good, ready-to-run learning platform. It comes with Pi Panel pre-installed and this guides you through a number of projects step-by-step. All of the required software, drivers and libraries are ready to run as well. You can start out with drag and drop block coding using Letscode and then move on to Python programming in Thonny once you get more comfortable.
To get the most out of this functionality, you’ll probably want to get the Crowtail starter kit or another 4-wire sensor kit so that you’ve got some basic electronic components to work with.
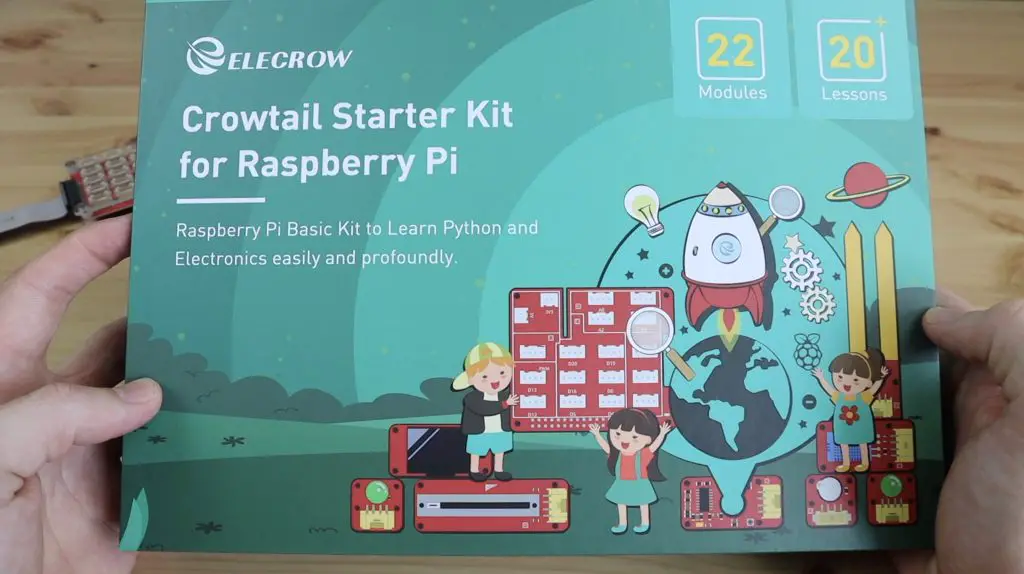
The Crowtail starter kit comes with 22 modules as well as some breadboard jumpers and 4pin cables. Some of the included modules are a PIR sensor, moisture sensor, buzzer, button, capacitive touch sensor etc.. The full list is available on their product page.
They also have Crowtail starter kits available for Arduino and Micro:bit, take a look at their full product range.
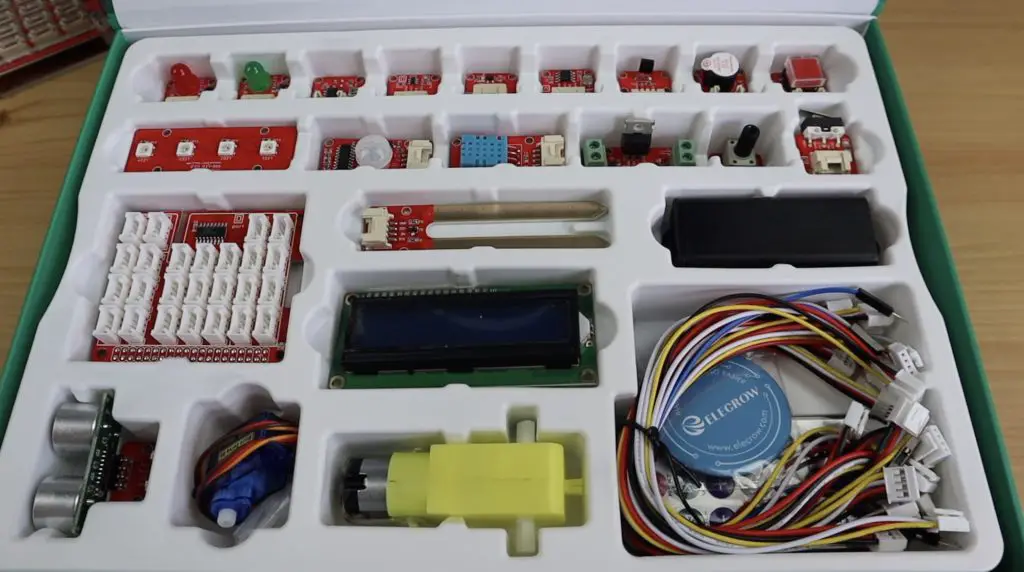
Each module has a four-pin interface that you can use an included cable to plug into the Crowtail board. So it’s all plug-and-play which is great for beginners.
The kit also includes a base shield which you can use directly on your Raspberry Pi’s GPIO pins if you aren’t using the CrowPi laptop. It’s basically the same sort of adaptor as the Crowtail but to be used straight in your Raspberry Pi.

As a beginner, it can be quite intimidating to open up a box of electronics and have to figure out how to connect them while also learning how to code the software. This package makes the first step a lot more manageable with the modules all being plug-and-play and the software preconfigured, so you can progressively work on more and more advanced projects.
Trying Out An Included Project On The CrowPi-L
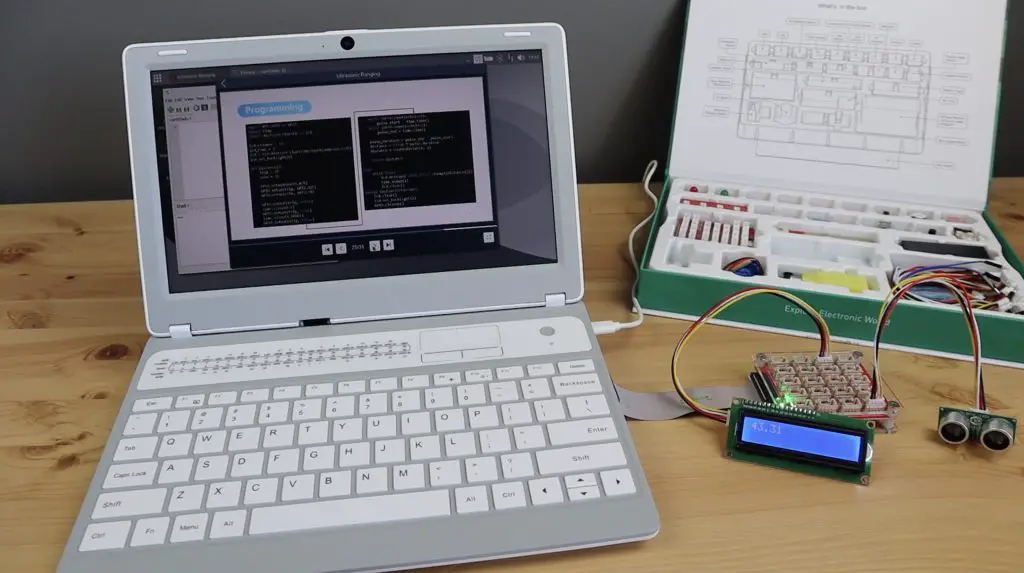
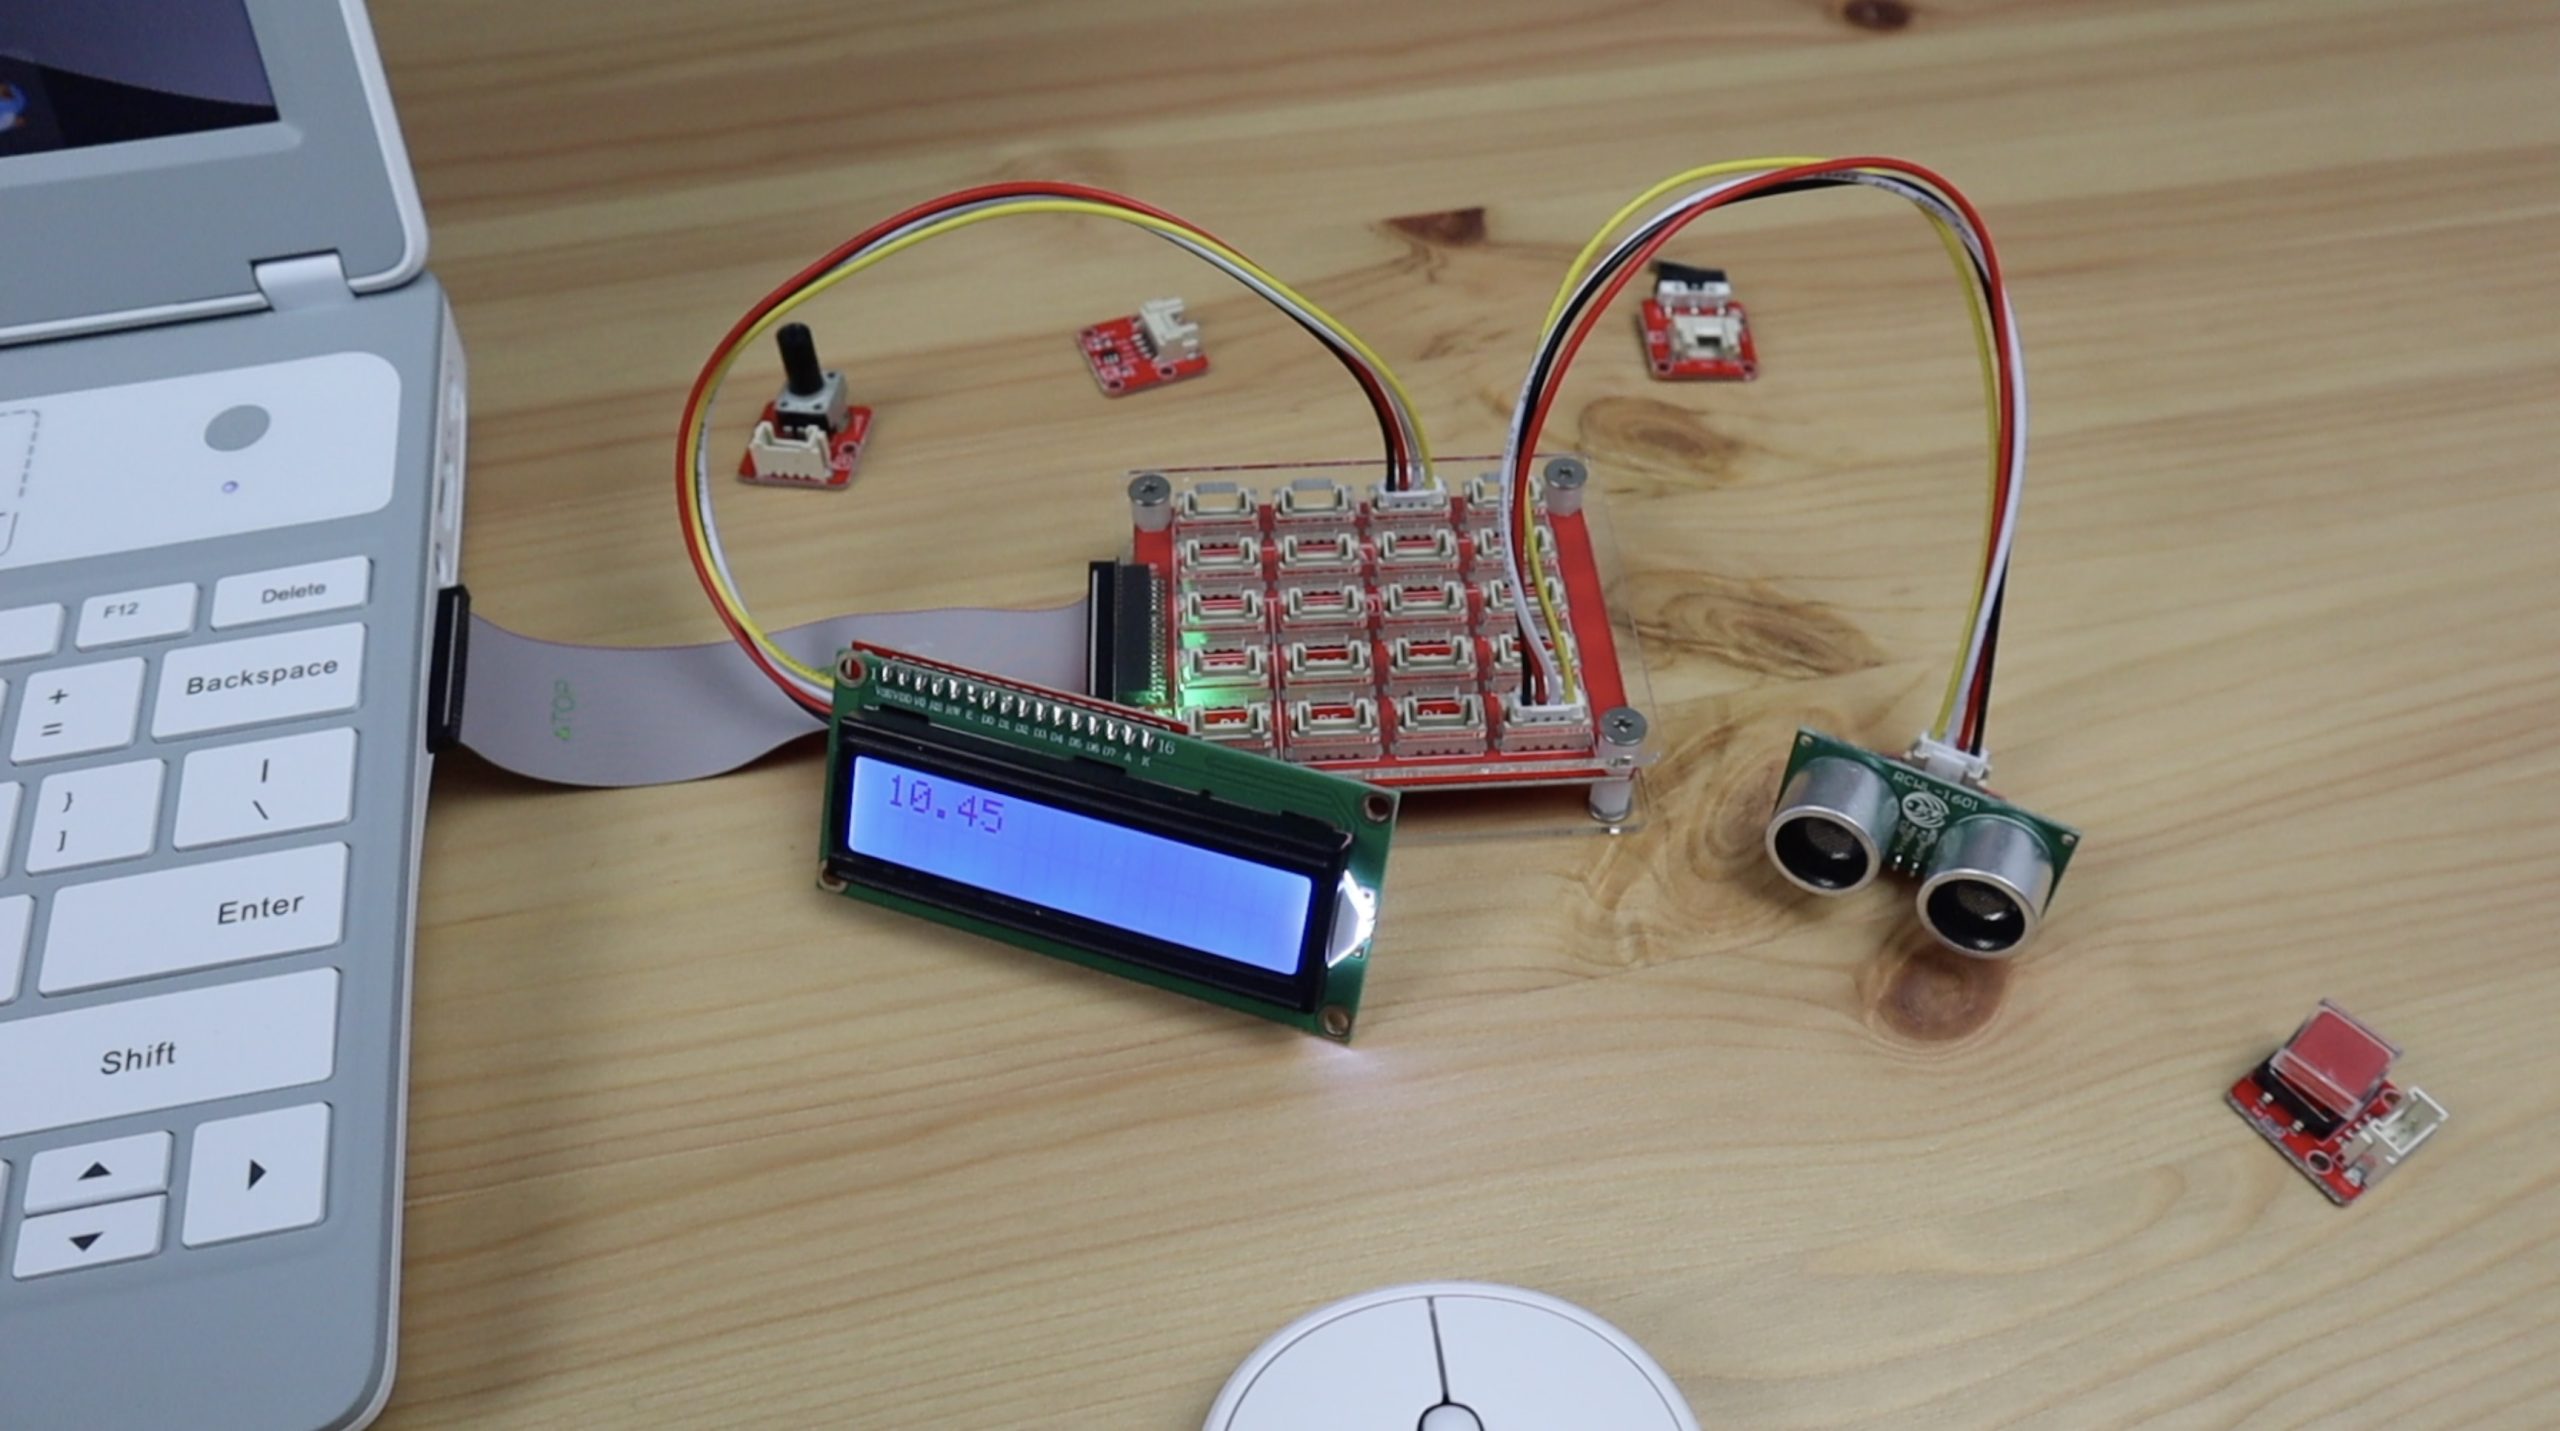
To get a feel for how the included modules and software work, let’s try one of the included projects. I’m going to go with connecting an ultrasonic sensor and display to the Pi and we’ll use Letscode to drag and drop the program.
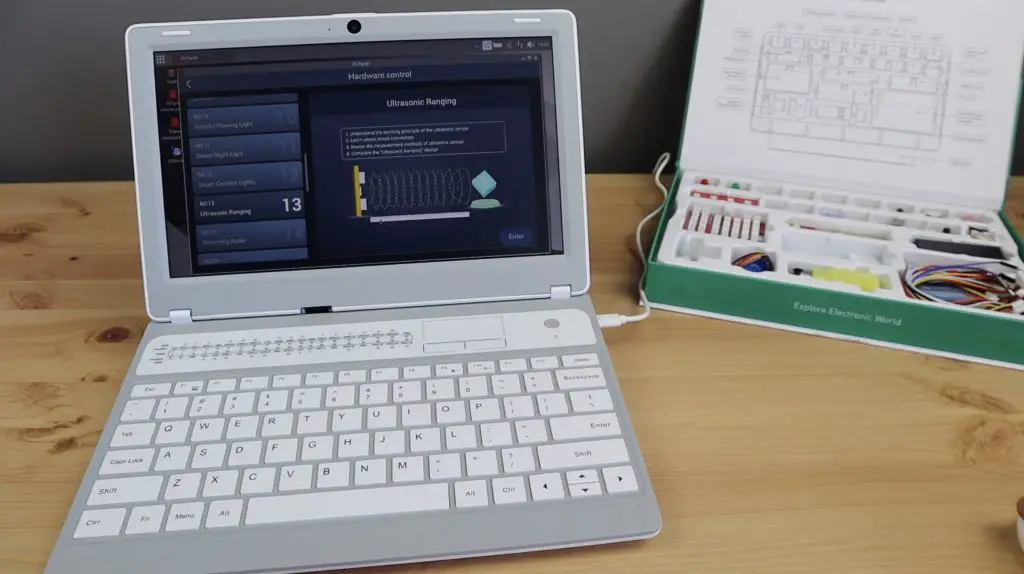
The lesson takes you through each step, from what you need to how they work, and from the circuit connections to the actual program. They even give you an example program at the end of the lesson.

Now let’s see if I’ve got this right.
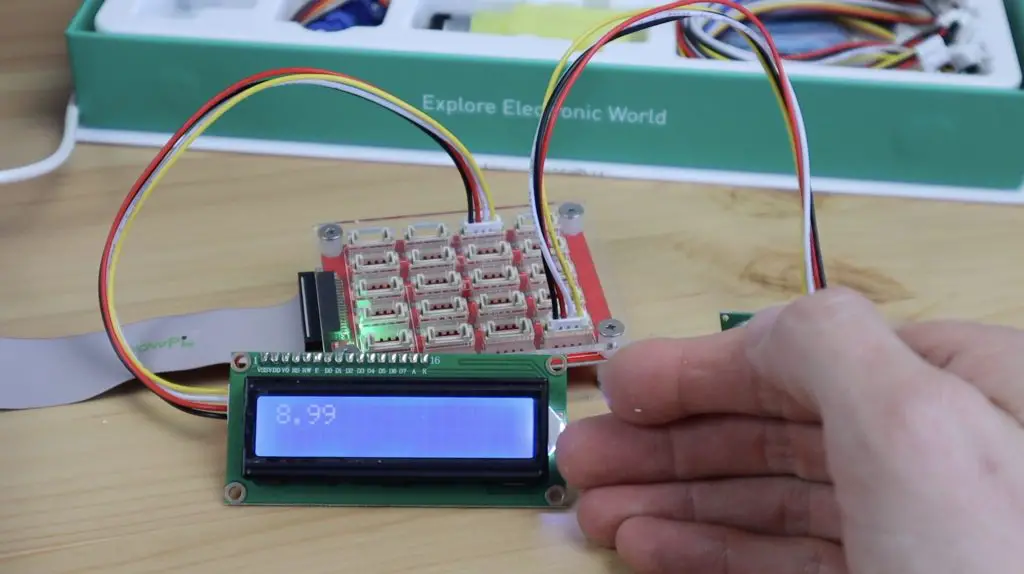
So yeah that’s all working the way it should and the whole program was pretty simple to put together by following their instructions. I didn’t have to install any additional packages, libraries or drivers to get this working.
They also have similar lessons for Python as well. These are obviously a bit more involved and are great for learning the basics of Python programming too.
Dual Boot Using The Included MicroSD Card Adaptor
When installing the Pi, we saw that we could boot from either microSD card. So I’ll show you how easy it is to switch to a different operating system.
We just shut down our Pi, open up the magnetic cover and flip the switch over to the second microSD card and turn it on again.
This is a really cool dual boot system that I haven’t seen implemented on a Pi before.
Potential Issue With The 12V Power Adaptor
Getting back to the power adaptor. If I plug it into my USB tester it immediately comes up as being 12V, so I’m almost certain that this isn’t a power delivery adaptor and will likely fry any non-power delivery electronics you plug it into.
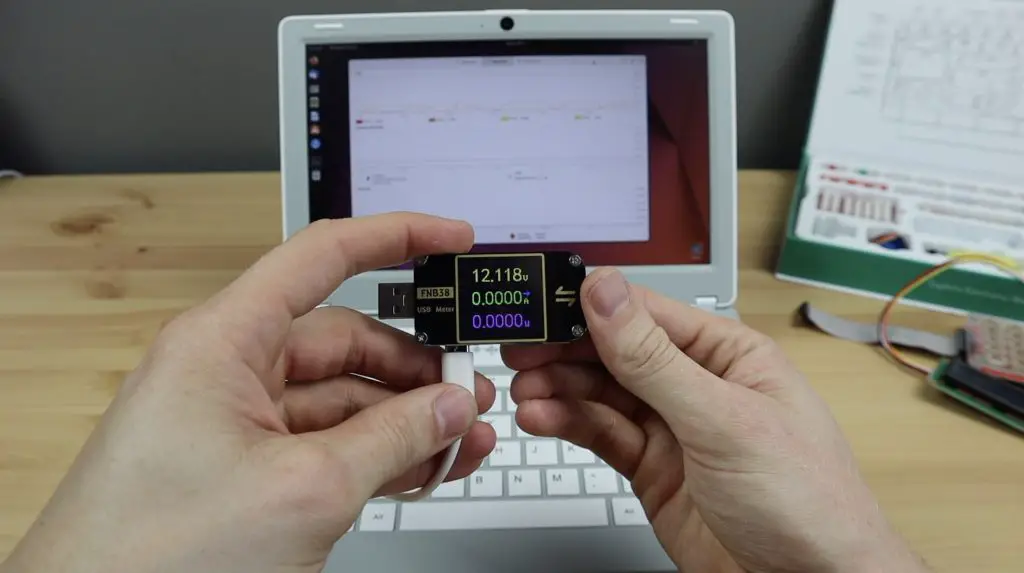
So that’s something to be cautious with. Generally, if you plug a power delivery adaptor into this tester it defaults to 5V because this meter doesn’t have to power delivery circuitry required to request a higher voltage.
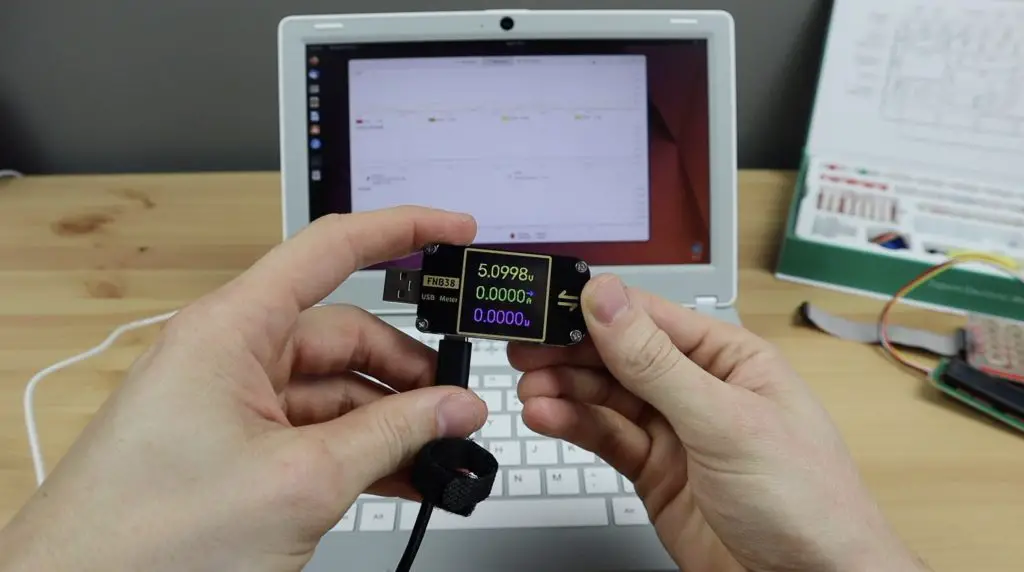
This issue doesn’t affect the operation of the CrowPi laptop as they state in the manual that it can run using other USB C power delivery adaptors, but it’s something you’ll want to be cautious of if you ever use this adaptor with other USB C devices. I’d go as far as to suggest throwing it out and getting a replacement, you don’t want to forget about this issue and then use the cable to try and charge a mobile phone, action camera or even plug it into a Raspberry Pi and destroy it.
This might not be an issue – there is a chance that this adaptor does work with 5V devices and this is a non-issue, but given the results from my USB tester this is not something I’m willing to try out on my devices.
Final Thoughts On The CrowPi-L
Overall I think the CrowPi-L is a really great product. The design is well thought out and the display they’ve used is excellent.

I would have liked to have seen some internal support for an SSD, maybe through using one of the USB 3.0 ports instead of the USB 2.0 port. As I’ve mentioned earlier, the trackpad is also in an odd place, but that’s about it. I don’t really have any other complaints about it.
It feels like it is good quality, it runs well and the effort that they’ve put into making this an education platform rather than just a laptop I think makes it well worth the price tag.
Let me know what you think of the CrowPi-L in the comments section below and also let me know if there is anything you’d like to see me try out on it.