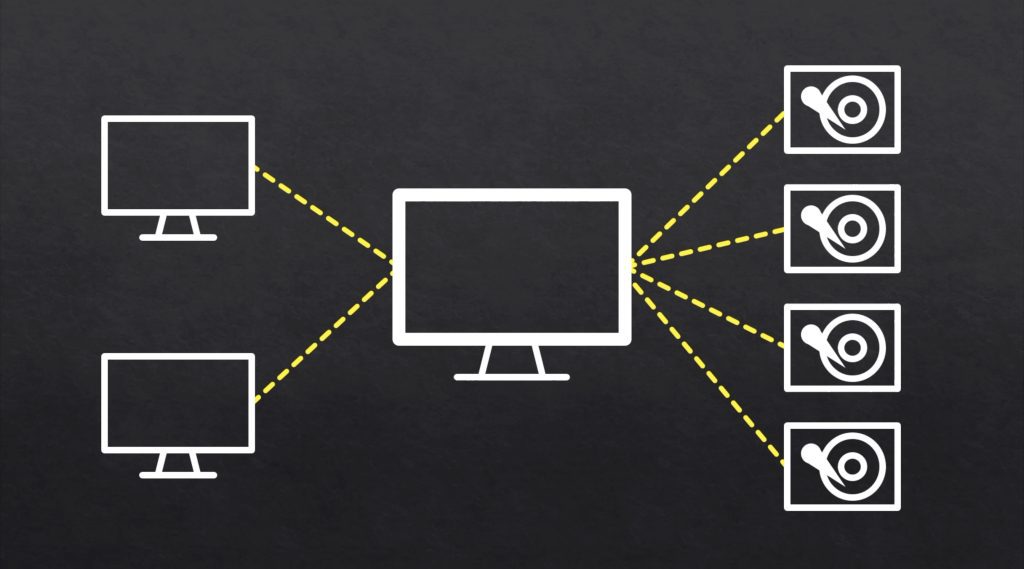
Today we’re going to be building a Raspberry Pi based NAS (network attached storage) device using all new parts for as little as possible. If you don’t know what a NAS is, it’s essentially a small computer that is hooked up to a storage drive and acts as a file server on your network, allowing you to access your files from any device.
This is not the first one I’ve built. I’ve actually built a few of these in the past, but they’ve all turned out to be quite costly. So for this build, the primary focus is going to be on building a fully functional NAS as cheaply as possible. To do this, we’re obviously going to have to cut some corners and make some sacrifices. So, I expect it to be slow and it probably won’t have a huge storage capacity, but it will be perfect as a first NAS build for someone who doesn’t want to spend a lot of money or if you’re just wanting to build one to learn how they work and how to set them up.
Here’s my video of the build, read on for my written guide:
Choosing The NAS Components
To start we’re going to need a cheap computer, and they don’t come cheaper than the Raspberry Pi Zero – the original being just $5. The trouble with the original is that it is now quite underpowered and it doesn’t have any onboard networking abilities, so we’d need to add a USB WiFi or Ethernet adaptor which adds to the cost. So, I’m rather going to splash out on the $15 Pi Zero 2 W.
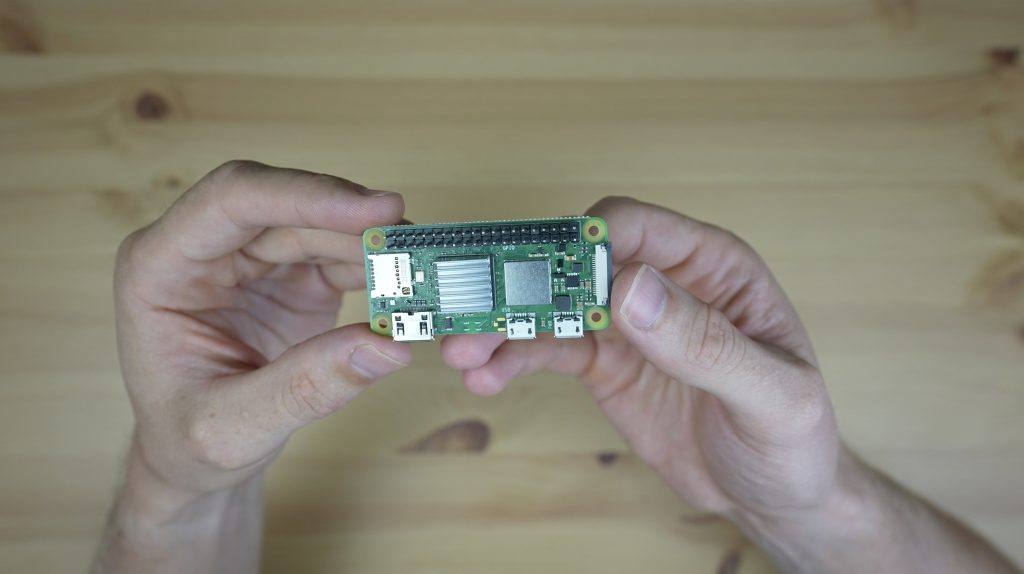
This is the second version of the Pi Zero, which has an upgraded 64-bit CPU that matches the launch version of the Pi 3. The W means that it’s got built-in WiFi, so we can use this as our network interface and we then don’t need any additional adaptors or dongles.
For storage, an SSD is the obviously reliable answer, but the cheapest one I could find from a reputable brand was for $35 – more than double the price of the Pi Zero 2 W.
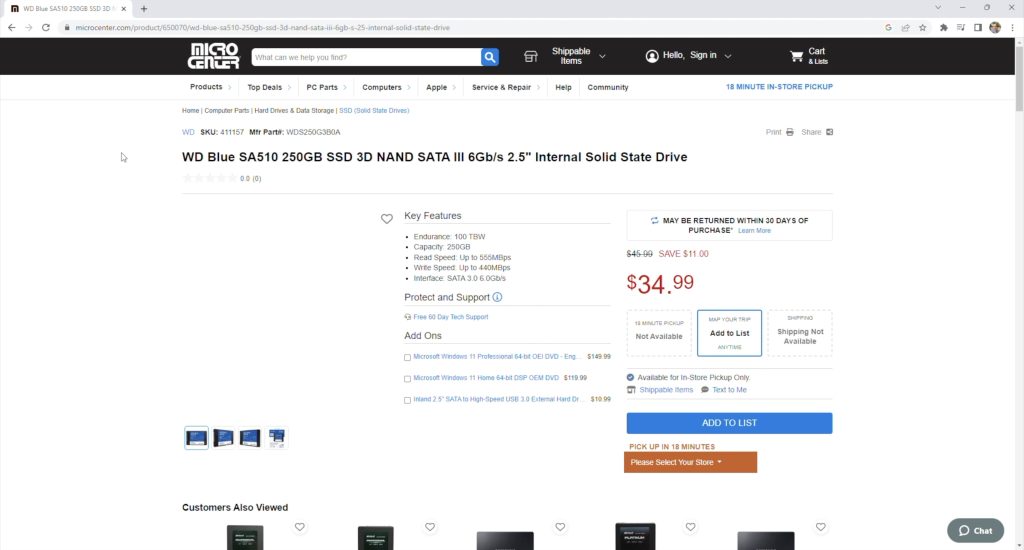
This was also a 2.5″ SATA drive which would then require a USB adaptor. Since the Pi Zero’s USB port is a micro-USB port, we’d also need another adaptor to convert it from USB A to micro-USB. So we’d be in for close to $50 in total for storage.
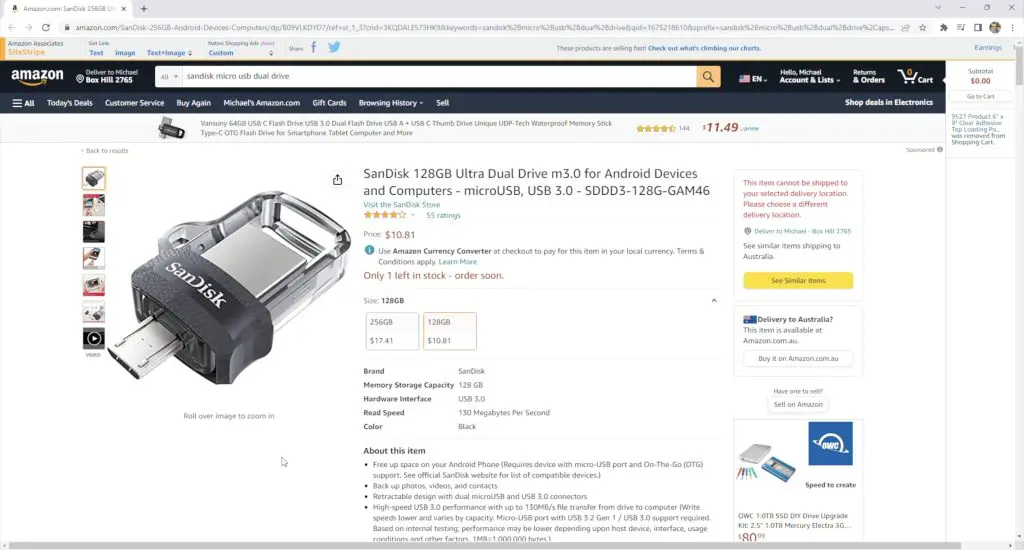
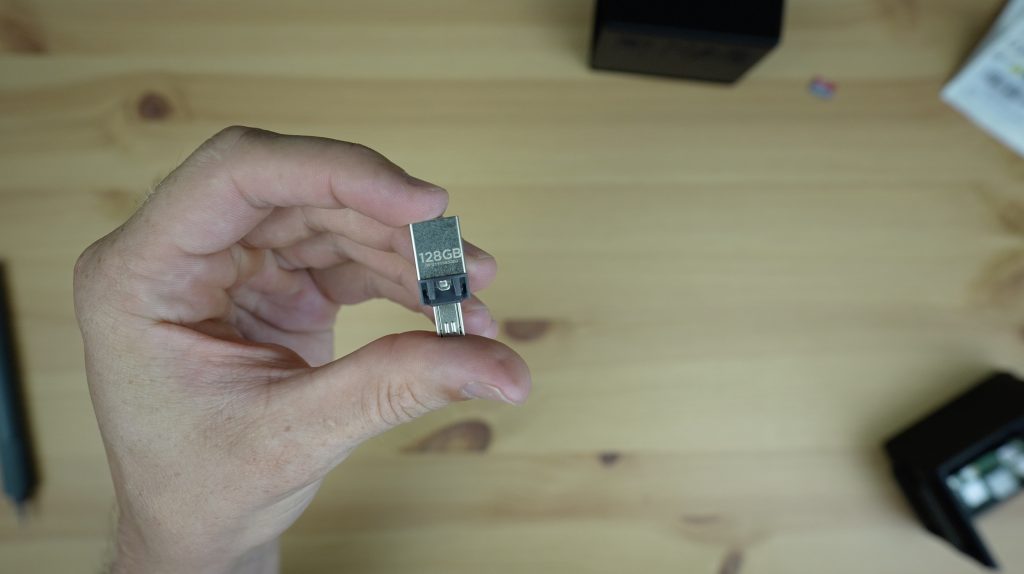
Instead, I found one of these 128G Sandisk Ultra Dual drives, which were made as flash drives for Android phones. This has already got a microUSB port to plug directly into the Pi without any additional adaptors.
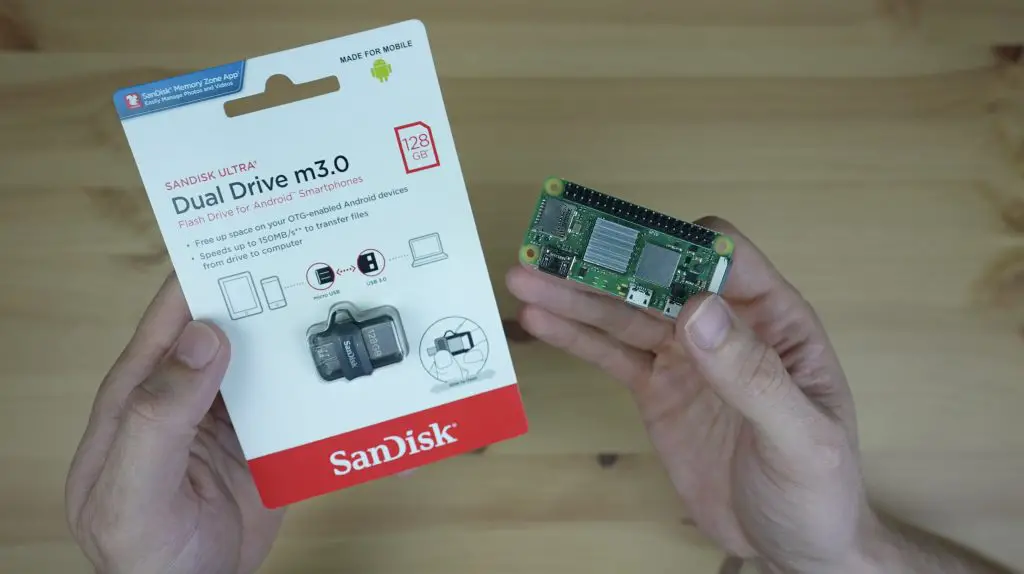
The best part is that this was only $12, and you can even get a 16Gb one for $7 or a 32GB one for $8 if you’d like to go a little cheaper.
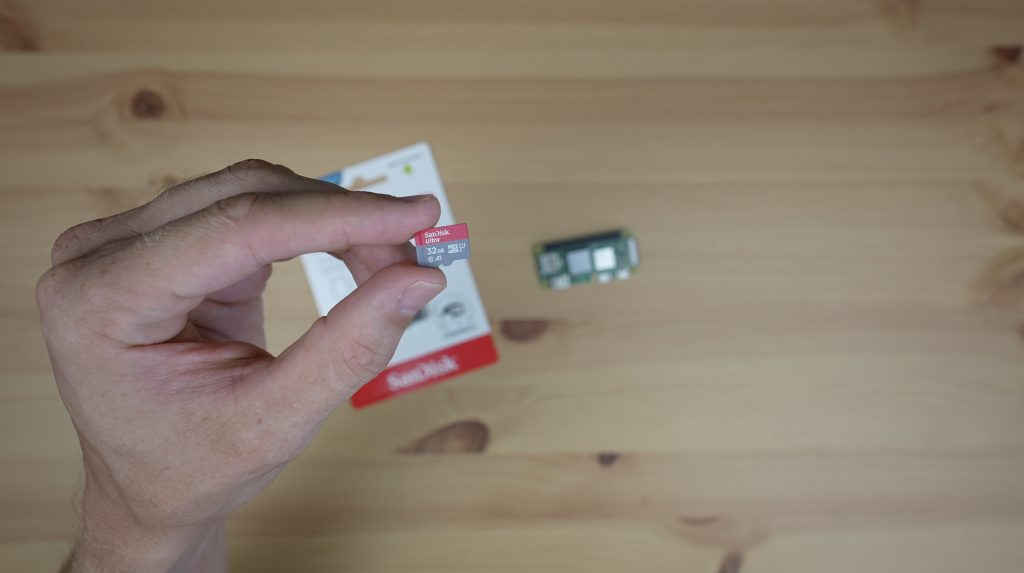
The last component I need to buy is the microSD card to load the operating system onto. I used a 32GB Sandisk Ultra card which was $6.
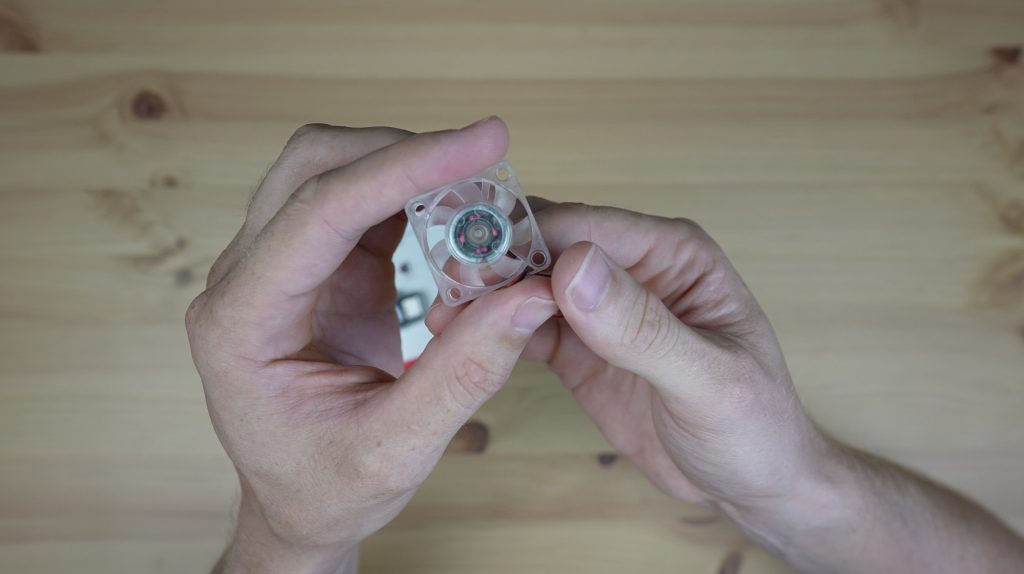
So I was all in on the parts for $33, leaving a couple of dollars for a fan and heatsink. You don’t need a fan if you’re not using the Pi in an enclosure, but I want to design a 3D printable enclosure for it so that it looks the part when it’s done. So, I’m using a small 30mm 5V fan and an aluminium heatsink.
Component Purchase Links
- Raspberry Pi Zero 2 W – Buy Here
- 128GB Sandisk Dual Drive – Buy Here
- 32GB Sandisk Ultra MicroSD Card – Buy Here
- 30mm 5V Fan – Buy Here
- Aluminium Heatsink – Buy Here
- MicroUSB Power Cable – Buy Here
- M2.5 Brass Inserts (Dia 3.8mm) – Buy Here
- M2.5 Button Head Screws – Buy Here
Tools & Equipment Used
- Creality Ender-3 S1 Pro – Buy Here
- Electric Screwdriver – Buy Here
- TS100 Soldering Iron – Buy Here
- Power Meter – Buy Here
Designing The NAS Enclosure
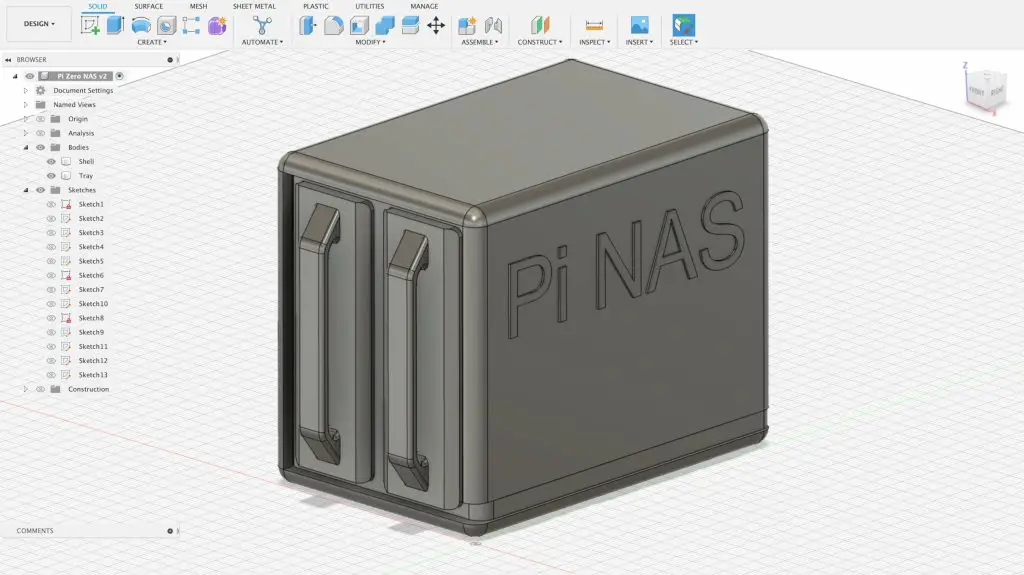
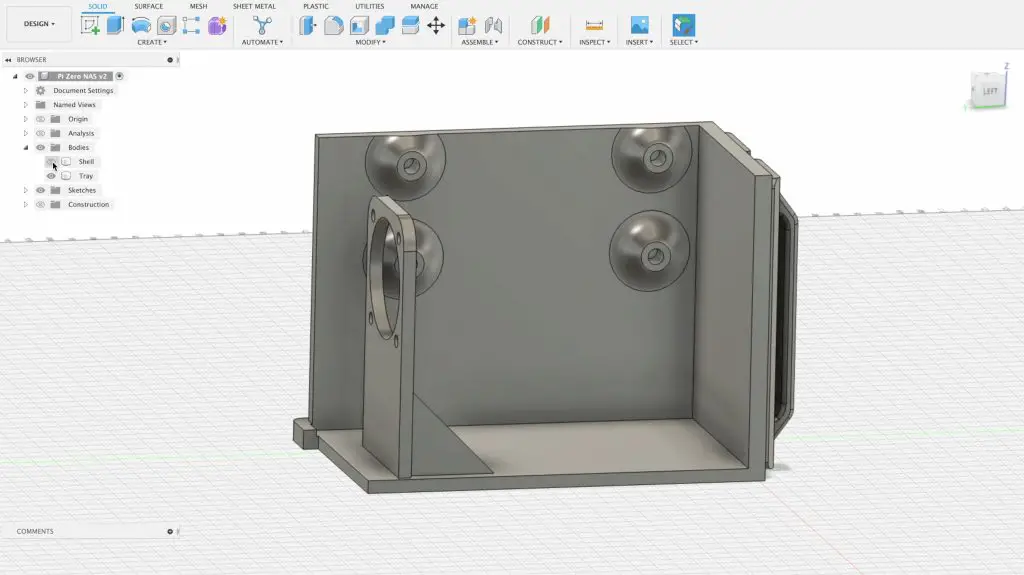
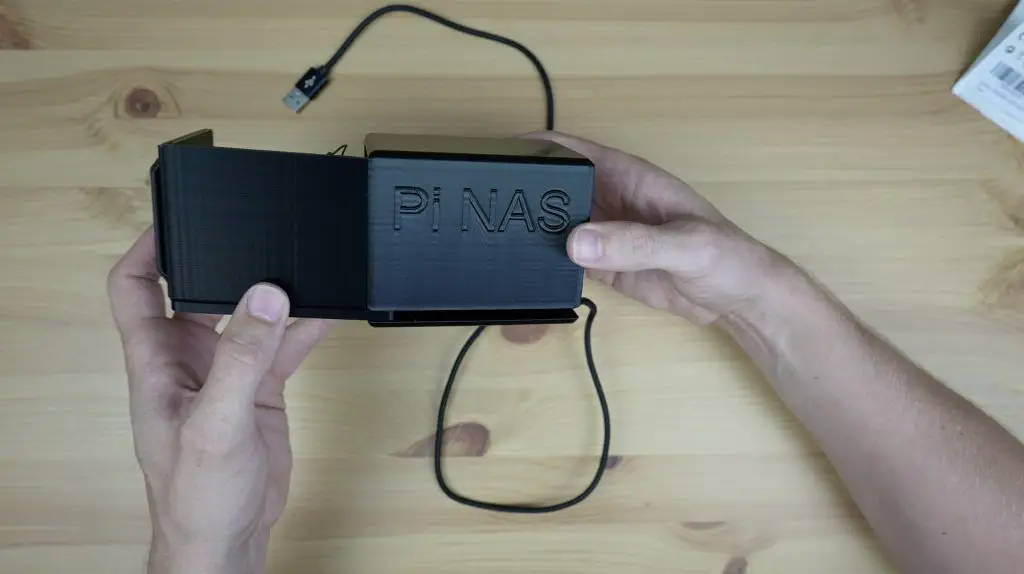
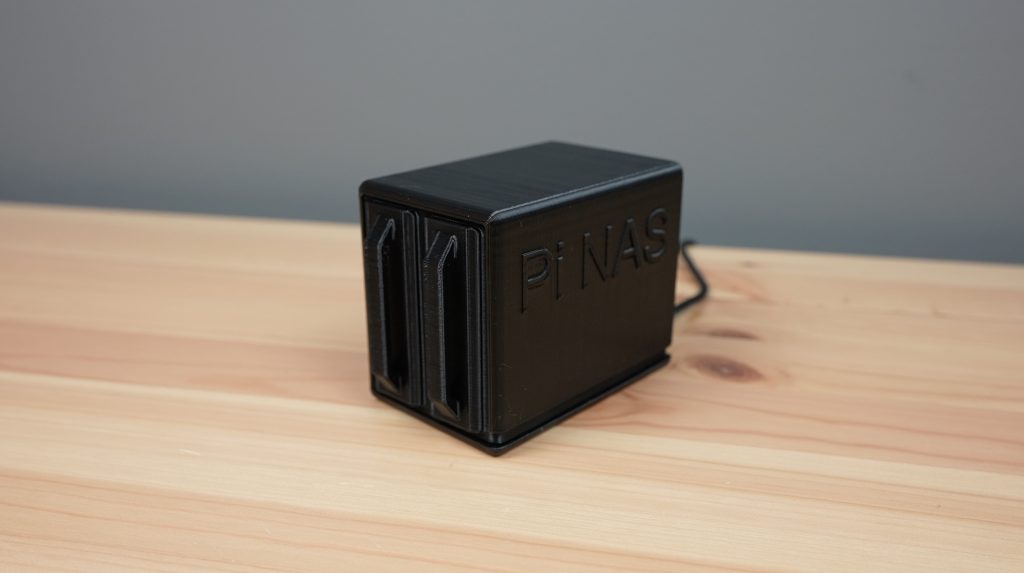
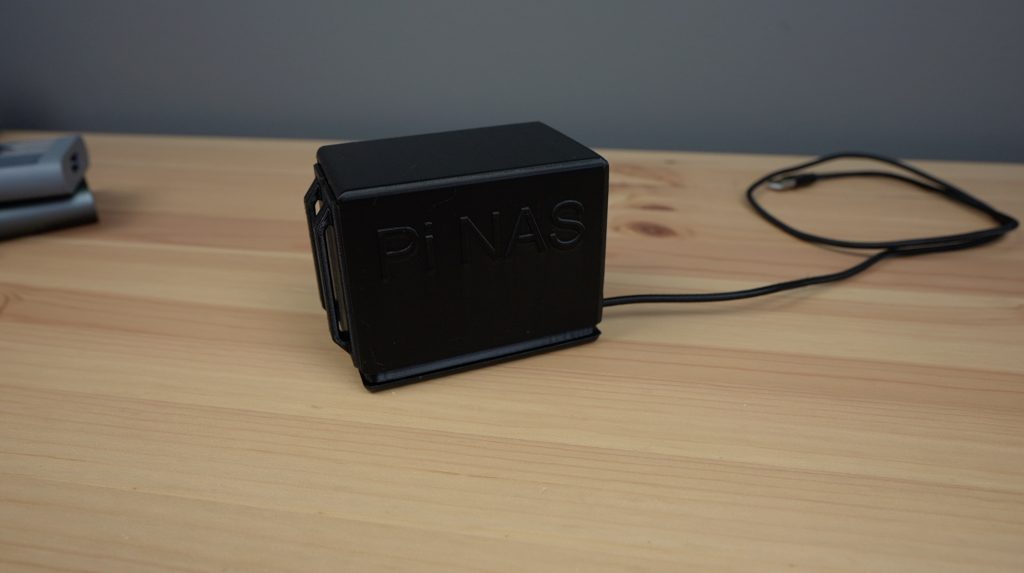
To design the enclosure, I used Fusion360. I designed it to look somewhat like a 2-bay NAS that houses the Pi Zero with the ports kept internal so that the storage drive would also be within the NAS. I also made a slot along the side that fed to the back for the power cable to pass through.
Download the 3D Printing Files
I made the enclosure into a two-part design, with the bays sliding out as a carrier tray for the internal components. The Pi, storage and fan will all be mounted onto this tray so that there is no need to worry about disconnecting cables or jumpers when sliding it out.
Finishing Off The Enclosure
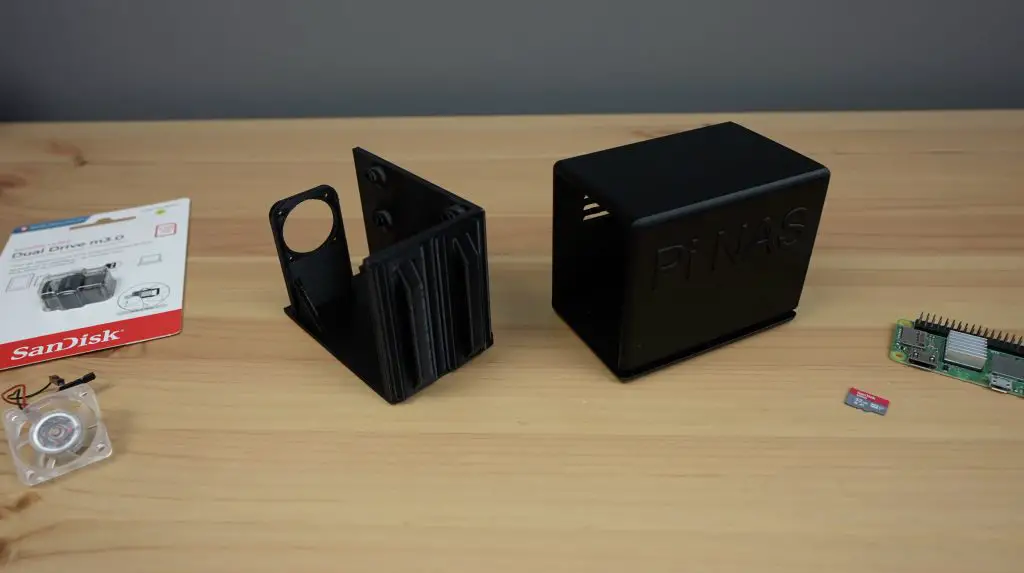
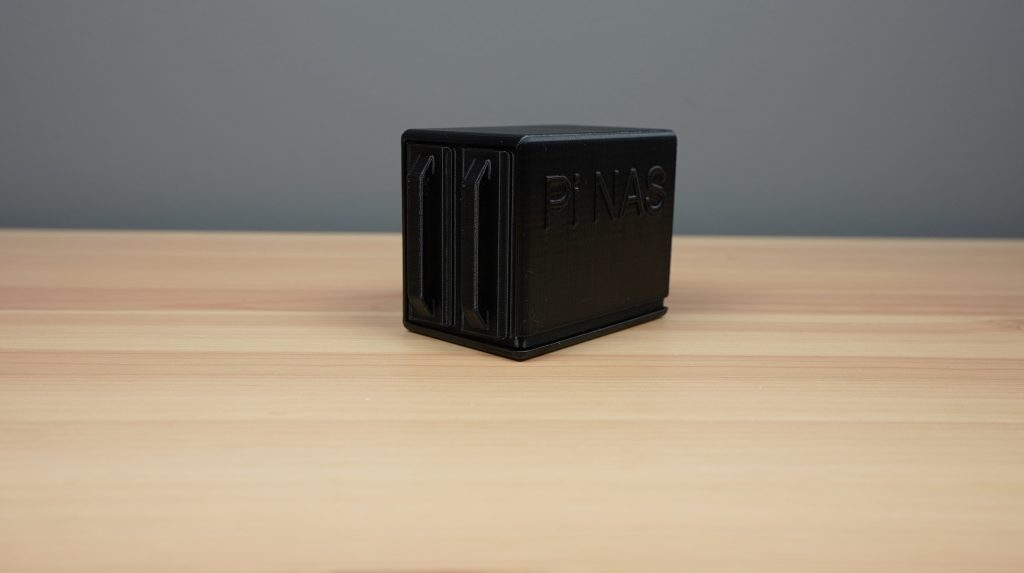
I 3D printed the two parts in black PLA on my Creality Ender 3 – it took about 19 hours to print both and used just less than a dollar’s worth of filament.
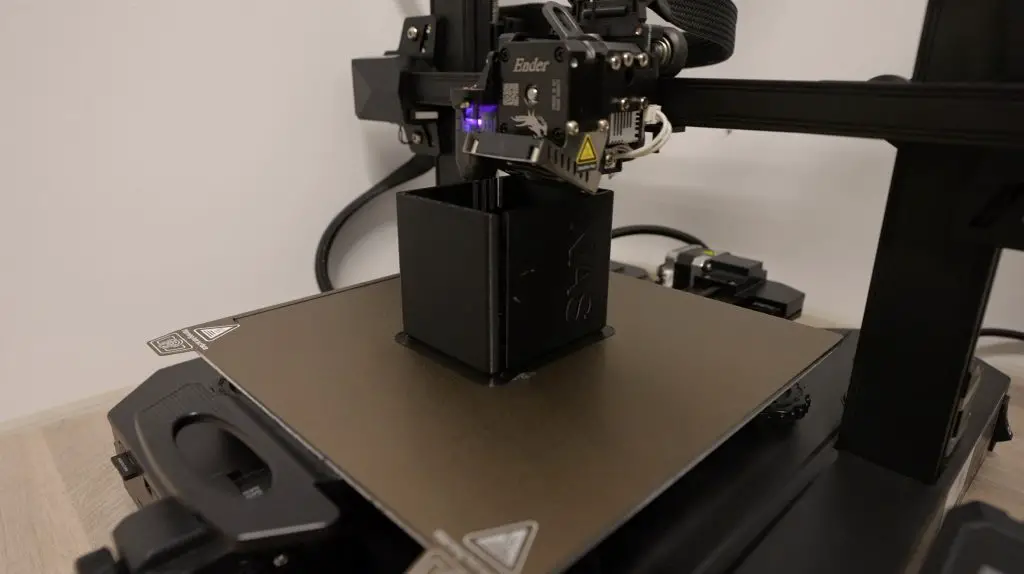
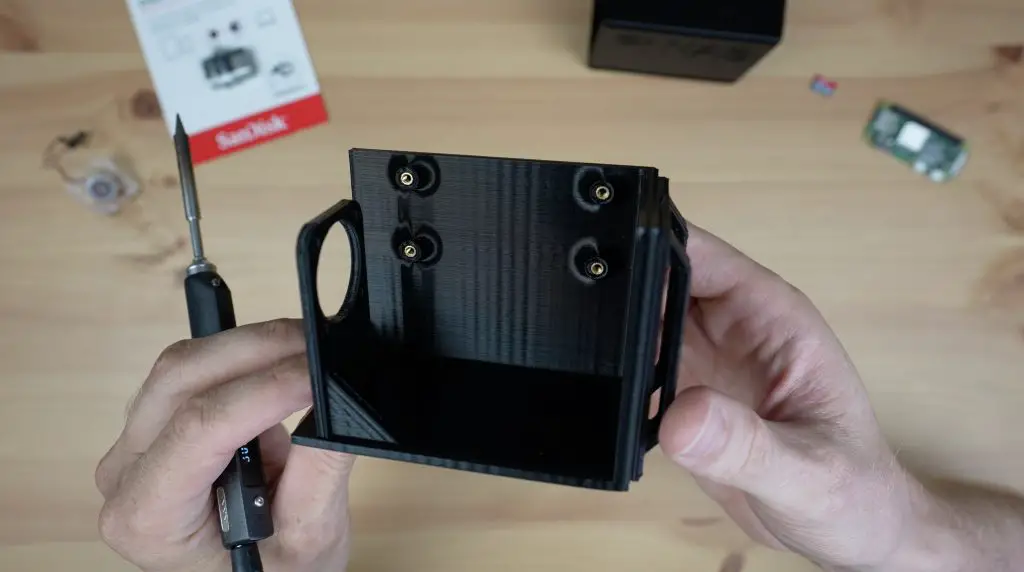
The two components can be printed largely without supports by printing the outer shell with the back wall on the print bed as shown in the photograph above and the inner shell in its standard orientation (oriented as shown on the desk below) with the bottom on the print bed
I removed the support for the fan cutout and brim, and the enclosure was then ready to mount the NAS components into.
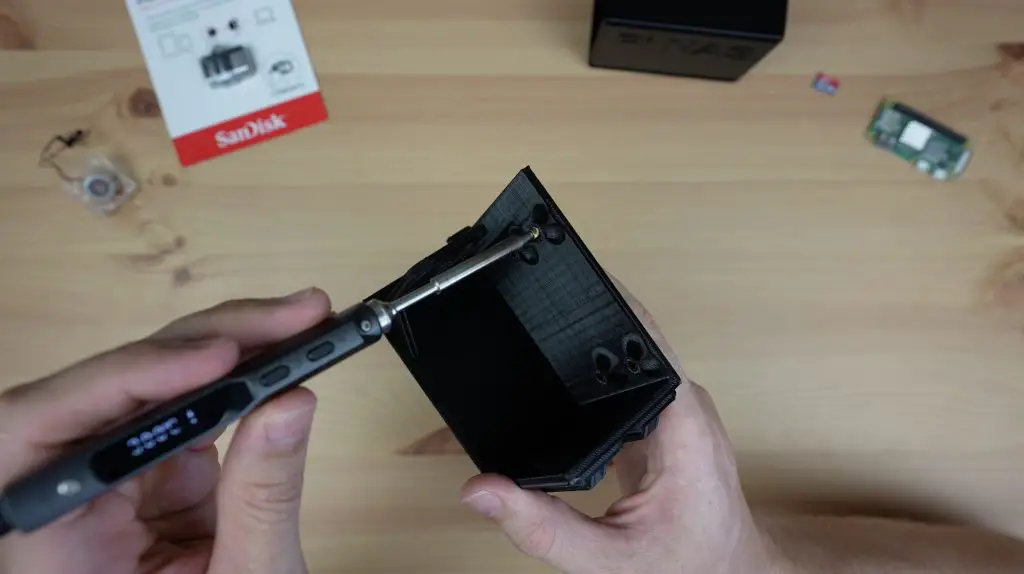
I designed two versions of the enclosure, one which you can screw the Pi directly onto and this version which requires some M2.5 brass inserts. The brass inserts make it a bit more durable and it’s easier to install or remove the Pi multiple times without stripping the threads. I have designed the tray around inserts that are 4.5mm long and 3.8mm in diameter.
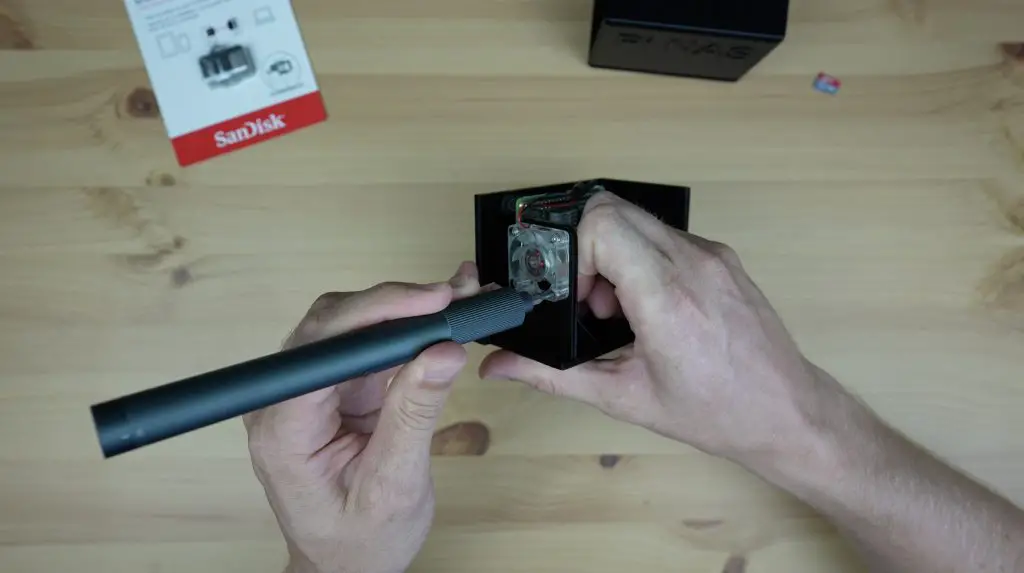
These brass inserts are melted into place using a soldering iron.
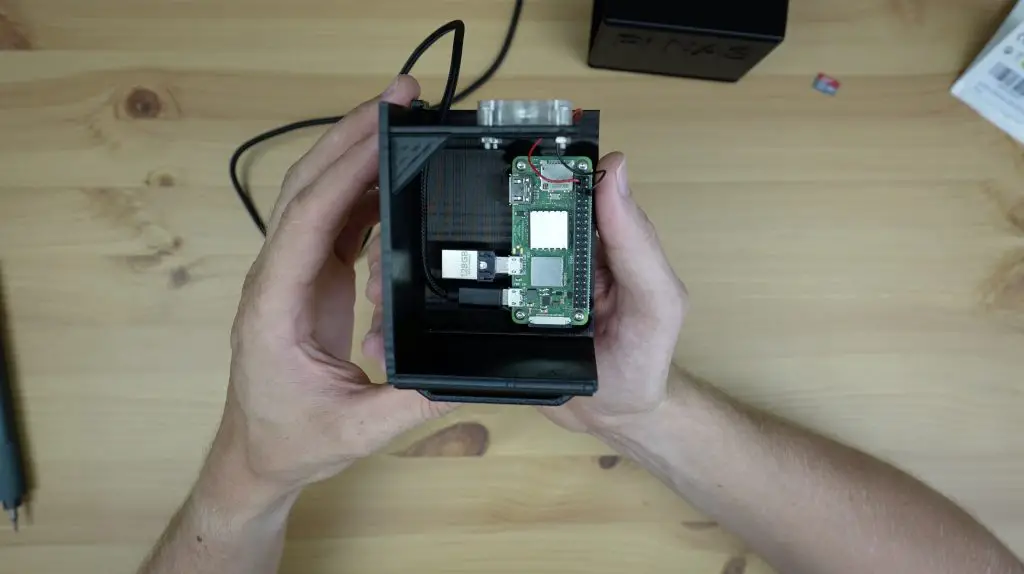
Installing The NAS Components
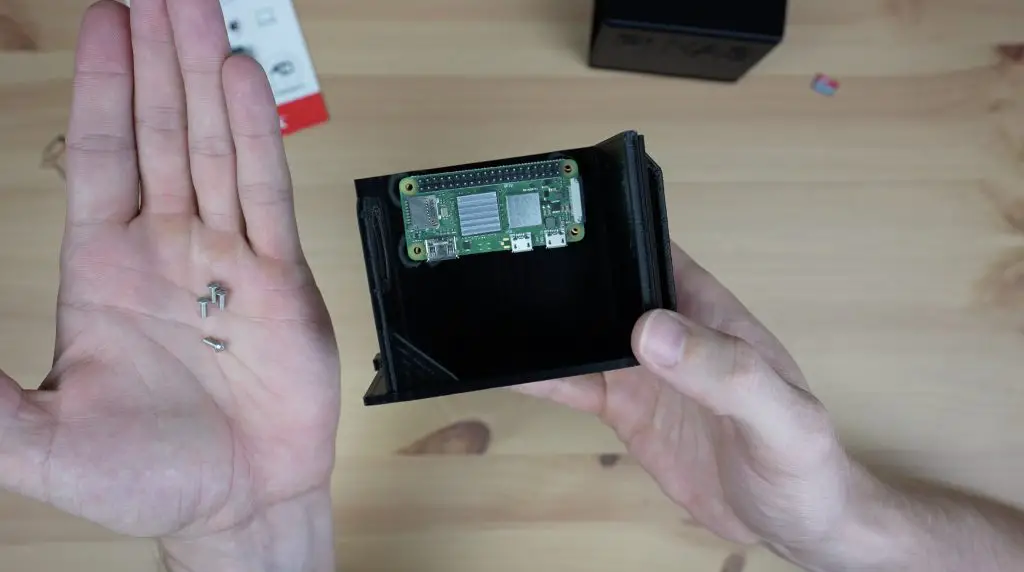
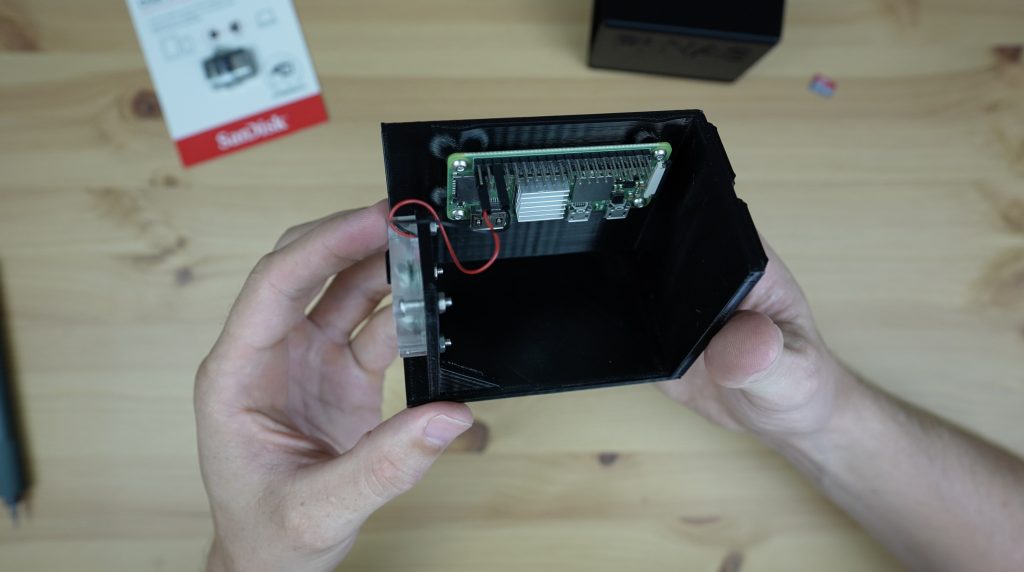
We can then mount the Pi onto the brass standoffs with some M2.5x6mm button head screws.
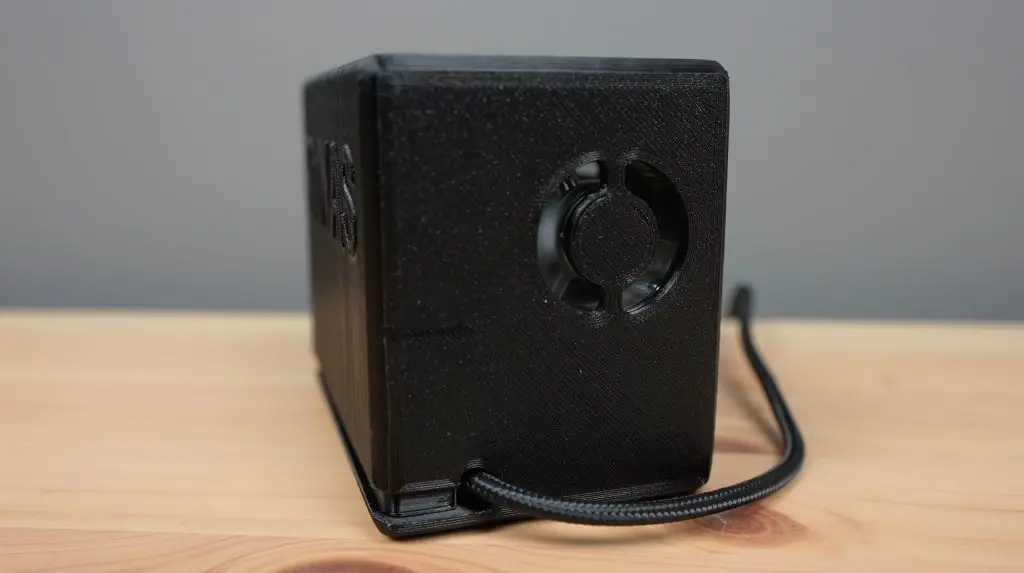
Now let’s mount the fan. I’m using the fan to pull air into the case and I’m mounting it using some M2.5x12mm button head screws and M2.5 nuts on the back.
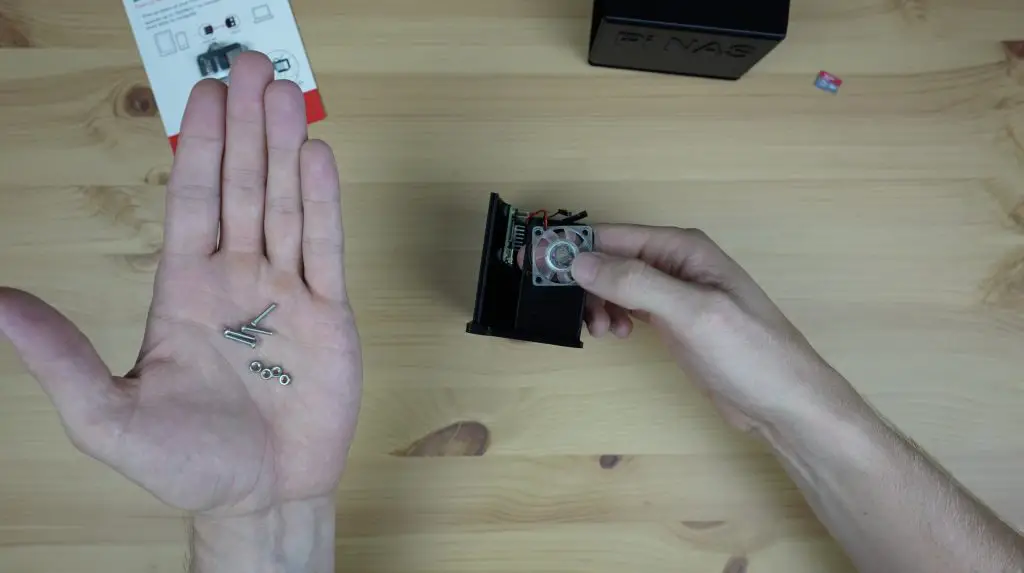
I’m plugging the fan into the Pi’s 3.3V and GND pins so that it runs a bit quieter than at 5V.
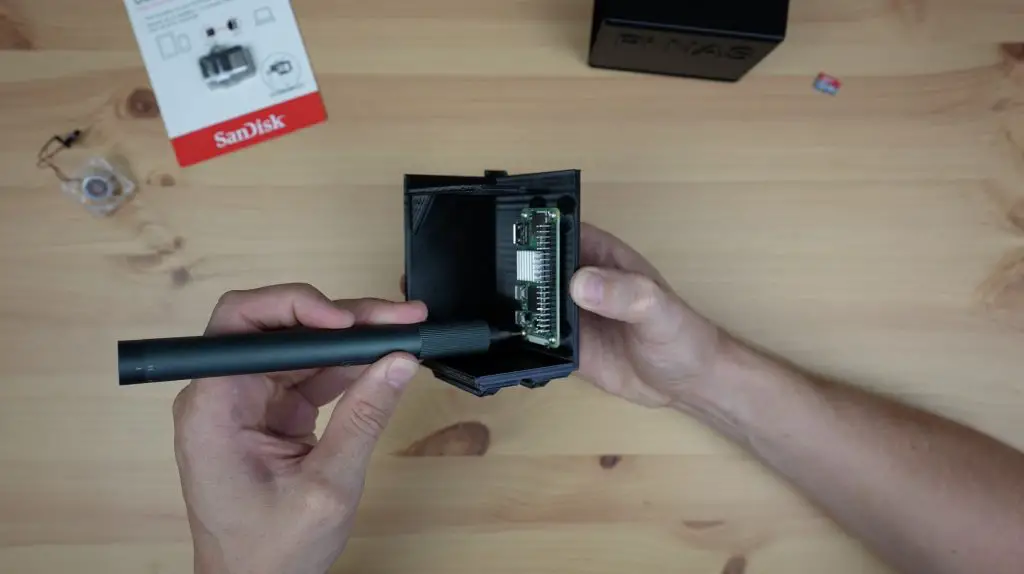
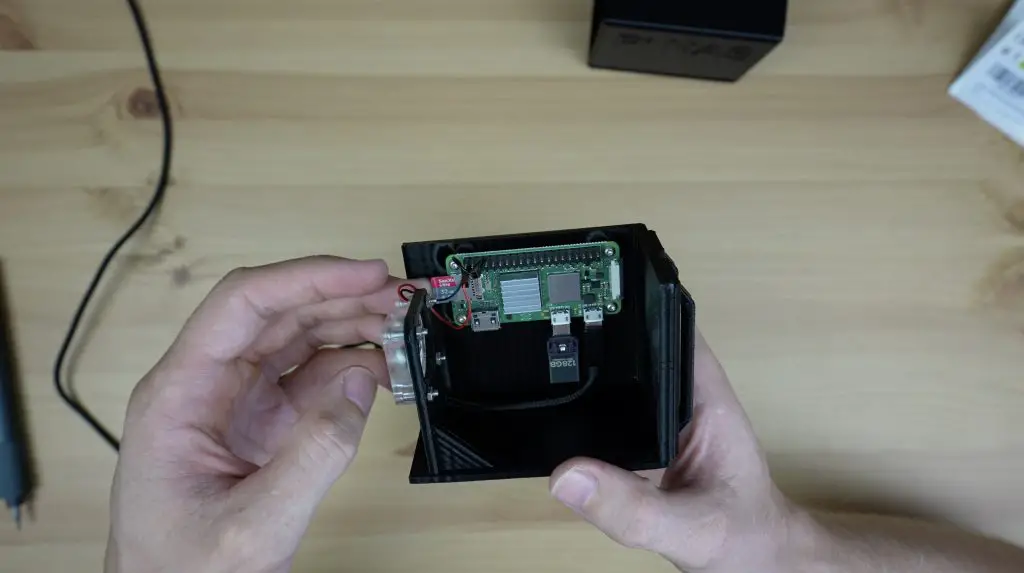
Next let’s install the drive. The housing on the drive that protects the USB ports gets in the way of the adjacent power cable, so I’m going to remove it by snapping off the grey slider cover.

We can then plug the stripped-down drive into the Pi’s micro-USB port.
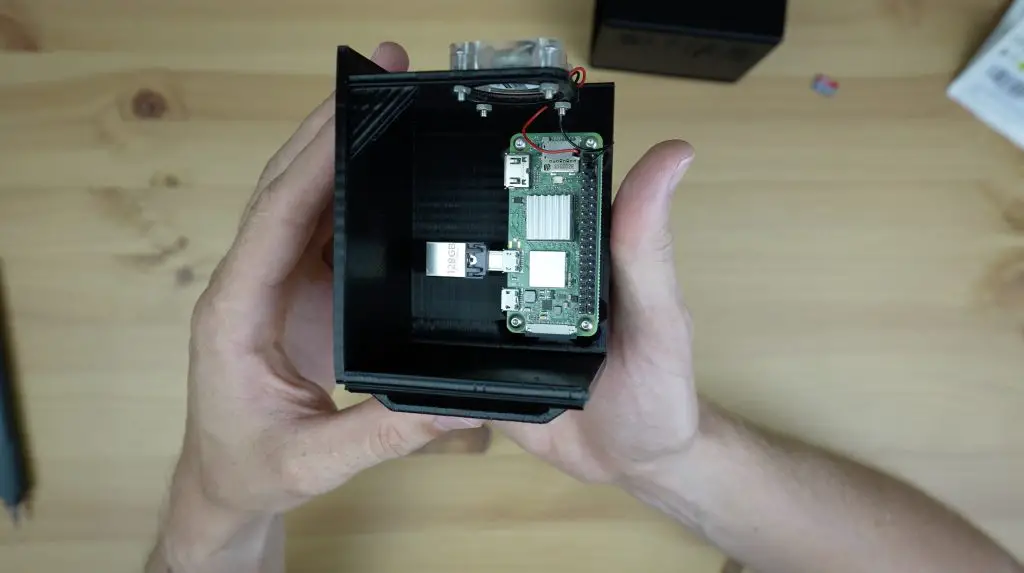
Next let’s add our power cable alongside it. There is a fair amount of room below the Pi for the USB cable to bend, but you might need to use a cable that has a flexible lead (like a braided lead) so that you aren’t putting strain on the port.
Flashing The OS and First Boot
Lastly, we need to add our microSD card, which I’ve flashed with Raspberry Pi OS Lite using the Raspberry Pi imager.
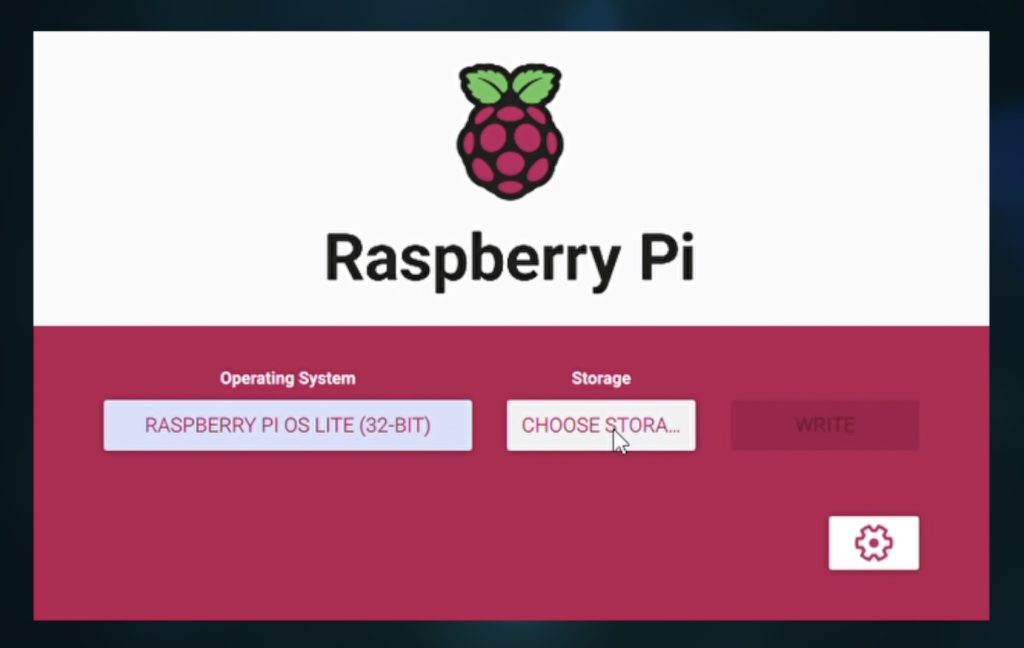
There are a few things we need to do in the settings tab before flashing the image. We’re going to be using this as a headless Pi, meaning we want to access it from another computer on our network to set it up rather than have to plug it into a monitor, keyboard and mouse as well. So we need to give it a name to identify it on our network. I’m going to call it miniNAS.

We need to enable SSH so that we can access it remotely. I’ll leave the username as pi but change the password. Then add your WiFi network name and password, and set your region.
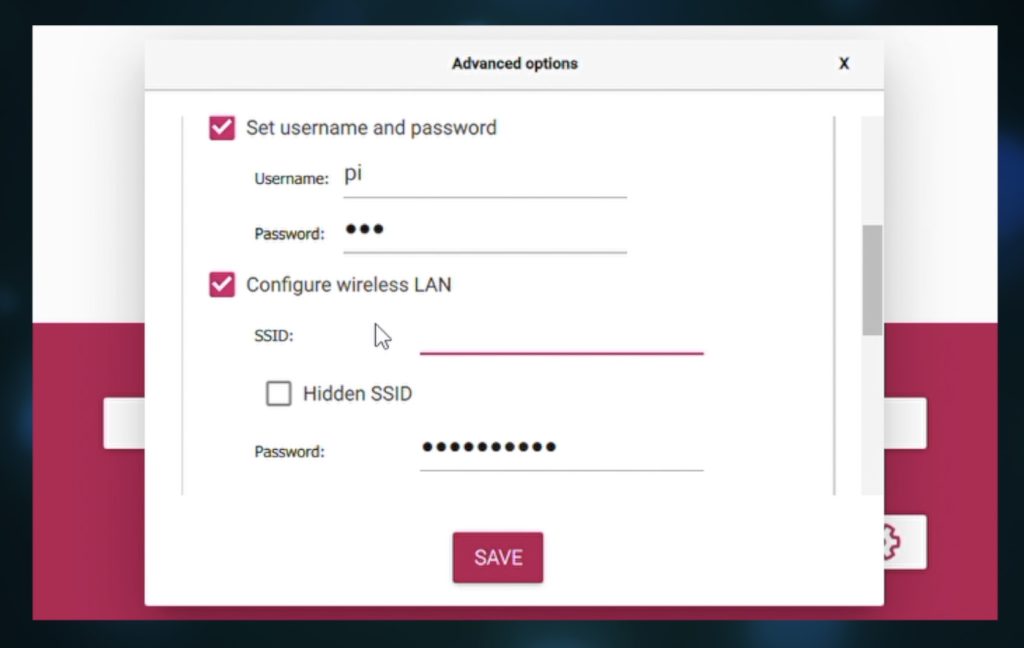
Make sure that you get these all correct or your Pi won’t connect to your network and you won’t be able to access it, so you’ll need to do this step again.
We can then put the microSD card into the Pi and that’s the hardware complete. So we can slide the tray into the housing and get it powered up.
Once your Pi is running, leave it for about 5 minutes to allow it time to run through the first boot and connect to your WiFi network.

Installing The NAS Software – OMV
We then need to find the IP address of our Pi. We can do this through our router’s DHCP table or by using a utility like Angry IP scanner. We’re looking for a Raspberry Pi or device called miniNAS that recently joined the network.

With the IP address, we can then SSH into the Pi to continue setting it up. I’m going to use the terminal on a second Raspberry Pi for this, you can also use a utility like Putty to do this from a Windows PC.
Enter the following command to ssh into the pi:
ssh pi@<Your IP>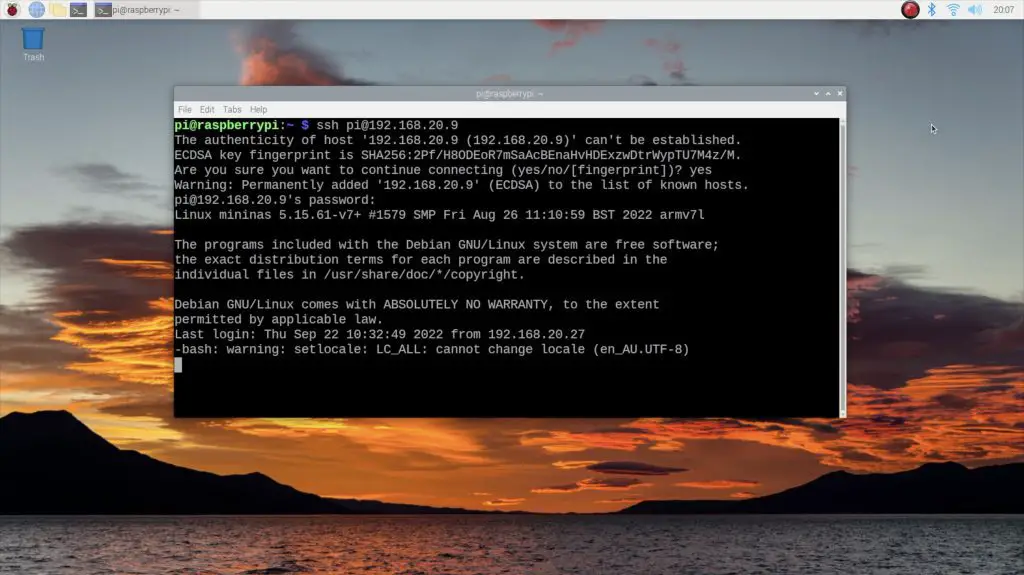
We’ll need to enter the username and password that were set up when flashing the microSD card and we then have access to the Pi.
Next, let’s run a quick update by entering:
sudo apt update
sudo apt upgrade
Then enter this command to download and run the Open Media Vault install script – this will install and set up everything needed to run Open Media Vault on the Pi:
wget -O - https://raw.githubusercontent.com/OpenMediaVault-Plugin-Developers/installScript/master/install | sudo bash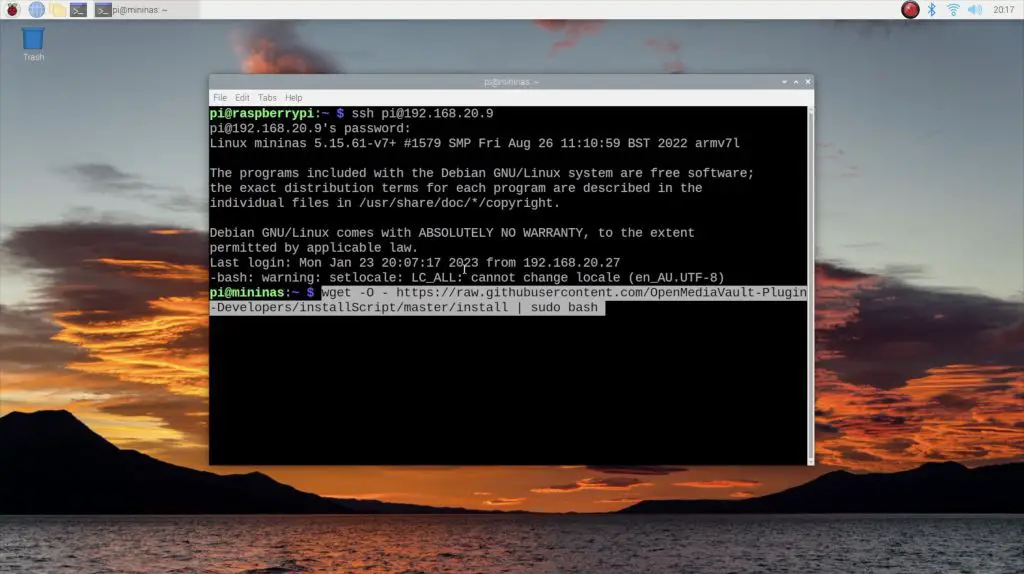
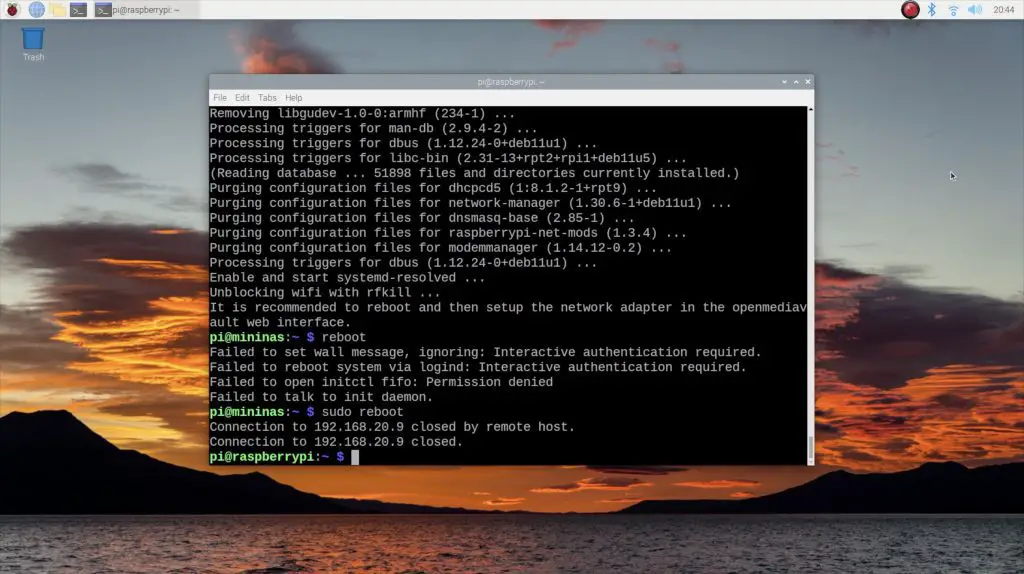
When it finishes, it’ll recommend restarting the Pi. Do not do this or you’ll have wasted the last half hour of your life like I did because the OMV setup disables the WiFi connection by default so you’ll then either need to start again by re-flashing the OS image, or find a way to add an Ethernet adaptor to the Pi to be able to access it again.
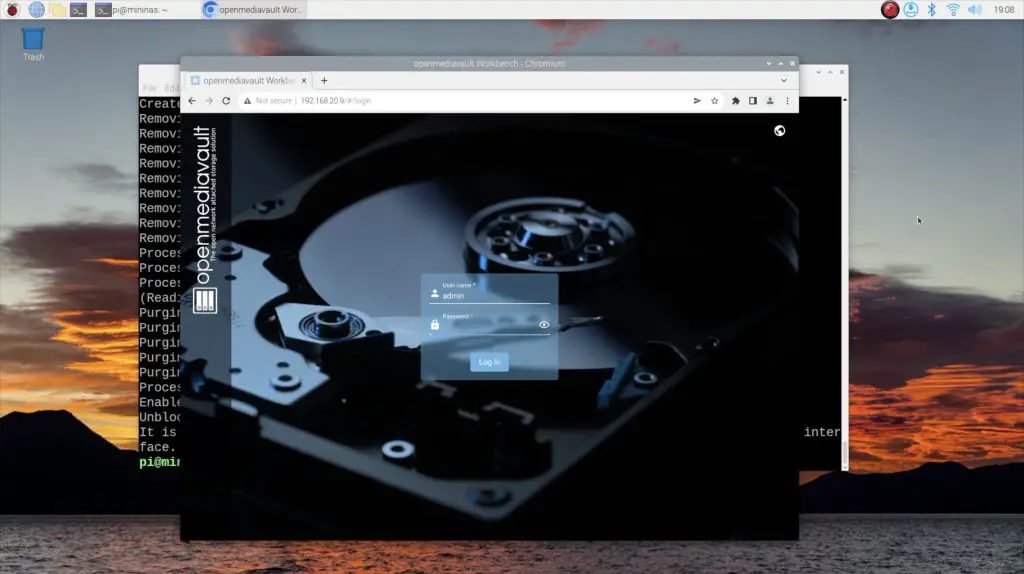
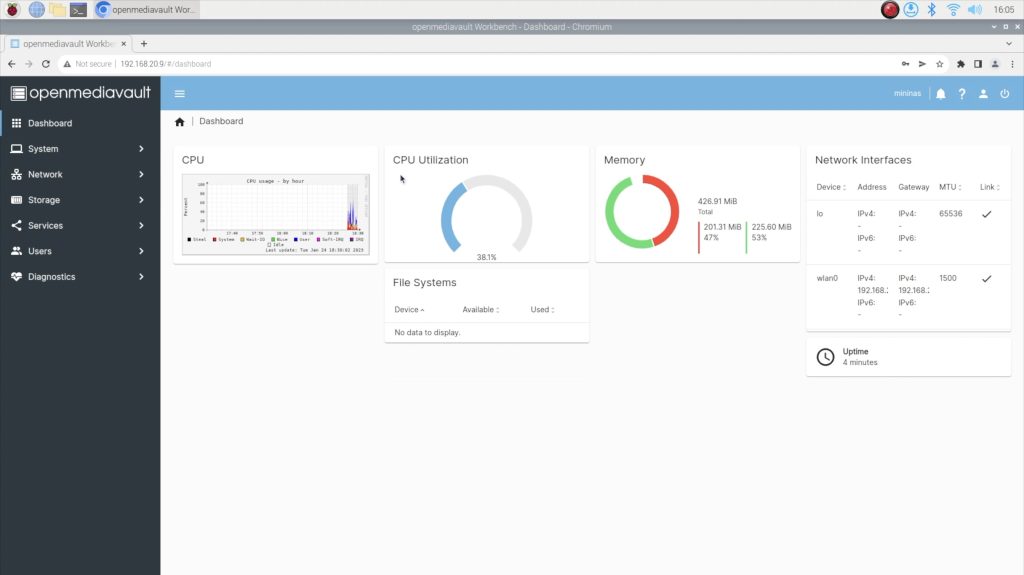
I reflashed the card and landed back at the above screen a while later. From here you can go into the OMV workbench through a browser by going to the Pi’s IP address. You’ll be prompted for a login, which is “admin” and “openmediavault” by default.
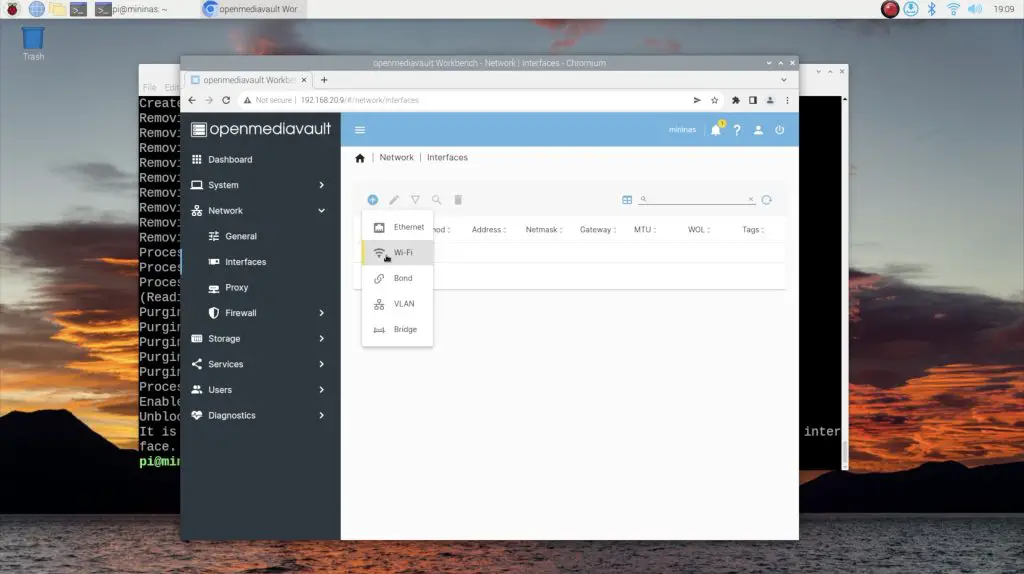
You can then go to Network and Interfaces and then recreate your WiFi network connection. You’ll also need to click on the tick in the yellow box to apply the changes for them to take effect.
I also did this through OMV first aid in the terminal although I’m fairly certain you don’t need to do both, but I didn’t want to take a chance and have to start again for a third time.
sudo omv-firstaid
Setting Up OMV
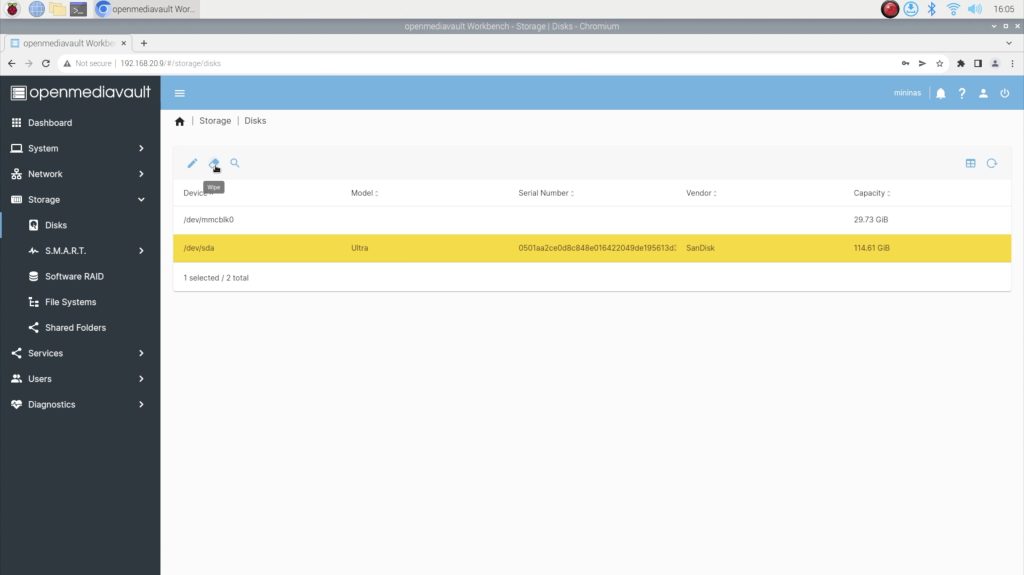
Once restarted, we can move on to setting up OMV. I’m going to go over this quite briefly here but PiMyLifeUp has a good guide if you’d like to follow along. We essentially need to wipe and mount our storage drive, which is our 128GB Sandisk drive:
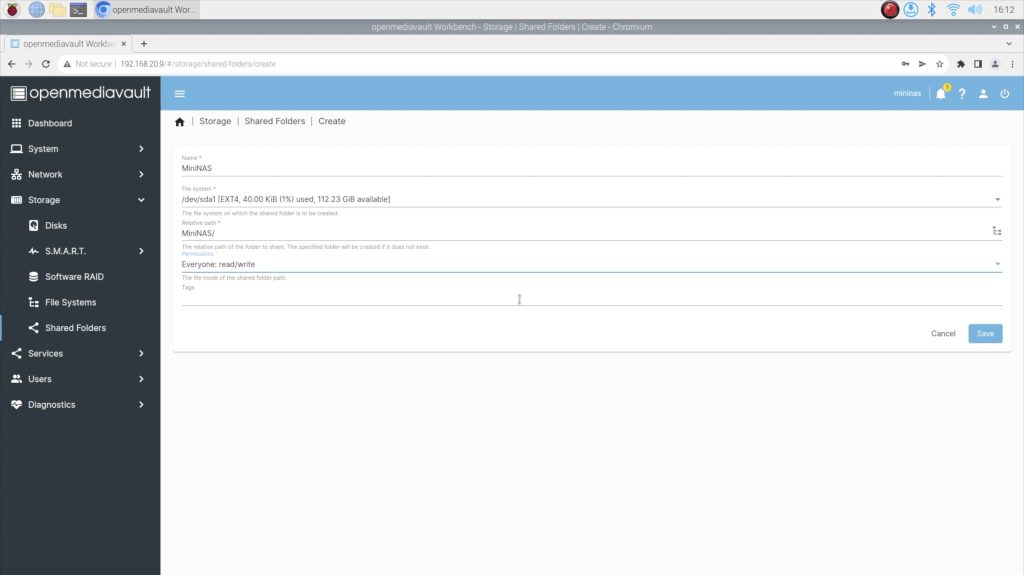
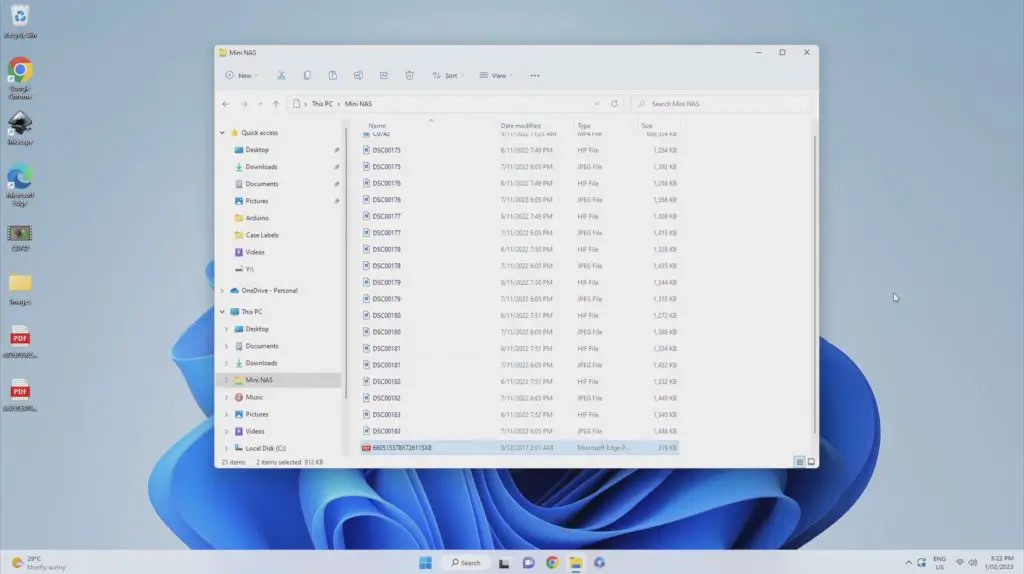
Then create a shared folder on our drive called MiniNAS for our files to be saved in:
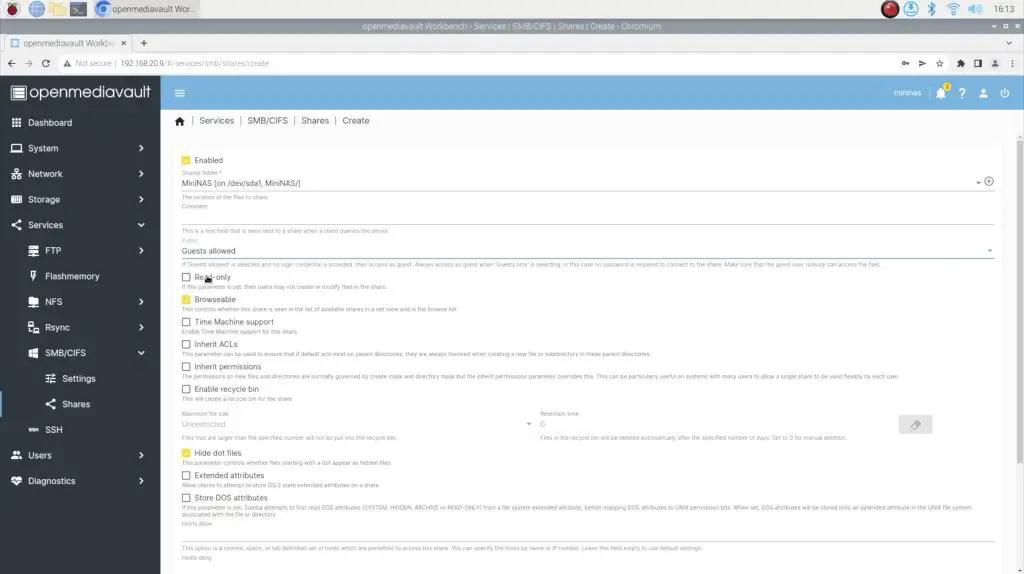
And finally, enable a sharing service for access through windows:
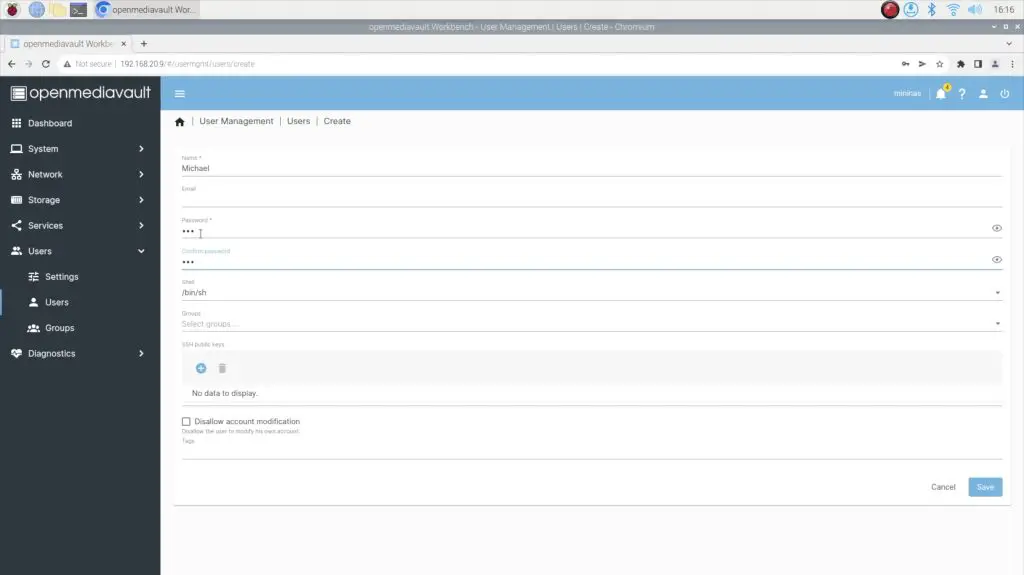
You can also create user accounts with different access rights to each folder that you create and set up a dashboard to monitor your miniNAS through this web interface.
Testing The Cheap NAS
Now that we’ve got OMV set up and running, let’s try it out and see how good, or rather how bad it is.
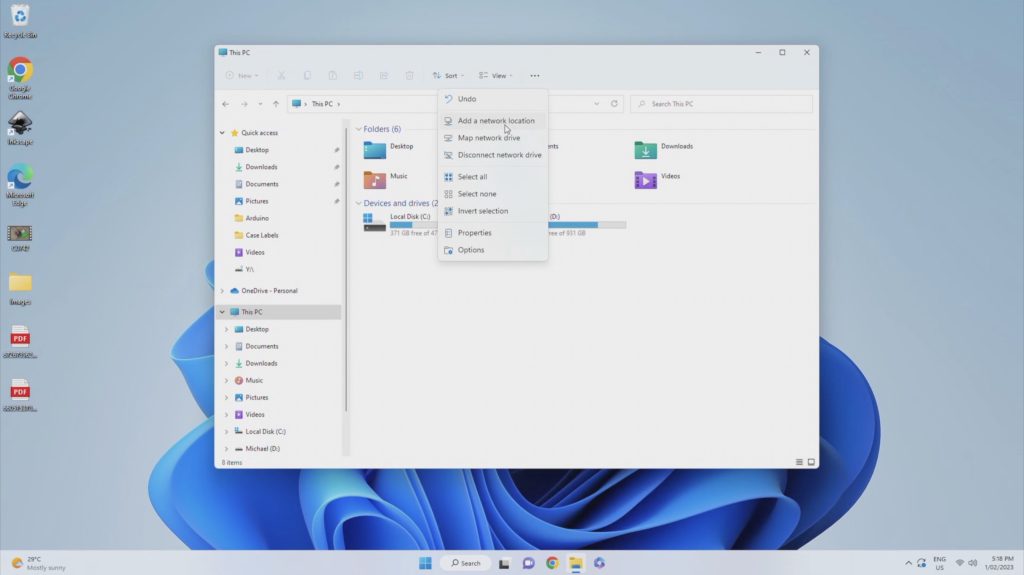
We first need to add our shared folder as a network location. This depends on the operating system you’re using but can be done from the top bar in your file browser on Windows 11:
Then enter your shared folder’s network location address or use the browse button to find it:

Once we have access to it, we can then try copying some files across to the NAS. Let’s start by trying to copy a 600 MB video file and see what speeds we get.
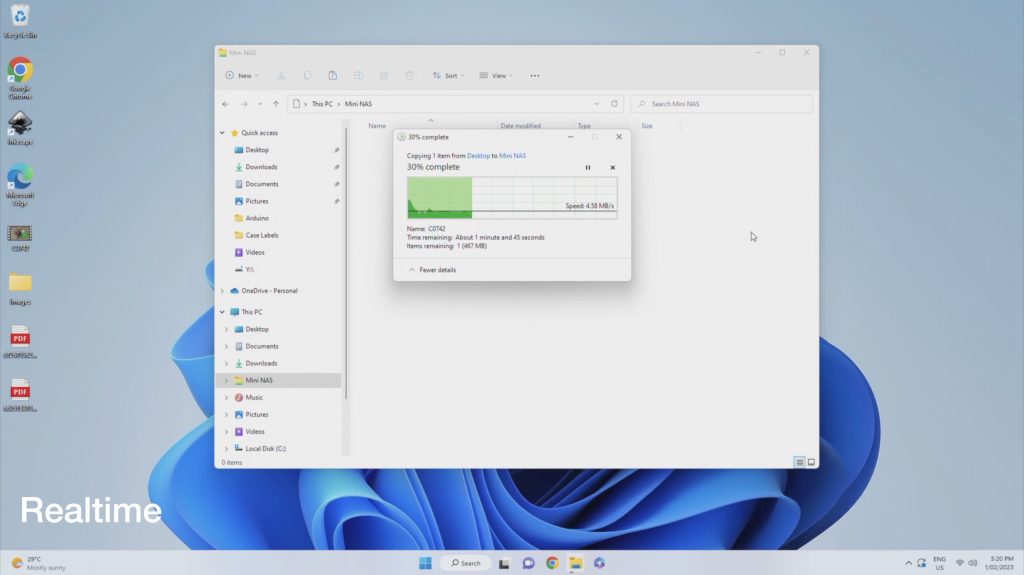
It seems to stabilise at an average of around 4.5MB/s. This is a bit less than I was expecting, but honestly isn’t terrible. It’s obviously not great for large files like this but if you want an easy network location to store documents and small files then this is quite usable.
I still need to do some experimenting with the speed to see where the bottleneck is as I expected this to be a bit closer to 10-15MB/s since the WiFi and USB speeds on the Pi Zero 2 W should manage significantly more than the 4.5MB/s I’m currently getting. But in any case, we have a perfectly functional NAS that cost $35 to build and we can easily add more storage, or more reliable storage in the future if we’d like to.
Another interesting aspect of this NAS is that it runs at just over 1W, so it’ll run for an entire year and only consume a few cents to a dollar’s worth of electricity.

Let me know what you think of my budget NAS in the comments section below and let me know what you think the first upgrade should be.
Thanks Michael. That is a project right up my street.
What did you use to measure bandwidth. I have tried to build several Raspberry Pi NASs and always give up because the overall bandwidth is horrible and I have trouble tracking down the bottleneck(s). I have an old WD Mirror NAS with spinning disks that somehow always outperforms my RPI with SSD on a hardwired network.
Lol pinas
Excellent. I’m going to try this out. Did you manage to track down any of the bottle necks that might be slowing it down? I’ve not found the answer to this question anywhere yet (and forgive my ignorance) is there any reason why the Pi can’t run as a NAS (occasional use) alongside being a lightweight web server, and possibly while running Pi hole? Obviously eventually there will be limits to what the pi can handle, but for a light use NAS and web server I would think it can cope. I don’t really want to have multiple Pi’s consuming a massive 1 watt 🙄 for each task. Cheers
I went a slightly different route… Pi 3B+ with a hat and SSD. Wanted to use OMV but that breaks dhcpd which I needed to run rasp-ap. Ended up just using a Samba share and Plex… The result is a portable NAS that accompanies us on road trips to feed content to the tablet for the kids via WiFi. Also used a small OLED display (thanks to your guidance) and a real time clock.
Tried this with a version 1.1 Pi Zero W, but got the message “This RPi1 is not supported (not true armhf)” Guess I’ll have to await delivery of the version 2 that I’ve ordered…
Nice tutorial, however. Thank you.
Hi all, i think the transfer rate of the Pi Zero 2’s wifi adapter maxes out around 4.5Mbps. This is the bottleneck because its only a 2.4Ghz chip using wifi N and most likely a single stream so the link speed will max out at N150 which is 75Mbps in each direction theoretically.
Real throughput hitting 45Mbps/4.5MBps sounds about right.
Still i’m going to be building this on my Pi Zero 2 as a backup server for my windows desktops and see how it goes.
Thanks for the great tutorial.
I quit after running the installation script twice with a fresh installation of Pi OS. The error came from the failure of installing one of the php-8.2 package, which hindered the finishing of the OMV installation after all, and I have no clue how to intervene during the script running or fix the issue. Sigh.
It doesnt work for me, it just gets stuck at a random part and then disconnects.
Worked perfect. Thanks!