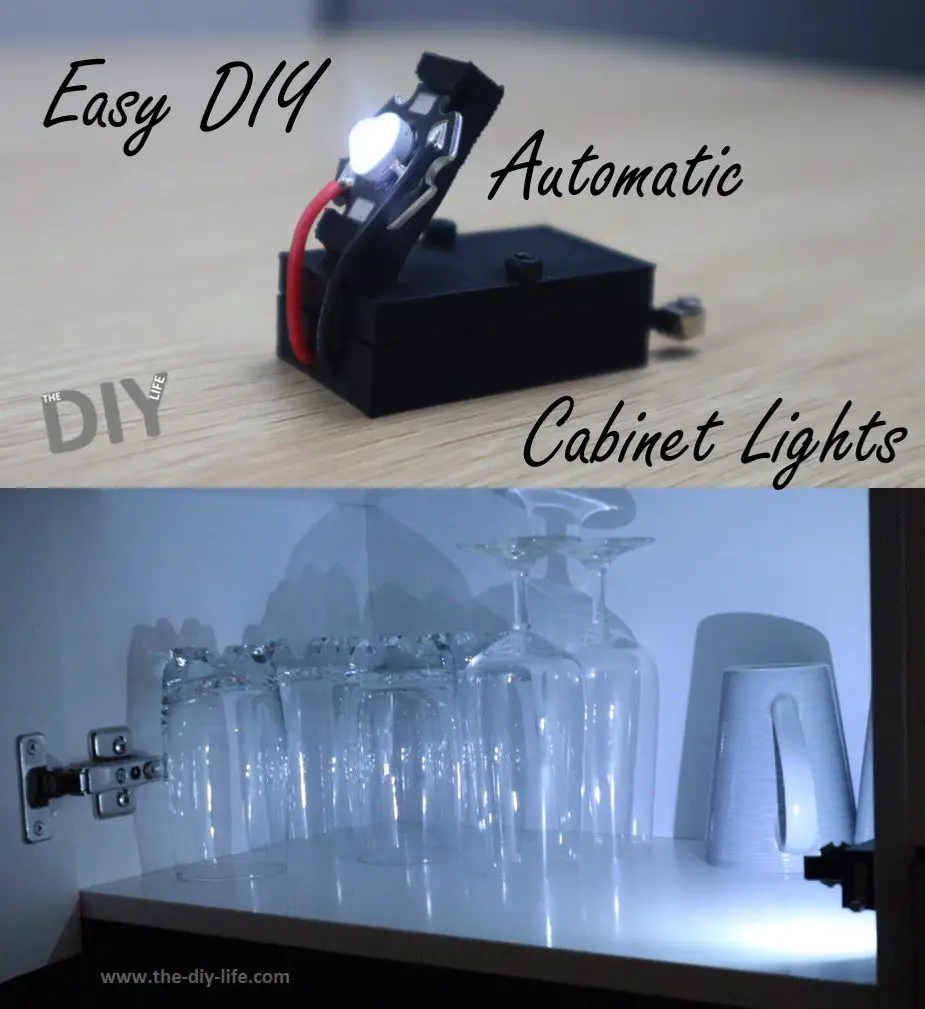
Today we’ll be looking at how to make your own easy DIY automatic cabinet lights which can be stuck in place using a small strip of double sided tape and automatically switch on and off when you open and close your cabinet doors. This switch is really cheap and easy to make and works well on kitchen or bathroom cabinets, bedroom cupboards, drawers or even storage rooms without their own lighting.
Here’s the video guide, otherwise read on for step by step instructions:
What You Need
You’ll need the following to make one light. Keep in mind that most of these are cheaper to buy in packs of 5 or 10 so it may be worth making a couple of them at once.
- Superbright white LED’s on Heatsink – Buy Here
- Limit Switch – Buy Here
- CR2032 Cell Battery – Buy Here
- 2 x M2.5 x 12mm Cap Screws – Buy Here
- Double Sided Tape Strips – Buy Here
You’ll also need a 3D printer and some filament to print the components. If you don’t have access to a 3D printer, there are a number of online printing services which can print out the components and deliver them to your door in a few days.
How To Make Your Cabinet Lights

Download 3D Print Files – Cabinet Light Print Files
Start off by 3D printing the two components. I printed them using black PLA with 15% infill. You could also use white, brown or grey to match your cabinets.
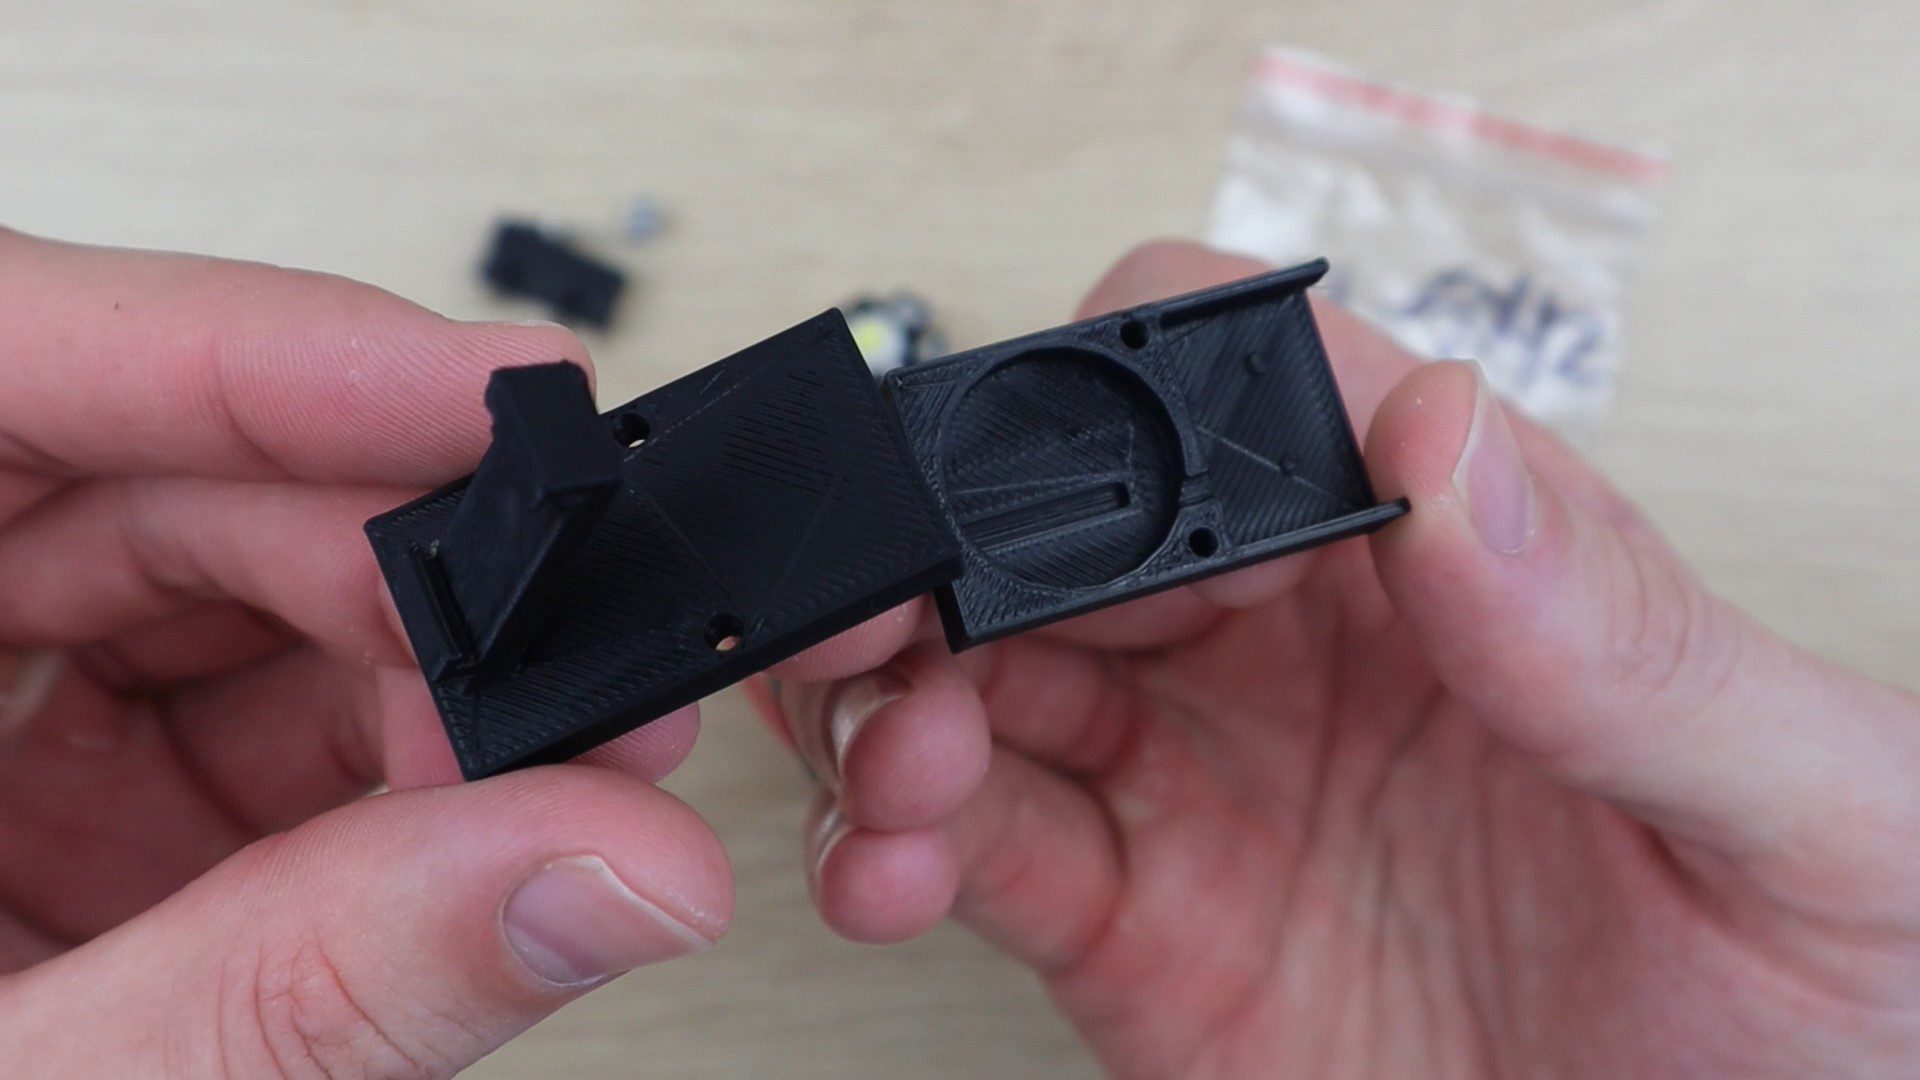
Once you’ve got your parts and 3D printed components, lets put the cabinet lights together.
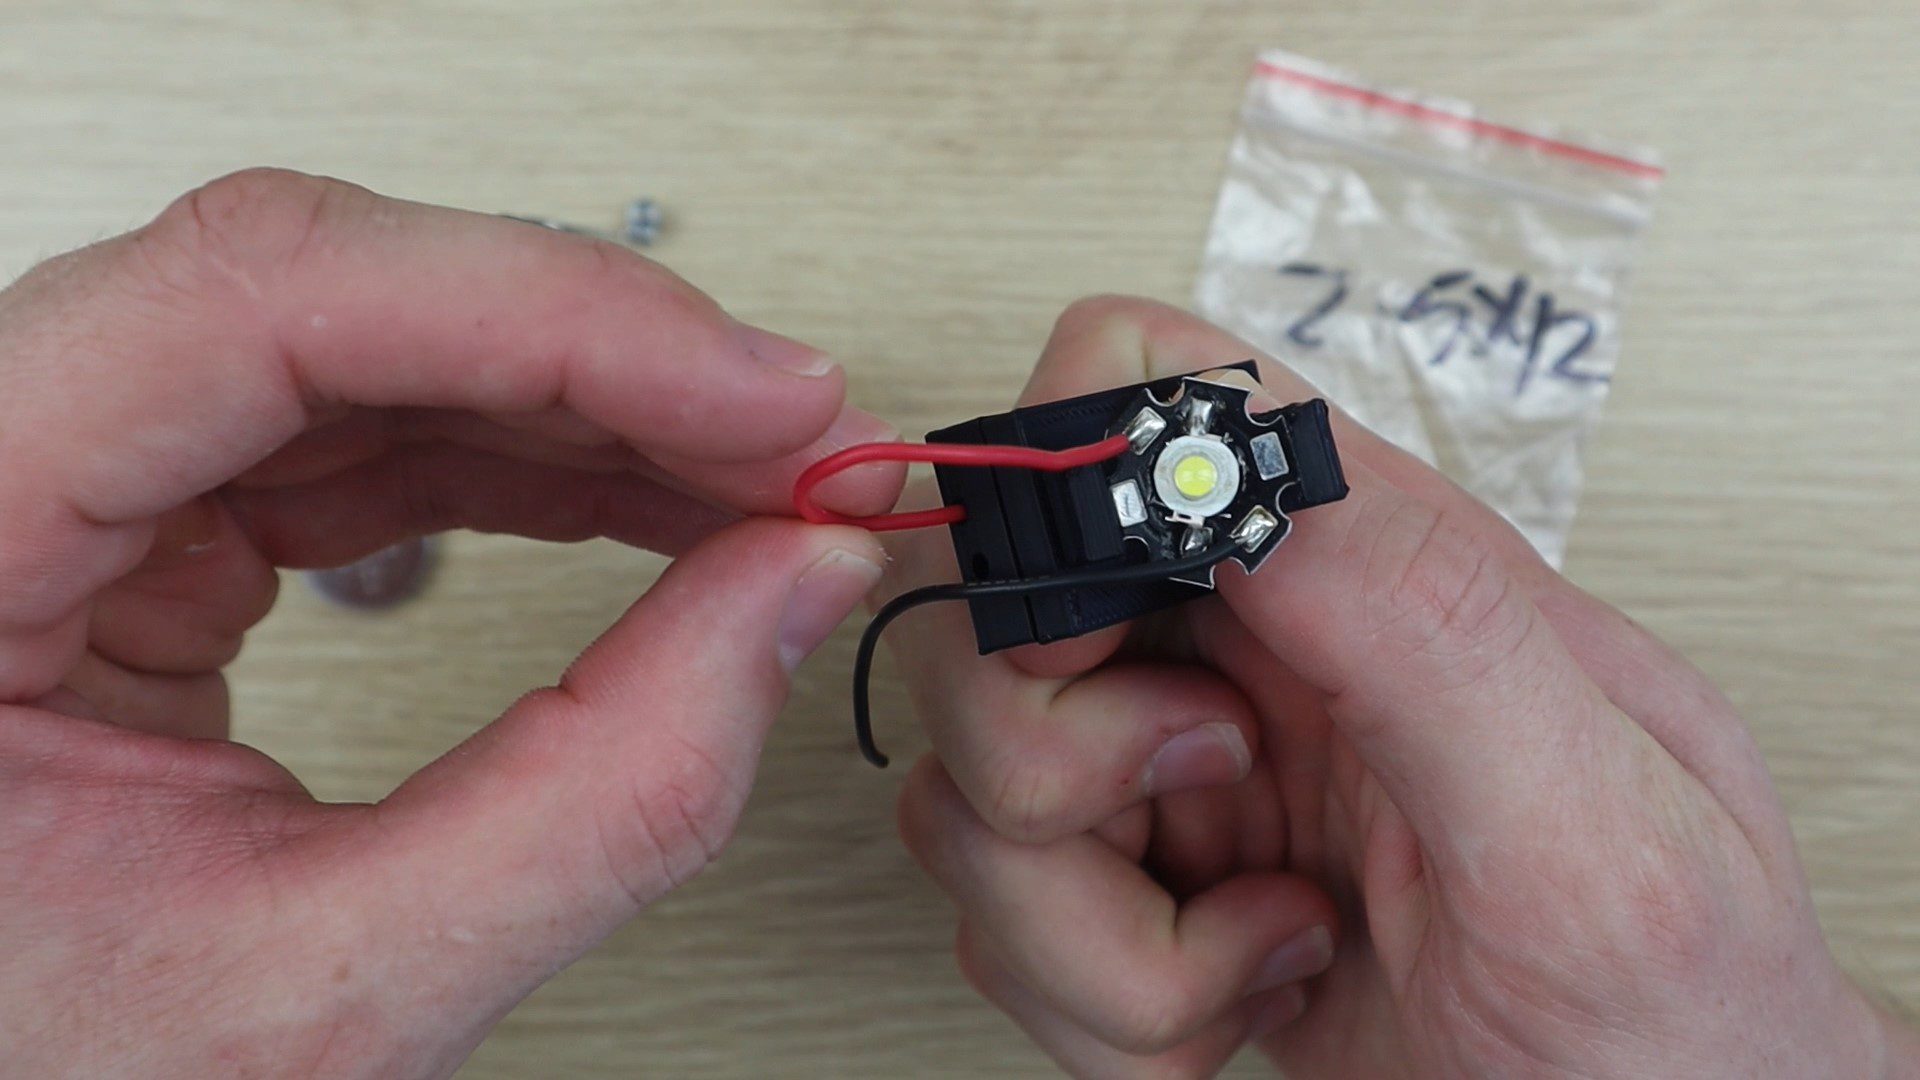
Slide the LED under the clips on the top bracket to hold it in place. If it is loose then add a few drops of superglue to the back or edges to hold it in place. Then feed the wires through the two holes in the base. Make sure that you get the polarity correct as you need the negative lead to be in the bottom of the battery holder.
You don’t have to use these LEDs, they’re just the most effective one’s I’ve found. They’re bright enough for a medium sized cabinet and because they’re just a single LED, they’re reasonably power efficient. You could use standard white LEDs as well, you’ll just need to modify the top cover to hold them.
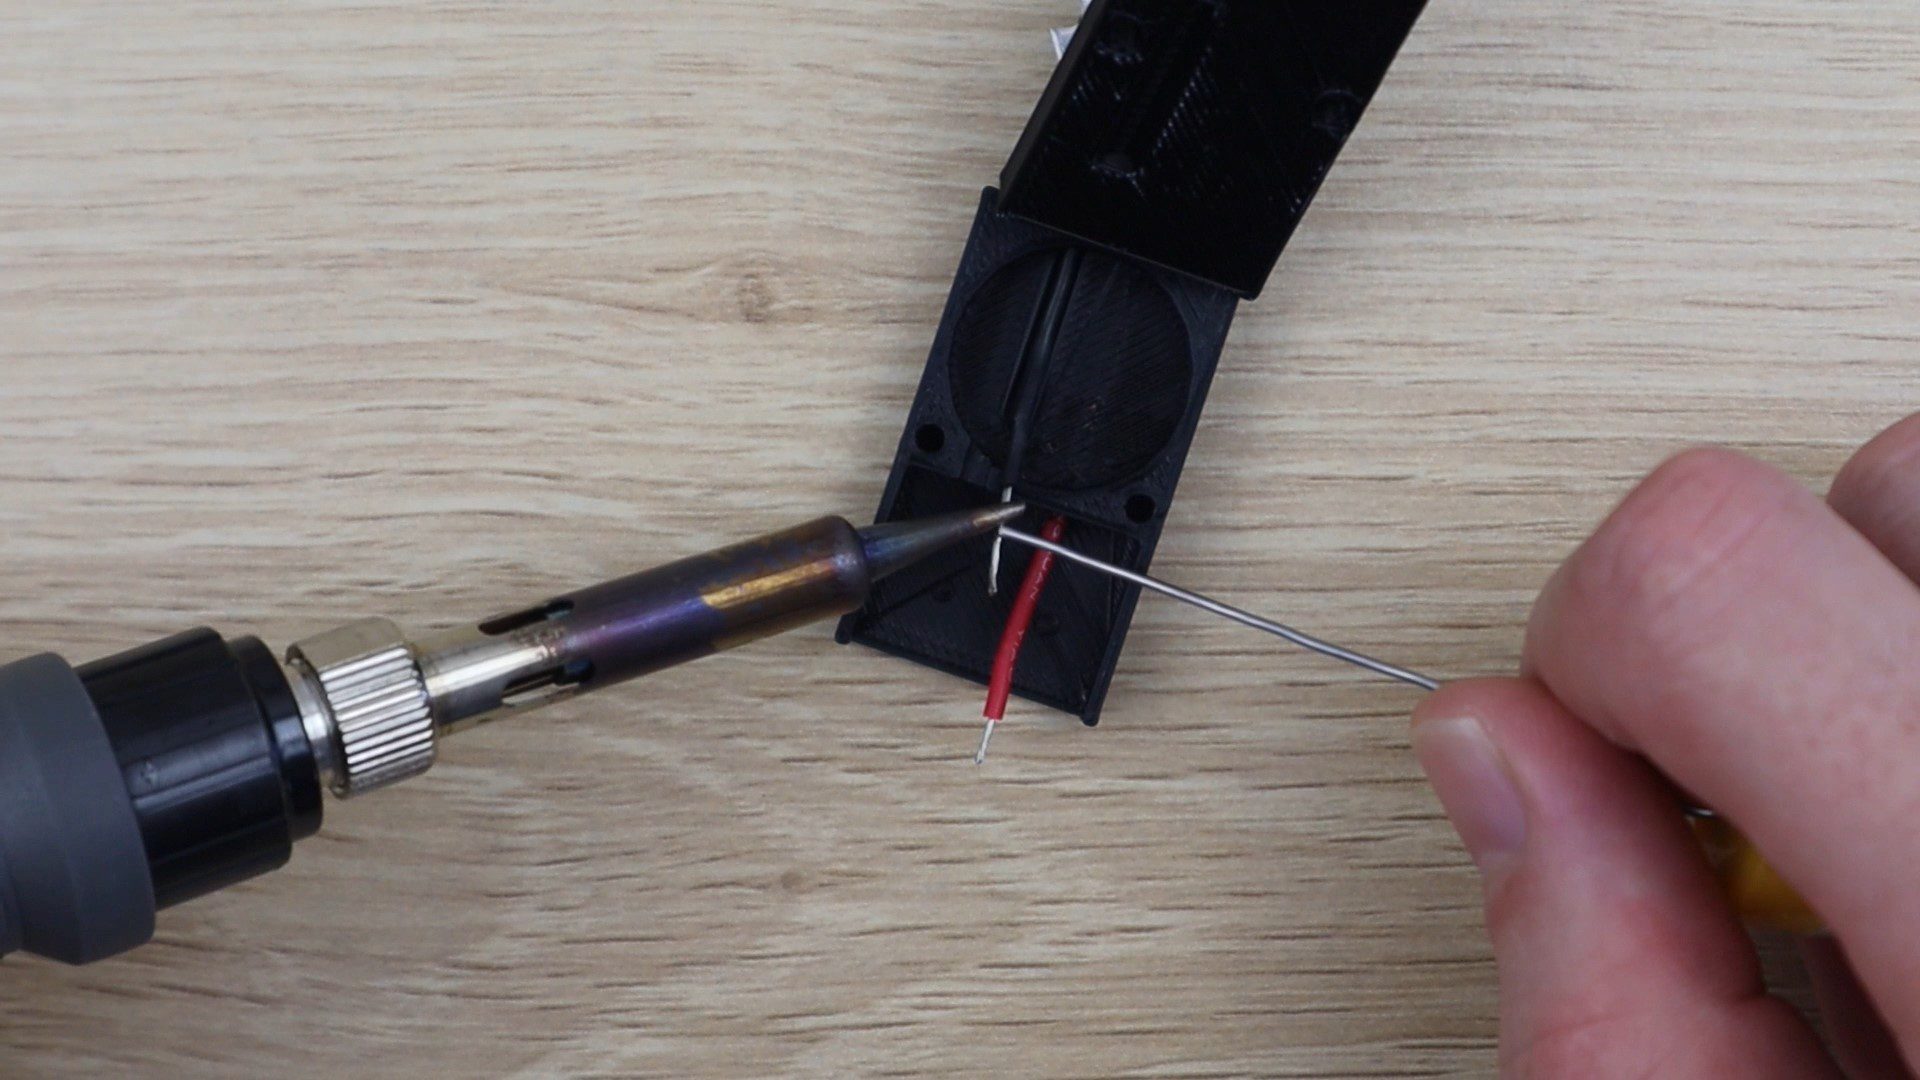
Trim your two leads to the correct length and strip the ends. Strip a slightly longer section on the black lead as this is going to be the negative battery terminal. Solder/tin the ends of the leads to make it easier to solder onto the switch and to prevent the end in the battery compartment from fraying.

You’re going to connect your leads to the two outer terminals on your switch, the common and normally closed terminals. Use one of the pieces of the leads which you cut off the LED to make up the section between the limit switch and the positive battery terminal. Again, strip a slightly longer section on the black lead to make the positive battery terminal.
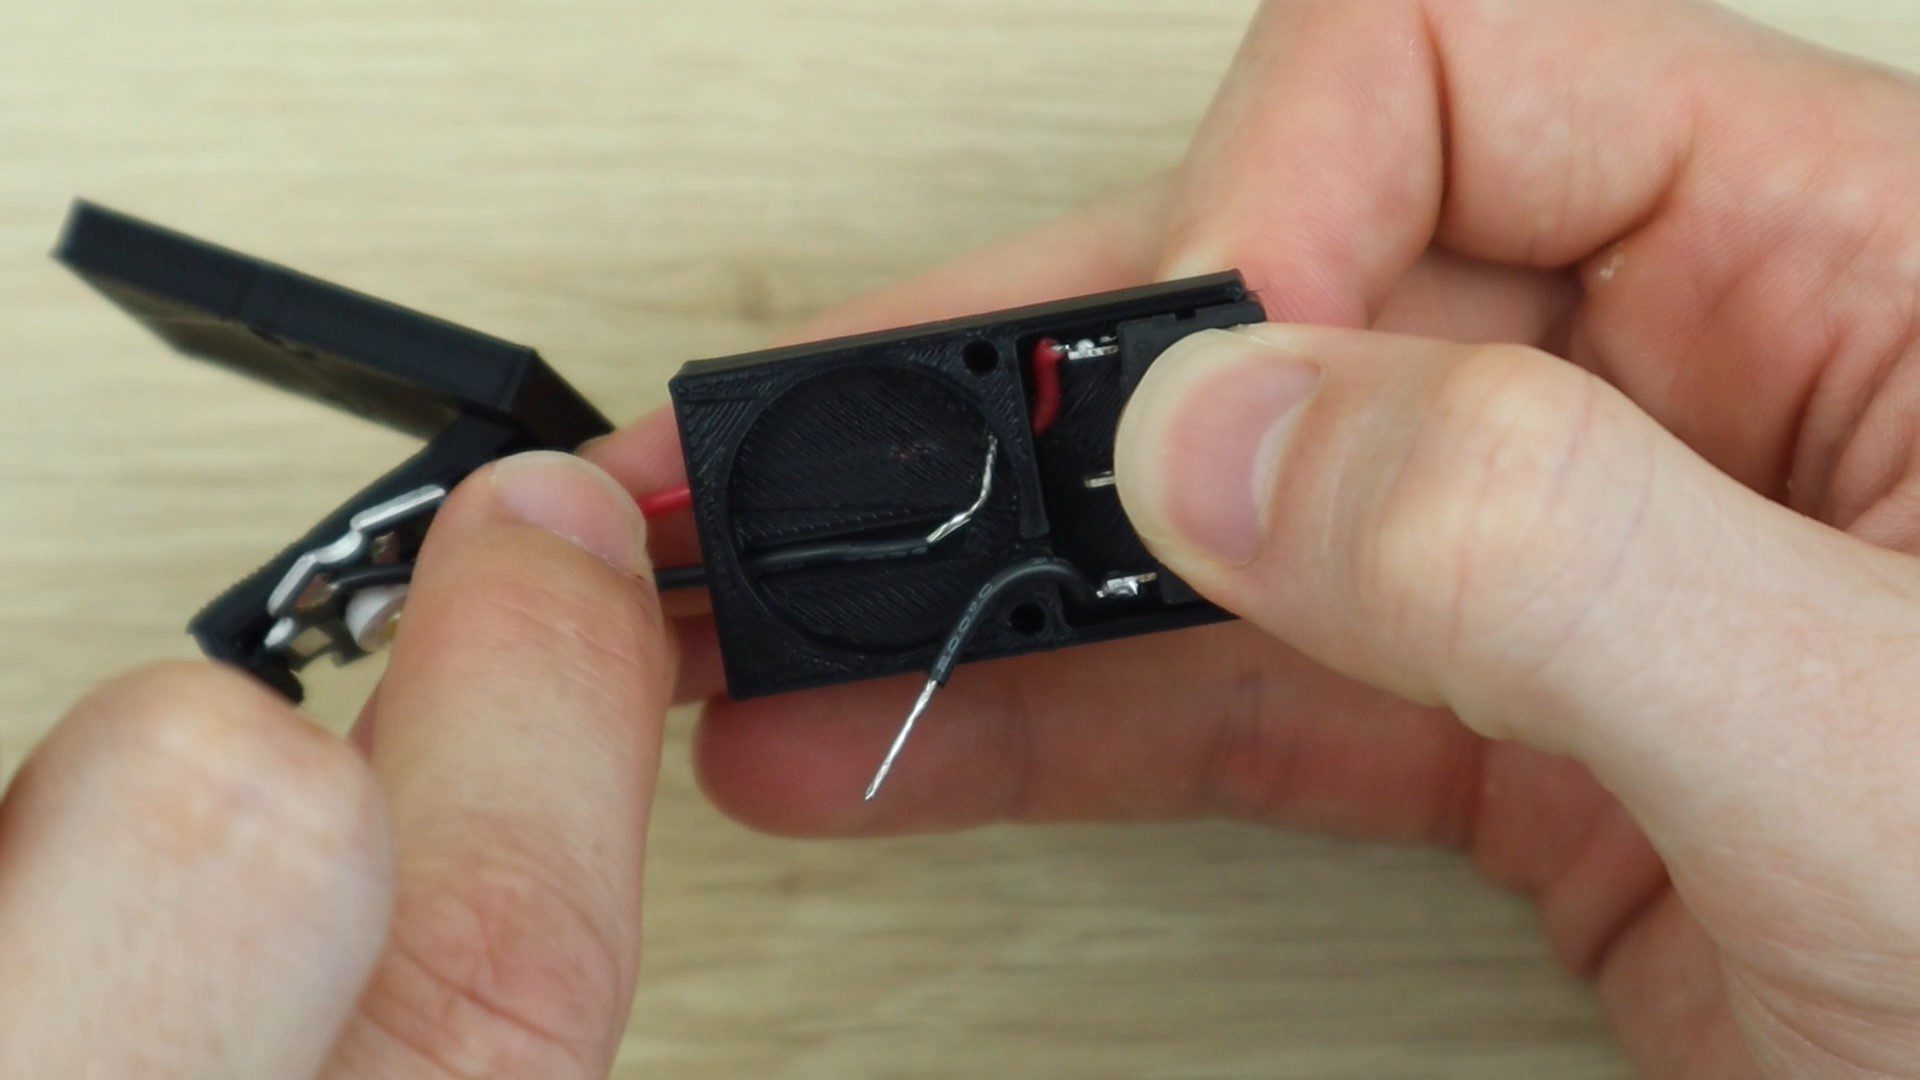
Make sure that the insulated portion of the lead in the bottom of the battery compartment is inside the groove and that a portion of the exposed wire sits on the bottom of the battery compartment.
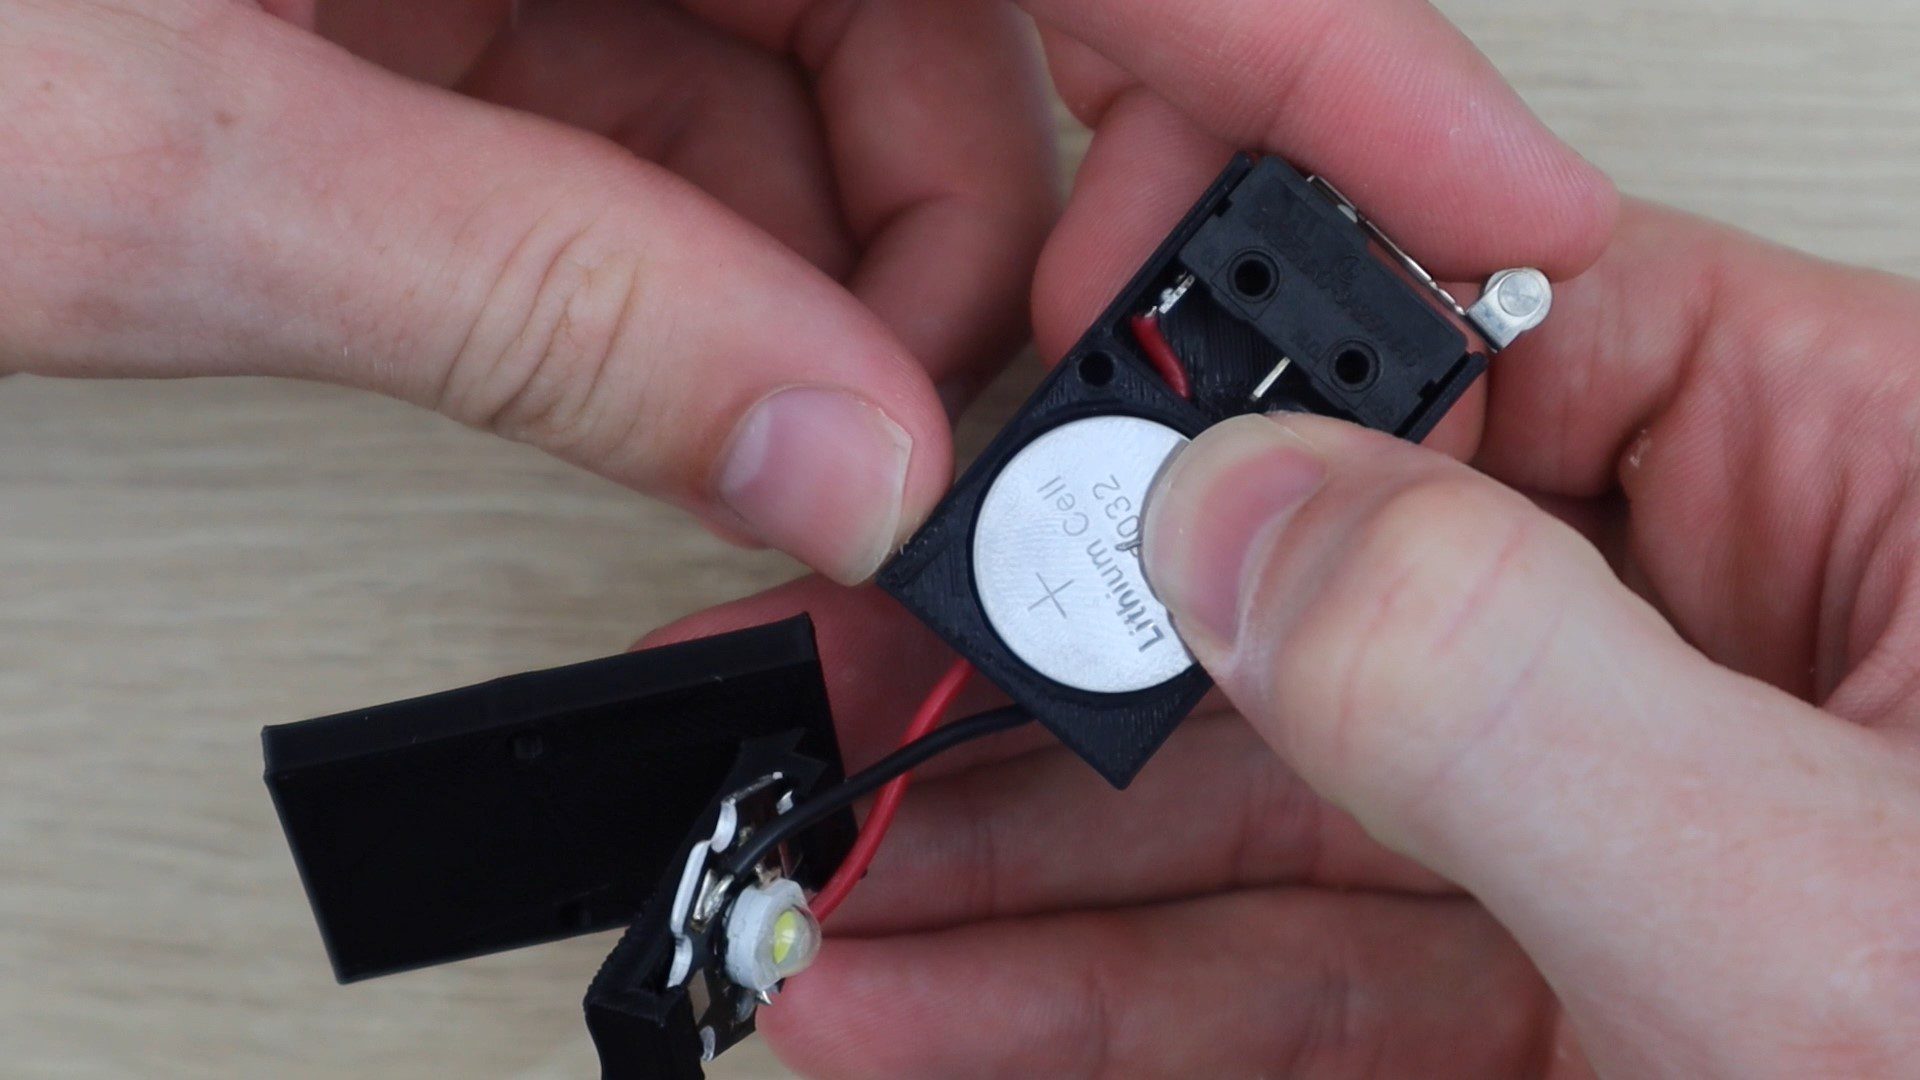
Insert the CR2032 battery into the holder face up (positive up). When you push the top lead onto the battery, the LED should turn on. You should then be able to turn it on and off using the limit switch.
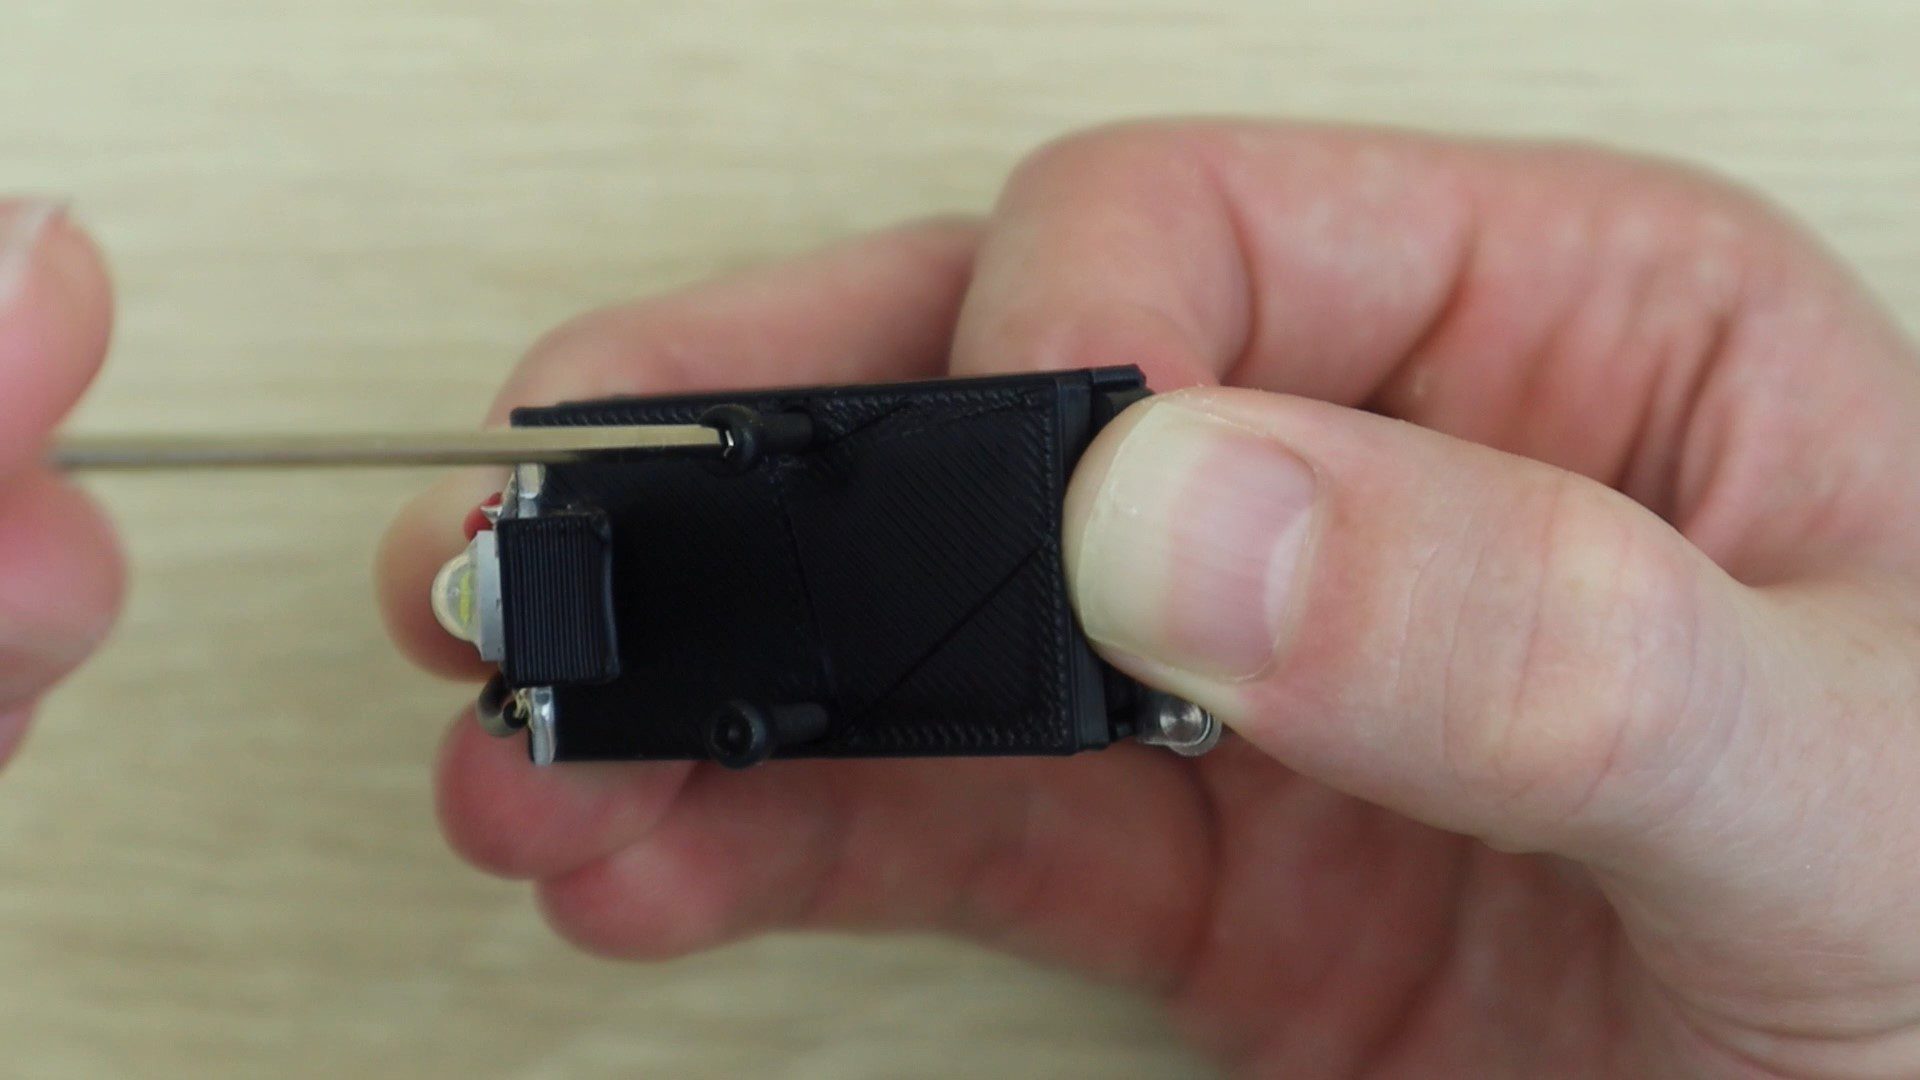
Use your two machine screws to screw the two halves together which presses the leads onto the battery. You’ll now need to turn the LED on and off using the limit switch.
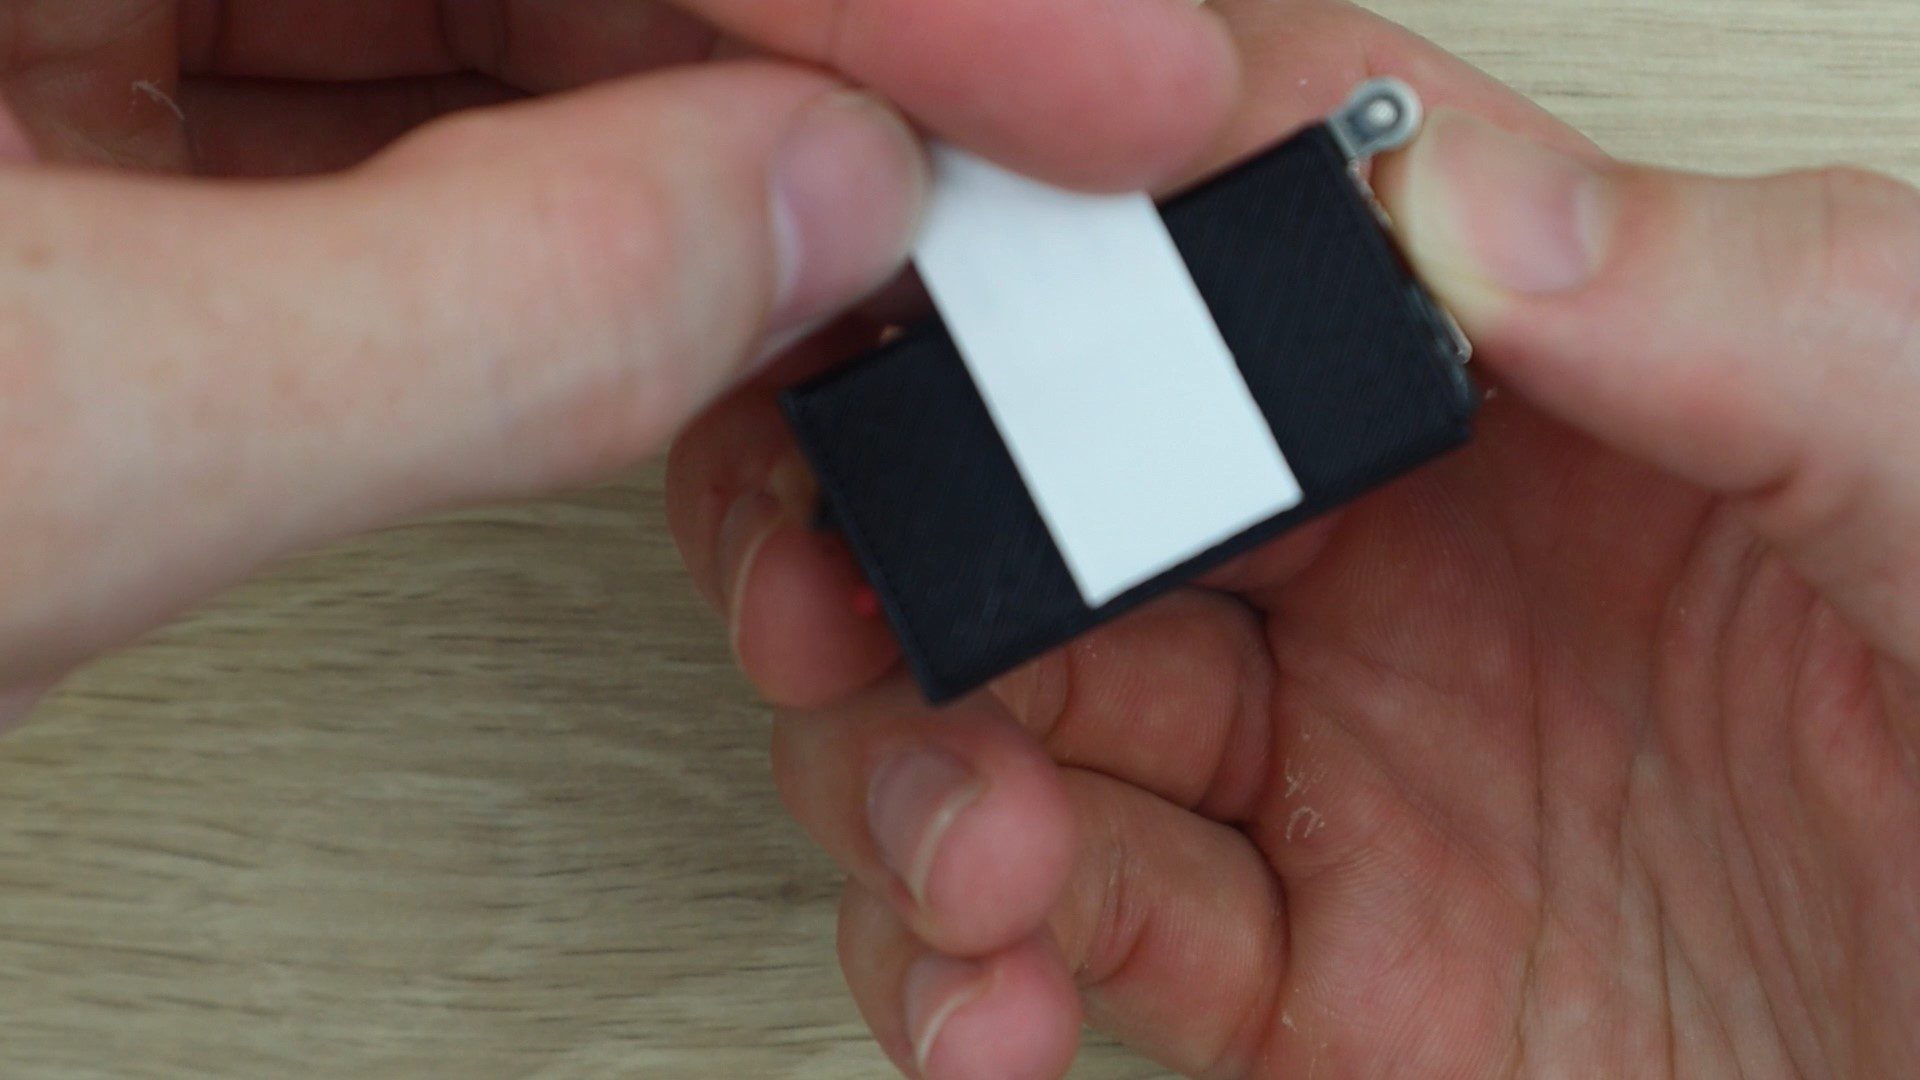
Use a strip of double sided tape to stick the limit switch in place. I used these removable ones with a pull tab so that I can easily remove them if I need to. You could also use slightly longer screws and screw the light into place using the two holes already in the parts.
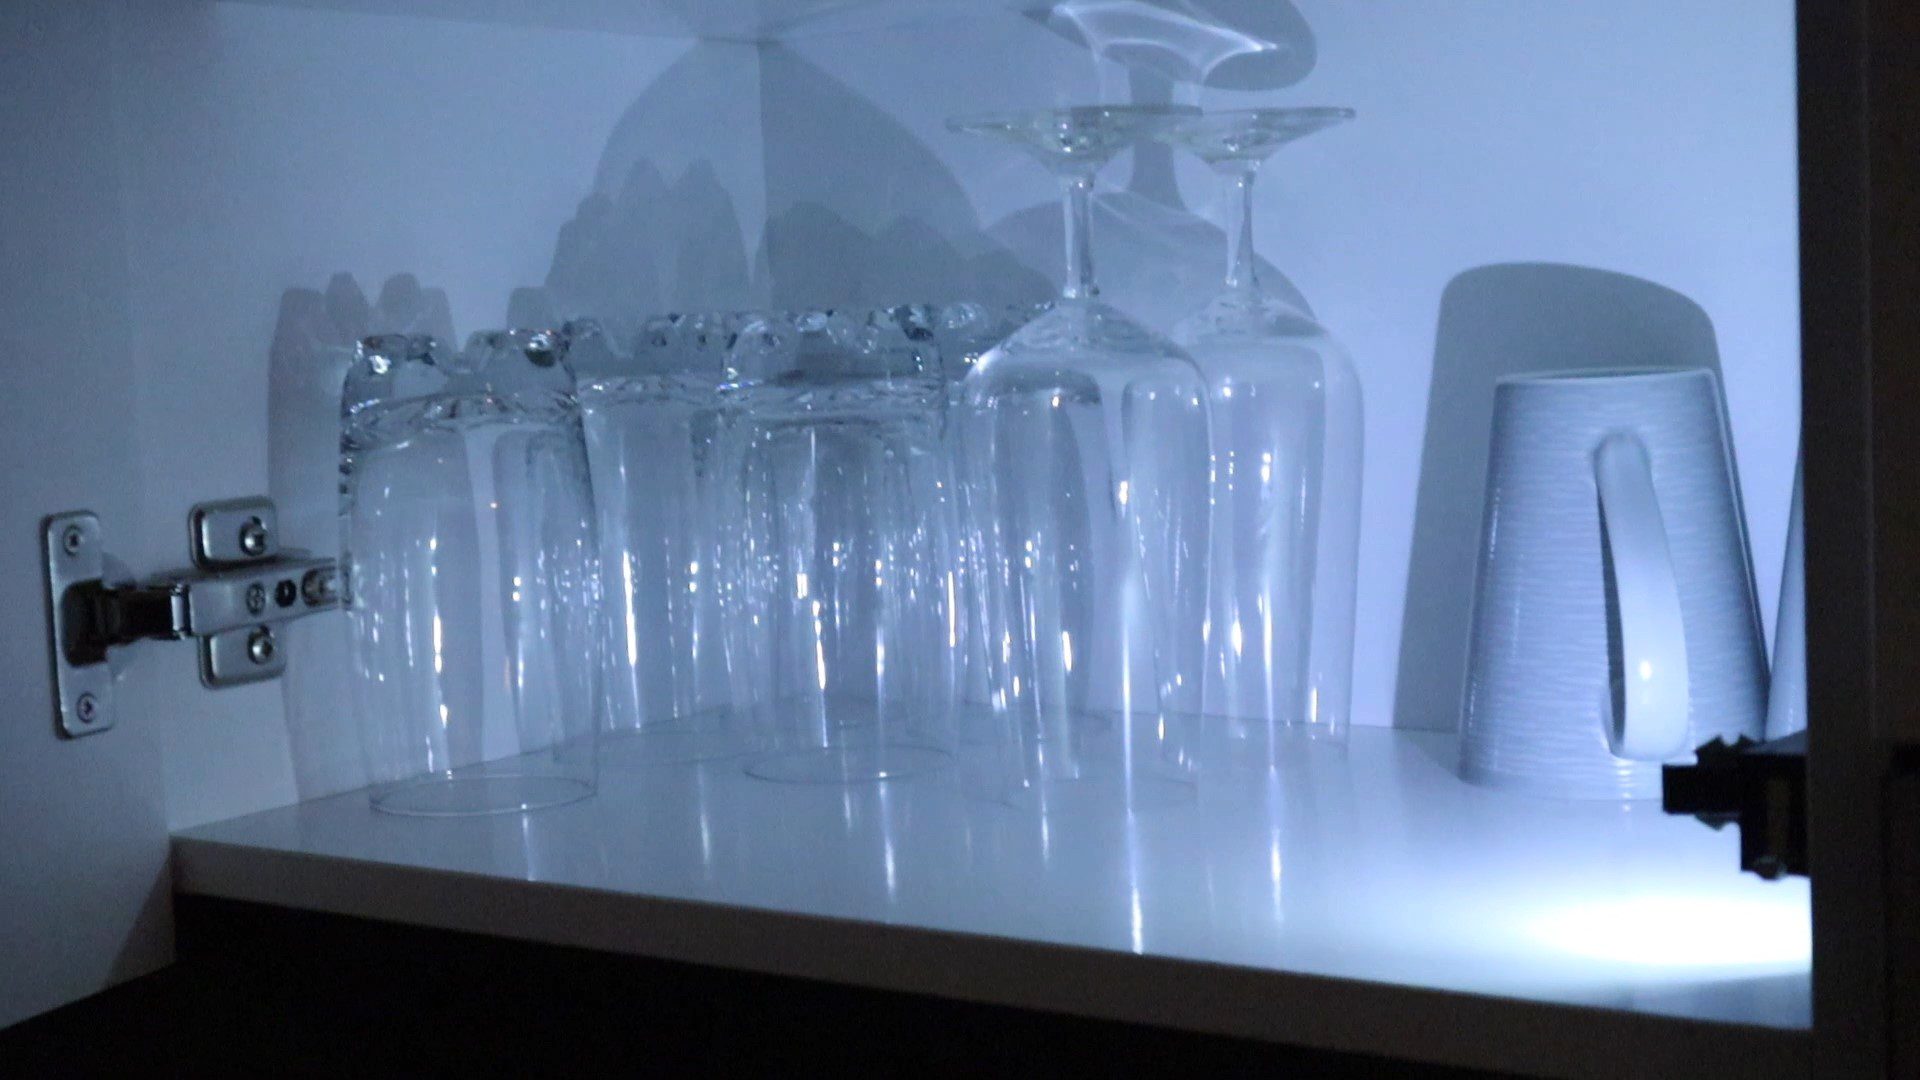
You can now stick the light into place on any edges of your cabinets which are close enough to almost touch the door when closed.
Make sure that when your door is closed, it is fully compressing the limit switch arm and the LED is actually being turned off or your battery will die quite quickly.
You should be able to easily replace the batteries without completely removing the cabinet lights by simply unscrewing the screws and removing the top covers.
Have you made your own automatic cabinet lights? Let us know in the comments section below, we’d love to see your designs.
Share This Guide