In this project, we’re going to be making a really easy tree canvas using hot glue and some basic craft supplies. They’re really cheap and easy to make and they look great. Each one costs around $2 to $6 depending on the size of the canvas and where you get the supplies from and it takes about an hour to make. You can pick up most of the supplies from your local dollar store, packs of two or three canvases are usually cheaper.
It’s worth making a couple at a time, they’re quite effective as an arrangement of four together or as three or four in a line down a passage or hallway.
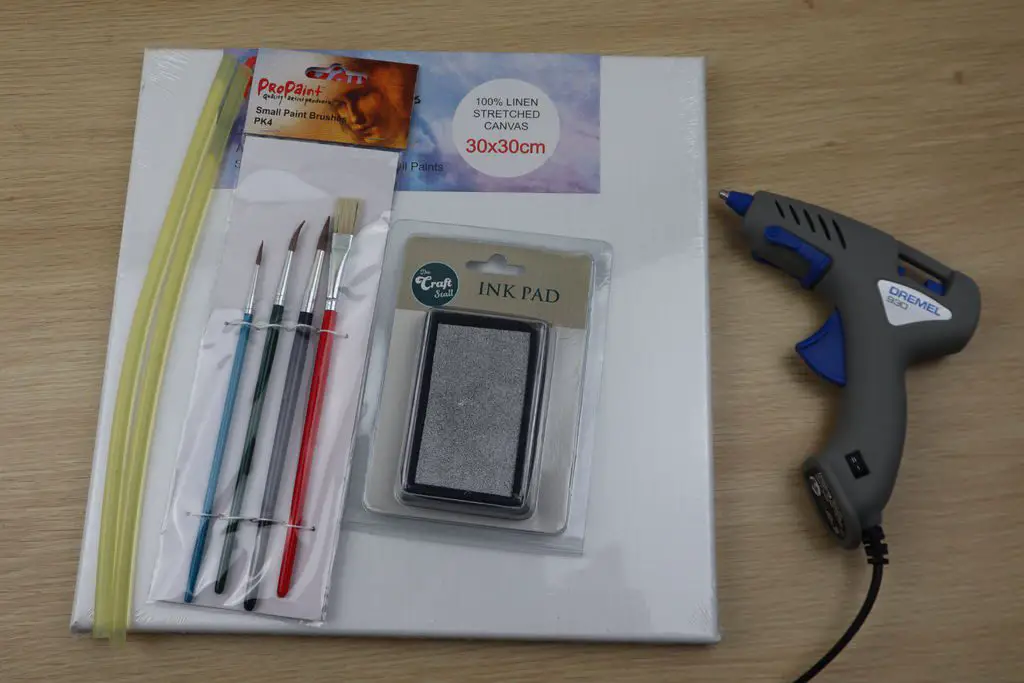
What You Need To Make Them
To make one canvas you’ll need:
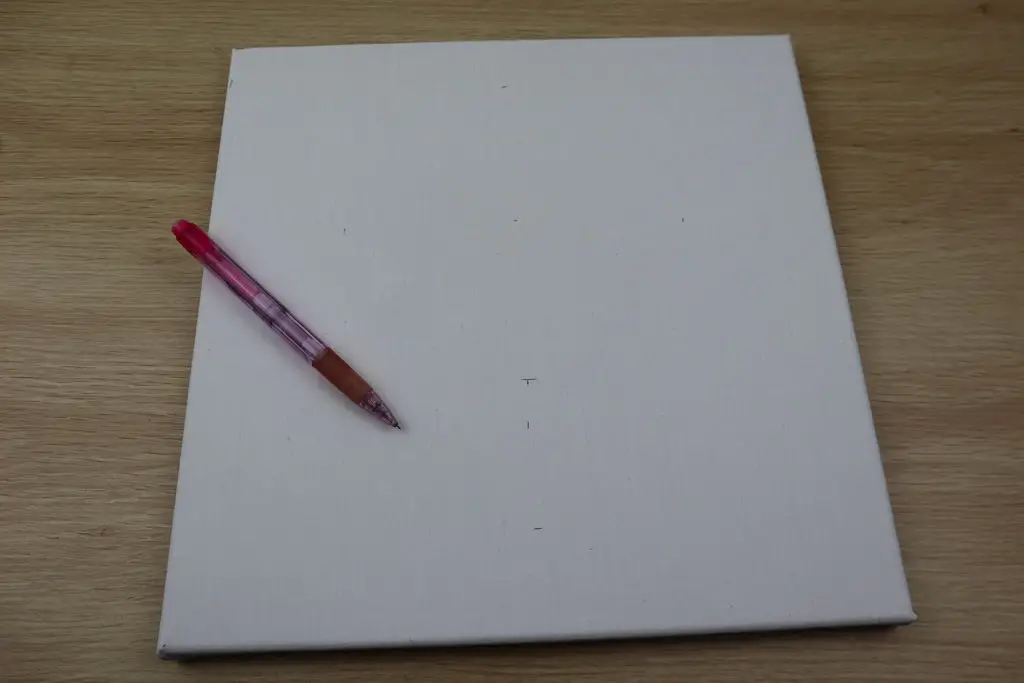
- A blank craft canvas, 40cm x 40cm (16″ x 16″) or larger – Buy Here
- A glue gun and glue sticks – Buy Here
- A flat paintbrush – Buy Here
- A metallic ink stamp pad, silver, gold or copper works well – Buy Here
- Black spray paint (you can use craft paint too, it just takes longer to apply) – Buy Here
Note: The purchase links above are affiliate links, provided as a guide to the type of product to buy. The products are suitable for the project, but you’re likely to be able to get the products at much better prices from a local craft or dollar store.
How To Make The Hot Glue Tree Canvas
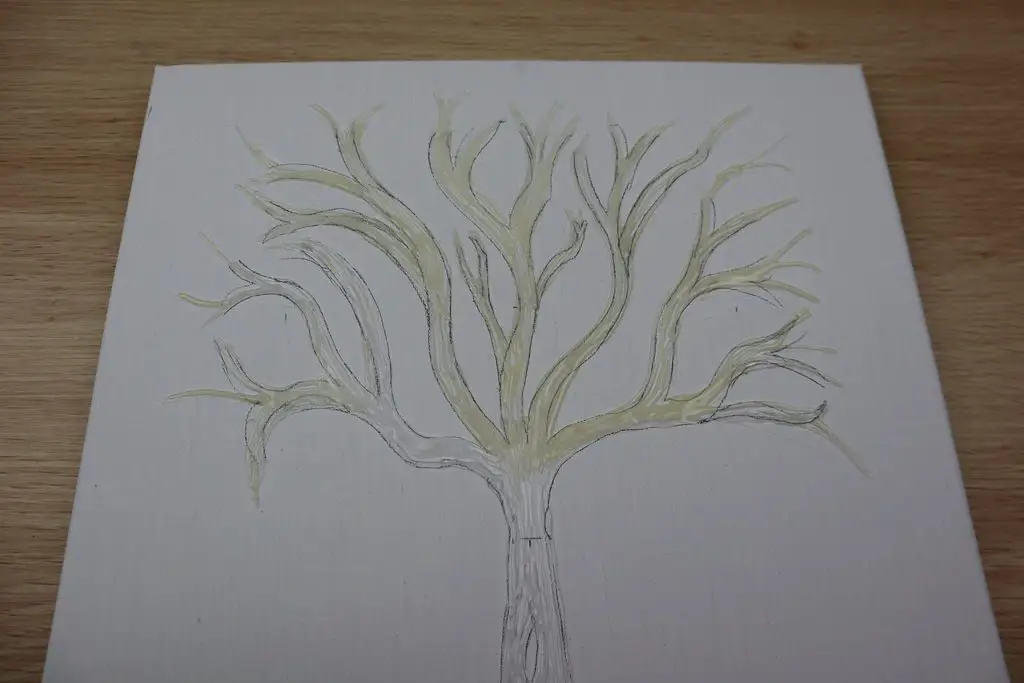
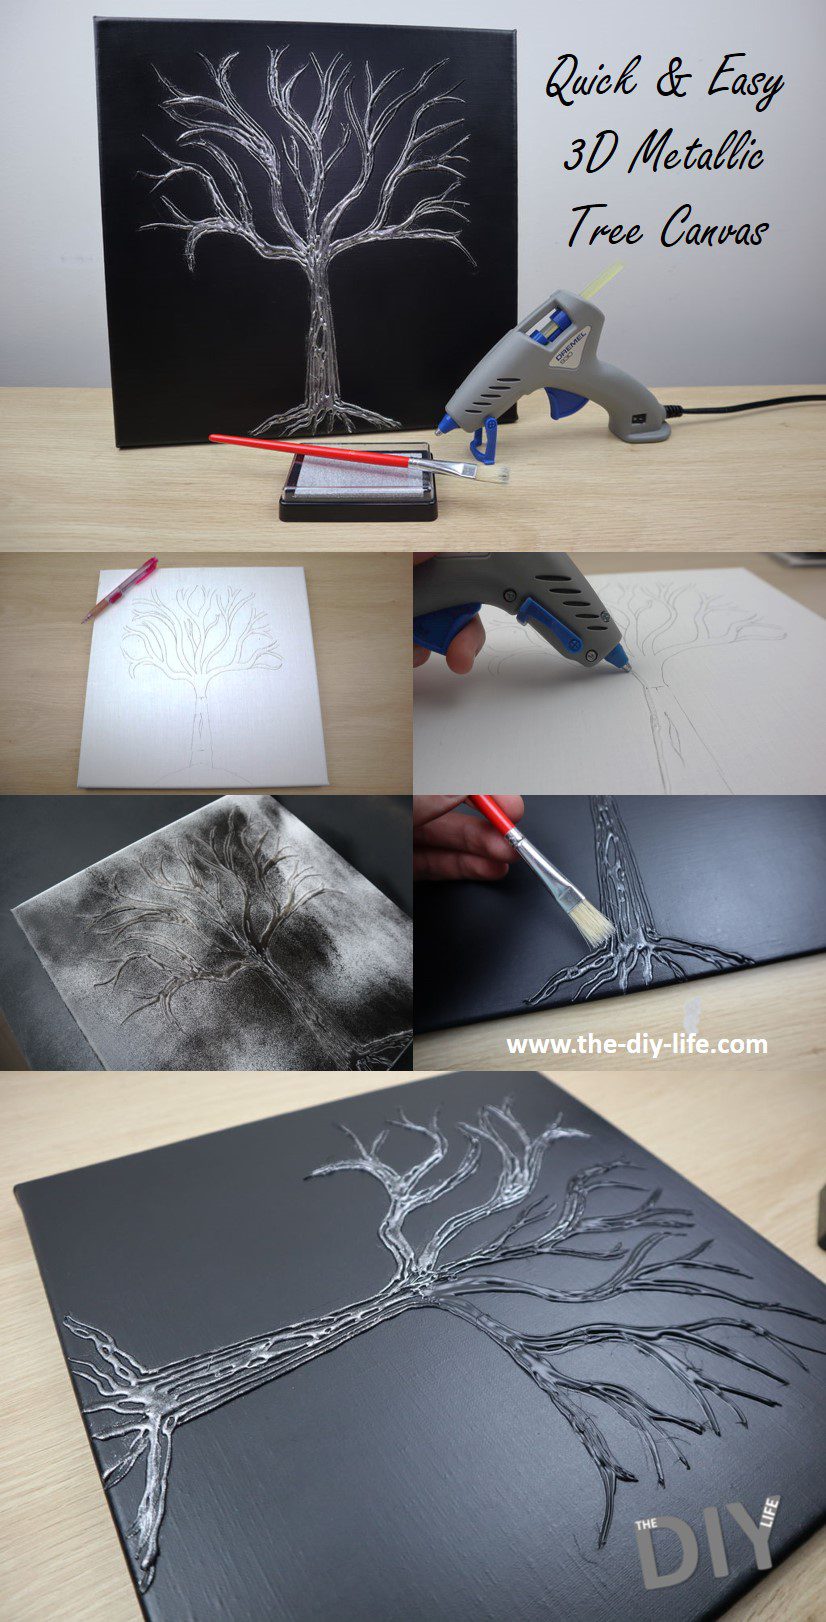
To start with, we’re going to make a rough sketch of the tree.
You don’t have to be an artist for this step and you can make as many mistakes as you need, you’re going to cover it up with paint anyway.
I started by dividing the canvas up with some basic marks for the roots, trunk, and branches in order to get the proportions correct. Mostly because I’m pretty bad at drawing.

Use your marks as a guide to sketch your trunk, then add the roots and then the branches.

You can sketch over areas that don’t come out well and add branches as you need. Try not to make the branches too thin and get them relatively evenly spaced out so that they fill most of the upper half of the canvas.
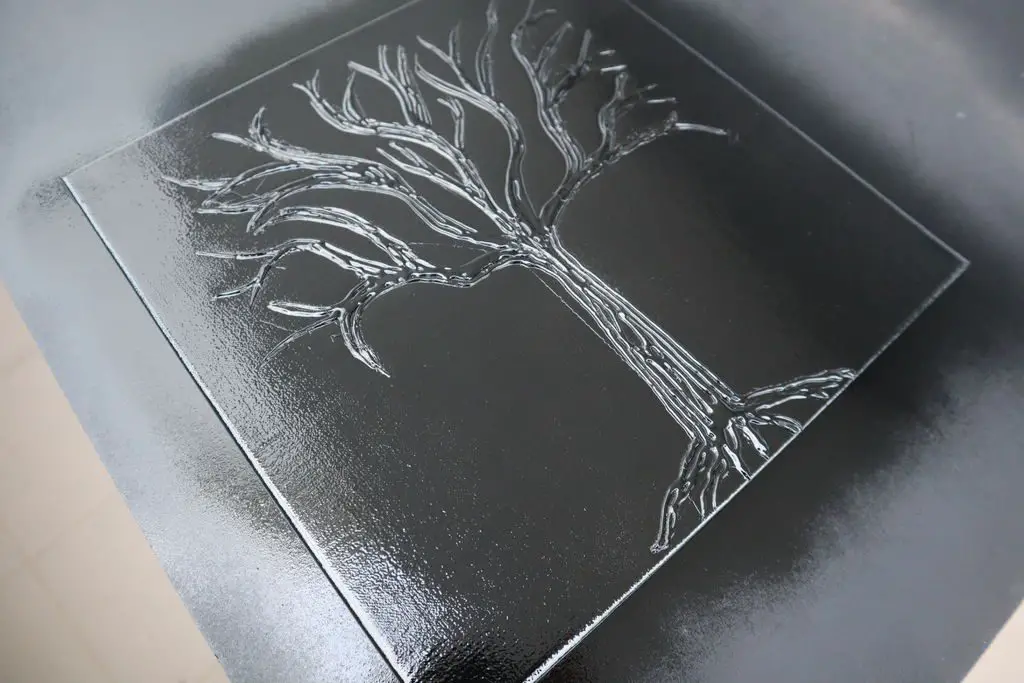
Once you’re happy with your tree sketch, its time to add the glue.
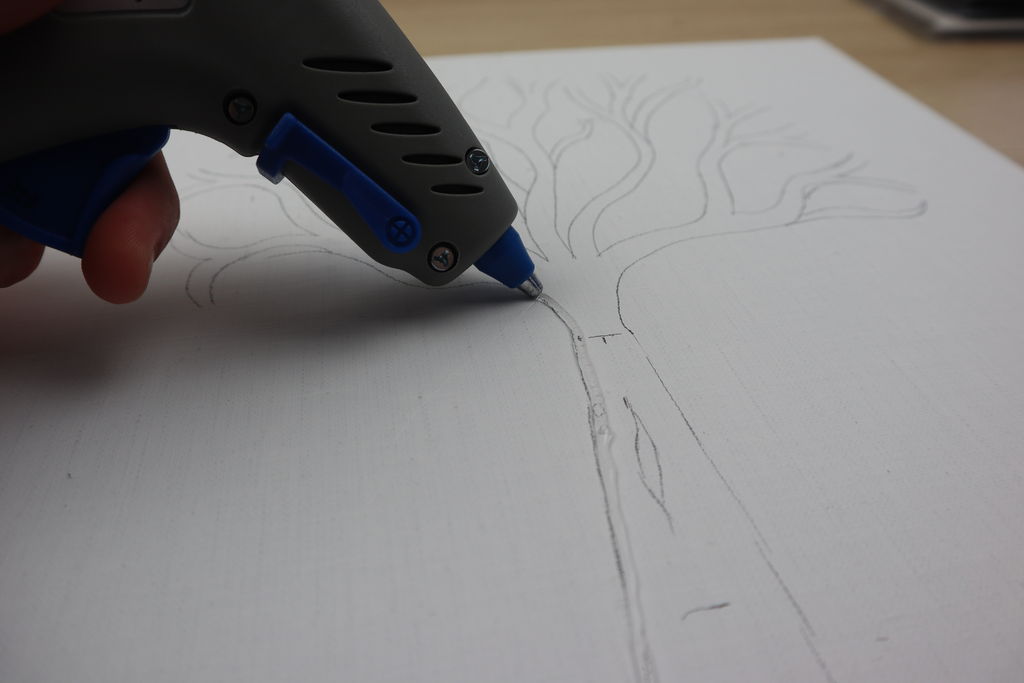
Add stripes of glue along your trunk, root, and branch lines. You want them to be thick and rounded. It’s ok if there are gaps between the stripes of glue, you don’t want to put them too close together and have them join up.

Fill in all of the lines you’ve drawn until you’ve completed the tree.
Once the glue has hardened, pull off any stringy ends and make sure that there aren’t any drops or sharp ends.
Now you’re going to cover up your canvas and glue with the spray paint.
You don’t have to use black paint, you can use any paint that’ll match your theme, just try to use a colour which contrasts well with your stamp colour. So use a light paint with a dark stamp or a dark paint with a light stamp.
I used spray paint because it’s quick and easy to apply and it dries quickly too.
Spray the whole canvas and the edges. Make sure that you get in between the glue stripes as well, there shouldn’t be any white showing when you’re done.
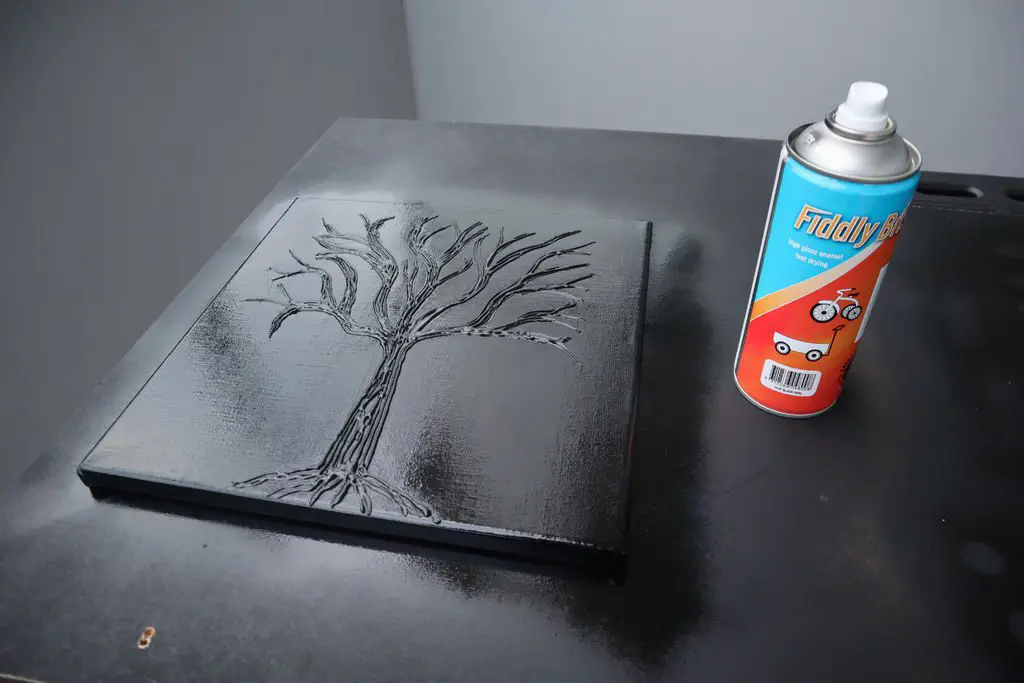
Allow the canvas to dry properly before moving on to the next step. This usually takes half an hour to an hour, depending on how thick your paint layer is.
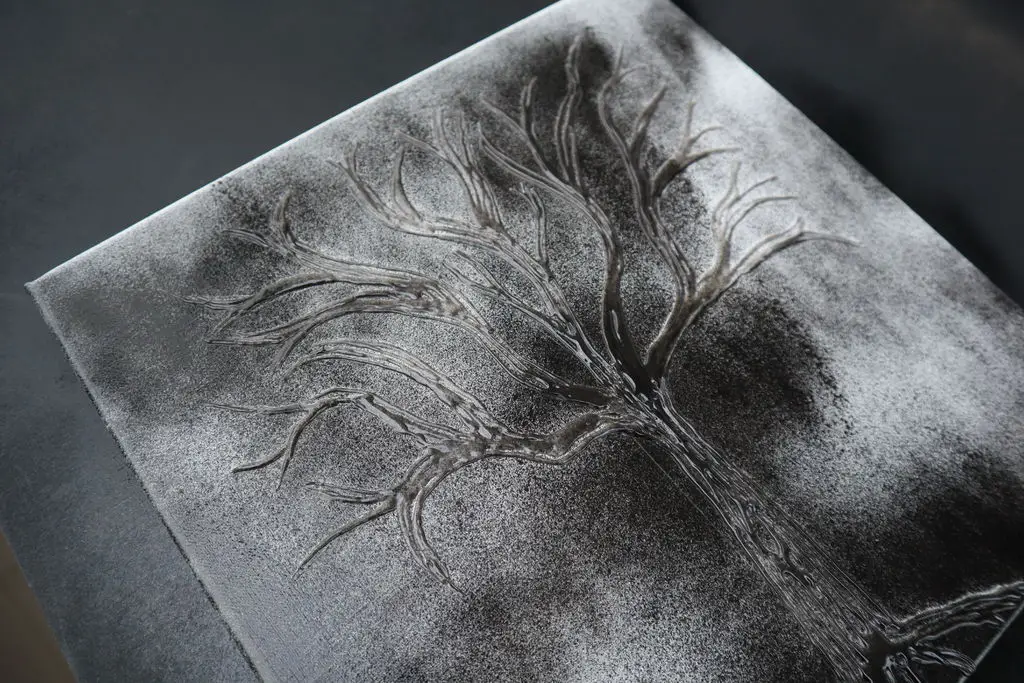
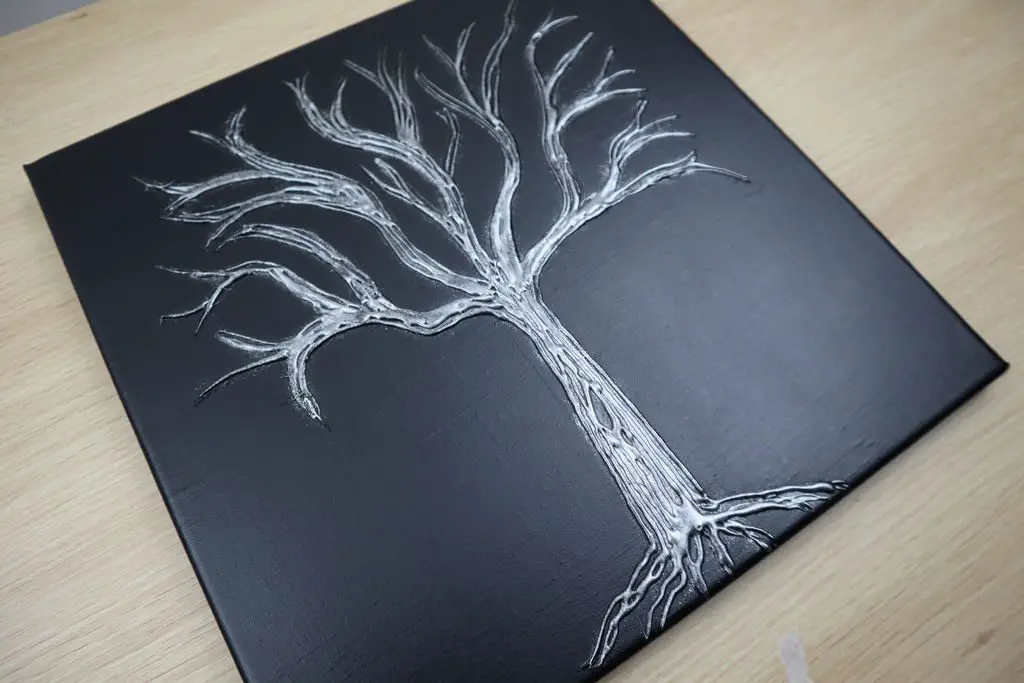
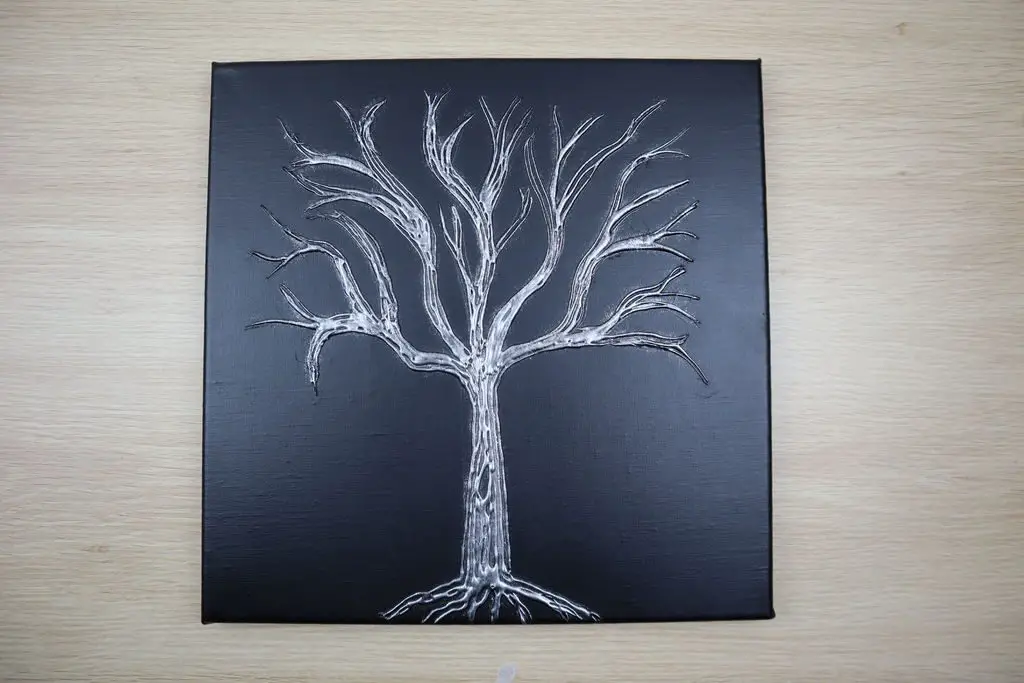
Once it is dry, use your paintbrush to highlight the glue.
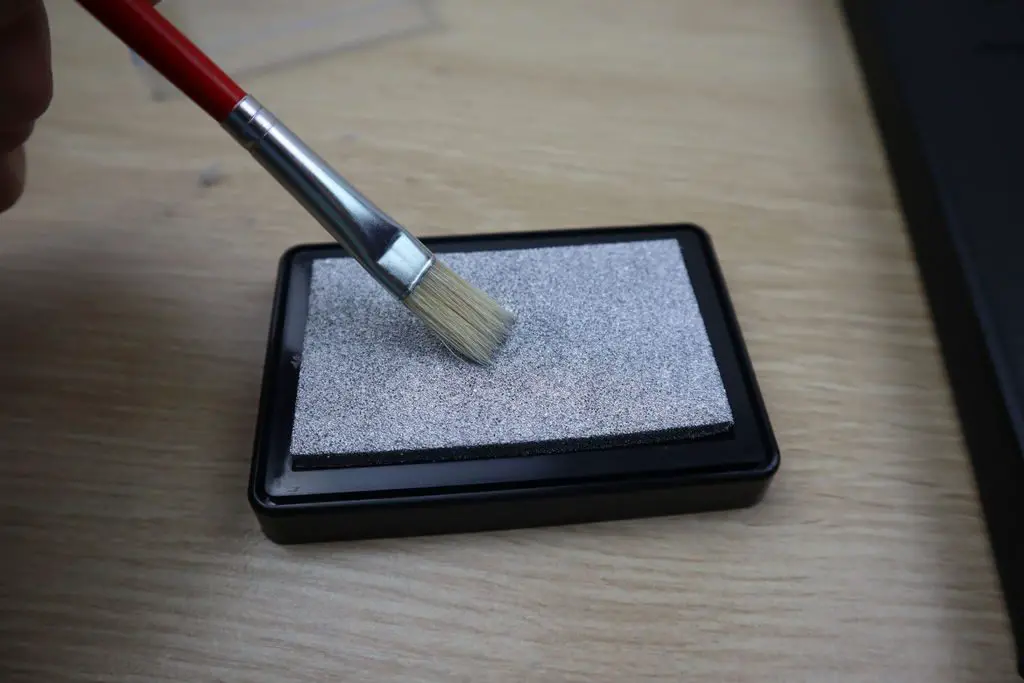
Brush your paintbrush on the stamp pad so that the tip of the paintbrush has some metallic ink on it.
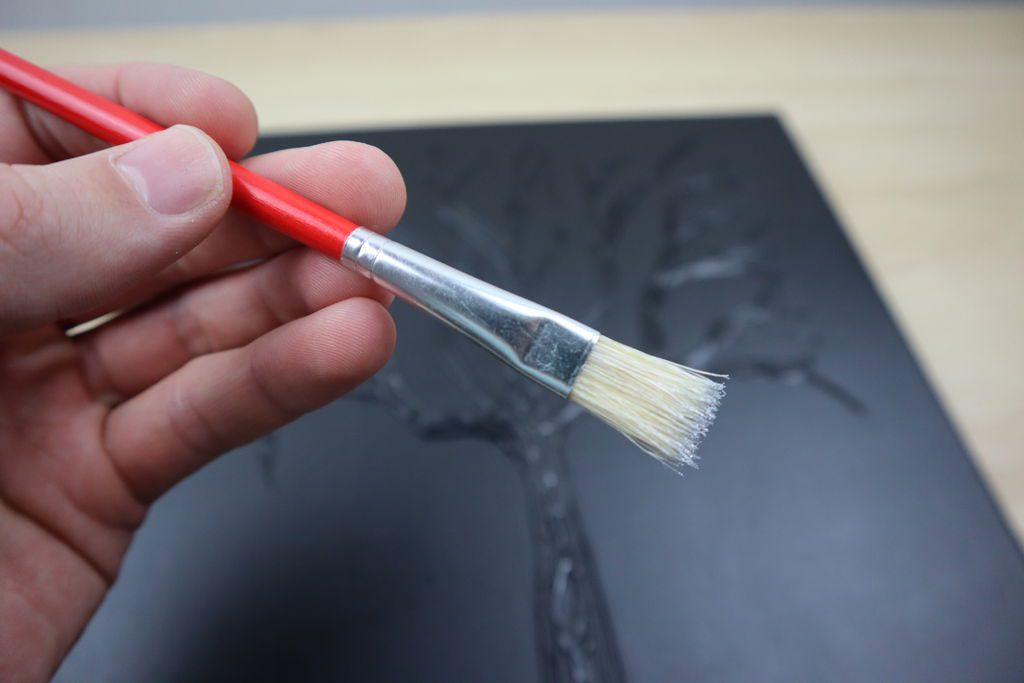
Don’t put a lot of ink onto it, you want the brush to still be relatively dry. Next, brush the ink across the glue stripes to highlight them, use quick and light brush strokes perpendicular to the length of the stripes (90 degrees to the direction of the glue).
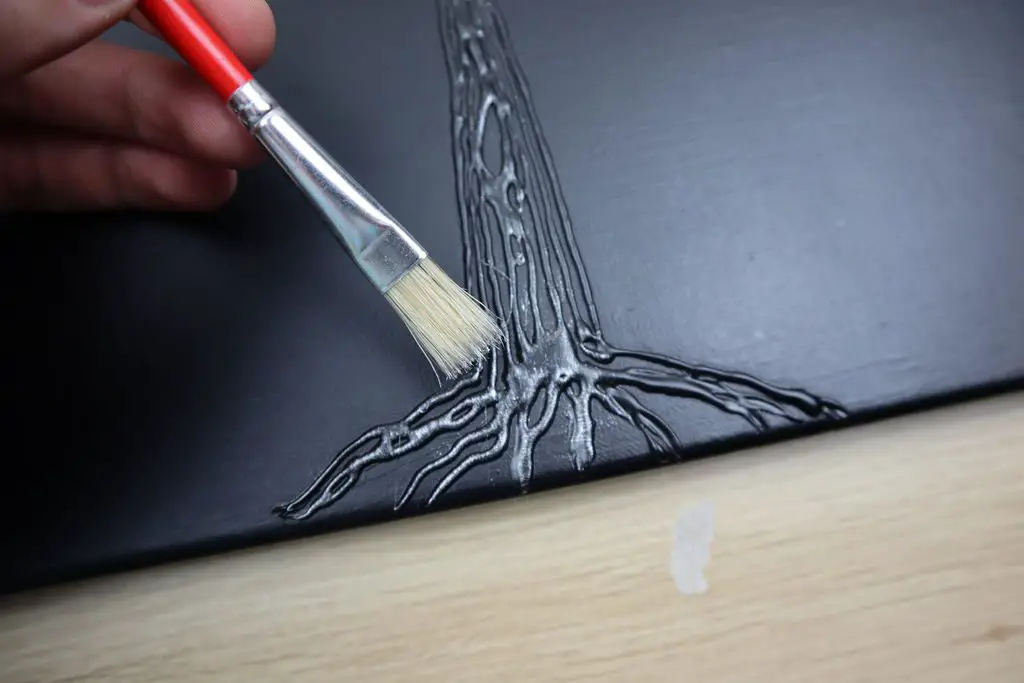
Don’t press down too much and try not to get the ink onto the canvas, you just want to highlight the glue.

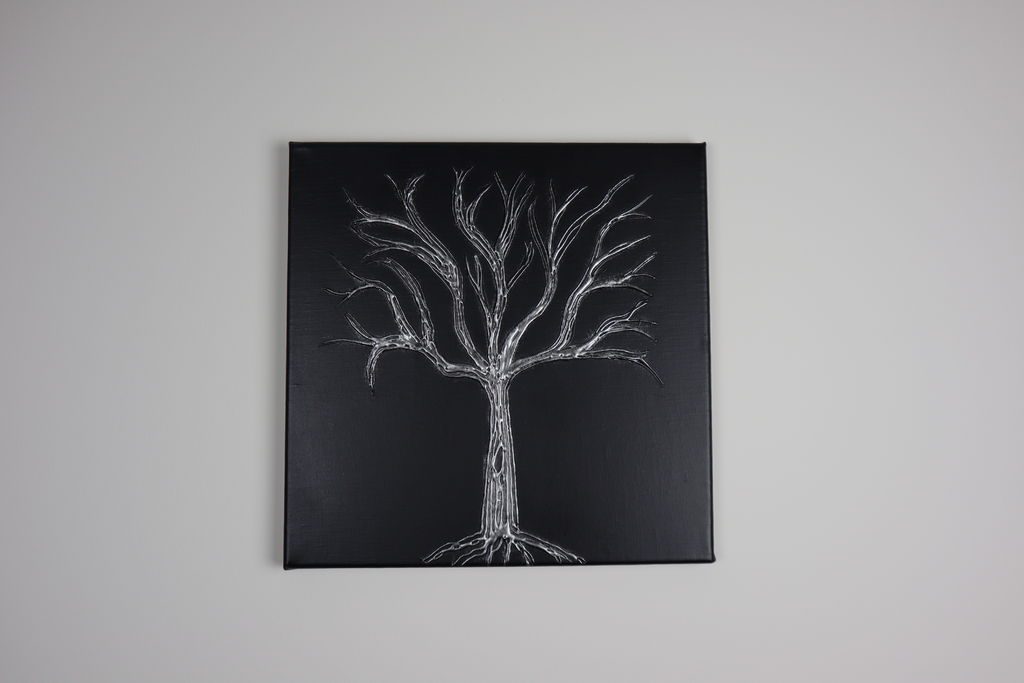
Highlight the trunk, roots, and branches.
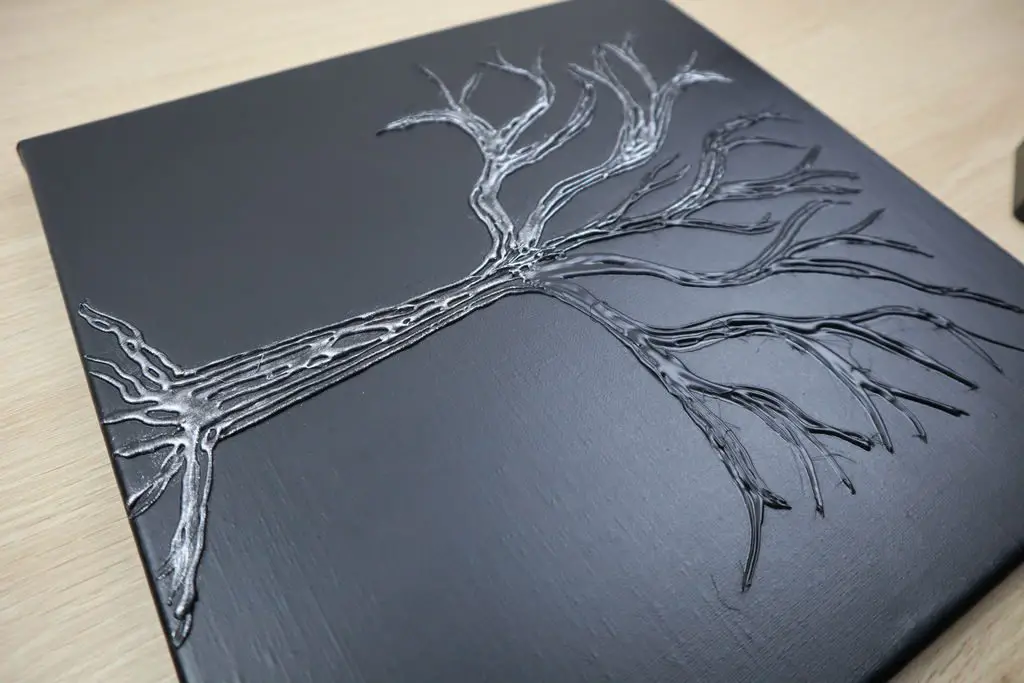
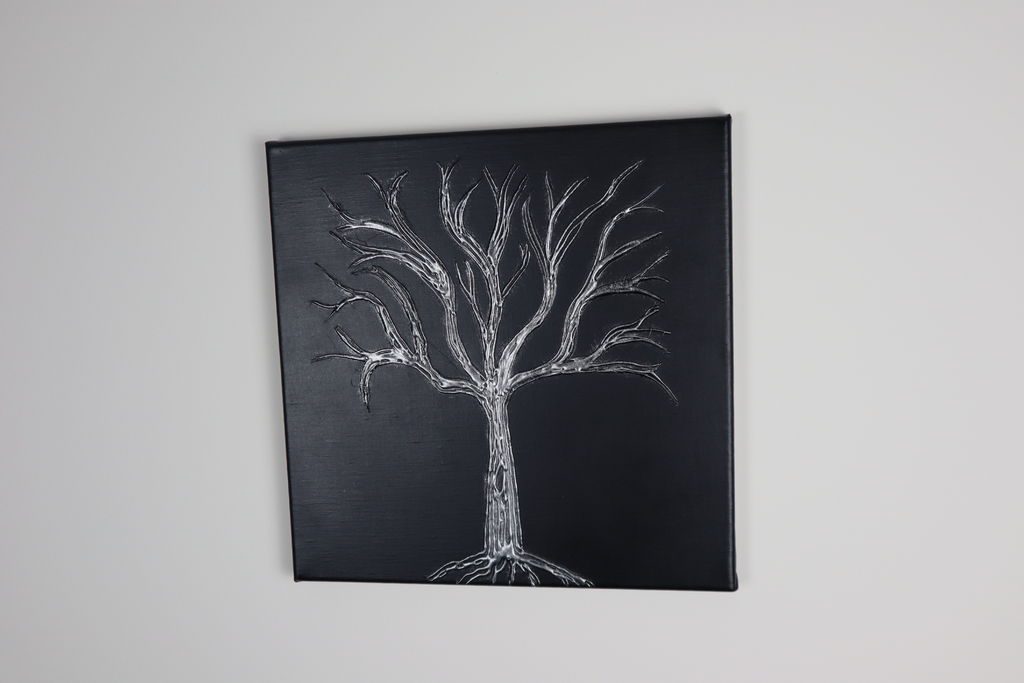
Once the ink is dry, your tree canvas is ready to hang. Your canvas should come with a picture hook on the back or the sides.

Enjoy making your own hot glue tree canvas.
Share This Guide
I am going to give this a try. Thank you for posting the instructions.