If you’ve used a stock k40 laser cutter, then you’ll know that positioning the laser for a cut is a bit of a guessing game. So in this guide, I’ll show you how to add a small red dot laser pointer to the laser cutter head to indicate exactly where the laser is aiming. This way you can accurately position your cuts along the edges of your material without wasting material or starting a cut off the edge.
Here’s a video of the modification, read on for the step by step instructions, and print files.
Make sure that you turn off and unplug your K40 laser cutter before working on it and allow the machine to stand for 10 minutes before working on it. While this addition is made to the low voltage DC side of the supply, there is always a risk in working in the open electrical compartment with the power still on.
What You Need For This Addition
- 5mW Red Dot Laser Pointer – Buy Here
- 7mm Drag Chain – Buy Here
- Latching Metal Push Button – Buy Here
- 22AWG / 1.6mm Electrical Wire
- 2 M3 x 15mm Hex Head Screws & Nuts – Buy Kit Here
- 1 M4 x 25mm Hex Head Screw & Two Nuts – Buy Kit Here
- 2 M4 x 15mm Hex Head Screws & Nuts – Buy Kit Here
How To Install The Red Dot Laser Pointer On Your K40
Mount The Red Dot Laser Pointer
I started out by measuring the head of the laser cutter in order to design a 3D printed bracket to hold the pointer.
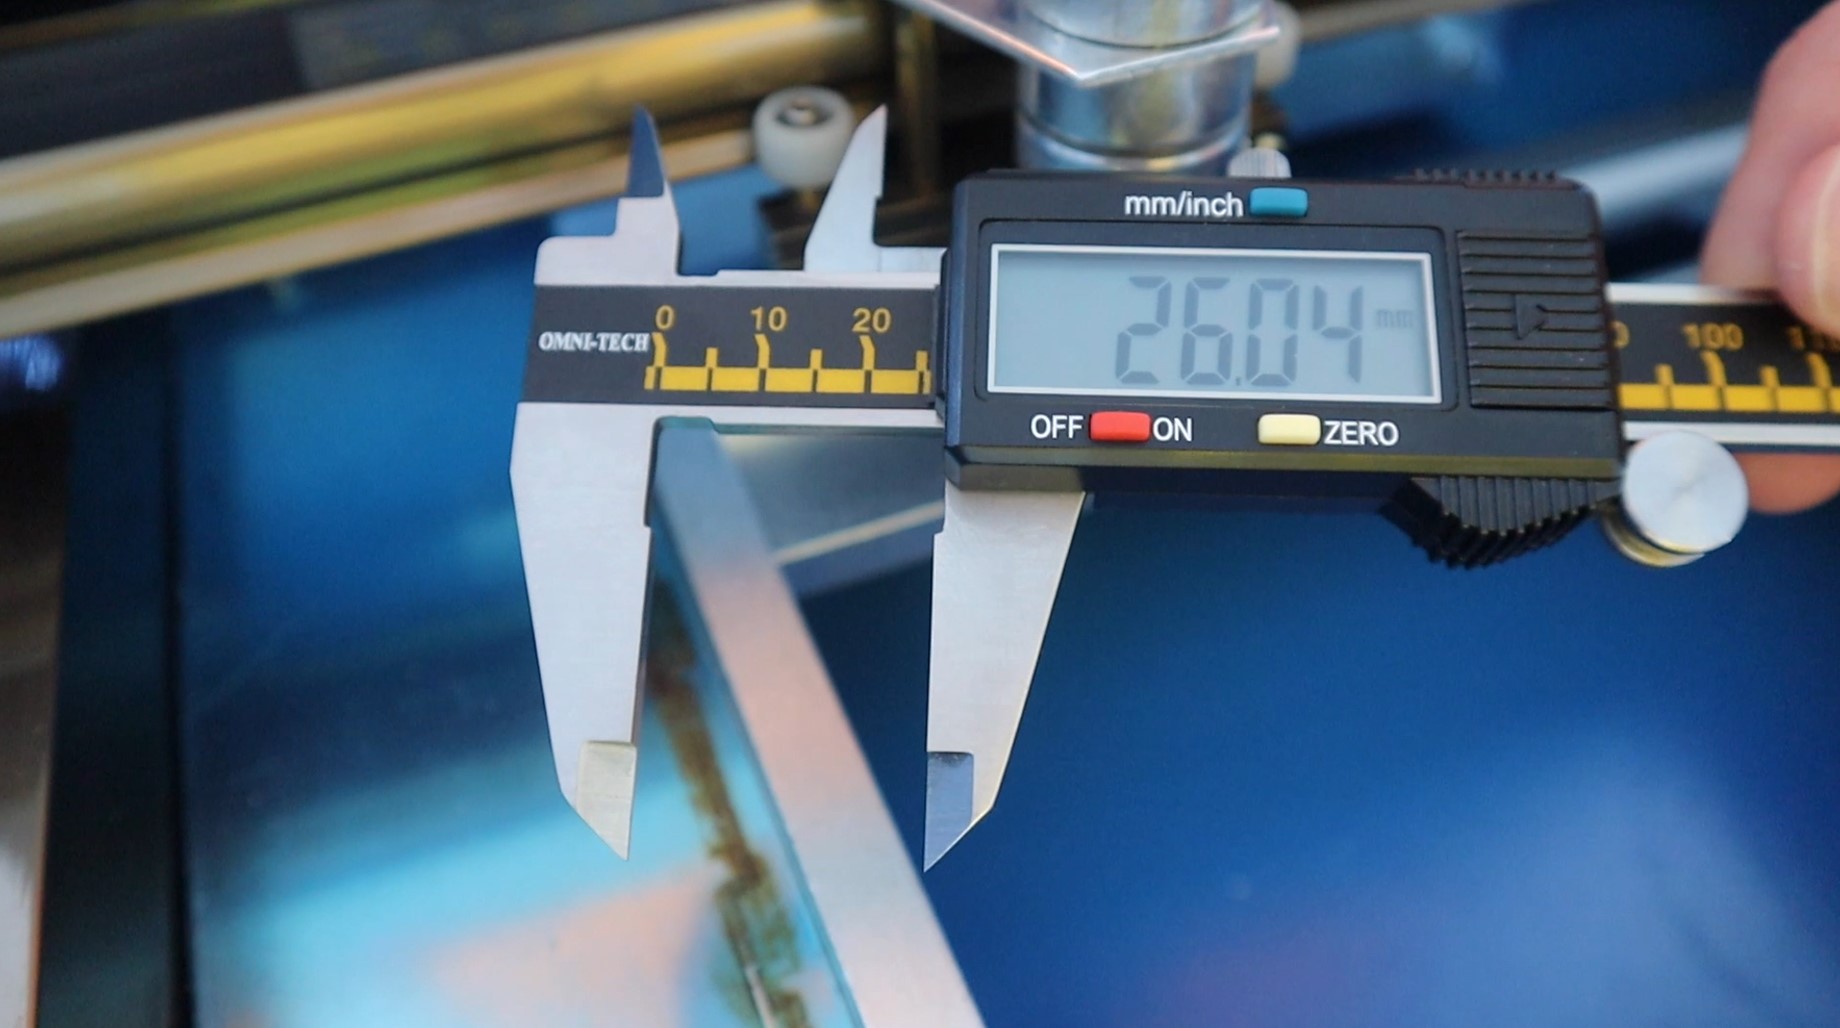
I wanted the red dot laser pointer to be adjustable so that you can make changes to the dot position for different thickness materials and different focal points on a range of lenses.
This is the design that I came up with. I designed a bracket and duct to support a small radial fan at the same time to try out a fan air-assist modification and see how well it works. I’ve included print files for the model with and without the fan bracket, so you can decide which works best for you. Here is the other guide if you’re interested in adding a radial fan air assist system to your K40 as well.
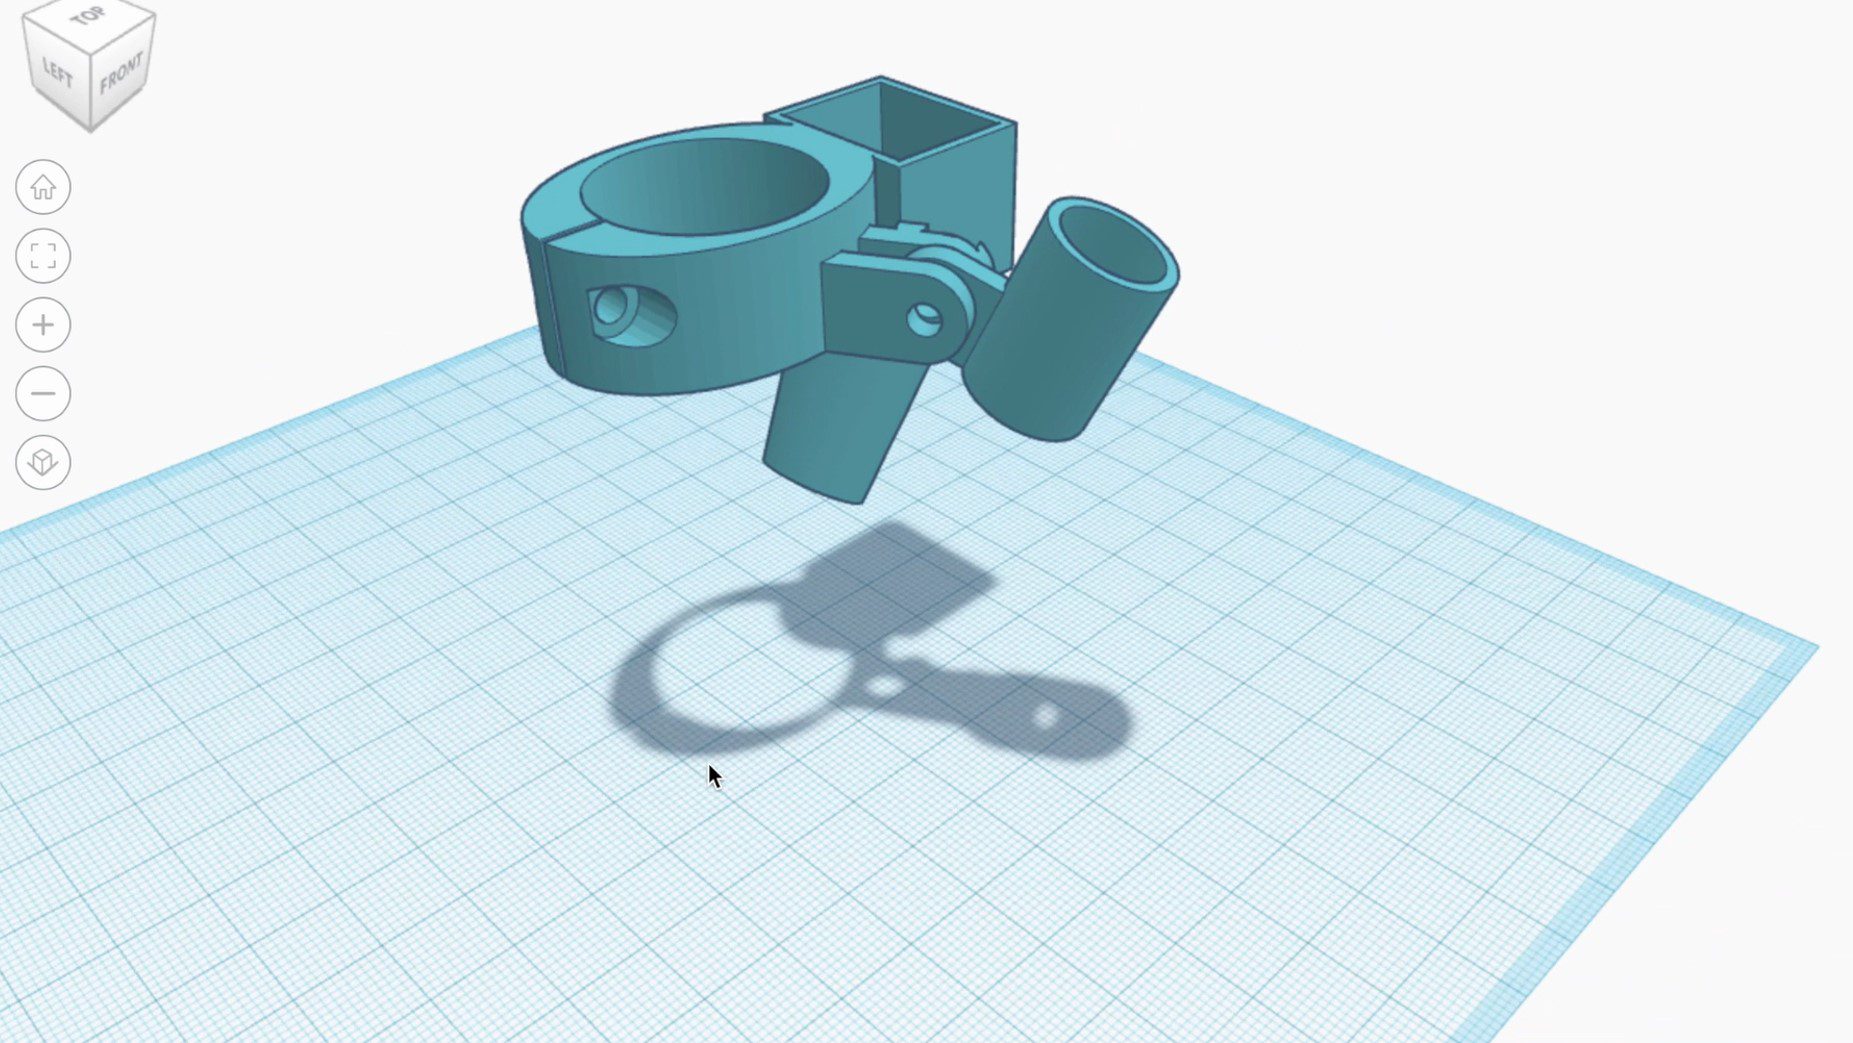
Download 3D Print Files – Fan & Laser Pointer Files
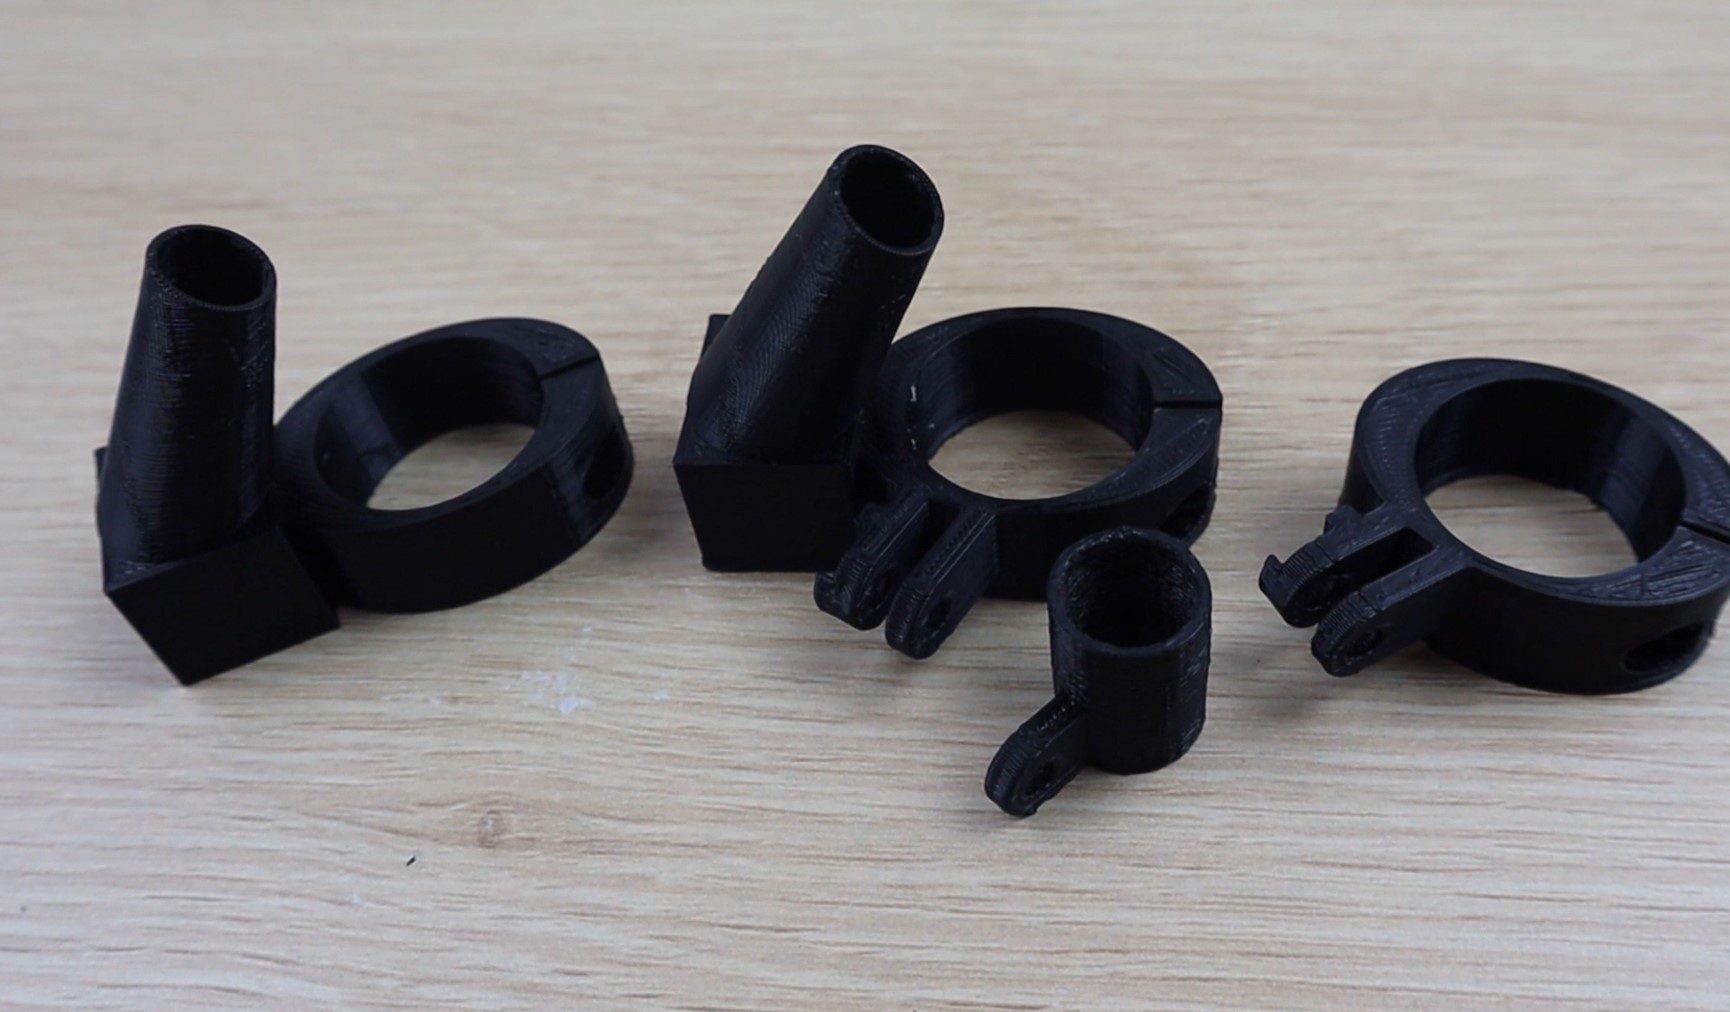
I printed out the bracket using black PLA with a 50% infill.
There are three included models in the download, one for the pointer only, one for the fan assist only and one for the pointer and fan assist.
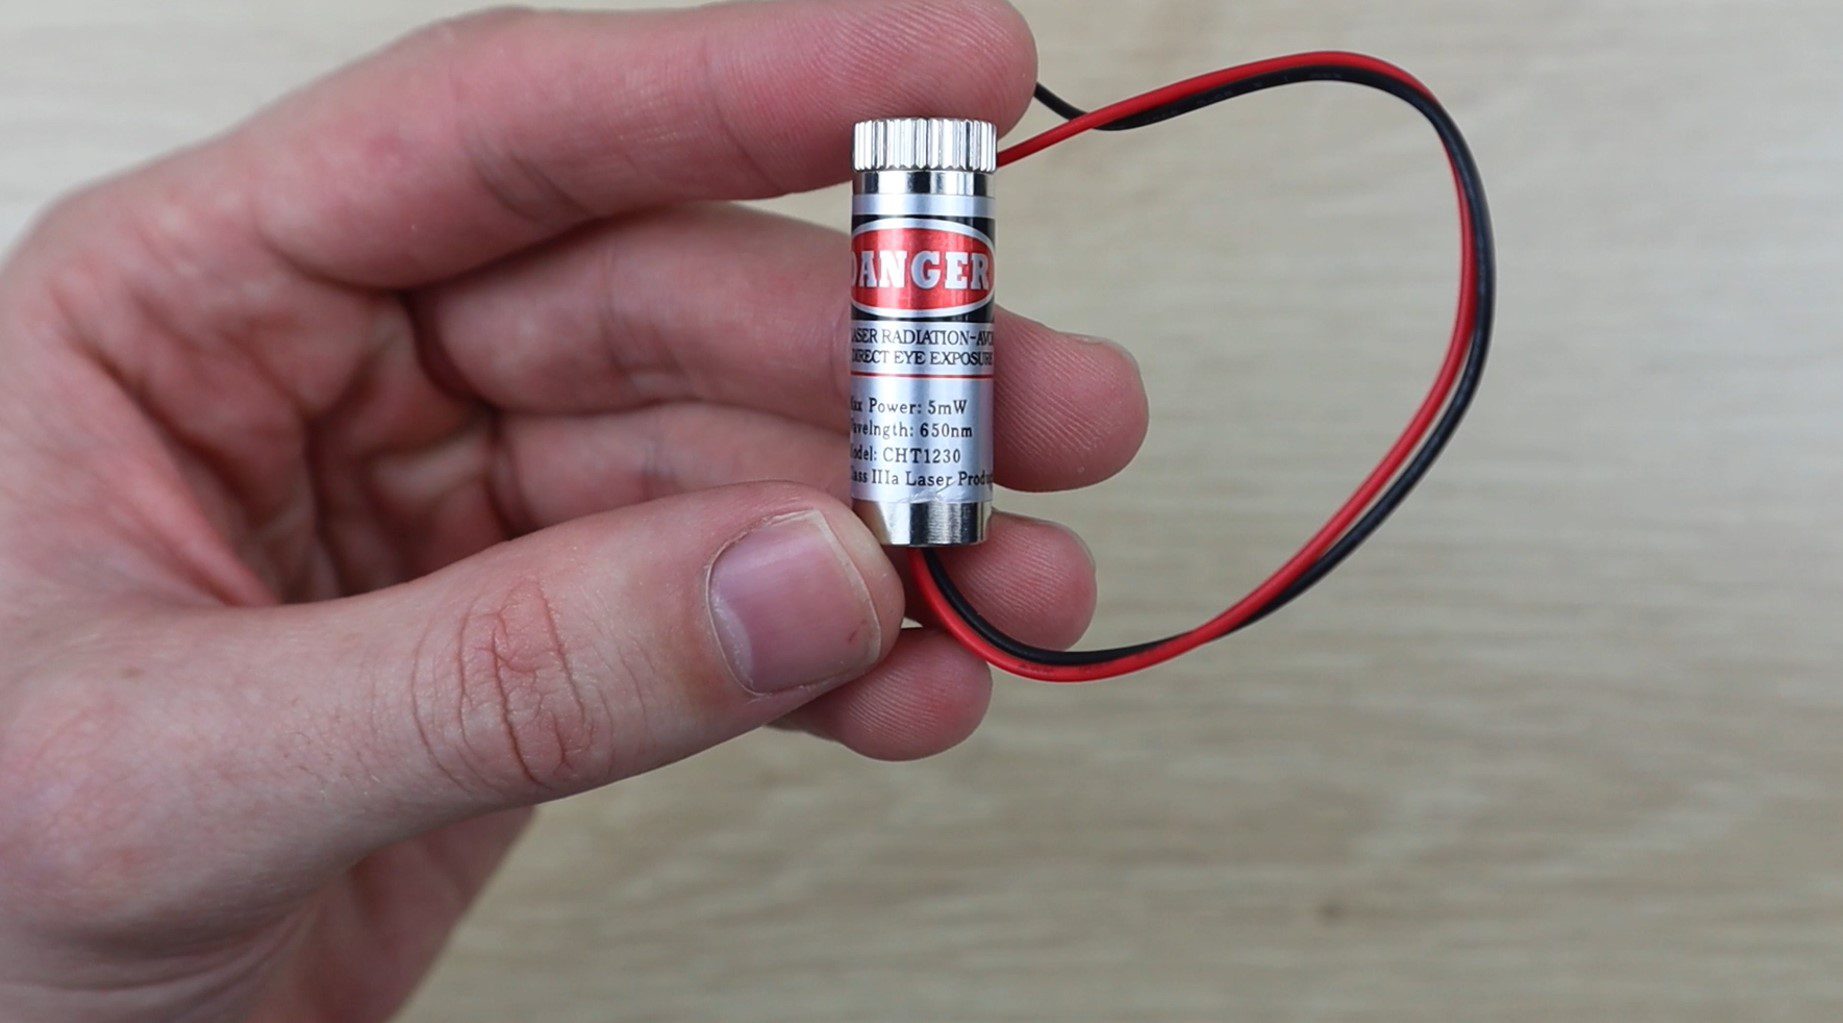
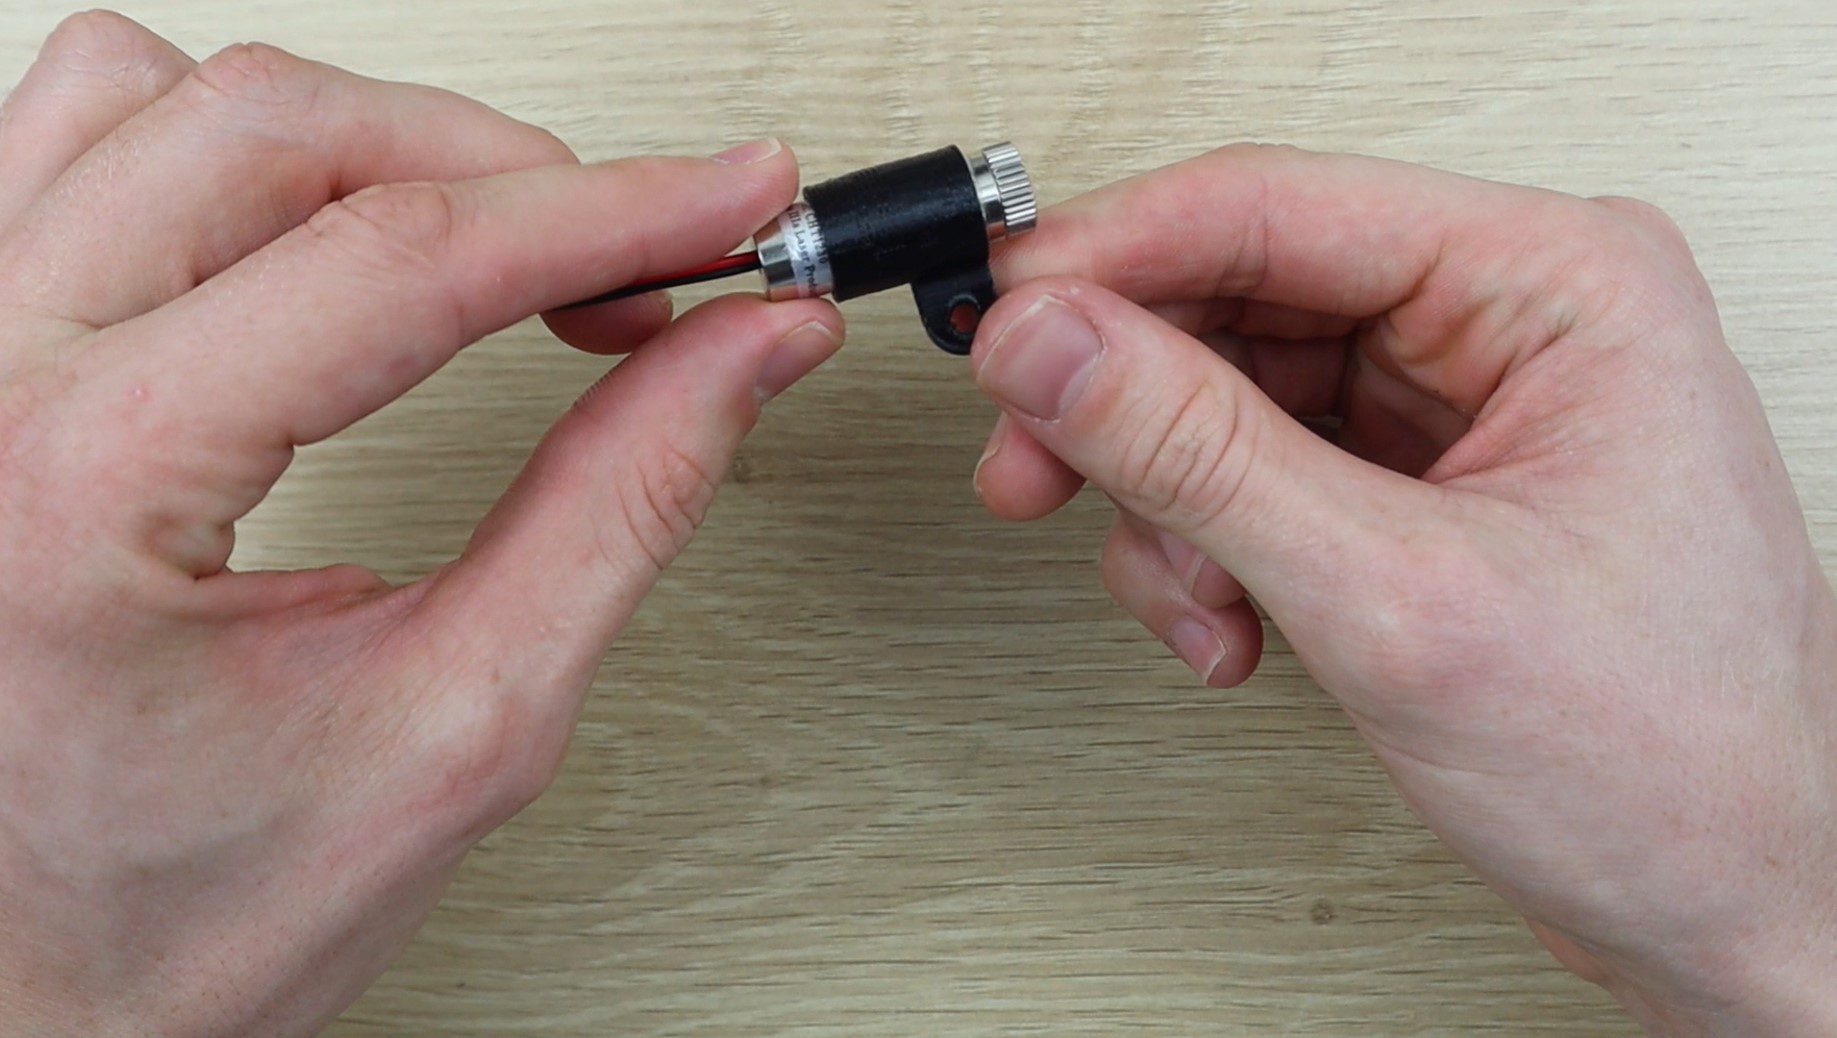
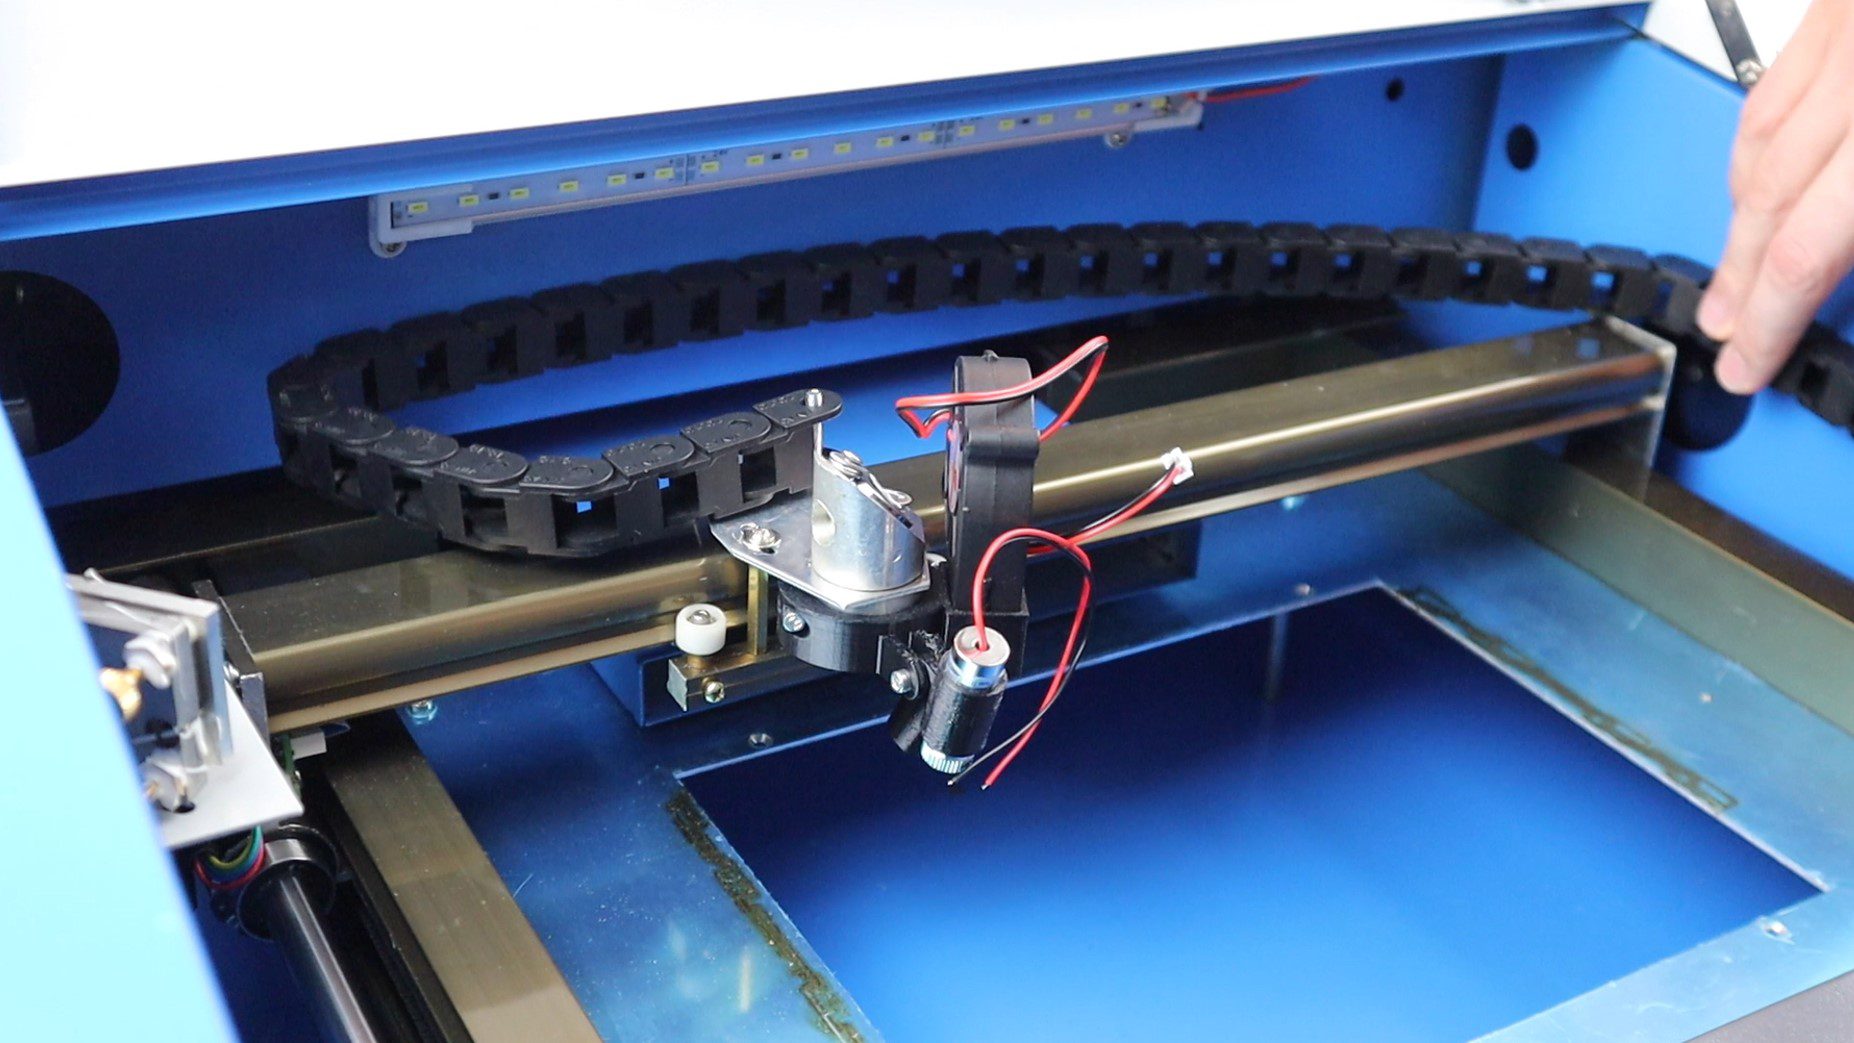
For the red dot pointer, I chose to use one of these focusable 5mW 5V laser pointers which are available from a range of online stores. They’re low power and have an adjustable focus ring on the end to accurately focus the pointer.
Push the laser pointer into the laser holder, it should be a snug fit.
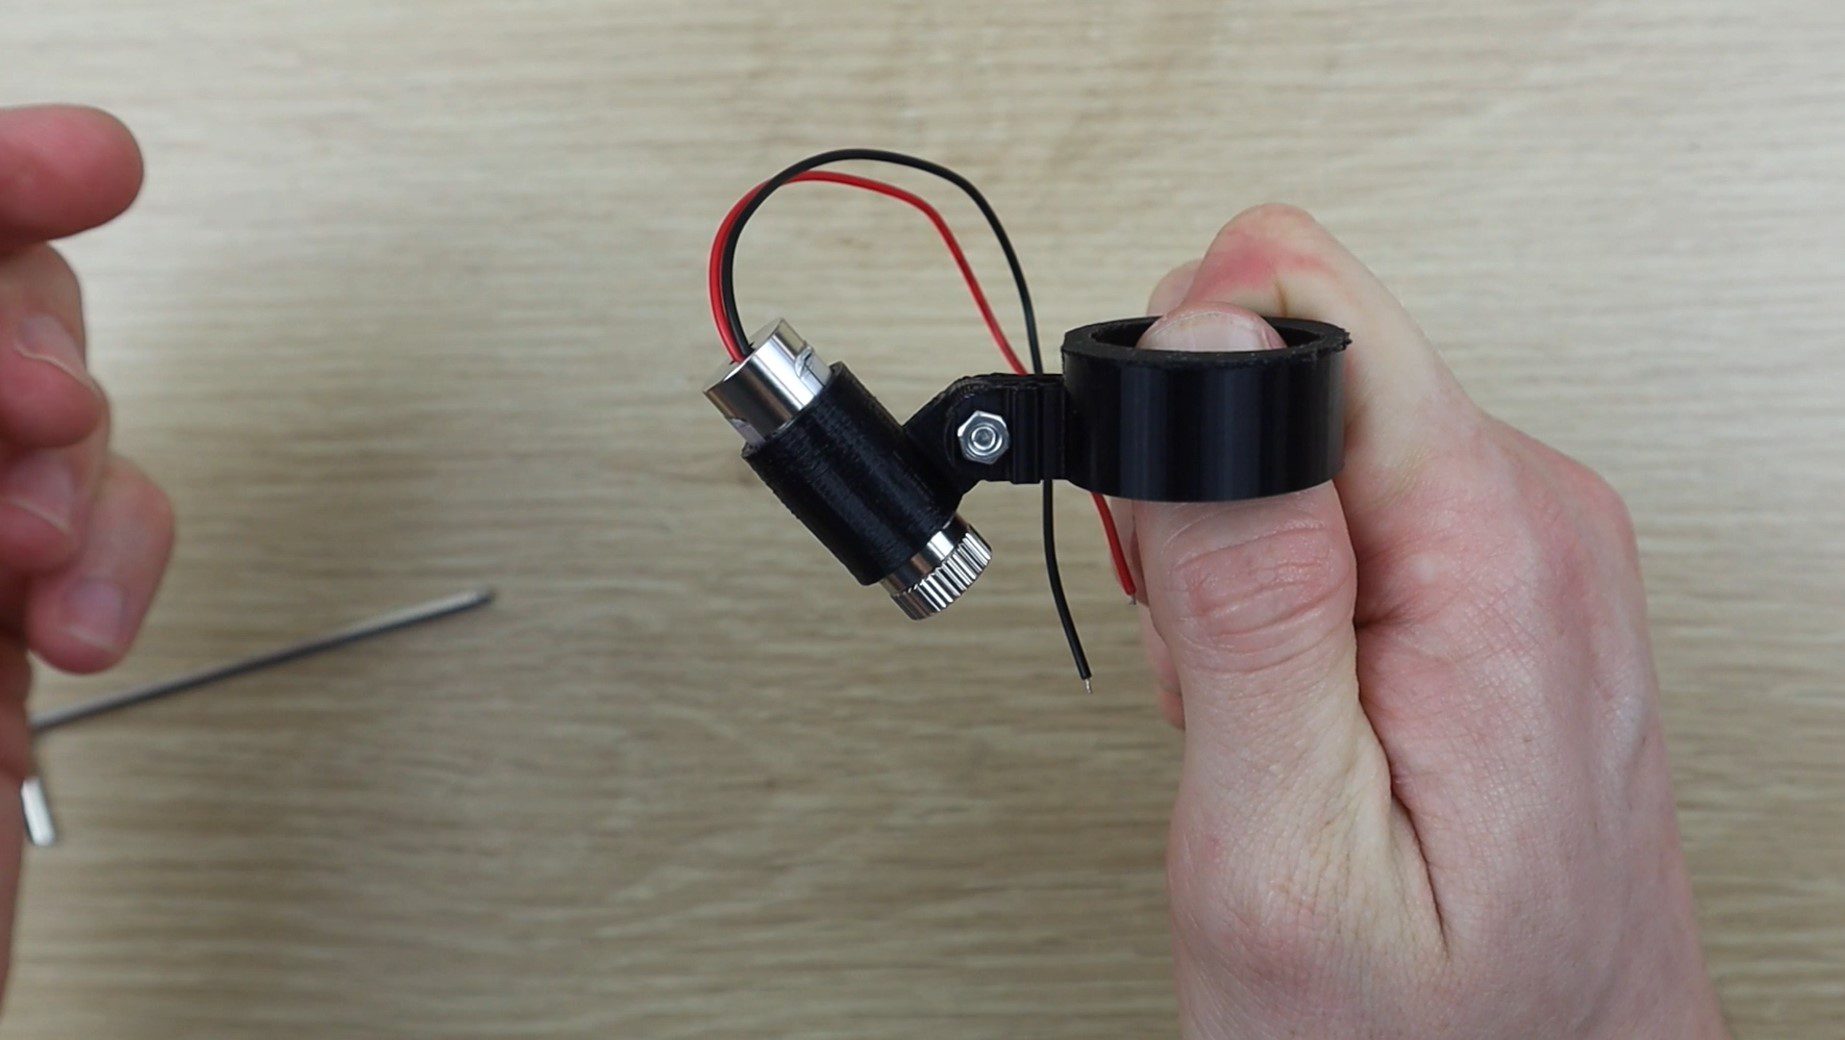
Now screw the laser holder onto the main bracket using an M3 x 15 hex head screw.
This screw allows you to adjust the angle of the pointer in order to line it up with the laser at different heights and focal points.
Slide the bracket onto the bottom of your head of your laser and then secure it with another M3 x 15 hex head screw.
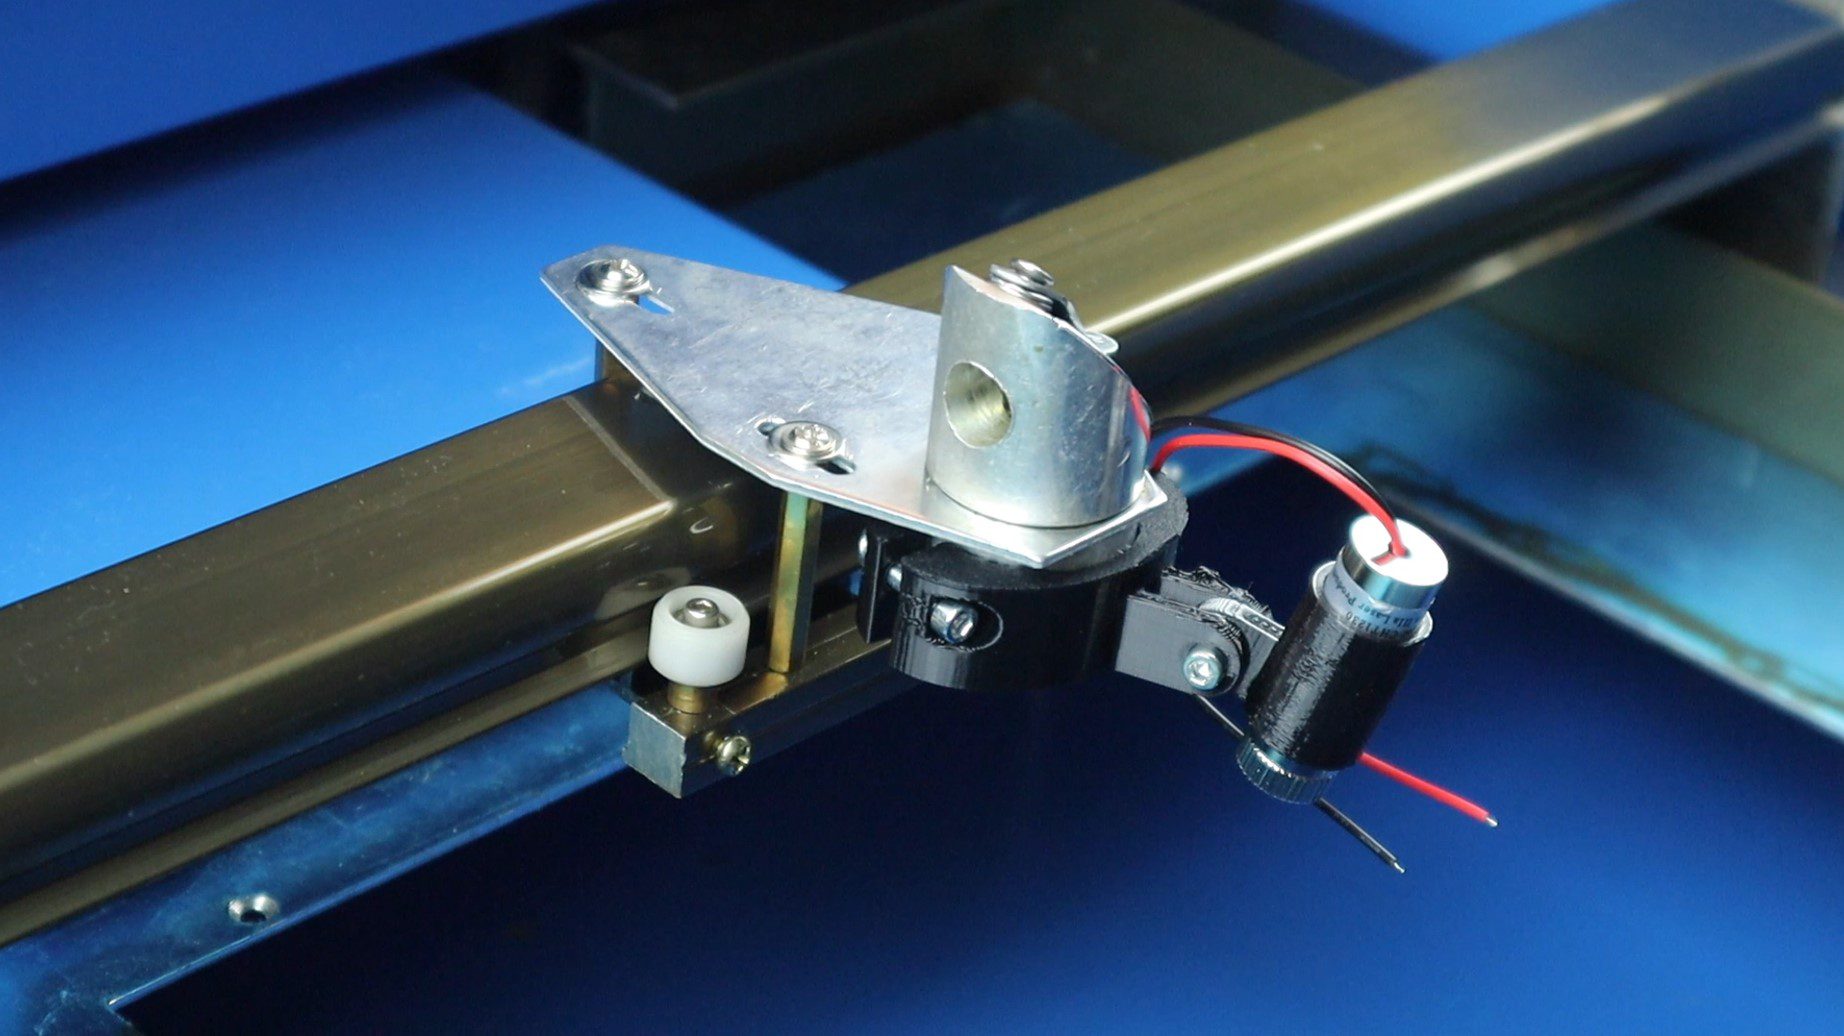
Now that the pointer is in place, we need to add the power supply and a pushbutton to turn it on. I’m going to be doing this next step in conjunction with the fan assist addition, but the method is exactly the same for either or both done together.
Supply Power To The Pointer
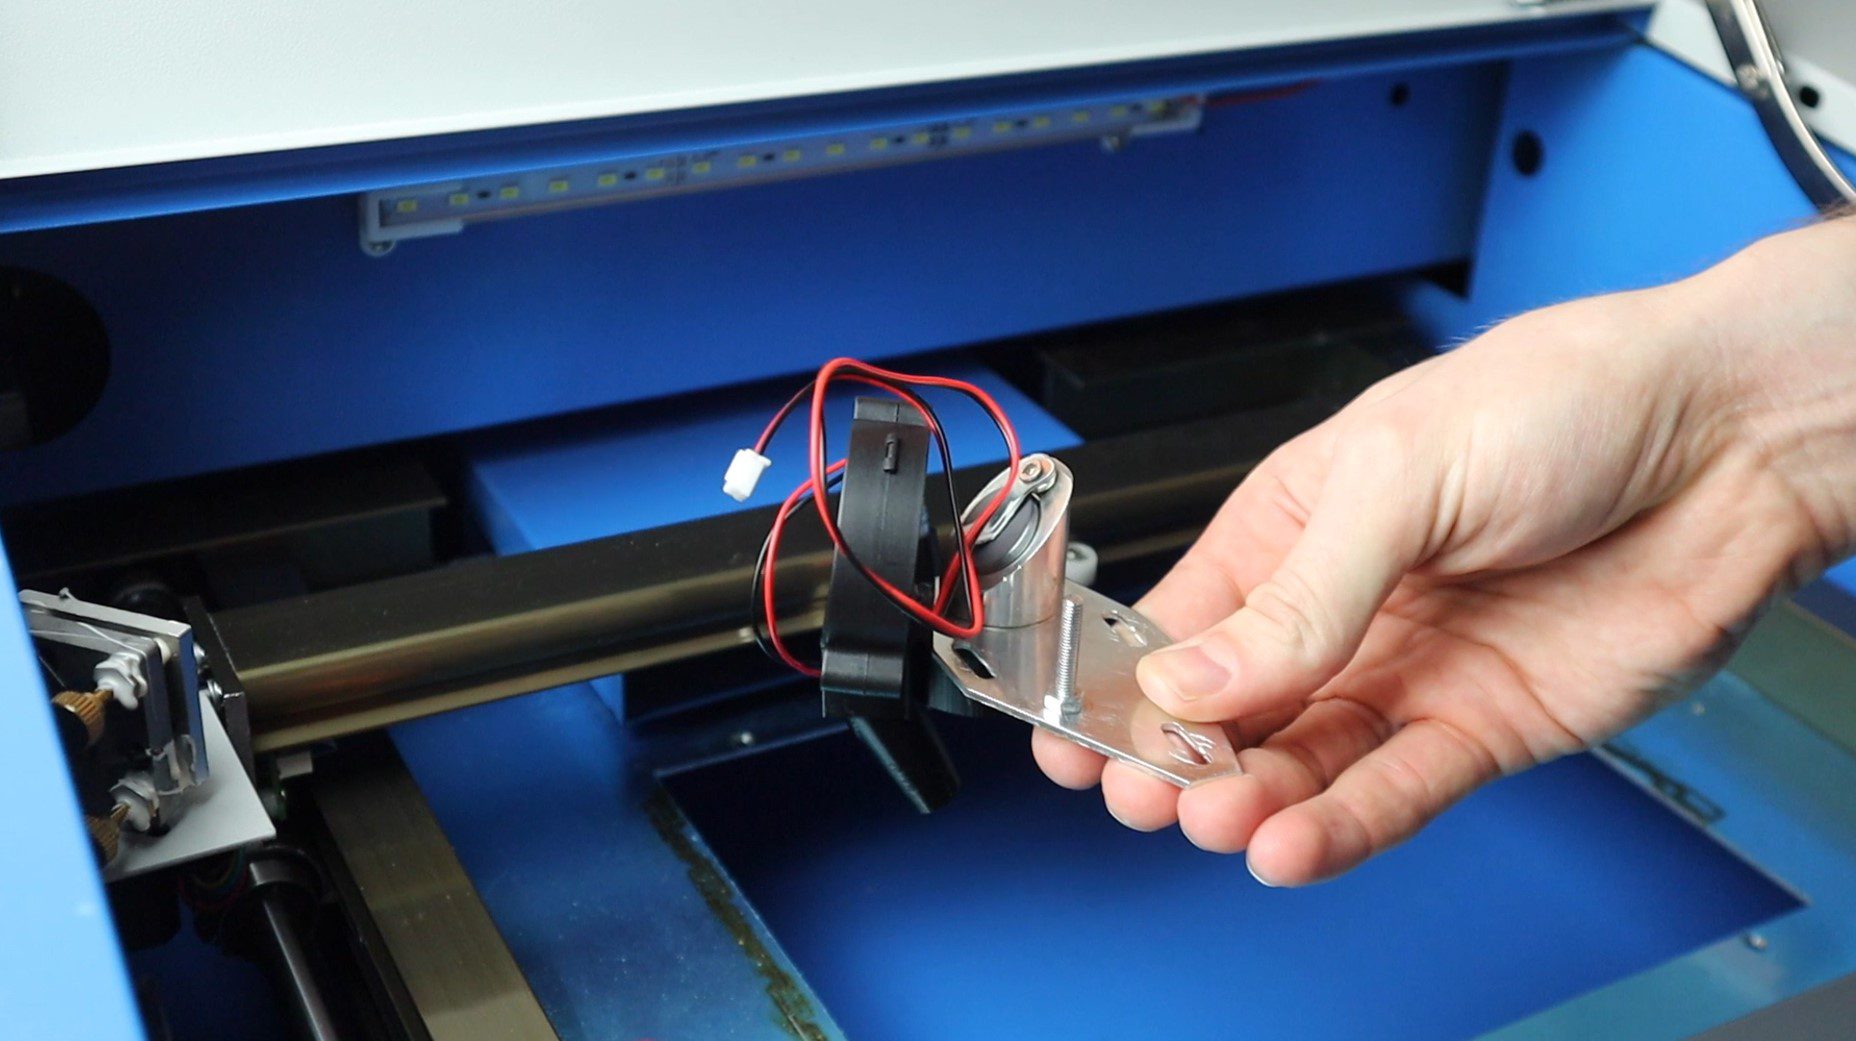
You’ll need to add a drag chain to support the power cables to the head of the laser so that they don’t get caught up when the laser is moving. The one end of the drag chain gets connected to the head of the laser and the other onto the sidewall of the machine.
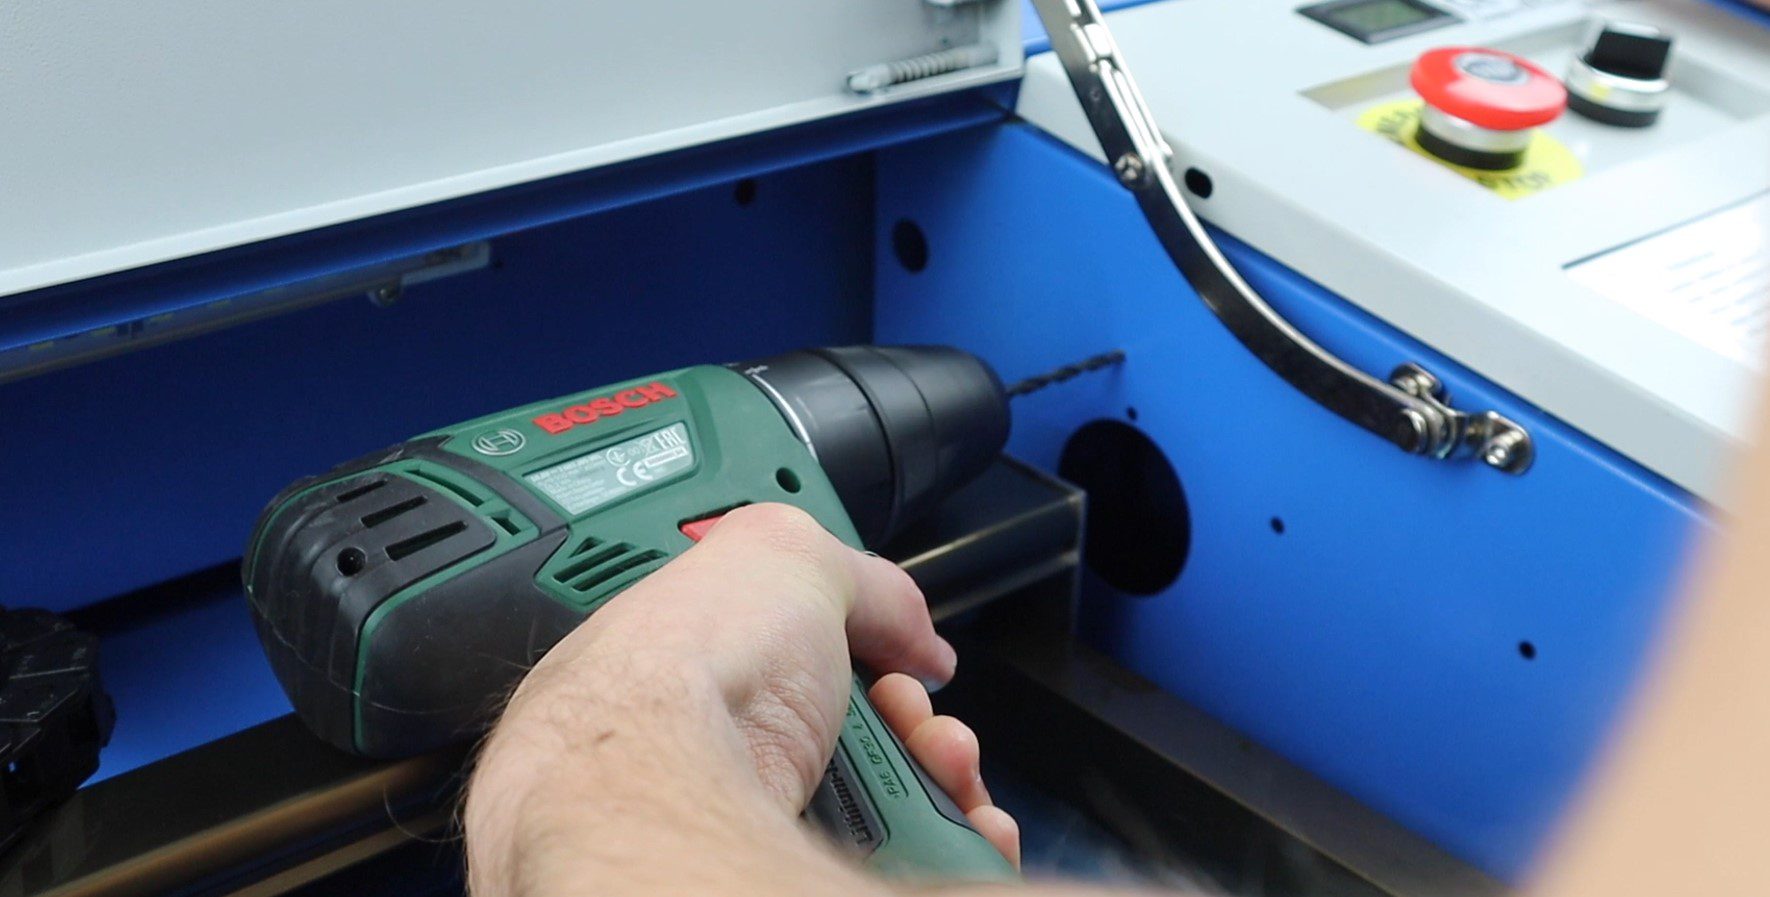
First, we’ll need to add an anchor screw onto the laser cutter head. I took the head off for this step as its easier to work with. I drilled a 4mm hole on one side of the head and add an M4 x 25mm screw which was long enough to fit through the drag chain and then replaced the head.
Place the end of the drag chain onto the laser cutter head and then measure out the length that you need. You want it to be long enough to reach all four corners of your bed but not too long that it gets in the way.
Remove the spare links so that it’s the correct length and then add the end support.
Mark off the two holes for the end supports so that you can drill the required holes.
I used a 4mm drill bit to drill two holes for some M4 x 15mm screws which I then secured through the sidewall.
You might also want to add a thin screw or rod onto the head to stop the drag chain from being able to move into the path of the laser. This will interrupt the laser’s path, causing your cut to fail and potentially damage the drag chain or cause it to catch on fire.

Next, I added some pushbutton to the control panel. I added four buttons, one for the pointer and one for the fan assist and then another two which I plan on using for a height-adjustable print bed in the future. I wasn’t too worried about keeping them neat as I’m planning on replacing the front panel in the near future as the LCD display is not very useful and the more basic ammeter panel is actually a better and more accurate option.
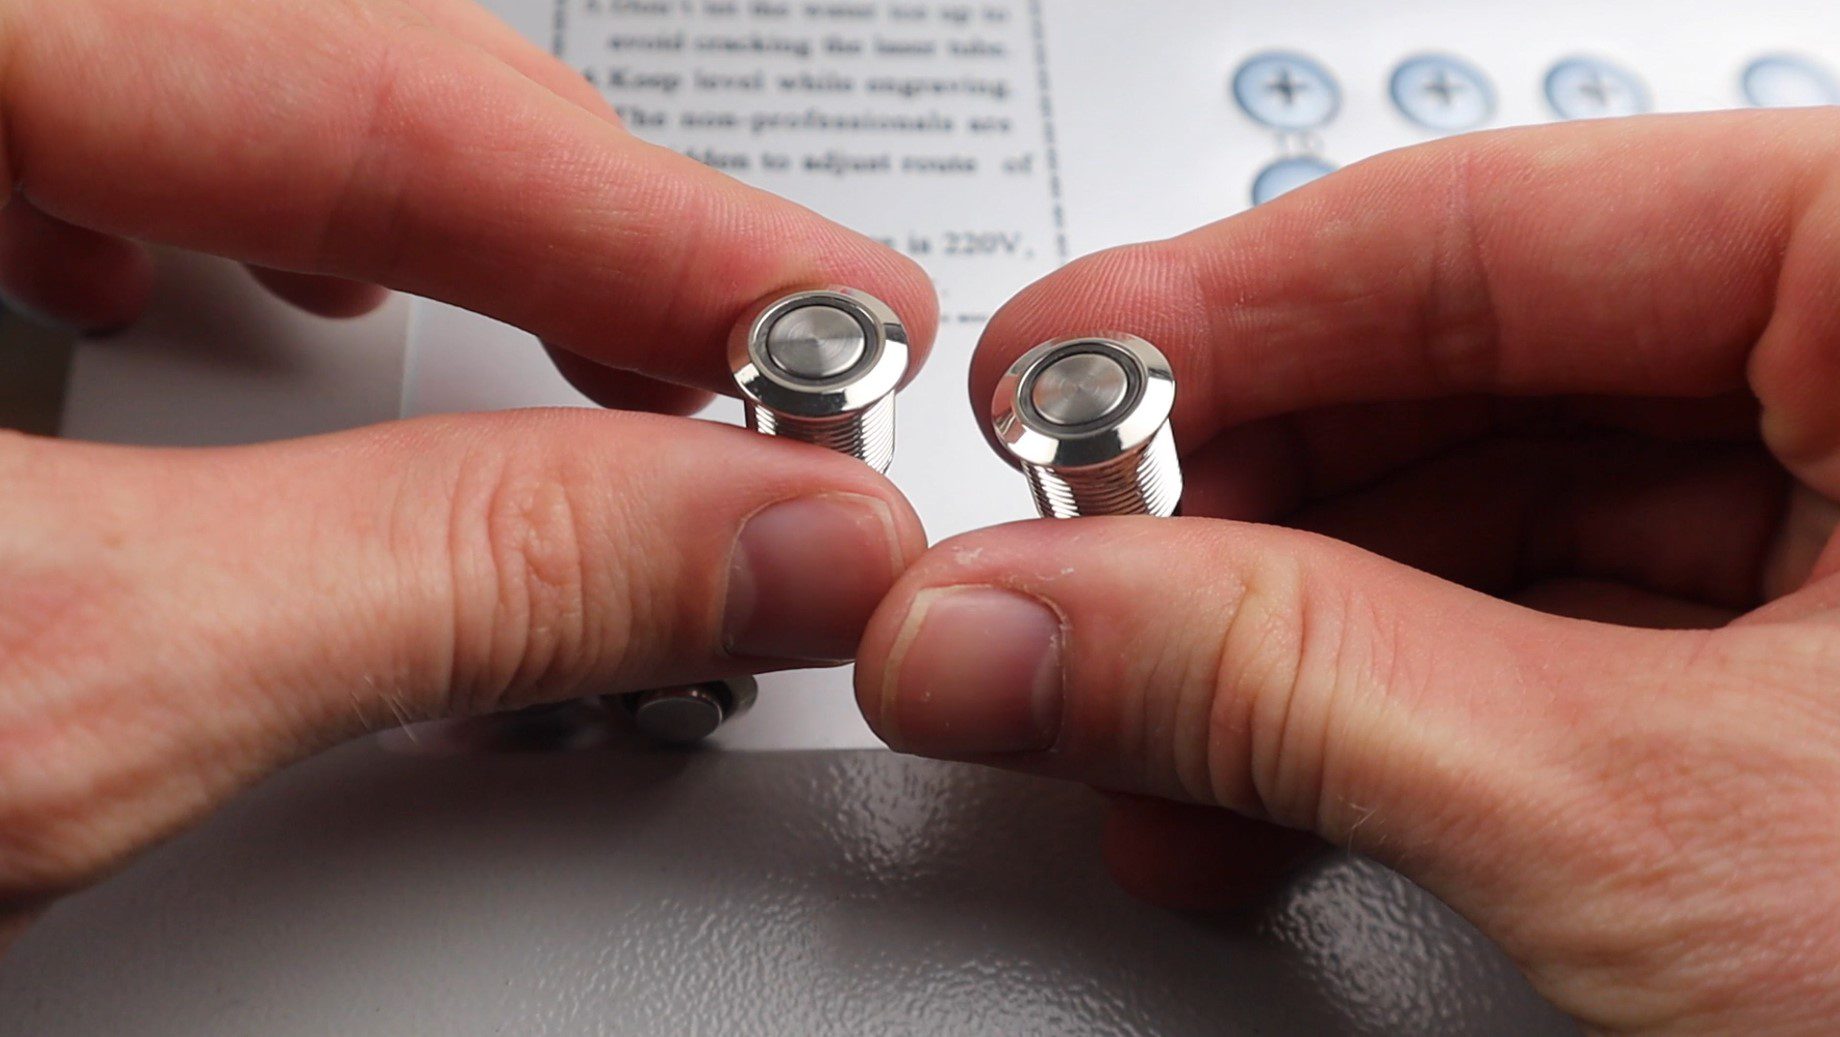
I removed the control panel to drill the holes and install the pushbuttons.
I then got to work on the wiring. I needed three wires to the head, one for 24V for the fan, one for 5V for the pointer, and one common/ground. If you’re not using the fan or not using then pointer then you’ll only need two.
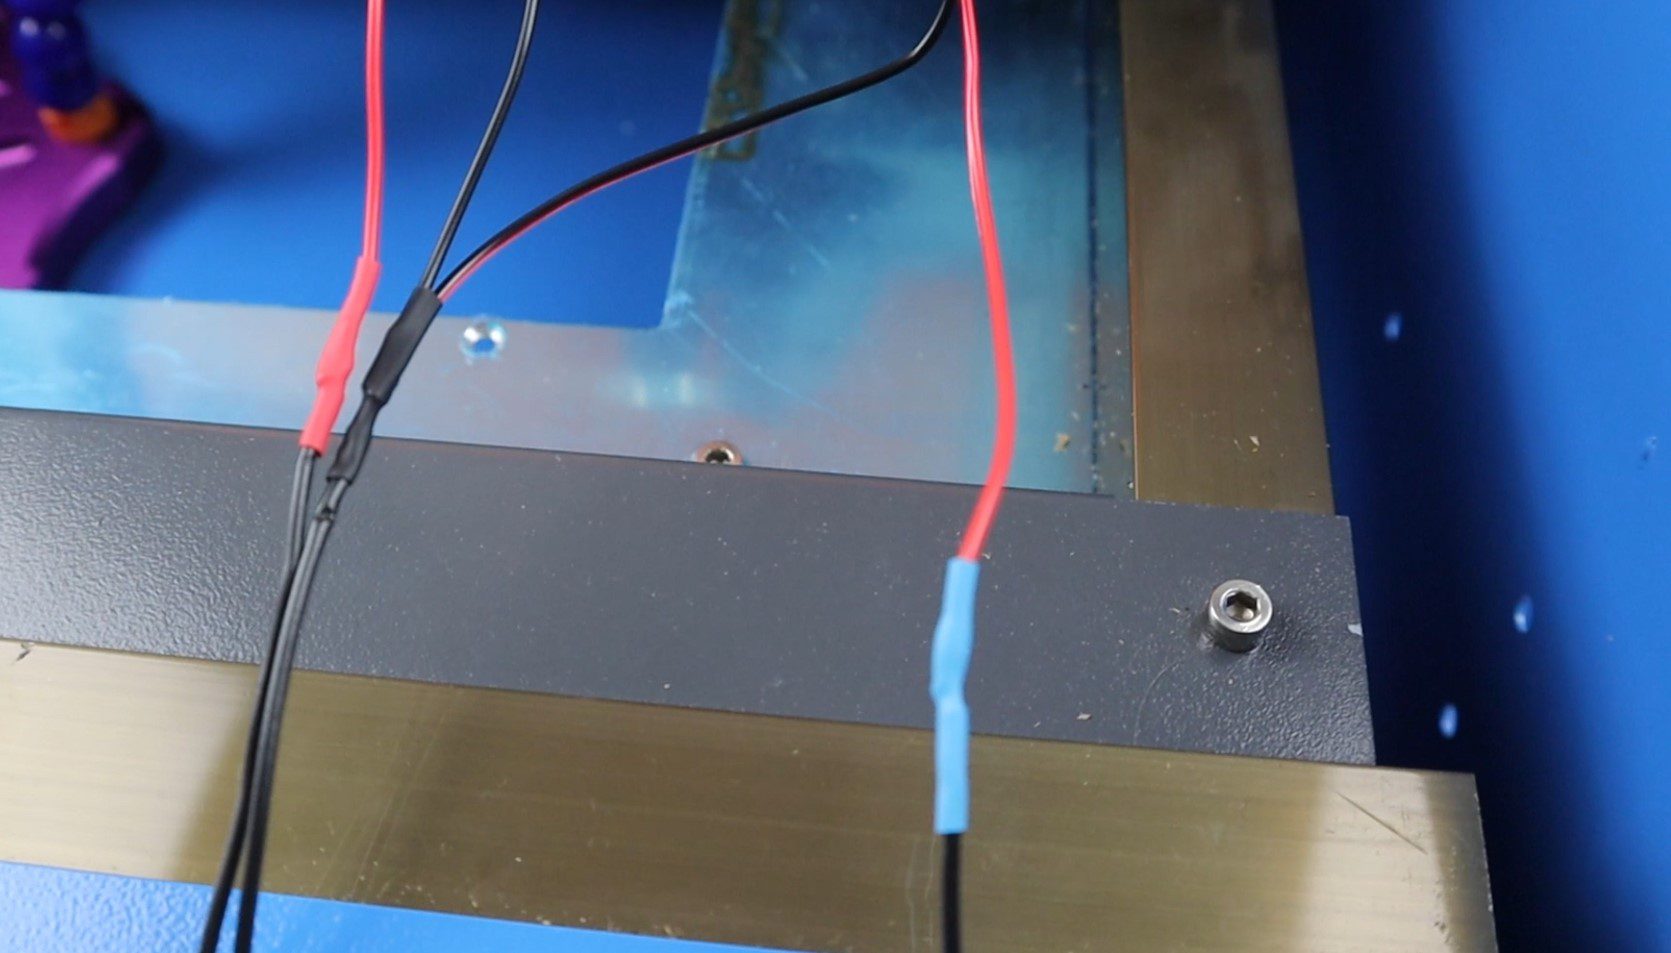
Feed then wires through the side of your machine and into the electronics compartment. I ran them in the existing cable bundles so that the wiring is kept neat. I ran the wires up to the pushbuttons and then down to the power supply for power.

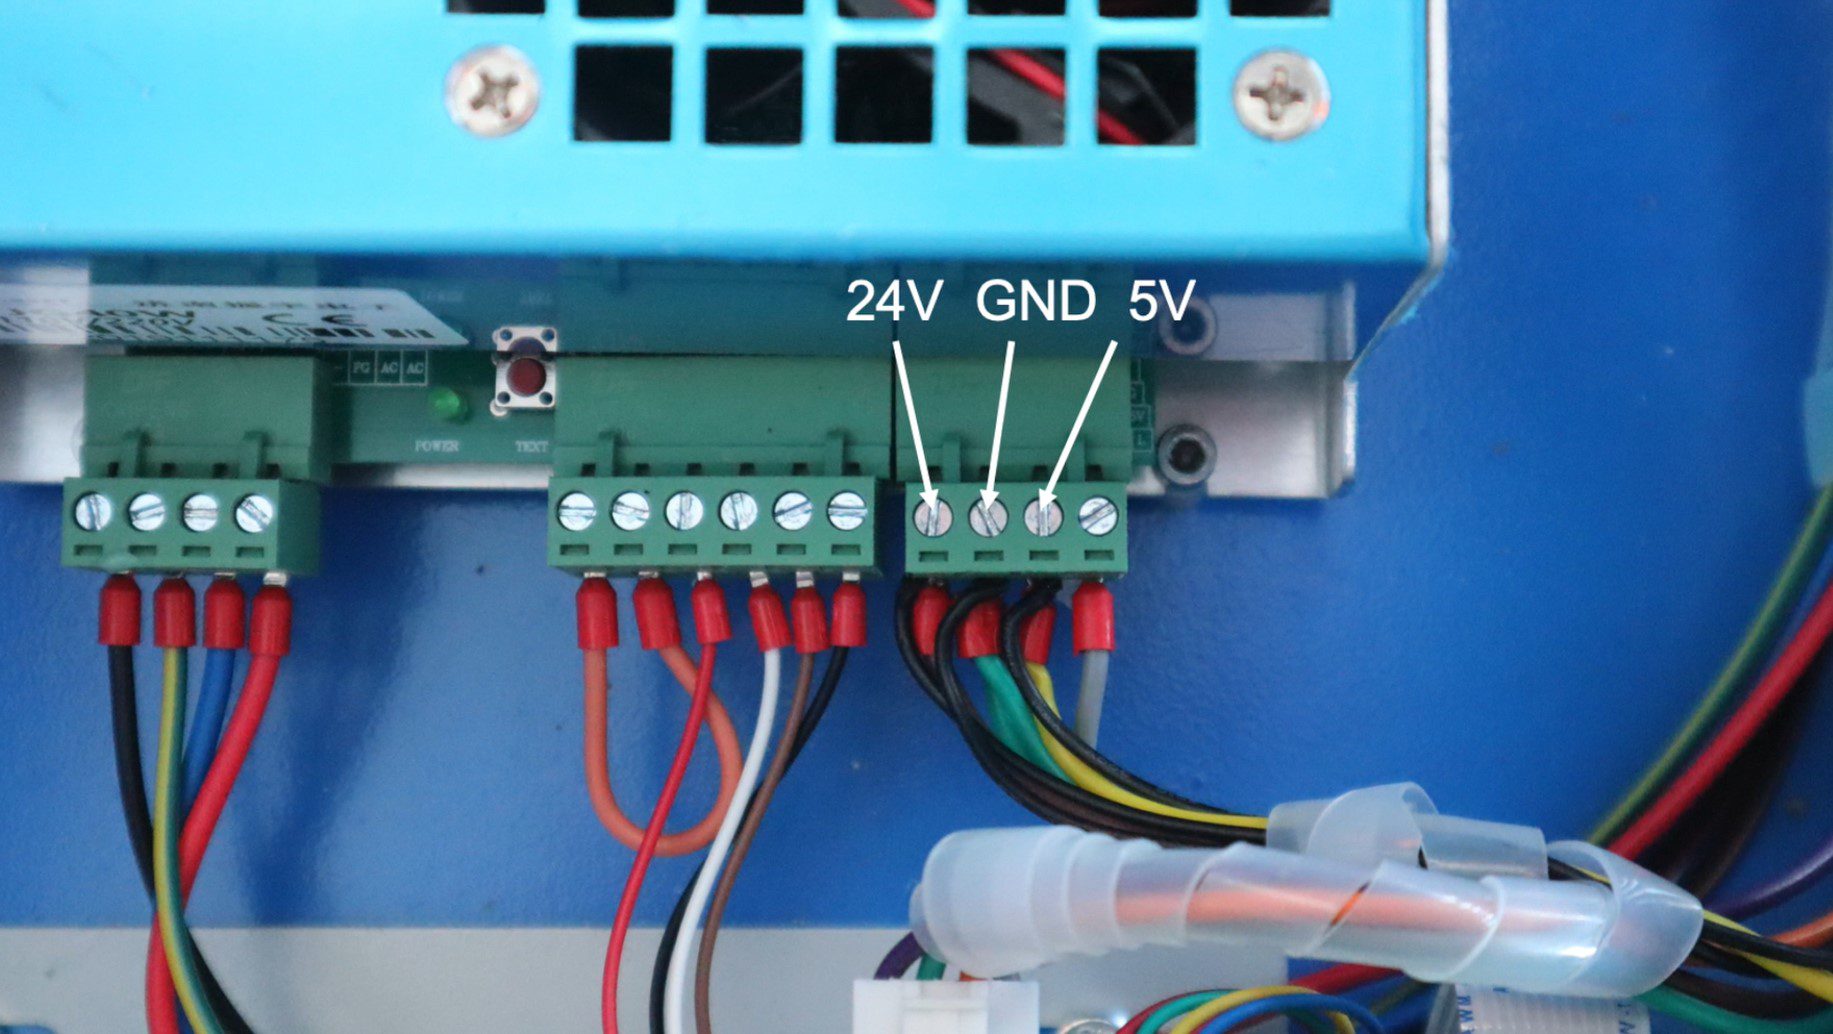
You’ll need to hook your wires up to these three terminals on the power supply, depending on what you’re supplying. Keep in mind that this power supply is not really designed with much extra capacity, so don’t add anything which will draw a lot of power or you may burn it out.
Once all of the wiring is done, check the connections and then turn it on to try it out.
Align The Pointer With Your Laser
Put a piece of wood, cardboard or acrylic into the cutting area.
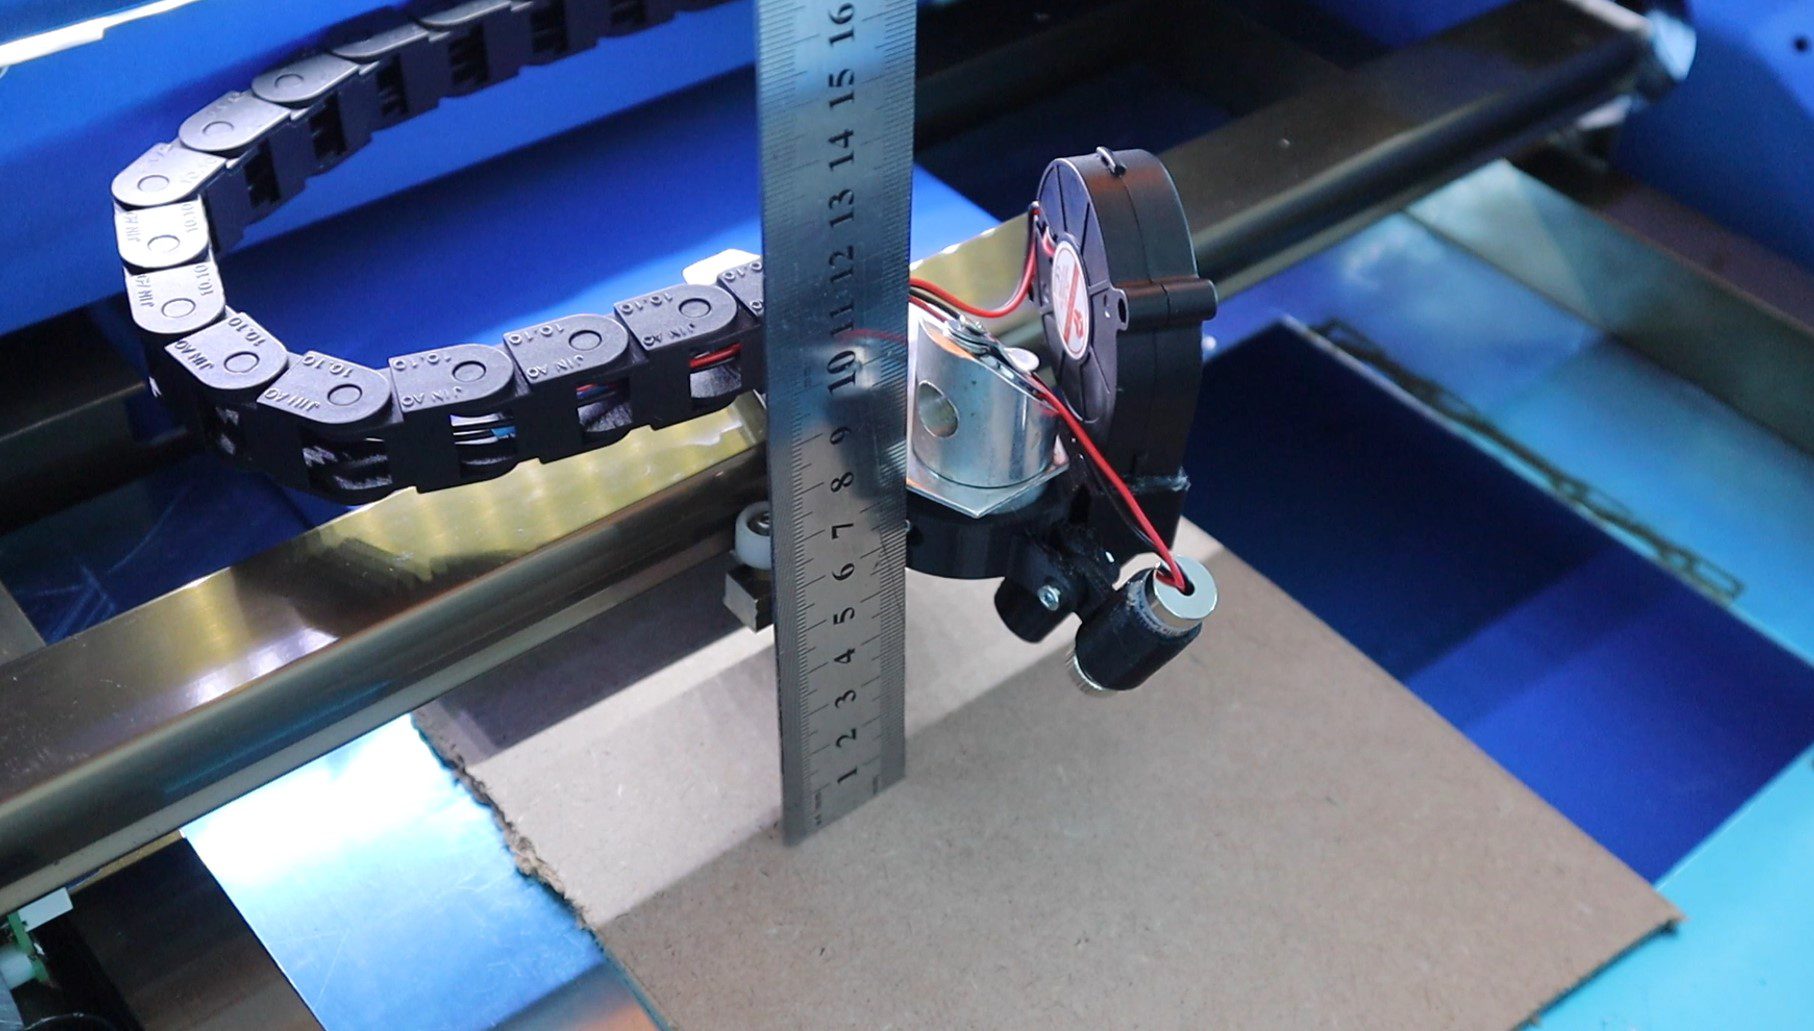
Make sure that the piece is at the correct focal point for your lens. Most stock k40s come with a 50.8mm focal point lens. This means that your workpiece should be 50.8mm from the bottom side of the lens for best engraving results.
Now turn the pointer on using your pushbutton and adjust the focus ring until a small focused dot is made.
Briefly turn your laser on using a low power setting (15% / 5mA) in order to make a mark to adjust the pointer onto.
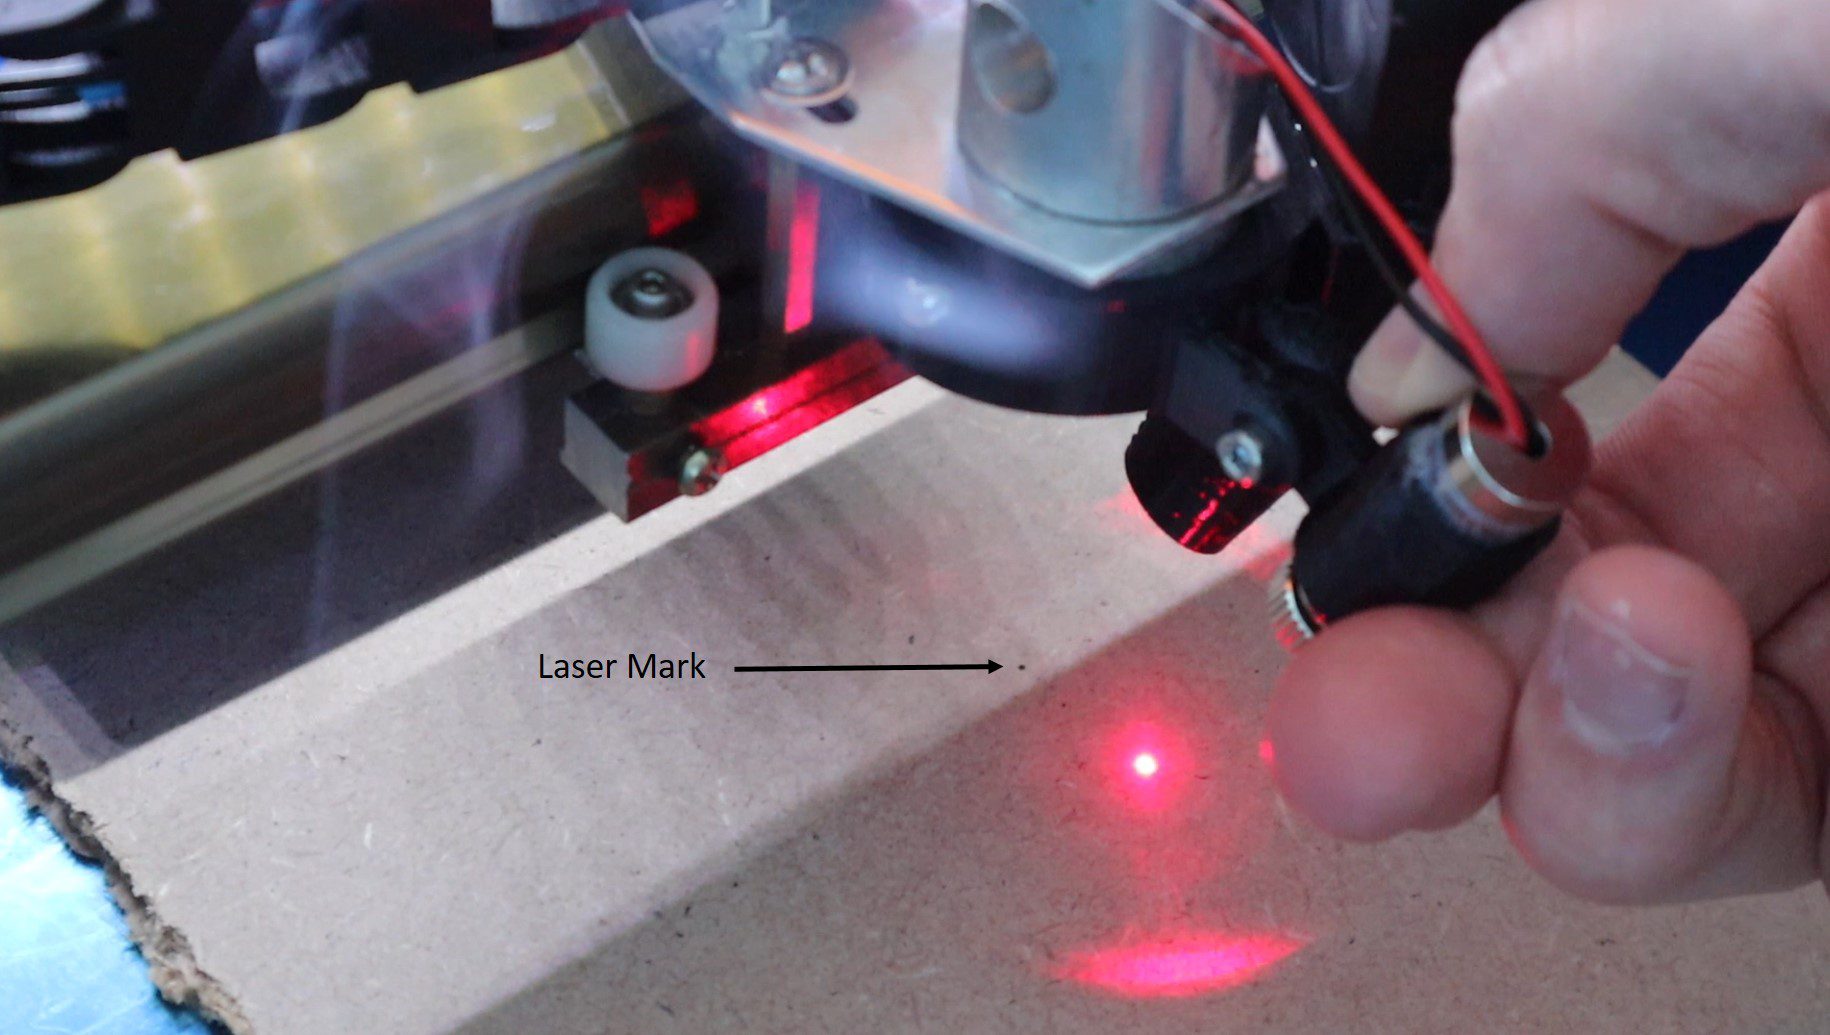
Now tilt the pointer so that it is pointing at the mark and then tighten the screw to lock it into position
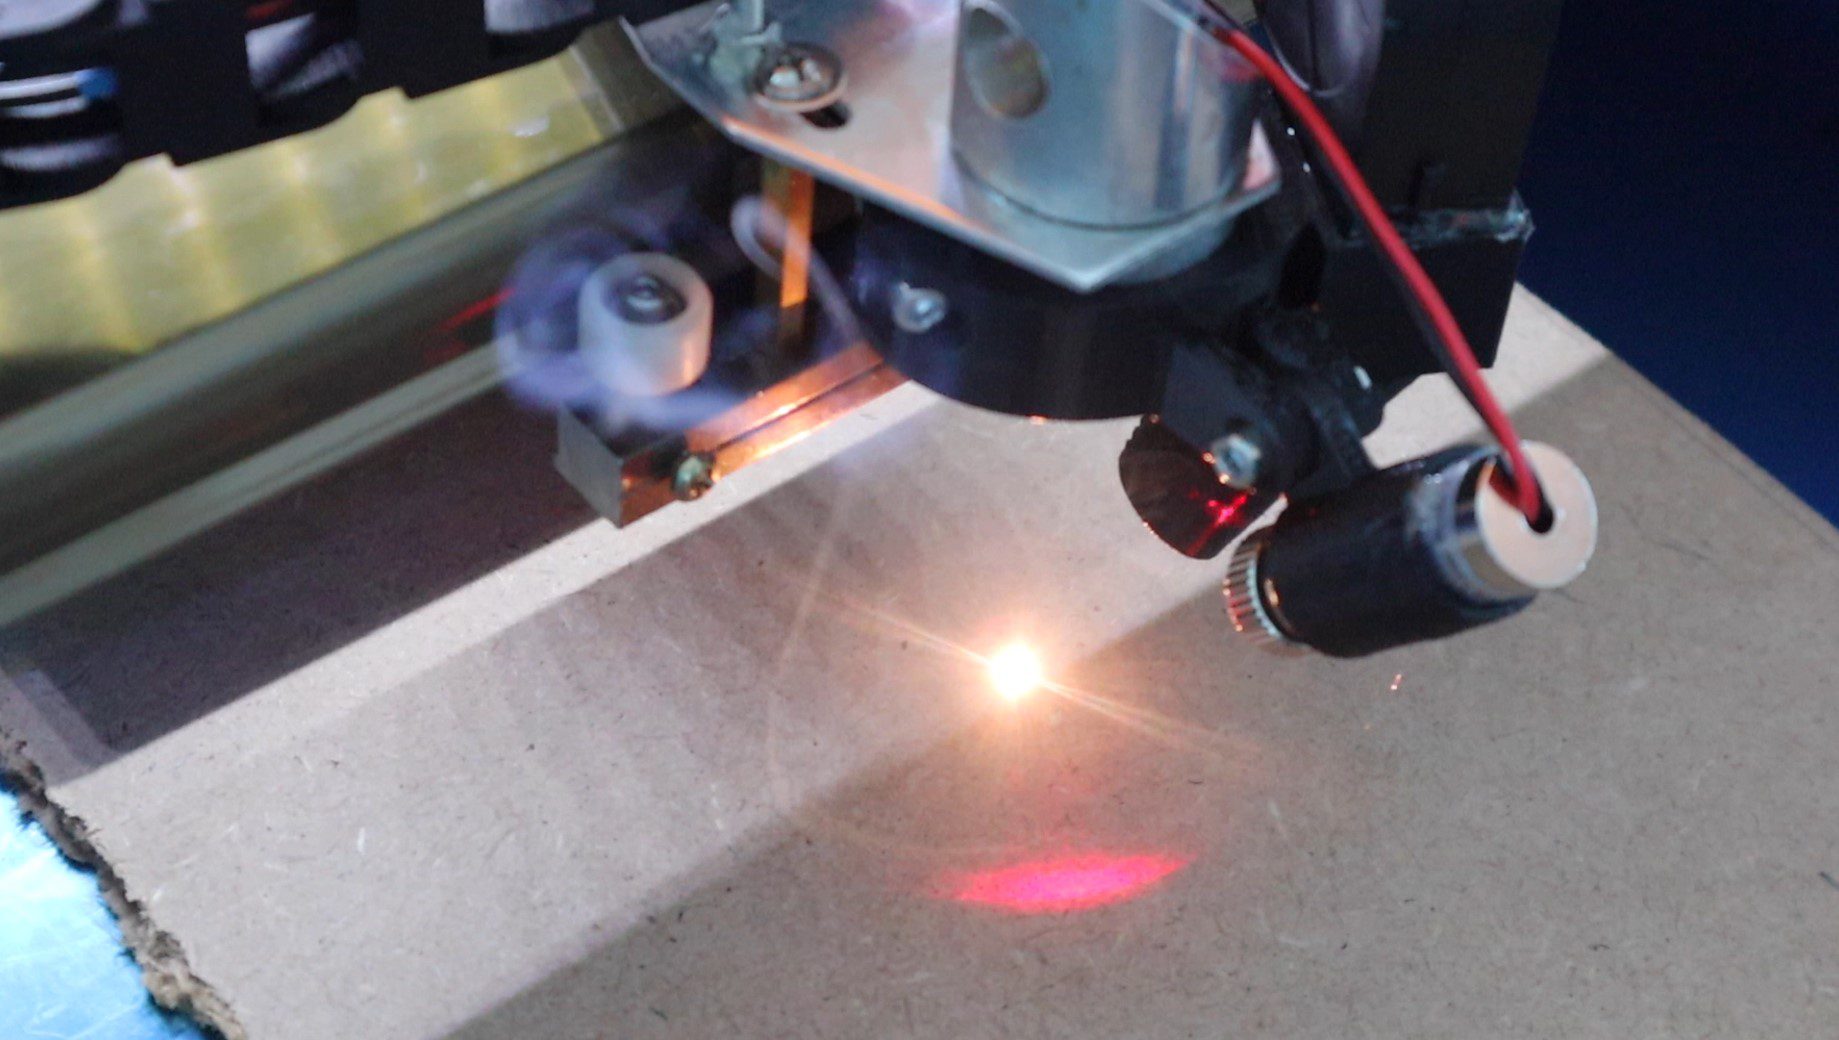
Check the laser again, the pointer and the laser should be in exactly the same spot on your material. Remember that this is now set up at this specific distance from the lens. If you use a different thickness material or work at a different bed height then you’ll need to adjust the pointer again, which is quite quick and easy to do.
You now have an easy way to see exactly where your laser is going to cut, allowing you to position it accurately and avoid wasting material or overrunning the edges of your material.
Let me know if you’ve built a laser pointer onto your laser cutter in the comments section below. What other additions have you made to your k40?