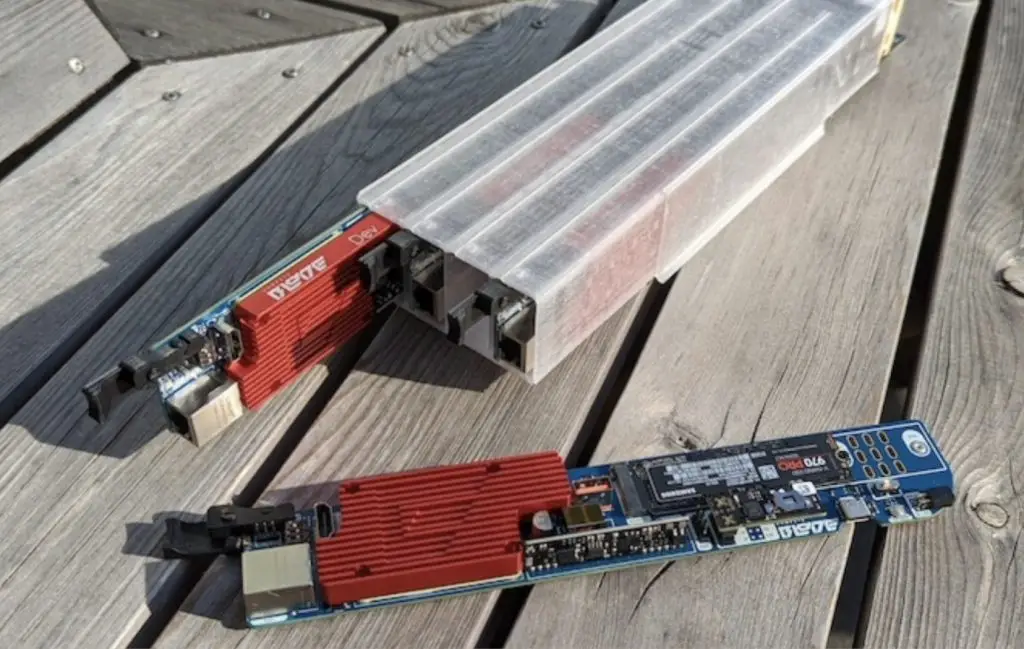
Today we’re going to be taking a look at the Compute Blade, a rack-mountable PoE (Power over Ethernet) carrier board for a Raspberry Pi Compute Module 4. They are designed to allow you to stack up to 20 blades, each carrying a Pi CM4 module, into 1U of 19″ rack space. So you’re able to create a low-profile cluster with up to 80 ARM cores, 160GB of RAM and 160TB of NVMe storage.

The Compute Blade has been designed by Ivan from Uptime Labs, who began working on the concept in 2020 and has now launched the Blade through a Kickstarter campaign which is due to end a little before mid-April.
Since the original version, Ivan has been through 8 iterations, taking in feedback from the community and adapting the design to suit.
While a 20-node cluster is probably overkill for most people in a home environment, a 4-node cluster in his 3D printable enclosure with two 40mm fans on the back is perfect for a home lab.
Here’s my video review of the Compute Blade, read on for the written review:
Purchase Links
The Compute Blade is not yet available to buy through traditional channels but is available through the Uptime Labs Kickstarter campaign. I’ll update the links below when the product is available to purchase through a web store after funding.
- Compute Blade – Kickstarter Campaign
- Raspberry Pi CM4 Module – Buy Here
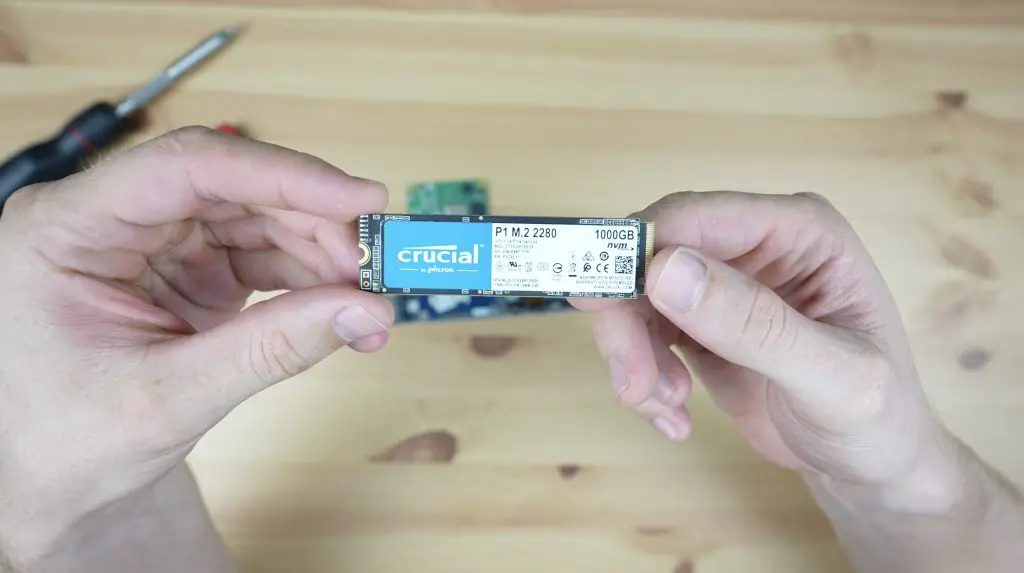
- Crucial NVME Drive – Buy Here
- Noctua 40 x 20 Fan – Buy Here
Equipment Used
First Look At The Compute Blade
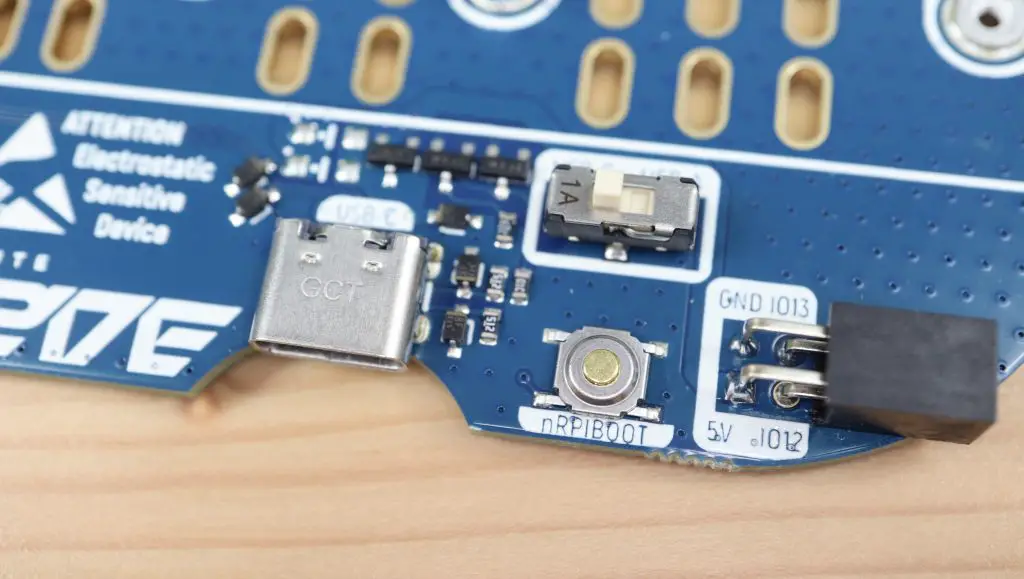
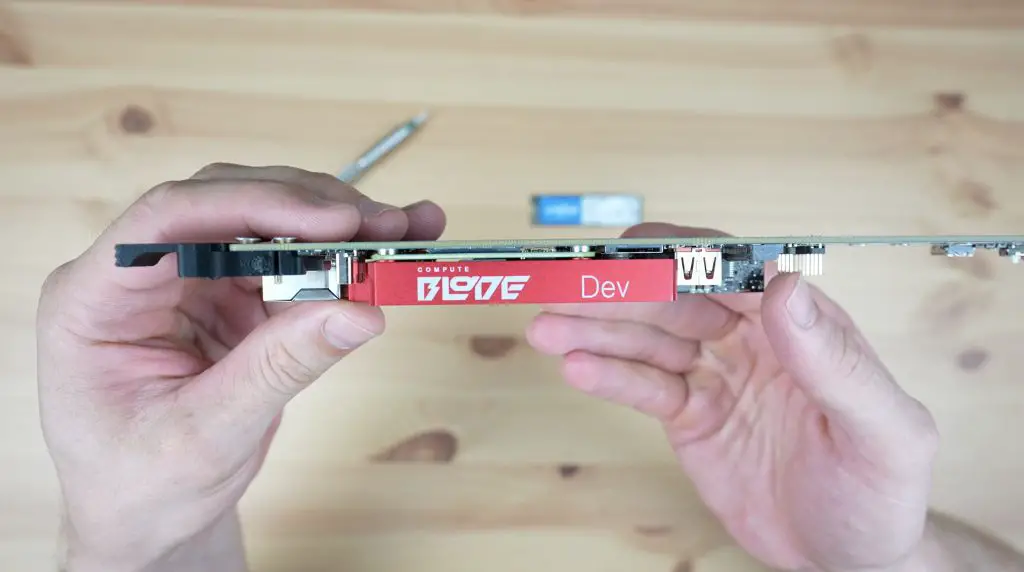
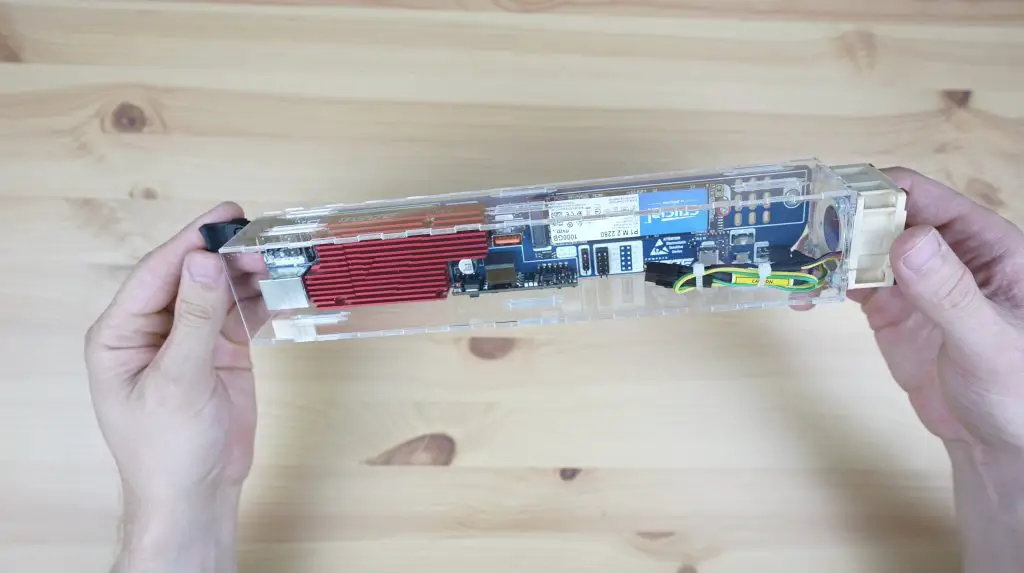
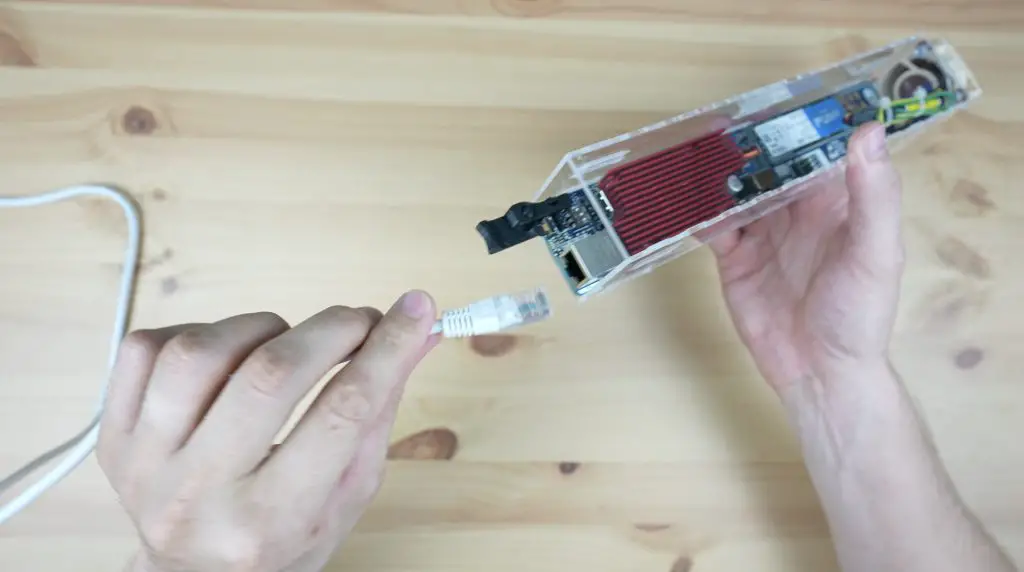
Taking a look at the board from end to end, at the front we’ve got one of two addressable RGB LEDs which are user-programmable. Alongside that is a Gigabit Ethernet port which supports PoE or power over Ethernet at up to 30W.
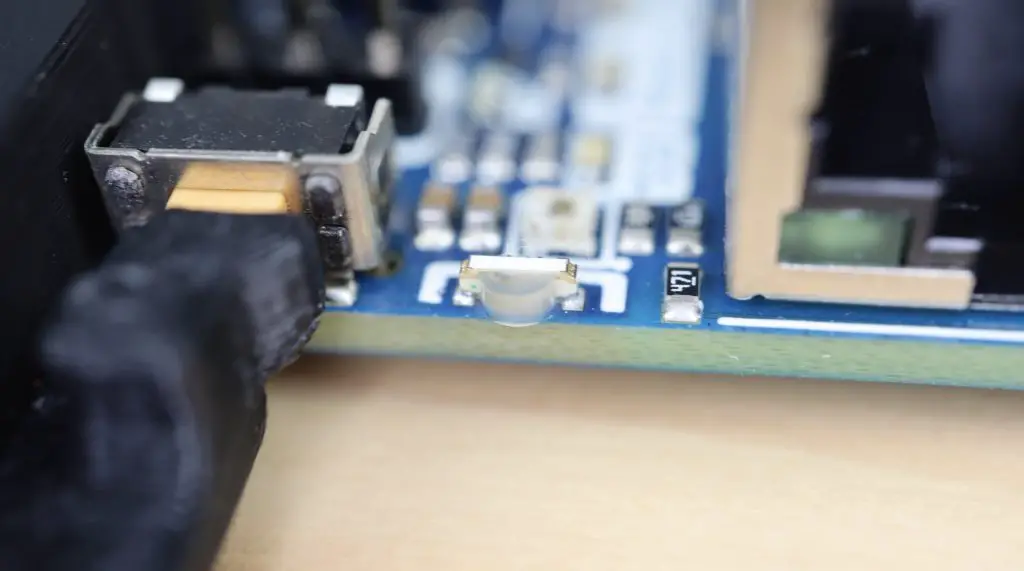

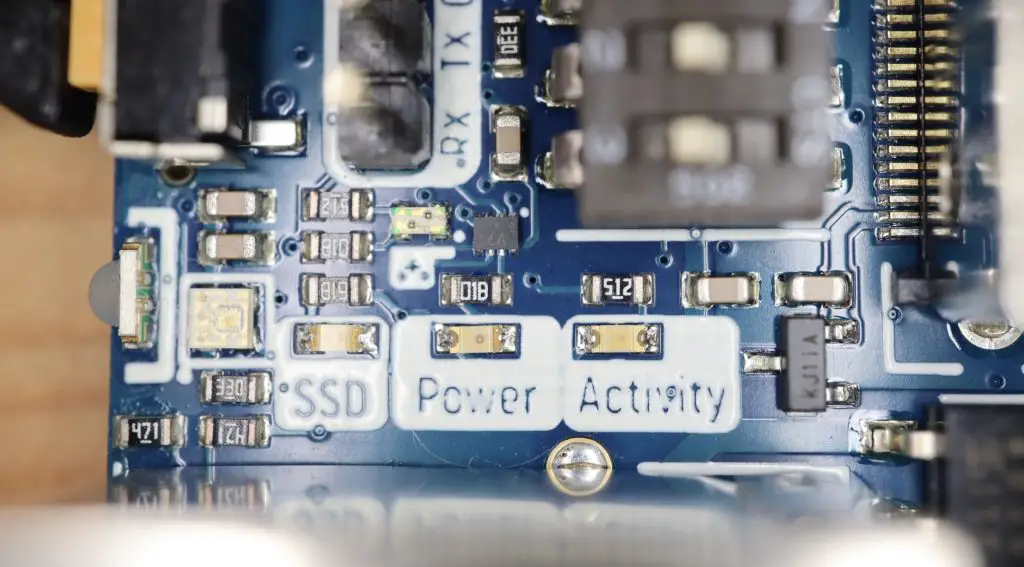
We’ve got a programmable button, a second RGB LED and three other status LEDs for SSD, power and activity.
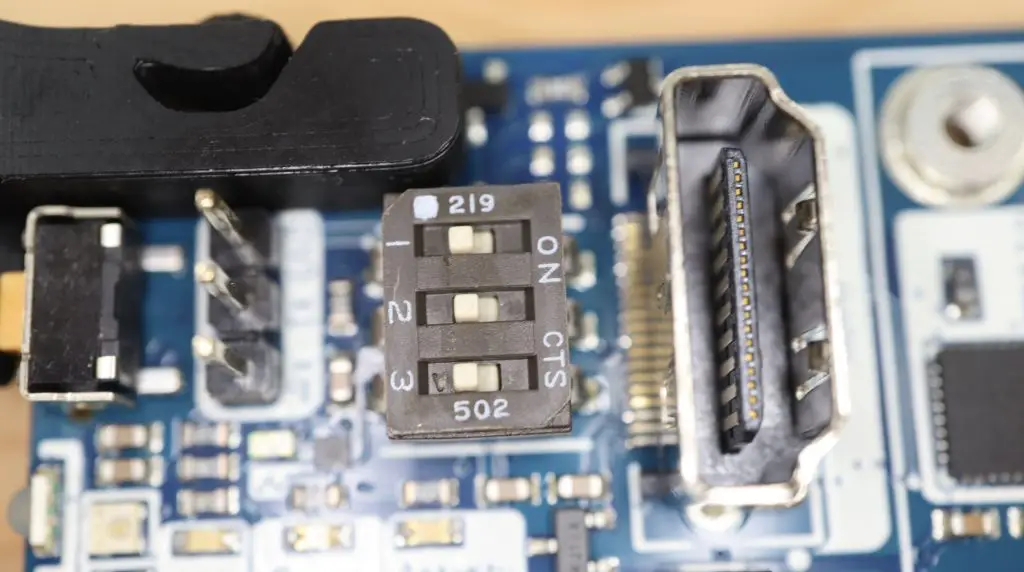
Alongside them is a UART port and a selector with hardware switchable WiFi, Bluetooth and EEPROM write protection.
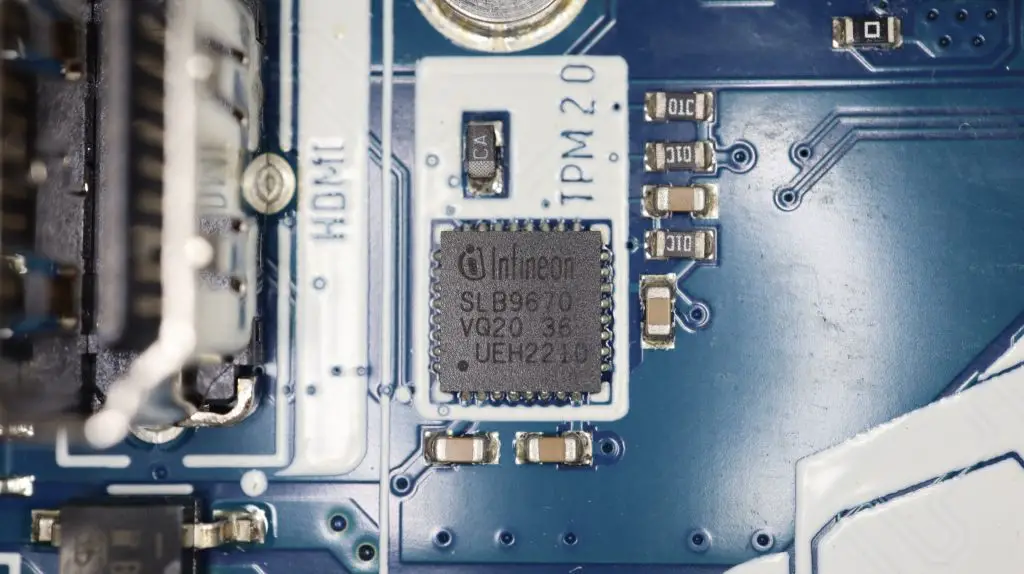
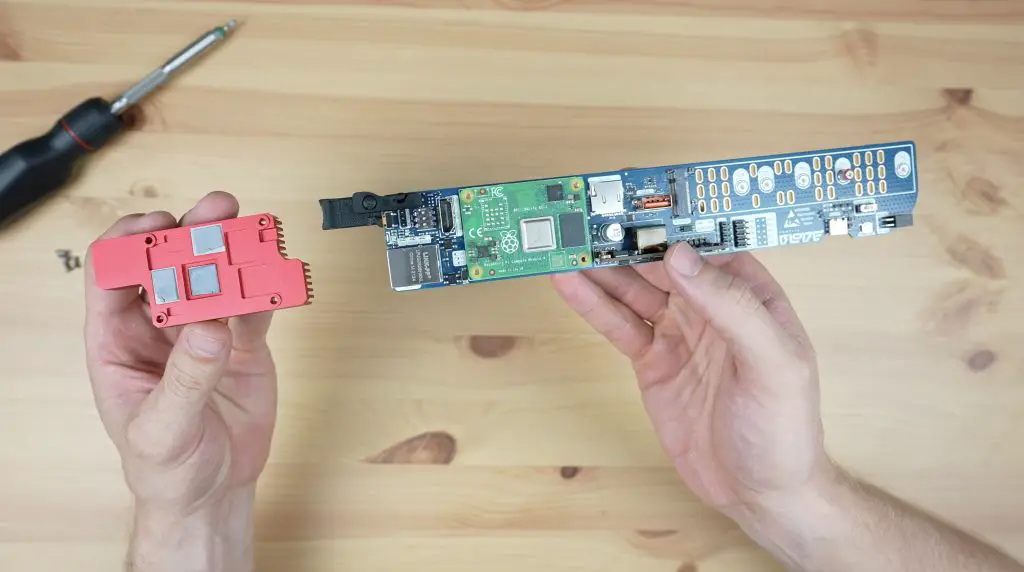
We’ve then got a full-size HDMI port, with the CM4 module area and sockets alongside it. Underneath the CM4 module is a TPM 2.0 security chip that allows you to secure-boot your Pi. This is strategically covered by the CM4 module for added security.
Next to the CM4 module area is the PoE power converter which steps the PoE voltage down to 5.1V.
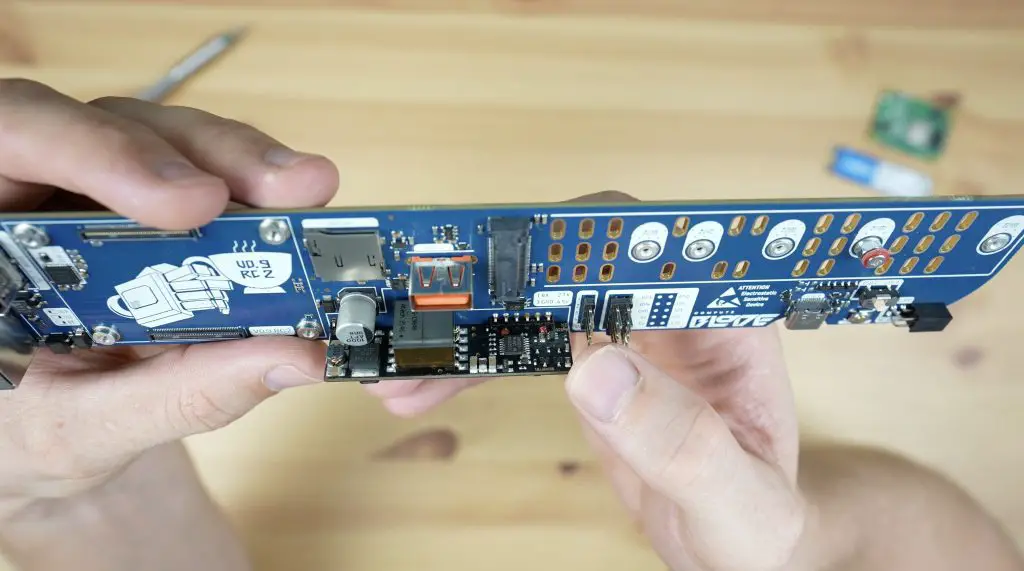
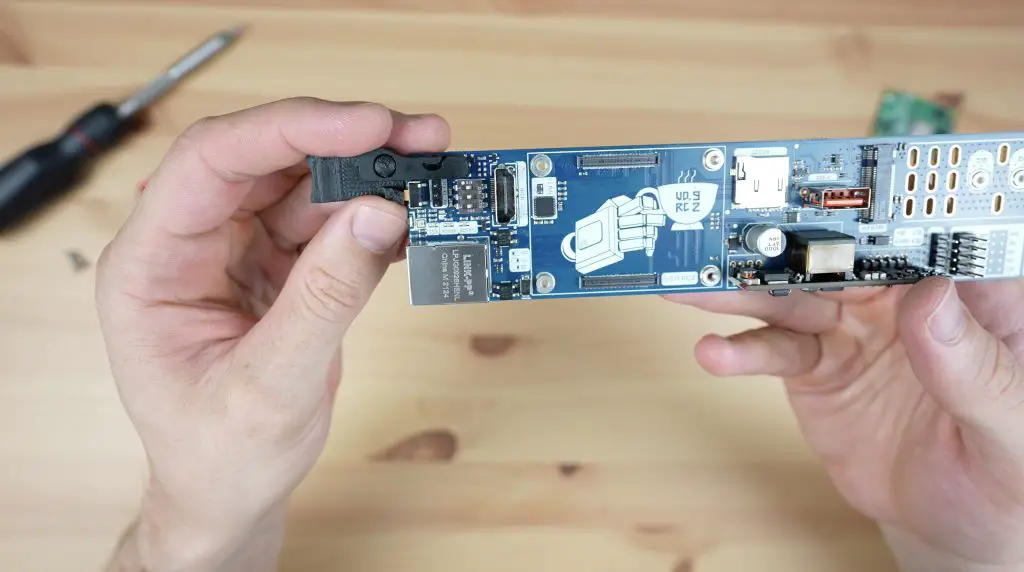
Above that is a microSD card slot and a USB A port, and next to those is an M.2 M-key slot which supports NVMe SSDs up to 22110.
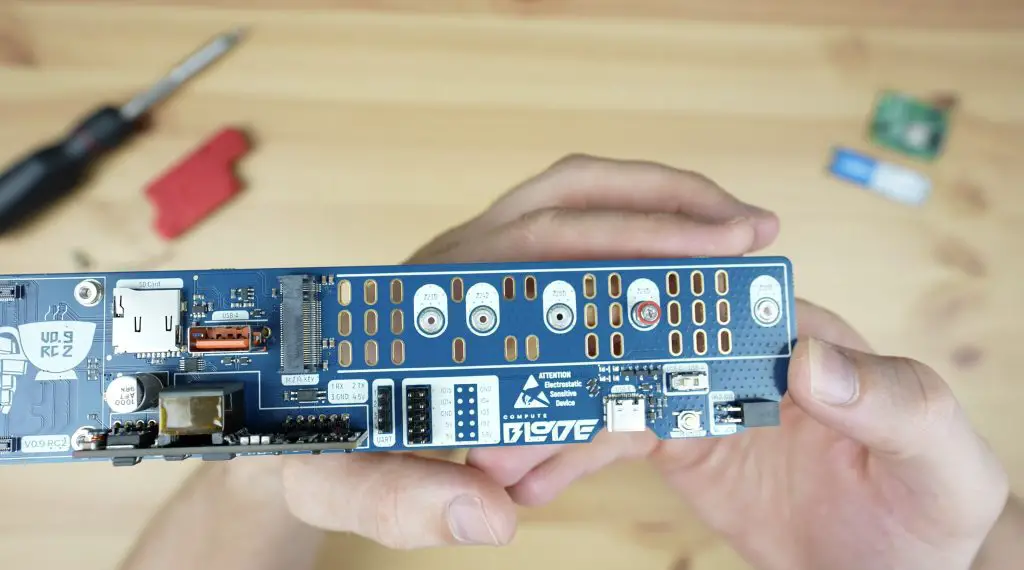
Below that is an expansion port for some optional add-ons like a real-time clock module or a Zymbit hardware security module that Ivan has been working on.

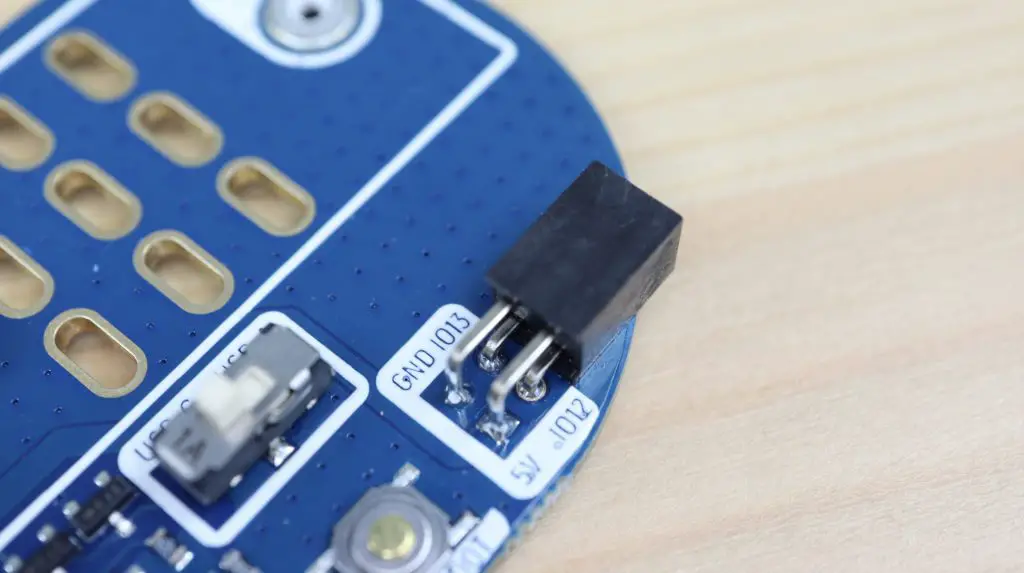
Then we’ve got a USB C port and boot button which can be used to flash the boot loader on the CM4 module and finally there is a fan port on the back. The fan port is designed to be used with his fan modules that the blade will slide to plug into.
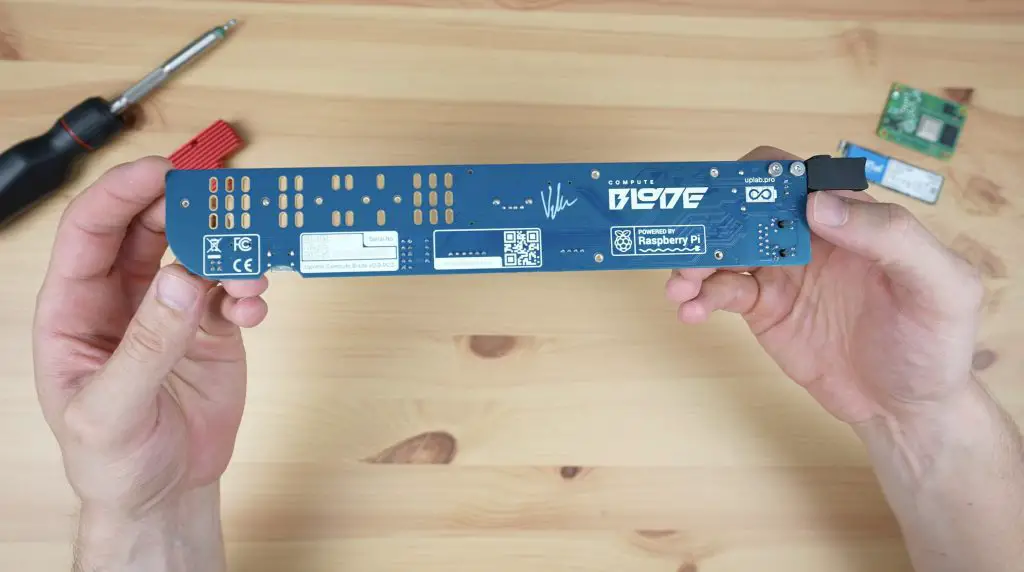
On the back of the blade, we’ve just got some manufacturing details on the PCB silkscreen.
Preparing The Compute Blade For First Boot
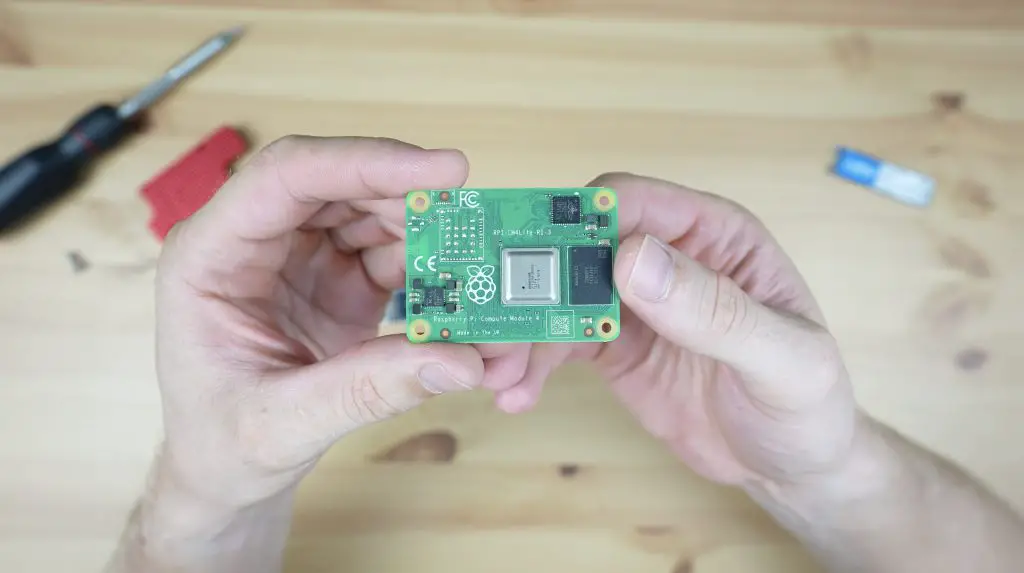
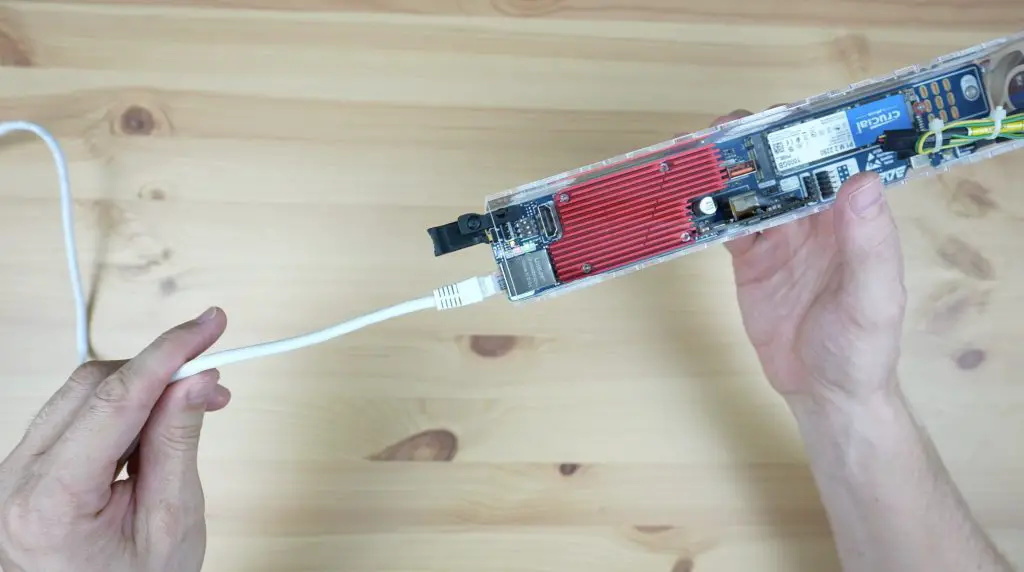
To get the Blade ready to boot up, we need to install a Raspberry Pi CM4 module and a boot drive. I’m using a CM4 Lite module, meaning that it doesn’t have onboard eMMC storage and this one also doesn’t have onboard WiFi or Bluetooth. This is perfect for the blade since we’re going to be booting from the NVMe drive in any case and we’re going to be using the Ethernet port on the front.
For the boot drive, I’m using a 1TB NVMe drive which I’ve preloaded with Raspberry Pi OS Lite. I pre-configured the operating system to enable SSH and I added myself as a user. You can also boot from a microSD card plugged into the slot on the blade if you don’t want to use an NVMe drive, or if you want to use the NVMe drive as a storage drive only, but I prefer the reliability of using it as the boot drive.
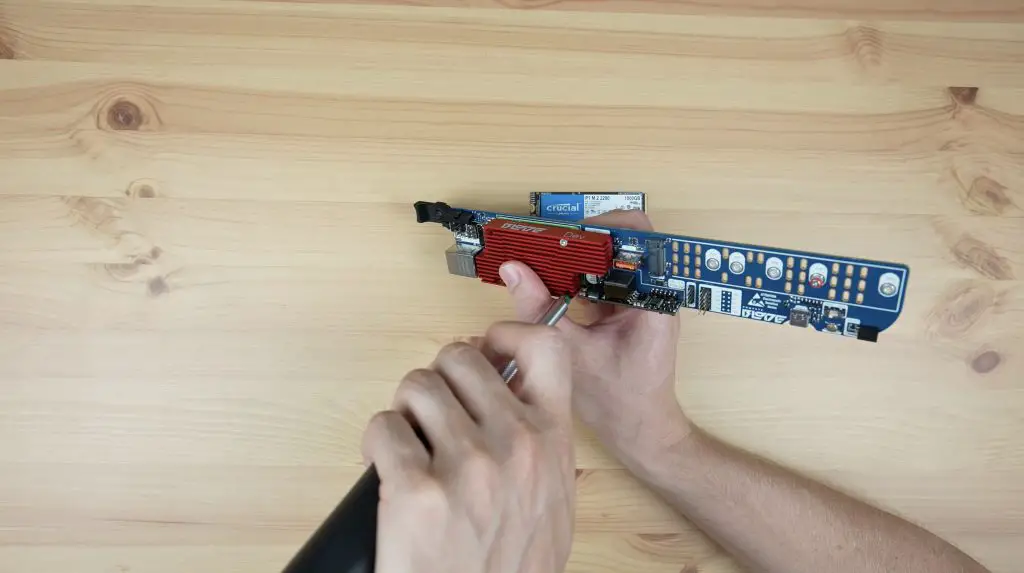
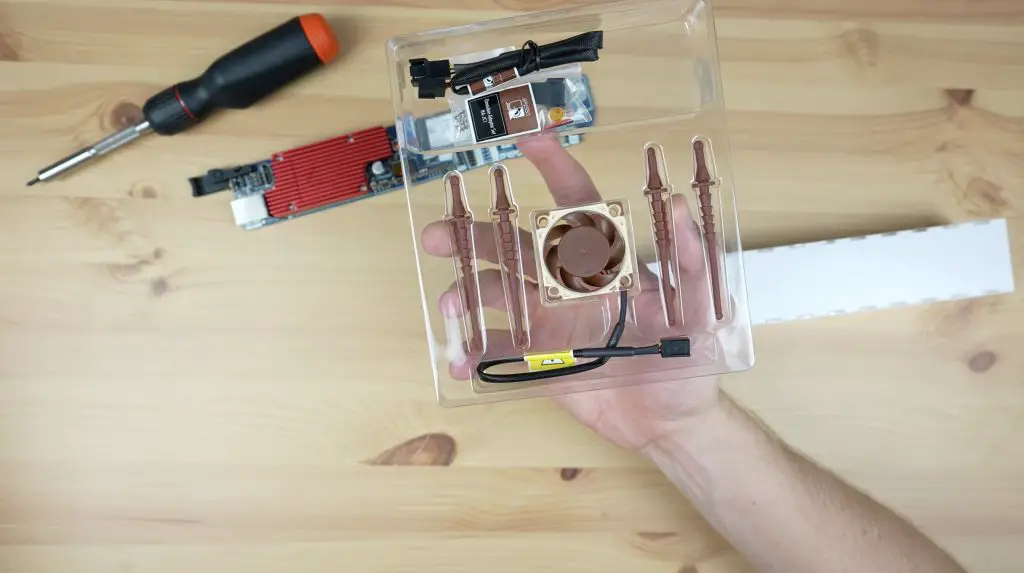
We can then install this awesome custom red heat sink over the CM4 module which has cooling pads for the CPU and RAM chips.
Putting The Compute Blade Into A Ventilated Enclosure
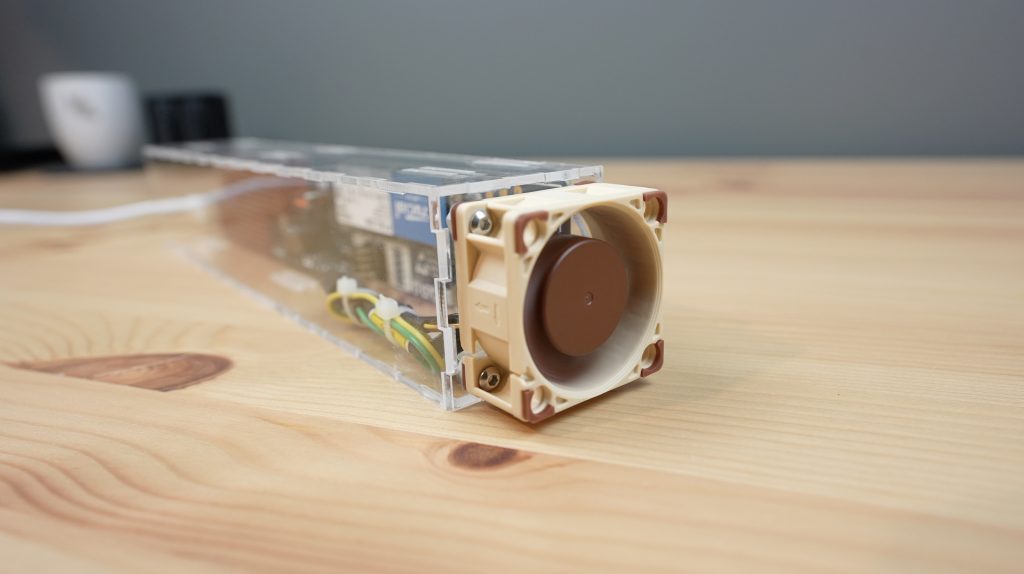
Before I power up the Blade, I’m going to make up an enclosure to hold it along with a 40mm fan at the back. This will be similar to Ivan’s 3D printable design for 4 blades but this one will be for one or two Blades and it’ll be made out of clear laser-cut acrylic.
One of the primary drivers behind the Blades design is that Ivan wanted to make them easy to swap out or replace if there is an issue with one. You can simply turn off power to the device and then slide it out of the chassis without affecting the surrounding blades or having to remove the whole rack – so we’re going to retain that in this enclosure design.
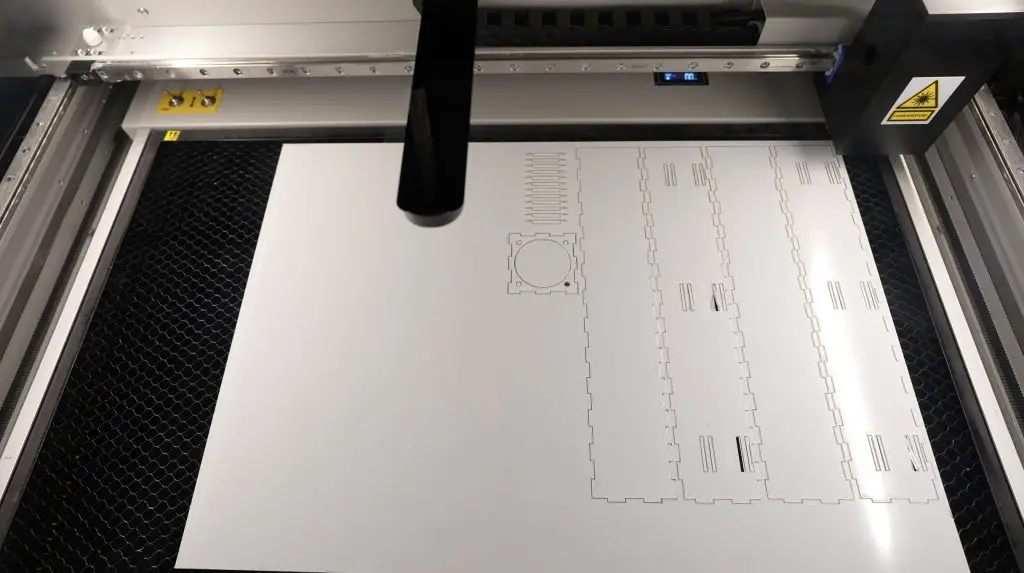
I laser cut the enclosure components from 2mm clear acrylic and glued them together along the edges.
I’m using the same Noctua fan that the Uptime Labs fan module uses but I’m just going to mount this directly onto the back of the enclosure.
I’ll plug it into 5V and GND, so it’ll be running at full speed all the time. The Blade does have two of the Pi’s GPIO pins available on the fan connector, so you can implement PWM control if you’d like to, that way the Blade or cluster of Blades will run a lot quieter.

With that done, let’s boot up the Blade and try running some tests on it.
Compute Blade First Boot
If you’re using an older CM4 module like I am, then it probably has a bootloader version on it that doesn’t support booting from the NVMe drive. You’ll need to update the boot loader otherwise your Pi will just get stuck saying that no SD Card or Network boot location was found.

CM4 modules shipped out after July 2021 should have the new boot loader installed, but you can see this one’s boot loader version is from February 2021.
Fortunately, this is quite easy to do right on the Compute Blade, you just need to boot it up with the button next to the USB port pressed, then connect it to another computer using a USB C cable (I used another Raspberry Pi) and then follow a few command prompts to reflash the boot loader.
After that, the Compute Blade should boot up from the NVMe drive and will then be accessible on your network.
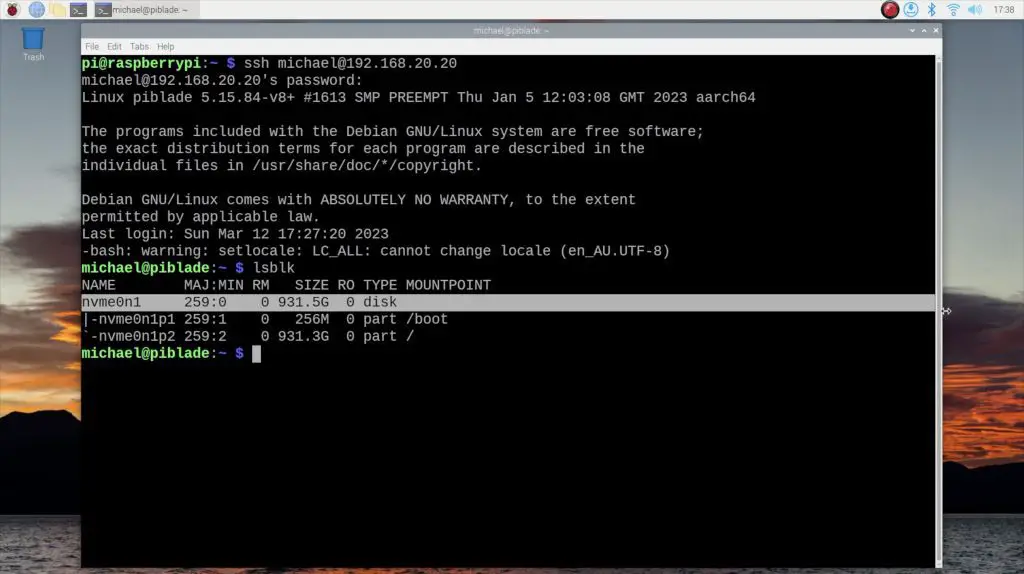
I’m using a second Pi to SSH into the Compute Blade to do some testing.
If we use the command lsblk, we can see our connected NVME drive.
Running A Drive Speed Test
With the Compute Blade now booted, lets install hdparm to run a drive speed test.
sudo apt-get install hdparmWe can run the test by entering this command with the drive name that showed up when we ran lsblk.
sudo hdparm -tT /dev/nvme0n1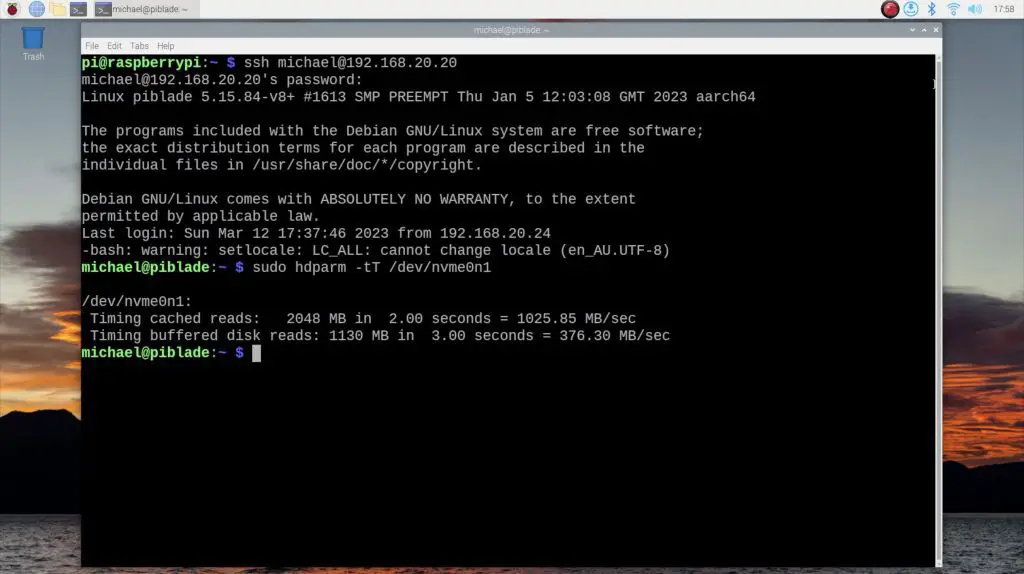
I’m going to run this test three times as it might change a little each time we run the test.
So we get a cached sequential read speed of a little over 1000 MB/s and a sequential read speed a little over 375 MB/sec. This is much lower than what the drive is capable of but it isn’t a limitation of the Blade, but actually of the Pi CM4 module which only has a PCIe Gen 2 x1 bus available.
Thermal Testing The Compute Blade
Next, let’s try running some thermal tests.
I’ll do two tests on the Pi, both using a utility called CPU Burn, the first running in the enclosure with the fan running, and then with the Blade out of the enclosure and without a fan, so just passively cooled by the large heat sink.

To install CPU Burn, enter the following commands:
wget https://raw.githubusercontent.com/ssvb/cpuburn-arm/master/cpuburn-a53.S
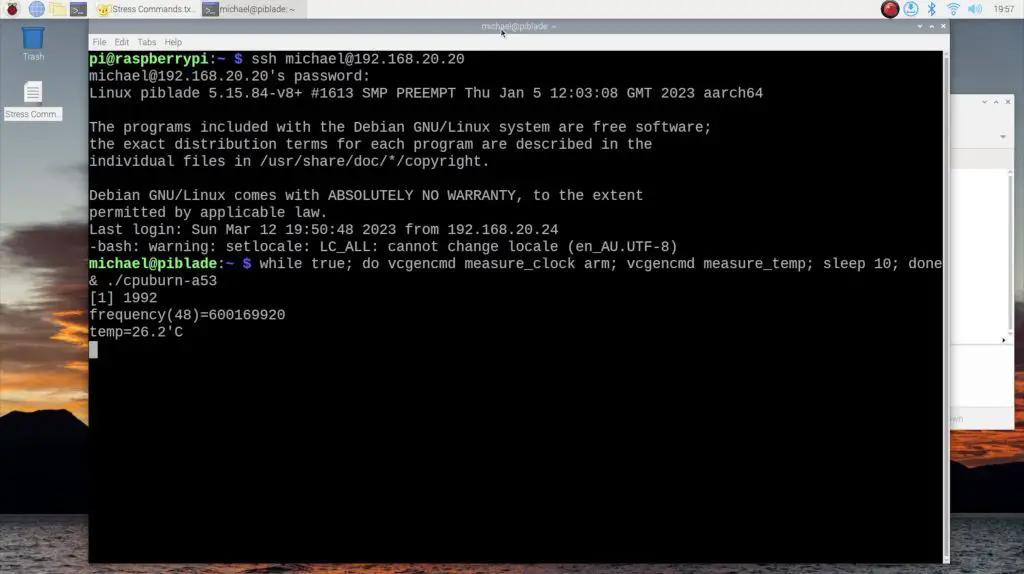
gcc -o cpuburn-a53 cpuburn-a53.SLet’s try the test with the fan first. We can run the test by entering:
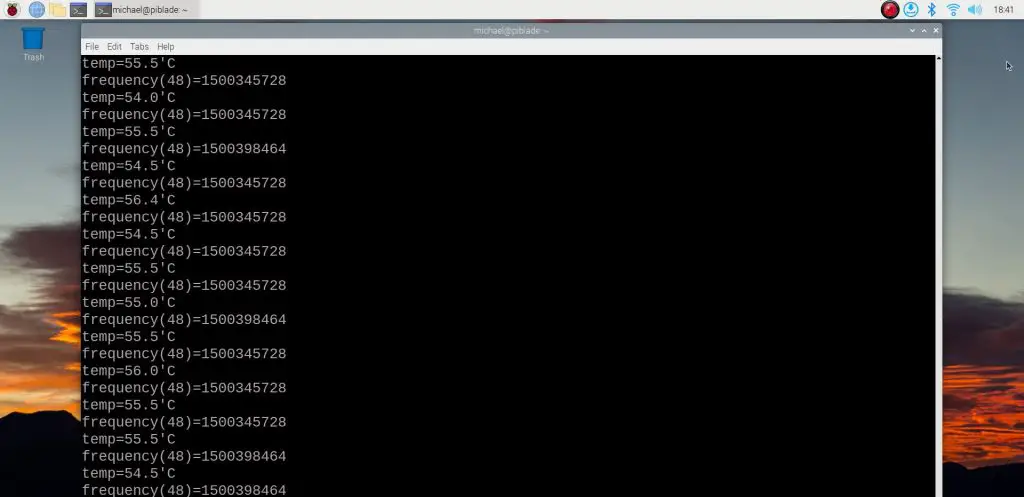
while true; do vcgencmd measure_clock arm; vcgencmd measure_temp; sleep 10; done& ./cpuburn-a53After running the test for a little over 20 minutes, the CPU temperature stabilised at around 37 degrees, which is really low for all four cores being maxed out continuously.
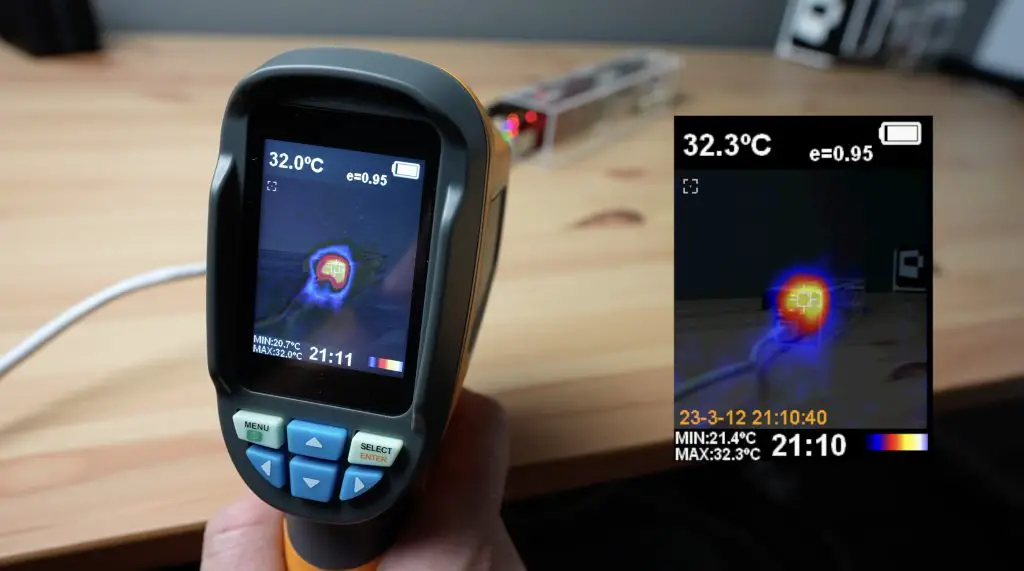
Looking at the heat sink through a thermal camera, we can see that it is heating up but it’s also not much over 32 degrees.
Now let’s take the blade out of the enclosure and run the test again.
After 20 minutes outside of the case, with only passive cooling, the CPU temperature has stabilised at around 56 degrees, which is still quite good considering this is under full load continuously.
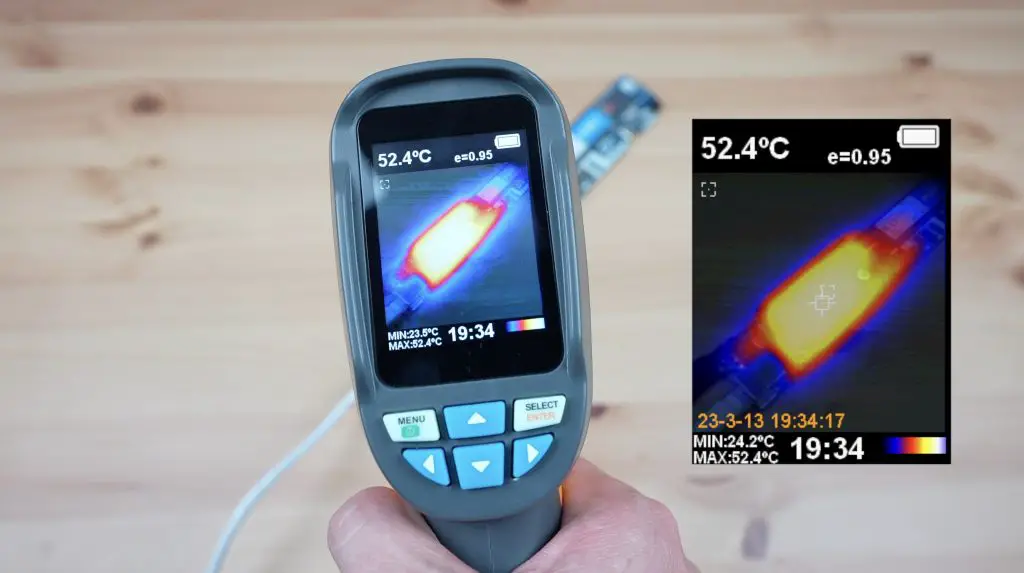
Looking at the heatsink through a thermal camera, we can see that it has heated up quite a lot more than when it was in the enclosure, it is now around 52 degrees.
So you’ll be able to get away without a fan if your Blade isn’t running in a confined space but you’ll most likely need a fan if you rack mount it as intended.
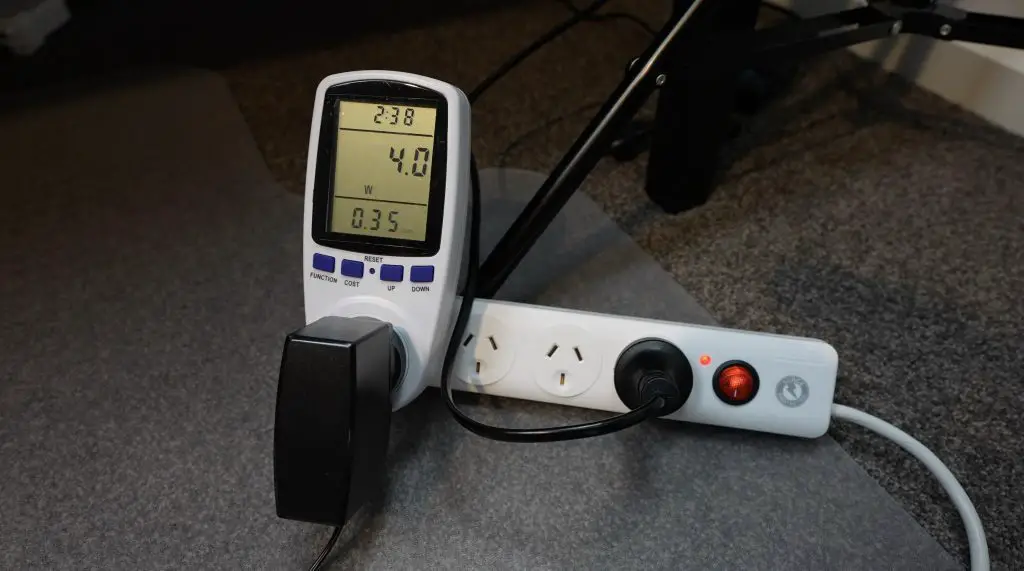
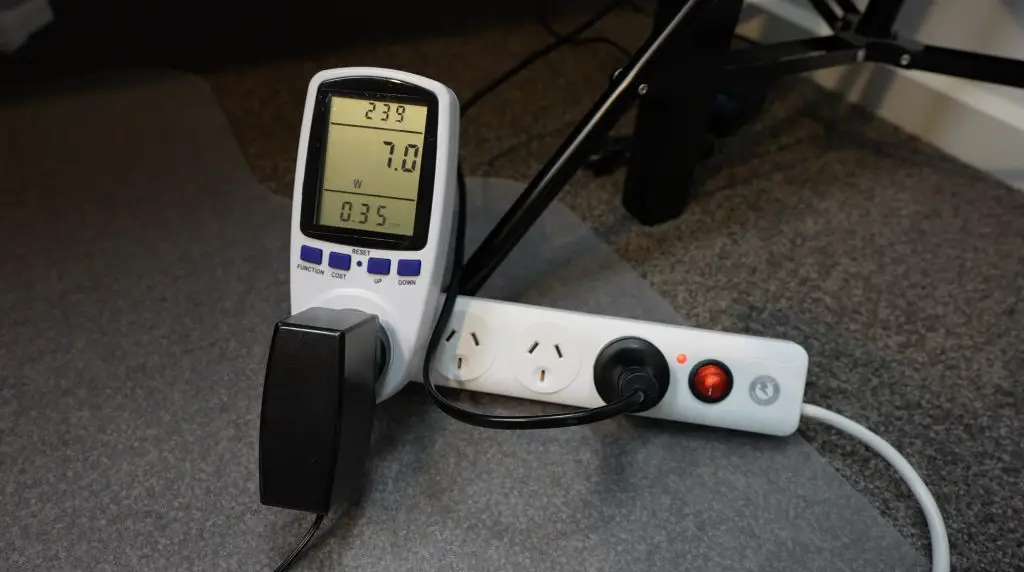
The Compute Blade’s Power Consumption
Power consumption when idle is around 4W, so it doesn’t use much more than the CM4 module uses alone.
With all four cores maxed out, consumption goes up to around 7W, which is still really power efficient. Even with a 20-node cluster with all 80 cores maxed out, you’d be using less than 150W.
Final Thoughts On The Compute Blade
There are also some other features of the Blade that I haven’t yet tried out. You can turn off the status LEDs if you aren’t a fan of flashing lights by entering some commands in the terminal. The two addressable LEDs are connected to GPIO18 on the Pi and are programmable, so you can use your own scripts to get them to indicate specific metrics or errors. Similarly, the button on the front of the Blade is connected to GPIO20, so you can program that to do whatever you’d like as well, like initiate a safe shutdown.
So the Compute Blade is a feature-rich board that is going to be great for a home lab or to pack a significant amount of computing power into a single unit of rack space. There are a lot of benefits to running individual smaller computing nodes rather than a number of virtual machines on a single more powerful computer.
Let me know what you think of the Compute Blade in the comments section below and let me know if there is anything you’d like to see me try on it. Also, check out the Kickstarter page if you’re interested in getting one, Ivan has already blown past his first funding milestone.
This Compute Blade sounds amazing! Stacking 20 blades in 1U space for a powerful cluster is genius. I love that Ivan went through 8 iterations based on community feedback. A 4-node cluster in a 3D printable enclosure seems perfect for a home lab. How easy is it to set up and program those RGB LEDs?