I’ve had a Hyperpixel 4 display in my project cupboard for about two years now. I bought it because it looked like the perfect display to pair with a Raspberry Pi to build a tiny Cyberdeck because it plugs into and is driven entirely through the Pi’s GPIO pins.
So when Atomstack reached out and asked me if I would like to try out their new Atomstack X30 Pro laser engraving and cutting machine, I thought that this would be a great project to build with it.
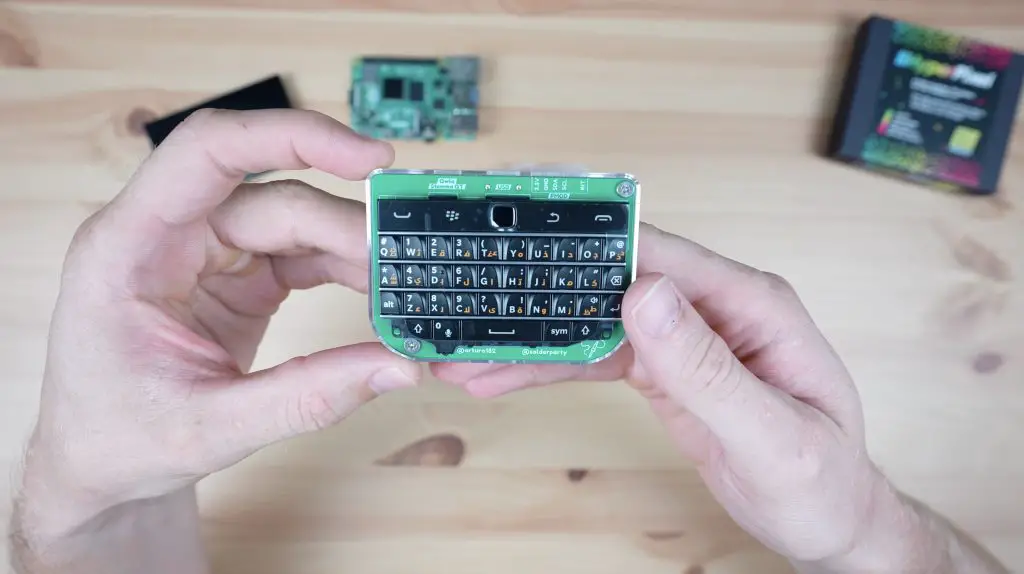
I’m going to make up the Cyberdeck in a clamshell design with the display mounted directly onto the Raspberry Pi in the top half and then a small keyboard in the bottom half. I found a re-purposed keyboard from a Blackberry online which has a small custom carrier board on it to make the keyboard and trackpad act as a USB-connected keyboard and mouse. So, I’m going to build this into the bottom half.
To make up the case components, I’m going to use the new Atomstack X30 Pro to laser-cut and engrave some 3mm plywood sheets. You can find out more about the X30 Pro in my unboxing and review post.
Here’s my video of the build, read on for the write up;
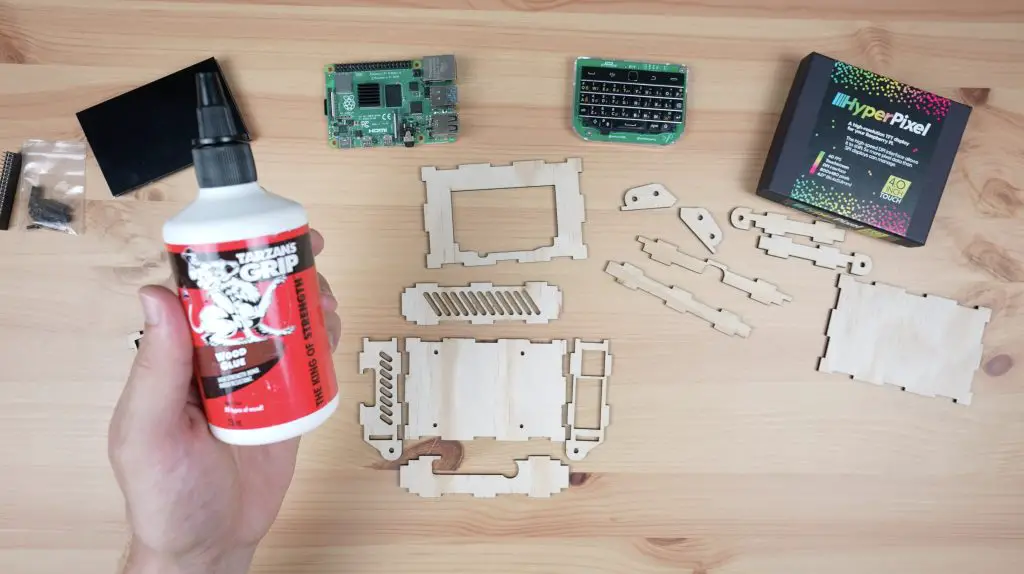
What You Need To Build Your Own Tiny Cyberdeck
- Raspberry Pi 4B – Buy Here
- Hyperpixel 4 Display – Buy Here
- 32GB Sandisk Ultra MicroSD Card – Buy Here
- Blackberry Keyboard & Controller – Buy Here
- M2.5 Button Head Screws – Buy Here
- Short USB C Cable – Buy Here
Tool & Equipment Used
Some of the above parts are affiliate links. By purchasing products through the above links, you’ll be supporting my projects, at no additional cost to you.
Designing The Tiny Cyberdeck Components
I designed the two halves of the Cyberdeck in Inkscape. It’s essentially two boxes, one that will hold the Pi and display and form the top half of the clamshell and then a second to hold the keyboard in the bottom.
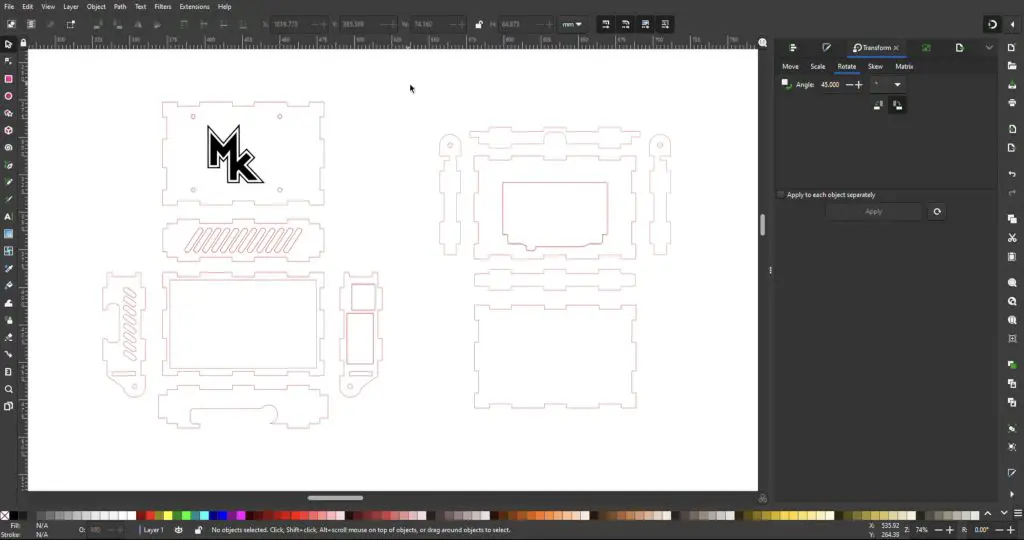
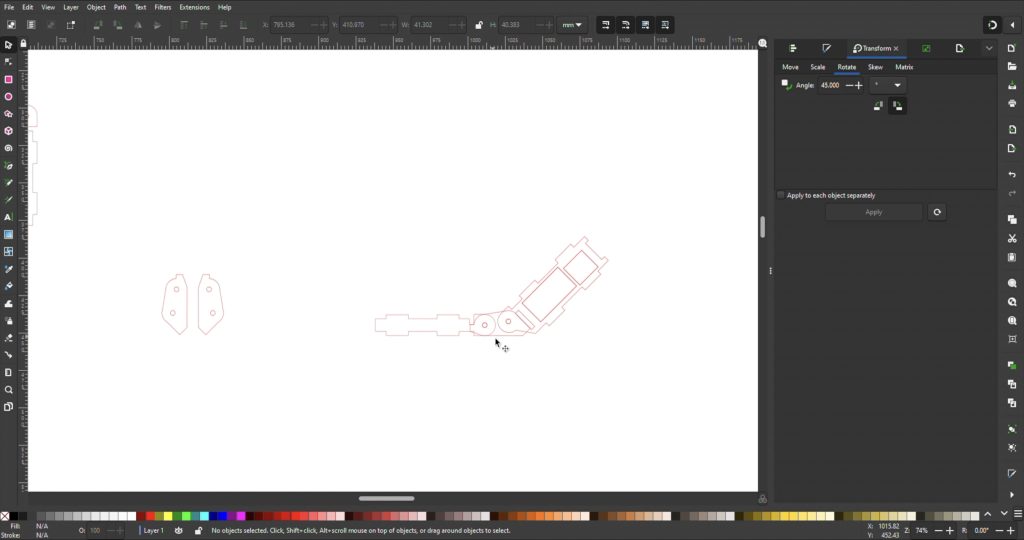
Holding the two halves together are these hinges, which are shaped this way to limit the opening range of travel to a 45-degree angle. It’ll also hopefully be able to sit on a desk when it’s open without toppling over. I’ll have to see about this as there is a lot of weight in the top half with the Pi and display both there.
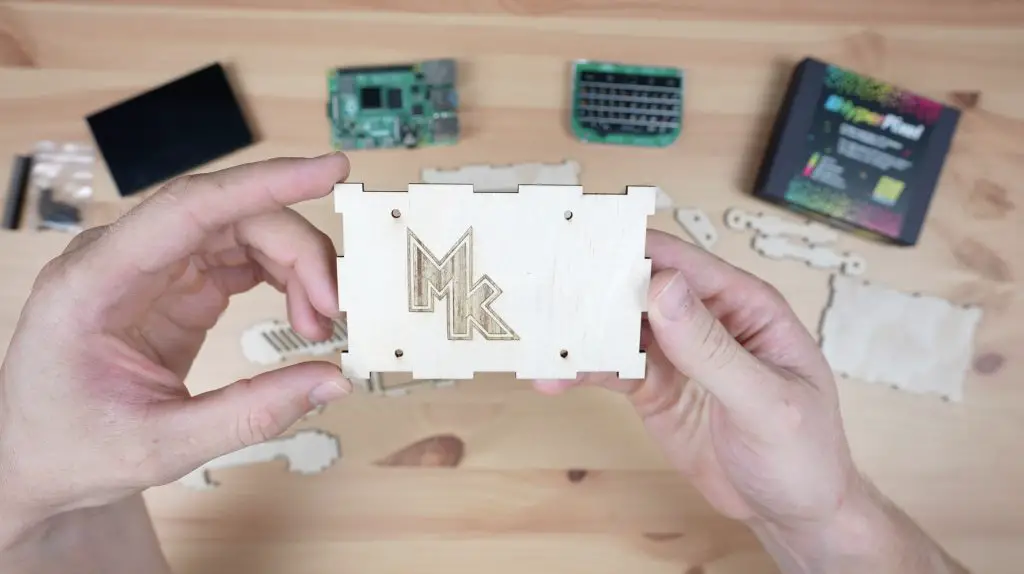
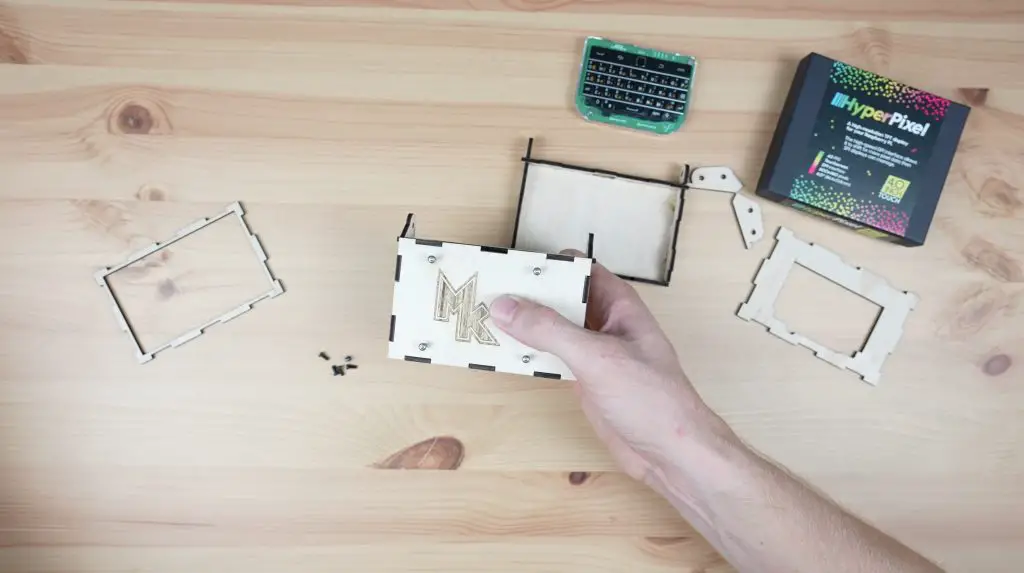
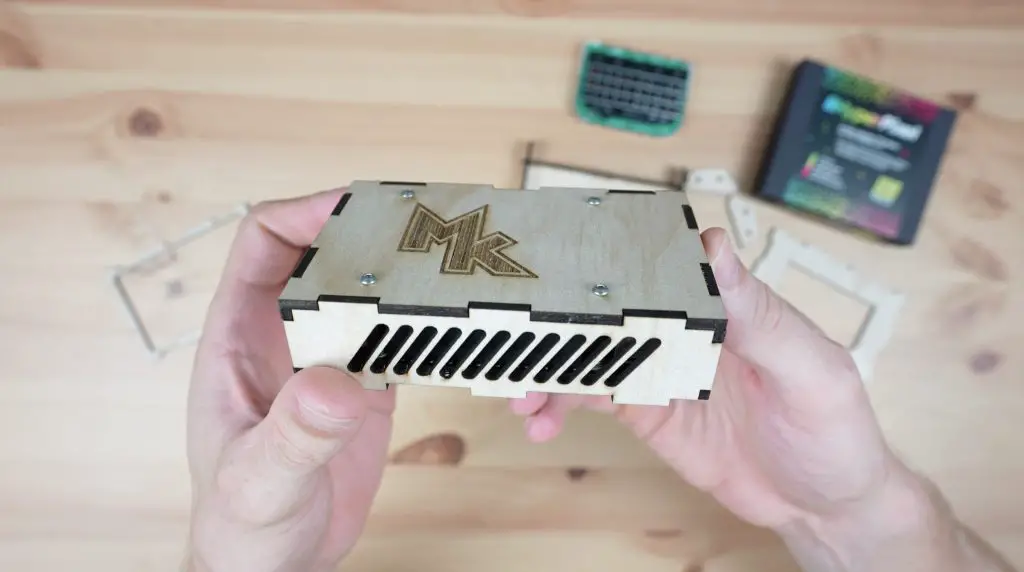
I also put my initials onto the top plate as a logo to engrave.
Cutting The Components On The X30 Pro
Let’s load a piece of plywood and engrave and cut the top half components. I’ve set Lightburn to engrave the logo first so that the part doesn’t shift when it is cut. I’ll leave the air assist off for the engraving and then turn it on when it starts cutting.
If you watch my video, you’ll see that the laser runs back and forth in lines, called scan lines, to mark the wood and create the logo.
Once that’s done we can turn on air assist to start the cutting.

Now we’ve got the first sheet of components cut. Next, let’s cut the components for the bottom half.
Assembling The Cyberdeck
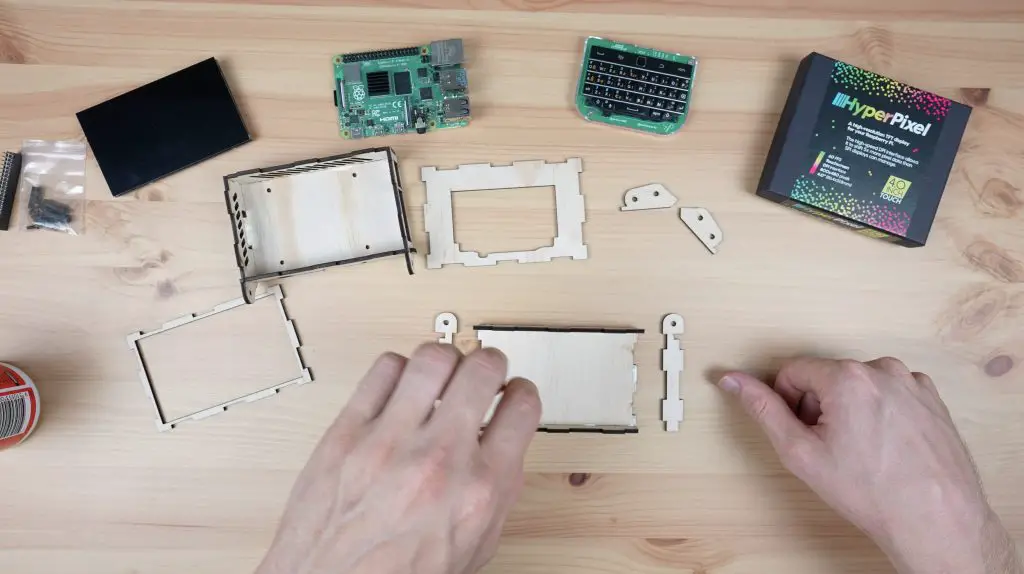
To assemble the cyberdeck, let’s first glue the bottom sections of each half together. These fit together using the interlocking tabs that we’ve cut into them, we just need to make sure that we put them in the right way around.
I’m using PVA wood glue to glue the components together. You can use clamps to hold them together while the glue dries for a stronger bond.
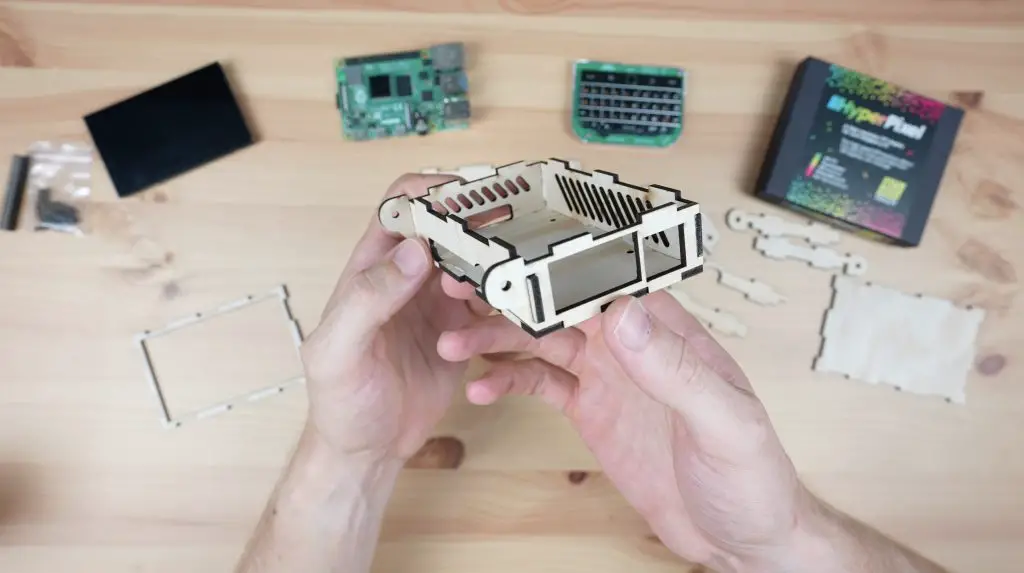
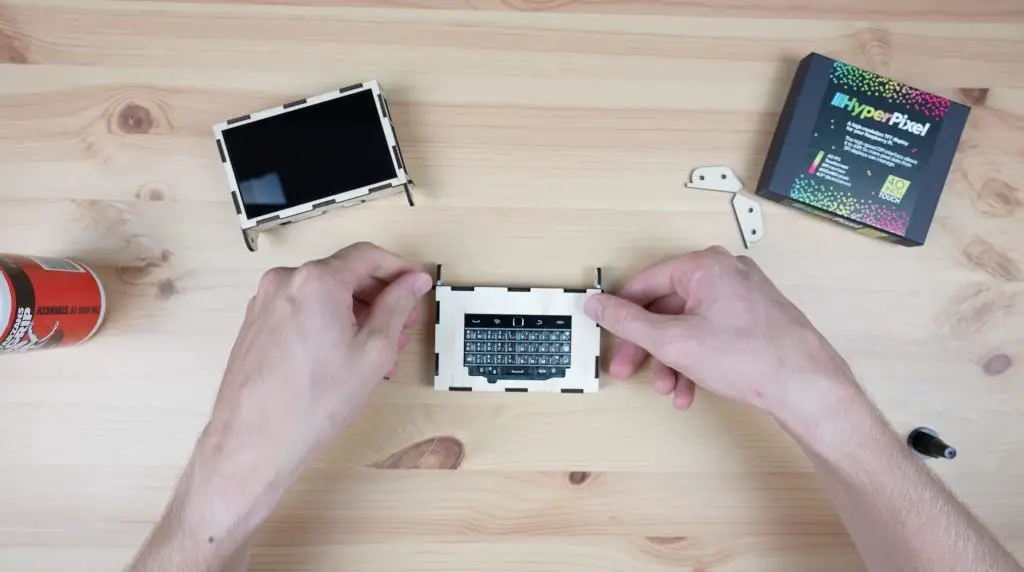
The keyboard housing goes together in a similar way, again making sure that the sides with the hinge tabs are installed the correct way around. The cutouts for the back strips should face upwards towards the surface of the keyboard.
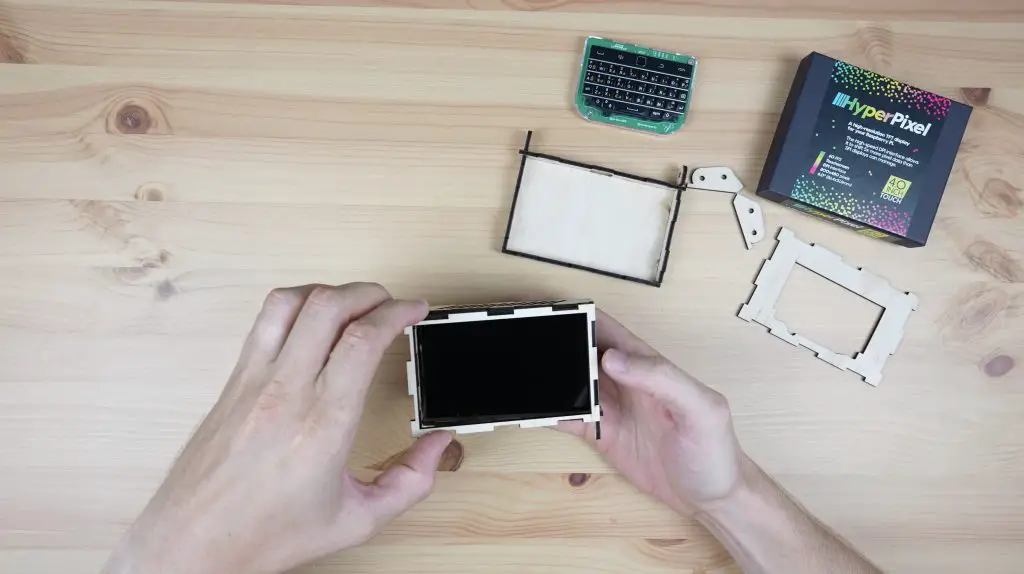
With those drying, we can mount the display onto the Raspberry Pi. It comes with a set of standoffs and a header extension, so let’s plug the extension into the GPIO pins.
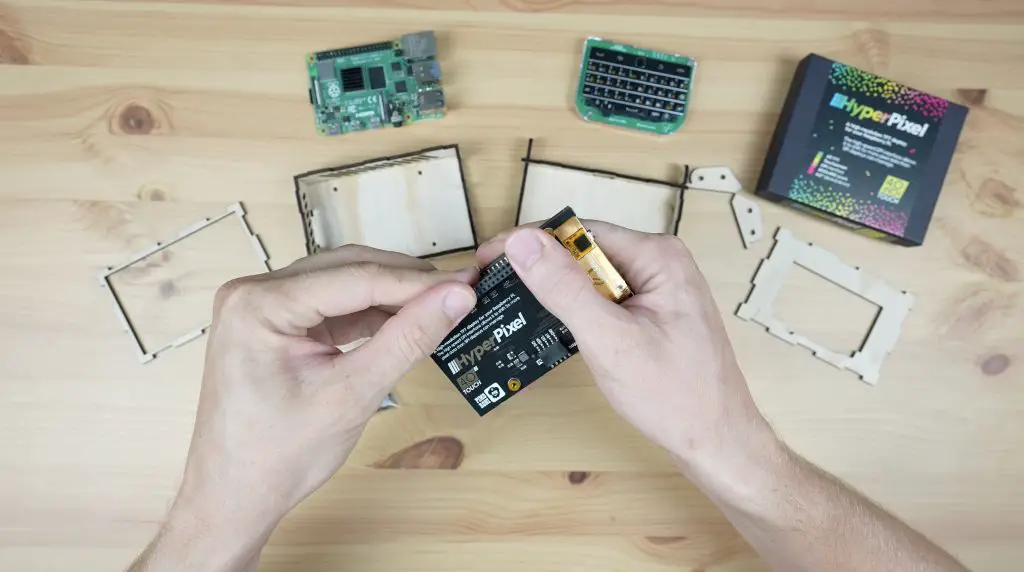
We can then screw the standoffs into the back of the display.
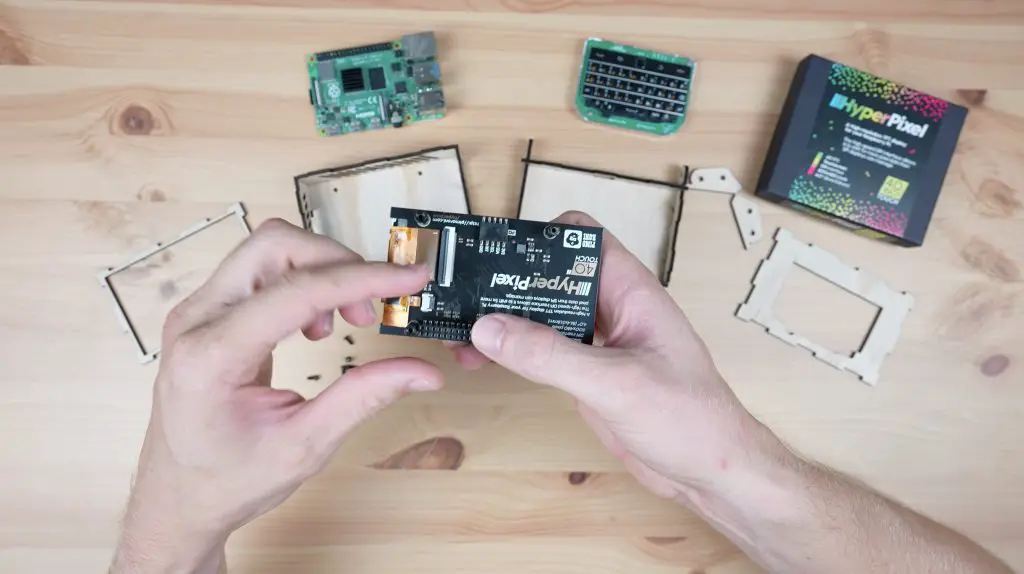
Then press the display into place on the Pi.
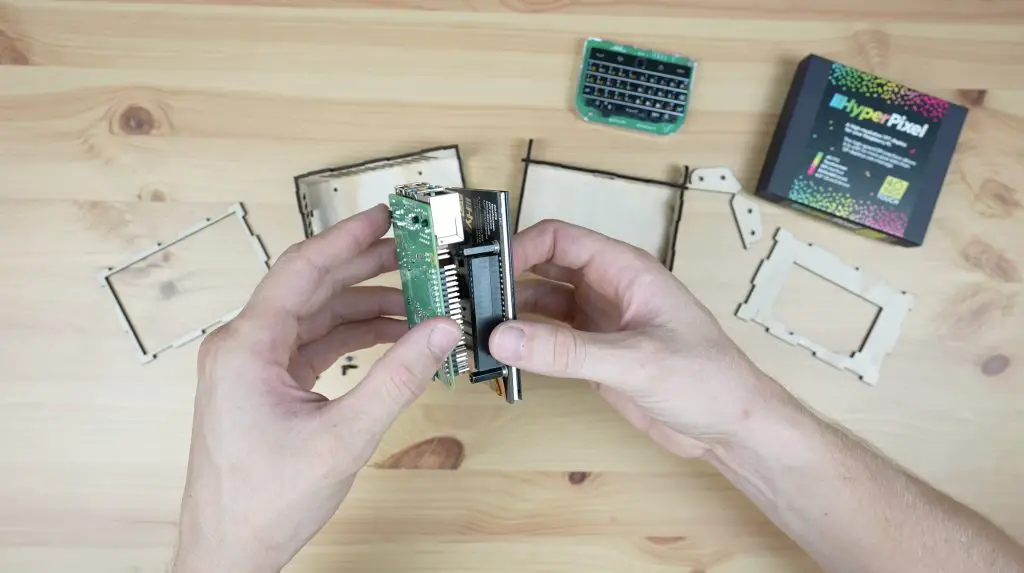
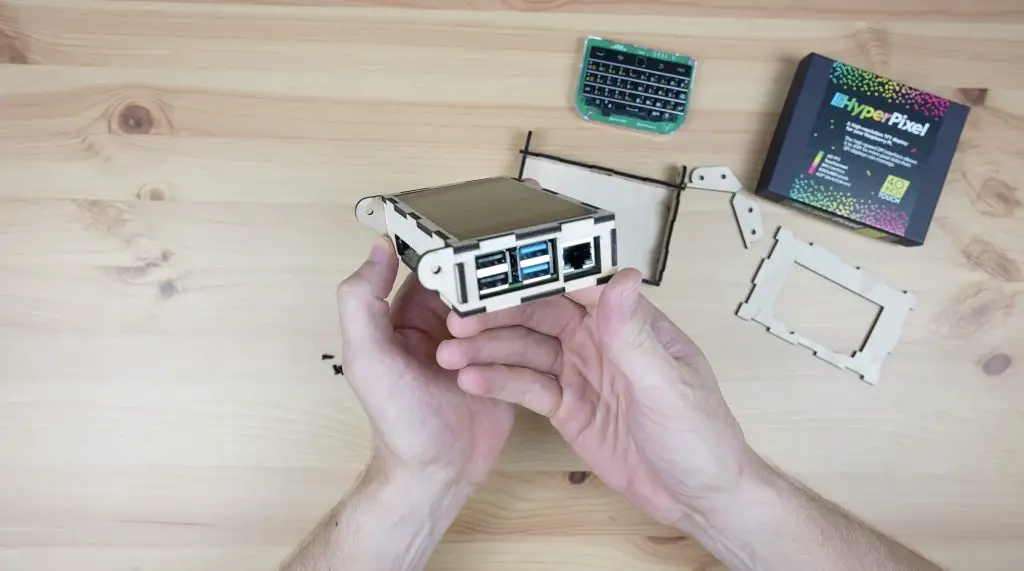
Now let’s mount the display and Pi stack into the top half of the Cyberdeck. The screws that hold the Pi onto the display’s standoffs are too short to go through the plywood as well, so I’m going to replace them with some M2.5x12mm screws.
I’ve prepared a microSD card with Raspberry Pi OS on it and I’ve pre-configured the software for the Hyperpixel 4 display, so it should work automatically shortly after booting up. The microSD card will still be accessible through the slot on the side of the Cyberdeck, so we don’t have to open it up again if we need to re-flash the card.
We can then press the bezel into place around the display. I could add a drop of glue to the edges to make sure that it doesn’t fall out again, but it actually fits into place quite well without glue.
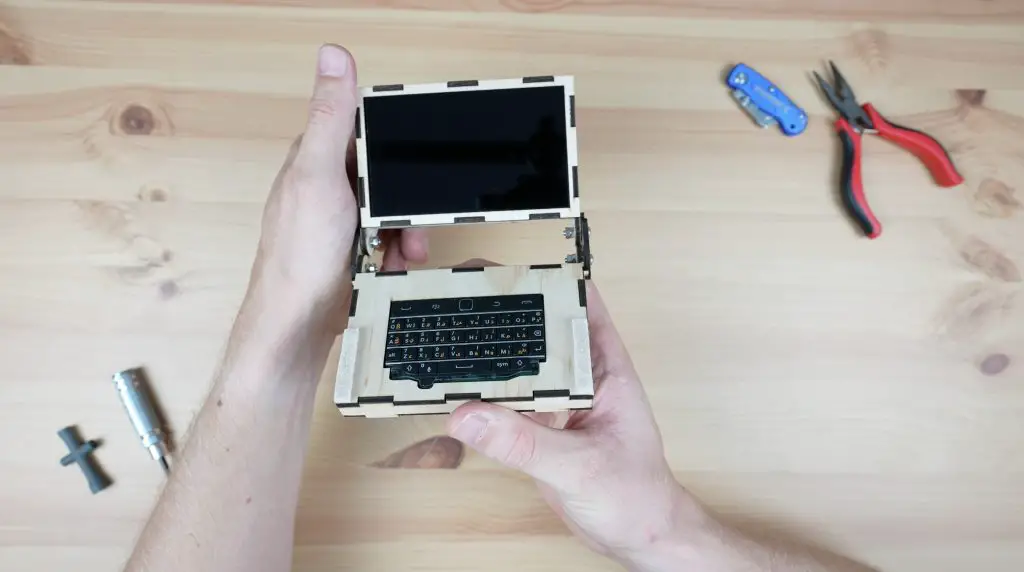
Next, let’s do the same with the keyboard. We’ll position it within the cutout and then glue the bezel into place to hold the keyboard.
Then we need to add the hinges to join the two halves together. These just use some M3x12mm screws, nuts and washers to mount them onto the two halves. I’m using two nuts on each so that the nuts can be tightened against each other and not the hinge so that the hinge is able to move freely.
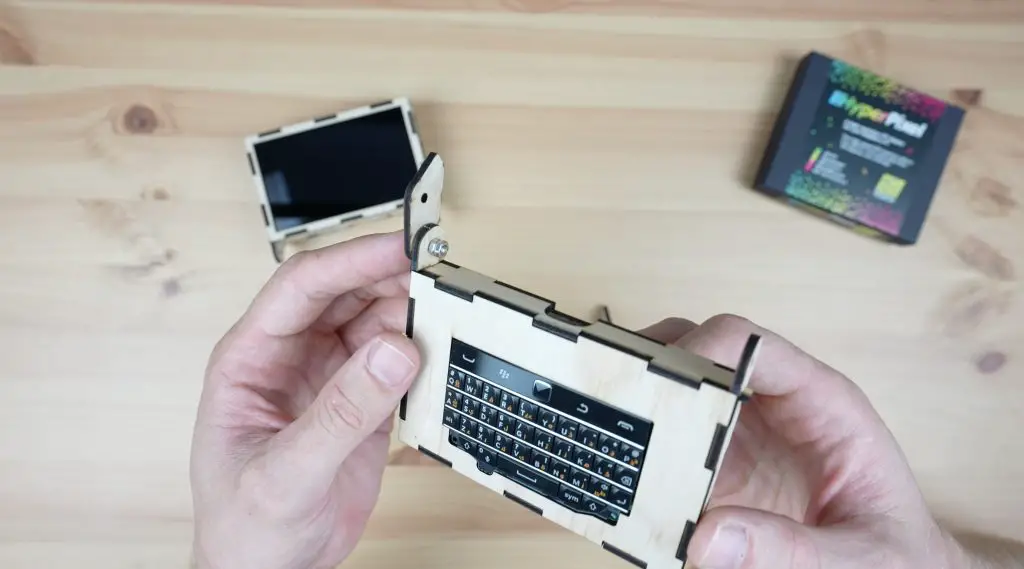
We also need to make sure that they are positioned correctly so that the end stops stop the display from opening too far.
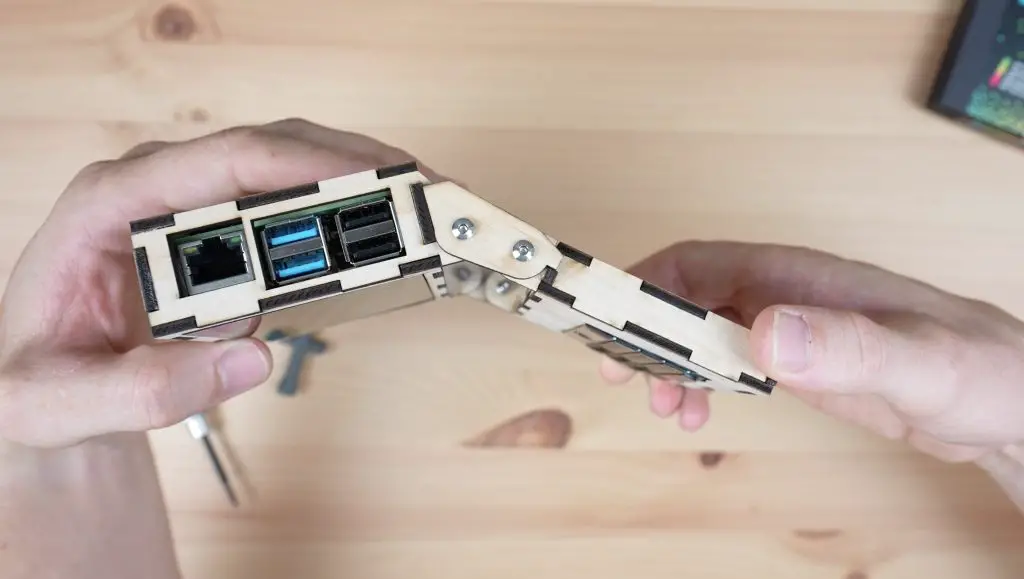
Lastly, I’m going to glue some felt strips onto the outer edges so that the display doesn’t rub against the keyboard when it is closed as this might scratch it.

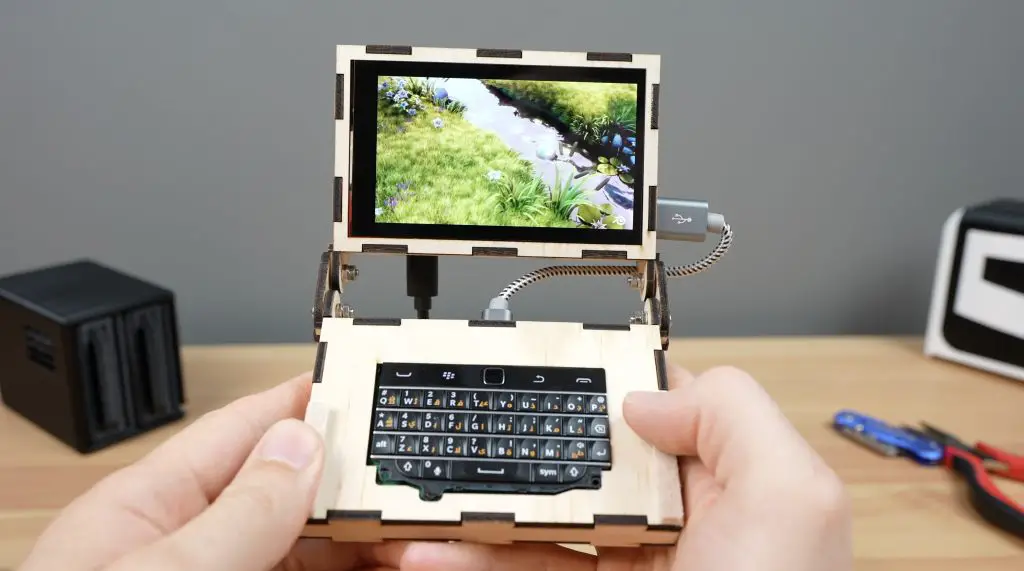
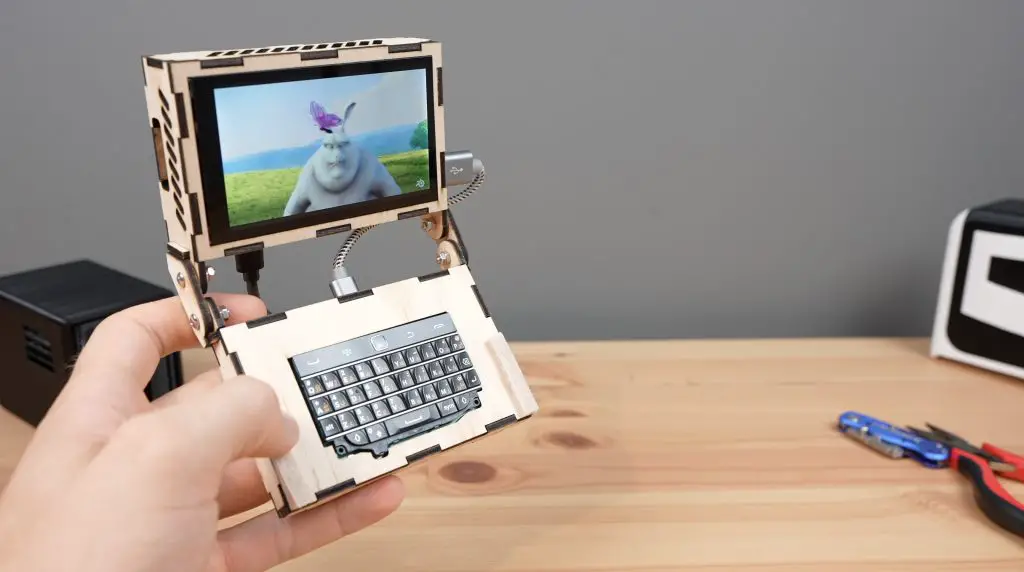
That’s the Cyberdeck complete. I really like the clamshell design and how compact it is when it’s folded up.
Using The Cyberdeck
To use the Cyberdeck, we need to plug in a short USB C cable between the keyboard and the Pi as well as a power cable.

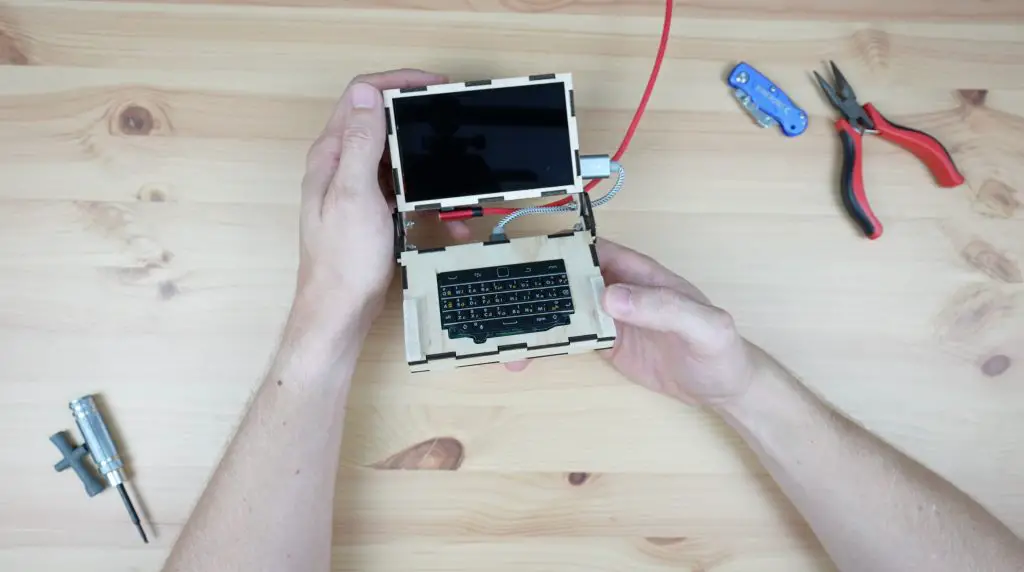
A straight USB C cable is fine if you’re using it as a handheld device, but if you want to use it on a desk then you’ll need to use a cable with a 90-degree connector otherwise it’ll rest on the connector and won’t lie flat on the desk.
Once it boots we can use the touchscreen or trackpad to move the cursor and open applications and we can type in commands using the keyboard.
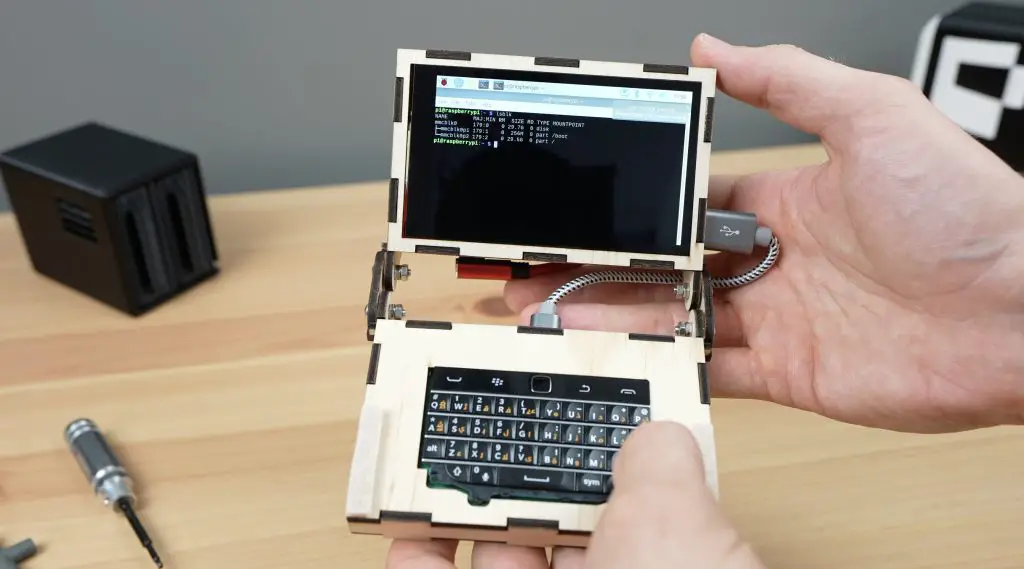
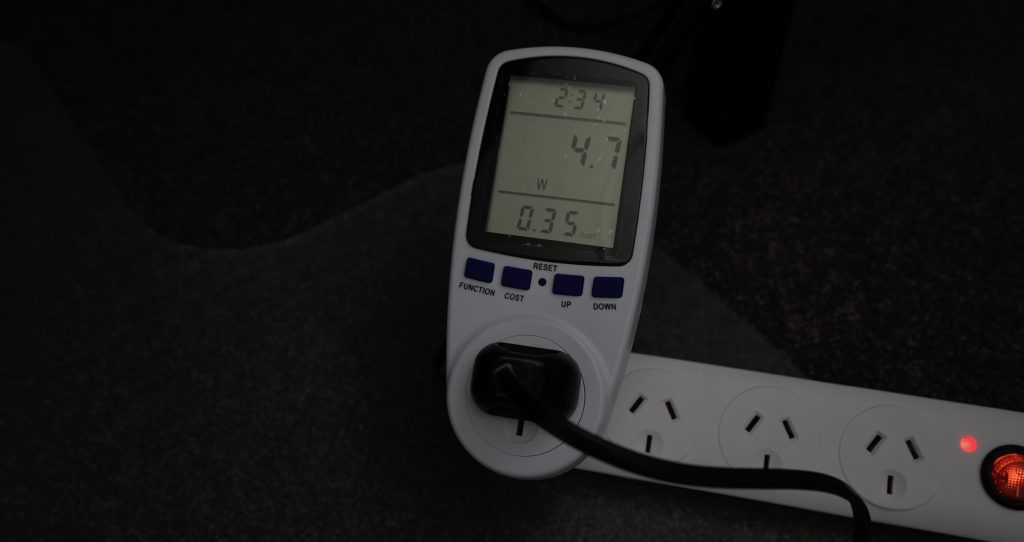
There is an under-voltage warning coming up periodically with this cable. So it probably isn’t able to supply enough power to drive the display and keyboard attached to the Pi as well.
This doesn’t come up if I use my USB-C adaptor directly, but this doesn’t have a 90-degree connector on it.
The Cyberdeck uses around 4-6W when running, so it can be powered through a power bank for a couple of hours if you’d like it to be completely portable.
I think it’s come out really well, let me know what you think of the Cyberdeck in the comments section below and let me know if there is anything that you think I could improve upon or change.
Great gadget, Michael! It would be helpful to see views of it closed to get an idea of it “heft”.
TIA,
RO
Love this !
Awesome Could you sell me one?
Steve
Wilsonsteve018@gmail.com
Awesome Could you sell me one or tho those?
Steve
Wilsonsteve018@gmail.com
wow thats insane that we went from computers the size of building to this. Amazing