Making your own mosaic mirror picture frame is a great way to add a customised and inexpensive feature to a bare wall in your home. By making your own, you have full control over the size, how many pictures you want to include and the colour of the grout and frame to match or compliment existing decor. This is a great weekend project as you’ll need to allow time for the tile cement and grout to set between working on it.
Make sure that you wear proper protective gloves and eyewear when working with and cutting the mirror sections. Glass edges and shards can be extremely sharp and cause sever cuts and permanent damage to your eyes.
What You’ll Need To Make Your Mosaic Mirror Picture Frame
- Large Wood Backboard – Cut to Size or a Standard Size
- Picture Hanging Kit – For Heavy Frames
- Large Center Mirror – Cut to Size or Standard
- Smaller Pieces of Mirror – Mirror Mosaic Kit or a Large Piece and Glass Cutting Tool
- Good Quality Picture Prints – 8 to 12 Work Well
- Clear Glass For Pictures, Cut To Picture Size
- Wood Trim For Frame – Length to Fit around Backboard
- Wood Mitre Saw
- Wood Glue
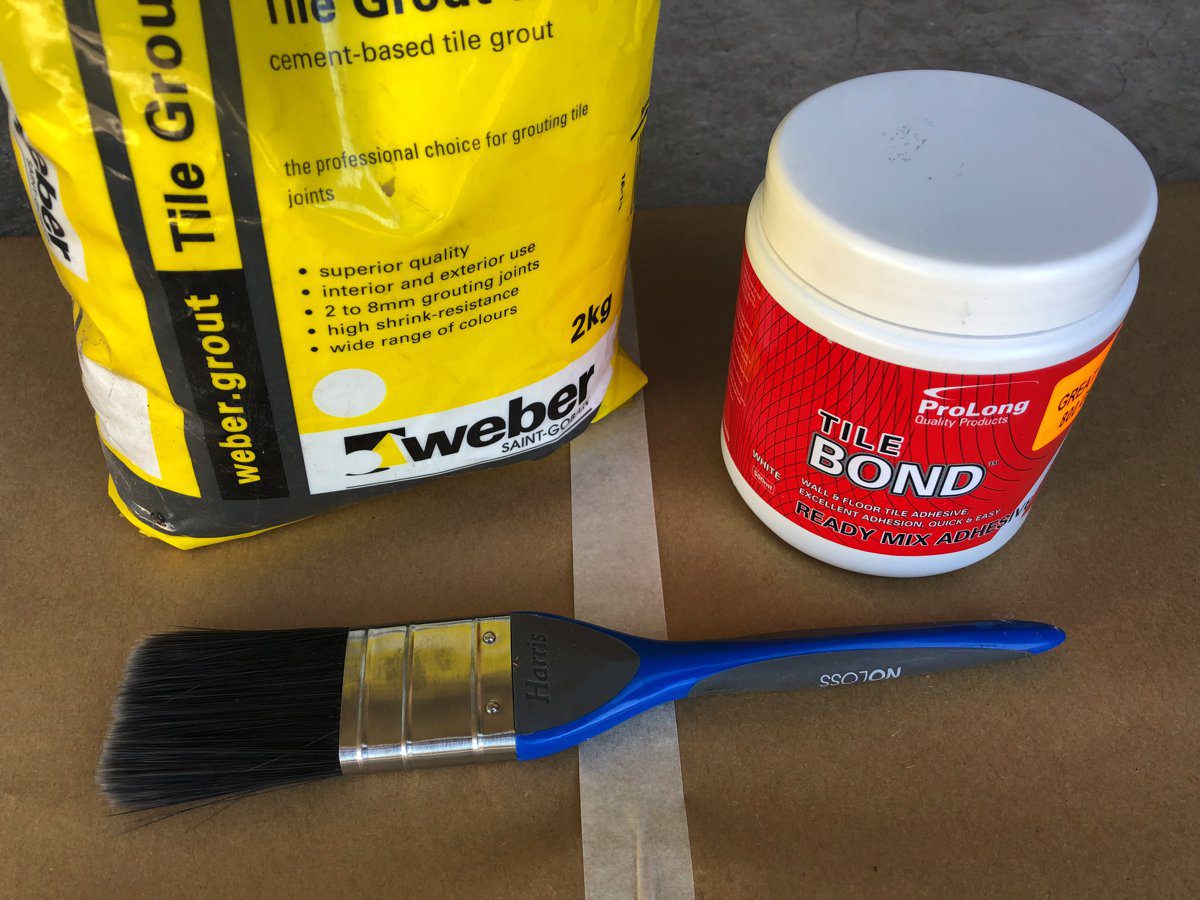
- Premix Flexible Tile Cement or Mirror Adhesive
- White Tile Grout – Or Colour to Suit your Decor
- White or Coloured Paint For Frame
- Grout Sponge
- Paint Brush
How To Make Your Picture Frame
Depending on what your local hardware store stocks and the services they offer, this project can be really easy to assemble or be a little more involved.
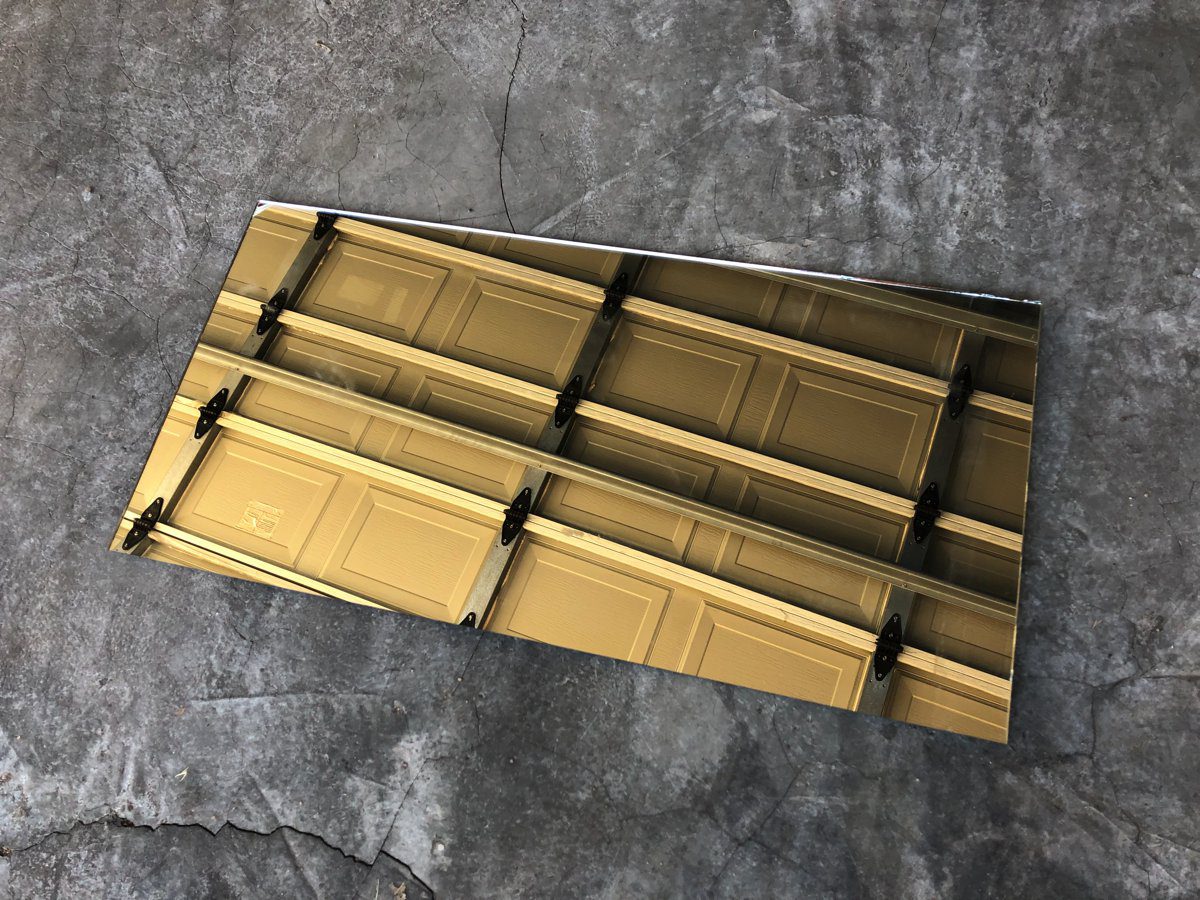
You’ll need a sturdy wooden backboard which is larger than your centre mirror, about 10-20cm (4-8″) around the edges works well. You may get lucky and find a standard size board and mirror which pair well together or you may need to ask your hardware store to cut the mirror or board to size or you may need to cut either yourself.
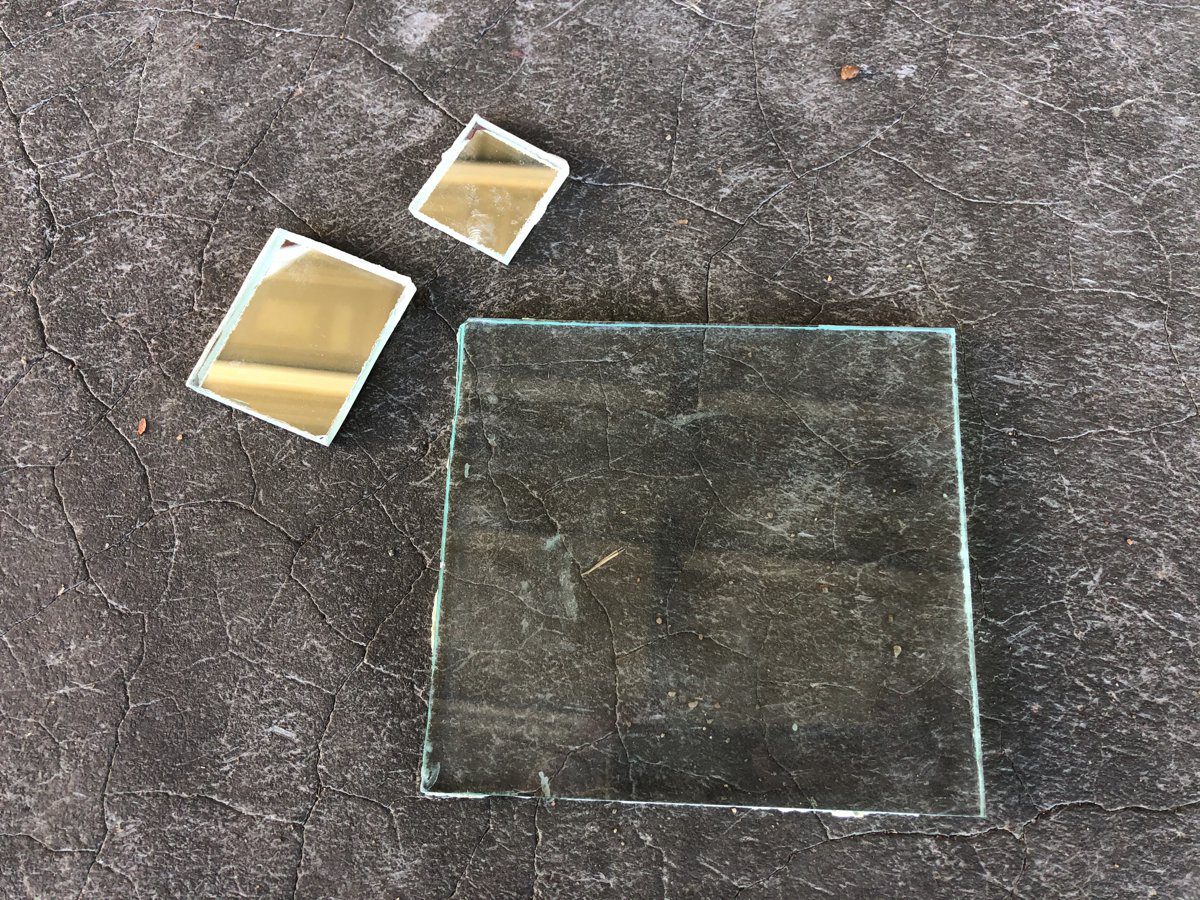
Once you’ve got the board and mirror together, you’ll need the mirror mosaic pieces. Some hardware stores sell mosaic mirror pieces in kits for crafts, theses are great if you’re not comfortable with using a glass cutter to cut a larger piece of mirror into smaller pieces. They are also usually safer to work with as they don’t have sharp edges.
If you can’t find a mosaic kit then buy a regular sized mirror with enough surface area (and a little more) to fill in the gaps between your centre mirror and the edge of the board. Use a glass cutter to cut/break this mirror up into smaller pieces to make a mosaic around the outside of your centre mirror. Although this takes a lot more time, it also gives you the flexibility to cut pieces to the exact size you need and tailor your mosaic to fit around your photos.
Next you’ll need to cut your glass, or get your hardware store to cut your glass to the size of your pictures. The glass should be cut to the exact dimensions of your pictures.
Finally, you’ll need to cut your wooden trim to size to build a frame around your larger baseboard. Use a mitre saw to cut 45 degree cuts with the inside edge, the edge to be stuck to the baseboard, cut to the dimensions of your baseboard. Lay out your frame after each cut to make sure that you are cutting the correct orientation and length.
Once you’ve got your materials together, its time to start assembling your frame. Start by using your flexible tile cement to glue your large centre mirror into the centre of your backboard. Make sure that the mirror is straight and that there is an equal amount of space on the opposite sides of the mirror.

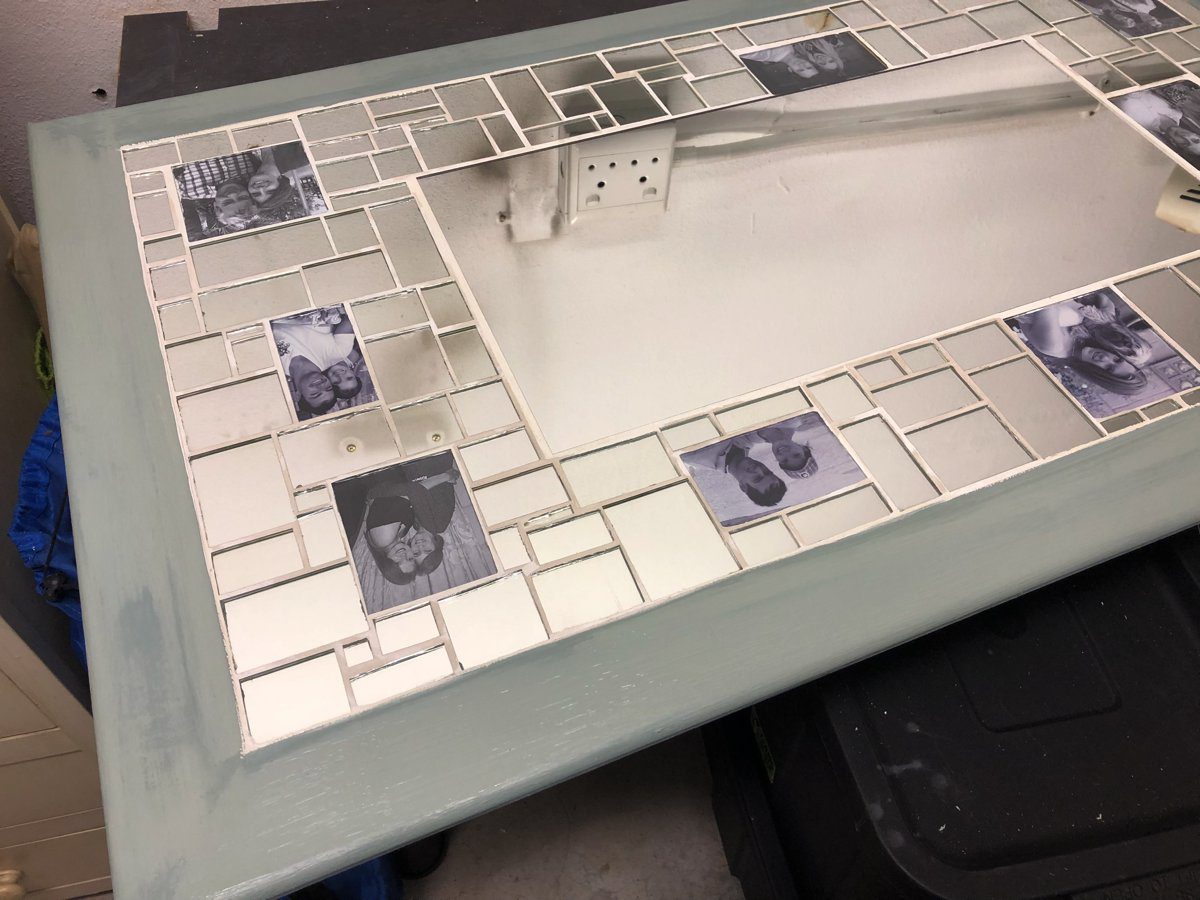
Now you can start laying out and gluing your mosaic. Start by placing your pictures around your centre mirror. Secure the pictures to the back of the glass with a small piece of tape along the top and bottom edges. Then use a drop or two of wood glue on the back of the picture to glue the picture to the backboard. The pictures don’t need to be really well stuck down as the grout around the edges of the glass will further help to hold them in place. Make sure you leave a small and consistent gap around all of your pictures and mosaic pieces to grout.
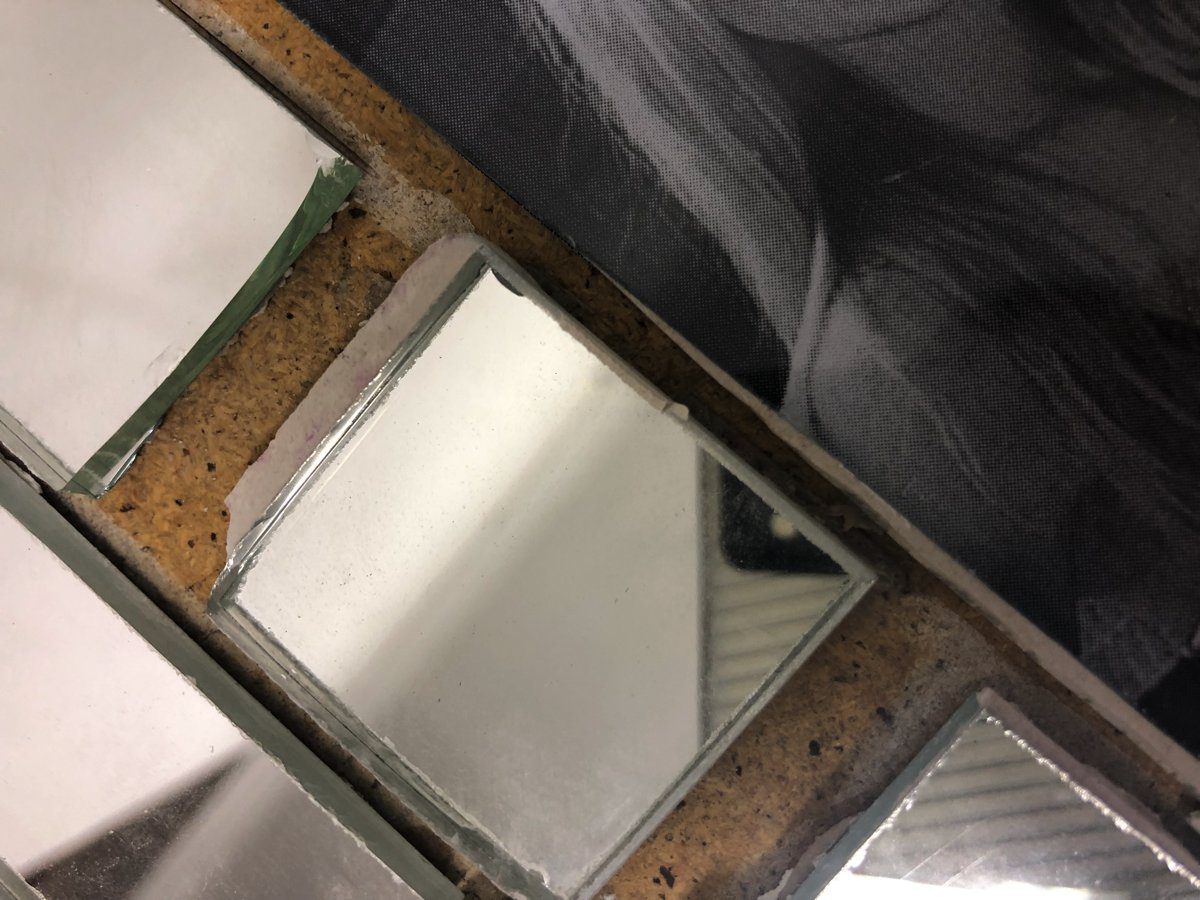
Allow a half hour or so for the glue to dry and then start positioning (and cutting if you’re not using a kit) your mosaic pieces. Lay out a small section of around ten to fifteen pieces to make sure you’re happy with the spacing and then glue them into place with the tile adhesive. Try and work from one corner or edge across to the opposite edge.
Once your mosaics have been glued into place, allow the adhesive to set according to the manufacturers recommendations.
When the glue has set, you can start assembling your wooden trim around the backboard to build a frame. Glue the trim along the edges and corners, making sure that the top of the trim is flush with the top of the mosaic pieces – all on one level. I used some old wooden trim which had been whitewashed and then painted a colour over it with chalk paint. Have a look at this guide on making your own chalk paint.
Its probably best to leave the frame overnight at this stage so that the frame glue and tile adhesive has enough time to set properly.
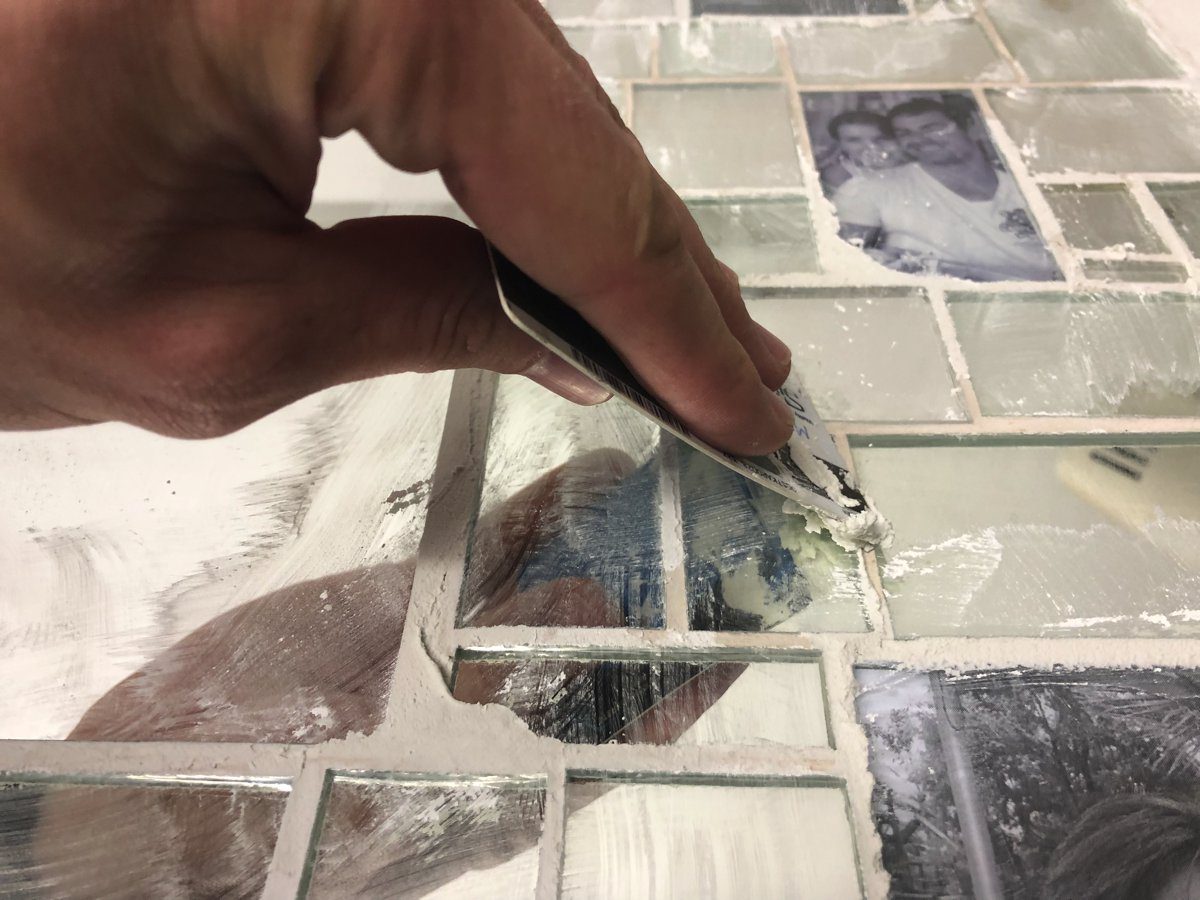
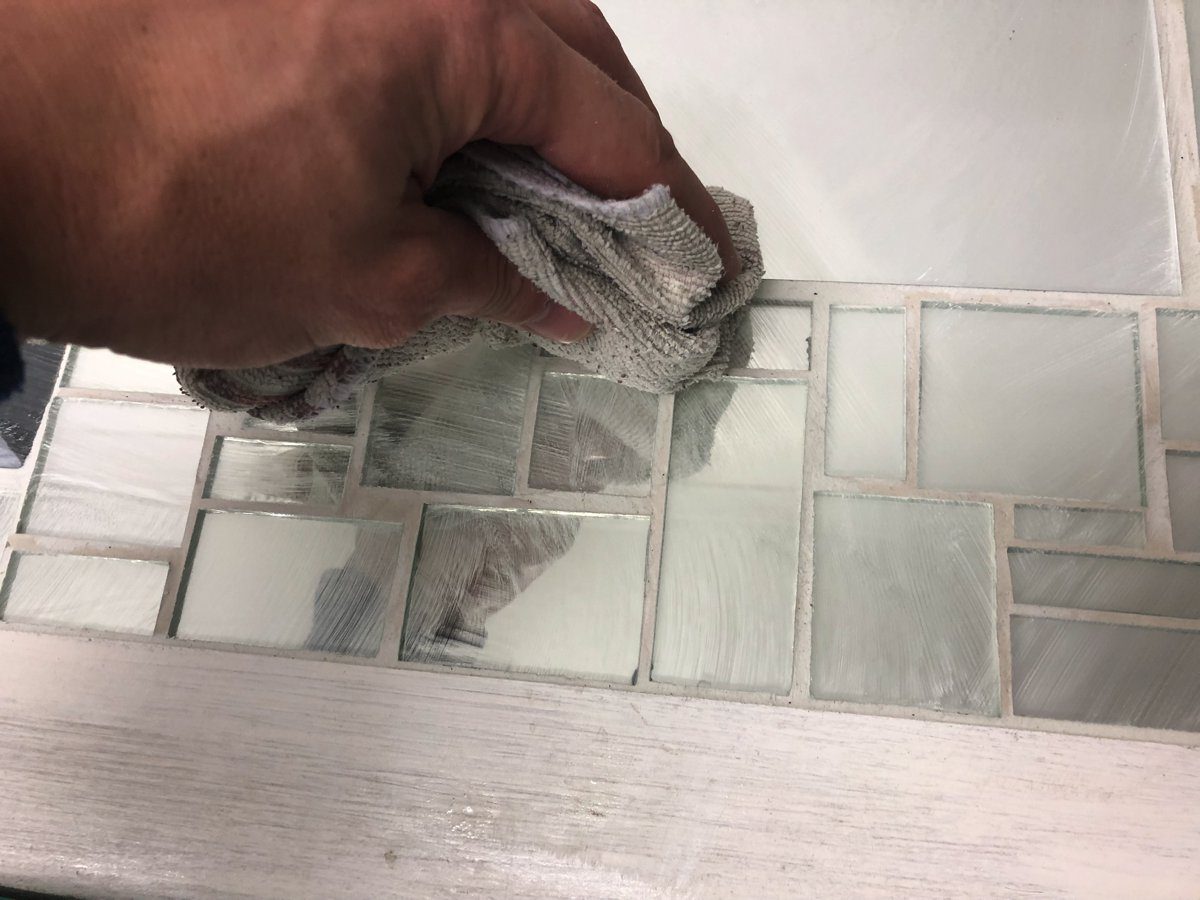
The next day, mix up a batch of tile grout and use a grout sponge, old credit card, rubber scraper or cloth to grout the gaps between the mosaic pieces and pictures. Follow the grout directions on your packaging to ensure that the consistency and application procedure is correct. You usually have to use an applicator to push the grout into the gap, then wait a half hour or so for the grout to set and then use a wet cloth to wipe the excess grout away.
Try not to add too much grout around the pictures, this allows you to change the pictures in the future by gently chipping the grout away and pulling the glass out. You could also try make a slot in the backboard to allow you to swap out the pictures quickly and easily but this is quite a bit more involved.
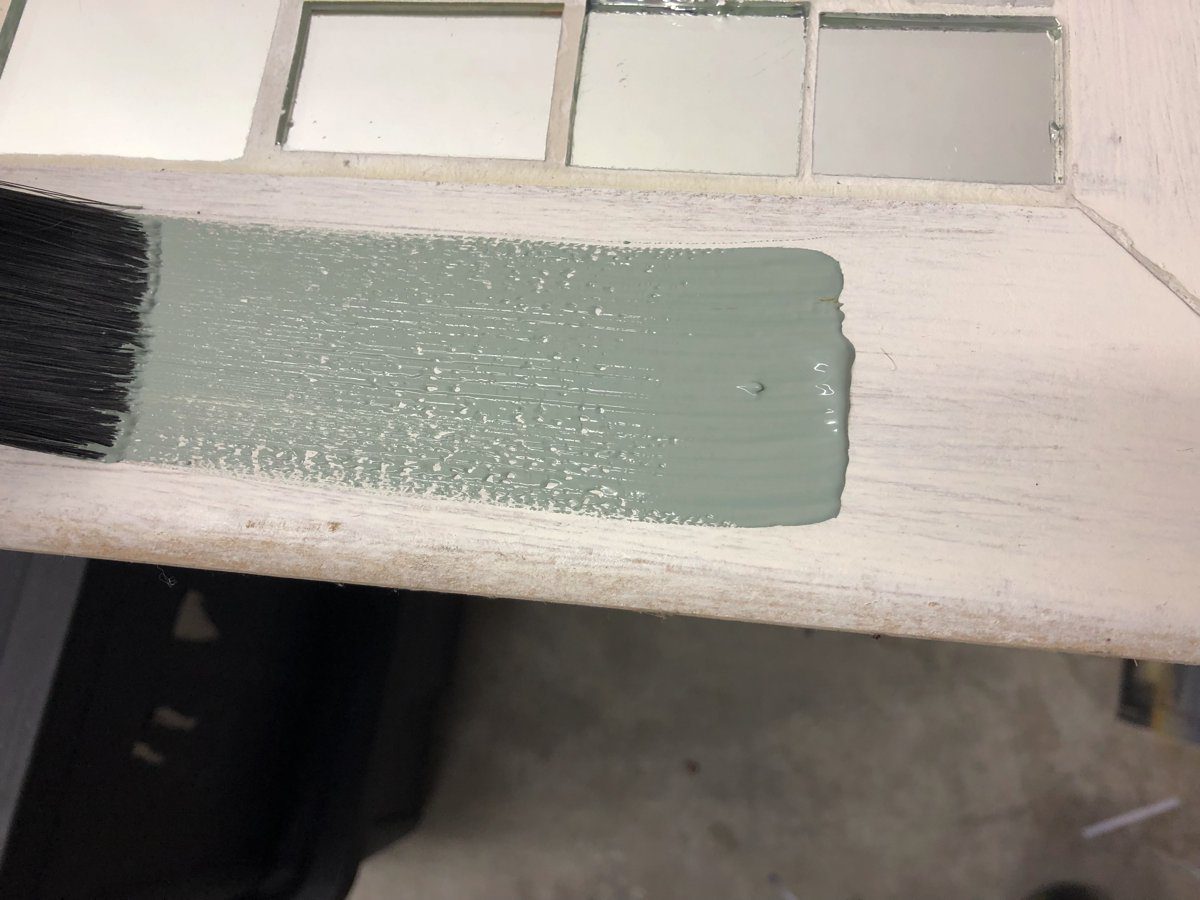
Now you can paint your frame and then add your picture hanging kit to the back of the backboard.
Allow the paint and grout to dry completely. Lastly, hang your new mosaic mirror picture frame on your wall.