There are a number of different designs for a DIY automatic fish feeder online but we particularly liked this design by Trevor DIY which allows you to measure out exact quantities of food for your fish and allows you to vary the amount and type of food per serving. It’s really easy to make, inexpensive and versatile.
This project assumes you know the basics of Arduino programming, otherwise read our article on getting started with Arduino.
Let’s have a look at how to make one…
What You Need For Your Automatic Fish Feeder
- Arduino (Uno Used Here) – Buy Here
- Arduino Mains Adapter – Buy Here
- Stepper Motor & Driver – Buy Here
- Hot Glue & Glue Gun – Buy Here
- 3D Printer or Facility to Print Components
How To Build Your Own Arduino Based Automatic Fish Feeder
There are essentially three sections involved in building your Arduino based automatic fish feeder; connecting the stepper motor and driver to your Arduino, printing and assembling the feeding mechanism and finally programming your Arduino to operate the feeding mechanism.
Connecting The Stepper Motor & Driver
To start with, you need to get your stepper motor connected to your Arduino and turning correctly. You’ll need a stepper motor driver to convert the signal from the Arduino into an output which sequentially energises the stepper motor’s coils in order to turn it. The stepper motor and driver available through the link is able to be driven directly from the Arduino’s outputs. Some larger stepper motors and drivers may require their own dedicated power supply.
If you are building a larger feeder or have a larger stepper motor, you can drive it using a Pololu stepper motor driver. These are commonly used with Arduino boards, have a look at our guide on Arduino Stepper Motor Control Using A Pololu Driver.
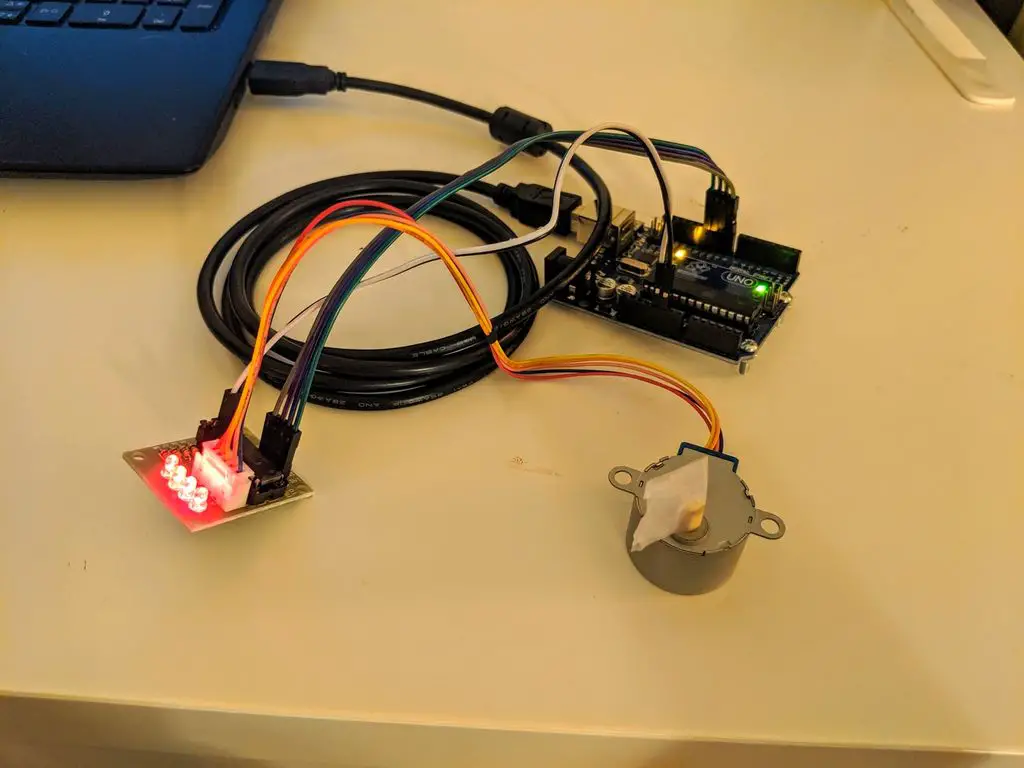
In order to connect this stepper motor driver to your Arduino, plug the stepper motor into the driver using the white plug. Then connect the stepper motor driver to your Arduino using jumper leads, connecting the motor driver’s 1N1, 1N2, 1N3 and 1N4 pins to the Arduino pins 8, 9, 10 and 11 respectively. Finally, connect the motor driver’s power pins – and + to your Arduino’s GND and 5V pins.
Printing & Assembling The Feeding Mechanism
There are two parts required for the feeding mechanism, the turn table which rotates and the plate which is fixed and allows one partition of food from the turn table to fall through at a time.
The parts for the feeding mechanism have been design in Autodesk Inventor and can be downloaded here:
The turn table as it is currently designed has partitions for 14 servings which means you can feed your fish a single serving per day for 14 days or two servings per day for 7 days. You can obviously make adjustments to the models to suite your own requirements if you need more servings. Just remember that fish food generally has a short shelf life when not in a sealed container, especially in higher humidity environments so don’t design it to last for too long!
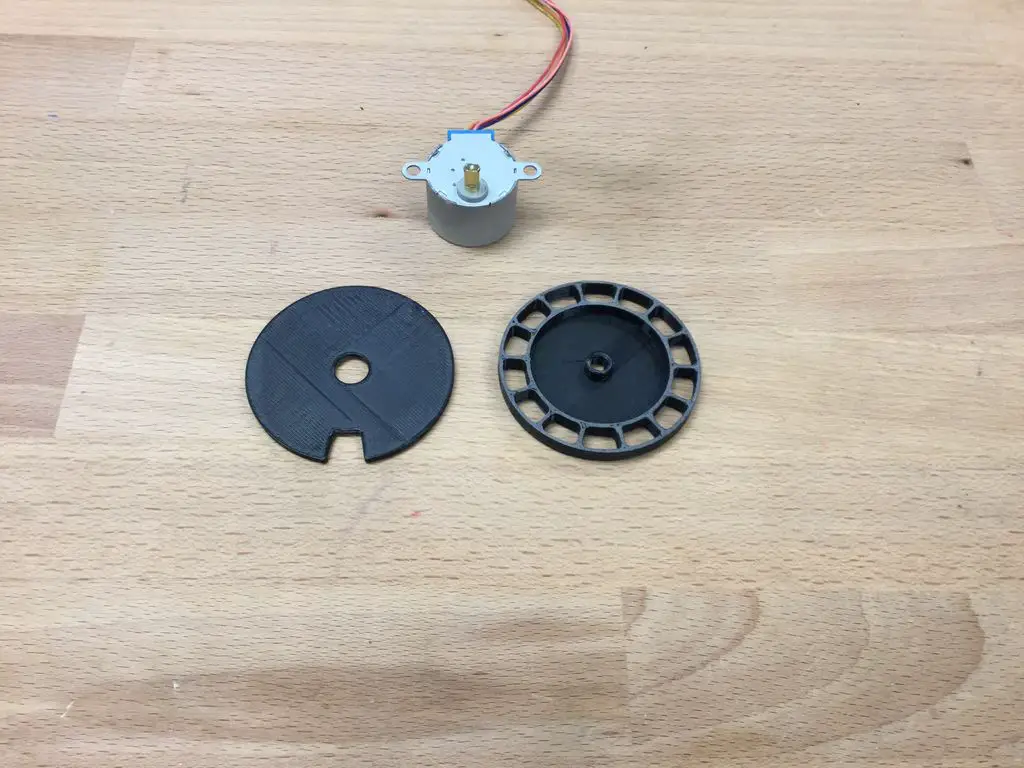
Print out the above two parts using your own 3D printer or send them to a 3D print facility nearby. They do not need to be very strong so you can probably get away with a 3 layer shell thickness and 30% infill. You should also be able to print the model in either ABS, PLA or HIPS as you have available.
If your printer prints quite roughly then you may want to sand down both flat surfaces so that the two pieces slide easily over each other.
Glue the flat plate down onto the face of the stepper motor with the motor shaft in the centre of the hole.
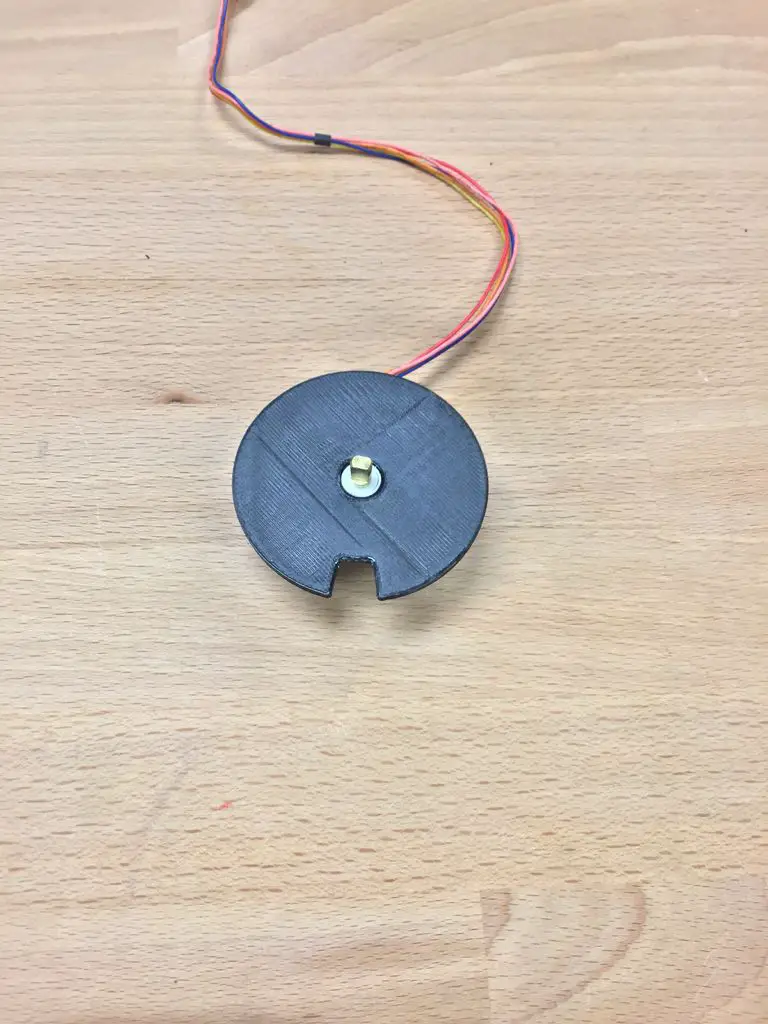
Now press the turn table onto the shaft of the motor. It should be a tight fit so that it turns smoothly with the shaft and rotates easily over the flat plate beneath it. This may require some adjustment to get the fit between the two plates right so that they can move over each other easily.
You can also secure the turn table to the shaft with a drop of super glue to make sure that it doesn’t move or come loose during use.
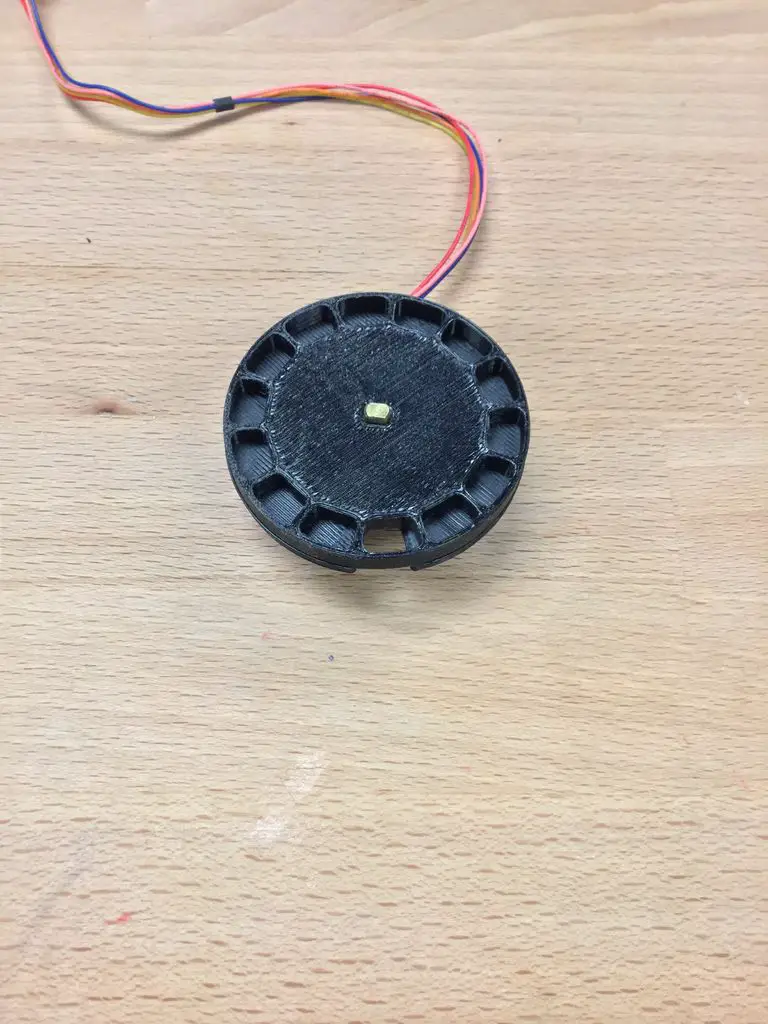
Finally, attach your Arduino and stepper motor assembly onto the side or top of your fish tank, hot glue also works well for this, with the opening in the flat plate positioned over the water. As the turn table turns over the flat plate, each serving will be dropped through the hole and into the water.


Programming Your Arduino
The programming of your Arduino is fairly straight forward, it makes use of the stepper.h library to reduce coding requirements. Essentially the code waits an amount of time and then moves the motor enough to dump one serving of food through the bottom plate and then begins waiting again.
//Code Adapted From Trevor_DIY
//25 June 2019

#include <Stepper.h>    //include the stepper motor library

const int stepsPerRevolution = 2048;   //From your motor data sheet, number of steps per revolution
int delayCount = 1;    //A counter to keep track of which delay is in use, 1 or 2

Stepper myStepper(stepsPerRevolution, 8, 9, 10, 11);   //Initialize the stepper library on pins 8 through to 11

void setup()
{
  myStepper.setSpeed(10);      // set the speed at 10 rpm:
}

void loop()
{
  myStepper.step(146);           //146 steps is 1/14th of a full rotation. Since we have 14 wells, this will index the feeder one space.
  digitalWrite(8, LOW);          //Turn the motor off when not in use to preserve energy and prevent it from heating up
  digitalWrite(9, LOW);
  digitalWrite(10, LOW);
  digitalWrite(11, LOW);
  if (delayCount == 1)
  {
    delay(28800000);               //Pause for 8 hours between morning and evening feeding. 8 x 60 x 60 x 1000 to get to milliseconds
    delayCount = 2;
  }
  else if (delayCount == 2)
  {
    delay(57600000);               //Pause for 16 hours between evening and morning feeding. 16 x 60 x 60 x 1000 to get to milliseconds
    delayCount = 1;
  }
}
For testing it is worthwhile to set both delays to 1000 milliseconds (1 second) so that you can test that the motor does rotate through 360 degrees to all of the feeding bays.
You can now power your Arduino using a USB cable and adapter or through an Arduino power supply, just make sure that the power is not interrupted or the timers will be reset. When you first switch it on, it will begin with the morning feed and then start timing to the evening feeding cycle so make sure to take this into account when first turning it on.
This won’t be a major issue if the power does go down and come back on while you’re away, the feeder will continue to feed your fish when it turns back on, it will just be at the incorrect times.
Have you tried building something similar for your fish or other pets? Let us know in the comments section below. We’d love to hear your thoughts or tips and tricks.
This article has been modified and used under the Creative Commons license CC BY-NC-SA 4.0.
Hello everybody 🙂 I’m pretty new to 3d printing and I have quite a few questions on the matter, so I hope you won’t get mad at me for asking here at least couple of them. I think even before I’ll get seriously into modelling I should focus on the software itself, and that’s what I’d like to ask you about. Mainly, should I begin with the most crudest program there is or would it be better to start on something more complicated? I’m worried that I’ll get some unwanted quirks while working with less complex software. My second question is about the program as well: should I search for software that would let me design and slice it in it, or should I use a different software for each of them? Does it even make a difference? Surprisingly, I couldn’t find the answer to that, as it seems like most websites want to focus on the very basics (like what is 3d printing and so on), and while the answers to those questions are fine, it seems like no one wants to go into the details (it looks like some of them even steal from each other! I swear I’ve read the same answers to the same questions on at least 3 different websites) but I’m getting off-topic… The last question is about 3d pens. Would it be possible to somehow convert whatever I draw with a 3d pen to a 3d model in a software? For example, if I’ll draw a car with 3d pen, would it be possible to get its outline in a program? I’m not sure how that could even work, but the very idea sounds interesting to me. Anyway, I think I’ll stop here just in case no one will answer me and all of this writing will go to waste. I’m sorry that I’m using your content to ask questions, but I hope you can relate and assist a newbie like me. Anyway, thank you for posting. I did learn something from this and that’s always appreciated. Thank you, and I hope to hear back from you very soon 🙂
Do you have the origonal files for the 3d model? If you do can you send me the link?
Hello! Great DIY project, congrats!
Do you happen to have the inventor files? I would like to extend to 20 servings of bigger volume. Thanks in advance!