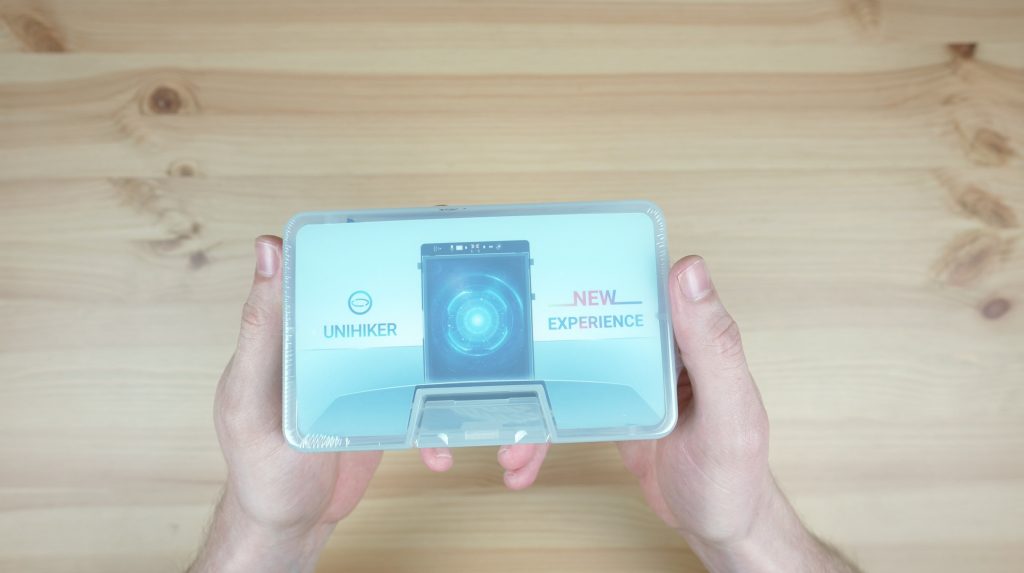
The Unihiker is a new single-board computer from DFRobot which is a bit different to the ones that I usually take a look at on my blog.
The Unihiker is designed to bridge the gap between a traditional single-board computer (SBC that runs an operating system like Linux, and a microcontroller like an Arduino. It’s actually got both of these onboard.
It’s got a traditional CPU, memory and storage that runs Debian 10, and it’s coupled with a microcontroller that controls all of the IO, including the onboard sensors and the expansion ports. So it has the flexibility of an SBC, allowing programming and running programs directly from the device, but it also has the timing reliability and robustness of a dedicated microcontroller.
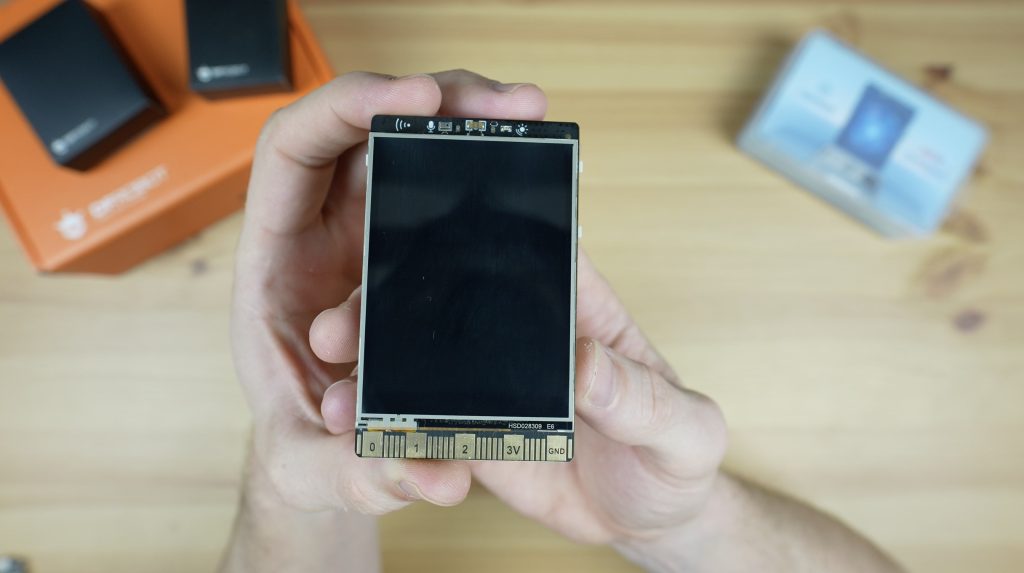
It’s also got an onboard 2.8″ touch display, built-in WiFi and Bluetooth and it’s equipped with a range of onboard sensors.
Here is my video review and testing of the Unihiker, read on for the written review:
Get The Unihiker & Parts For The Test Projects
- Unihiker (Web store) – Buy Here
- Unihiker (Amazon) – Buy Here
- Unihiker Silicon Case – Buy Here
- DFRobot BME280 Sensor – Buy Here
- Relay Module – Buy Here
- Motor, Fan & Battery Pack – Buy Here
Some of the above parts are affiliate links. By purchasing products through the above links, you’ll be supporting my blog, at no additional cost to you.
Taking A Look At The Unihiker’s Hardware
The Unihiker comes in an opaque plastic case along with an included USB C programming cable and a range of white connector cables to connect sensors and modules to. The Unihiker itself if packaged in a black bubble sleeve for additional protection within the case.
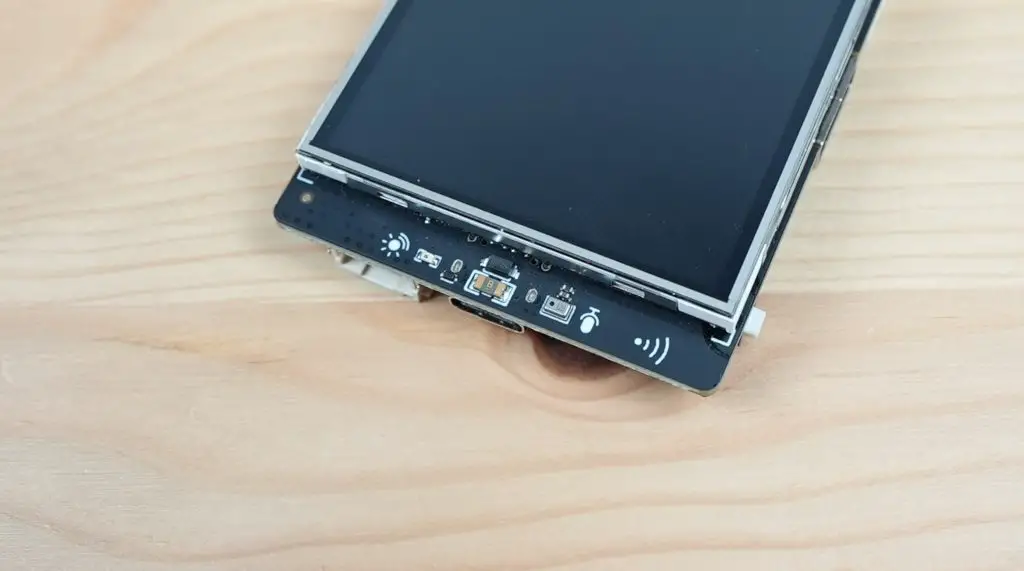
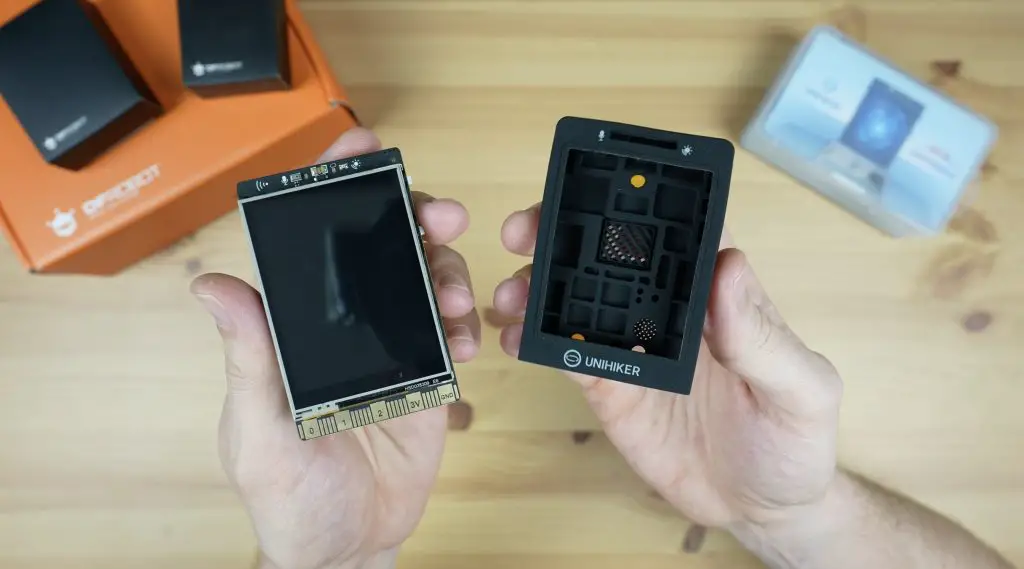
At the front is the 2.8″ touch display and along the top of the display is the light sensor and microphone.
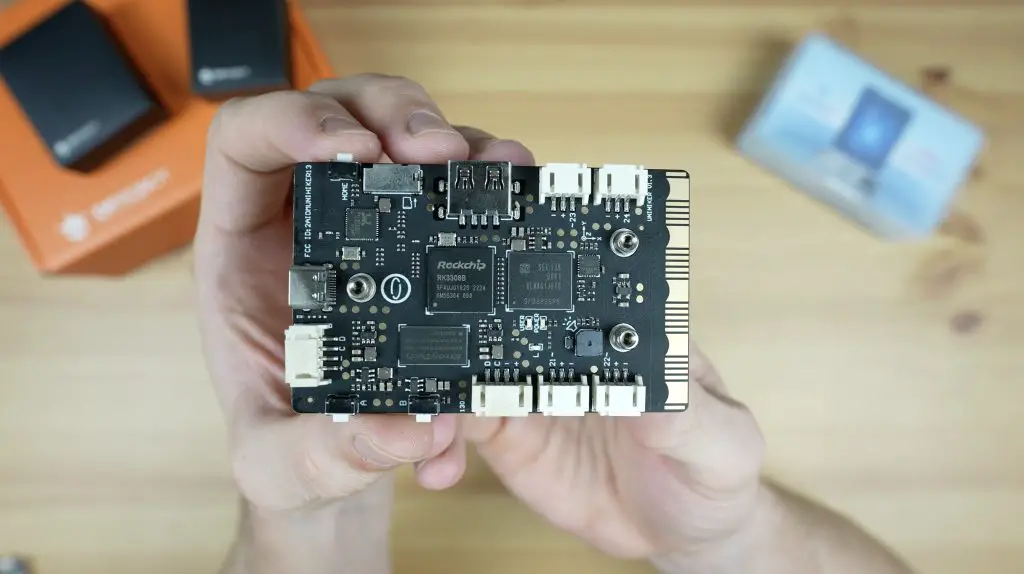
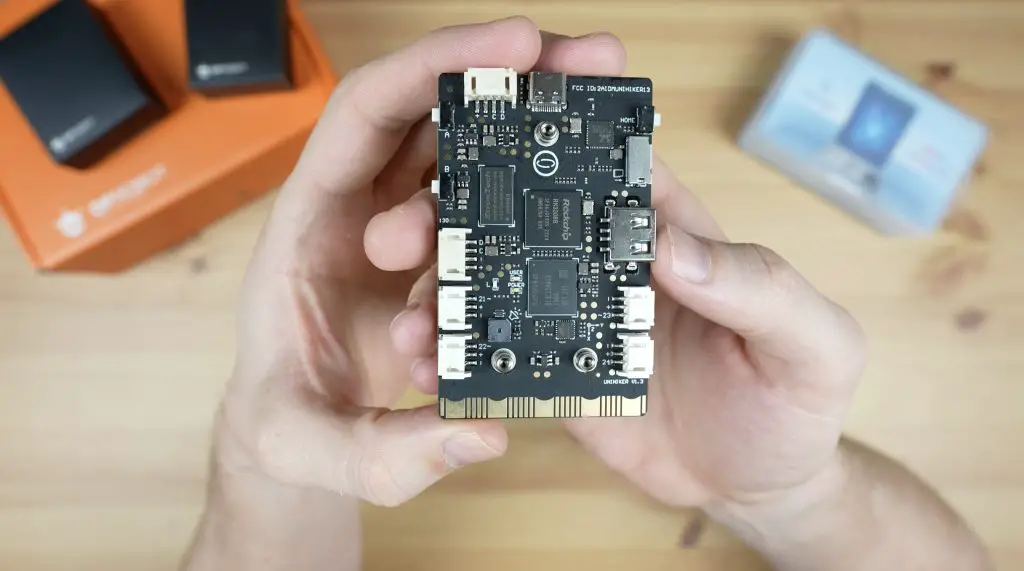
On the back is the processor, which is an RK3308 64-bit, 4-core processor running at 1.2GHz. So it’s not exactly a powerhouse, but it’s plenty for what the Unihiker is designed to do. It’s got 512MB of DDR3 RAM and 16GB of onboard eMMC storage.
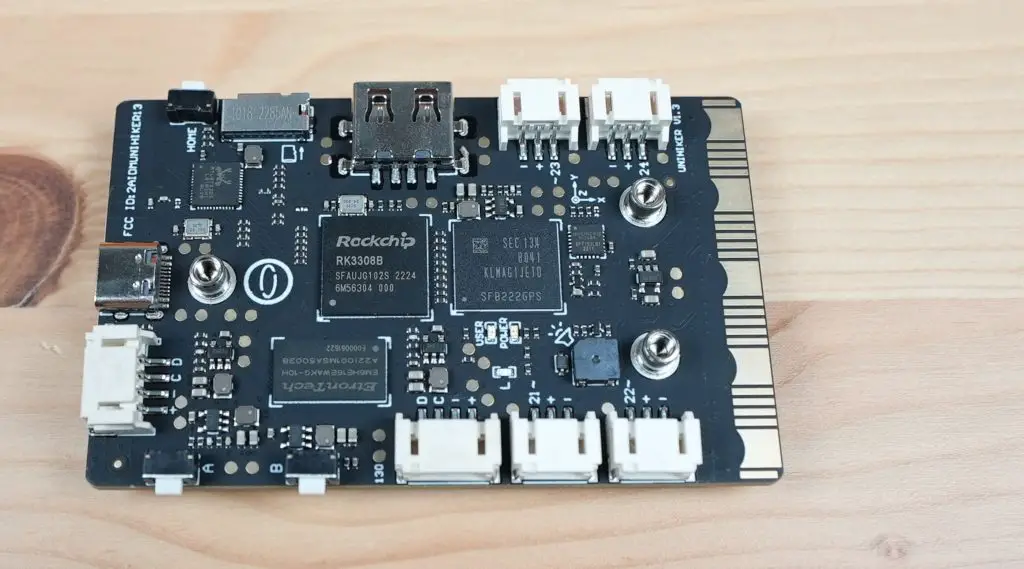
It is coupled with a Gigadevice RISC-based microcontroller running at 108Mhz which 64kB of Flash memory and 32kB of SRAM.
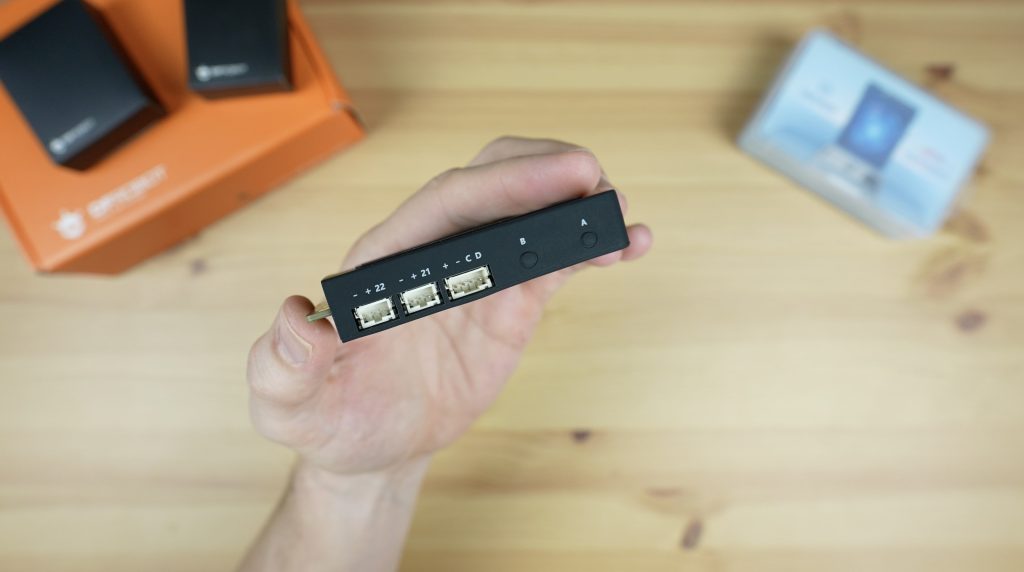
On the back is also a microSD card slot, a range of plugs to connect sensors and actuators to, as well as a buzzer, gyroscope and accelerometer.
Along the edges, we’ve got two pushbuttons on the right-hand side and then a home button on the left. These are programmable, so they can be used to add functionality to your projects.
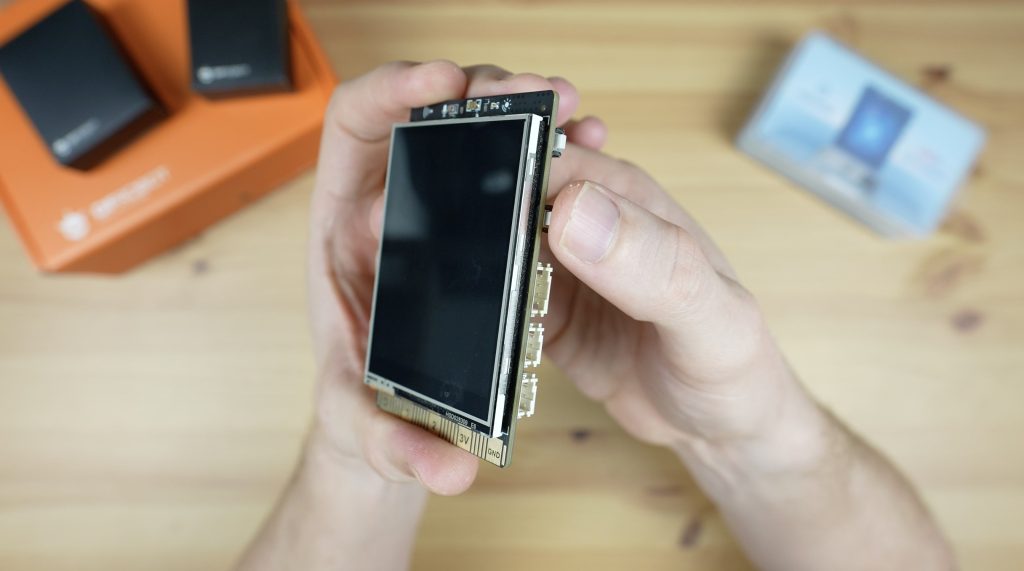
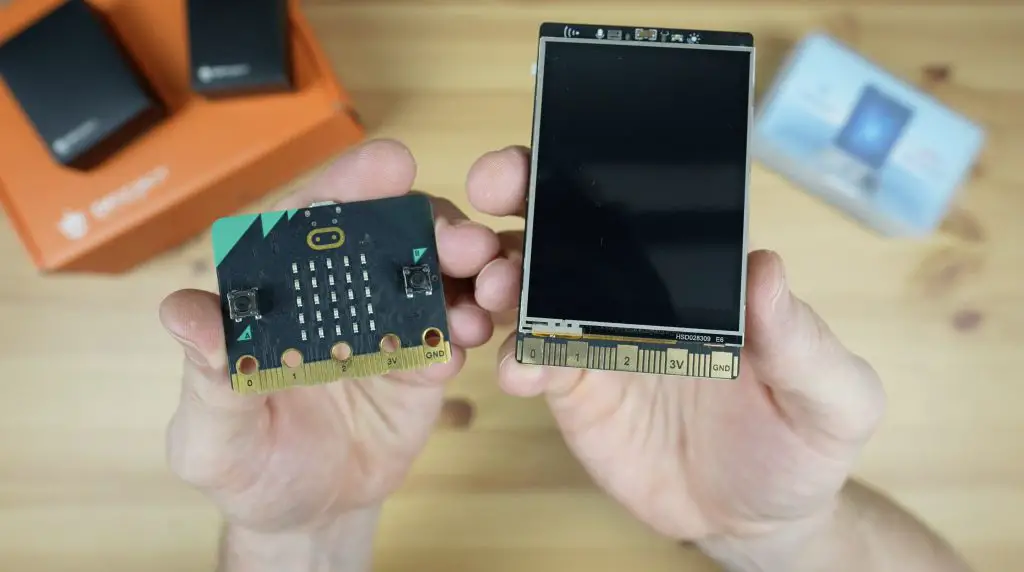
Along the bottom is the edge connector. This is essentially an expansion connector that allows access to additional IO pins and interfaces. This connector follows the same format as the connector that is used on a Micro:bit, so I assume it would be compatible with most of the expansion boards available for that platform.
DFRobot also make a silicon case for the Unihiker which fits snugly around it while still allowing access to all of its ports and sensors. The case also comes with a removable protector for the edge connector at the bottom. You can get it in red or green as well if you don’t like black.

First Boot & Look At The Operating System
The Unihiker comes preloaded with a Debian-based operating system, so you just need to plug it into your computer or power source to boot.
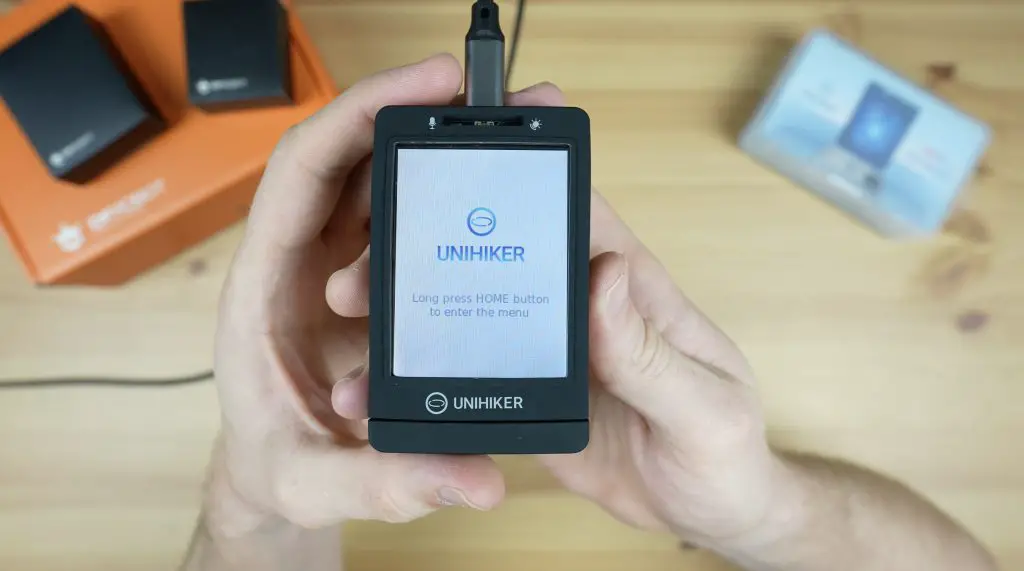
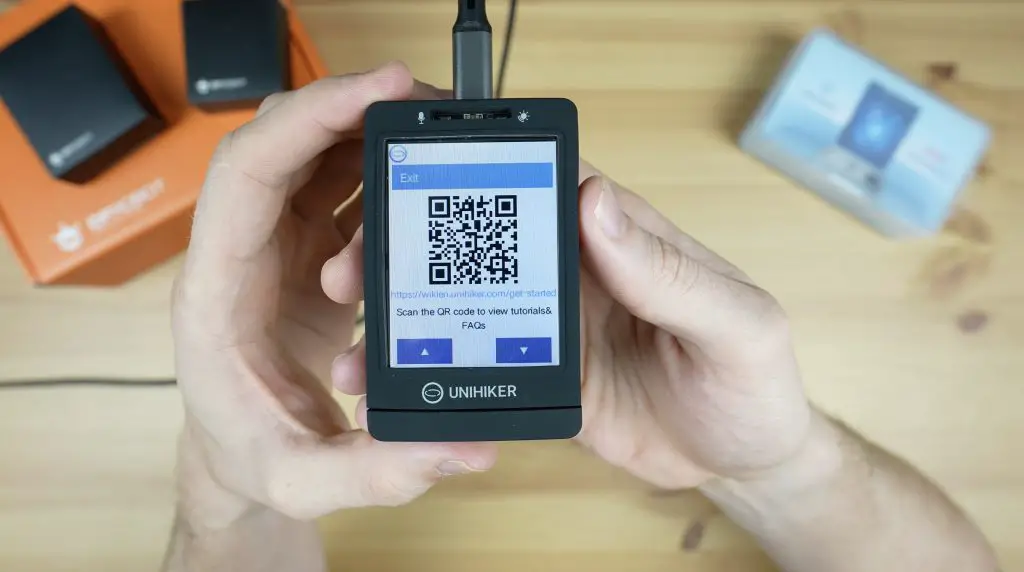
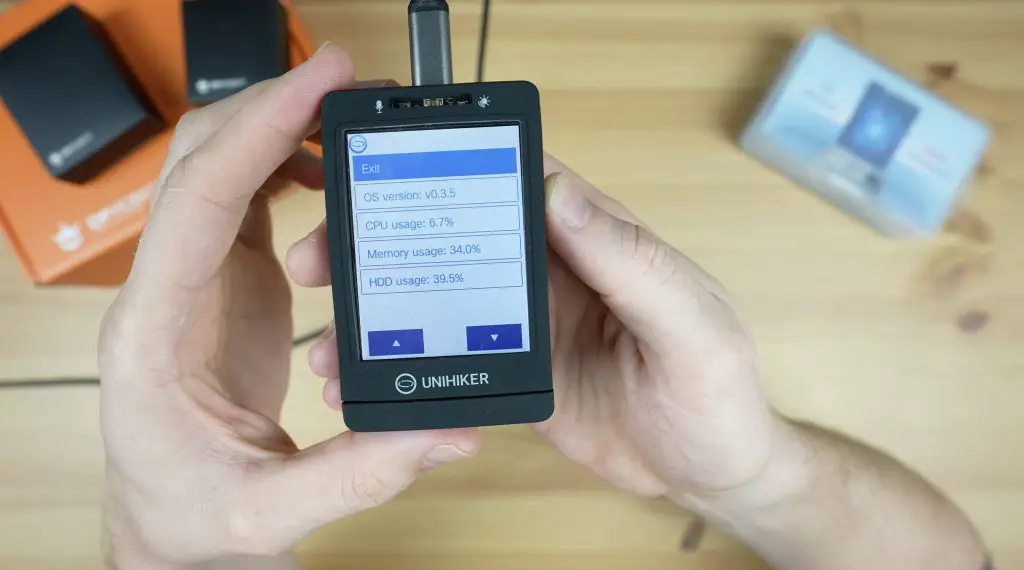
Once it has booted up, the buttons on the sides along with the touch display allow you to navigate through the menus to access documentation or tutorials, run programs directly from the device, connect the Unihiker to your network or make changes to settings.
Programming the Unihiker is done through a network connection with a few different options:
- It can be directly attached to a computer through a USB cable and can then be accessed as an RNDIS device with a fixed IP address [10.1.2.3].
- You can connect it to your WiFi network and then use a computer, tablet or even your mobile phone on the same network to program it.
- You can create a hotspot on the Unihiker and connect to it directly from a computer, tablet or phone.
- And if none of those options appeal to you, you can even plug a USB Ethernet adaptor into its USB port and connect it to your network via. Ethernet.
I’m going to go with the first option, so let’s plug the Unihiker into a computer and try to load a program onto it.
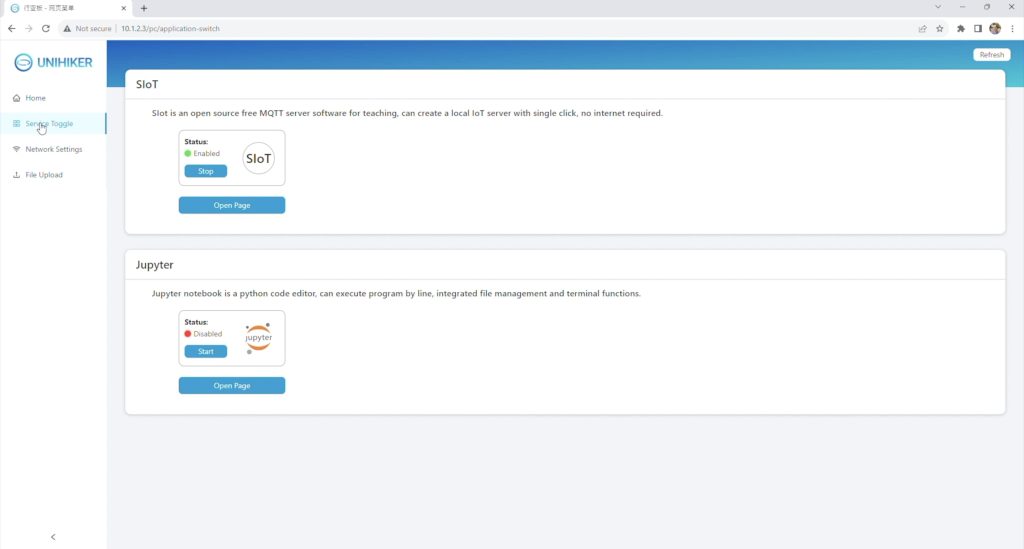
As mentioned earlier, if you connect the Unihiker to your computer via USB it can be programmed using its fixed IP address. We can also enter this address [10.1.2.3] into the browser on the computer that it is connected to and we can then access its local web service.
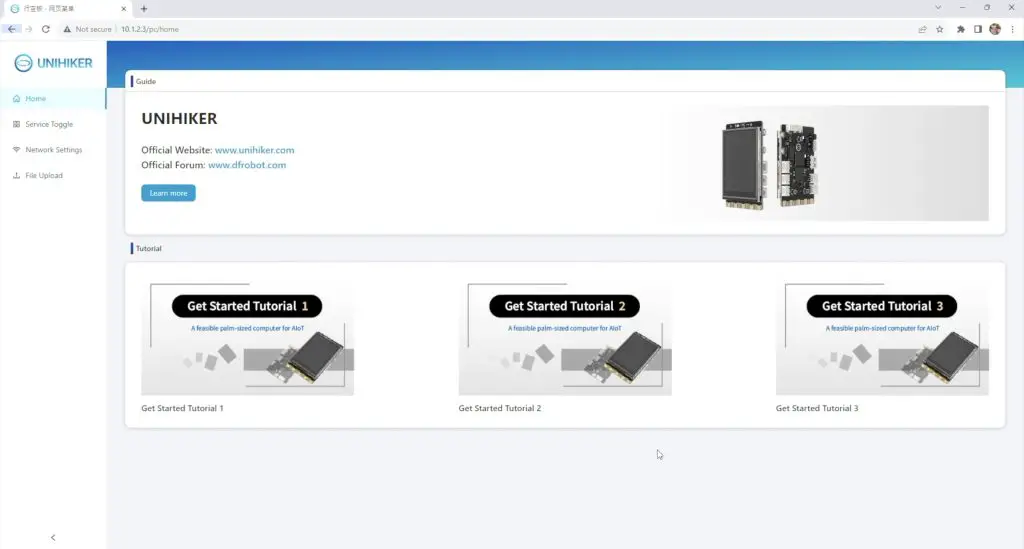
From this page, we can access documentation and tutorials, toggle services on or off, configure its network connection and upload files to the device.
We’re going to try to create a basic program to run on the Unihiker using the DFRobot programming package called Mind+.
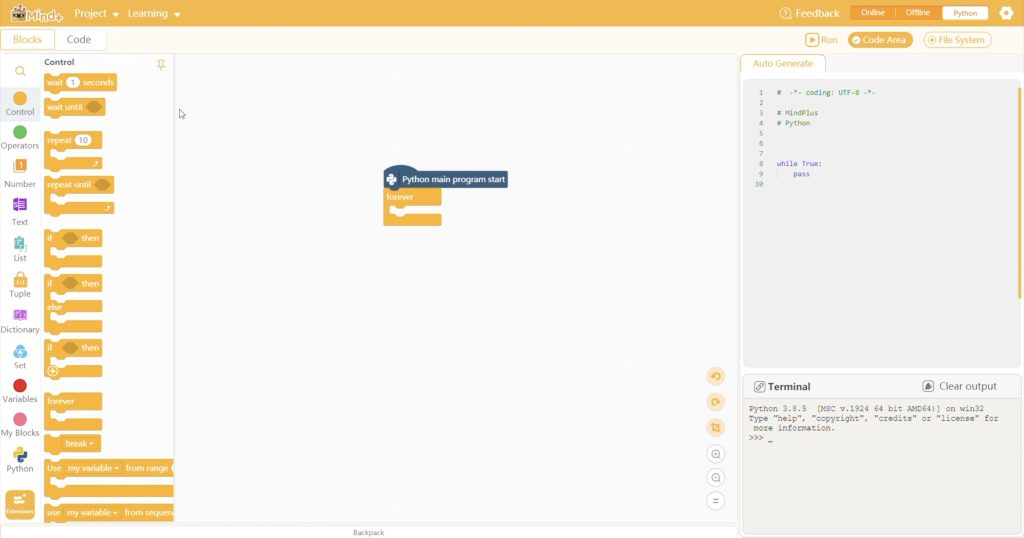
Creating Our First Project
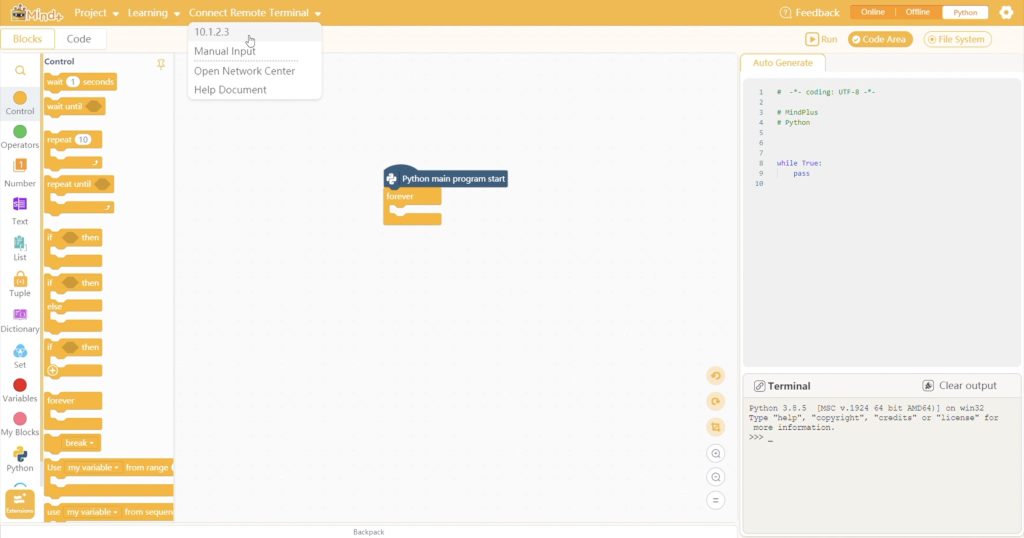
After starting a new blank project, we can add the Unihiker as an extension and then connect to it. Mind+ will then automatically establish the connection and update all of its required libraries.
We can then either use the drag-and-drop block coding interface or the Python code area to make up a program. Let’s start by creating a program to show the level of light detected by the onboard sensor. We do this by just dragging function blocks in from the toolbar on the left and we can then make any necessary adjustments to parameters.
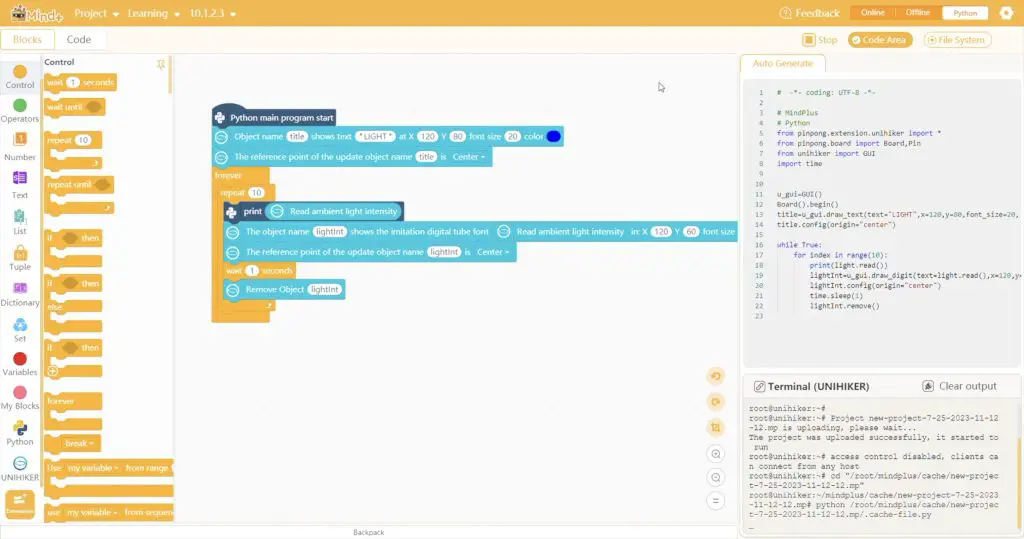
Then we click on run to upload the code to the Unihiker and execute it.
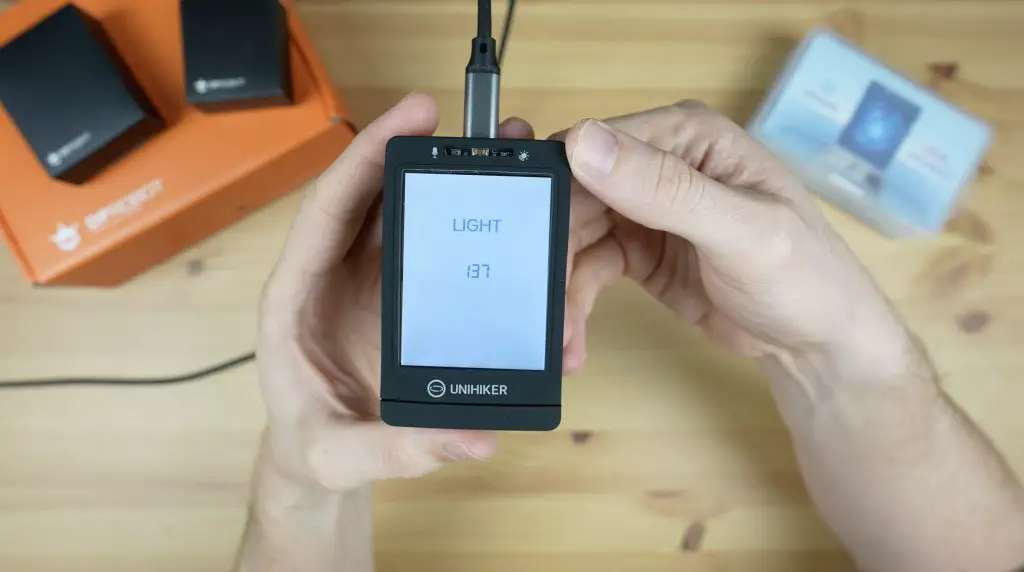
So that was really easy to get working and it took less than a minute to program. If we hold the Unihiker up to different levels of light, the indicated value on the display changes as we’d expect.
Creating An Environment Sensing Project
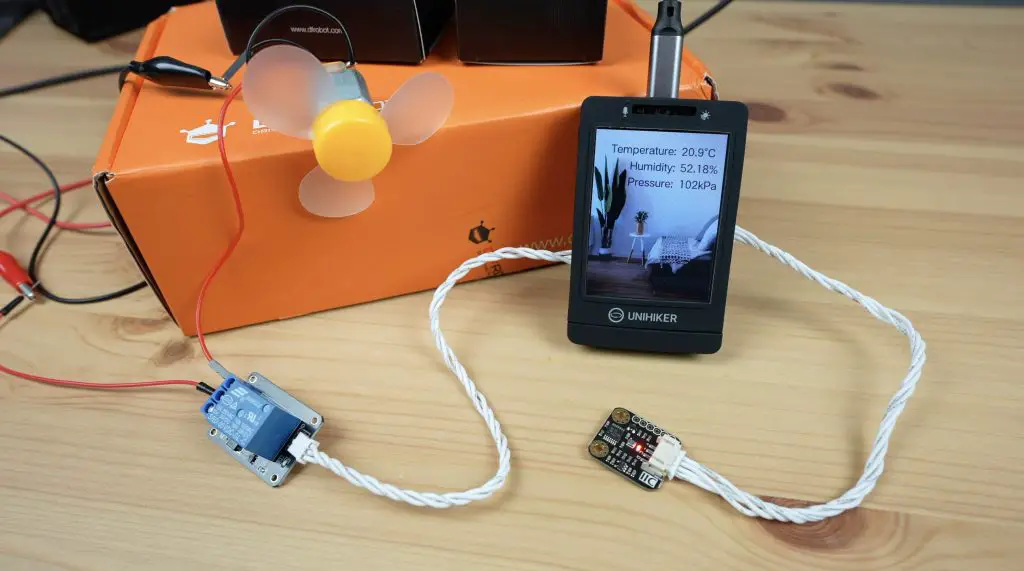
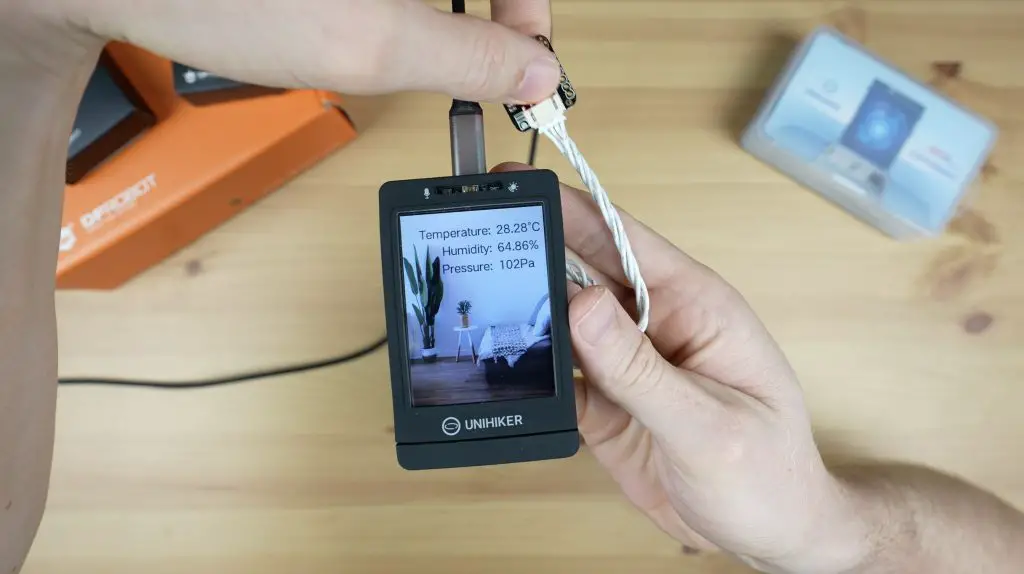
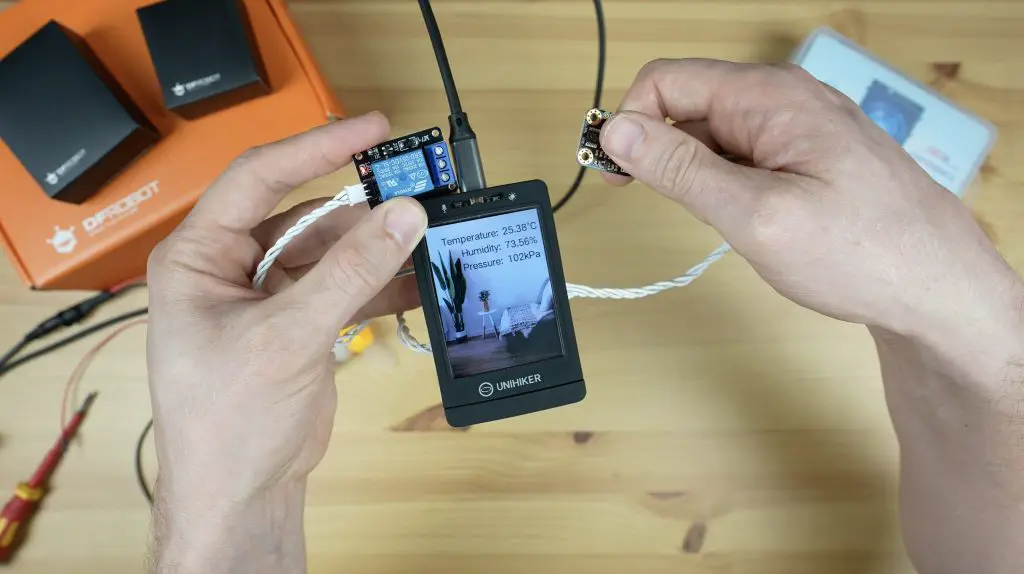
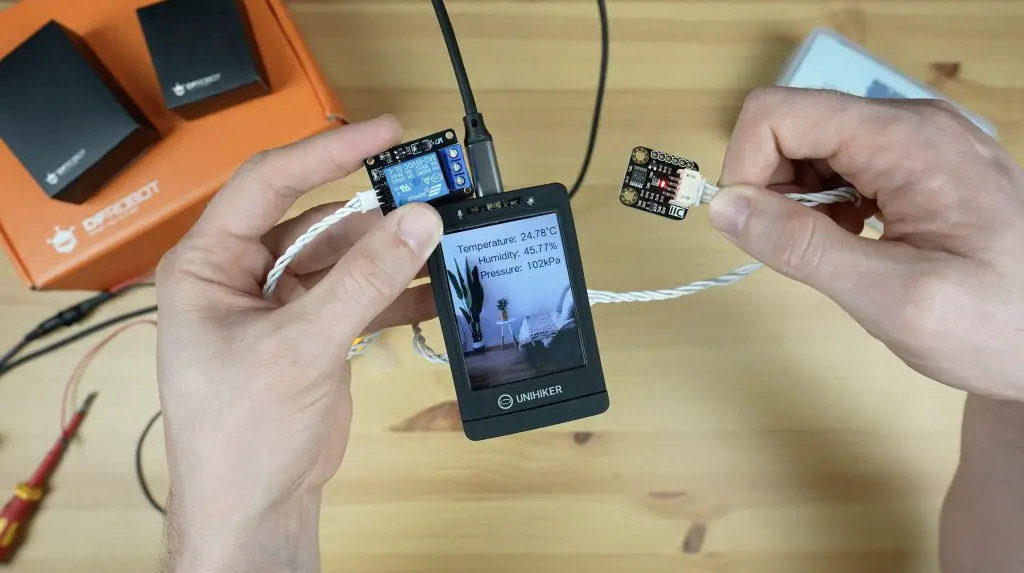
Now let’s try to build something a bit more complicated. I’m going to use a BME280 environment sensor to display the ambient temperature, pressure and humidity on the display. This sensor uses a Bosch sensor and an I2C interface to provide these three parameters to the Unihiker.
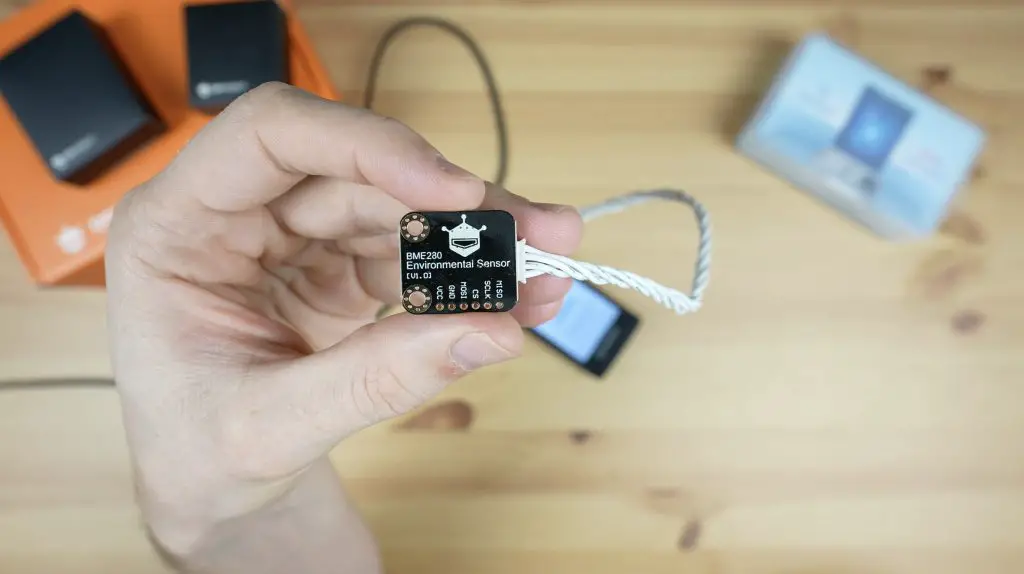
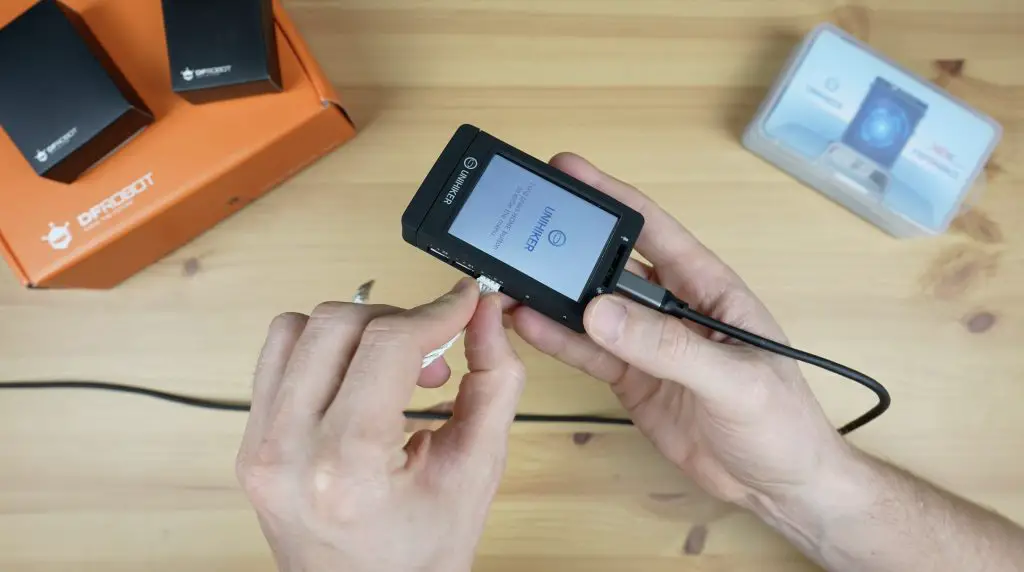
We’ll start by plugging the BME280 sensor into the I2C port on the side of the Unihiker.
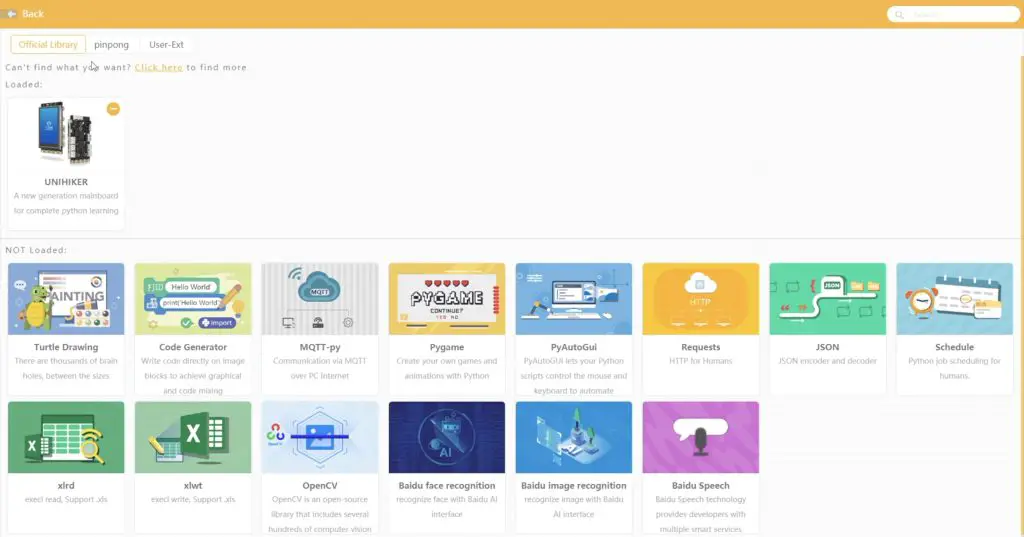
We can then add the BME280 extension to the project. This tells the Unihiker to import the libraries needed to communicate with the sensor and adds the function blocks to the toolbar on the left to get information from it.
Now we can drag and drop text and fields to display these on the Unihiker. I have also included an image of a room as the background for the environment monitor.
As we did previously, we can click on run to upload the code to the device and we can then see it running.
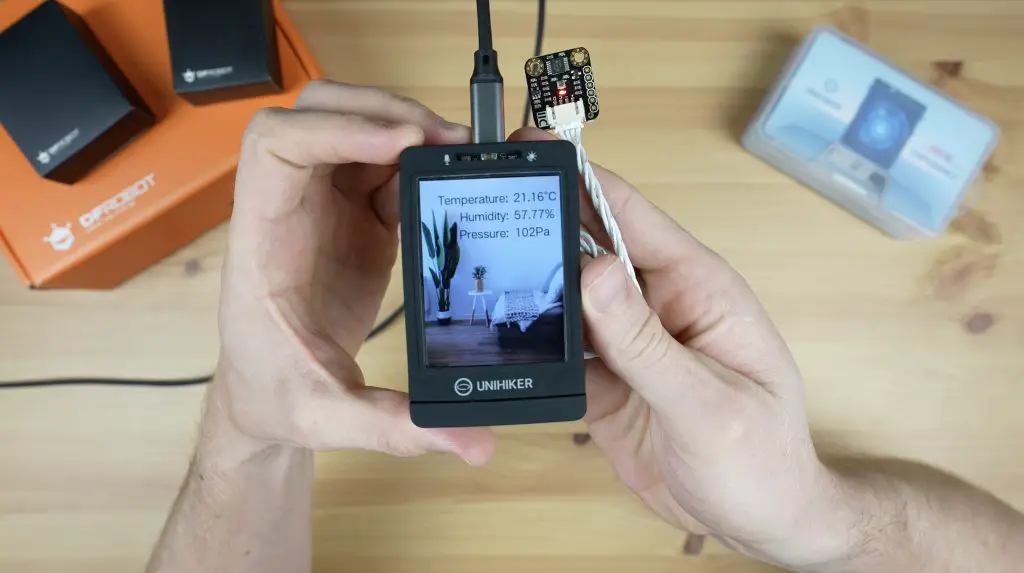
Holding a finger on the sensor warms it up and changes the output values.
We can also take it a step further in Python rather than using block coding. Let’s try turning on a fan if the temperature gets too high.
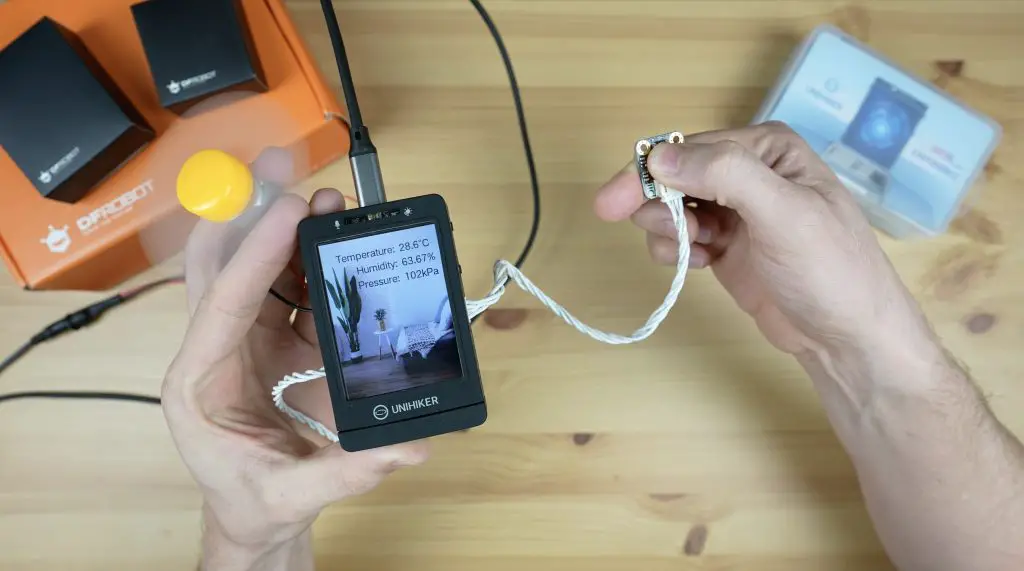
For that, I’m going to add a relay module to one of the digital ports on the side and I’ll then connect the fan to the relay module.
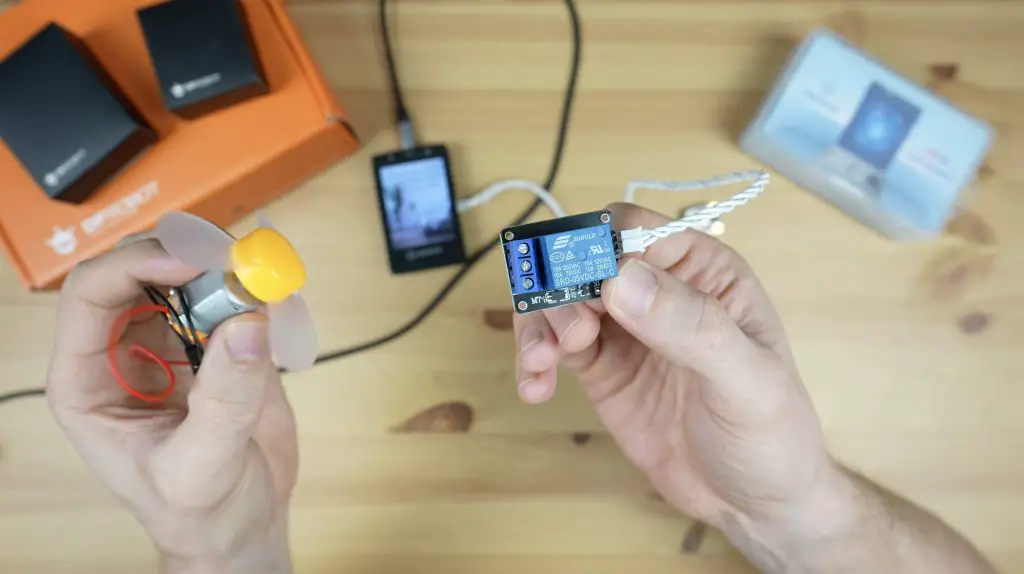
Now we need to write a script to turn the fan on when the temperature exceeds a certain setpoint and then try to run it again. As a starting point, I’ve just copied the generated script from the block code and I’ve then added some additional lines to define the operation of the digital pin for the relay and an if statement to turn the fan on if the temperature exceeds 25 degrees.
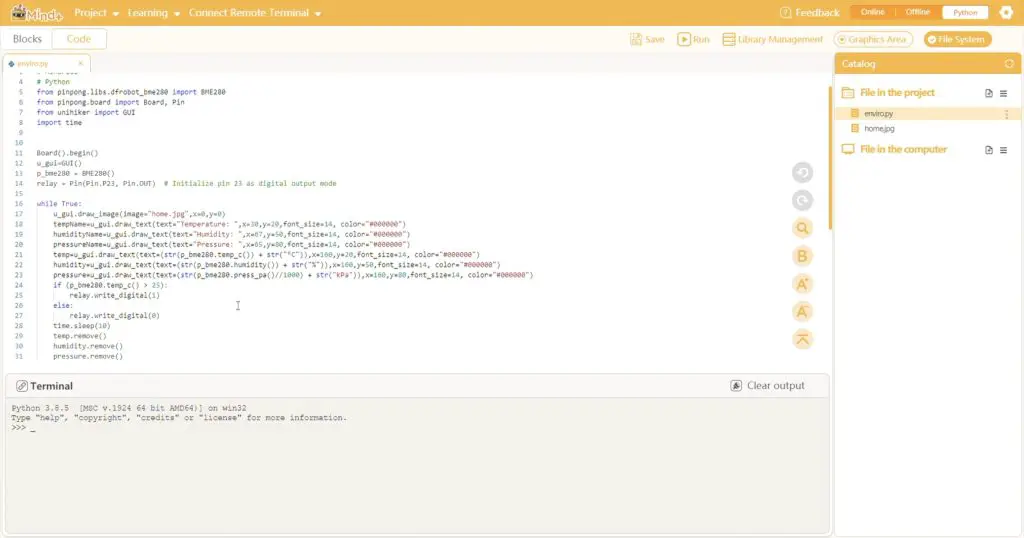
Let’s upload and try it out.
The relay module is initially off as we’re below 25 degrees. If I put my finger onto the BME280 sensor, which will warm it up, then the temperature will then exceed the setpoint and the relay switches on. When it cools down again then the relay turns off.
Now if we hook the fan up to it, the fan comes on and turns off automatically when we do the same thing.
Here’s a link to download the Mind+ code for all three of the above sample projects:
Final Thoughts On The Unihiker
So you can see from these examples that it was really easy to get these projects up and running on the Unihiker and there is a lot of flexibility to easily build upon your projects. You don’t need to have an advanced knowledge of programming or electronics to get some simple projects running on it.
I also really like the flexibility in programming options, even being able to program it using Jupyter your phone or tablet. This makes it a great, compact platform for education and tinkering.
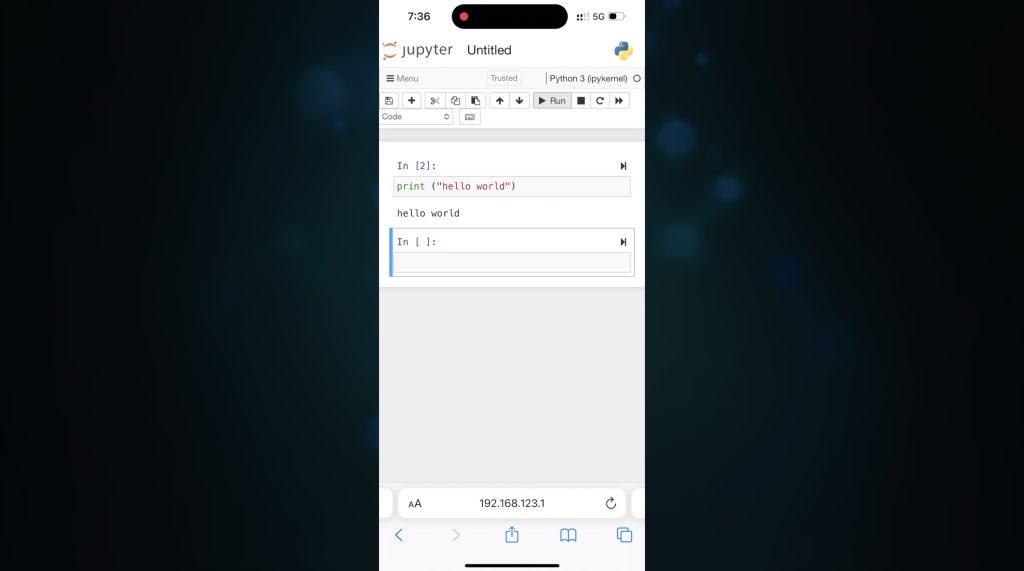
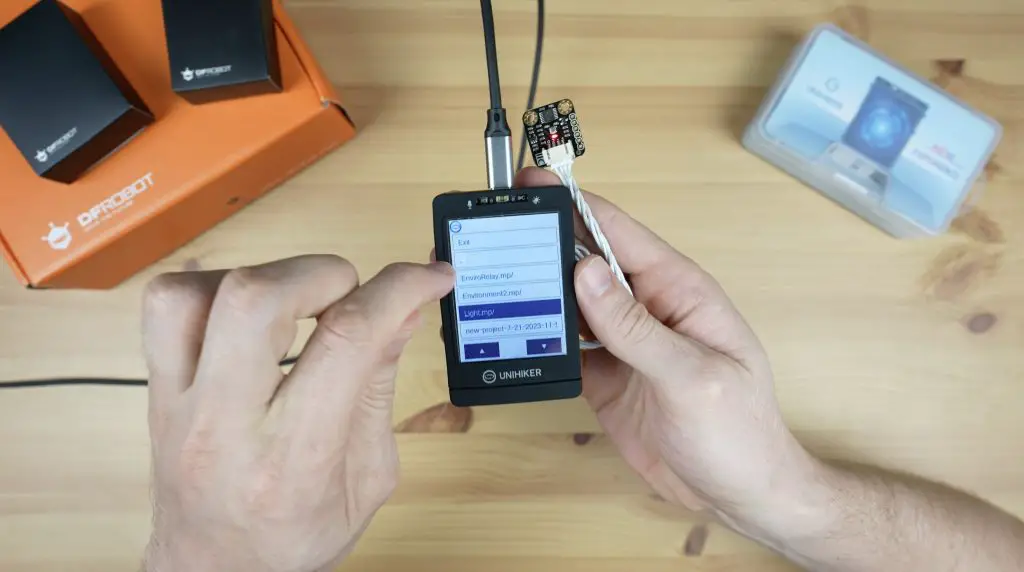
Once you’ve uploaded a program to the Unihiker, it is also stored for you to re-run directly from the device at a later stage if you’d like to. You can use the menu buttons to access the code which has been transfered to the Unihiker and then run it from the device. Each project is saved in it’s own folder, so you can have a number of scripts, sketches or programs ready to run on the device.
At the time of writing this review, the Unihiker is $79.90 from DFRobot’s web store. I think this is pretty good value for what is essentially a compact single-board computer, a touch display and a microcontroller.
Let me know what you think of the Unihiker in the comments section below and let me know if you’ve got any project ideas that you’d like to see me try on it.