The Arduino IDE serial monitor is an extremely useful tool for troubleshooting and fault finding in your code. If your code is giving you erratic or unexpected results then a good place to start is by displaying the key variables used in your code through the serial monitor tool in order to see where the problem arises. This tutorial is going to briefly take you through setting up and using it in your code.
This tutorial assumes that you have worked with and are familiar with the Arduino IDE and interface. If this is your first project then we recommend that you familiarise yourself with programming an Arduino first.
In order to be able to use the serial monitor function, you need to add a single line to the setup function of your code to initialise the serial communication.
void setup () { Serial.begin (9600); // initialize serial communication at 9600 bps }
Next, you’ll simply need to use a single line of code to display anything on the serial monitor.
Serial.println (variableValue);
You can also display static text to help organise what is displayed, such as:
Once you compile and run your code, you’ll need to open the serial monitor on your computer in order to be able to see the data being sent to it. It can be opened through Arduino IDE by clicking on Tools > Serial Monitor.
That is, it is a really simple and very effective tool to assist you with fault finding. Let us know if you have any queries or issues in the comments section below, we would love to help you out.
Play is an essential component in the proper development of young children. The activity presents them with the opportunity to think for themselves or use their imagination to work out simple life dynamics.
However, due to the rise of digital technology, the brand of play that a lot of young children get into has changed immensely. They are often spoon-fed information and they do not even get to explore the world outside their home. A lot of tots even grow quite obsessed with gaming consoles, smartphones, and tablet PCs that they become so oblivious to what is going on around them.
Cubbies create a “domain” for your little ones. Although you may be in charge of filling it up with decor (toys basically), it is a place that your kids can call their own and have full control of. They can turn a cubby into anything that they want it to be for imaginative play. Also, here, they can create stories that depict their growing understanding of the world they live in.
Not only is a cubby house perfect for that kind of play but it likewise makes for a cozy, ready nook. If your kids are learning to read, you can assign their cubby as the place to enrich their vocabulary by reading books.
And perhaps, the most important function of cubbies for little kids is how they serve as a private hideout or hideaway for them. A cubby may not be too much of a secret hideout but it can pretty much perform the same job because when young children need a place to let off steam or a getaway to think without being disturbed by an adult, a cubby easily meets this need.
Developmental Advantages Provided by Sandpits
Sand is a great sensory stimulus, which is pretty much the reason why
young kids can spend countless hours just playing with it at the beach.
Child development studies also reveal that sand promotes physical
development. Children build strength as they work with sand as a medium. Plus,
they develop eye and hand coordination as the young ones manipulate it
according to the vision in their head.
Early childhood care and development specialists also point out that
because sand is not quantifiable, it is an ideal toy for socialization. You can
place young children in a small sandpit with fun
rainbow sand and the likelihood of them fighting with each
other is lower. This is because their area will always have more than enough
sand for the play they have in mind.
It is worth noting as well that sand is what ECCD specialists call a “didactic” toy. It is educational because with its “manipulative” quality, children learn various concepts such as shape, texture, and the cause and effect of certain interactions between sand and other media. Best of all, sand can turn into anything — there are countless possibilities with it.
Smart Play Investments
Toys and play equipment that hone gross and fine motors skills,
encourage social interaction, and creative thinking are always smart
investments in ensuring the healthy development of your young brood.
These allow children to fully explore what they are physically and
mentally capable of. And, when they
obtain an understanding of this, you secure them an advantage in this often
challenging world.
Truly, you cannot go wrong with these investments. And because your
children need to use their imagination when playing with such toys or play
equipment, you can have the assurance that they will not get bored easily.
As opposed to digital games whose excitement is simply concentrated on reaching a new level (which, at times, will require you to dole out more money), traditional play implements like cubbies and sandpits are guaranteed to enhance playtime and learning.
If you’ve enjoyed this post, be sure to check out these unorthodox ideas for the back yard. Let us know in the comments sections below what you’ve included in your back yard for your children to play with.
For people with a creative, DIY spirt, having a back yard is like having a blank canvas. That doesn’t mean the whole thing has to turn into a project, but it’s a ton of fun to think about different things you could do to enhance the space, from planting a garden, to installing a greenhouse, to building a clubhouse if there are ever kids in the picture. There’s really no end to the number of things you can do with some creativity, perseverance, and know-how. And to that point, we thought it would be fun to dream up a few unorthodox ideas for the back yard.
A Tunnel & Enclosure (For A Cat)
This is one of the strangest but neatest ideas out there, at least for those who have cats or other small pets who might like more freedom to go outside. The idea is essentially to build a wire enclosure outside, and you won’t believe how easy it is. To make it even more fun though, you can also attach what are essentially small hallways branching off of said enclosure to other parts of the yard. These tunnels might go up the side of your house, run along a fence surrounding the yard, or whatever else works in your space. Think of it a little bit like a hamster home, but supersized and built for the cat in your back yard. Just be sure that the construction is sound, both so that the cat can’t get out and so that other animals can’t get at the cat.
An Adult Sandbox
It’s strange, when you think about it, that we consider sandboxes as being exclusive to children. In the traditional sense, in which they’re meant to be crawled in, and used for sand castles and the like, perhaps it’s only logical. However, the idea of simply designing a sand pit can appeal to adults as well. You can essentially design this as its own island in your yard, either dug into the ground or raised with a stone border, and once you fill it with sand you can use it however you’d like! You could simply put some attractive chairs there, lay out in nice weather, or even set up a grill or fire pit there if you have the space.
Racing Posts
This is a strange idea, and draws inspiration from professional horse races around the world. Look to the Cheltenham Festival, one of the biggest events of the year in horse racing, and you’ll see both racing posts and, for some of the competitions, hurdles, all designed fairly simply but used effectively to divide up a course and present different challenges. A similar arrangement in your back yard can serve as your own fitness course, and can also be useful for any younger family members or visitors who might simply want to run around. It’s a little bit silly, but you can’t say it wouldn’t be unique! Plus, the construction is actually fairly straightforward.
A Roof (For A Hot Tub)
One of the worst moments a homeowner can have is making the decision to go outside to use a hot tub only to realize it’s raining or snowing. Okay, that’s overstating things somewhat, but it is quite a bummer. This problem can be completely solved if you simply built a roof – something like a permanent canopy, or even one that can be pulled back, if you prefer – to hang over a hot tub. It’s a great way to make a hot tub accessible in all seasons and weather extremes so that you can get the most out of it.
A Fire Trough
People do all kinds of things with fire pits, but you seldom hear about one designed to be elongated, and thus serve more space. Creating a stretched out fire pit – a fire trough if you will – is an awesome way to set your yard apart though, as well as to make the gathering space a little bit different. While the standard small circle around a fire is great for conversation, a fire trough can handle a bigger gathering of people, with seats along both sides. Particularly if you’re the type to do a lot of entertaining, it can be a wonderfully beneficial project.
If you haven’t heard about tiny houses, here’s what you need to know: tiny houses are typically no more than 500 square feet and focus on simple living without sacrificing on quality. When it comes to tiny living, it’s a good idea to incorporate designs that are also functional. Functional DIY additions that make the most efficient use of space in a tiny house can make the building process a fun, creative experience. Let’s take a look at some design ideas to help you make the most out of your tiny house.
1. Overhead Mason Jar Storage
This is the perfect DIY addition to your tiny house kitchen, or any space where you want to store small things safely. First, glue the tops of mason jars to a strip of wood. You can then install the strip of wood under cabinets or somewhere over your kitchen space. Fill the jars with herbs, spices, or pastas so when you screw the jars into the tops, you’ll have a colorful display of ingredients. Unsure where to keep things like stray earrings or paperclips? Mason jars are also a visually pleasing way of keeping track of the small stuff.
2. Pallet Bed
Recycling old pallet wood is a great way to do right by the environment and by your wallet. Building sites and companies that are in shipping often have perfectly good pallets lying around. No need to spend big bucks on a bed frame–just cut, sand, and piece the pallets together until they’re the right dimensions for your mattress. Add a string of lights on the wall and you’ve got the perfect rustic-chic bedroom.
Pro Tip: A pallet bed is also a nice addition to a sleeping loft. It can look a lot nicer than a mattress on the floor!
Surface space is precious in a tiny house kitchen. Give yourself the gift of extra counter space and a cutting board, by using the cut-out piece to cover your kitchen sink. You’ll have a strong cutting board, as well as something to fill the space over the sink when there’s a lot of food prep to be done.
4. Storage Stairs
If climbing a ladder into a sleeping loft doesn’t sound appealing, then a multi-functional set of stairs might be the solution. When designing your set of stairs, be sure to add plenty of shelving or cubbies along the side. Although stairs can sometimes take up a great deal of space, adding storage options to your custom home design is an ideal compromise.
When it comes to designing your tiny house, it’s a good idea to first make a list of the features you know you want. Next, consider ways they can serve one or more purposes. Can a breakfast bar also be a workspace? Are the mirrors on the wall placed in an ideal place to spread natural light? If your answers are yes to questions like these, then you’re on the right track.
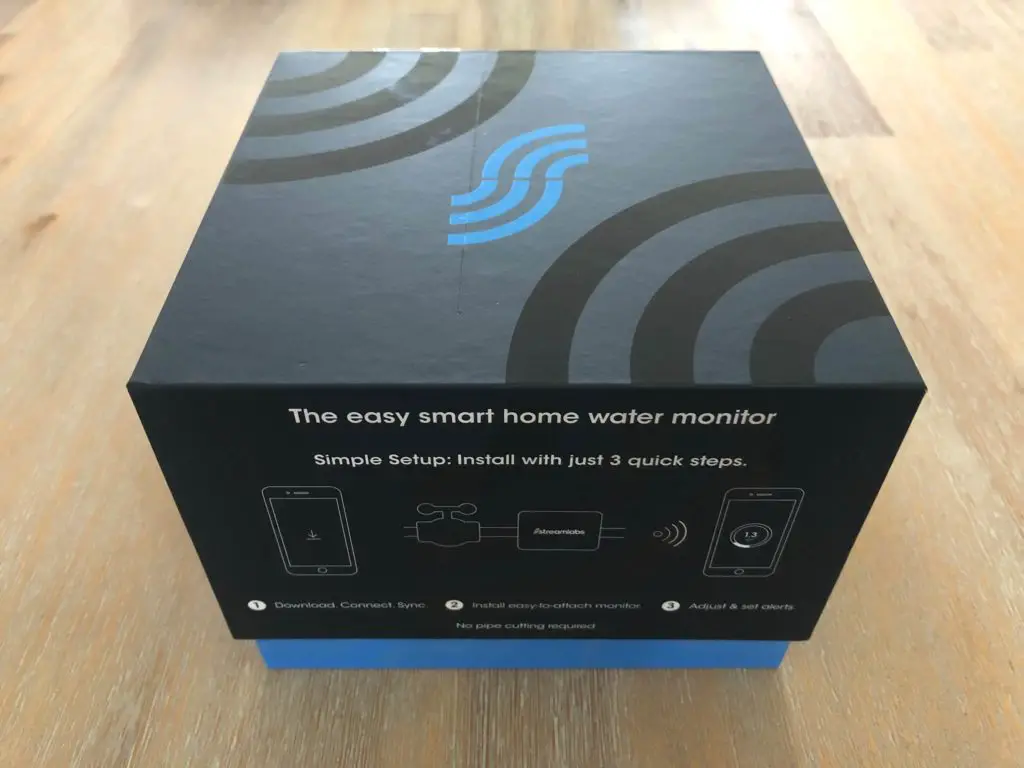
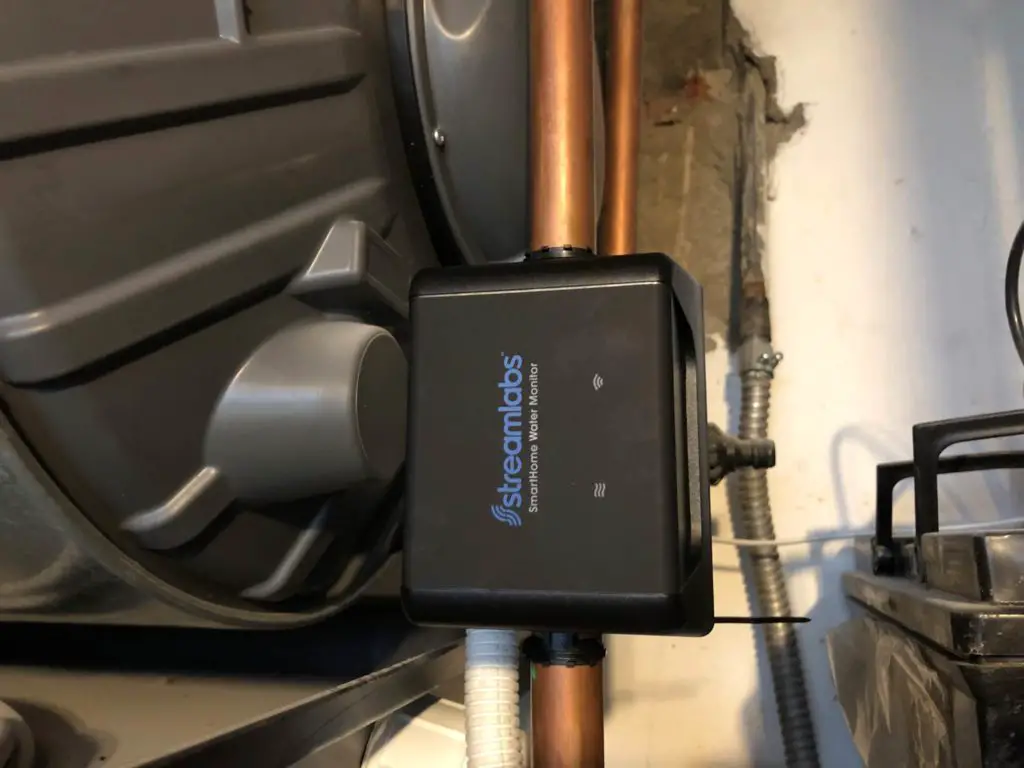
The Streamlabs water monitor is an innovative product which makes it super easy for almost anybody to install and get started monitoring their water consumption and protecting their home against leaks. The non-invasive monitor simply slips onto your water supply line and in a couple of steps, starts providing you with data on your water usage and habits through the app.
The Streamlabs Smart Home Water Monitor is available for purchase directly from their website https://streamlabswater.com for $199.00 including shipping. It is also available through Amazon for the same price – Buy Here.
Let’s have a look at my experience setting up and using the Streamlabs Water Monitor.
Unboxing
The Streamlabs device comes well packaged in a simple black box with the Streamlabs logo and a couple of images around the edges indicating how it is used and installed and what is required for it to operate.
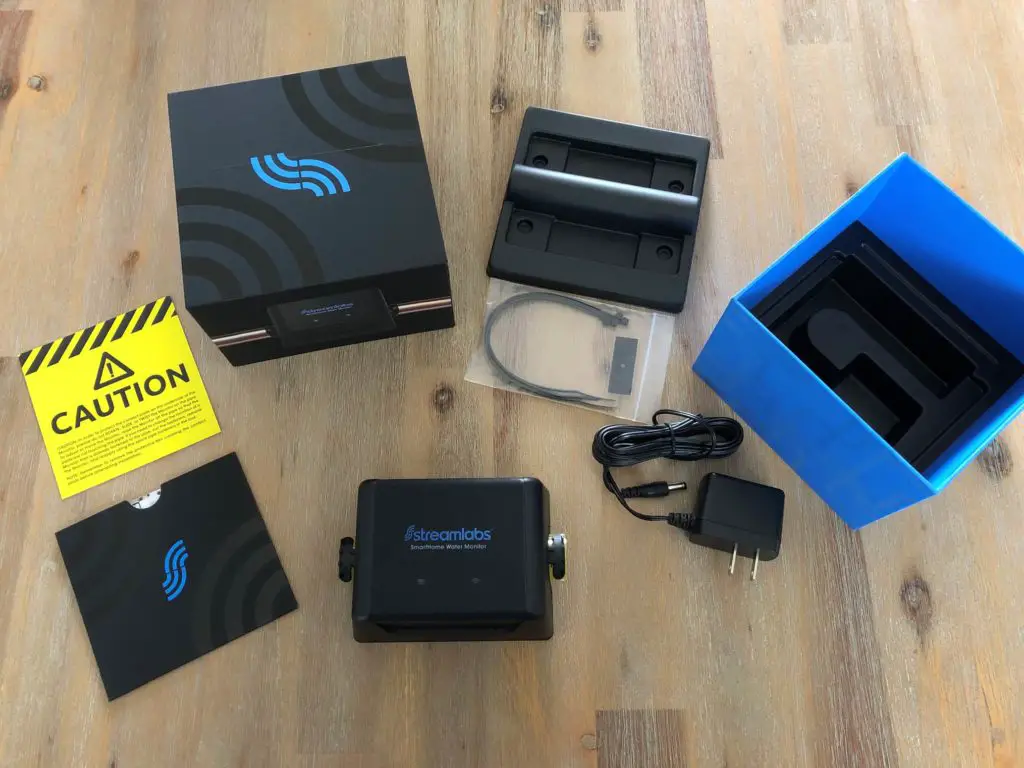
Slipping off the lid, you are first presented with the water monitor, and underneath it the installation ties, power supply and manual.
Included in the box is:
The Streamlabs Water Monitor
Power supply
Installation zip ties plus one extra set and anextra set of contact pads
An installation/operation manual booklet.
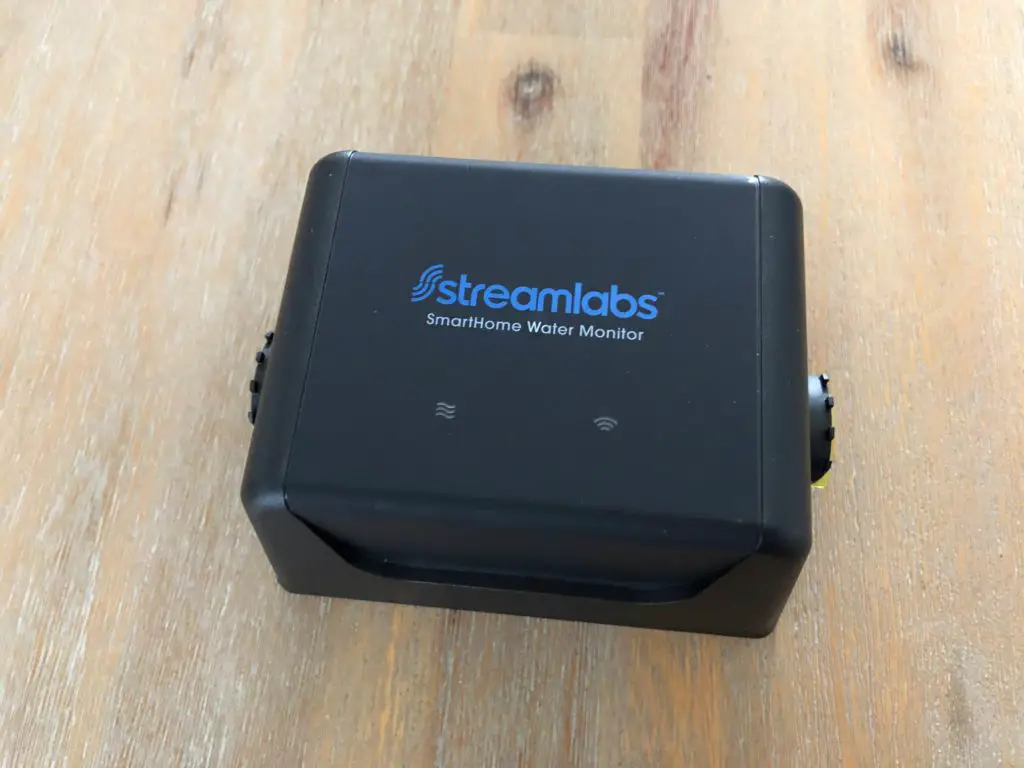
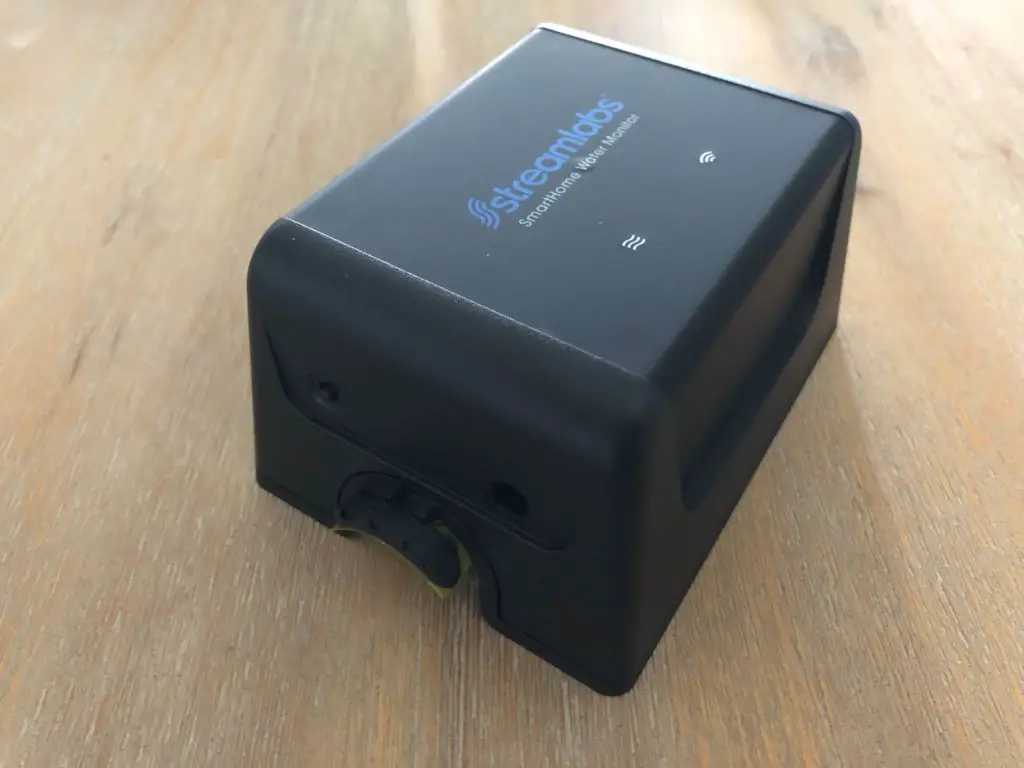
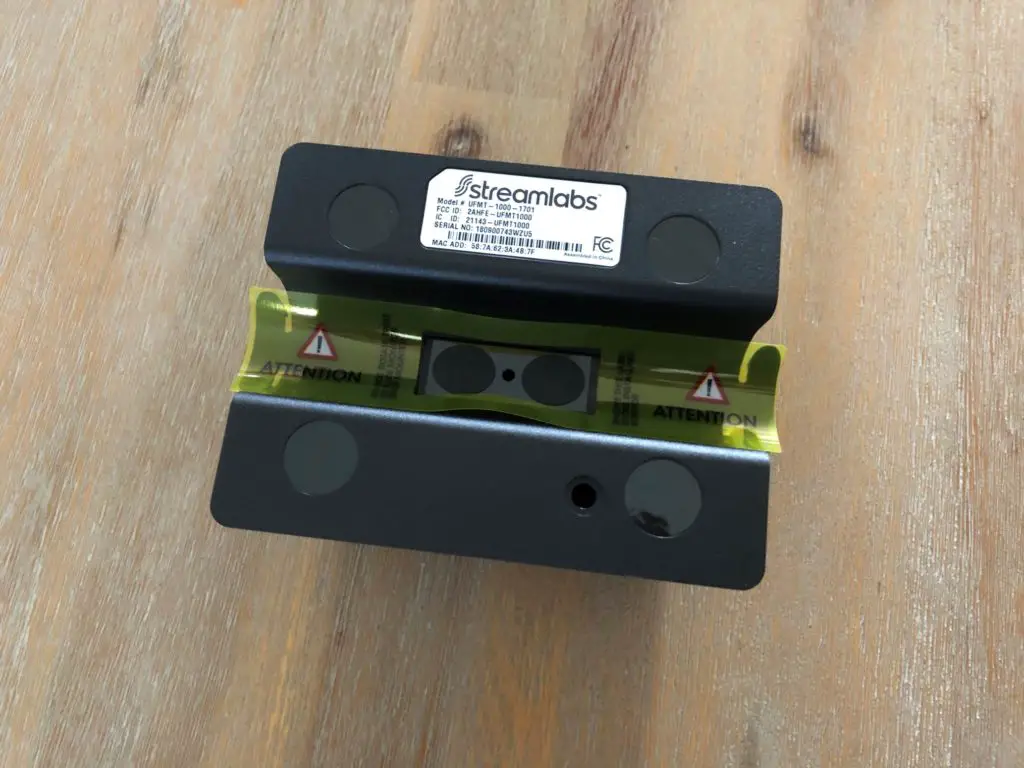
The physical water monitor has minimal user interfacing. There are two LEDs on the top surface which indicate that the unit is calibrated and connected to WiFi and there is a port for the power supply on the side along with a WiFi reset button. Apart from the sensors on the bottom, that’s all that there is to the outside of the monitor.
Technical Specs
If you’re not that interested in the technical details, skip to the next section.
The app is available on iOS devices runningiOS11 or later and Android devices running Android 6 or later.
It works on copper schedule M&L as well as PEX and CPVC piping in ¾” or 1” diameter sizes.
The power supply is pretty universal and operates on 100-240VAC 50/60Hz.
It is designed for indoor use with an ambient temperature range of 0°C (32°F) to 46°C (115°F) and a water temperature range of 4.5°C (40°F) to 26.5°C (80°F).
Installation & Set Up
To start out, I had a quick flip through the manual which is only a couple of pages long. I have to admit that I was initially a bit sceptical about how simple the manual made the installation and set-up out to be and expected to run into a few problems along the way. My scepticism was quickly put to rest, it really is this simple.
The manual gives you a brief summary of the inputs and LEDs, the installation process and the technical specifications.
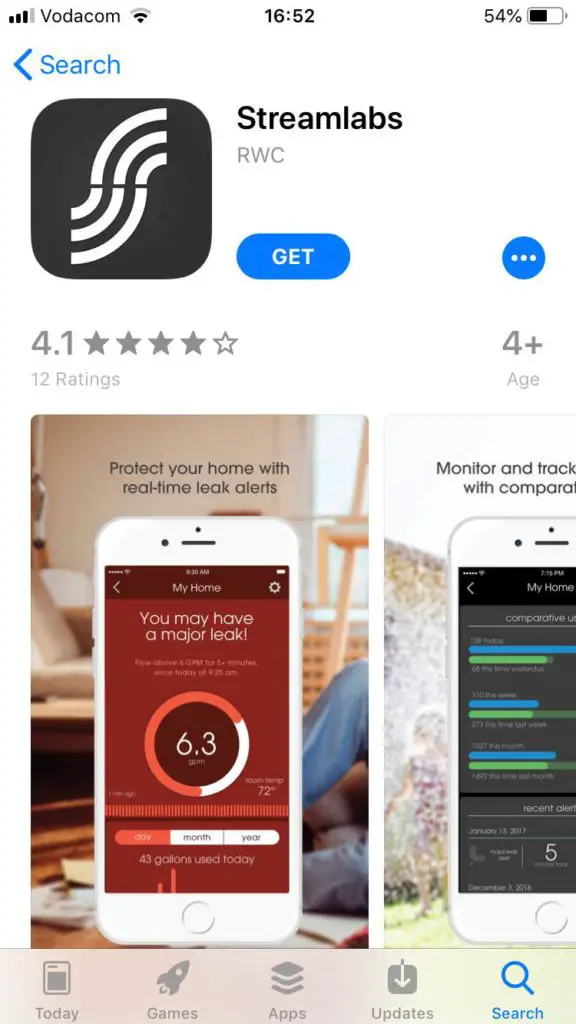
To start out you need to download the free Streamlabs app which is fairly simple to find in the App Store or on Google Play.
The app is quite compact and installs quickly. When you open it up, you’ll need to log in or register with your email address; this has become pretty standard amongst smart home devices.
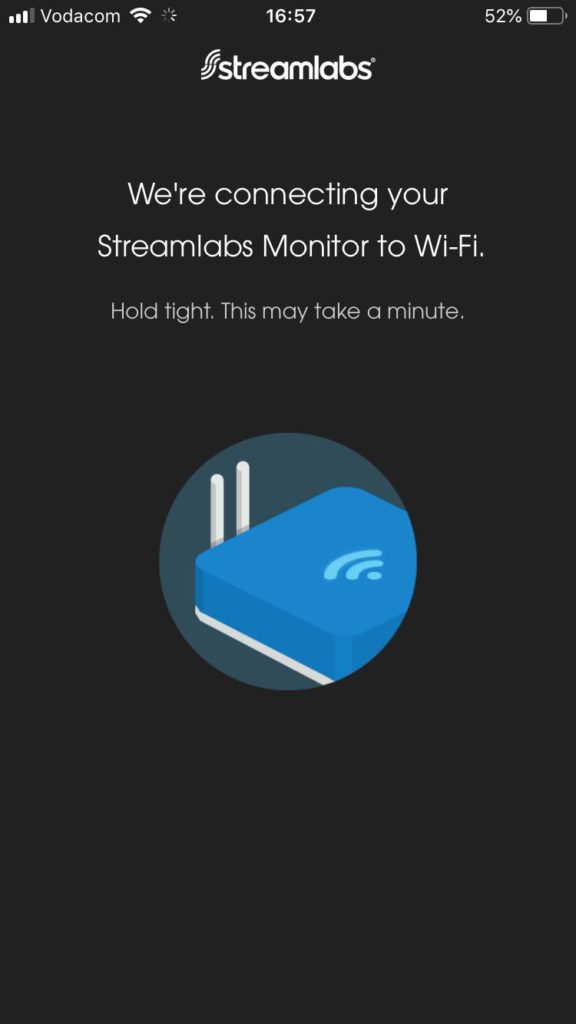
The app then guides you through connecting your water monitor to your home WiFi network. It recommends doing this before you install your water meter so I just plugged it in near my desk to complete the WiFi setup.
The whole process, including identifying my water monitor, connecting it to my WiFi network and updating the device’s software took about two minutes and worked first time. I was really impressed with how quickly and easily it connected to my WiFi network and just started working.
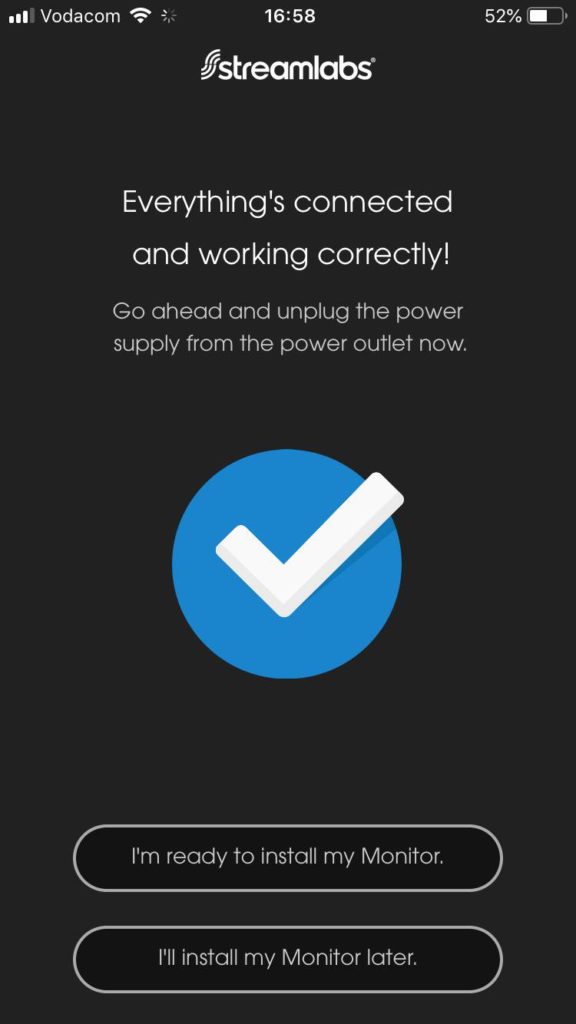
You’re then presented with a screen which lets you know that you can disconnect the power from the monitor and begin the installation process.
The app then guides you through the installation process step by step and even provides an on/off button for iPhone’s torch function to help you out if you’re installing your meter in a dark spot in the basement, attic or cupboard.
Once you’ve completed the installation, you plug the power cable back into the unit, wait for it to power on and reconnect to your network and then the unit automatically recognises the pipe material and size. The app asks you to verify that the detected material and size are correct but it did a perfect job recognising mine. This is just another example of how easy they’ve managed to make the installation and setup process, most devices ask you to plug information like this into the app yourself.
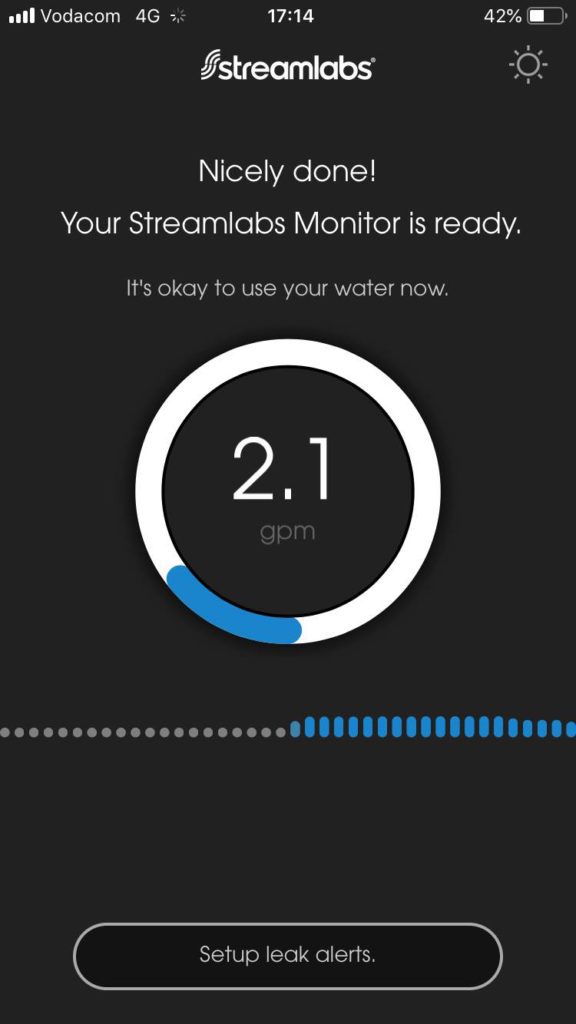
You’re then asked to calibrate the unit by shutting off the water supply for a few seconds and then flushing a toilet or opening a large faucet to get a high flow rate through the pipe. This also took a few seconds to complete and you’re then finally asked to set up leak alerts.
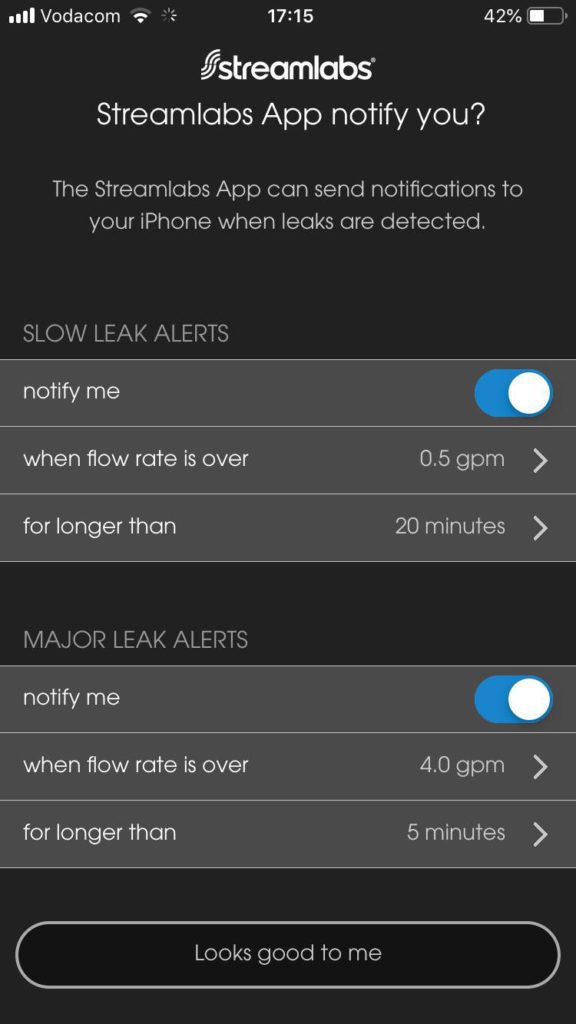
The leak alerts are broken down into two sections, one to detect slow leaks in which you set a low flow rate for a long period of time and one for major leaks (such as a burst pipe) in which you set a high flow rate for a short period of time. There are also toggles to enable or disable these alerts.
As somebody who has used a fairly wide range of smart home products, I can tell you that this product is definitely one of the easiest I have installed and set up. There is very little I could complain about throughout the installation and setup process.
If I really had to be critical, I could only come up with two things I’d prefer to be done differently. I would suggest that the choice of units – imperial or metric be included in one of the early setup steps on the app instead of a setting to be changed in the settings menu afterwards. The second is that I would allow the user to specify an internal pipe diameter if required, this obviously detracts from the simplicity of the device but providing the ability to do so, even if not during the primary setup procedure could make the meter a bit more versatile.
General Operation
In keeping with the overall simplicity of the product, the day to day operation is neat and fairly simple as well.
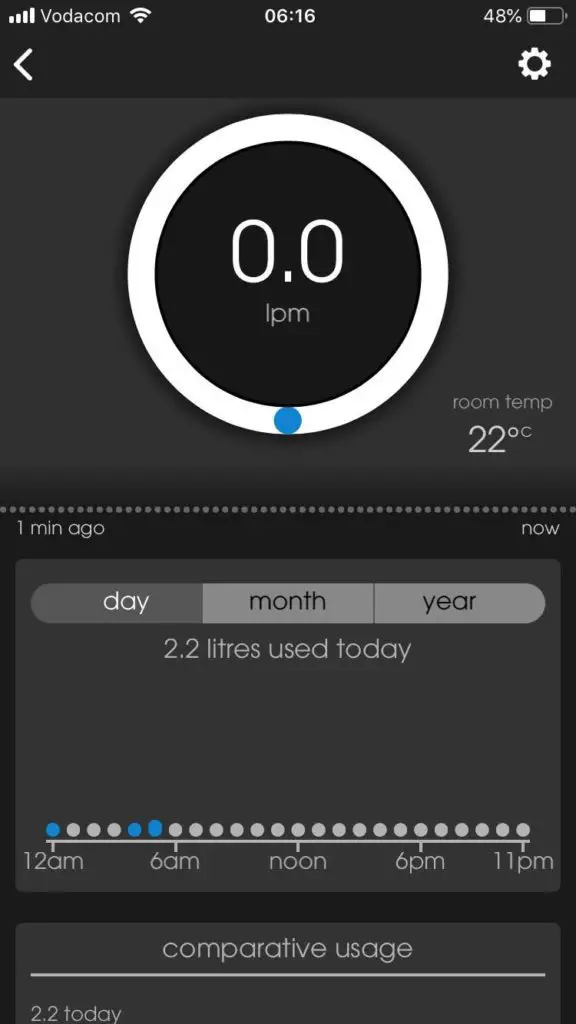
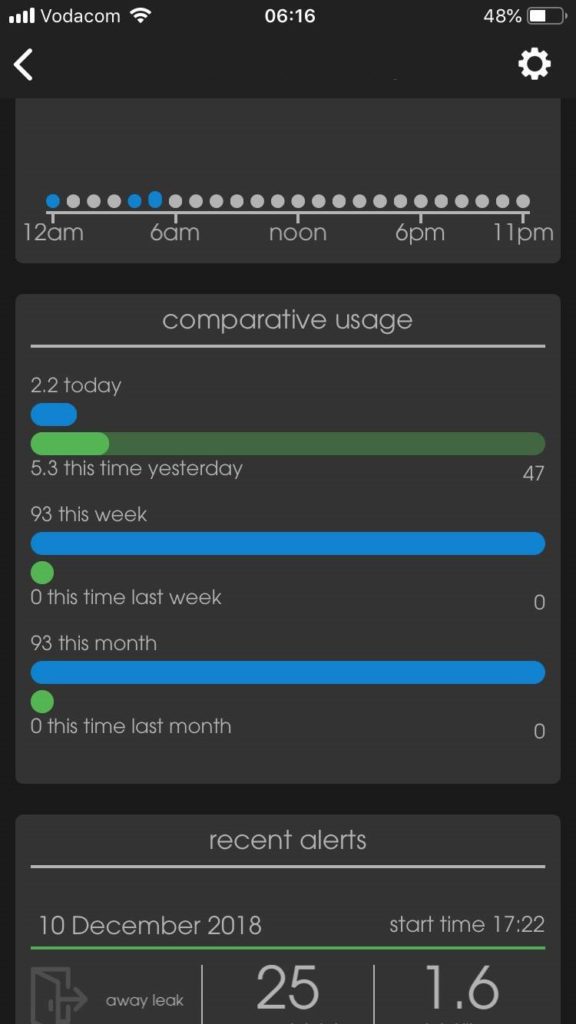
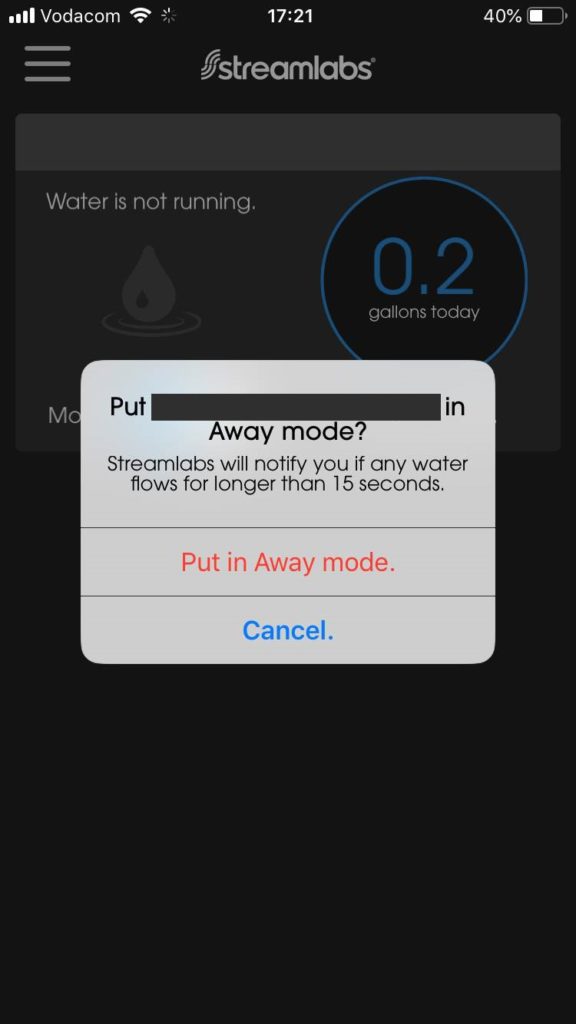
When you open up the app, you are presented with a summary home screen which displays your water usage for the day, a note on whether or not there is water currently being used and an indication of the status of the Home/Away mode.
If you have multiple monitors set up in different locations then each of these summaries will be displayed one underneath the other on this home screen.
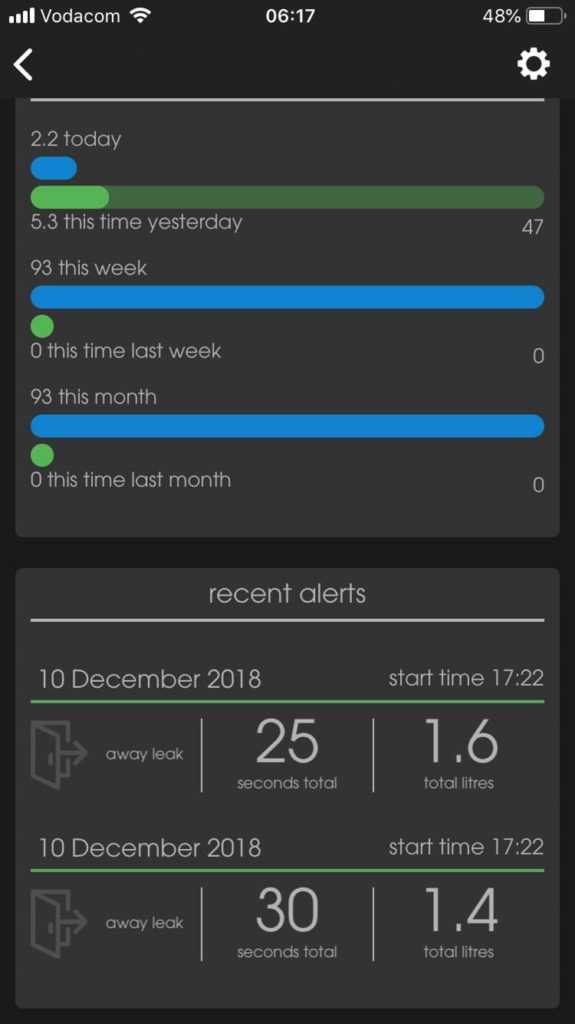
Touching the water usage for the day takes you to a detailed breakdown of your current water usage, room temperature, historic data for the past day, month and year as well as comparative usage for the past day, week and month. At the bottom of the page there is also a log of all of the leak alerts which have been triggered.
In addition to the major and minor leak alerts, there is an additional leak alert for when you are away from home. This function is particularly useful for weekends away or vacations during which the monitor will notify you if there is any water flow for longer than 15 seconds. You can turn on the away from home mode from the home screen on the app or through your smart home device like Amazon’s Alexa interface.
The app interface works quite well and seems to be stable, I haven’t experienced it crashing or hanging. It does however take a few seconds to “fetch information” when you load it or switch back to it from another app.
Additional Smart Home Integration
In addition to the WiFi connectivity and app, I noticed on the box that the monitor can be controlled by Amazon’s Alexa as well as Nest, so I thought I’d try that out as well.
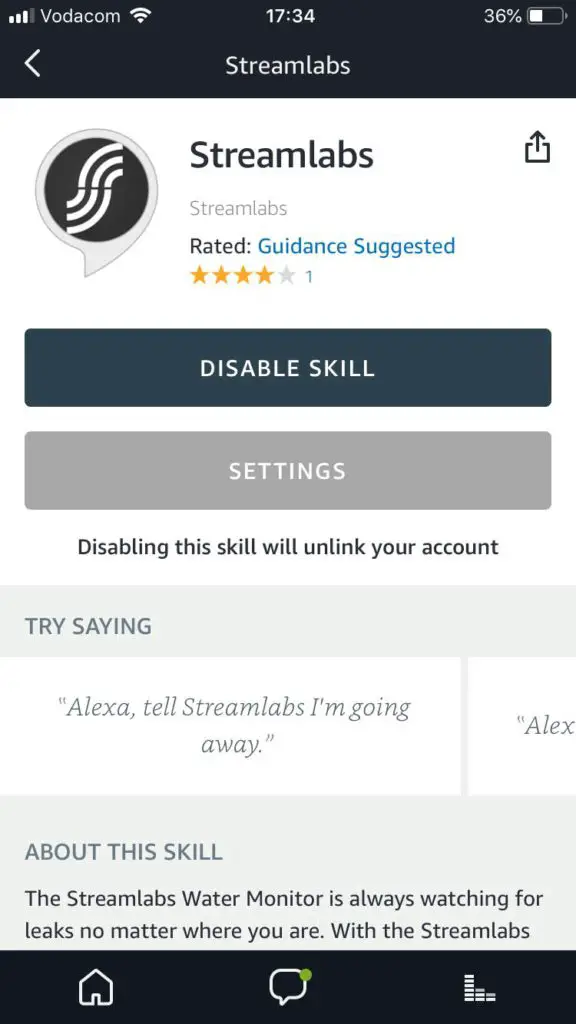
The device doesn’t connect to Amazon’s Alexa platform with the traditional smart home device protocol like most universal remotes, smart plugs and smart bulbs but rather interfaces through a Skill which allows Alexa to control the state of the monitor. This essentially means that your Alexa device will not communicate directly with the monitor but rather control it through the cloud interface.
There’s nothing wrong with this interface, it is still easy to install and get running, it is just different to how you’d expect a smart device to connect to your existing smart home network.
The Skill is enabled through your Alexa app on your smartphone and you’ll then need to link your Streamlabs account after which you can start using your Alexa enabled products to control your water monitor.
The available commands are pretty basic, you can ask Alexa to put your monitor in home or away mode if you just have one monitor or ask her to put a specific monitor into home or away mode if you have multiple.
This is one area which could be developed a bit further. I’d like to be able to get feedback from the device as well as change the modes. Being able to ask whether water is running or not or ask how many gallons or litres of water have been used today would be great additional functionality.
What I Like & Dislike About The Streamlabs Water Monitor
I Like
It really is super easy to set up and install,the app guides you through every step and it requires no cutting of pipes or special tools.
You don’t need any technical experience or knowledge to set up the monitor, it detects the pipe material and size automatically and the default settings are sufficient for most people.
The out of home leak detection function is great peace of mind for vacations and weekends away.
It’s a great tool to assist you in becoming more conscious of your water usage and reducing your environmental footprint.
The price is right, at $199 this is one of the cheaper water monitoring devices with this level of functionality. It’s also a small price to pay for the peace of mind knowing about a major leak as it happens brings; a flood of a basement or in your apartment could easily cost thousands of dollars to repair.
The device retains its settings and re-connects to the WiFi network automatically when the power is interrupted. You don’t have to reconnect it and set it up if the power is out for an hour or two.
I Dislike
The app is a little too simple. While they’ve done a really great job at making it easy to use and understand, it would be nice to provide users with a little more information and metrics and a few more customisable settings. I’d like to be able to look at the actual figures as well as the more general graphs.
What I’d Like To See Added Or Changed
I love how simple they’ve managed to make the setup and interface but I would like to be able to further customise the settings, even if it’s through an “advanced” settings page or something similar. I’d like to be able to set the alert flow rates and times to customisable values, perhaps within an allowable range.
Further integration with Amazon’s Alexa. I’d like to be able to ask Alexa whether there is water running and how much water I’ve used in the day or this month.
The WiFi status LED blinks every 4 seconds to indicate that it is connected. Also not really a problem but I’m used to LEDs staying on (like the calibration LED on this device) when everything is working correctly. A blinking LED generally indicates a problem or limited functionality.
A smart home water isolation valve would be a great addition to this product as an optional extra. Getting a major leak alert when you are away from home is great but it would be even better if you could solve the problem from the app as well by turning off the water supply. This would obviously also require a more complicated installation.
Conclusion
The Streamlabs Smart Home Water Monitor is an incredibly easy to use and well priced device for it’s functionality. It provides users with useful metrics to keep track of their water usage and become more water conscious and it gives you peace of mind knowing that your home’s water supply is constantly being watched, even when you’re away from home.
The app is really well put together in guiding the user through the installation and setup process and while I’d like to see a bit more detail available for the historical recorded data, all of the important information is readily available.
If you’re interested in becoming more aware of your water usage or you’d benefit from the peace of mind that comes with having your water supply continuously monitored then I’d definitely recommend the Streamlabs Water Monitor.
We all expect expensive batteries to last longer than cheaper ones but do they last long enough to provide better value for your money than simply buying a number of cheaper ones? James White from Freakin’ Reviews has put a range of different price batteries to the test to see which last the longest and which are the best value for money in terms of the duration they last and their cost. Have a look at the test below, you may be surprised by the results:
From the results its clear that the more expensive ones do generally last longer than their cheaper counterparts however, depending on your application and requirements, you may be better off buying the cheaper ones. The cheaper ones can cost almost 6 times less than the most expensive ones and yet they manage to last around half of the duration. This means that cheaper batteries turn out to cost almost three times less per hour of running time.
So next time you head out to buy batteries, remember that it may be worth your while to pick up a few packs of cheaper batteries rather than a single pack of more expensive ones.
With so much talk about climate change and how it can and will impact on our lives in the long term, concepts like passive housing and general methods of being environmentally aware are becoming more and more popular. People want to take more of an active role in ensuring the longevity of the planet and one way to do that is to alter our way of living and how we consume every day energy.
Passive housing is said to use 90% less energy than “regular” housing but what does having a passive house actually mean? The guys at EZ Living have put together this infographic to explain the concept further to allow you to decide whether a passive house is something you definitely need!
As you can tell, passive housing shifts the focus in energy savings right back to the basics of home design and can generate substantial benefits in the form of utility bill savings, possible rebates and even increase the value of your home.
The holidays are around the corner and we thought that this would be a great time to give you 5 fun and easy DIY projects for you to do this holiday season, some of them even make great gifts.
This article by Drill Service lists 5 unique DIY tasks you can easily recreate yourself and the list of tools needed to master each one.
Pallet Shelves
Recycling pallets has become increasingly popular in DIY over the past few years, as it is not only an affordable way of creating cool things for your home or garden, but they are also extremely versatile, meaning you can make almost anything out of one. One of the simpler DIY tasks you can undertake using pallets, is to create shelving, which looks beautiful painted in your choice of colour and can be used to store plants or flowers. Why not be extra creative and make a wine rack style shelf? The opportunities are endless!
With Christmas fast approaching, what better way to get in to the festive spirit than by making your very own Christmas wreath? You can be really creative with this task and tweak the wreath to suit your own taste or to fit your personally preferred colour scheme. You can use faux flowers, pine cones, glitter and fabric as well as countless other decorative items. To make this task a little easier, you’re best off buying a foam wreath ring online or alternatively you can make your own using wire. The foam wreath will save you time and means you can simply pin and glue fabric and greenery to it.
A personalized scrabble picture is a super easy and affordable way to create the perfect gift for a loved one, or to simply hang in your own home. You can either create an inspiring quote using the scrabble pieces, or make note of a significant date and then decorate it as you wish. For a rustic effect, stick to a wooden frame and wooden scrabble letters, this will fit perfectly into any vintage themed décor. Personalized Scrabble Pictures are almost effortless to make and the results are incredibly effective.
Tools Needed:
Large wooden or plastic scrabble letters – Buy Here
A photo frame
A blank canvas
A glue gun or strong craft glue
Decorative embellishments
A Suitcase Dog Bed
Why settle for a standard dog bed when you can create a unique and stylish suitcase one instead? This quick and easy DIY task allows you to recycle an old, unwanted suitcase and use cushions and patterns of your choice to upscale it into a comfortable and quirky bed for your furry friend. A vintage suitcase works really well for this, as it not only looks expensive but it also looks of a higher quality. To learn how to make a suitcase dog bed click here.
Looking for a cool way to create your own personalized gift that doesn’t cost a fortune? A sharpie mug is a quick and easy way to draw your own design or write a message onto a plain white mug, and then simply pop it in the oven for 30 minutes so that the writing doesn’t smudge or come off; genius! Get creative as you like with this task using coloured sharpies or stick to just black for a simple, sleek look.
Exercise is known to improve our mood, reduce the risk of major illnesses and increase our energy levels. Unfortunately despite the many benefits of exercise, more than 20 million of British people are physically inactive and do not go to the gym.
The problem is, going to the gym takes time, money and effort that not many of us have. Lots of us would like to exercise more, but fitting it into our busy lives can be difficult. As a result, an incredible £558 million is wasted every year due to unused gym memberships. Many of the reasons why people don’t go can be solved by exercising at home.
One way to do this is by creating a garden gym. And not only will it improve your health, but it will transform your home too! In fact, 27% of people’s most desirable feature in their home is an exercise or fitness studio, and having one can have a significant increase on your property’s value. So for the DIY enthusiasts among us, maybe it’s time to consider creating a garden gym.
There are many reasons why this should be your next DIY project, and some of them might surprise you. This infographic created by Prestige Lawns looks at 6 incredible benefits to having a gym in your garden. Read on to find out more!
Have you built yourself a place to exercise at home? Let us know how you’ve transformed a space in your garden or an unused room into a functional exercise space in the comments section below, we’d love to hear from you.
Have you got an old smartphone lying around? Here’s an easy project to get some use from your old smart phone by turning it into a smart mirror for your bedroom, bathroom or living room. You can use it to display information like the date and time, weather, traffic updates and your daily reminders or to do list.
This project should take you around an hour or two to complete and costs about $15 – $25 depending on what materials you have at home already.
Start off by preparing your smart phone. You’ll need to download an app which is able to display all of the information you’d like to be able to see through the mirror as you won’t be able to use the touch screen functionality once your phone is mounted behind the mirror sheet. There are a couple of “home smart mirror” applications available in the Apple and Android app stores, you’ll just need to find one which suites your preferences.
After downloading the app, set your display to maximum brightness and prepare a charger which you’ll leave permanently plugged into your phone.
Assemble Your Mirror
Start off by removing the glass and any photos or artwork from your picture frame, you’ll just be using the outside frame and the mounting/hanging brackets or wire which is secured to this frame.
Next you’ll need to mount your two way mirror into your picture frame. The mirror should be the exact same size as the glass was to fit perfectly into the frame. Make sure that the mirror you’ve bought is a two way mirror, this is a completely different design to a traditional mirror. A two way mirror allows the light to pass from the back to the front of the mirror as well as reflecting the light from the front like a traditional mirror. Mounting your cellphone on the back side of the mirror will allow the display to be seen through the mirror while maintaining the reflection of a traditional mirror from the front.
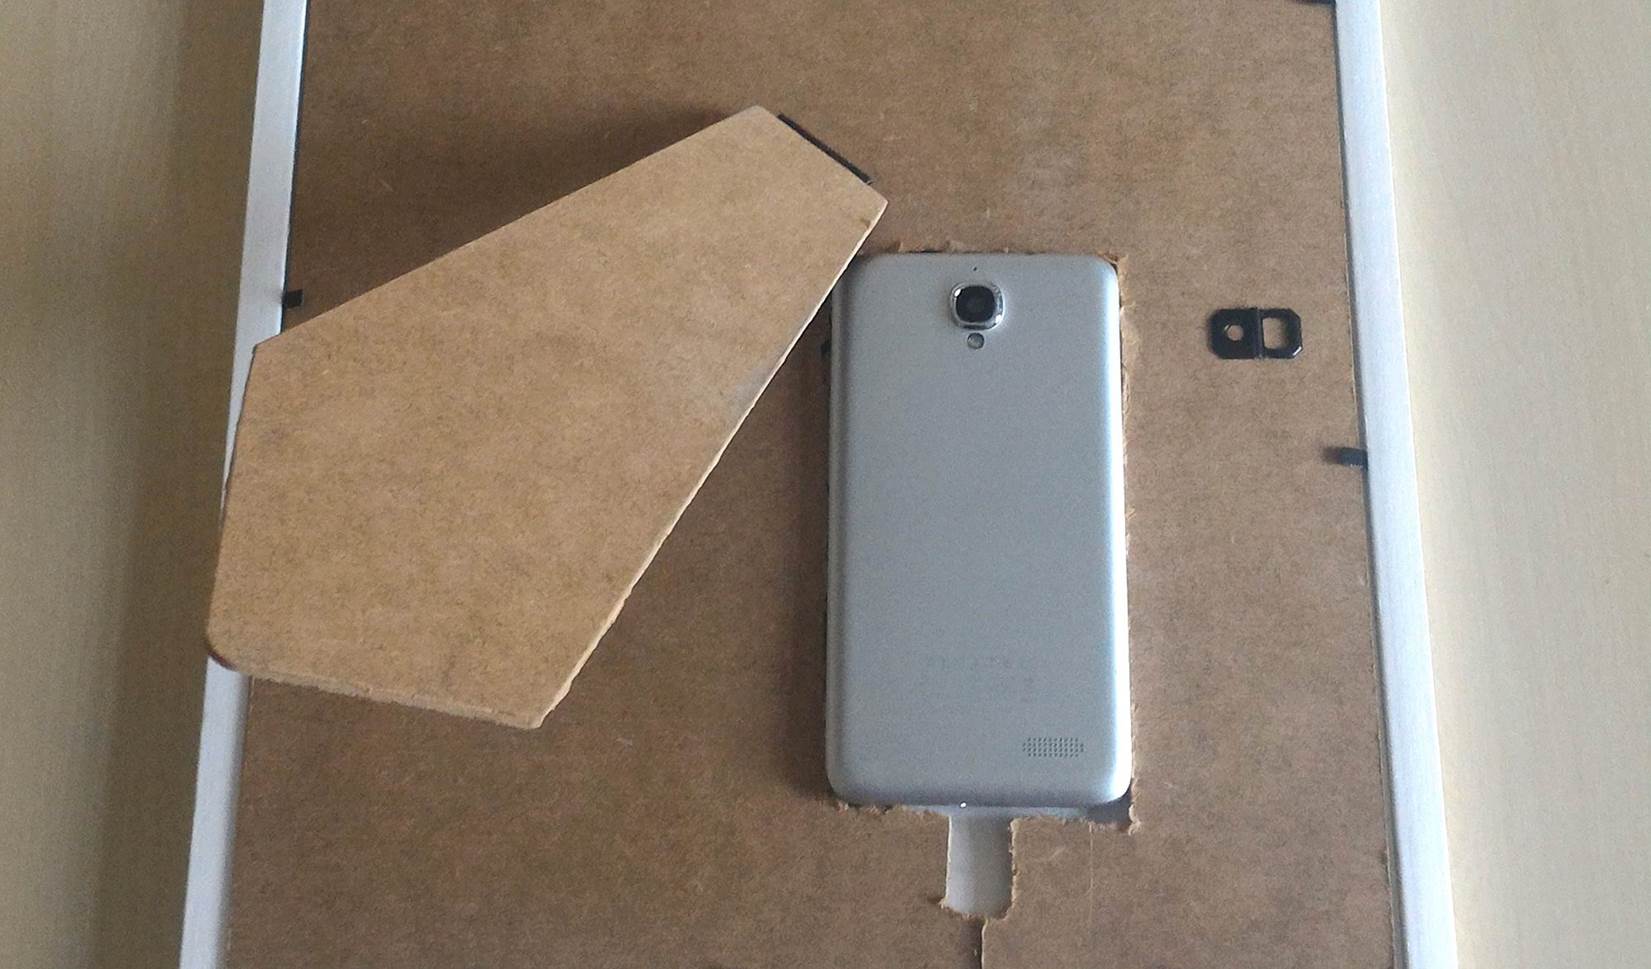
Next comes the mounting of your smart phone and covering the back side of the mirror. In order for the two way mirror to reflect properly, the back side needs to be as dark as possible. You can either cover it with black card or use the thick backing from the picture frame and cut out a section in an area you’d like the text displayed the exact same size as your phone’s display. Place your smart phone into this cutout and then use the duct tape to secure it in place and cover up any gaps along the edges where light could get from the back of the mirror to the front.
You don’t have to use a smart phone, you could use an old tablet or even an old LCD monitor or television if you’ve got a larger two way mirror.
Use a proximity sensor to switch your smart phone display on or off when a person is detected or take it one step further an use your phone’s facial recognition to tailor the information which is displayed to the individual looking at the mirror.
Since the touch screen functionality does not work behind the mirror, using voice recognition would be a great idea to change the displayed data.
Good luck with your smart mirror project, let us know how yours turned out in the comments section below. We’d love to see some pictures of what our readers have built.