Proper home maintenance is nothing short of a task, but it is a very necessary one too. Designing the perfect home office, for example, requires you to also have your devices in check. Keeping all of the electrical components of your home in good shape leads to the saving of a lot of money, which you would have otherwise been forced to spend on repairs and fixes. It’s natural for devices to reduce their performance with continuous usage, but you can always put off or delay certain expenses by being smart about your maintenance routine.
Here, we’re talking specifically about your AC. Air conditioners are known to use more power than any other regular home appliance but, of course, it provides additional comfort in your living space. It’s not necessary for your AC to increase your power bills either. Let’s look at some effective energy saving tips when it comes to your Air conditioner:
1. Scheduling services
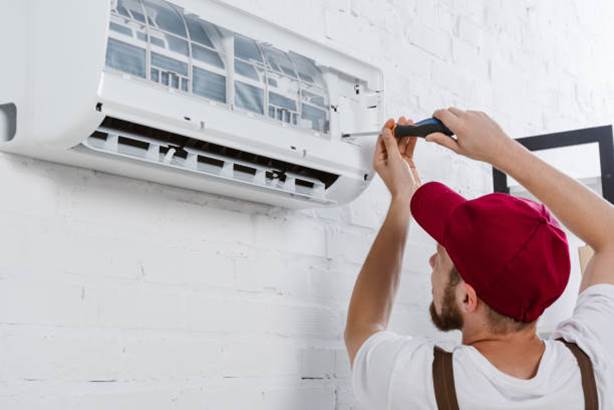
It’s important to keep in touch with your HVAC service provider and give them updates on how your air conditioner is functioning. You must also schedule periodic visits and checkups with them because this helps you with keeping ahead of the problem and preventing any major malfunctions from occuring. Your service provider is the best team to trust, and they’ll guide you through a proper maintenance schedule too.
2. Judicious usage
At times when you don’t really require the AC, because the temperature is cooler or you’re not physically present at home, remember to turn your AC off. This helps with lowering the load on the AC and gives it time to refresh. Continuously using the AC is bound to affect its longevity and performance too. You could also opt for a programmable thermostat if you don’t already have one. These considerably reduce power consumption.
3. Understand your unit
Many new air conditioner models come with hidden energy saving features. First, you need to thoroughly read the manual to ensure that you know of each and every function. Some ACs even have an economy mode, which switch the temperature to an optimal level that keeps the surroundings cool but also consumes less energy.
4. Alternative energy
Thanks to technology, electricity is not the only source of power available to us. You could always opt for an alternative energy source like solar power, especially in the hotter seasons. Using solar during summer makes sense because of the abundance of sunlight, it will definitely take a load off of your electricity bills.
5. Stay alert
Your air conditioner is probably hinting at you, with signs of leakage, odd noises, inefficient cooling, and so on. You need to keep an eye on these signs to ensure that you fix minor issues before they become major ones. The importance of staying aware comes into play here, because putting off obvious defects as “not a real problem” can force you to spend a lot more money on repairs later on.
6. Spacing it out
Obstruction from furniture and other objects can make your AC function ineffectively. Whether it’s wall hangings or large furniture, it’s better to keep them at a safe distance from the indoor AC unit. Anything kept against or too close to the AC could hamper the wiring and/or the functioning of the unit. Also, keep objects at a distance to ensure that the cooling is more evenly distributed throughout the target area.
7. Stay informed
Many HVAC providers have special schemes and offers which include free servicing, annual checkups, replacement part plans, and so on. Why not make the most of it? You need to be proactive and ask your service provider for the best deals they’re offering, and also keep yourself updated with new specials. The better you maintain your air conditioner, the more efficient it will be!
8. Avoid wastage
Whenever possible, switch to the fan or portable cooler for a while. Also, you need to ensure that your blinds and windows are closed so that none of the cool air is escaping. A few precautions like this can avoid wastage and also make it function more effectively.
9. The right temperature

If you’re looking to make the most of your thermostat energy efficiency, it’s time to pay attention to temperature settings. Most HVAC sellers and service providers will mention the optimal temperature range that won’t cause much wear and tear, but will still make you feel comfortable. Another tip would be to stick to a more consistent temperature range, instead of switching too often. It gives your HVAC system a chance to stabilize and function more efficiently. Ensure that you check the owner’s manual, which has detailed information on temperature settings.
Maintaining your air conditioner, while avoiding major repair and replacement expenses, is essential to it lasting for a longer period of time. Ideally, your AC should function efficiently and effectively without causing too much expenditure. If you’re in Jacksonville, FL and are looking for professional HVAC services, have a look here. Be sure to share these effective tips with your family as well, you’ll notice that your AC is working better than ever!