Looking for ways to streamline your home improvement planning and make the process smoother? One of the things you could do is assimilate a collection of apps for exploring design ideas, selecting colors and making the hands-on tasks easier (e.g. apps which contain digitalized versions of DIY tools).
This infographic from Senator Windows picks out a few apps which come in very handy when you’re preparing to launch a home improvement project. You’ll definitely thank yourself for having these in your collection once the work starts and you’re progressing towards the home design you’ve always wanted.
Have you used any really cool or useful apps to assist you with your home improvement projects? Let us know about them in the comments section below. We’d also like to hear about your home improvement projects and how they turned out.
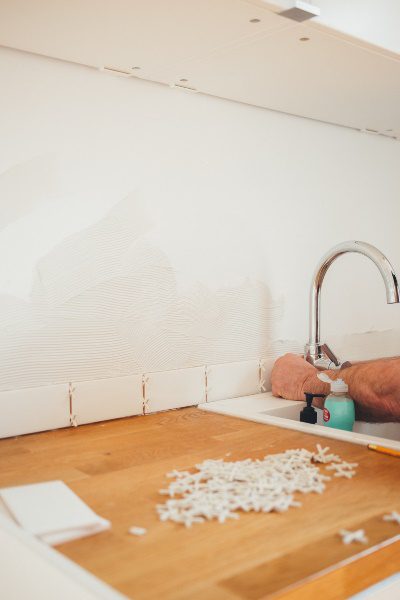
Installing your own backsplash can be a relatively quick and easy task, but the process can get a lot more complicated if your counter outlets are an afterthought in planning. The following are some useful tips for what to focus on and how to be safe while installing your backsplash. If you need some creative inspiration for your backsplash, have a look at these 10 DIY Backsplash Ideas Which Look Great.
This article is a guest post written by Caryl Anne Crowne, a contributing writer and media specialist for Mr. Electric.
Turn the Power OFF
It should go without saying, but turning off the power is a step you do not want to forget. Turn off all electricity in the area where you will be working, and double check that it is off to your outlet using a voltage detector. This is the most important step to eliminating risk!
Outlet Extenders
Once the power is off, you can remove the outlet cover and insert outlet extenders in to the outlet boxes. When the outlet boxes are more than ¼ in. behind the wall surface, the National Electrical Code requires the use of extenders, so go ahead and put them in before you start working on the backsplash. These will also serve as a guide for placing the tile. Extenders can be removed later when you begin to grout.
Measure Twice, Cut Once
Every installation is different, but you should always start from the left or right bottom corner of the area you plan to tile and work until you get close to the outlet. Once you have reached the outlet, hold up the tile sheet that is meant to be installed in that area. Using a grease pencil, you can mark the location of the outlet on either the sheet or the tiles themselves. PRO TIP: A quilter’s square (a clear ruler found in craft supply stores) makes a great tool for marking cut lines since you can see the tile underneath the ruler.
There may be many different ways to cut the sheet down to fit, so before you cut, make sure your plan for cutting gives you the least number of pieces. This will make it easier to line up the joints. Also, make sure you are using the appropriate tool for the type of tile that you are installing, whether it’s a utility knife or a tile nipper. You don’t want the tiles to shatter when you start to cut.
Check for Gaps
Once your tiles are cut and installed around the outlet, you are going to want to check for gaps. The goal is for your tile to end just below where your cover screws in. Take the cover plate that you removed earlier and gently place it over the outlet. You will want to make sure that the edges of the plate are touching the edge of the tile before you begin to apply the grout. You should have about twenty minutes after the tile is installed where the tile can still be moved and made to fit.
After your installation is complete, just secure the outlet cover back in place and turn the power back on. Congratulations! By following these troubleshooting tips, your backsplash is sure to look professionally installed, and you have kept yourself safe in the process.
Bring your 2011 Mac Mini up to 2018 specs with a 16GB RAM upgrade. It’s one of the cheapest and most effective upgrades you can do, it takes less than five minutes and requires no tools. After upgrading your Mac Mini’s RAM, you’ll notice a substantial increase in the load times of applications and an increase in speed when switching between tasks and applications.
The most important part of this upgrade is to ensure that you buy the correct RAM for your Mac Model. You can find your model information by looking in your “About This Mac” window or through a serial number search.
You don’t need any tools or materials to do this upgrade, you just need the replacement RAM modules. These are usually sold in either an 8GB or 16GB upgrade kit online.
Here are some of our recommendations for a range of model numbers:
No Model Numbers Listed But Claimed Best Compatibility
Note: The model numbers above and compatibility thereof are as stated by the seller, only the compatibility of the first has been tested on a Mid 2011 Mac Mini Server.
How To Upgrade Your Mac Mini’s RAM
Watch the video below on how to do the upgrade, alternately you can follow the image guide further on.
Here’s the guide broken down into image steps if you’d prefer to follow these:
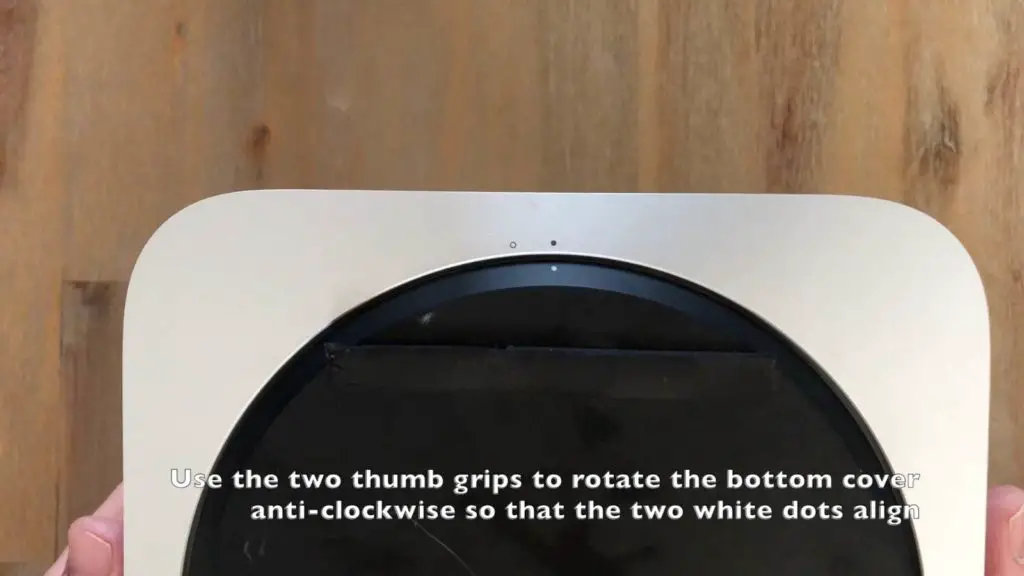
Flip your mac mini over and use the two thumb grips on the bottom black cover to rotate it until the two white dots align.
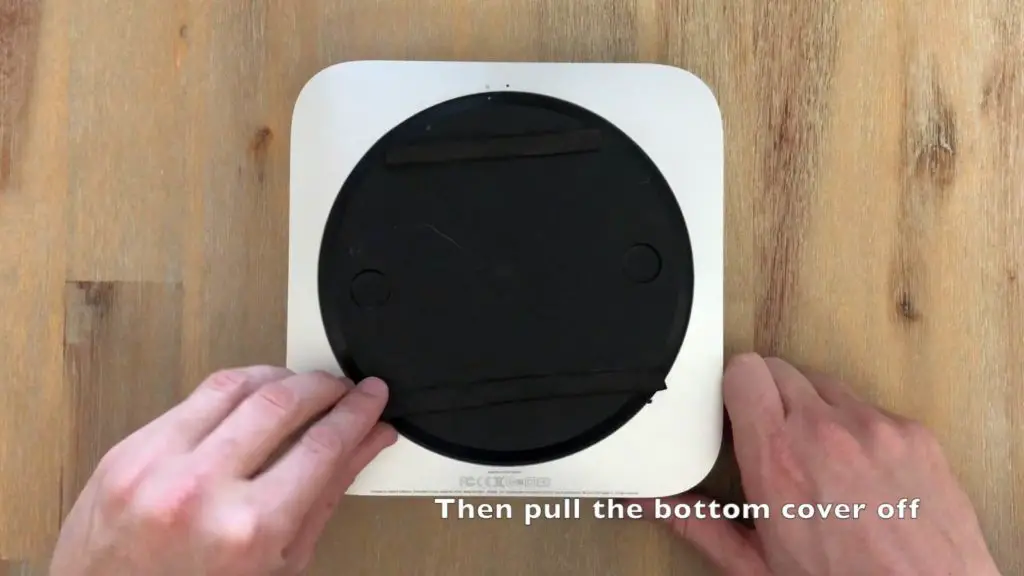
Lift off the bottom cover.
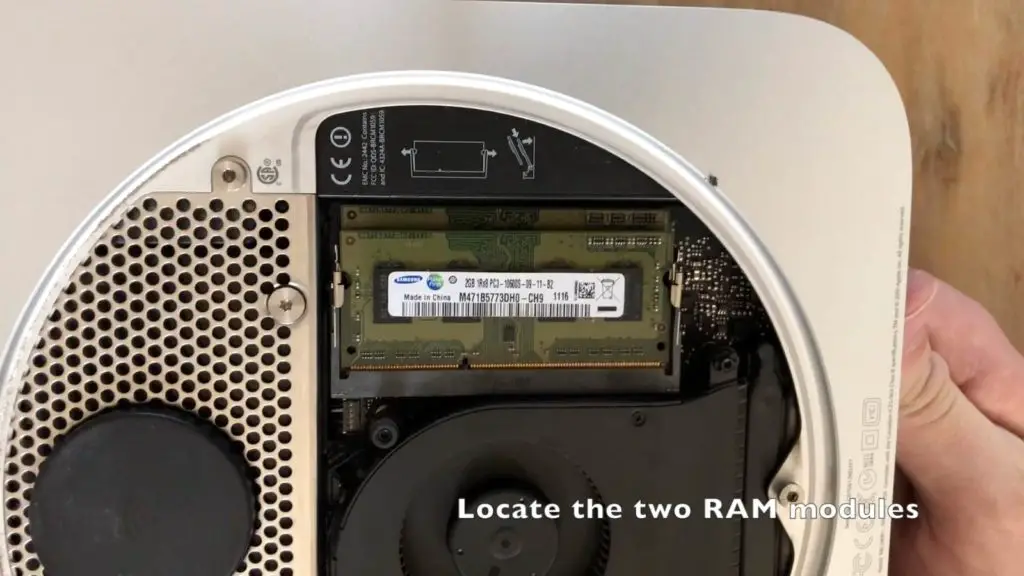
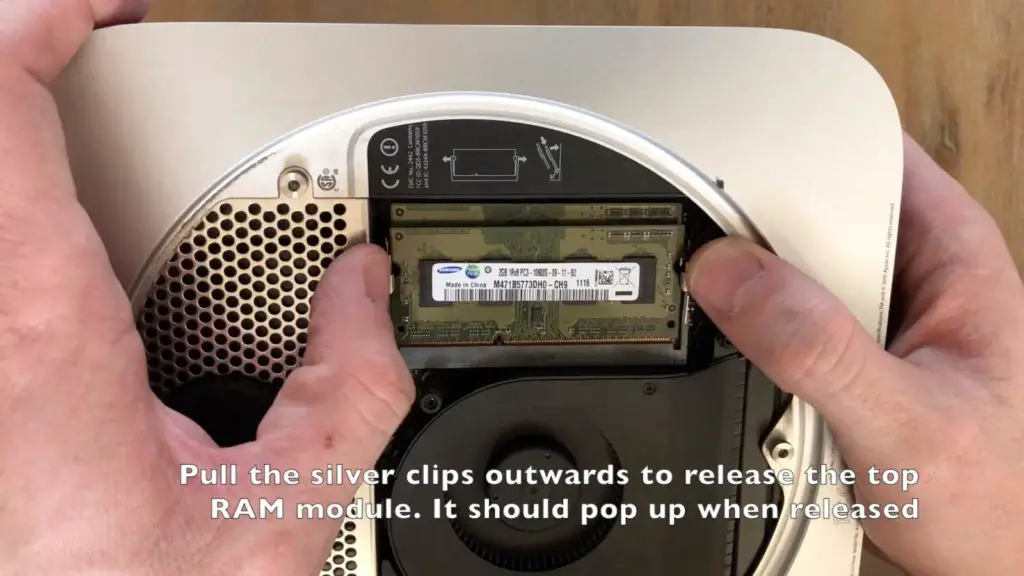
Locate the two green RAM modules. They are stacked one underneath the other.
Pull the silver clips on the sides of the top module outwards and the top module should pop up.
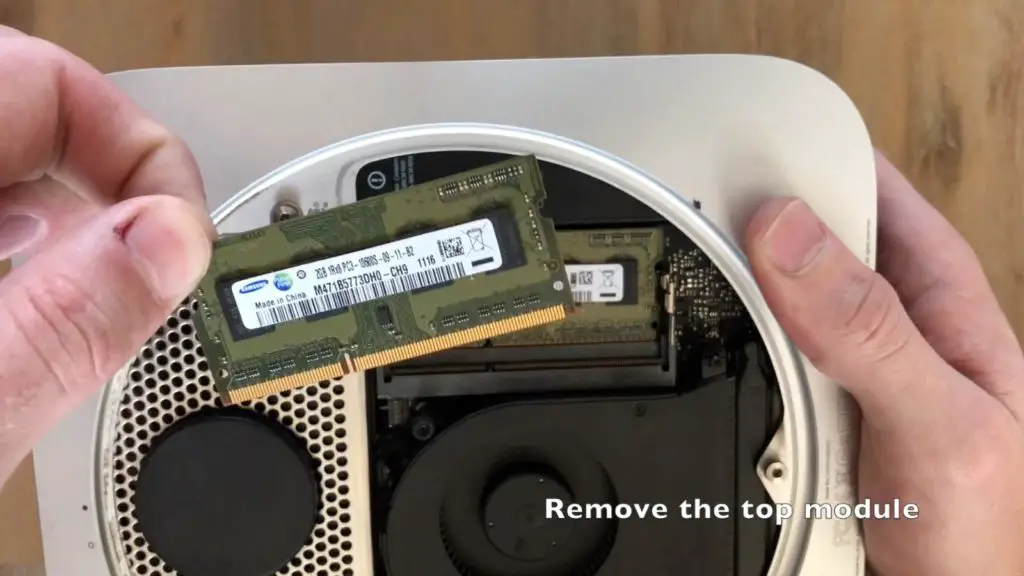
Pull the top module out of its slot.
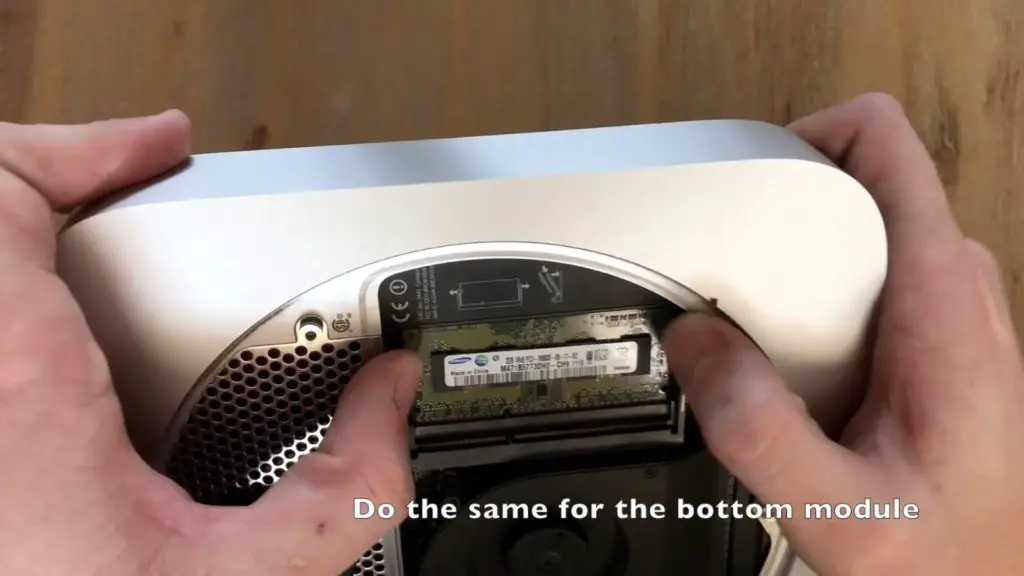
Repeat the same process for the bottom RAM module, it is a bit more difficult to get your fingers onto the clips as there is less space around the module.
This mid 2011 Mac Mini Server had 2 x 2GB modules installed.
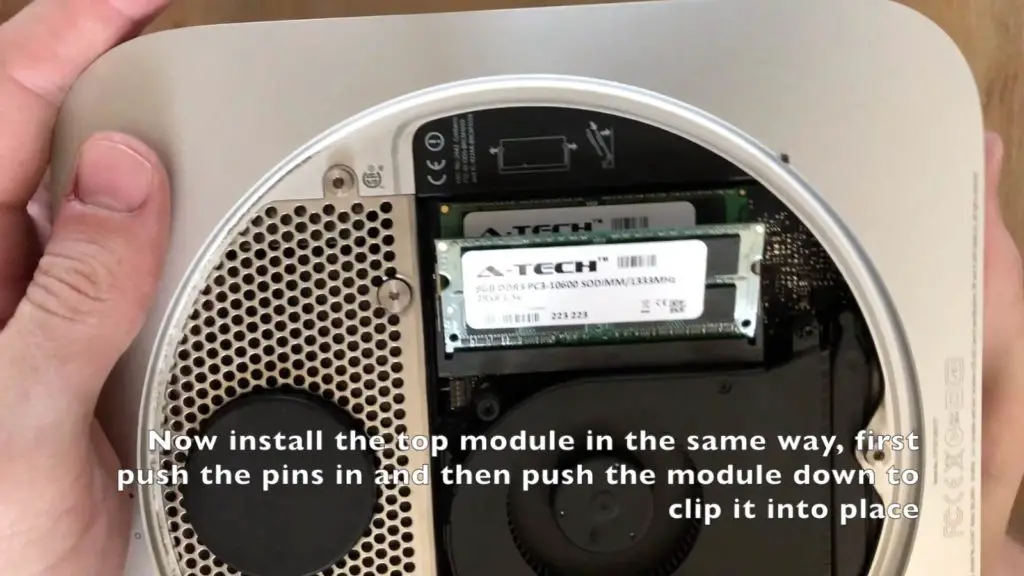
Now you can insert your new modules. Start with the bottom one. press the gold pins into the slot first and then press down on the top of the module until it clicks into place. The silver clicks should then be holding it down firmly.
Your new module is seated correctly if the top of the gold pins align with the top of the black slot and the clips are both snug and secure around the module.
Install the second module in the same way, push the pins into place first and then push the module down until it clips into place.
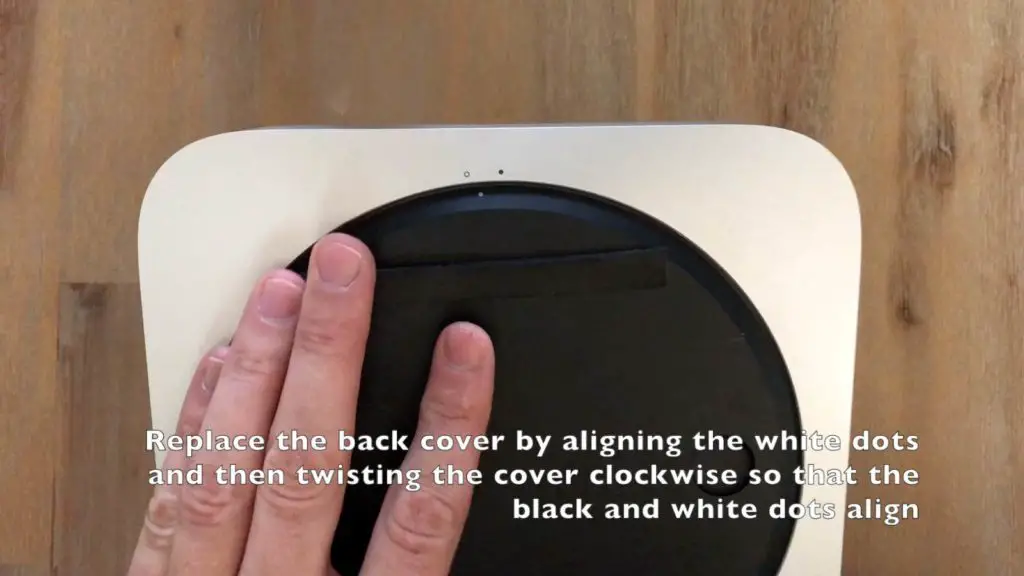
Replace the black bottom cover by aligning the two white dots, seating the cover correctly and then twisting it clockwise so that the black and white dots are aligned.
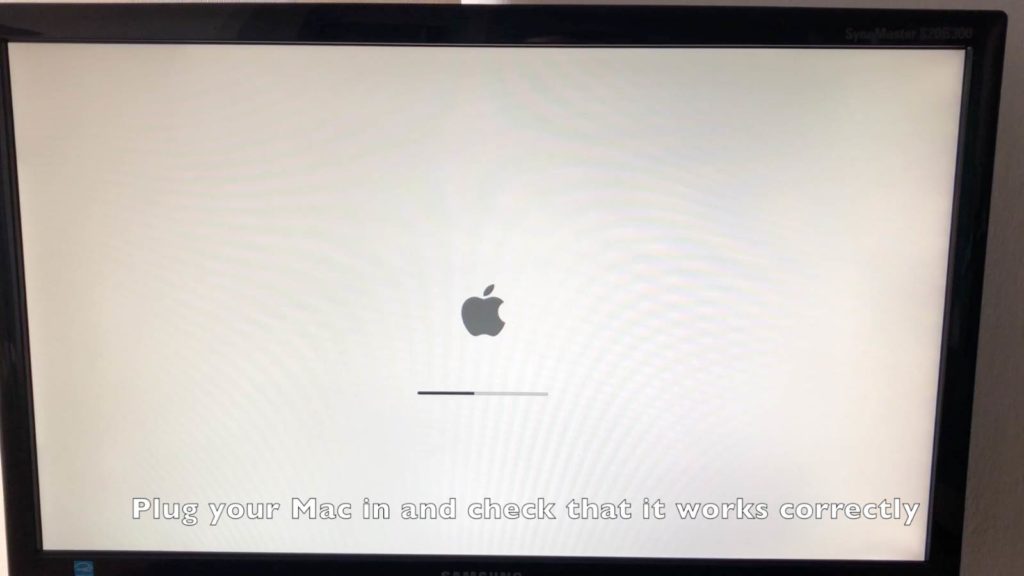
Plug all of your peripherals back in and power up your Mac Mini to check that it is working correctly.
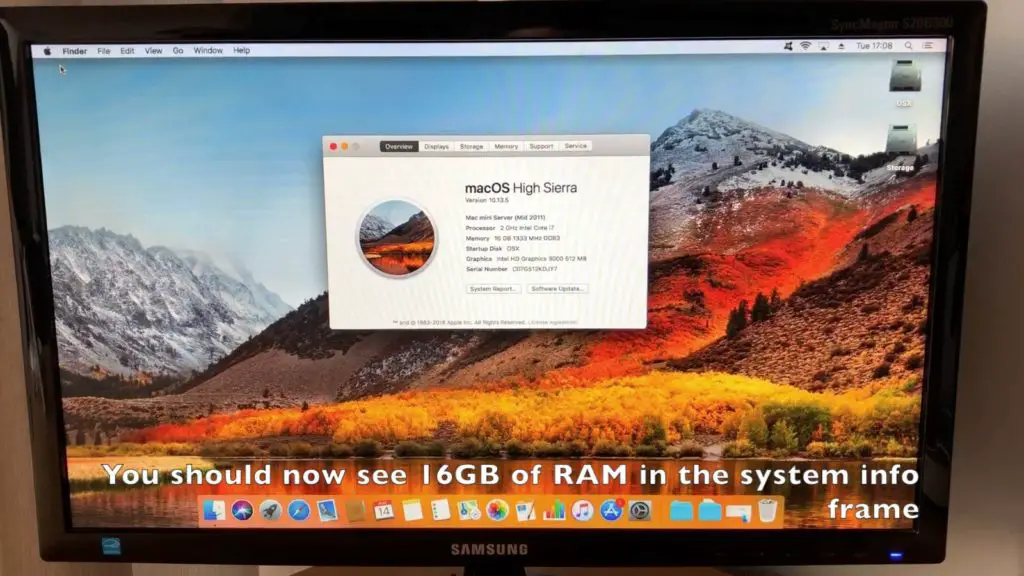
If you click on the Apple menu and then About This Mac, you should see a window which shows that you now have 16GB of RAM installed.
You should see a substantial speed increase especially in the load times of programs and switching between tasks or programs when multitasking.
Have you done this upgrade to your Mac? How did it go for you? Let us know in the comments section below.
If you’ve got indoor plants then you’ve likely come back from vacation to a home full of wilted (or dead) plants. It’s really disheartening to add to your post vacation blues. Fortunately, we’ve put together a couple of tips and tricks to keep your plants watered and cared for while you’re travelling.
Start By Trimming Your Plants
This may sound like a strange way to start but it really does make a big difference. A week before you leave, give all of your well established (larger or more bushy) plants a good trim. Remove any overhanging leaves or branches and trim off any dead or dying ones as well. Your plants will benefit from the trimming and they’ll now use less water during your time away.
Self Watering Pots & Planters
The first and perhaps the most obvious method is to use self watering pots or planters for your indoor plants. These come in a wide range of designs and each operate slightly differently, some require a connection to a water source and others have a jug or bottle which needs to be filled periodically.
Water wicking is an art and it is difficult to get it right straight away, but it can be really effective and last for a long time. We recommend trying this method out a few weeks before you go on vacation to make sure that you’ve got it right.
Place a jug or vase of water next to your plant and then loop a piece of twine or natural fibre rope across from the jug to your plant’s soil. The water will wick from the jug to your plant’s soil while you’re gone and keep your plant hydrated.
Watering bulbs have been around for years, and they really do work. They’re perfect for when you’re away for a week or two, simply fill them up and pop one into each pot you need to keep watered.
With a simply plastic sheet and a glass or plastic dome/box over your plant, you’ve made a simple terrarium which will keep the moisture in and create a warm and humid environment which many plants love.
You can also make a similar terrarium using clear garbage bags like these.
Remember to keep your terrarium out of direct sunlight or you may land up overheating your plants.
You could also try recycling an old coffee pot by building a Coffee Pot Terrarium.
Moisture Crystals
Moisture crystals work well as an addition to the above mentioned methods for when you’re going to be away from your home for up to a month. These tiny crystals help to retain moisture for longer periods of time, keeping your plant watered for longer.
These moisture crystals by Miracle-Gro work well for long periods of time.
Water In The Tub
As a last resort, but also one of the cheapest and easiest methods, you can put all of the plants you need to keep watered into your sink or tub without their drip trays and then fill then sink or tub with two centimeters / an inch or so of water. This will keep you plants watered for a long time and costs nothing to do.
Make sure that the pots you’ve put into the bath have holes in the bottom to absorb the water or this method wont work.
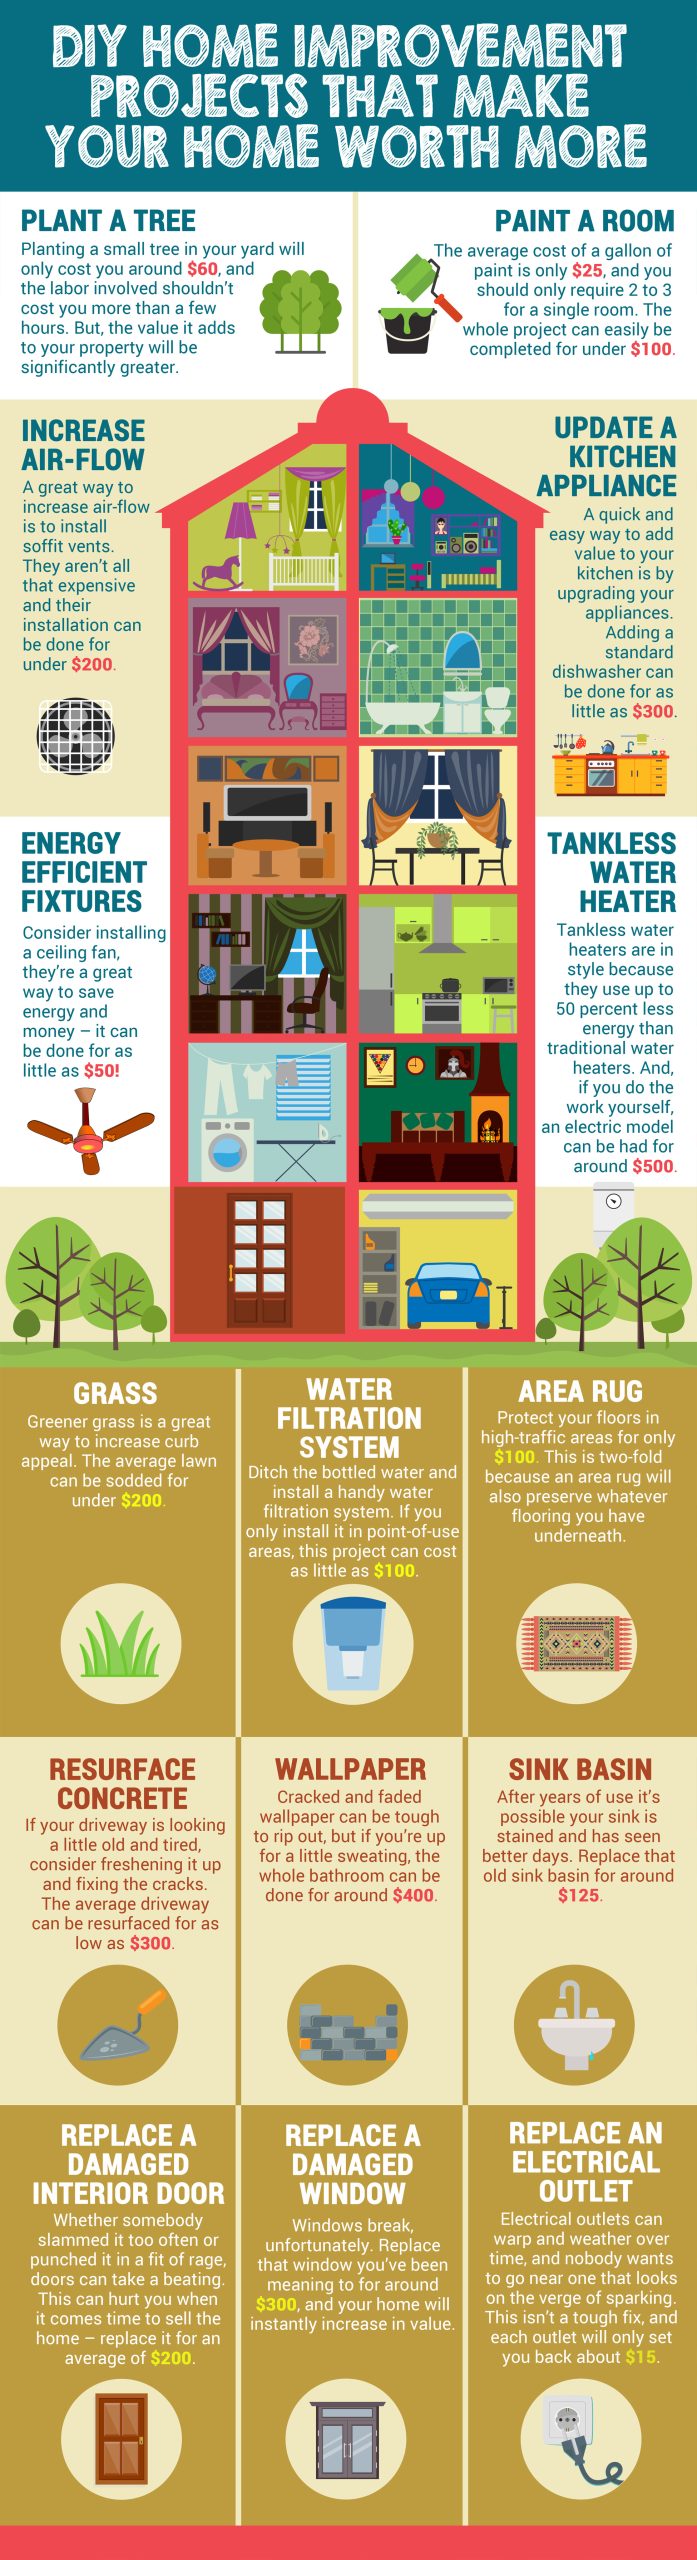
Looking for ways to increase the value of your home without breaking the bank? Luckily, there are many things you can do that won’t burn a hole in your wallet. Better yet, these home improvement projects can be done all on your own, assuming you’ve got the right DIY spirit. It doesn’t matter if you’re looking to sell your home for a greater profit, or simply sprucing it up to increase the quality of your own life, these inexpensive tips are proven to work.
These home improvement projects vary from the quick and easy to weekend projects, and the value they add to your home increases accordingly. Whether it me replacing an outdated appliance, or planting a tree to beautify your yard, these home improvement projects will offer long-lasting benefits. The bigger you decide to go depends on your individual budget, but none of these DIY projects should cost you over $500. Now, get buys increasing the value of your home, no matter the region or real estate market.
Home improvement projects are a great way to keep yourself, as an avid DIY’er like us, busy on the weekend and really add value to your home. There’s also no better feeling than friends or family asking about a project that you’ve done yourself. If you enjoyed this info-graphic, have a look at these 8 DIY Projects To Increase Your Home’s Value or these 10 Weekend Projects to Seriously Add Value to your Home.
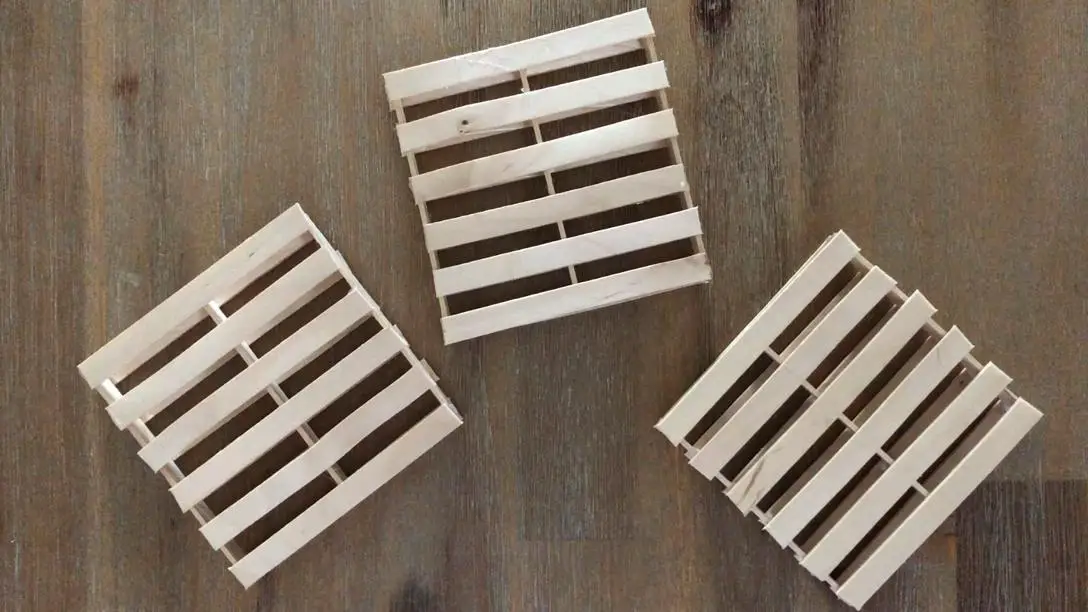
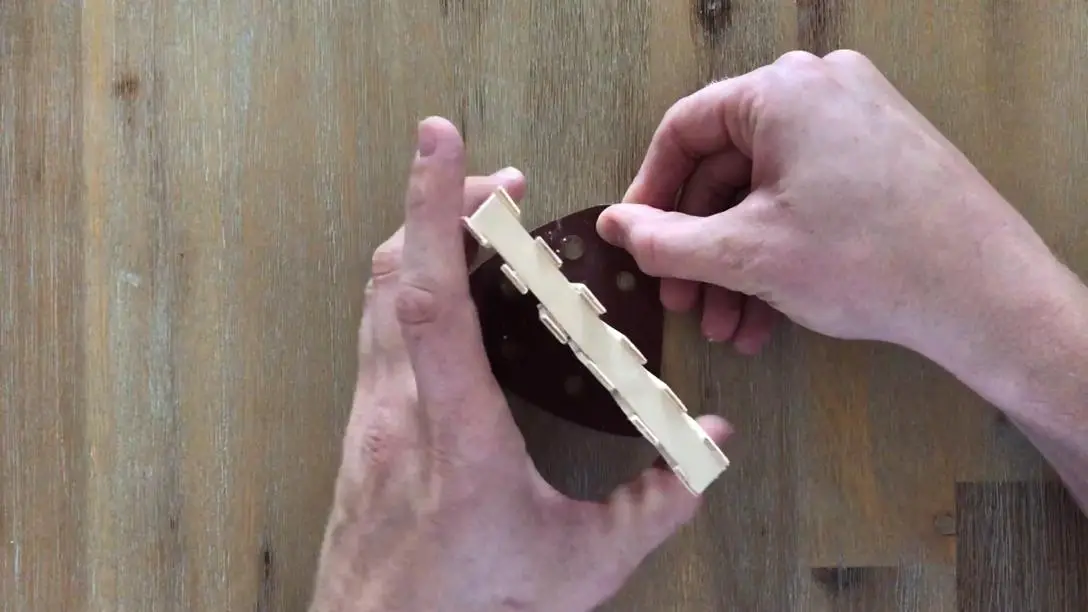
Make these awesome mini pallet coasters using just some glue and popsicle sticks. They’re really easy and cheap (around $0.50) to make and they look great around wooden or pallet furniture. They also make great gift wrap bases for soaps, bath bombs or other homemade gifts.
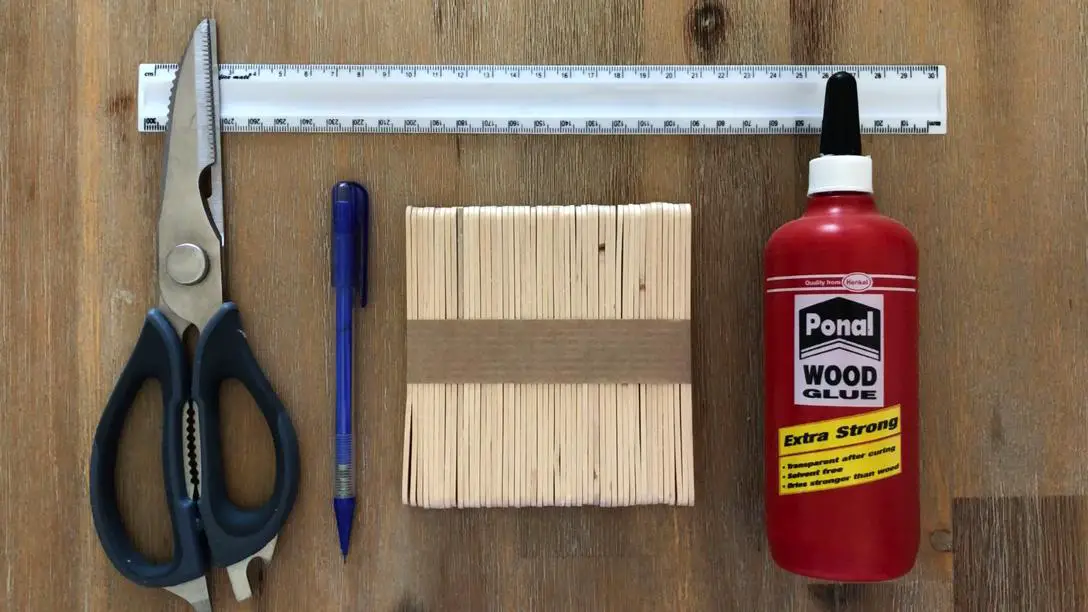
Scissors or Craft Knife or Side Cutters – Buy Here
You can decide whether to use wood glue or a glue gun, wood glue will last longer but it takes longer to make a coaster as you have to wait for the glue to dry between steps. The glue gun is much quicker but your coasters may collapse if you leave them in the sun or if you put something really hot on them. A mug of coffee or tea is usually fine as the mug doesn’t make contact all around the coaster and the wood keeps the heat from reaching all of the joints.
I’ve also said that you can use scissors, a craft knife or side cutters. The scissors are by far the hardest to use, popsicle sticks are quite strong. The craft knife is a bit easier but you need strong mat to cut on. The easiest thing to use is a good strong pair of side cutters or workshop scissors.
How To Make The Wooden Pallet Coasters
Open up your pack of popsicle sticks and put them into groups of 15. You should be able to make three to four coasters from a single pack of sticks. Try to choose the sticks that are as straight as possible. You can also decide if you prefer the grainy looking sticks with very visible wood grain on them or choose the sticks which are more uniform and don’t have a visible grain.
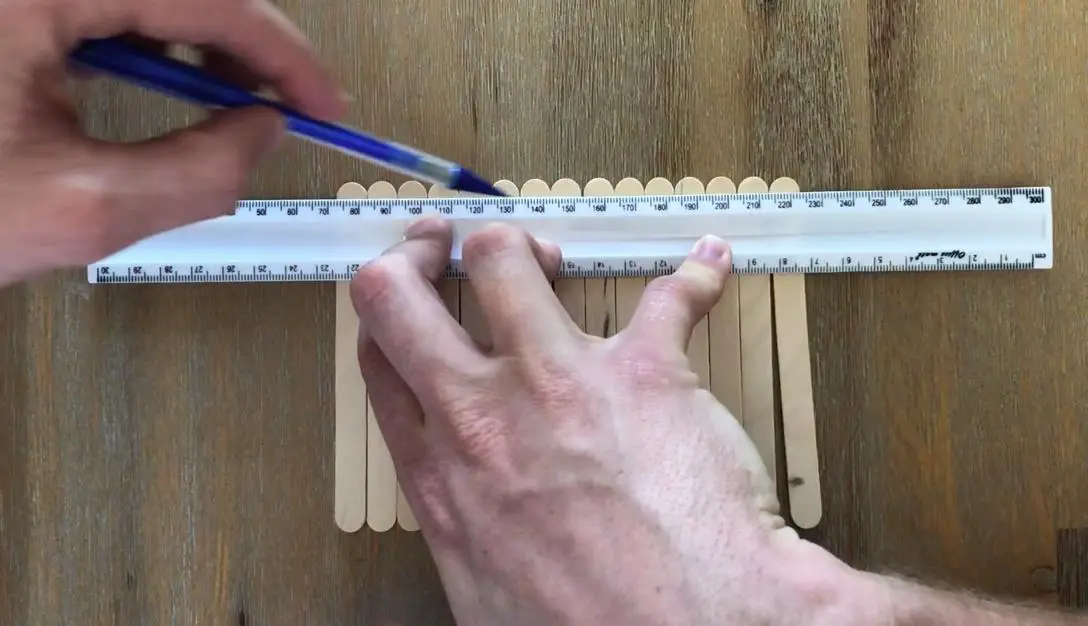
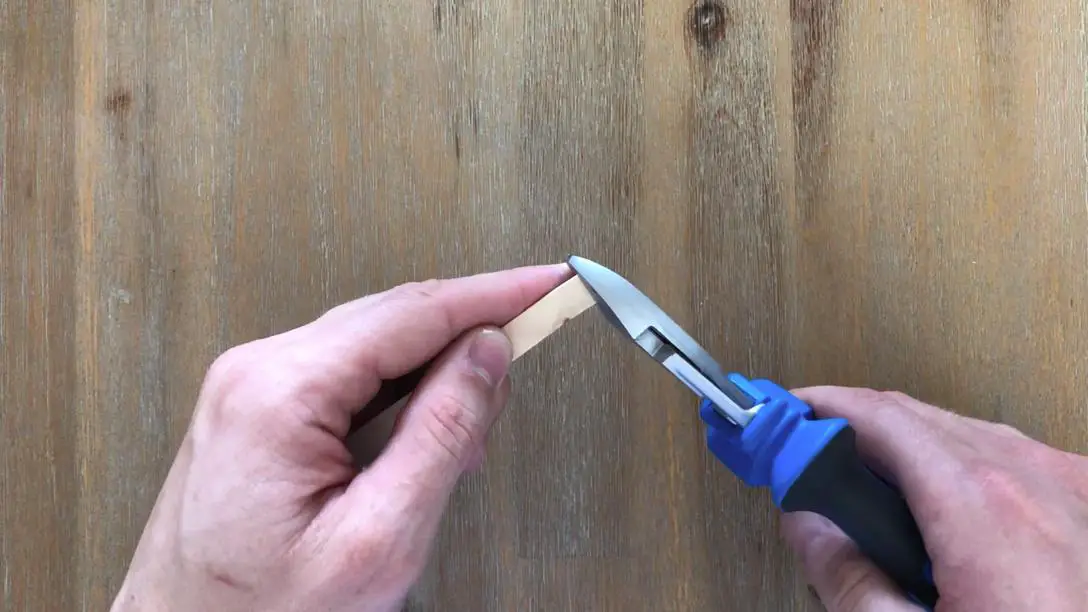
Next you’ll need to cut the round end off of the sticks. Use your ruler and pencil or marker to mark off the ends of the sticks, this will ensure that you cut the same amount off of each stick so that they are all the same length when you’re done.
Mark both ends of the sticks just underneath the end of the curved edge.
Once you’ve marked your sticks, use the scissors, craft knife or side cutters to trim off the piece that you have marked. Be careful when using the scissors or knife as you’ll have to apply quite a lot of pressure to cut through the sticks. As I’ve mentioned before, this step is a lot easier with side cutters or workshop scissors, but not everyone has these lying around.
Trim all 15 of your sticks, more if you’re making multiple coasters.
Now that you’ve trimmed the curved edge off of your sticks, it’s you can begin putting the coasters together.
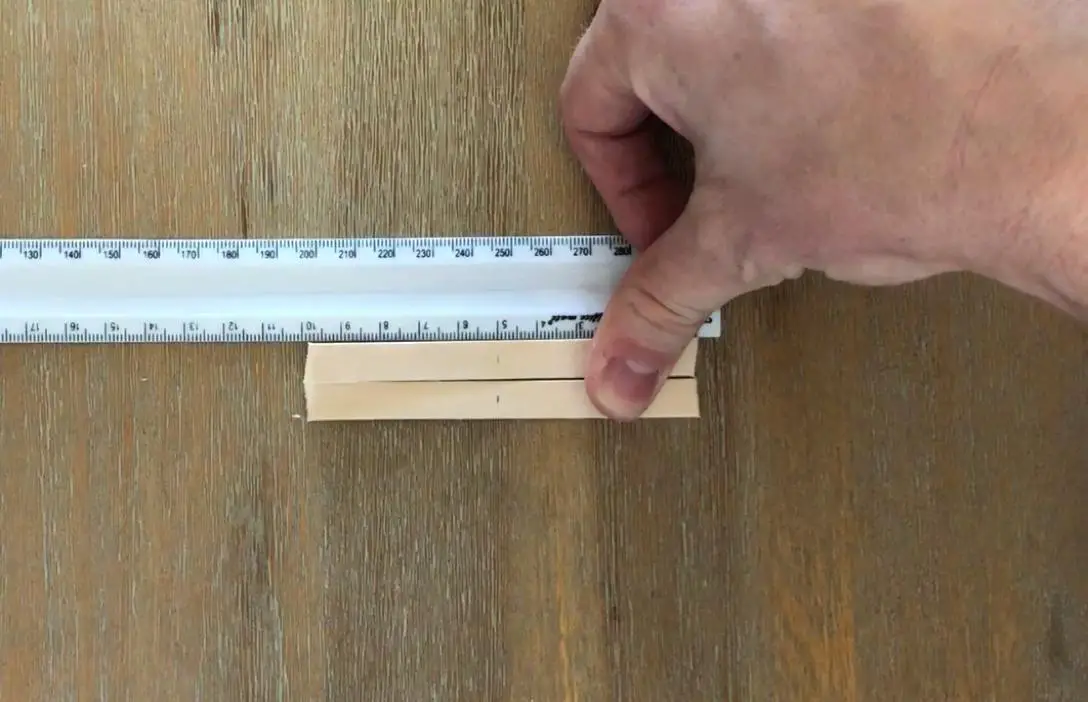
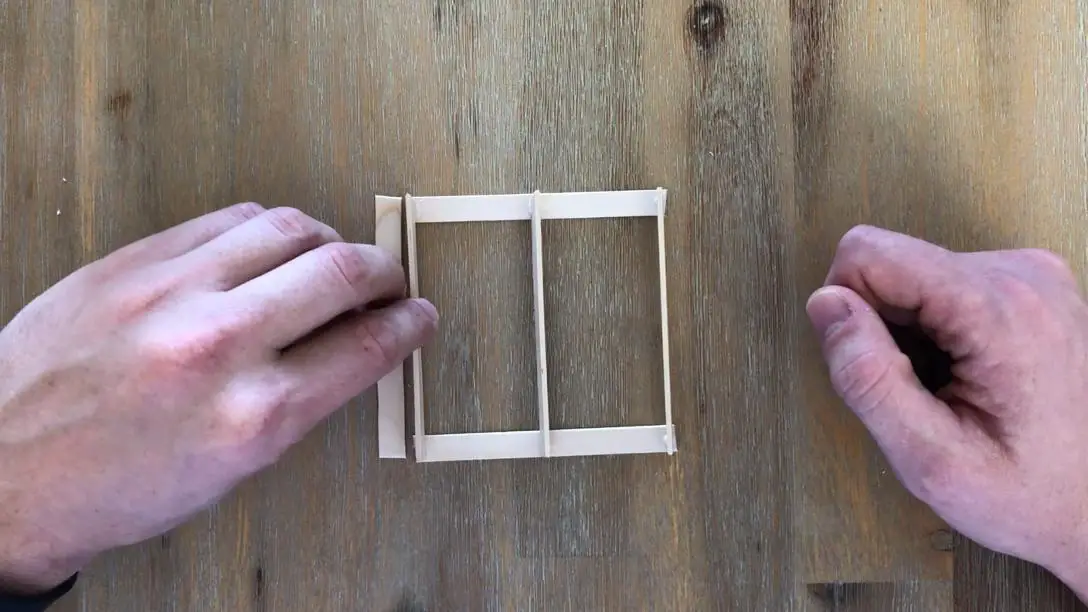
Start off by marking the centre point on two of your sticks, this will help you to place the three “planks” in the middle layer of your coaster. My sticks came out to be around 10cm (just under 4 inches) long, so I’ve marked the centre at 5cm (2 inches).
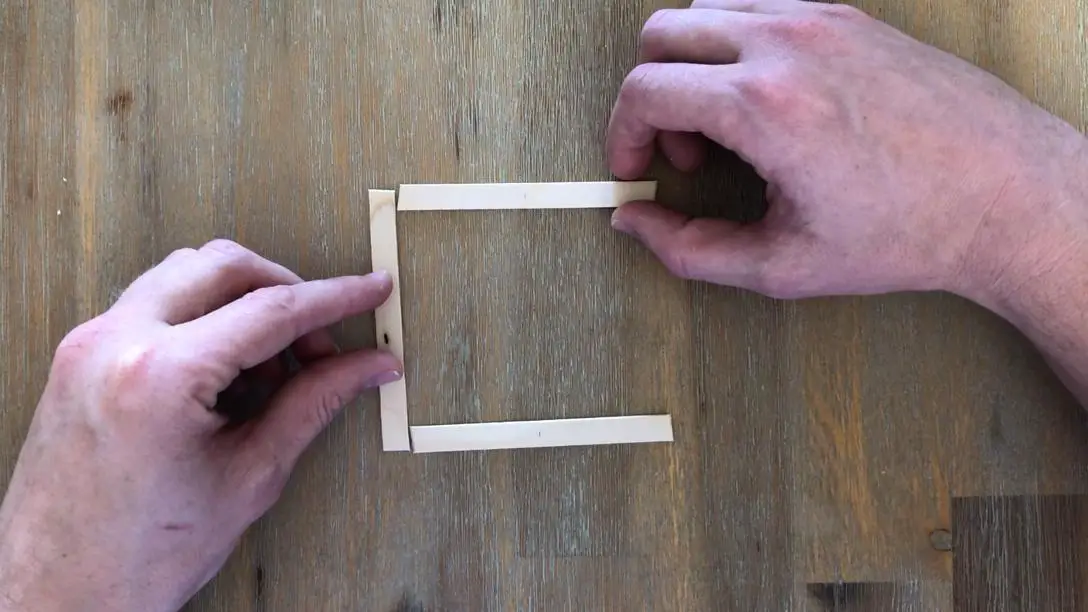
Space the two marked sticks one stick length away from each other. The ends of the spacer stick should align with the outside edges of your marked sticks. These are going to form the base of your pallet.
Gluing With Wood Glue
You’ve got your basic coaster size, now it’s time to glue them together. As I’ve mentioned before, there are pros and cons of each glue type, if you’re impatient and want to get your coasters done quickly then go with a glue gun, if you’re willing to spend a bit more time and come out with longer lasting coasters then go with wood glue.
If you’re using wood glue, follow this step and skip the next. If you’re using a glue gun, skip this step and follow the next.
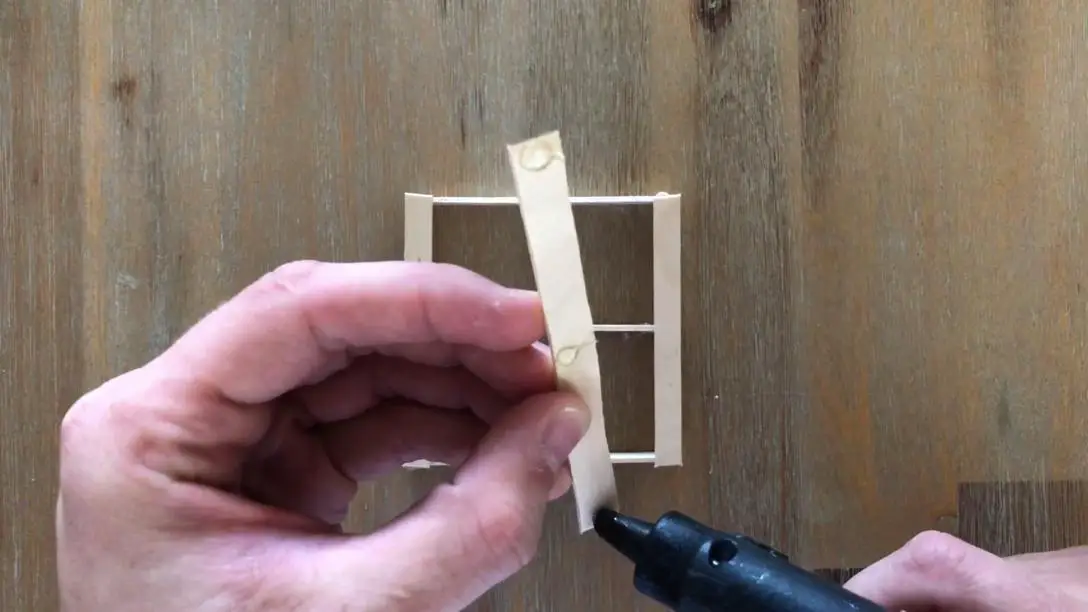
Put a drop of wood glue on each end and in the middle of both of your marked sticks.
Now stick another 3 sticks between these drops along their thin edge (standing on their side). These three sticks are going to form the middle layer of your pallet.
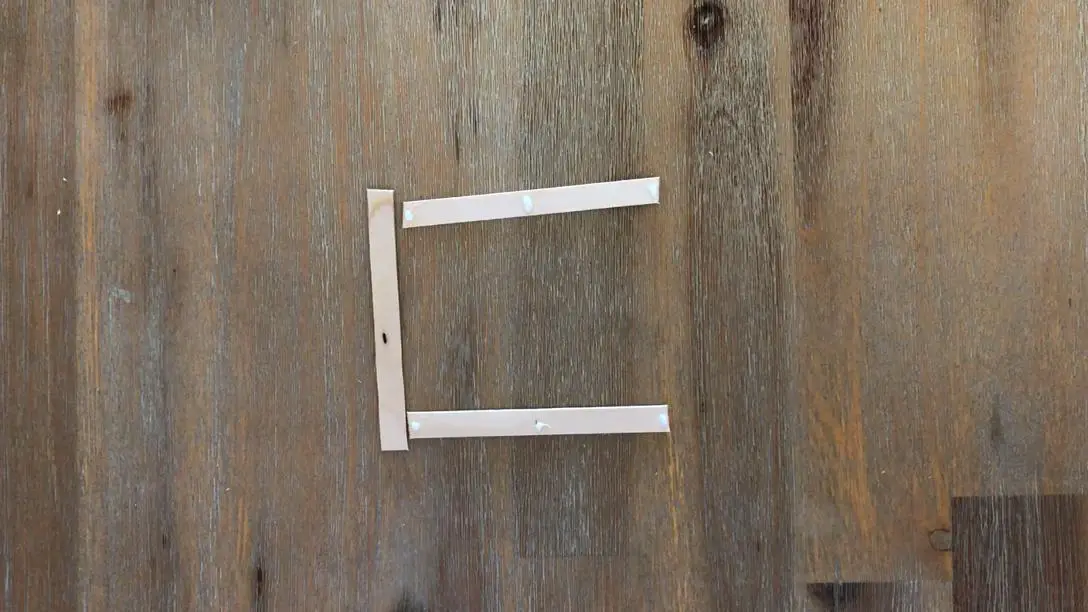
Leave the glue to dry for about 10 minutes and then flip the pallet over to glue the remaining sticks onto the first side of your pallet.
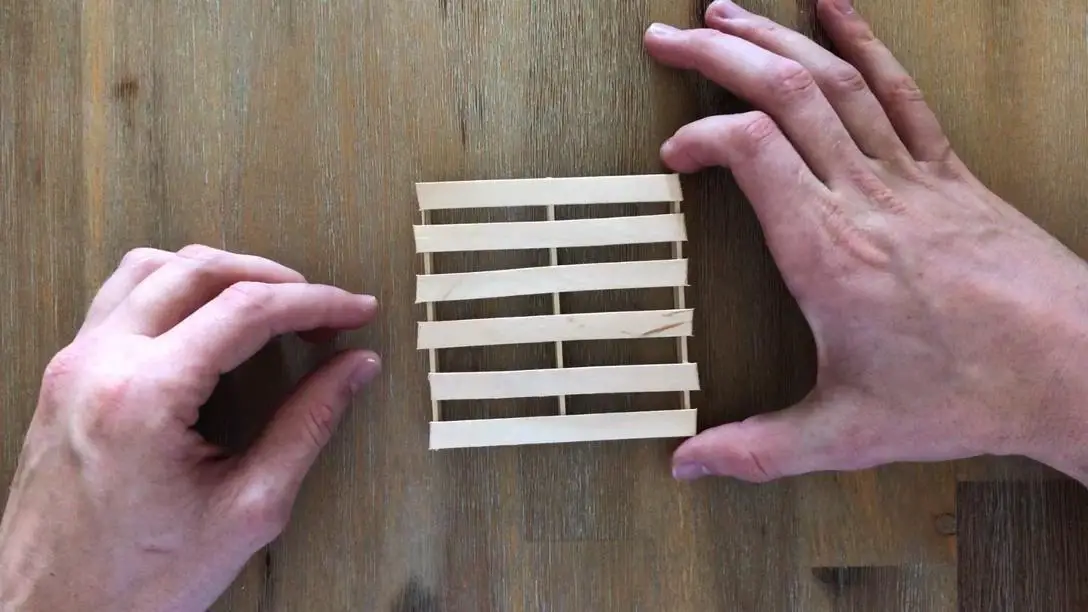
Glue another 4 sticks between your two end sticks, taking care to space them evenly as you go.
Again, leave your pallet to dry for around 10 minutes before flipping it over.
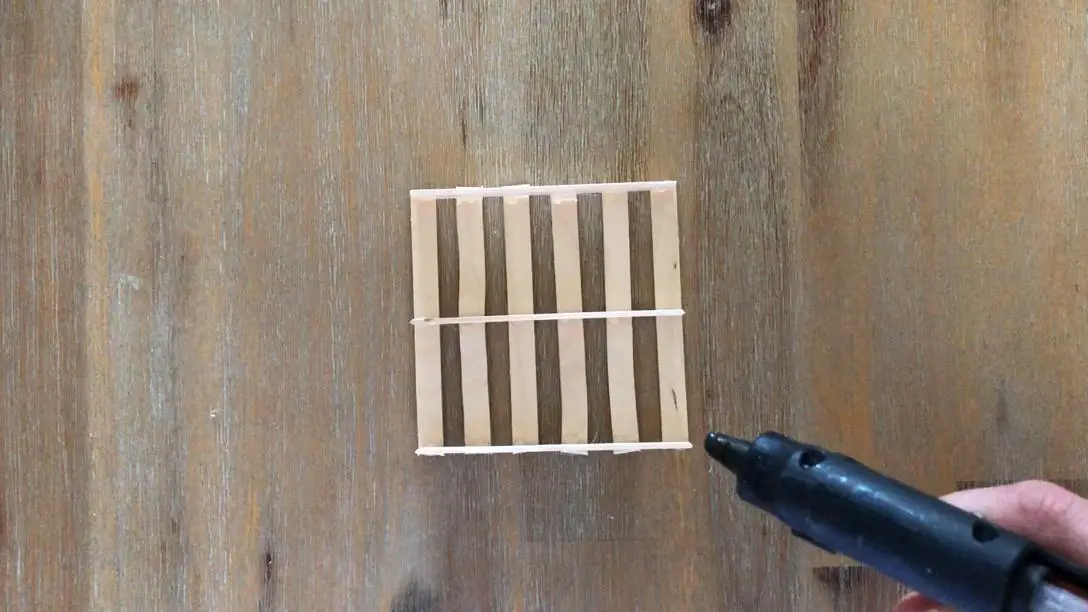
Then glue the next 6 sticks onto the other side of the pallet. Two on the ends and the other 4 spaced out evenly between them.
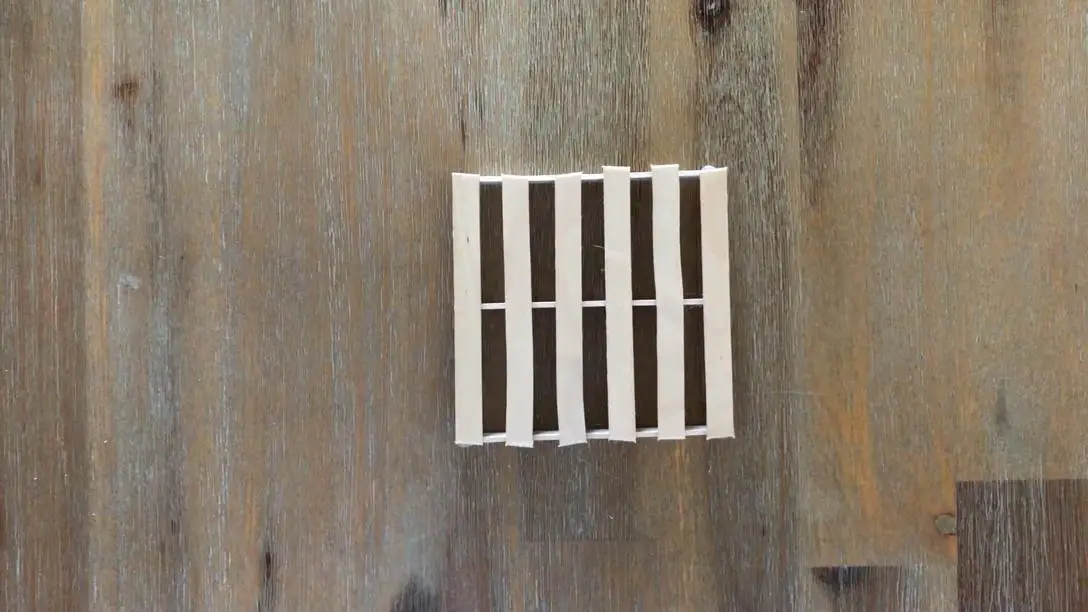
Allow your glue to dry completely and then pick up your coaster and touch up any areas which are not properly glued together.
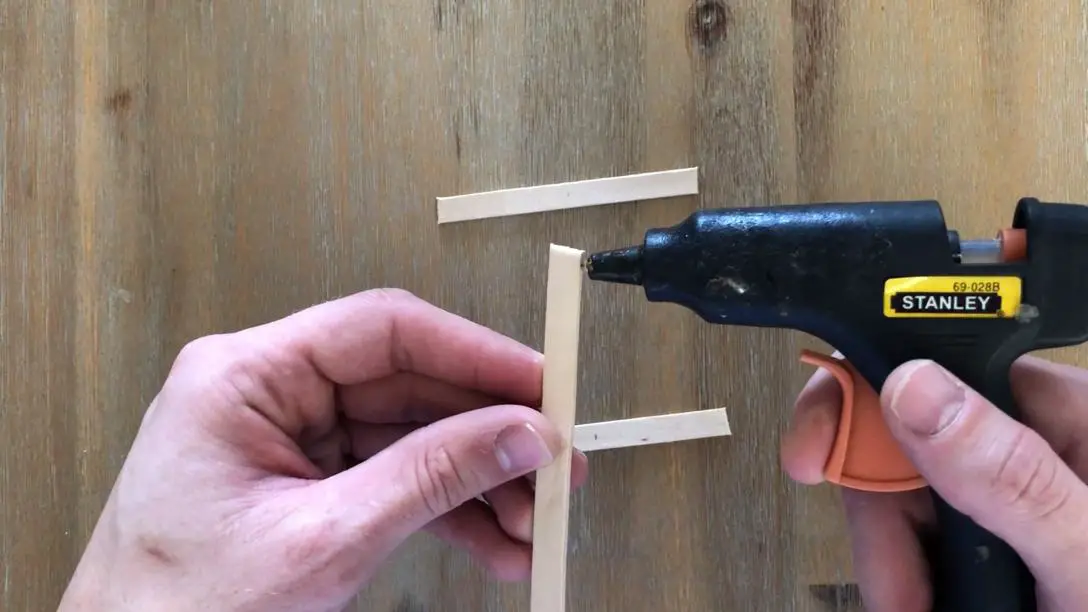
Gluing With a Glue Gun
Using your glue gun, put a drop of glue onto the thin edge on the end of a stick and stick this onto the one side of your two marked sticks. Do the same for a second stick and stick it onto the other side and a last stick for the middle. These three sticks are going to form the middle layer of your pallet.
Flip the pallet over to glue the remaining sticks onto the first side of your pallet. Glue another 4 sticks between your two end sticks, taking care to space them evenly as you go.
Flip it over again and then glue the next 6 sticks onto the other side of the pallet. Two on the ends and the other 4 spaced out evenly between them. Pick up your coaster and touch up any areas which are not properly glued together.
Finishing Touches
If you like a rustic, raw wood look then you can stop here. Repeat the previous steps to make as many additional coasters as you’d like.
If you’d prefer the edges to be neatly aligned, use a piece of sand paper and gently sand the high points on the edge of your coaster. When you’re done, all of the edges should be even and aligned with the stick in the middle layer.
You can also apply paint or a wood stain to your coasters for a dark or coloured wood effect.
Almost everyone who owns an iPhone has dropped it at some stage and no matter how well the cover protects it, occasionally the drop results in a cracked or shattered screen. Getting the screen replaced by the manufacturer is usually really expensive and in reality it is actually quite a simple fix. You can buy an affordable replacement from Amazon or eBay for around $20 – $40 dollars (depending on the quality) and it takes around a half hour to an hour to do if it is your first time.
In this guide, we’ll show you step by step how to replace your screen on your iPhone 7. Although this guide is done specifically on an iPhone 7, the iPhone 8 is very similar inside as well.
Most of the replacement screens you’ll find on Amazon or eBay come with the tools required to do the replacement as well. These tools are not the best quality but they do get the job done, you’ll just need to be careful not to strip the heads of the screw drivers as this is really easy to do.
Have a look at this guide if you’re looking to replace the screen on an iPhone 6 or 6s.
What You Will Need To Replace Your iPhone 7 Screen
Note – your replacement kit may come with a basic tool kit. This is usually good enough to get the job done but the screw driver heads often strip after a few screws.
How to Replace your iPhone 7 Screen
The replacement of your iPhone 7 screen is done in four stages, first you’ll remove the existing screen, then you’ll need to remove the components which you still need to use, then install these components onto the new screen and finally install the new screen on your iPhone.
The most important thing to keep in mind when doing this replacement is to keep your screws well organised. The screws inside your iPhone are different types, sizes and lengths and it is very important that you put the correct screws in the correct place. It is easy to get confused and lose track of your screws. I like to draw a quick sketch of each bracket or component and lay the screws onto the sketch over the hole they came out of.
The next thing you may not be familiar with is the ribbon cable connectors. These are very fine connectors which simply “snap” into place, similar to Lego. To separate them, you can slide your pry tool underneath the connector and pop it off. To connect them again, make sure that they two are correctly lined up and simply pressed down on top of the connector and you’ll feel it snap into place.
Here is the complete video guide to replacing the screen:
Here is a summary of the steps involved in replacing your iPhone screen:
Turn off the iPhone.
Use the pentalobe screw driver to remove the two screws at the bottom of the phone.
Position the suction cup on the screen near the bottom in an uncracked section.
Pull the screen away from the body of the phone and insert your pry tool to gently lift it away. Be careful not to stick the tool in too far or you might damage the ribbon cables.
Slide the pry tool down the edges of the phone from the bottom to the top to loosen the side clips.
Slide the screen down and out of the clips at the top of the body of the phone.
Use the tri-point screw driver to remove the four screws on the battery and digitizer cover plate.
Remove the cover plate and use your pry tool to unclip the ribbon cable connectors using your pry tool.
Remove the two camera cover plate screws.
Remove the cover plate and again use the pry tool to unclip the ribbon cable connectors.
The old screen should now be free.
Remove the four screws on the camera and ear piece cover plate on the old screen.
Remove the cover plate and then the remaining two screws, the ear piece should then come loose.
Use your pry tool to gently lift the ribbon cable assembly off of the screen body. Be careful not to pull the ribbon cable too hard or you may tear it or damage some of the components.
Remove the four screws securing the home button assembly.
Remove the cover plate, then unclip the ribbon cable connector.
Fold the top connector back and then gently pry the ribbon cable assembly away from the screen body. Feed the home button assembly through the front of the screen.
Remove the 6 screws securing the large cover plate on the back of the old screen.
Gently pry the ribbon cable away from the back of this cover plate along the bottom edge.
Position the cover plate onto the new screen and make sure that the ribbon cables are neatly positioned behind the cover plate without being folded over or crushed.
Replace the 6 screws on this large cover plate.
Replace the home button assembly, these is a small black plastic peg which is used to locate it.
Clip in the ribbon cable connector.
Replace the home button assembly cover plate and screws.
Remove the adhesive strip cover on the top of the screen by the ear piece.
Replace the camera sensor assembly and then the ear piece.
Replace the cover plate and 6 screws to secure the components. Make sure that they are all in the correct positions and are aligned correctly. The components should not be forced or squashed by the bracket or they may break.
Remove any left over sticky residue from the edges of the phone body. This residue forms a “gasket” which keeps the iPhone water resistant.
If your replacement screen came with a replacement gasket, fit it now and make sure that it lines up with the edges of the phone body.
Clip in the camera ribbon cable connector and replace the cover plate and 2 screws.
Clip in the battery and digitizer ribbon cable connectors.
You should now test the screen and make sure that everything works correctly before sticking the screen down with the new gasket. If it all works correctly then you can start closing up the phone. If not, check all of the ribbon cable connectors, they may not be seated correctly.
Slide the top of the screen into the phone body.
Then work from top to bottom pressing the sides of the screen down and onto the new gasket.
Finally, snap the bottom edge into place and then replace the two pentalobe screws.
Test the phone again to make sure that everything you’ve moved still functions correctly and you’re finished.
Good luck with the repair and let us know how it goes for you in the comments section below.
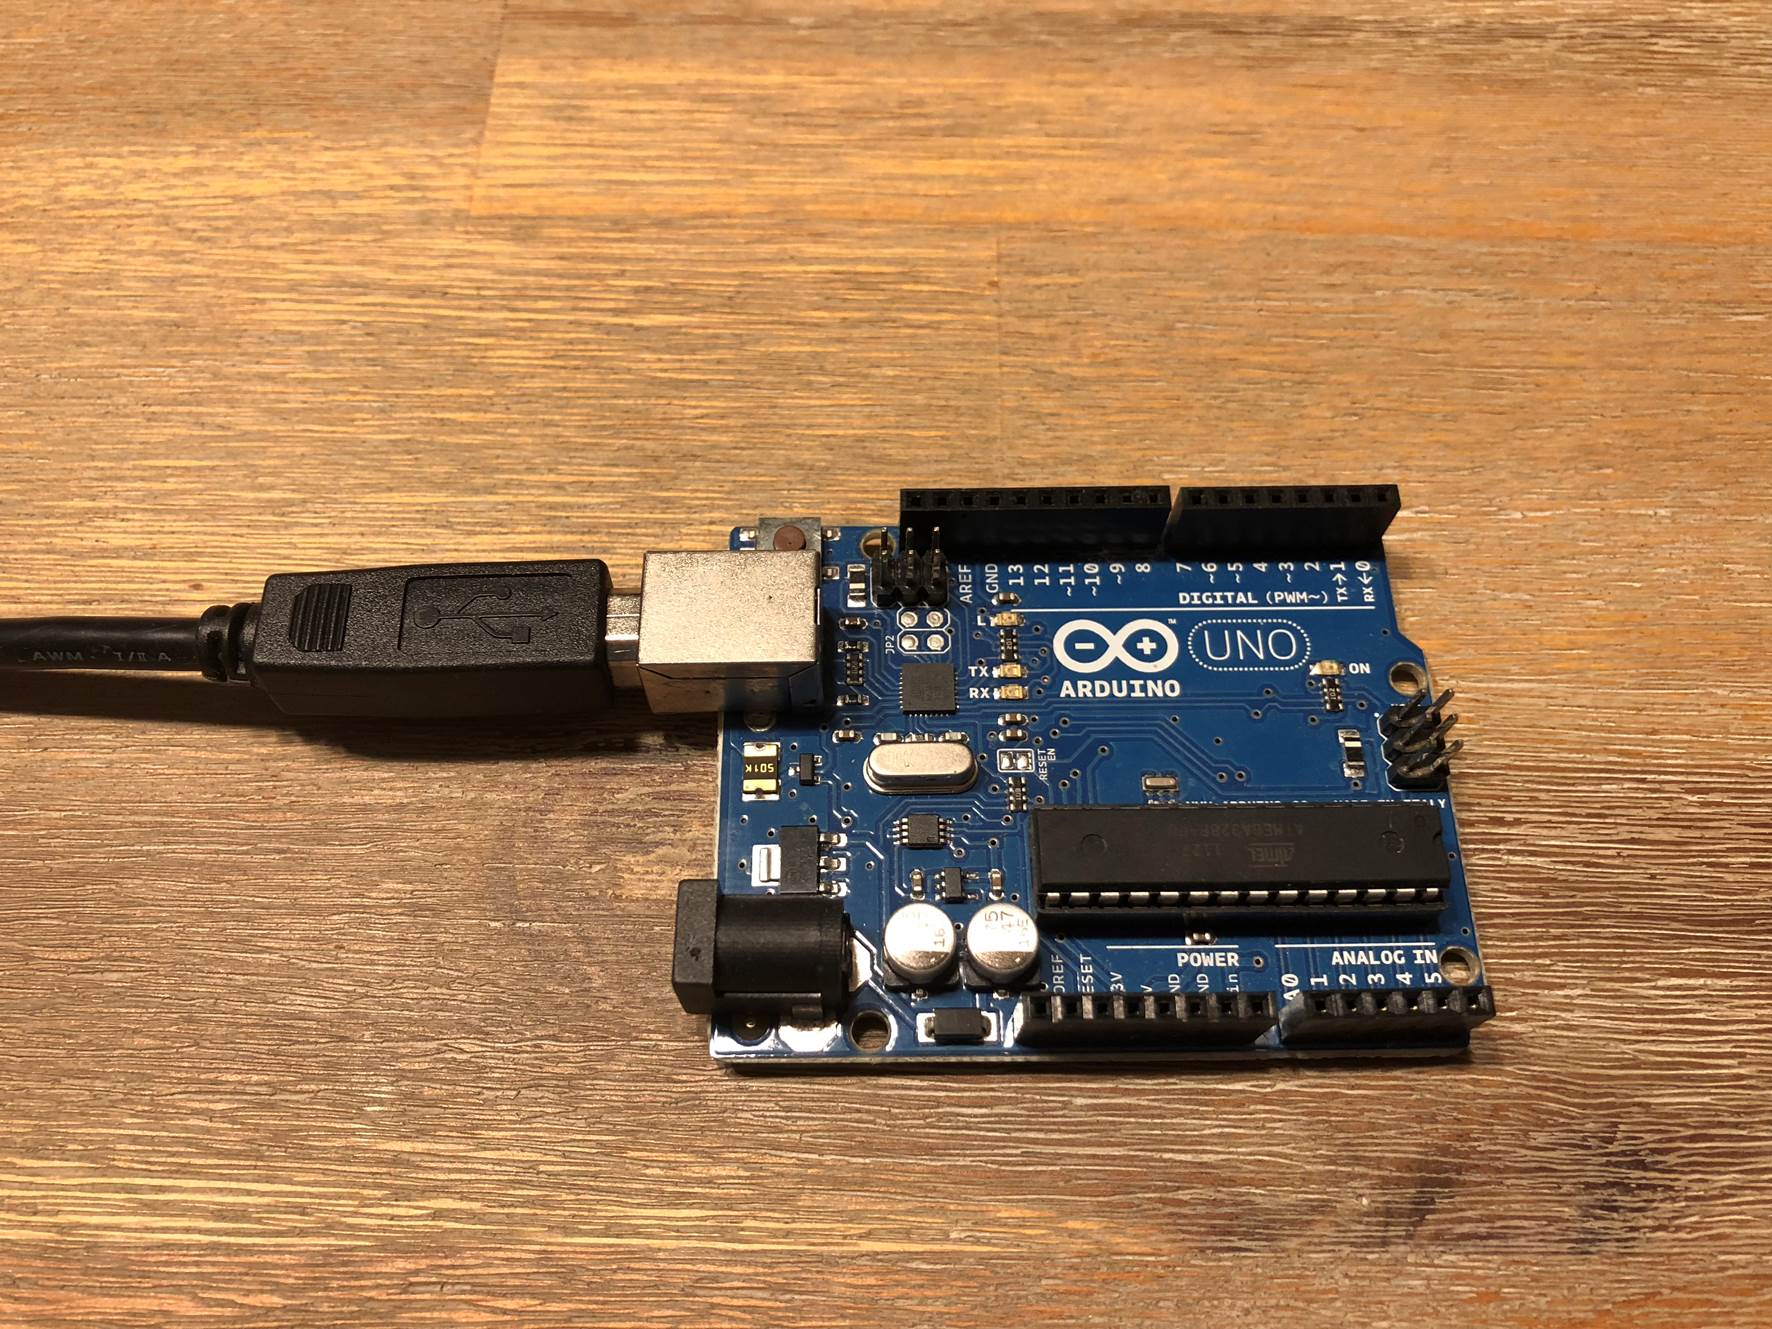
In this guide, we will be looking at how to run an artificial neural network on an Arduino. This is the perfect project to learn about machine learning and the basics of artificial intelligence. The neural network in this example is a feed-forward backpropagation network as this is one of the most commonly used, the network concept will be described briefly in the background section.
Although we’ve used an Uno in this example, the network can be run on a Nano, Mega or Leonardo as well.
This project assumes you know the basics of Arduino programming, otherwise read our article on getting started with Arduino.
Background on Artificial Neural Networks
An artificial neural network is a mathematical computing model which is designed to mimic the way in which the brain reacts to sensory inputs. The brain is made up of millions of neurons which are connected to each other in huge networks. Each neuron is capable of being stimulated, much like a switch being turned on or off, and the state of the neuron turns surrounding neurons on or off as well depending on the level of activation of the neuron and the strength of the connection between the neurons. A neuron with a strong connection will have a greater level of stimulation than one with a weaker connection. Very simplistically, the neurons own level of stimulation is related to the sum of the stimulation it is receiving from all of the other neurons connected to it, and this is precisely how the artificial neural network works.
Let’s start off by understanding what exactly a backpropagation network is. The network itself is not a new concept, in fact they have been around since the 80’s and while they are based on some fairly complicated mathematics, you do not need to understand the mathematics in order to understand how the network functions.
So what is an artificial neural network? In short, an artificial neural network is a segment of code which learns how to respond to inputs based on example sets of inputs and outputs. They are very powerful tools and are rapidly finding their place in facial recognition, autonomous vehicles, stock market and sports predictions and even as far as websites suggesting products which you may be interested in. Their most powerful application lies in pattern recognition, where the exact input into the network is not known. There may be too little or too much information and it is up to the network to decide how it is processed. A good example of the application of an artificial neural network is in handwriting recognition. We are able to recognise letters and numbers but the exact shape of the characters varies from person to person, therefore the input into the neural network is never precisely known. It is up to the neural network to identify the input and relate it to the relevant output.
In an artificial or software based neural network, a mathematical model of all of the neurons and their connections is created. An input is then fed into the network and the neurons systematically add up their inputs and produce an output into the next level of neurons until an output is reached.
One of the key principles in an artificial neural network is that the network needs to be trained. When the network is set up, random weights are applied to each of the connections. These weights provide a starting point for the network but will almost invariably provide “rubbish” outputs. A set of sample data is input into the network and the results are compared to the expected results. The weights are then adjusted and the input/output cycle repeated. This training cycle is repeated until the output data from the network matches the expected output data within a certain level of accuracy. This typically takes a few tens of thousands of training cycles depending on the complexity of the data and network.
In this example, we’re going to be building a three layer feed forward network, the three being the input layer, hidden layer and output layer as shown below.
In the sketch in this article features a set of training inputs and outputs which map the seven segments of an LED numerical display to the corresponding binary number. The network runs through the training data repetitively and makes adjustments to the weightings until a specified level of accuracy is achieved, at this stage the network is said to have been trained.
The input and output training data:
You’ll need to run the Serial monitor on your Arduino IDE in order to see the progressive training and the final results. The program will send through a set of training data every one thousand cycles so that you can see how the network is “learning” and getting closer to the correct answers.
You can create your own training data to train your network on, have a look at the last sections in this guide for instructions on creating your own training data.
What You Need For Your Arduino Based Artificial Neural Network
How To Build Your Arduino Based Artificial Neural Network
In this example, we are simply training a network with a predefined set of training data until a solution is achieved. This is the easiest and most basic way to get an artificial neural network running on your Arduino and it requires no connections to the input or output pins. You’ll simply need to plug your Arduino into your computer using the USB cable and you’re ready to upload the neural network code.
Understanding The Code
As stated before, the mathematics behind a neural network can be quite complex if you don’t have a strong mathematical background but fortunately you don’t need to understand the code to be able to use it and modify it to use your own training data. You should be able to follow the majority of the code through a simple understanding of arrays and loops.
Simplistically, the program establishes a system of arrays which store the network weights and the data being fed through the network. The data is then sequentially fed forward through the network and then the errors are back propagated through the network and the weightings adjusted.
Here’s a summary of the code operation:
Set up the arrays and assign random weights.
Start a loop which runs through each item of training data.
Randomise the order in which the training data is run through each iteration to ensure that convergence on local minimums does not occur.
Feed the data through the network calculating the activation of the hidden layer’s nodes, output layer’s nodes and the errors.
Back propagate the errors to the hidden layer.
Update the associated weights.
Compare the error to the threshold and decide whether to run another cycle or if the training is complete.
Send a sample of the training data to the Serial monitor every thousand cycles.
Uploading The Code
The best way to learn and understand how the code works is to run it and see on the Serial monitor how the solution to the training data is developed.
Once you have the basic network running, you may want to try and input your own training data. To do this, you’ll need to modify the training data in the table as well as these items in the input parameters:
PatternCount – The number of items/row of training data in your table.
InputNodes – The number of neurons associated with the input data.
Output Nodes – The number of neurons associated with the output data.
In addition to the above parameters which have to be changed for the new training data, the following items can also be changed and experimented with to get different training results:
HiddenNodes – The number of neurons associated with the hidden layer.
LearningRate – The proportion of the error which is back propagated.
Momentum – The proportion of the previous iteration which affects the current iteration.
InitialWeightMax – The maximum starting value for the randomly assigned weights.
Success – The threshold at which the program recognises that it has been sufficiently trained.
You’ll may need to adjust some or all of these values in order to optimise the training process for your new training data. It is possible that a solution may never be reached and the training process gets stuck oscillating above and below the threshold infinitely, you’ll need to then adjust these values such that a solution is able to be reached. You can read up further on each of these parameters if you research and improve your understanding in how artificial neural networks work.
It is worth noting that the training data and network configuration provided in this example is about as large as you can run on an Arduino Uno without exceeding it’s 2K SRAM. If you’d like to experiement with a larger network, you’ll need to use an Arduino board with a larger SRAM allocation such as the Mega. Unfortunately, no warning is given by the IDE or the Arduino if the allocation is exceeded, you;ll just keep getting strange results and the network will be unable to be trained.
Obstacle Avoiding Robot Running A Neural Network
Tim Kälin has used this code as a basis for an obstacle avoiding robot which uses two ultrasonic modules connected to an ESP32 running the neural network to control it’s movements. The neural network has two inputs nodes from the ultrasonic modules and five output nodes, turn left, turn right, light left, light right and go straight
According to Tim it takes a minute or two to train the neural network on the data set when powered up. It also has some on-board LED strips which are used to display the inputs, hidden layer activation and selected outputs so that you get a visual representation of the neural network’s functioning.
It’s really impressive to watch.
The code is quite a bit more complicated than in this example due to the complexity of the project but it’s broken down quite well. You can download the code through this link – Neural Network Robot
What To Try Next
Once you’ve become familiar with artificial neural networks and you’ve tried experimenting with different training data, I’m sure you’d like to make use of the Arduino in a more practical way. Here are some ideas to take this project further:
Add an LCD or TFT display to your Arduino and send the training or output data to the display instead of to your Serial monitor.
Develop a network which responds to inputs to the Arduino. For example, you could use physical switches or photoresistors on the Arduino inputs to activate the input nodes and drive a “learnt” output.
Use the network to drive outputs on your Arduino. Add a motor or servo onto your Arduino which uses the neural network to response to inputs. For example you could make a servo arm shade screen which covers the Arduino when light falls onto a photoresistor.
Have you built your own artificial neural network? Tell us how it went and what you’ve used it for in the comments section below.
Poor kitchen design can prevent you from using your kitchen in a seamless and efficient way. But the right design solutions will help ease your headaches and save you plenty of time. A complete kitchen renovation project is thus a perfect opportunity for you to fix any annoyances in your kitchen.
To help you out, here are some solutions to common kitchen design problems by Toby Walker from Zesta Kitchens.
1. Storage
Insufficient storage is one of the common kitchen design problems that result from poor planning. This can lead to frustration, mess and clutter. To fully maximize the space, you need careful and imaginative planning and expert help.
Most modern kitchens are equipped with numerous kitchen tools and appliances. Organizing all these implements has become a common challenge.
Incorporating an appliance cupboard in your kitchen design can be a good solution as this offers plenty of storage space. You can keep items here that often come out once or twice a year. It can also be home to vases of different shapes and sizes, platters and water jugs.
Another clever storage solution to consider is to include hidden spice racks and secret drawers in your design. Good kitchen design maximizes storage, helping owners keep bench tops clear and avoid a cluttered look.
2. Ventilation
Proper ventilation will allow the removal of steam, cooking smells and smoke in the kitchen. Otherwise, the smell can linger on your clothes and furniture, especially for properties with open-plan layouts.
When choosing a kitchen ventilation system, look for a high-quality model and the right size of ducting. This way, it fits perfectly on your chosen hood. Also, this will result in a quieter and effective extraction, leading to increased energy efficiency and making the unit less likely to incur damage.
Imagine how much noise your rangehood makes if you choose a model that has a noisy motor, which is also a common kitchen design mistake. This is crucial if your kitchen is huge enough that everyone often gathers in it. You should hear the television or comfortably converse with someone even while there’s cooking going on.
3. Countertop Space
Another common kitchen design problem is insufficient countertop or benchtop space. This can also be frustrating because your counter is essential for a huge number of tasks carried out in the kitchen.
Having sufficient benchtop space does not just offer convenience but promotes safety as well. You do not want to find yourself carrying hot food across your kitchen looking for the safest spot to set it down.
Homeowners often neglect to leave enough space opposite or next to an oven or a fridge – this can host extra counter space. Another excellent solution you can try is to get a movable island extension. A unit on wheels will give you flexibility if you need it most.
4. Rubbish and Recycling
Sufficient space for garbage management is also something that you may overlook. A small trash bin can often easily fit in a cabinet, allowing you to maintain the clean aesthetics of your kitchen. However, the reality is that only a small container can fit most cabinets. The bin may fill up too fast which means constant emptying for you.
Some of the most effective solutions to this problem are to get a container with bigger capacity, install a kitchen waste disposal unit, or bring in a bin with separate compartments. Rubbish removal services like Kwik Sweep will help you to get rid of an even greater amount of garbage in no time.
5. Task Lighting
Another complaint you might have is insufficient task lighting. This type of lighting is essential in any kitchen as it focuses direct light to specific sites. These include the stove, sink areas, and the countertop or benchtop.
Usually, counters for preparing food are positioned under the upper cabinets. Thus, these cabinets will cast shadows and even darken the surface if there is no additional lighting. The lack of light makes slicing, cutting and other food preparation tasks more challenging.
The best solution to this kitchen design problem is to install spotlights on the underside of upper cabinets and statement pendants over an island. By doing so, you successfully combine practicality with great visual impact.
Gone are the days when only one cook is in the kitchen. Today, one person is preparing in the countertop space while the others are cooking on the stove and searching for food in the ref.
A modern kitchen is now a busy place where you and your family members share the same space. Thus, you must be meticulous when planning your kitchen design. Most importantly, work with a kitchen designer who considers your habits, kitchen requirements and lifestyle.
By now you’ve probably seen videos or heard of a few of the popular smart home voice assistants out there, the Amazon Echo range, Google Home, Apple’s Siri integrated HomePod are all big competitors in the market. The Amazon Echo seems to be leading the pack in terms of functionality, speed and compatibility with third party products so I wanted to try one out. The issue is, I do not live in the United States. I managed to get one anyway and here’s my experience with the Amazon Echo and its functionality outside of the US.
How Do You Buy An Echo?
The main sales channel for the Amazon Echo range is through Amazon’s online store and while they’re been making an increasing effort to make their products available to the international market, you’ll see that if you choose a delivery location outside of the US, you’ll get a message saying that the product does not ship to locations outside of the US.
These are the most popular models available online from Amazon:
To get around the shipping issue, we used a US based forwarding service, more specifically MyUS. They essentially give you a US based address to ship your online purchases to and when the products arrive at the address, they forward them to your chosen international address and simply charge you a handling fee and the courier services fees. Its reasonably affordable and the service which they provided was fast and efficient. This is the first time I’ve used a package forwarding service so I don’t really have anything to compare it to but I was quite impressed with the service provided by MyUS and I’d probably use them again if required.
My Echo dots (I ordered two just in case) arrived in just over a week from the date of ordering them from Amazon. This is quite impressive considering they had to be sent to the forwarder and then a further 18000 km (11000 miles) to my house.
Does It Work Outside Of The US?
If you’ve come here looking for a quick answer, in summary, yes it does work. Is it worthwhile getting? Definitely. Are you able to use all of the functionality and applications advertised? No, but almost all of the apps which do not require third party or location based services seem to work quite well.
To be more specific, the apps which do not work are those which have location based regulations such as some music and radio services (although these can be worked around by using a VPN) and those which require third party services such as food delivery, goods delivery and transport services.
While these apps don’t work and certainly do limit the functionality of the Echo a bit, there is still a lot that can be done with the Echo without these apps and services, especially from a smart home point of view.
I’ve been using the Echo for around three months now and I’ve found it to be quite useful for a couple of things we’ll get into a bit later.
Some Problems I Experienced And How I Solved Them
The Supplied US Plug
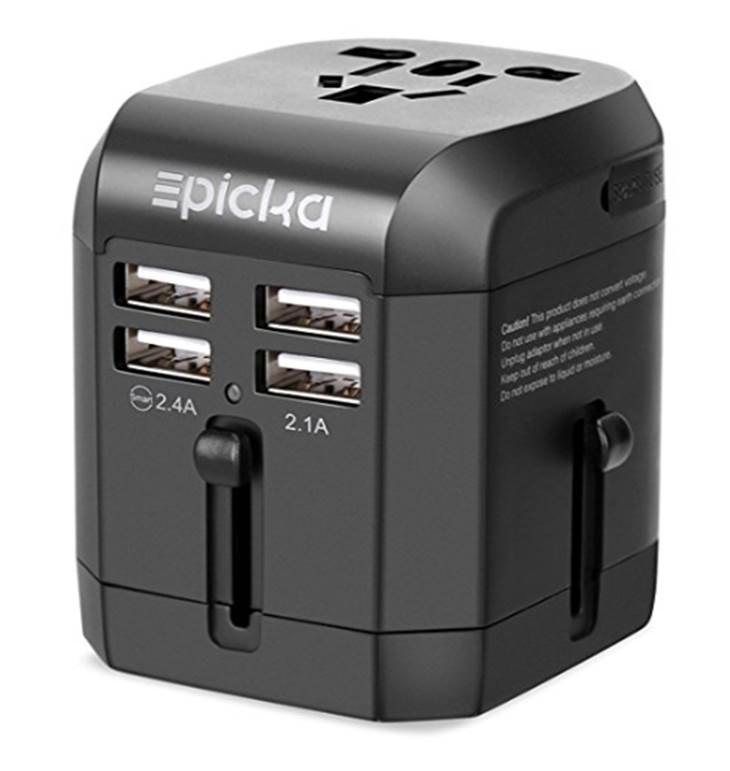
While the Echo supports voltages from 110VAC to 220VAC, the plug on the power adapter is a US plug. You can solve this problem by either using a local power adapter with the correct plug from your own country or by using a cheap plug converter from US to your local plug.
The Echo Dot is powered through a USB cables and comes with a USB power converter which also has a US plug. Again, you can either use your own USB power converter or use a cheap plug converter to plug the supplied adapter into your local plugs.
This USB travel adaptor works well for USB devices in different plugs around the world.
You Won’t Find The Alexa App
Because Amazon don’t sell the Echo outside of a few select countries, the Alexa app is only available in the App Store or Google Play Store in those countries. Being outside of one of these countries, I had to log out of my local App Store account and sign in to my US App Store account in order to download the app.
There are a number of guides available on the internet for opening US accounts for the Apple App Store or Google Play Store. Work through one of these and you’ll soon be able to download the app.
Note that on an iPhone you only need to log into the US store to download the app, you can then log back into your local store and the app will remain on your phone and function correctly.
If you don’t want to use your phone or open US stores, you can also set your Alexa up from your laptop.
Let’s start off with some of the basics I’ve found useful. I’m not going to list all of the things you can do with your Alexa, once you get one, Amazon will be sure to fill your mailbox with bi-weekly Alexa mails suggesting phrases and apps to “ask Alexa”.
I’ve been using the Echo for around 3 months and these are some of the things I use it for on a daily basis and some thing I’ve simply found to be entertaining.
Useful
Alexa, what is the weather today? You’ll get a summary weather report for your current location. Once you’ve set your location in your Alexa app, this seems to work for almost any location where weather services are available around the world.
Alexa, do I have any meetings tomorrow? You’ll be informed of any meetings or appointment scheduled in your calendar for the next day. This can be expanded to the week or a particular day as you need to.
Alexa, what can I make with mince? The recipes functionality is quite useful if you’re stuck for ideas for dinner, can’t find a recipe for a particular dish or you’re looking for something to make with a particular ingredient. You can get the recipe read out to you or sent to your phone to make it easier to follow.
Alexa, how many steps have I taken today? Requires linking to your Fitbit app but provides an easy summary for your daily activity.
Alexa, who is leading the US Masters? This seems to work for most popular sports games, you can get real-time scores for most games.
Alexa, who is the current minister of finance? Who is questions work quite well and are location based. So if you ask who the current president is and you’re in Germany, you’ll get a different answer to the US.
Alexa, pair to my phone. You can pair your Echo to your phone using bluetooth and then play music stored on your phone using your Echo as a Bluetooth speaker. This is a useful stand in for not being able to us Amazon or Apple music directly through the Echo.
Alexa, turn on the living lights. The Echo pairs well with the Philip Hue bridge to provide easy voice activated lighting. Turn lights on and off, dimmer or brighter and set scenes or moods using your voice. I’ve gone into this in a bit more detail later one.
Alexa, I want to watch TV. I’ve paired my Echo to a smart universal remote (see next section). This allows me to set routines such as this one. Telling Alexa I want to watch TV automatically dims the living room and dining room lights, turns the TV on and turns the audio system on. I can also say “I’m done watching TV” and the Echo will reverse these steps, turning the appliances off and the lights back to being bright.
Entertaining
Alexa, tell me a joke. You can also ask for a joke about cars, work, computers etc.
Alexa, give me a quote. You can also ask for a quote by a particular person.
Alexa, can you beat box?
Alexa, can you sing?
Alexa, can you rap?
Alexa, where are you?
Echo Compatible Smart Home Devices
One of the more exciting aspects of a smart home voice assistant is its ability to control your smart home devices. Along with the Echo, I ordered a Philips Hue starter kit, some extra Hue light bulbs and an RM Mini 3 smart universal remote to control my TV and audio system.
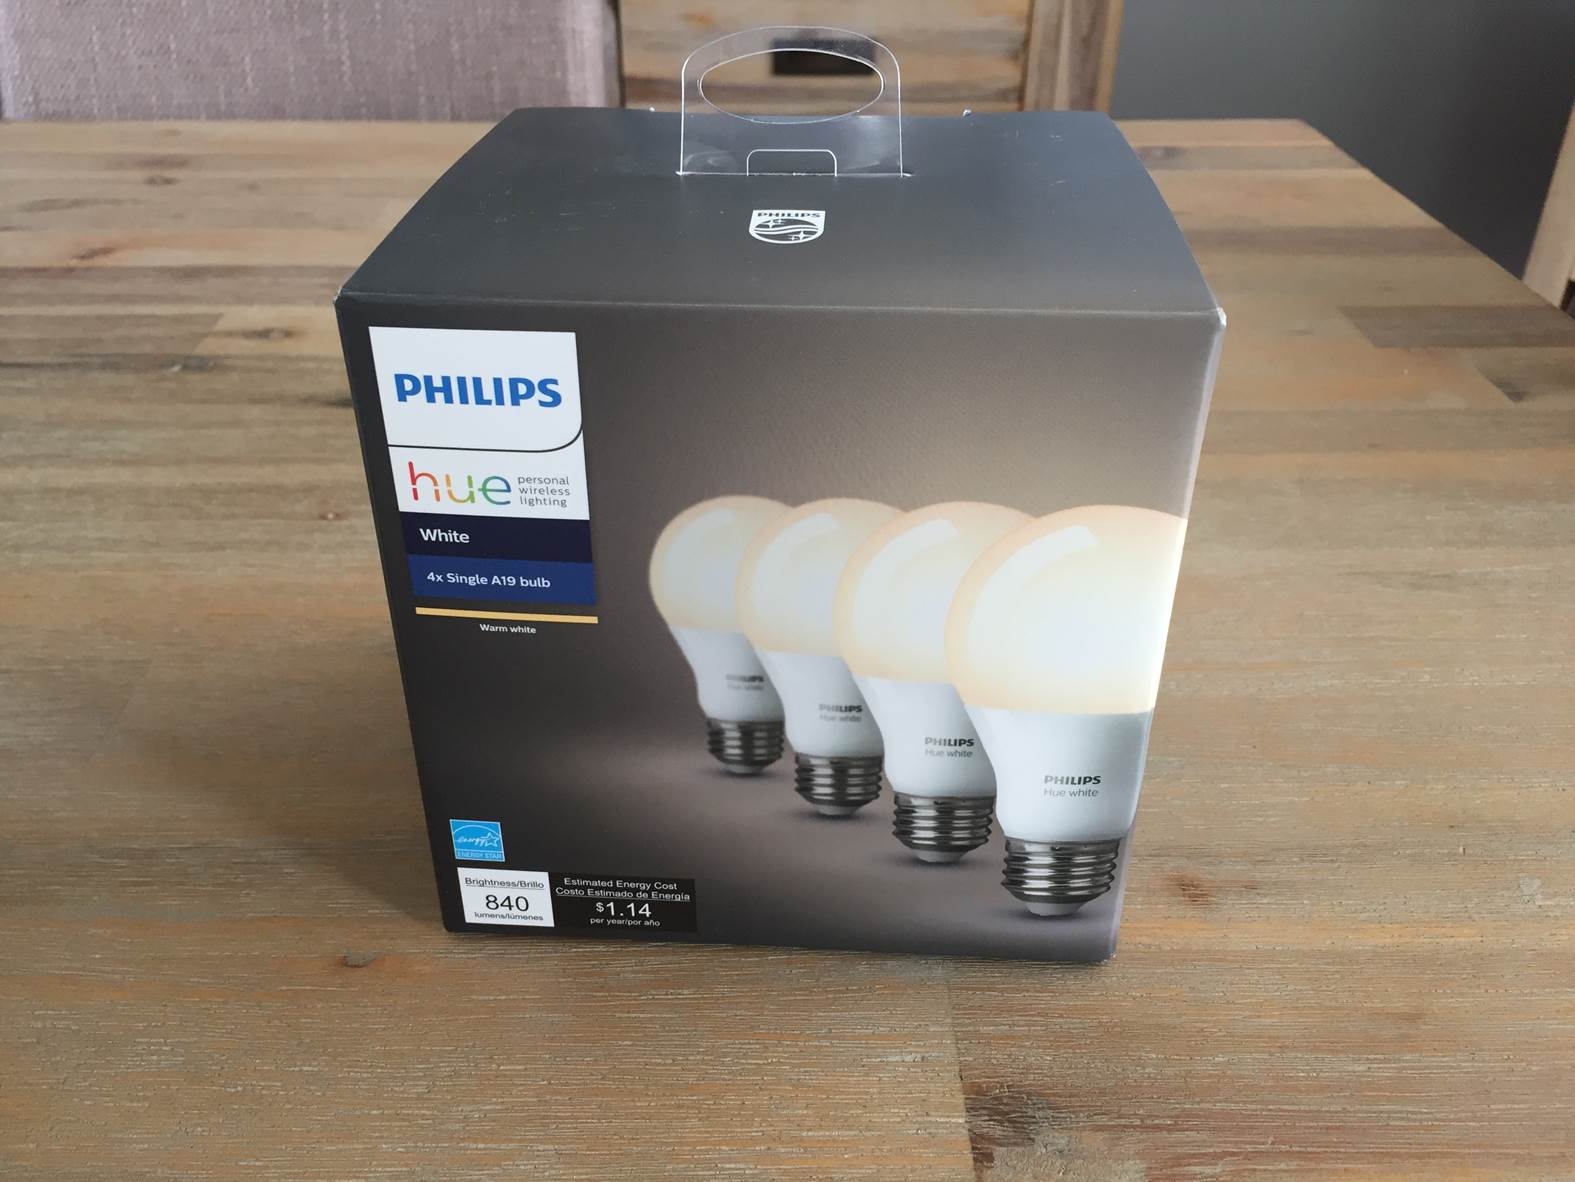
The Philips hue bulbs are quite pricey but once you’ve got them installed in your home, you’ll love them. They really make life a lot more convenient, especially when you’re away from home or you have pets. They enable you to set timers, use day/night functionality, arrival and leaving lighting and remotely operate your lights from your phone. I don’t really like the idea of having coloured lighting in my home so I saved quite a bit by simply ordering the Philips Hue white bulbs, they’re significantly cheaper than the coloured ones and still offer the smart and dimming functionality.
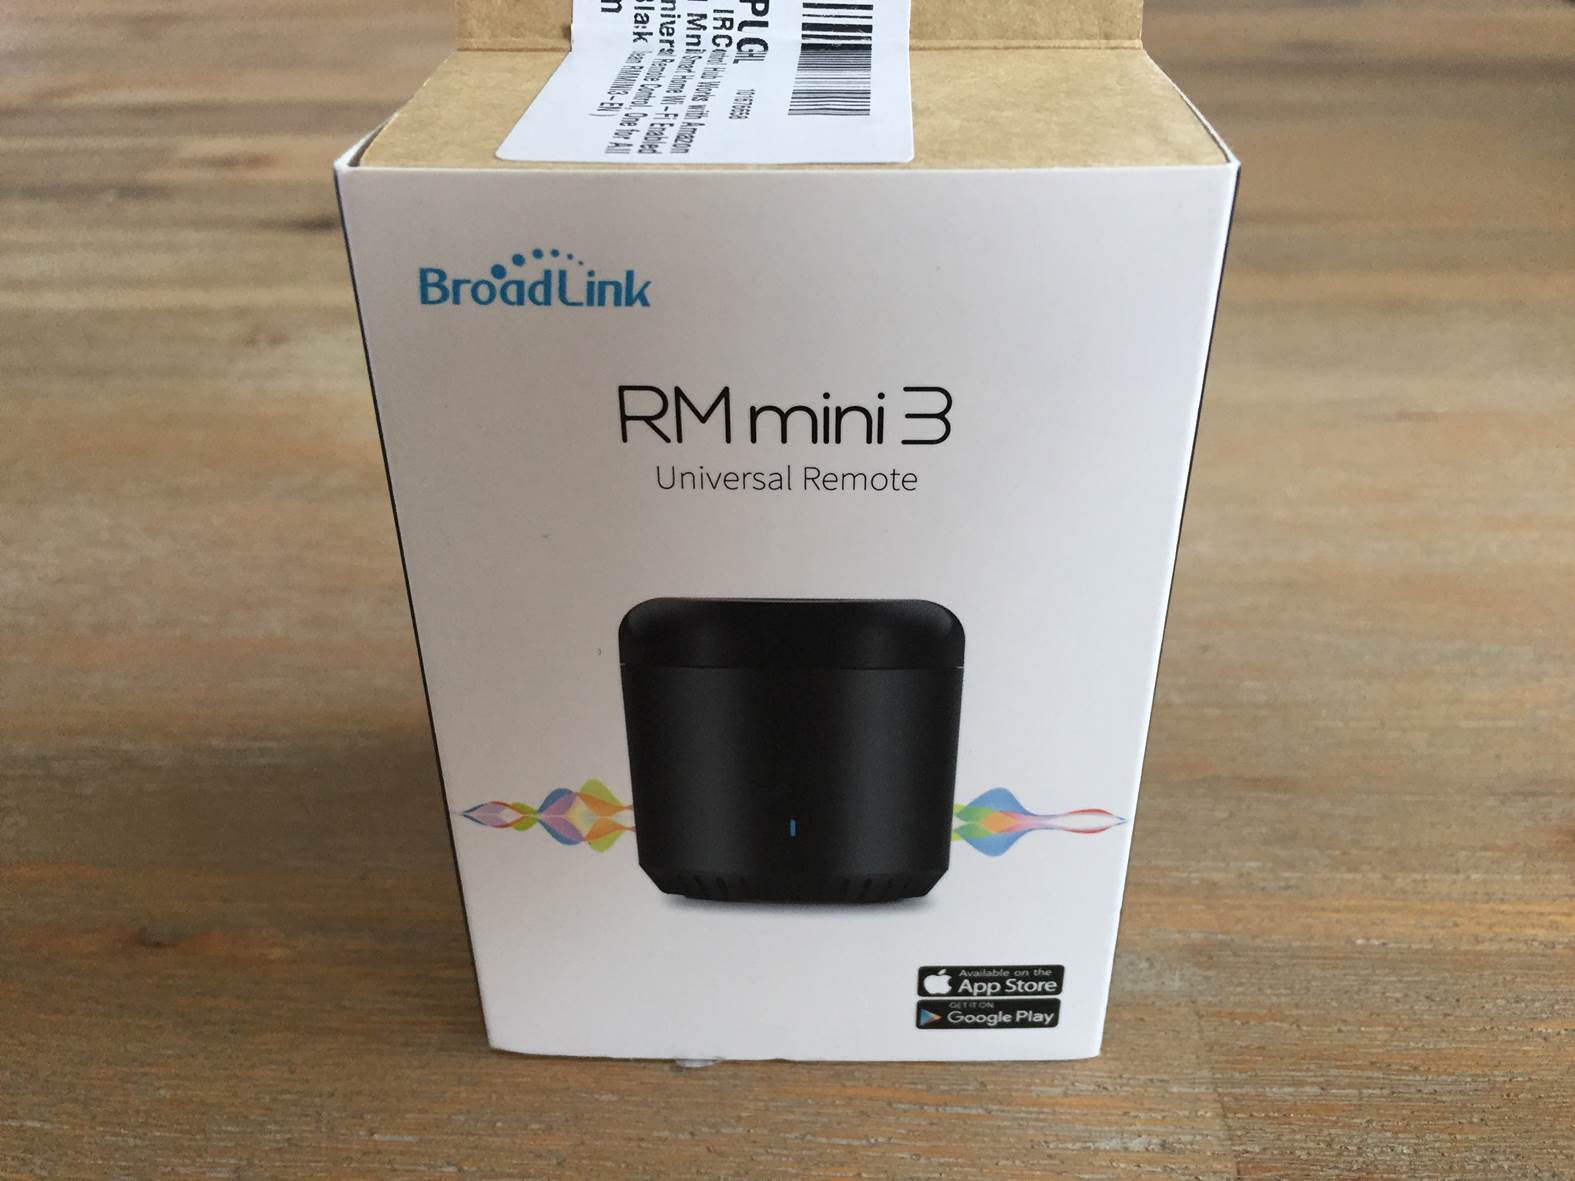
The RM Mini 3 universal remote is a small black cylinder which you mount somewhere in line of site of your TV and anything else you’d like to control. You can then copy your existing remote controls to the device through the app and use it to switch the devices on or off through your phone or through your Echo. The RM Mini 3 is quite a challenge to get up and running as there are two apps for it in the store and it’s not clear in the instructions which one to use for the Echo compatibility. Once I got it working, it’s easy to use and hasn’t required any further input to maintain.
These are just two of a huge range of smart home devices which are compatible with the Amazon Echo range and I’ve been really impressed with them. They work reliably and have survived power cuts and internet downtime without needing to be set up again.
Overall I’d definitely suggest the Amazon Echo, its a really reliable and well built voice assistant which has definitely been useful in our daily lives. If you’re not planning on using it for music then the Echo Dot is a great and affordable device that offers the same functionality as the Echo but without the powerful speaker. If you’re looking for a speaker and voice assistant then the Echo is definitely the way to go.
Have you used the Echo or any other smart home voice assistant? Let us know what you use them for in the comments section below.


 Buy Here
 Buy Here
 Buy Here
 Buy Here
 Buy Here
 Buy Here