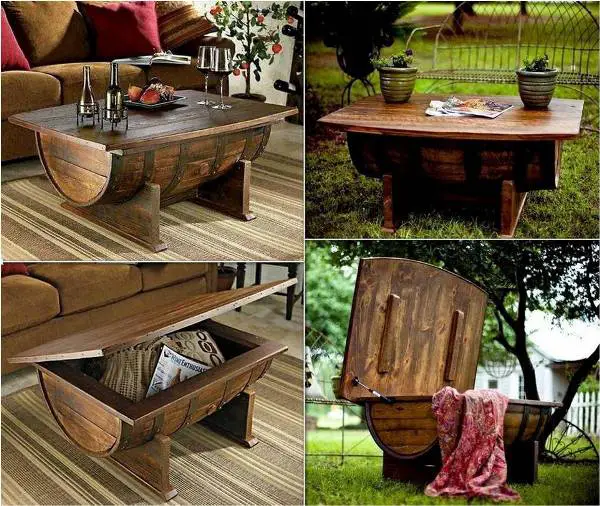
Whiskey barrels, wine barrels or beer kegs are popular home decor features. If you have an old whiskey barrel lying around, why not turn it into a functional coffee table for your lounge or beer table for your bar area. It will fit in perfectly with rustic cottage decor and is right at home in any bar or man cave.
What You Will Need To Build A Whiskey Barrel Table
- Whiskey Barrel, Wine Barrel or Beer Keg
- Pallet or Barn Distressed Wood (5cm x 15cm / 2″ x 6″)
- About 100 2cm (3/4″) Self Tapping Wood Screws – Buy Here
- 10 10cm (3 1/2″) Self Tapping Wood Screws – Buy Here
- 4 5cm (2″) Self Tapping Wood Screws – Buy Here
- Wood Glue – Buy Here
- Staples – Buy Here
- 80 Grit Sandpaper (Optional) – Buy Here
- Clear Varnish – Buy Here
- Jig Saw (With Steel and Wood Blades) – Buy Here
- Screw Driver or Drill Driver – Buy Here
- Staple Gun (Optional) – Buy Here
- Sanding Block (Optional) – Buy Here
How To Build A Whiskey Barrel Table
Whiskey barrels or beer kegs are typically made with wood strips which are forced into place and held in position by three or five steel bands. To ensure that the barrel does not come apart when you cut it in half, you need to secure each wood strip to the steel band. To do this, drill a hole through the steel band in the centre of each strip on every band for each strip. Only drill through the steel and try to drill into the wood as little as possible. Now screw a 2cm (3/4″) wood screw through each hole and into the wood strip to secure them.
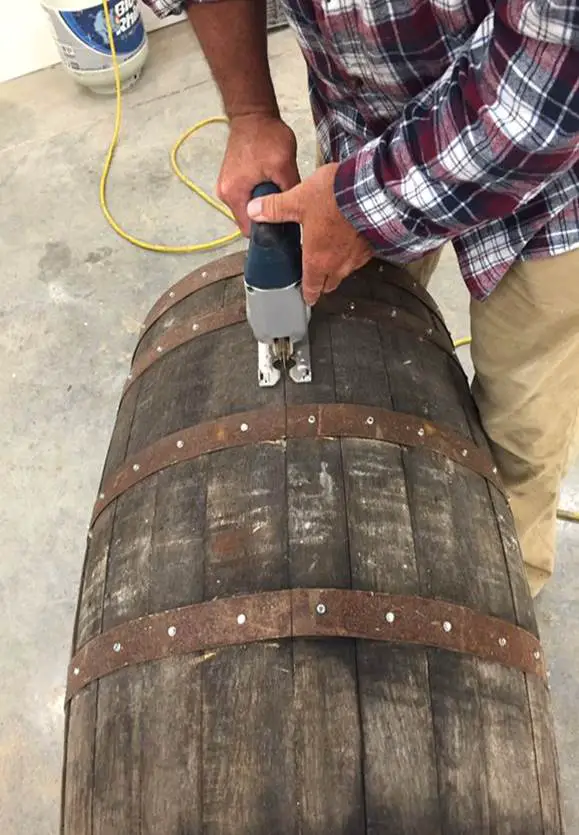
You can now cut the barrel in half. Cut through the steel bands along the join between two wood strips. Do the same on the other side of the barrel. One half should then easily come away from the other half. Try and keep the two barrel ends in place on one of the halves as you pull the barrel apart.
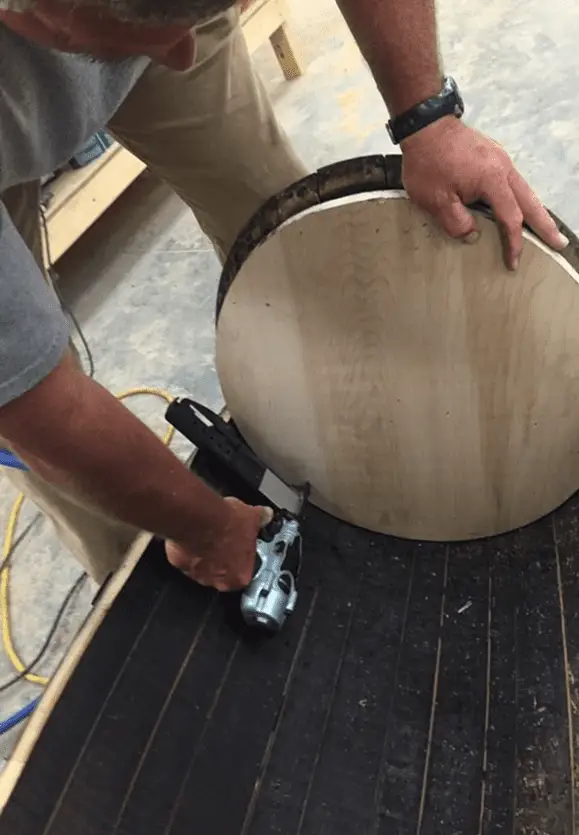
Next secure the barrel ends. Cut a half circle of pine wood the same diameter as the inside of the barrel ends. Screw or staple this to the inside ends to provide the additional support. This piece keeps the wood strips which make up the barrel end in place while you cut it in half.
Cut the barrel end in half along the line of the sides of the barrel so that you are left with a perfect half. The ends can be additionally supported by a pieces of pine screwed or glued in horizontally along the top straight edge.
The table top can now be cut. Use old pallet wood or distressed barn wood for the right texture. Cut enough lengths of the wood so that the edges overlap the wine barrel by about 15cm (6″) all around. Glue the planks together to make a continuous surface.
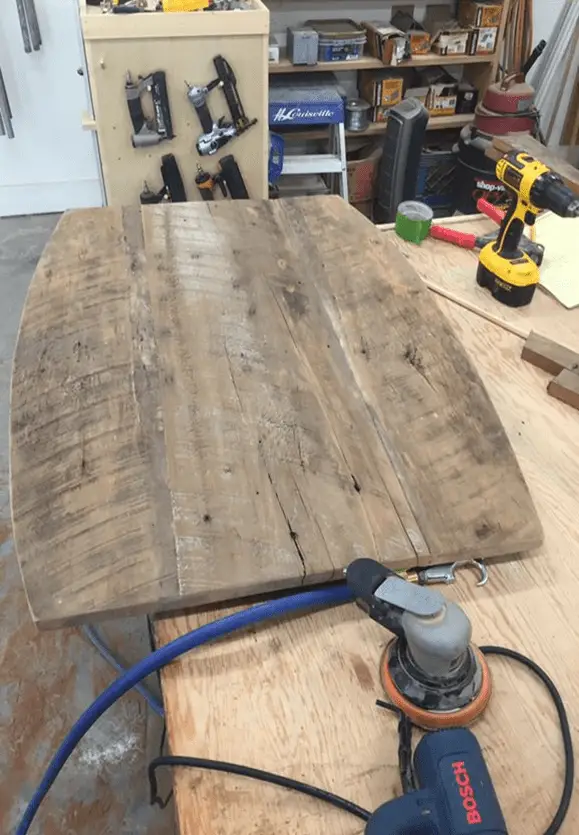
The long edges of the table top can also be contoured to match the sides of the barrel. Turn it upside down onto the table top and trace the long edge onto the edge of the surface of the table top. You will need to extend the two far edges along the same curve to the ends of the table top surface. Cut along the traced line using a jig saw to create the profiled table top. If you are not confident with a jig saw, consider leaving the table top edges square.
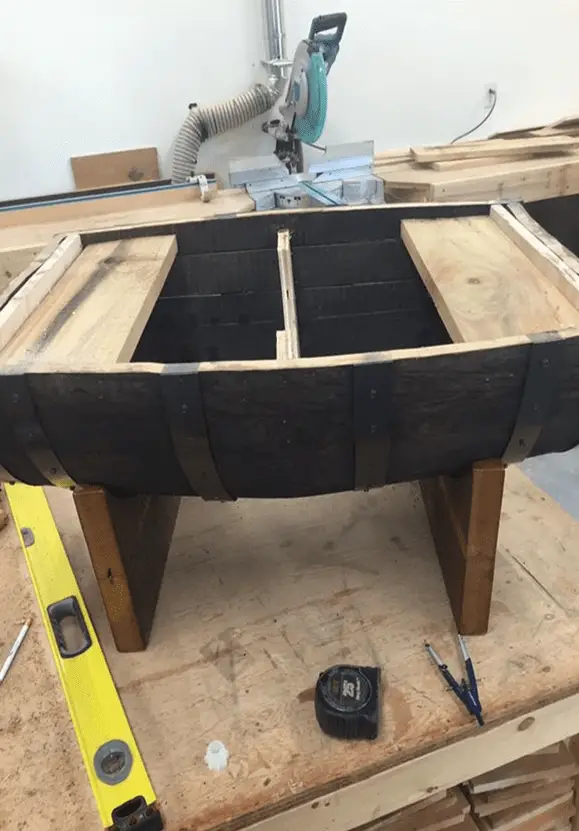
Finally, the legs can be made. Cut four 50cm (20″) pieces from the same reclaimed wood you used for the table top. Glue two of these pieces together side by side. Next you need to decide how far from the edges you would like the legs to be positioned. Measure the radius of the barrel at this point, trace and cut the radius from the long edge of the legs. This may require some trial and error before the legs fit snugly along the whole edge of the barrel. For a more professional look, the edge of the leg which meets the outer edge needs to be cut at an angle to follow the contour of the barrel. This angle can be set on a jig saw when making the radius cut. If you are not able to achieve the correct angle cut, just cut it at 90 degrees, it is not noticeable unless you look really closely at the legs.
Screw the legs on from the inside, drilling a small pilot hole through the slats along the line where you would like to position the leg will assist you in getting the screws in the centre of the legs. Use three to five 10cm (3 1/2″) screws for each leg, evenly spaced from end to end.
Once you have screwed the legs on, the table top can either be placed on top of the half barrel or it can be screwed on so that it does not move around. A 5cm (2″) screw at each corner screwed through the underside of the barrel and into the table surface will hold it securely in place. Be sure to check the length of the screws beforehand as you want the screws to penetrate about 10mm (3/8″) into the table surface but not go right through the surface as they will then be visible on the table top.
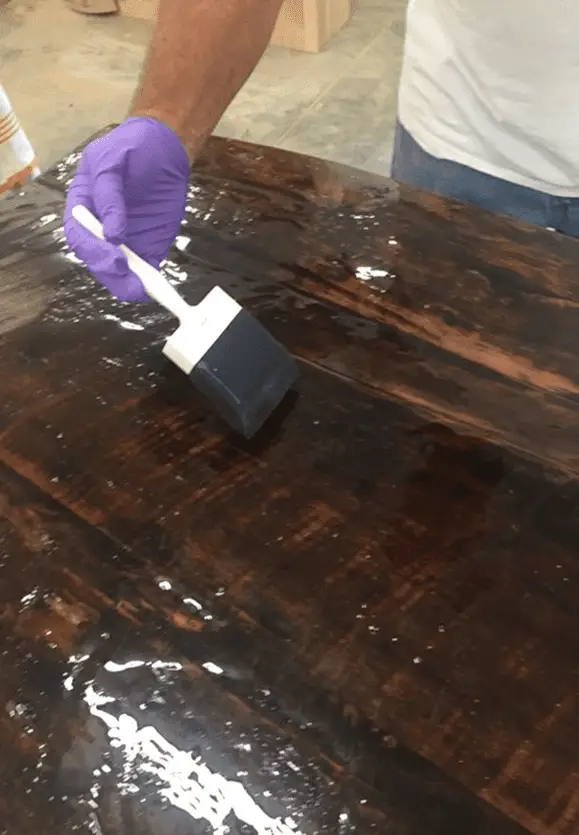
Finally you need to varnish or polyurethane coat your table. The completed table can be rough sanded before varnishing however it is supposed to be a rustic looking piece of furniture and the rough wood finish completes this look. A clear wood varnish is the easiest option for a surface coating and will also be relatively hard wearing. For a smoother finish which can take a bit more abuse, consider using a two part epoxy table coating for the table top surface. Follow the directions on the product for application details.
Optional: You could add a hinge to the table top and use the space in the barrel for storage.
Have you turned an old whiskey or wine barrel into anything useful around the house? Let us know in the comments section below, we would love to see your projects.
This project by logant3030 has been shared under the Creative Commons license CC 2.5 BY-NC-SA.
I was first inspired to make a Wine Barrel table after seeing the above on Pinterest. have made a few versions of tables trying to make each Unique
Hi Michael,
Thank you for sharing your experiences with us. I also want to cut a barrel in half. How do you do that when you cut the barrel in half it doesn’t go flat. Are the wood stripes screwed with the barrel ends?
You need to put a screw through each strip along each of the bands. You can see these screws in the photo of the cut being made.