A couple of weeks ago I was inspired by an old LTT video to try to make my own portable Bluetooth speaker. They used some 2″ full-range Dayton Audio drivers and 1″ tweeters along with an inexpensive Bluetooth amplifier module. They set themselves a goal of beating the $180 price tag that the LG XBOOM Go PL7 carried at the time. They came up with a pretty cool design, it had some quirks but overall performed reasonably well.
They did however blow out quite spectacularly on the budget when they included their labour costs. So I thought I’d try out this type of project and see what I could come up with.
Here’s my video of the build:
What You Need For This Project
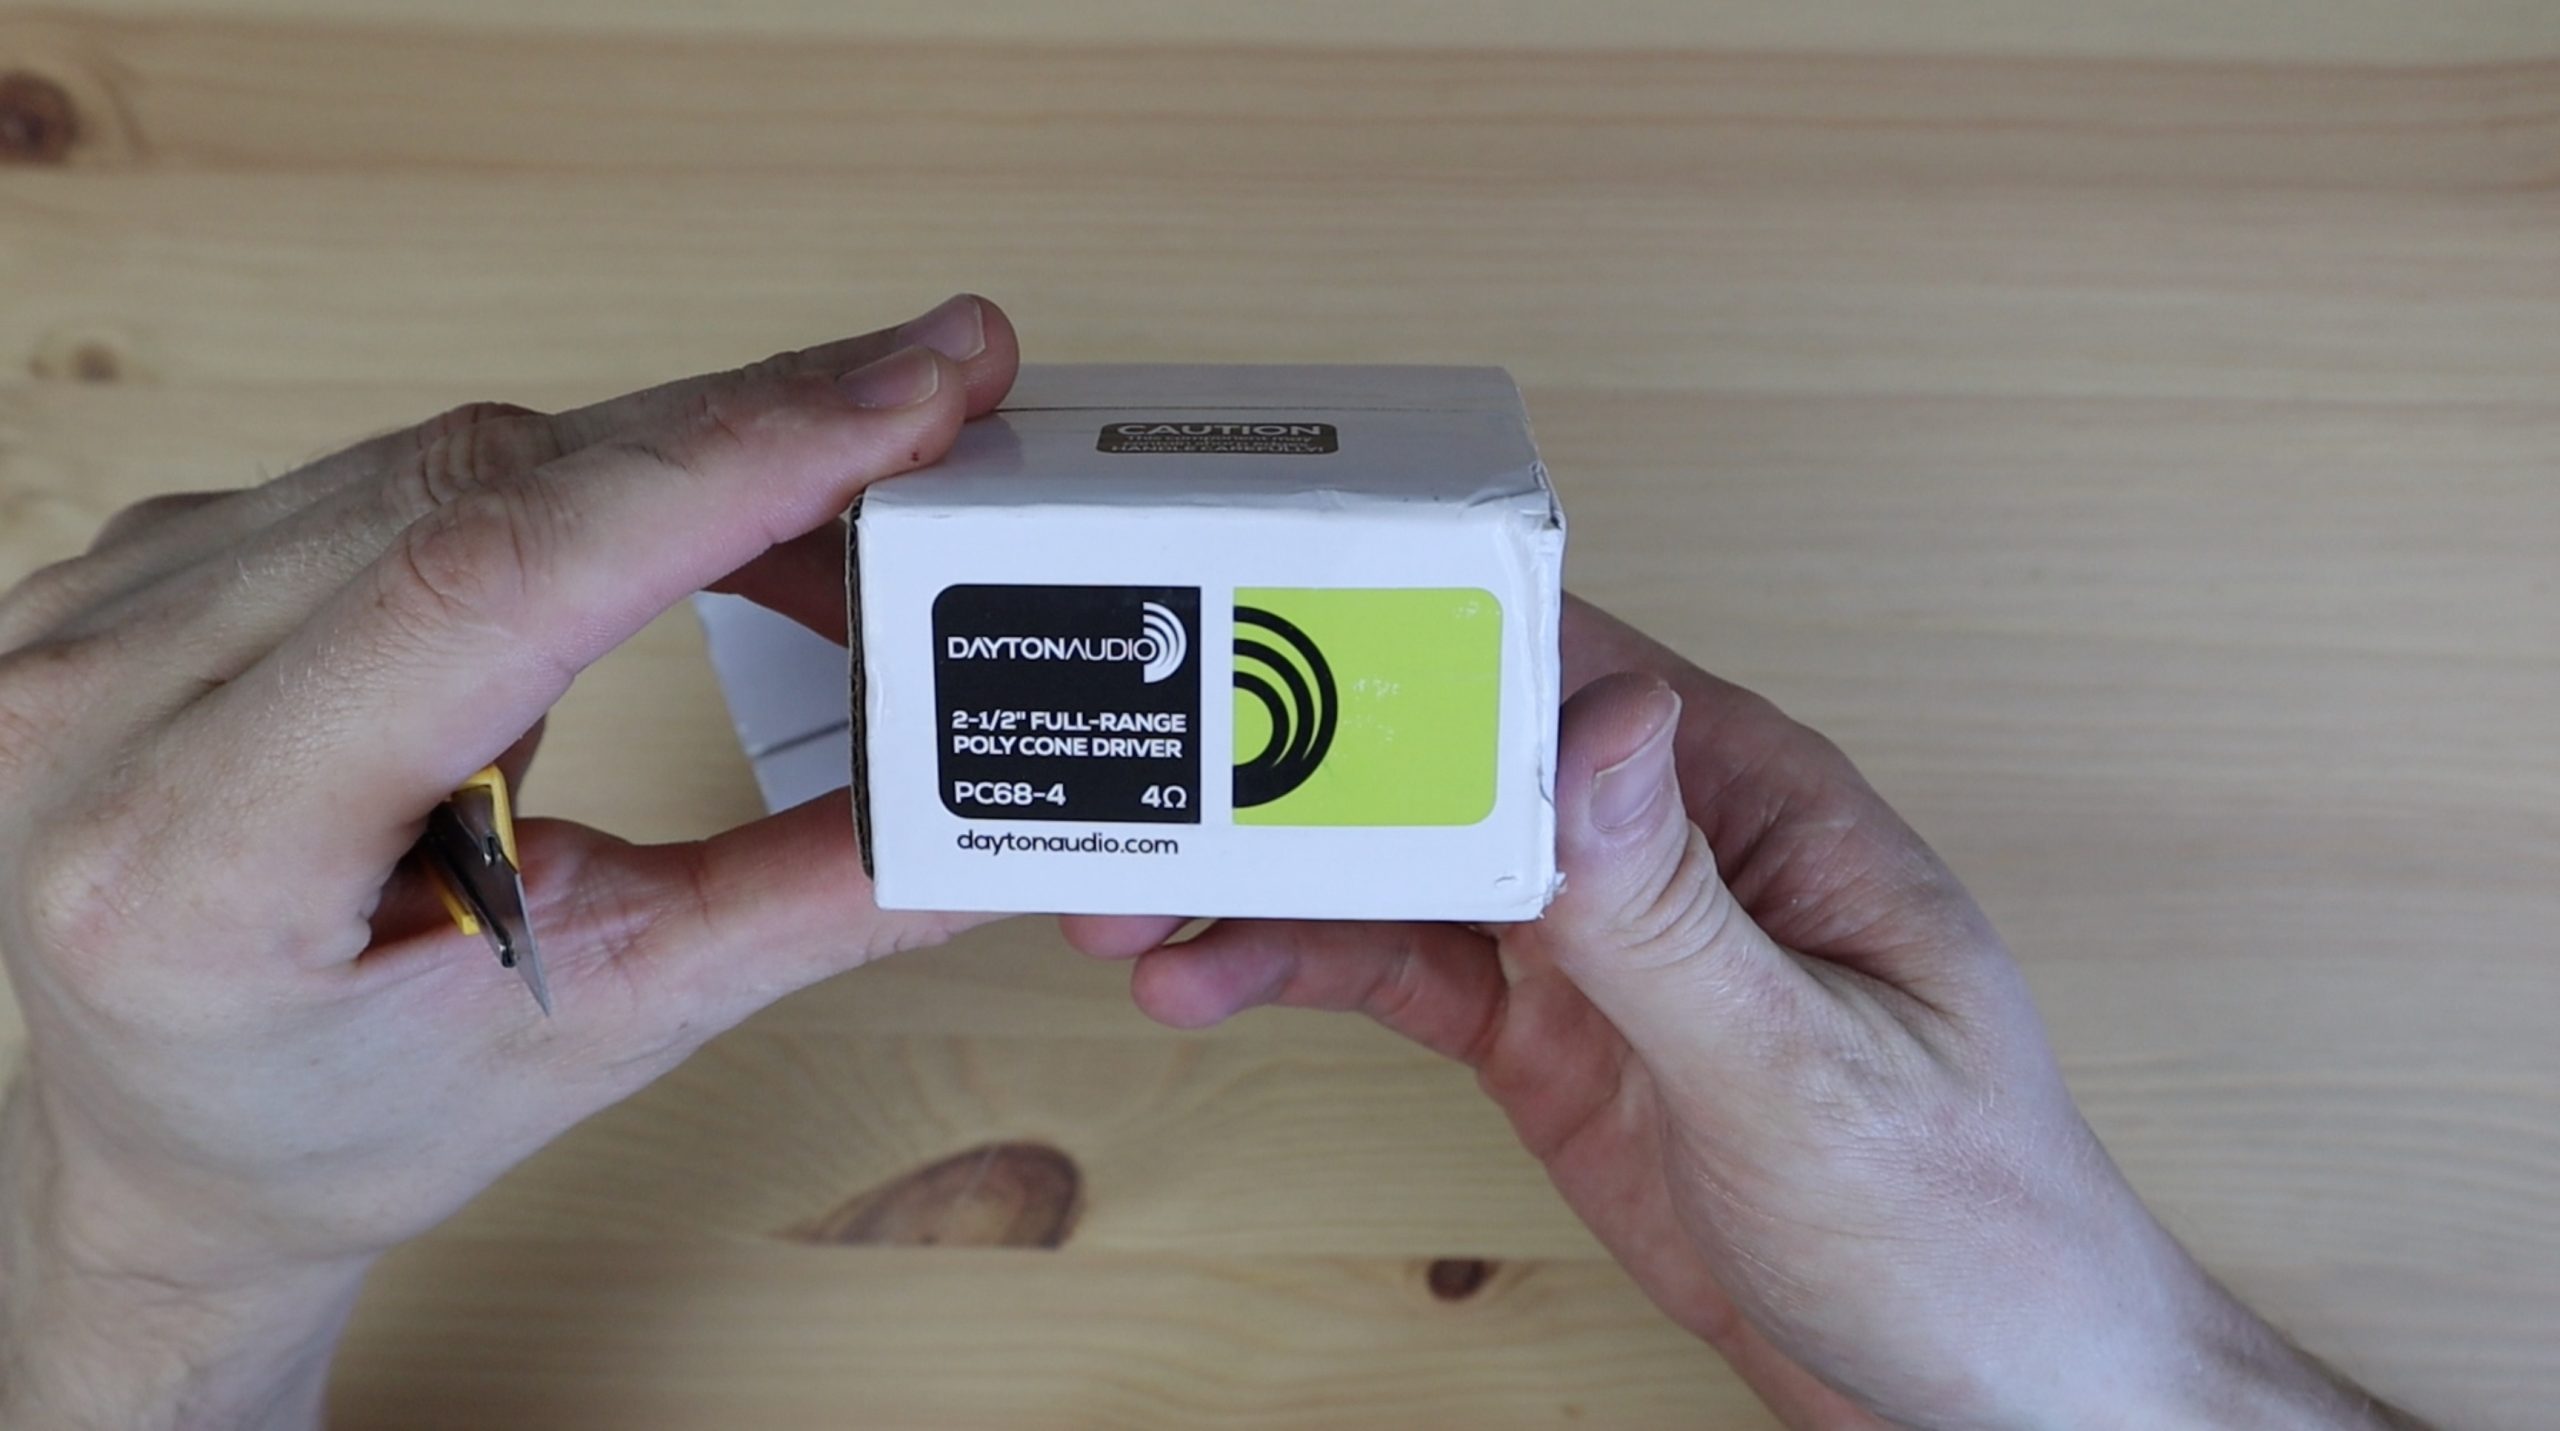
- 2 x Dayton Audio PC68-4 Drivers – Buy Here
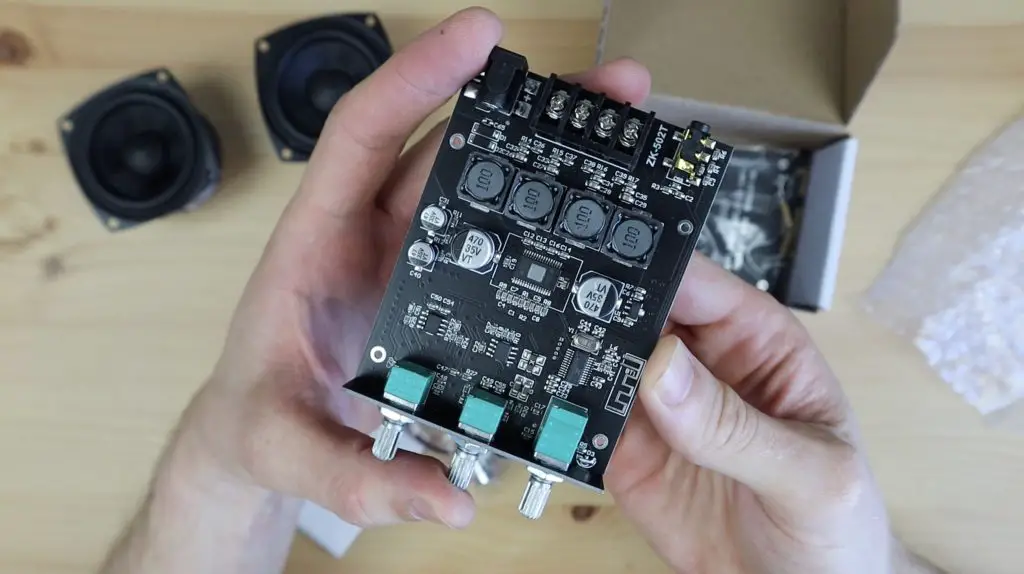
- ZK-502T Bluetooth Amplifier – Buy Here
- 12V Inline UPS – Buy Here
- 60 x M3 x 8mm Black Button Head Screws – Buy Here
- 4 x M3 x 12mm Button Head Screws – Buy Here
- 60 x M3 Brass Inserts – Buy Here
- 8 x Rubber Feet – Buy Here
- 0.5m Speaker Wire – Buy Here
- Black PLA Filament – Buy Here
- 3mm Clear Acrylic – Buy Here
Equipment Used
- Creality Ender 3 S1 Pro 3D Printer – Buy Here
- K40 Laser Cutter/Engraver – Buy Here
- Electric Screwdriver – Buy Here
- TS100 Soldering Iron – Buy Here
- Knipex Wire Strippers – Buy Here
Selecting The Bluetooth Speaker Components
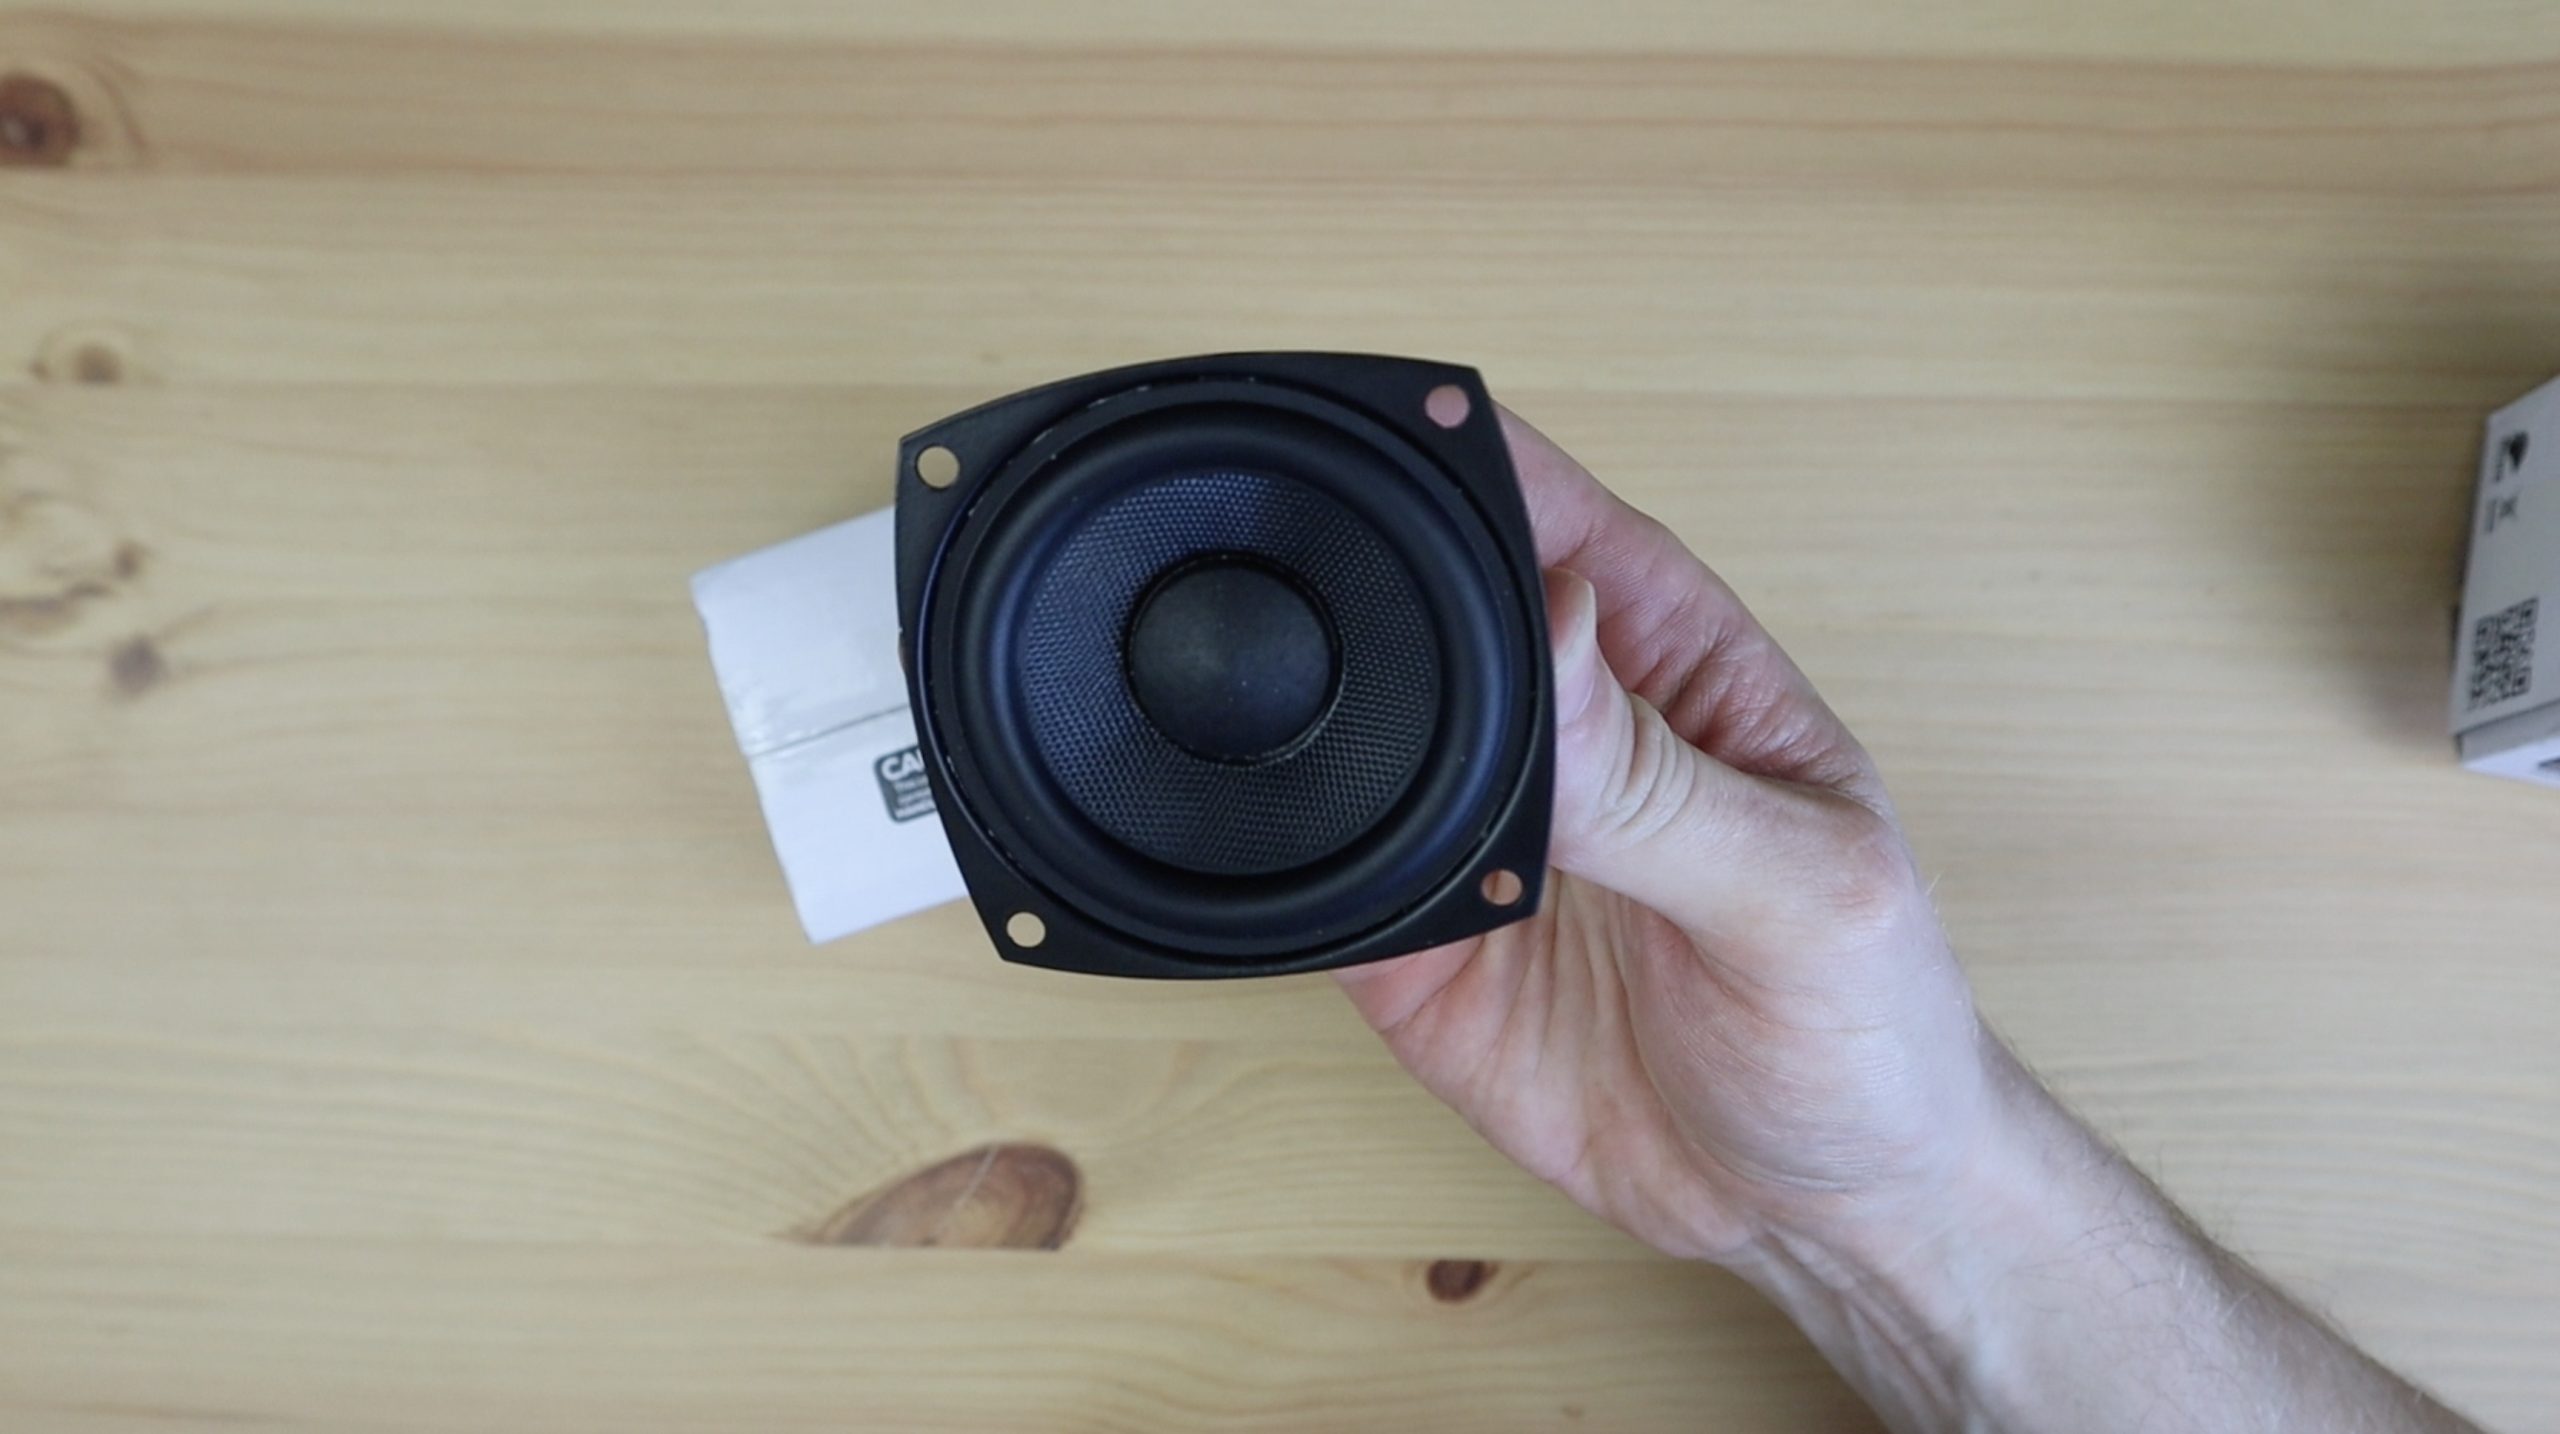
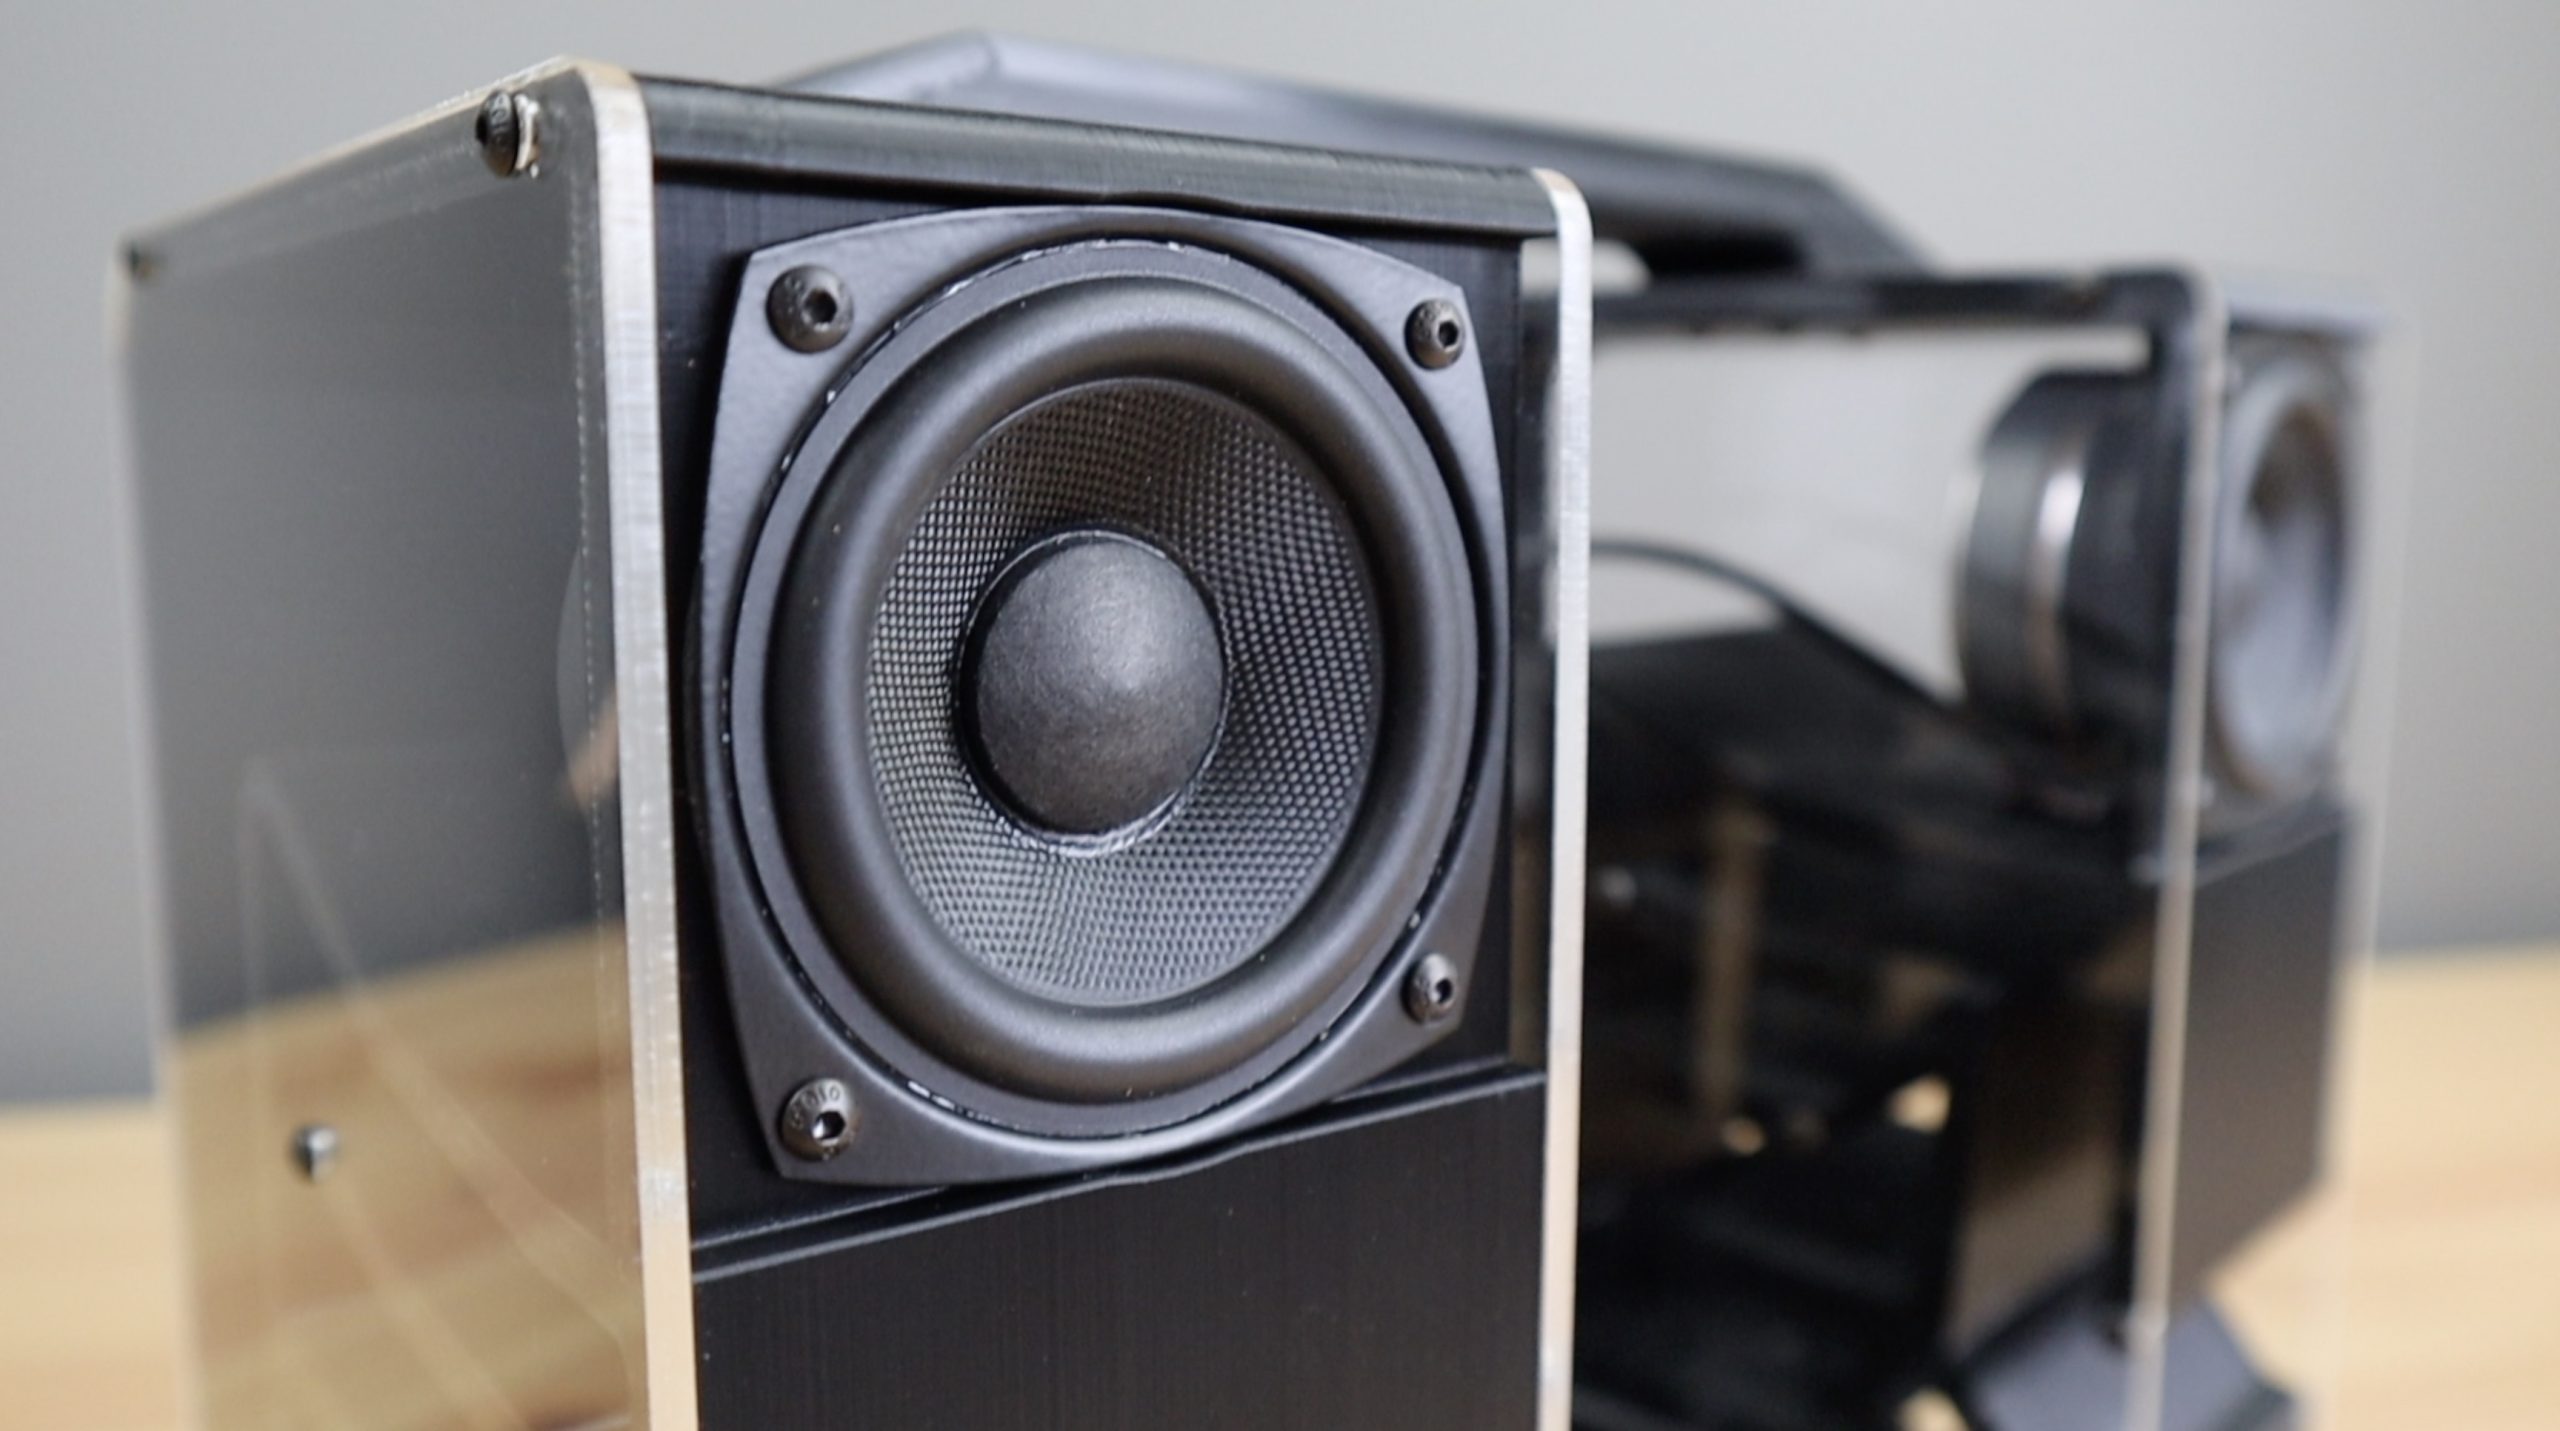
I started off by scouring the internet for hardware and some design inspiration. I settled on using some 2.5″ full-range Dayton Audio PC68-4 drivers, which would be powered by a ZK-502T Bluetooth amplifier.
I felt that the slightly larger 2.5″ drivers would provide a bit more bass than the 2″ ones they used and I didn’t want to go down the path of including tweeters and a sub as this would increase the size and cost quite substantially and would require a larger amplifier and crossovers.
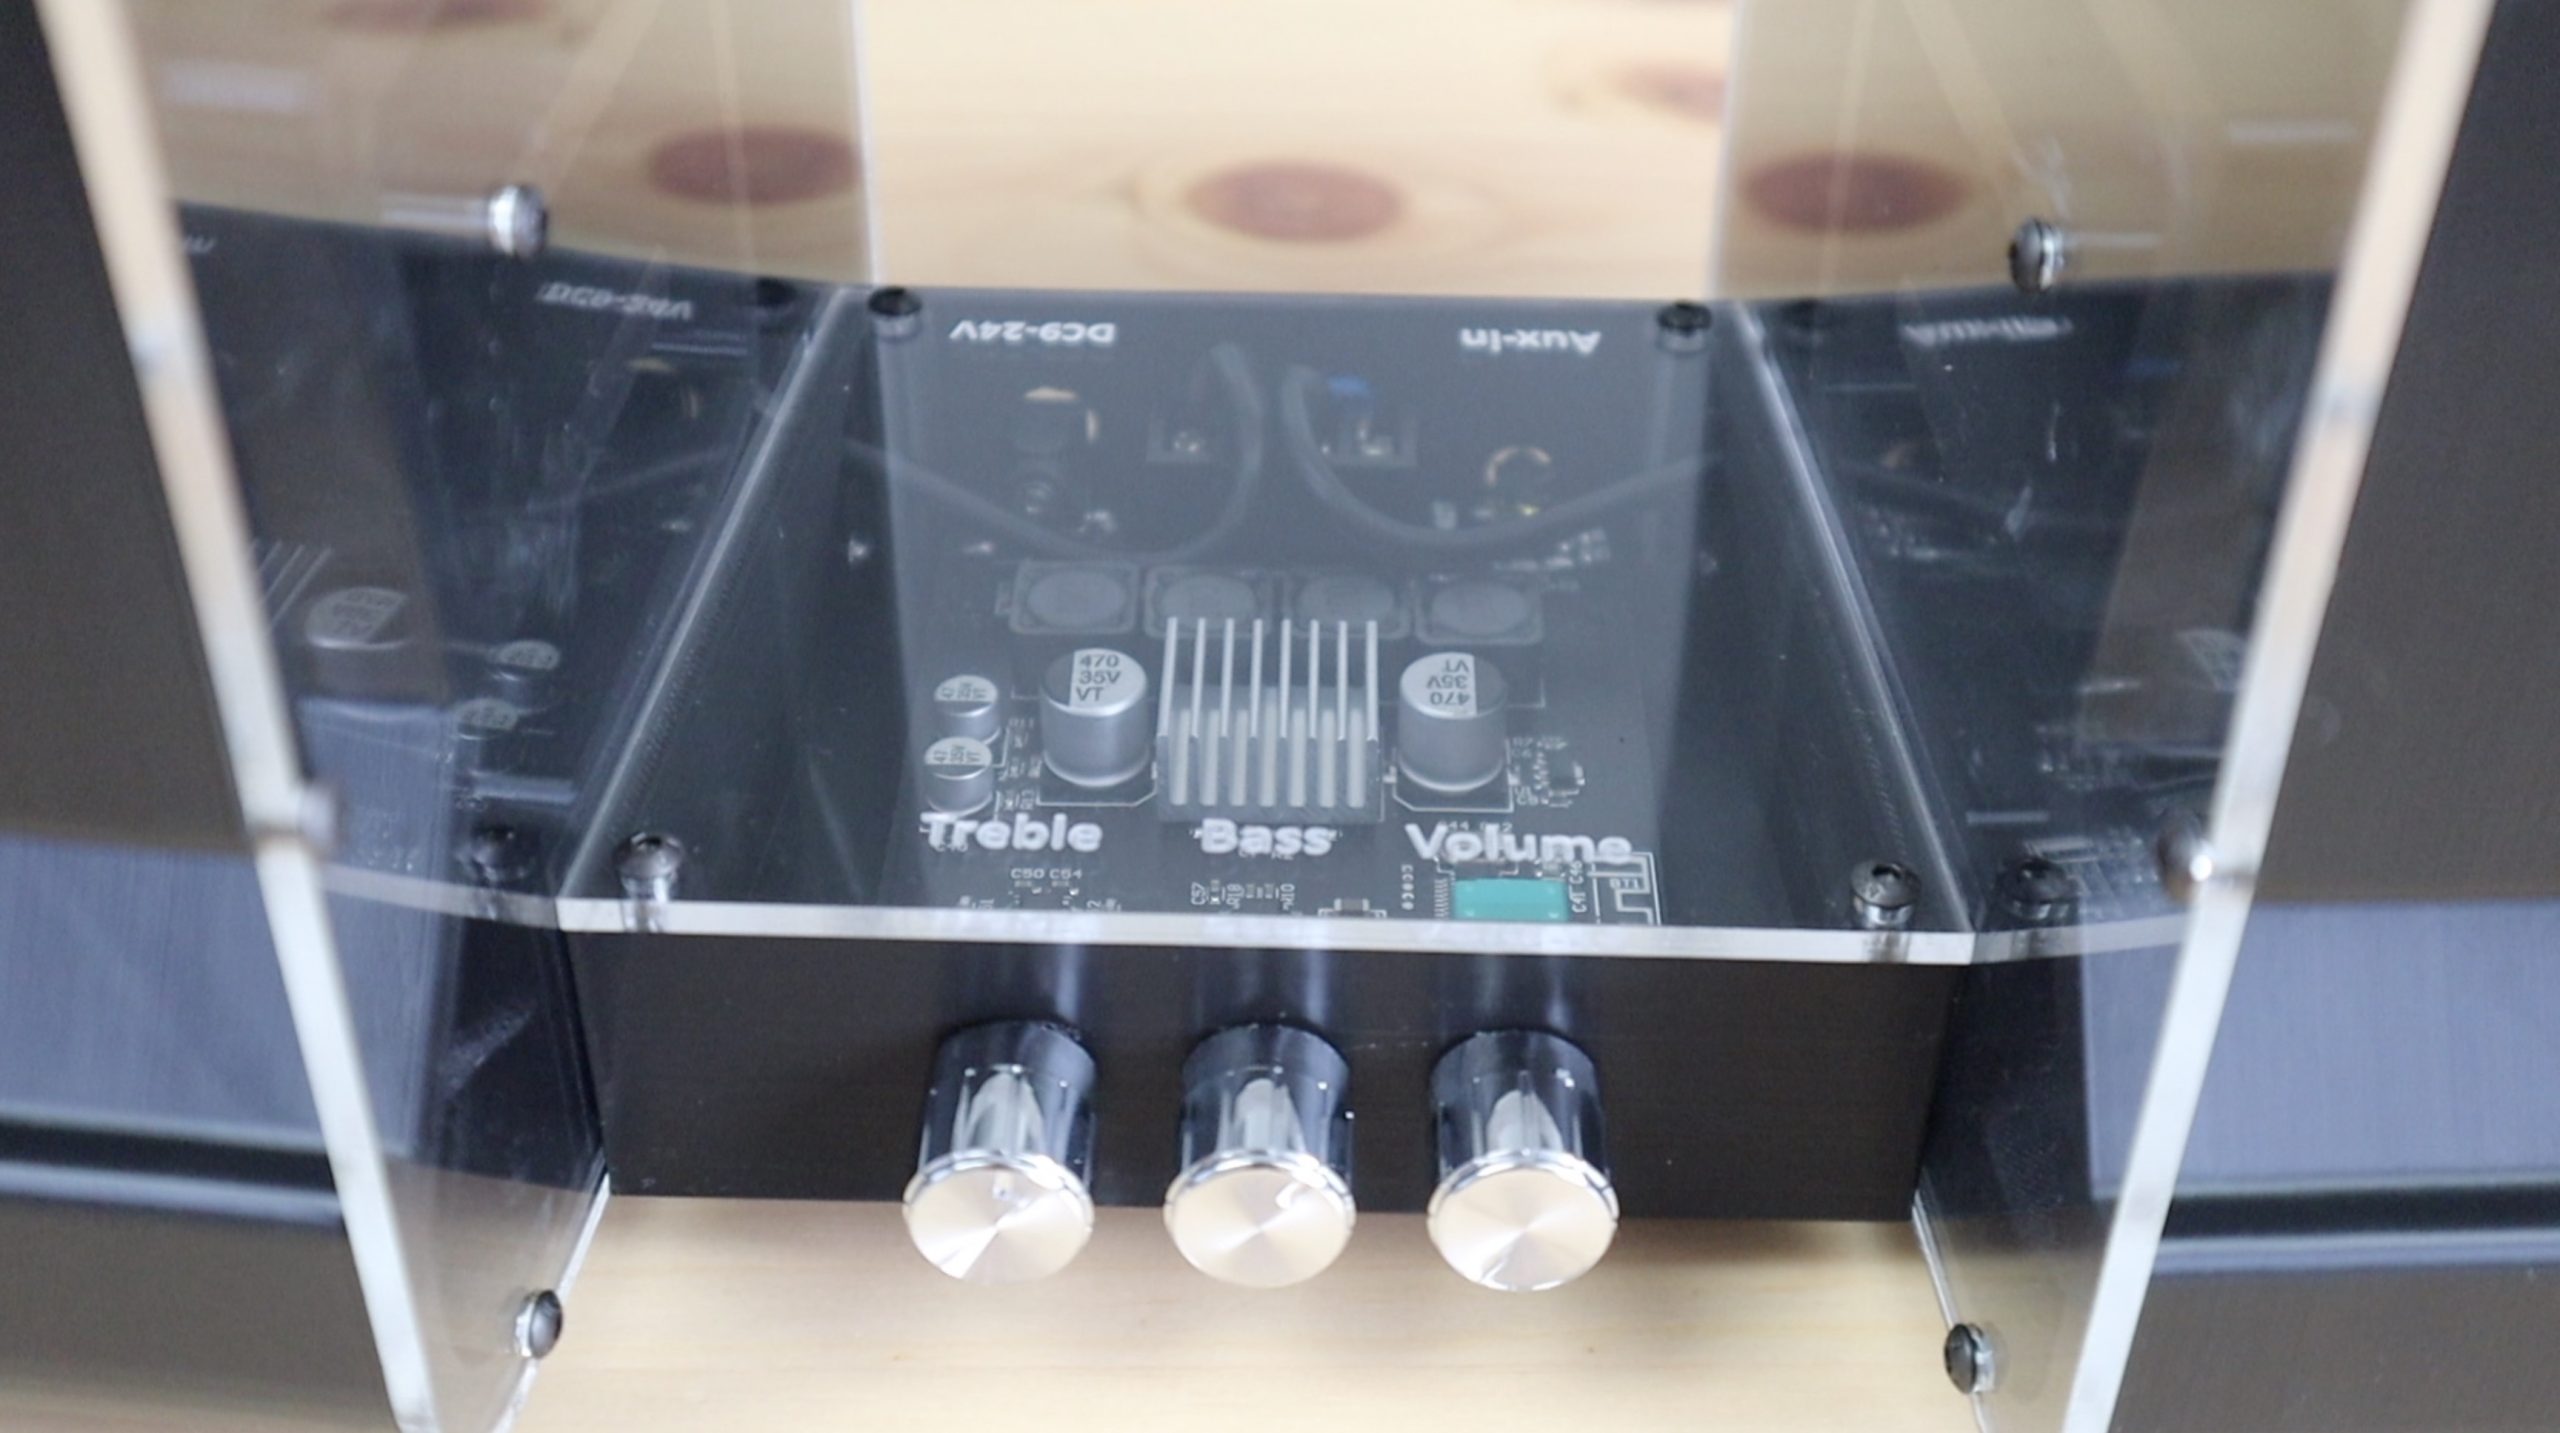
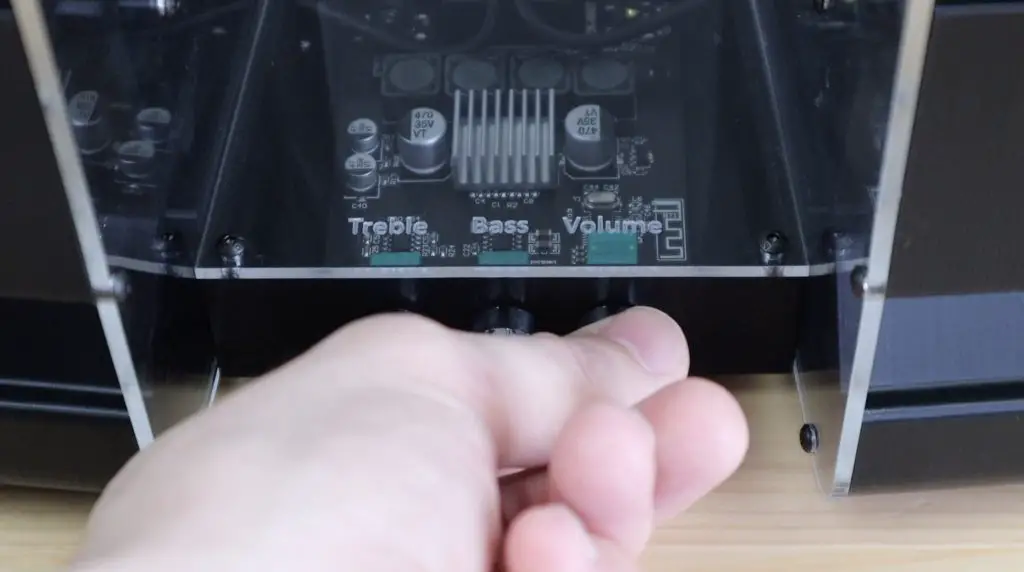
I also liked that the amplifier had bass and treble controls so there was some opportunity to make adjustments to the sound to suit the final speaker enclosure design.
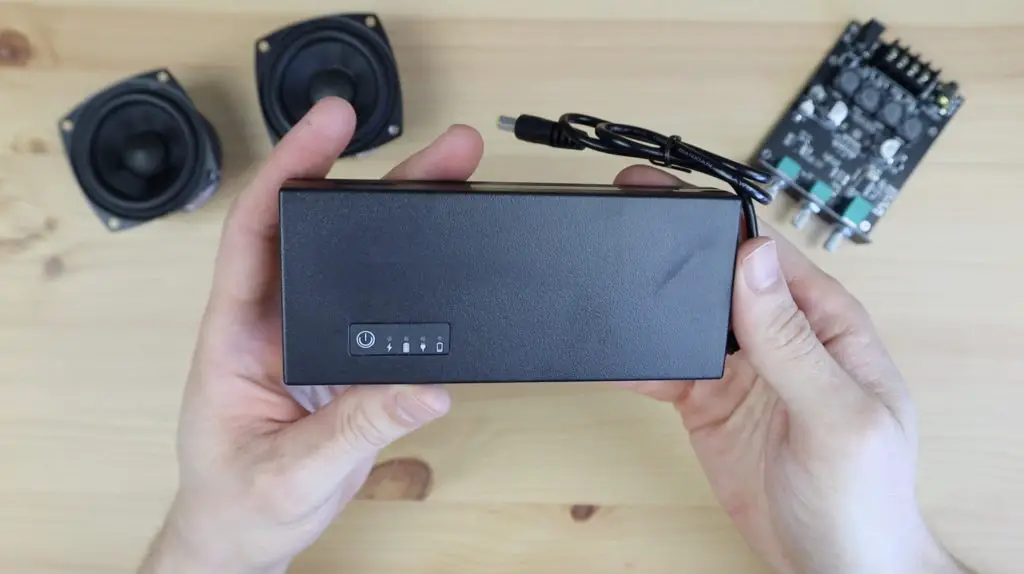
I primarily use a Bluetooth speaker in a fixed spot in my workshop or in my home office, so I don’t need it to be battery powered although this would be nice for portability. Rather than include a battery pack within the speaker design, I opted for a 12V inline UPS that I could use to provide portable power to the speaker if I needed it.
Designing The Bluetooth Speaker
With the hardware selected, it was time to start working on the speaker enclosure design. I start off looking at different ported speaker designs but was eventually drawn to the visual appeal and experimental nature of transmission line speakers. This was a rabbit hole if ever I’ve seen one! It turns out that the best way to design a transmission line speaker is to follow a pretty rough design guideline and then do a lot of trial and error adjustments until it sounds good.
To start you need to use your speaker’s free air resonant frequency to calculate the corresponding wavelength. My speaker’s resonant frequency is 117.1 Hz, so the corresponding wavelength is 2.929m. We then need to divide this by four to get our recommended transmission line length, which for our speaker is 732mm.
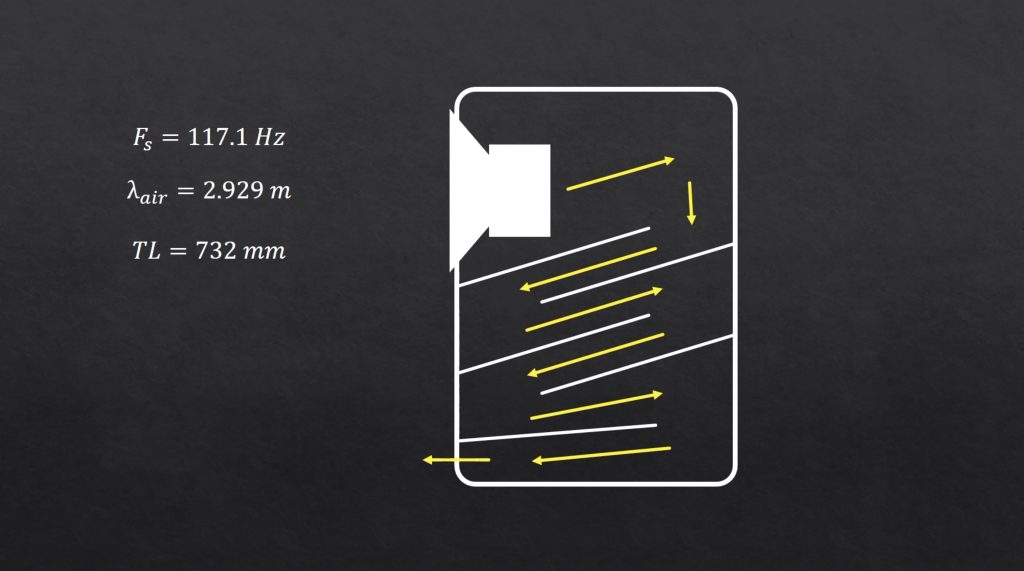
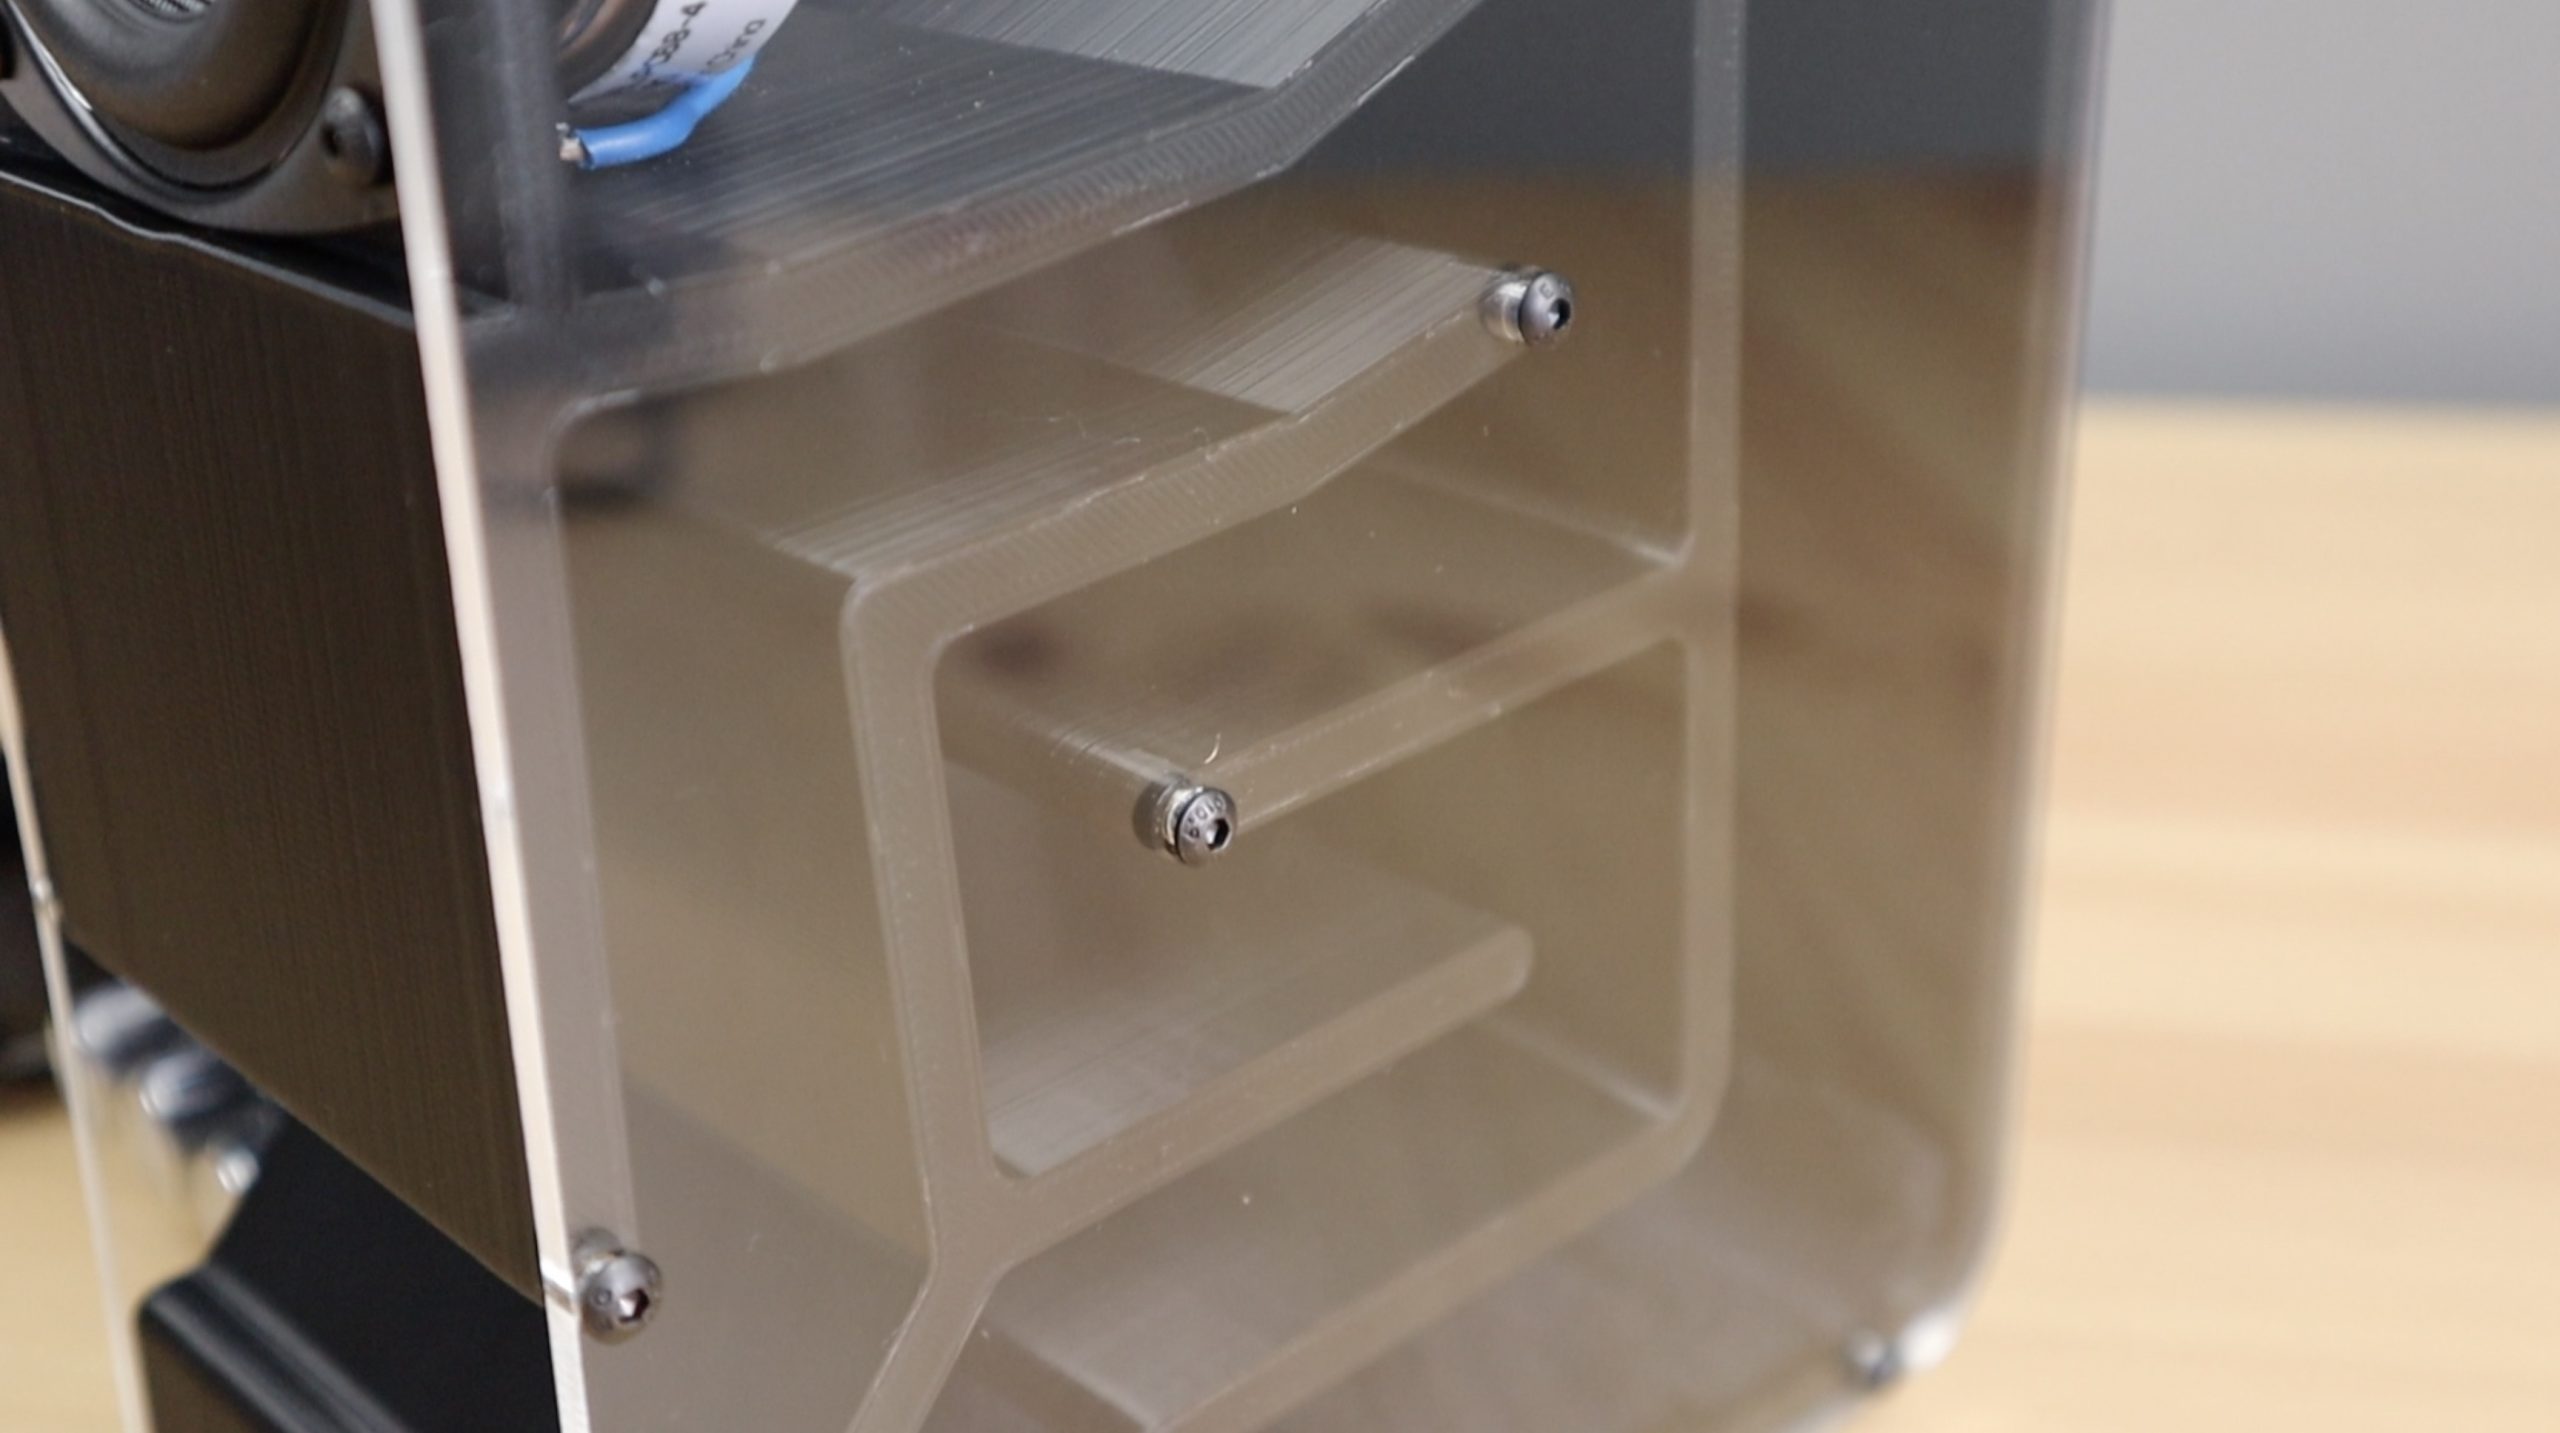
So we essentially now need to design a transmission line housing with a 732mm path from the back of the speaker to the front of the housing. The easiest way to do this is by creating a labyrinth, or a path that crosses back and fourth a number of times, within the enclosure.
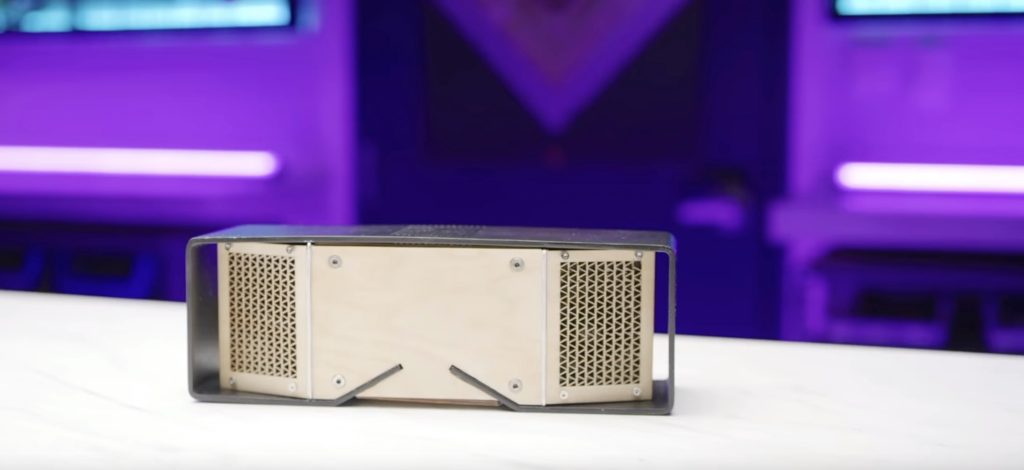
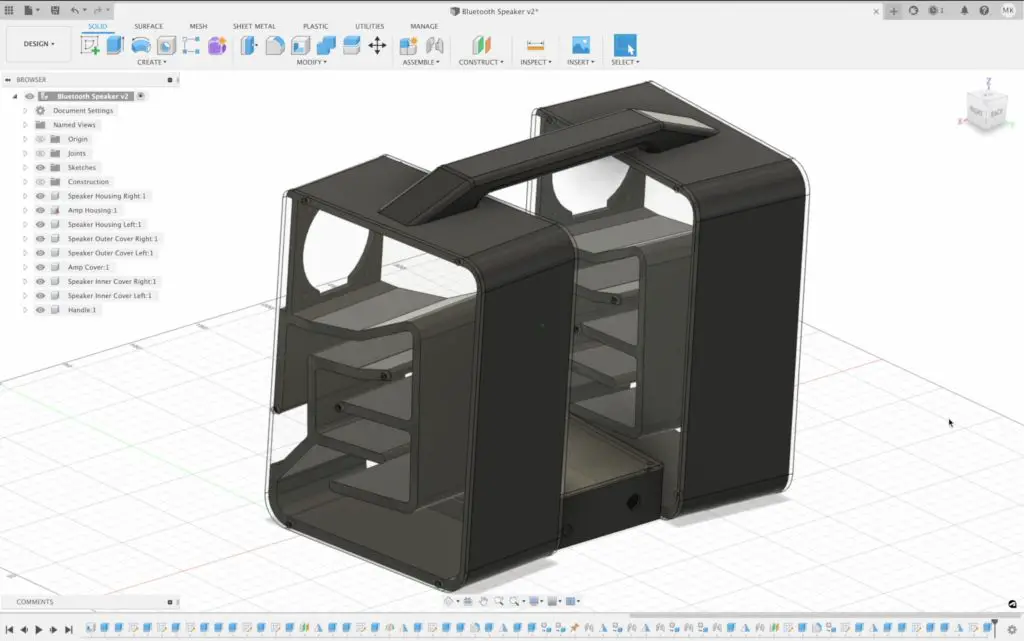
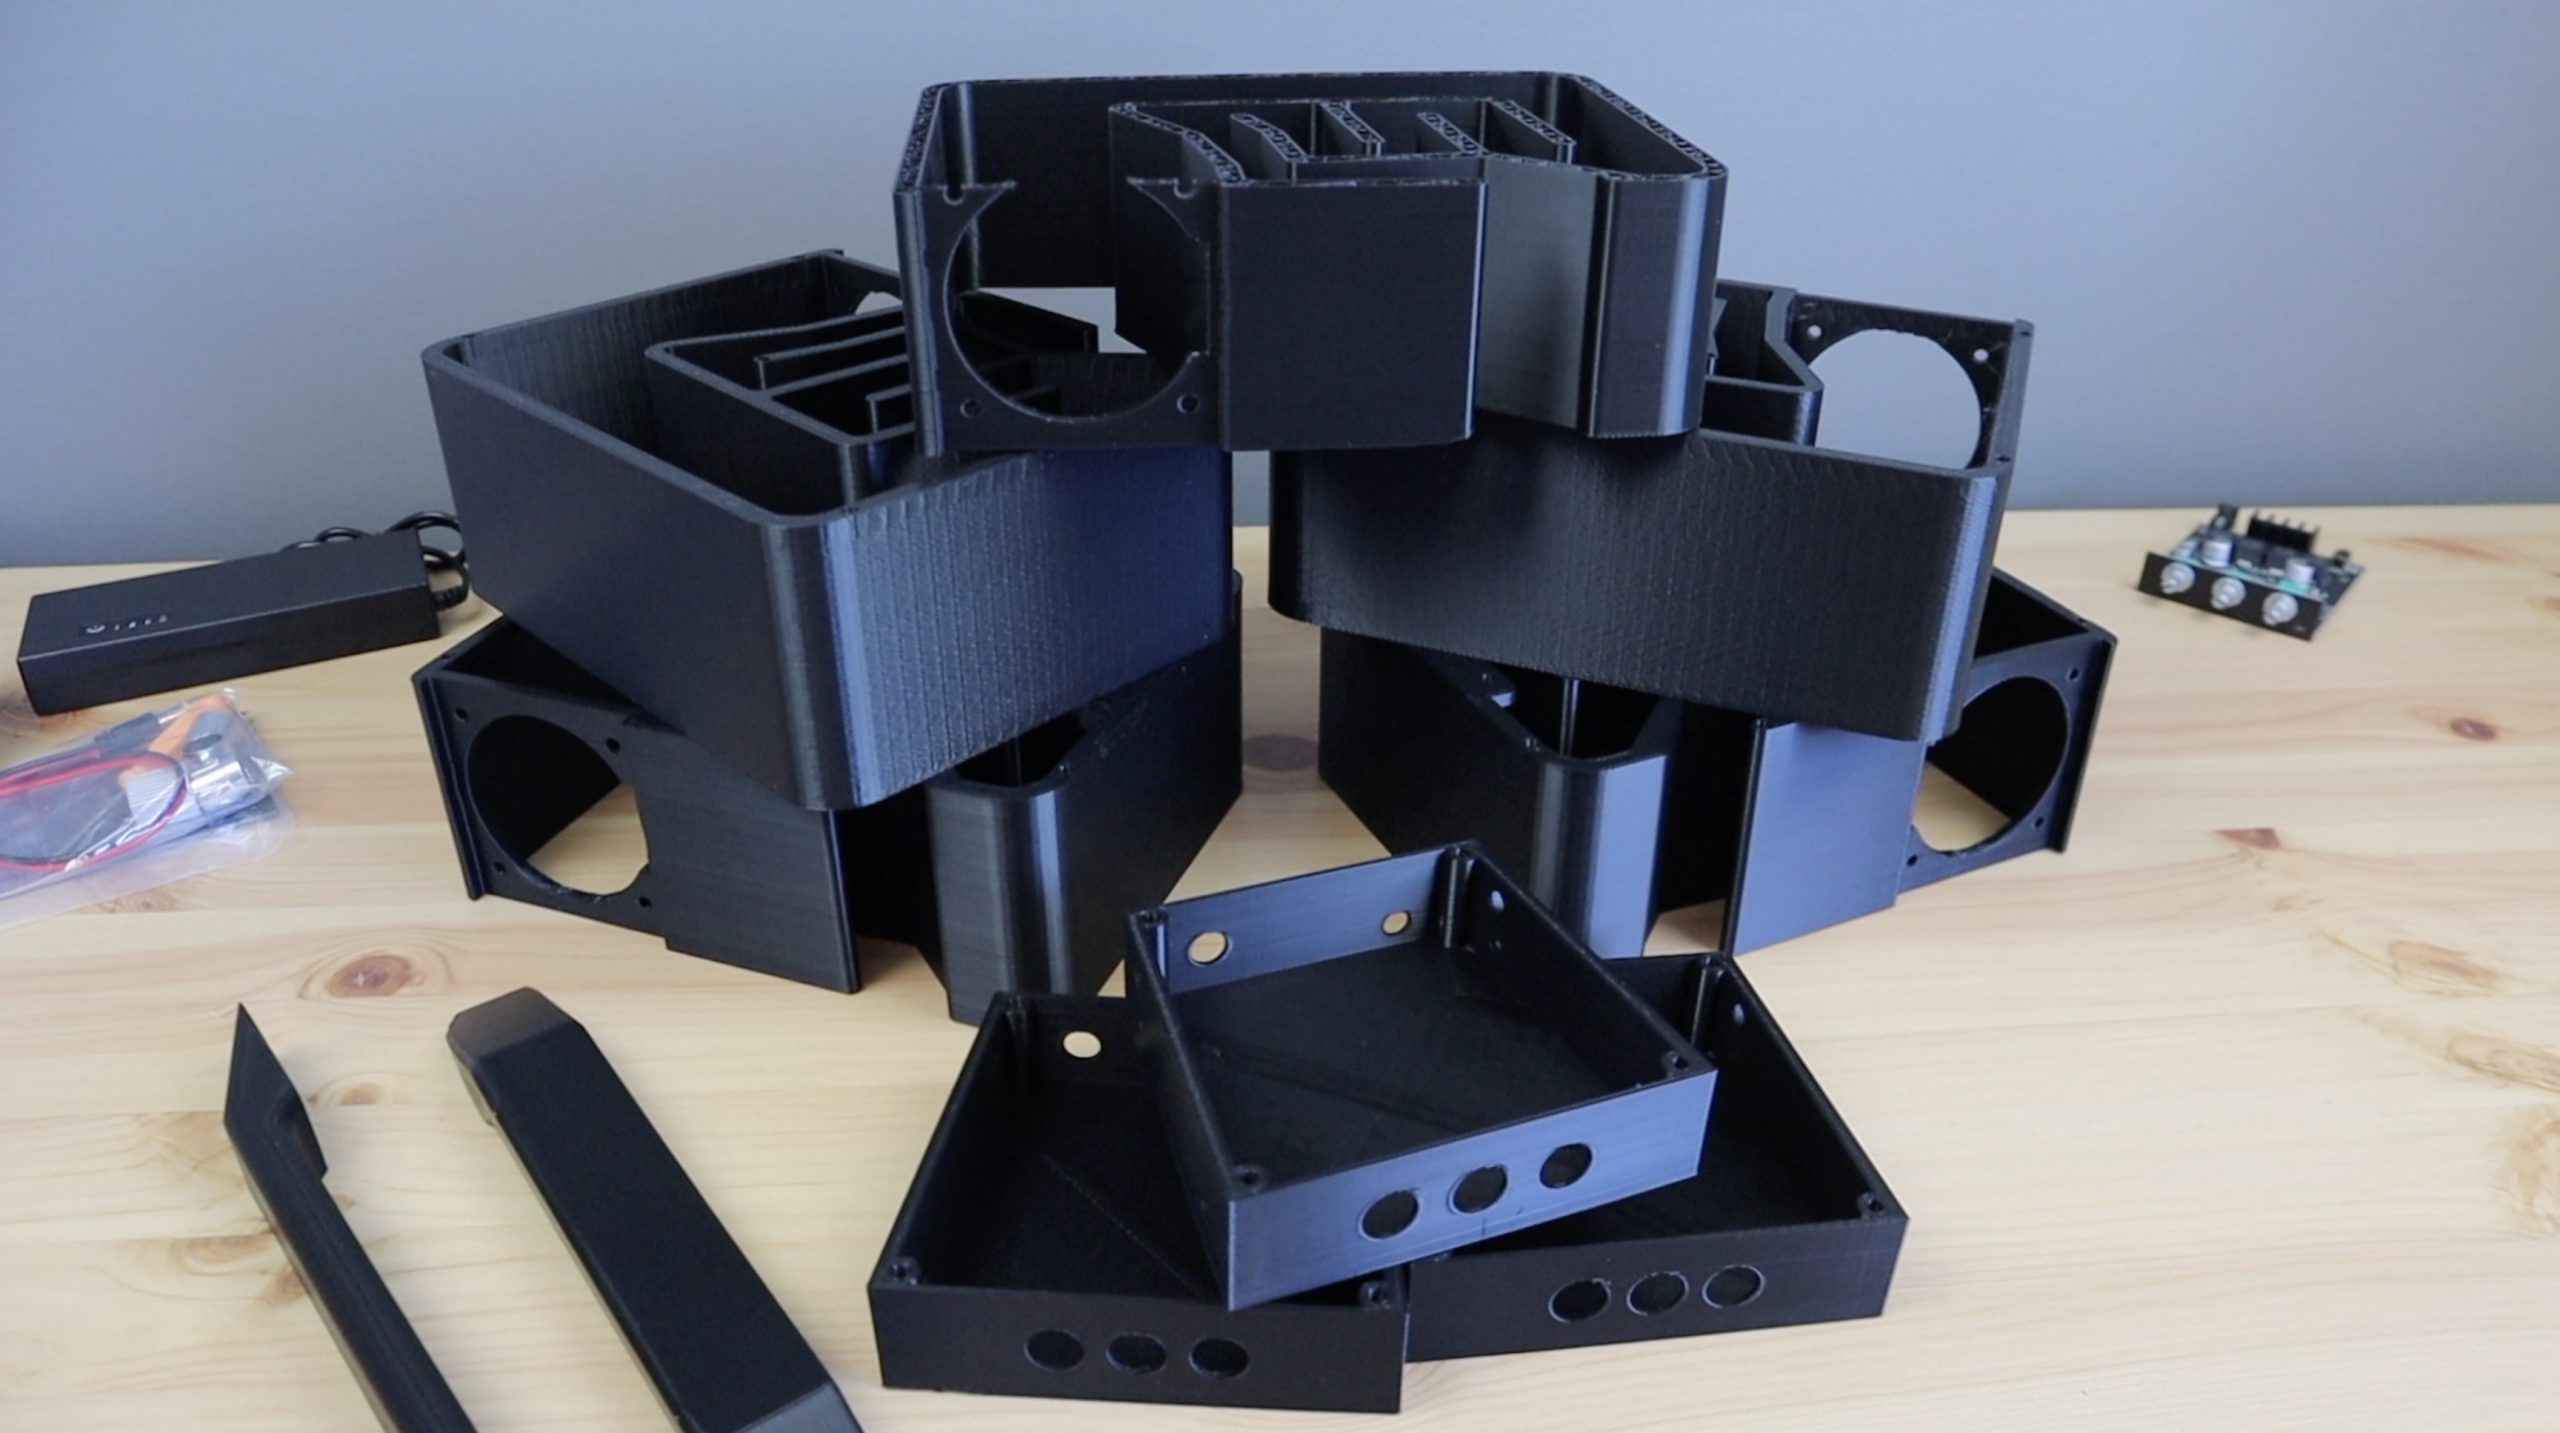
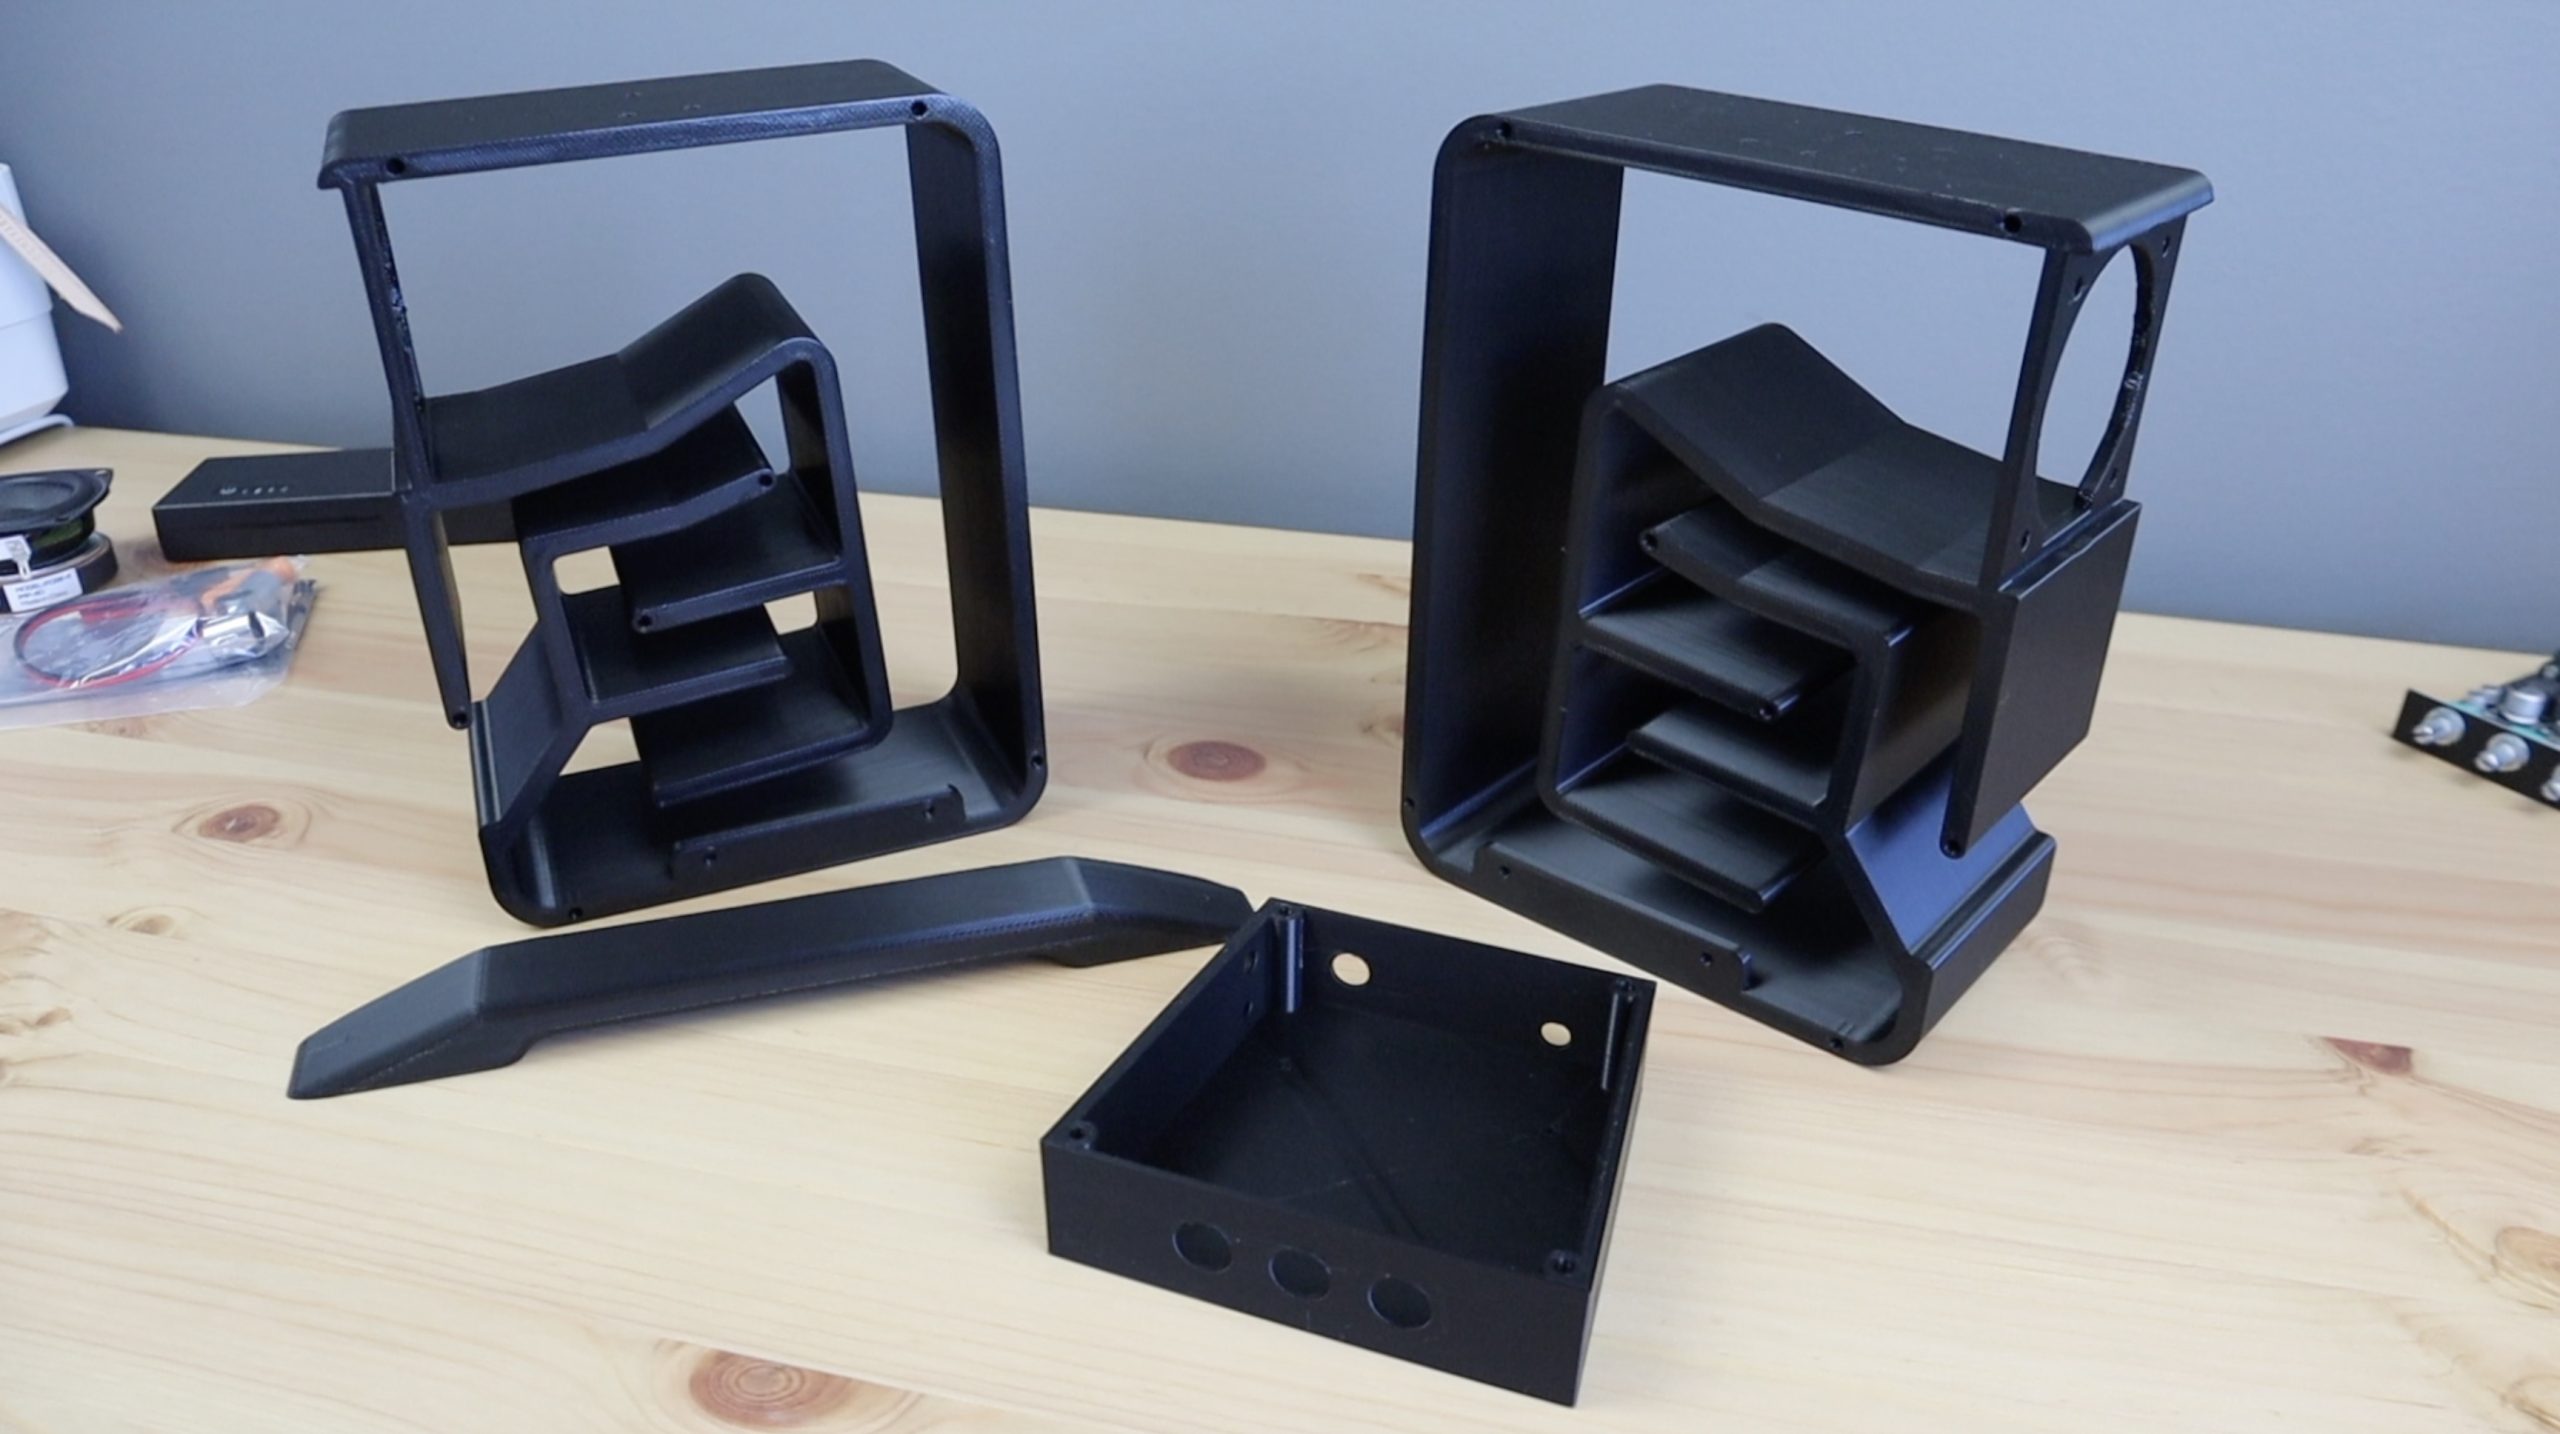
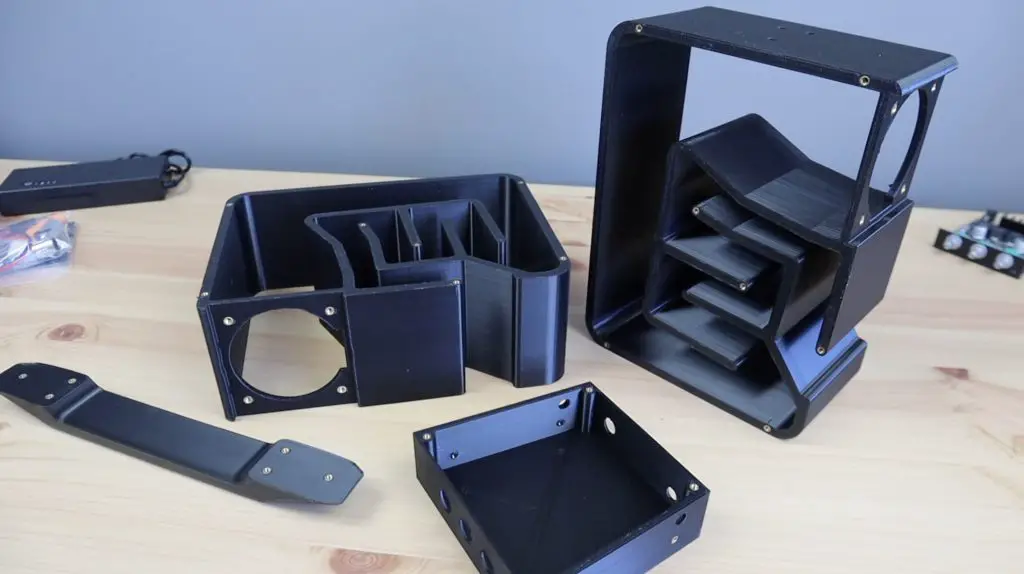
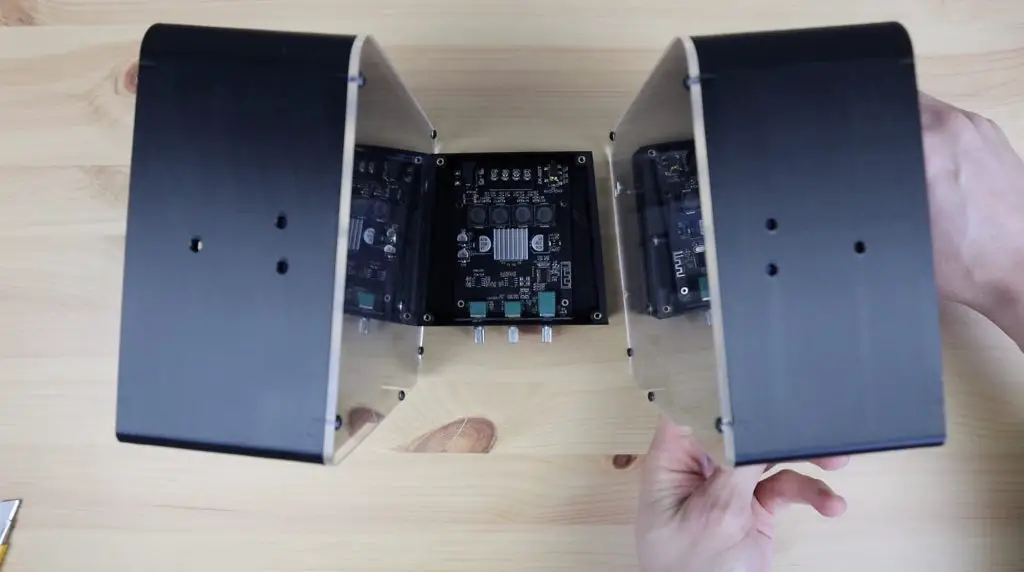
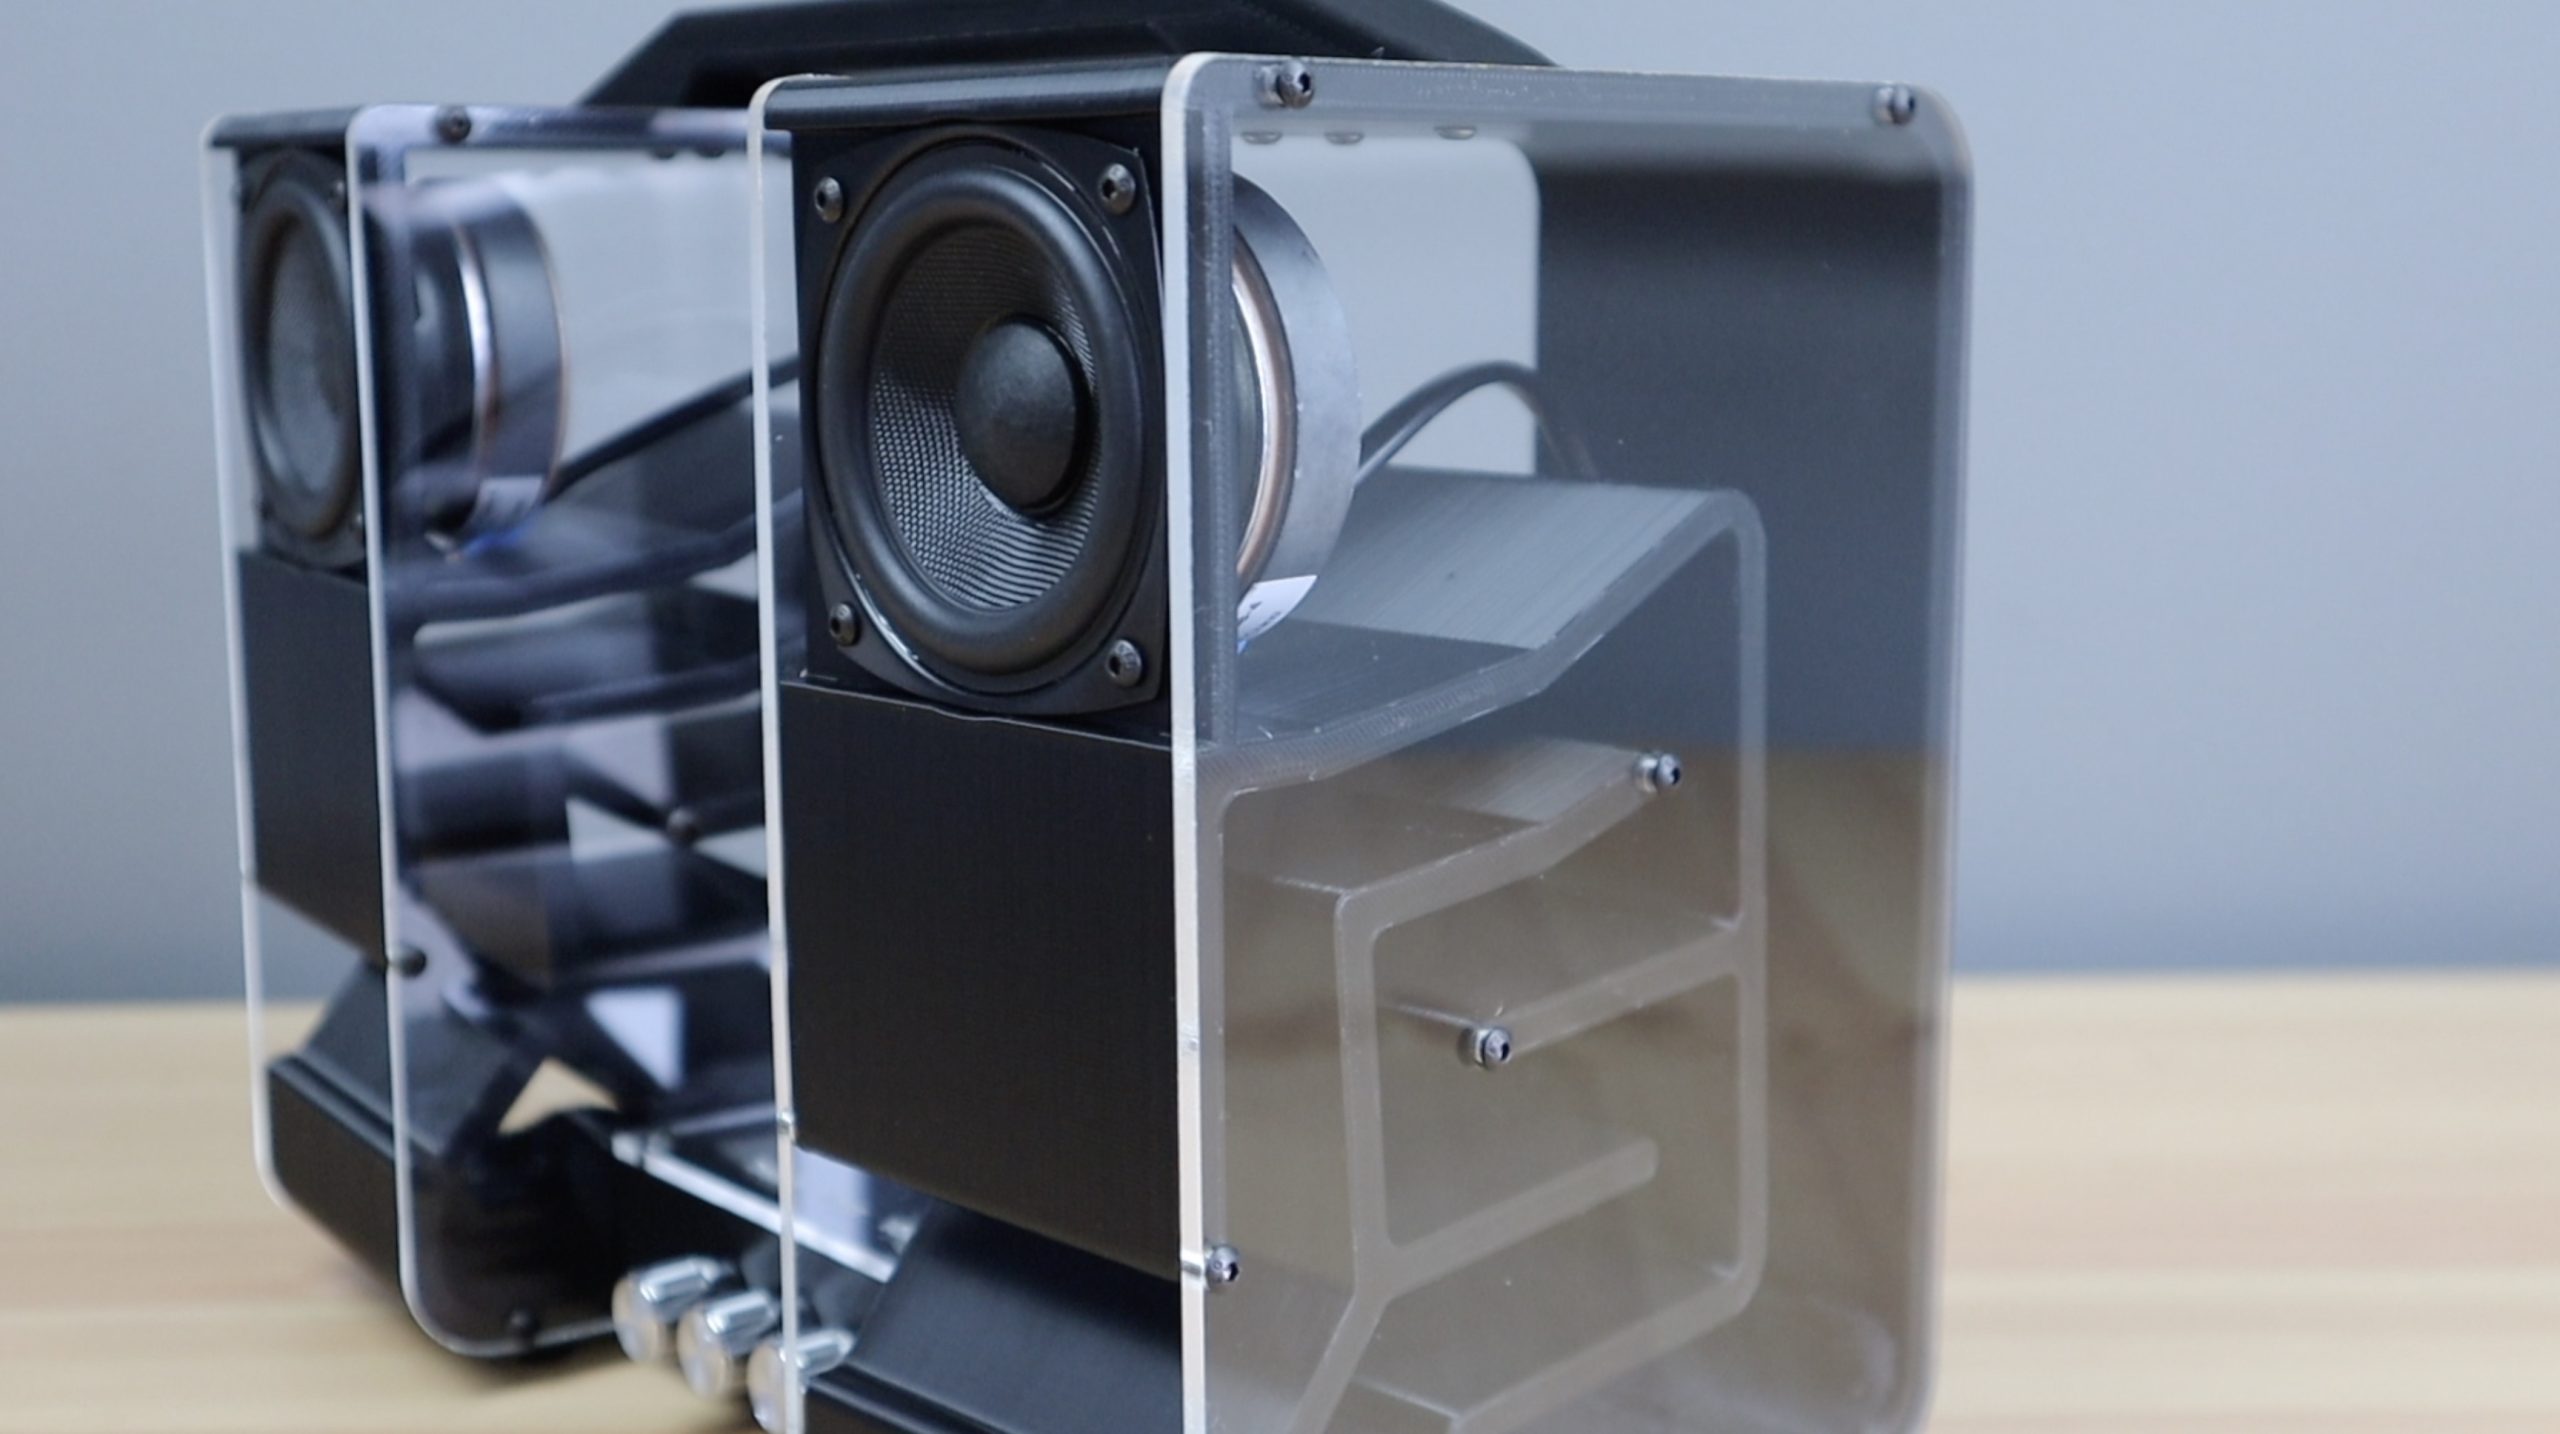
So I sat down with Fusion360 and spent a few hours designing an enclosure to house the drivers, provide a 732mm path from the back of the Bluetooth speaker to the front again and house the amplifier. This is the design that I came up with.
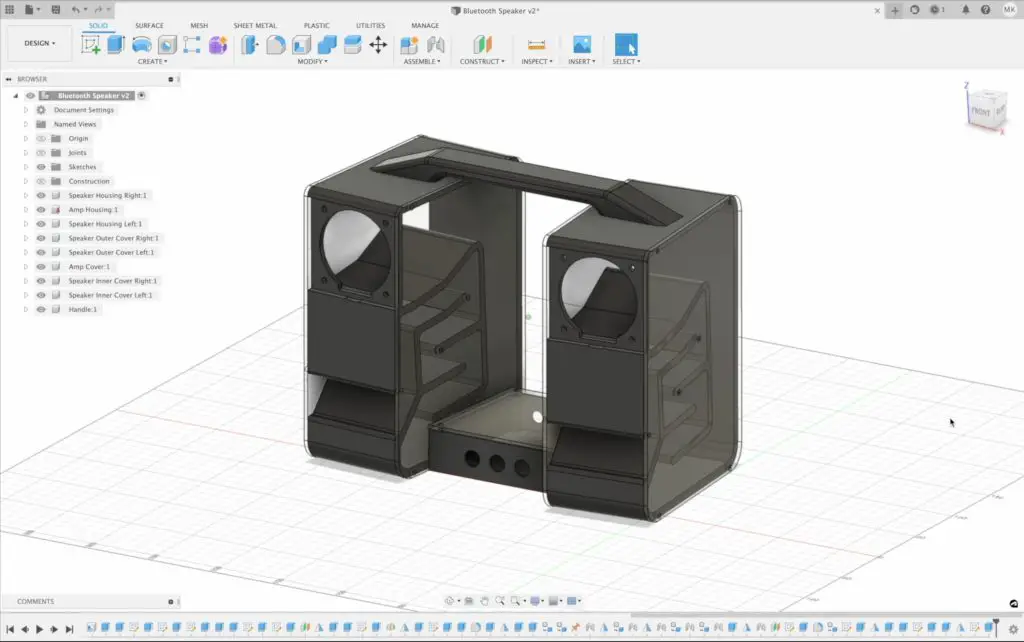
The main internal parts of the speaker, the amplifier housing and the handle would be 3D printed and I’d then use some laser-cut acrylic panels as covers to box them up.
Download the Design to Print your Own Bluetooth Speaker.
I liked this layout for a couple of reasons, it leaves the transmission line design visible, which I thought looked quite cool, but it also allows the sides to be opened up to add or remove damping material to get it to sound right. Another neat feature of this design is that the amplifier can be swapped out for a different model, or the speaker size can be changed without having to redesign the whole enclosure again. You can just redesign the new amplifier housing to drop in or scale the speaker enclosure to fit the new driver size.
Making Up The Speaker Components
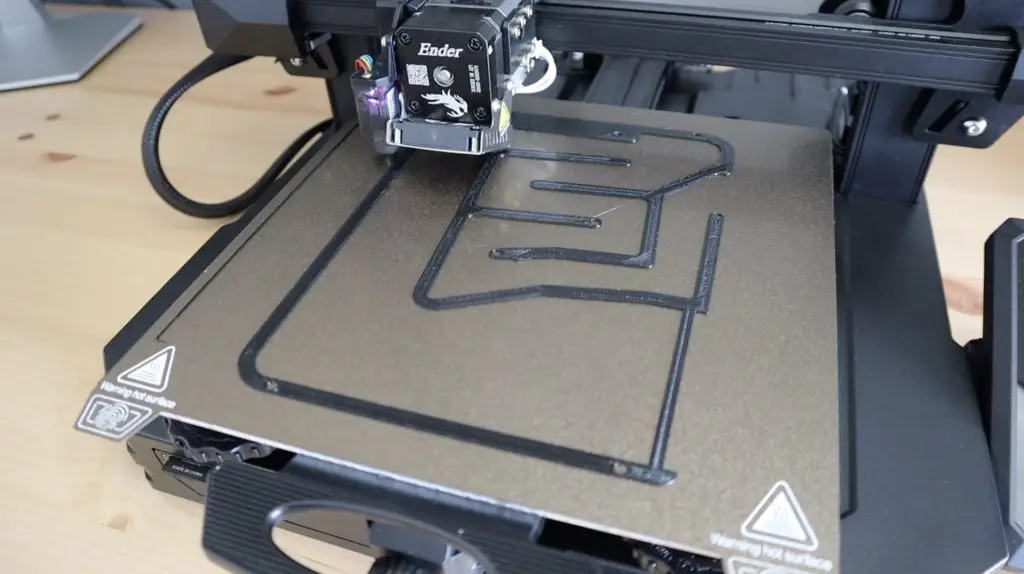
Next came a lot of 3D printing. Each housing took around 36 hours to 3D print. I printed them using black PLA with a 20% infill.
We also had a couple of cold nights at the same time, causing the prints to fail by lifting at the corners, but I eventually got the four components made up.
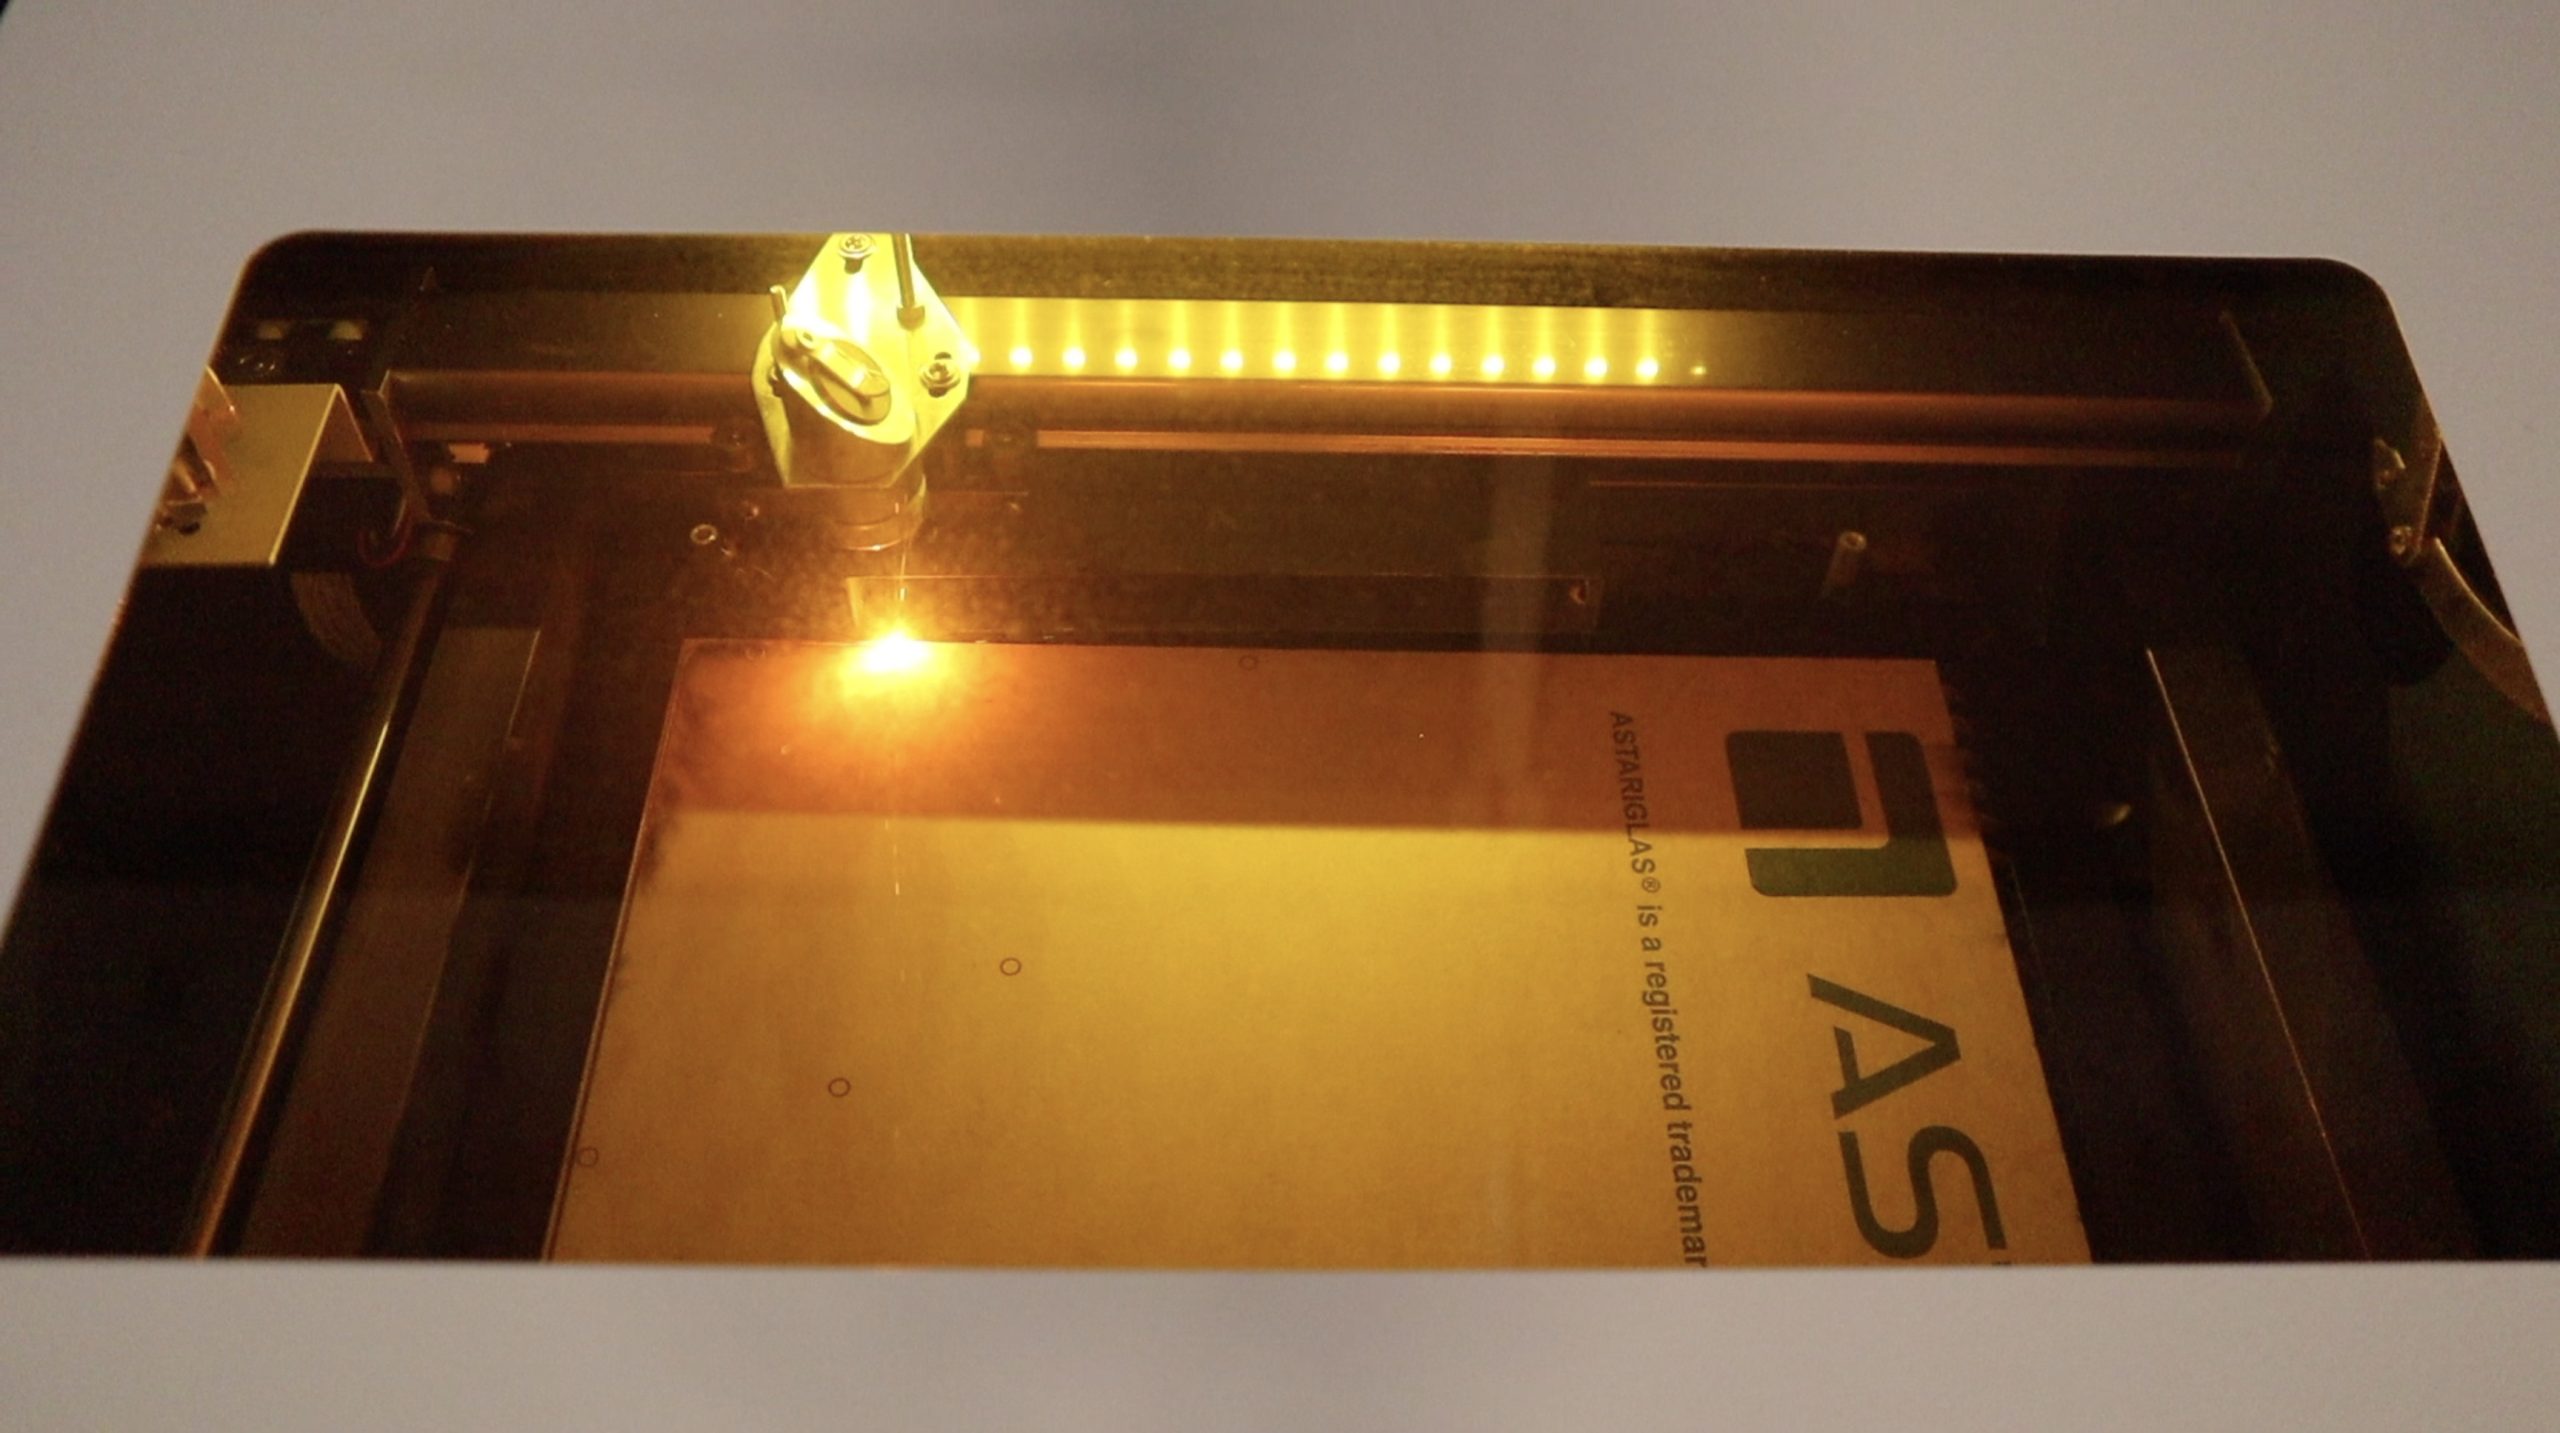
I then laser-cut the side panels from 3mm clear acrylic. 3mm acrylic sheets are one of the most popular thicknesses, so you could easily replace the sides with other transparent or opaque colours or even just use matt black sheets if you don’t want them to stand out.
Assembling The Bluetooth Speaker
Now that we’ve got all of our components made up, we can now start assembling the speaker.
Preparing The 3D Printed Parts
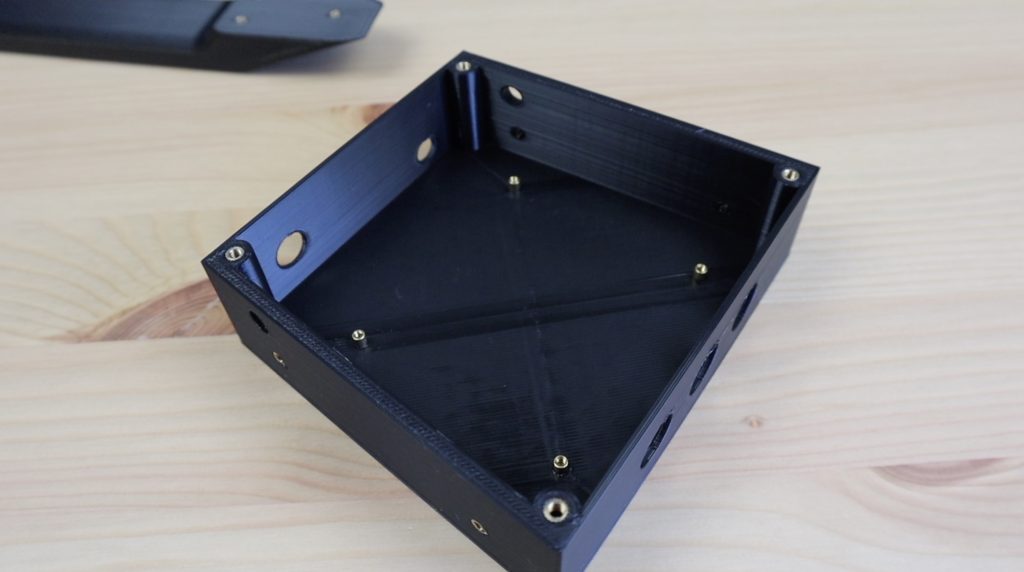
If you’ve printed your parts the way I have then you shouldn’t have any supports to remove, but we do need to add some brass inserts to the parts before assembling them. I did this because I figured I’d be taking the side panels off quite often while experimenting with the sound and they need to be held in place quite tightly so that they don’t vibrate, which I didn’t think plain 3D printed holes would handle.
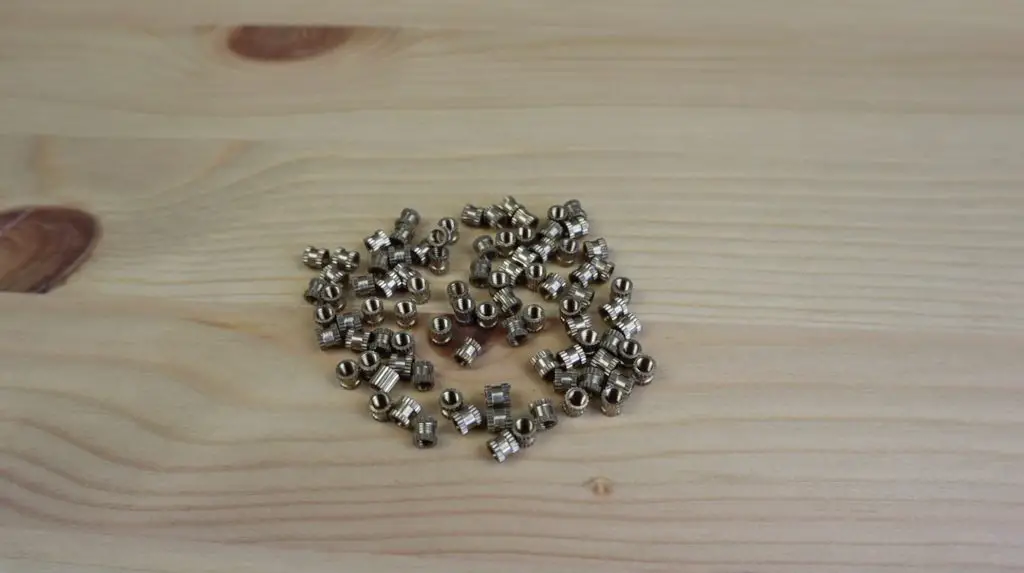
There are a number of 4mm holes around the four prints that we need to melt brass inserts into.
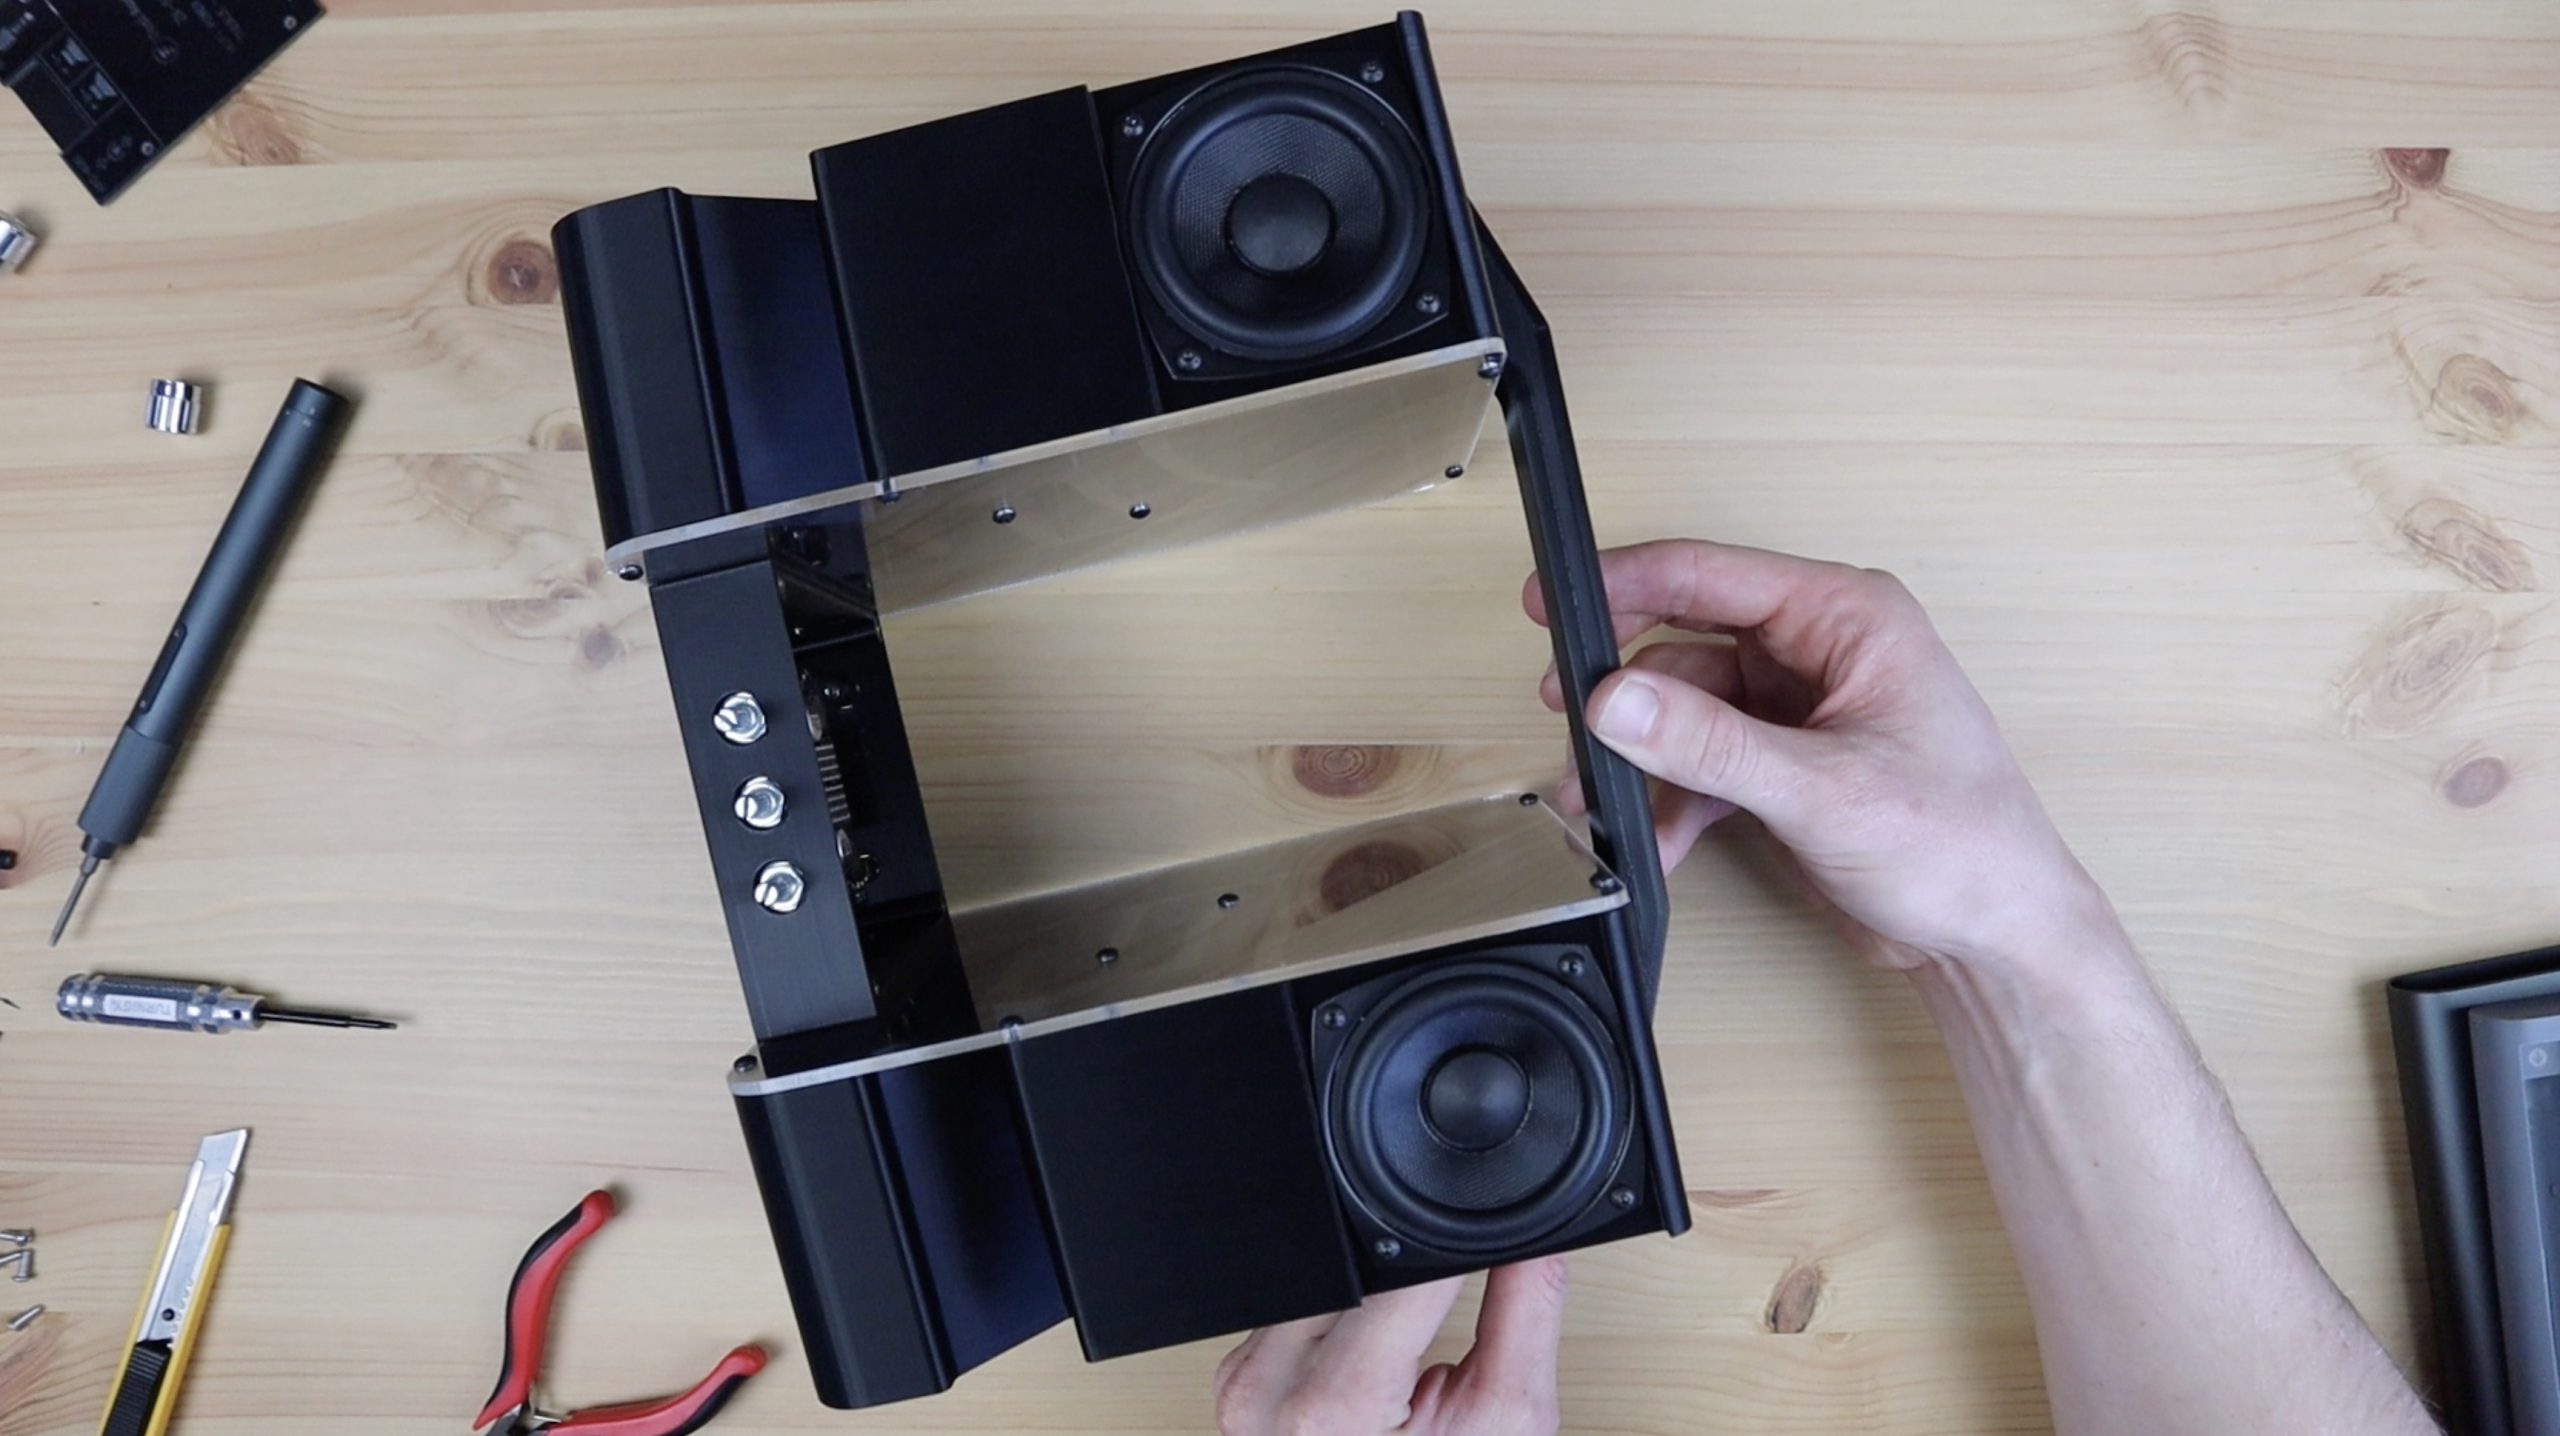
All of the 4mm holes in the amplifier housing – four at the top for the cover and two on each side to connect to the speaker housings (8 in total).
And then almost all of the 4mm holes in each speaker housing – four for the driver, seven on each side for the clear covers and four on the bottom for the feet (22 in total for each housing). The holes that don’t require inserts are the two on the inside bracket that connects to the amplifier housing and the three on the top for the handle – these are all clearance holes for the screws to pass through.
Lastly, all of the holes on the handle – three on each side to connected to the speaker housings (6 in total).
The inserts are just melted into place using a soldering iron that’s set above the melting temperature of the 3D printing filament. Make sure that you get them set as close to square with the print as possible, if they go in skew then try to straighten them up a bit before removing the soldering iron tip.
Preparing The Amplifier Housing
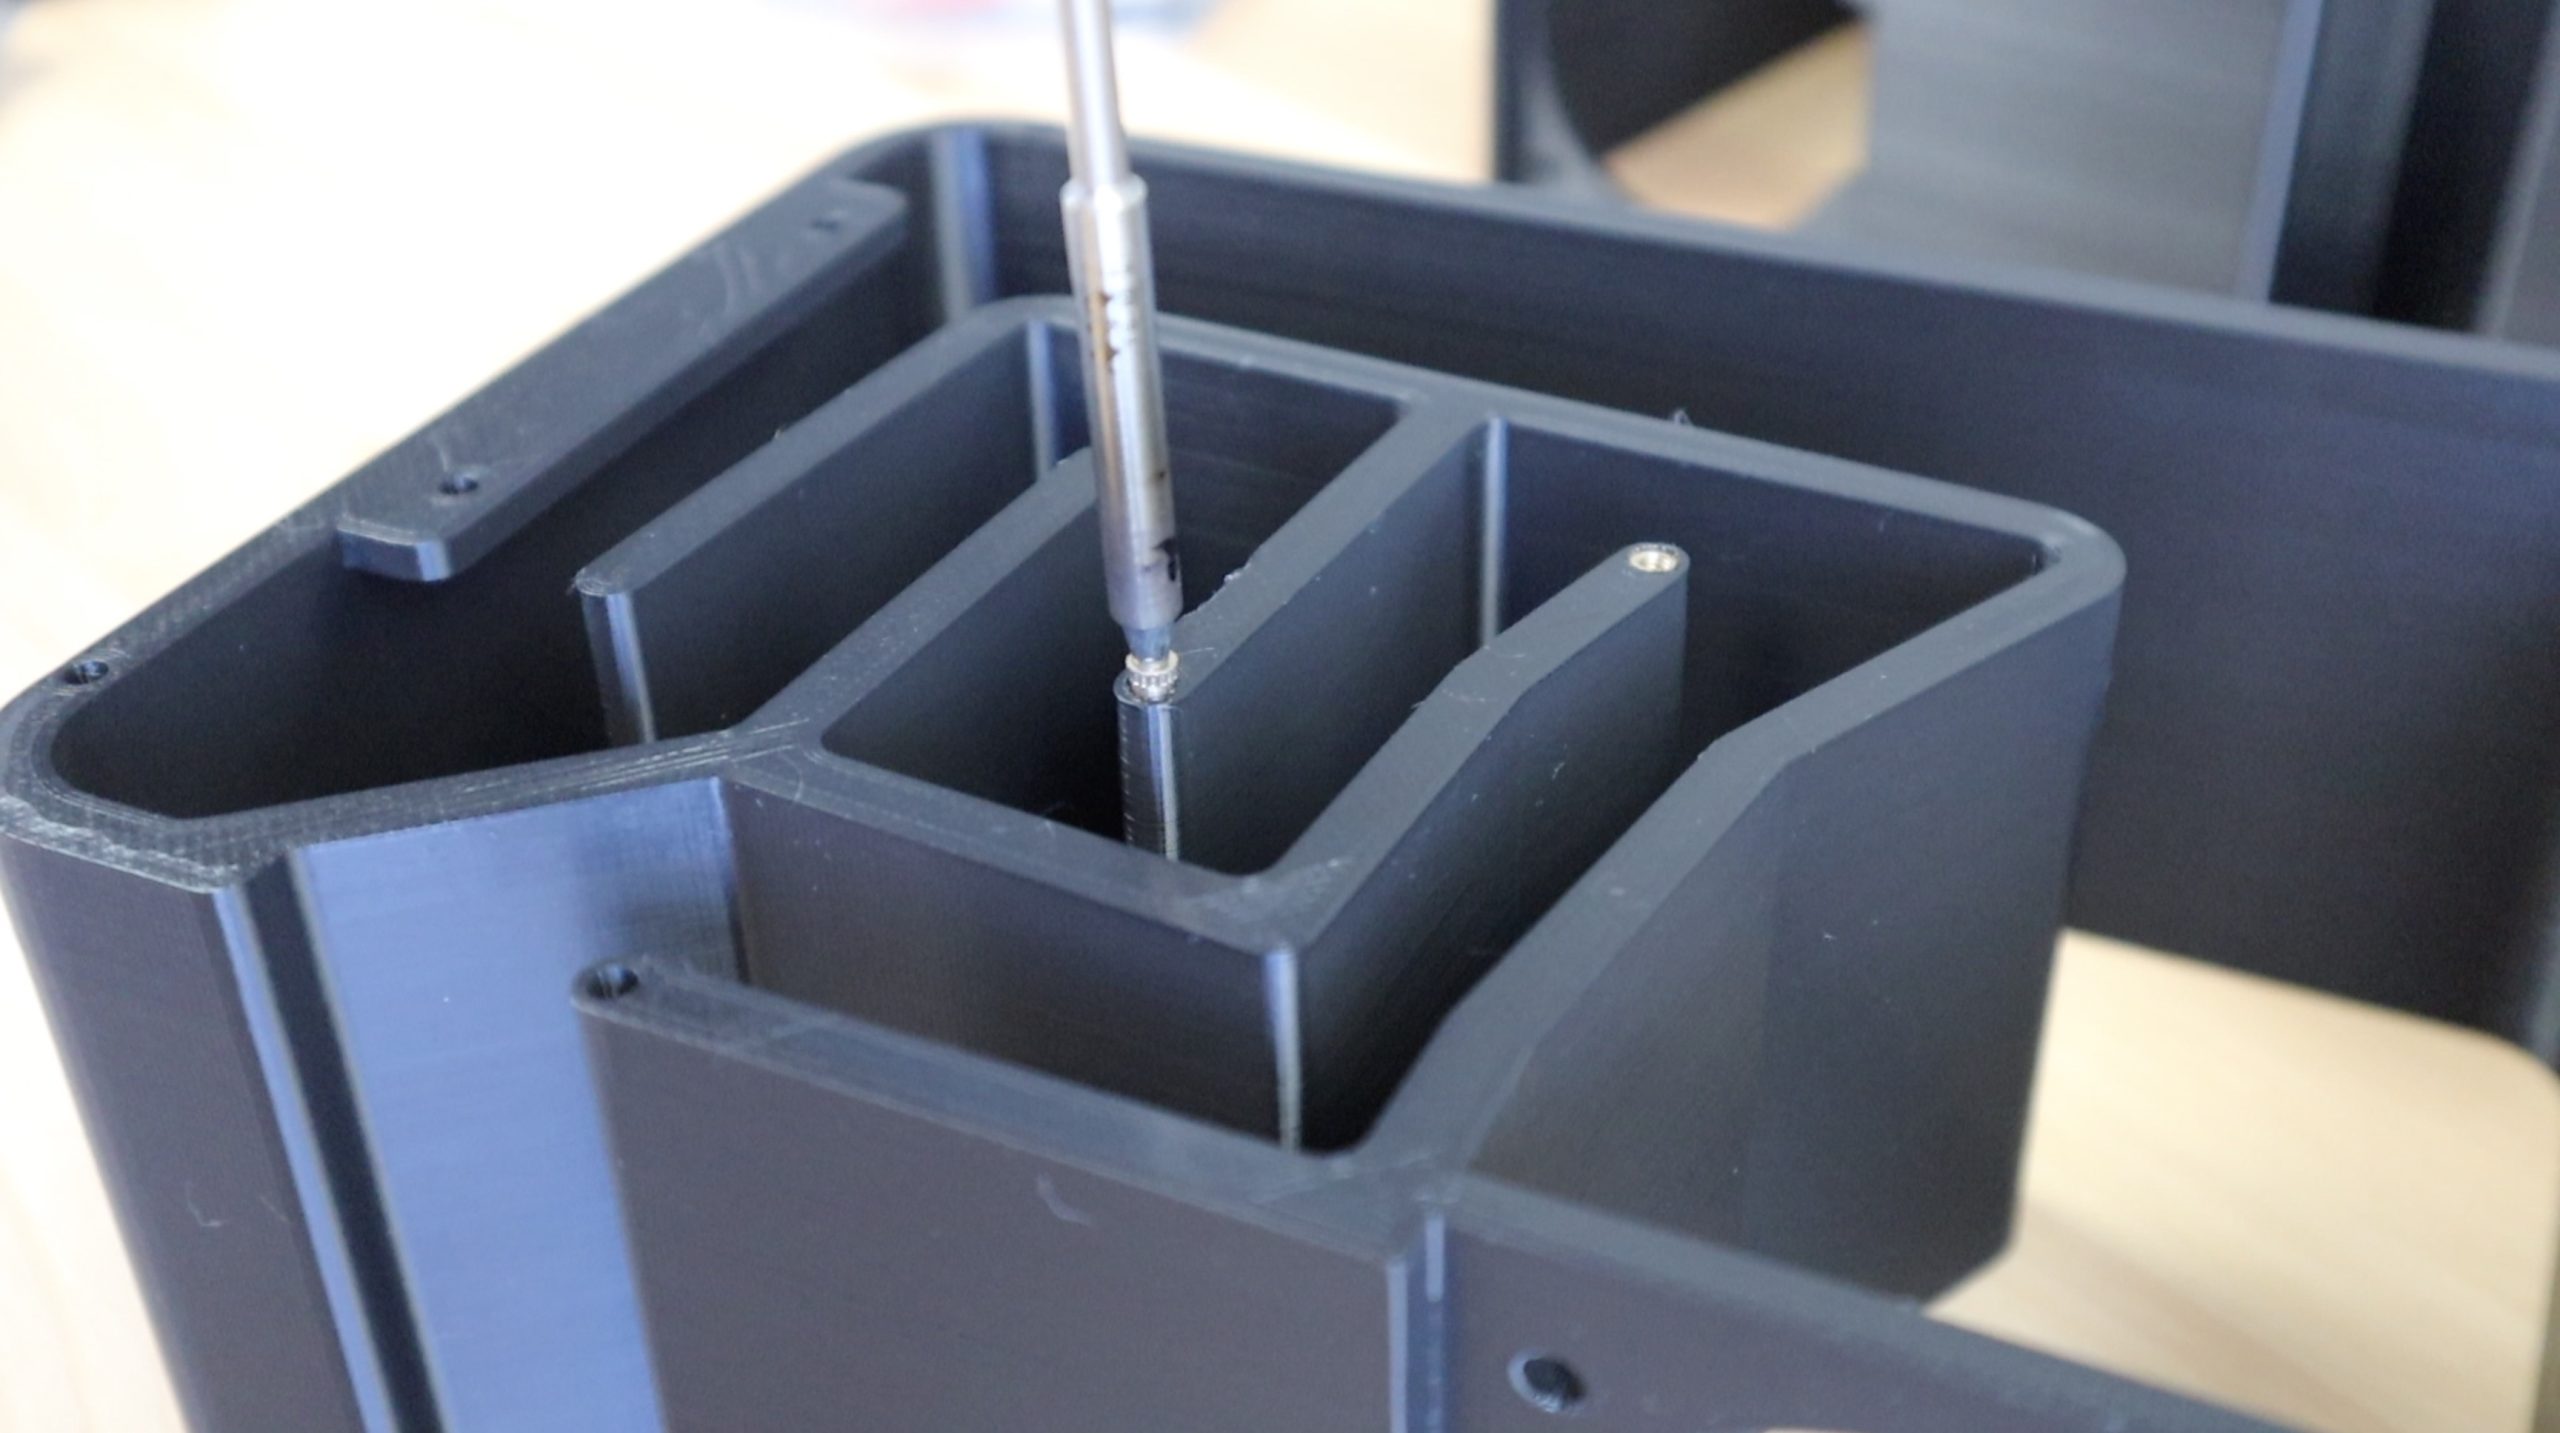
Next, let’s install our amplifier in its housing using the included standoffs. Look for the smallest M2 standoffs included with the amplifier, the ones with a short male thread on one side and a female thread on the other.
These need to be screwed into the four holes in the base of the amplifier housing. Use a small pair of needle nose pliers to do this. Alternately you can melt them into place with the soldering iron as well, but be really careful to set the correct height and ensure that they are perfectly upright.
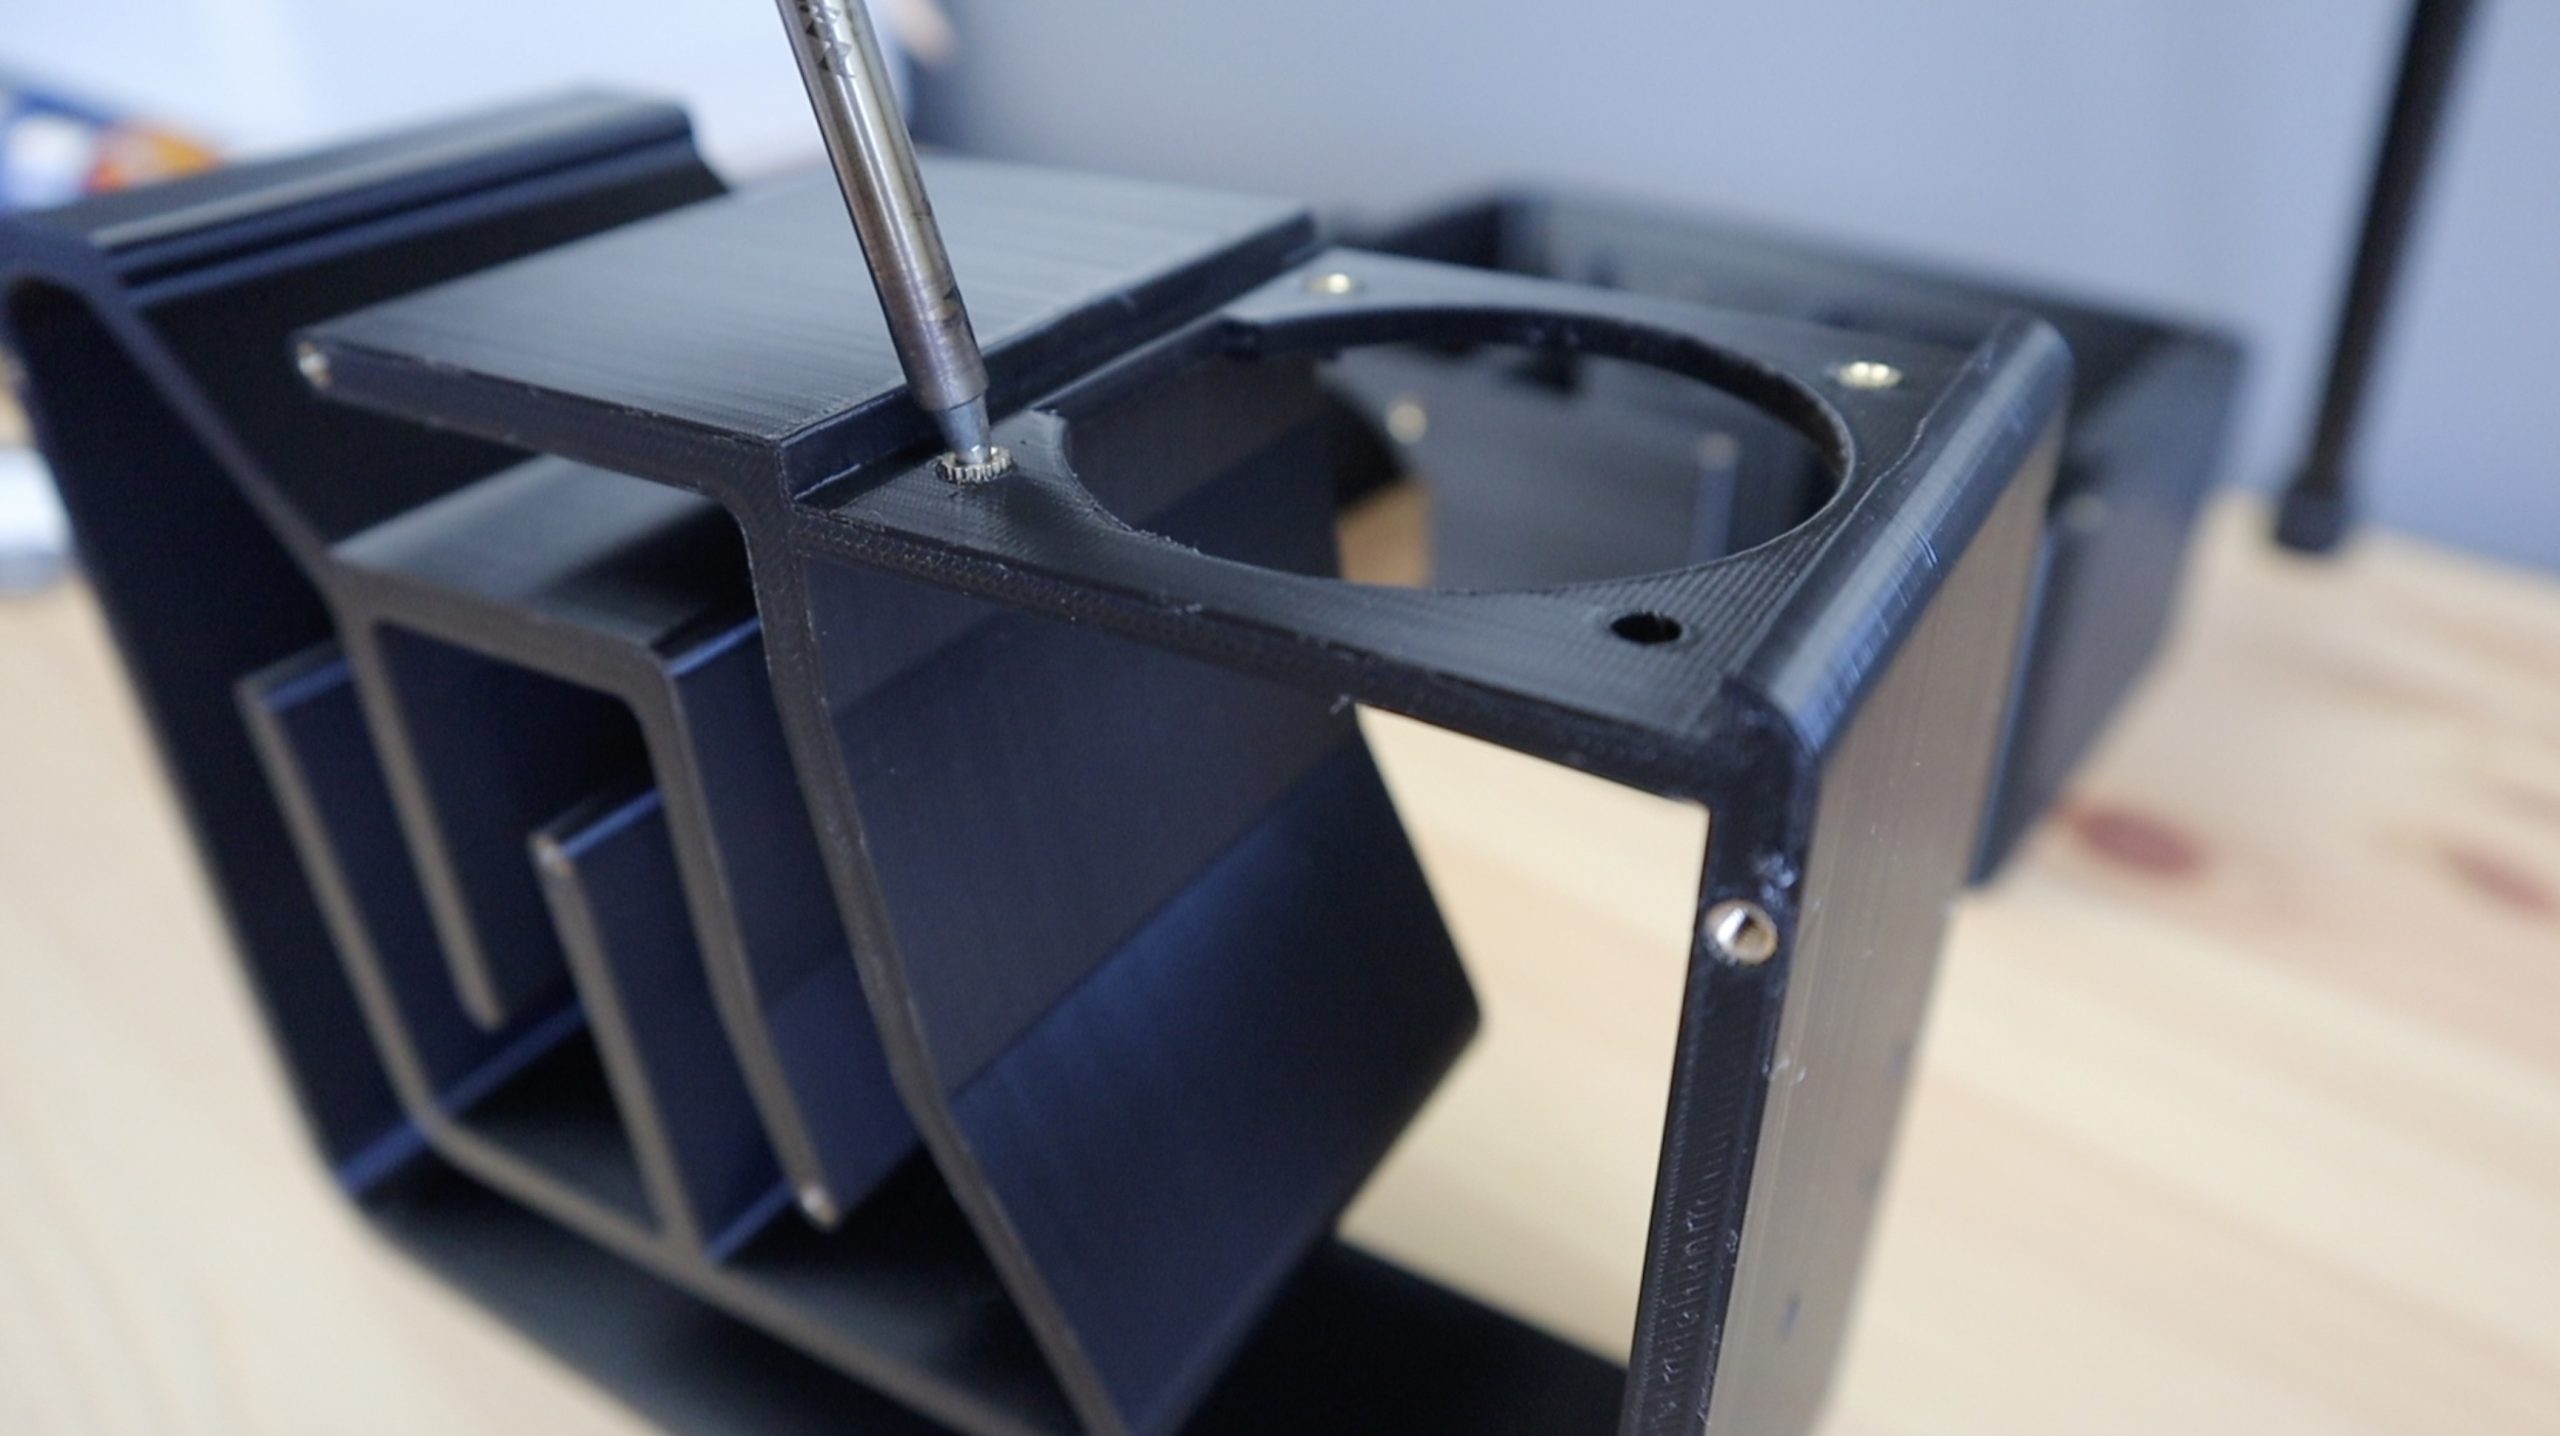
Add the amplifier to the housing by feeding the potentiometer stems through the three holes on the front first, then gently pressing the back into position.
Secure the amplifier to the brass standoffs with the included black M2 screws.
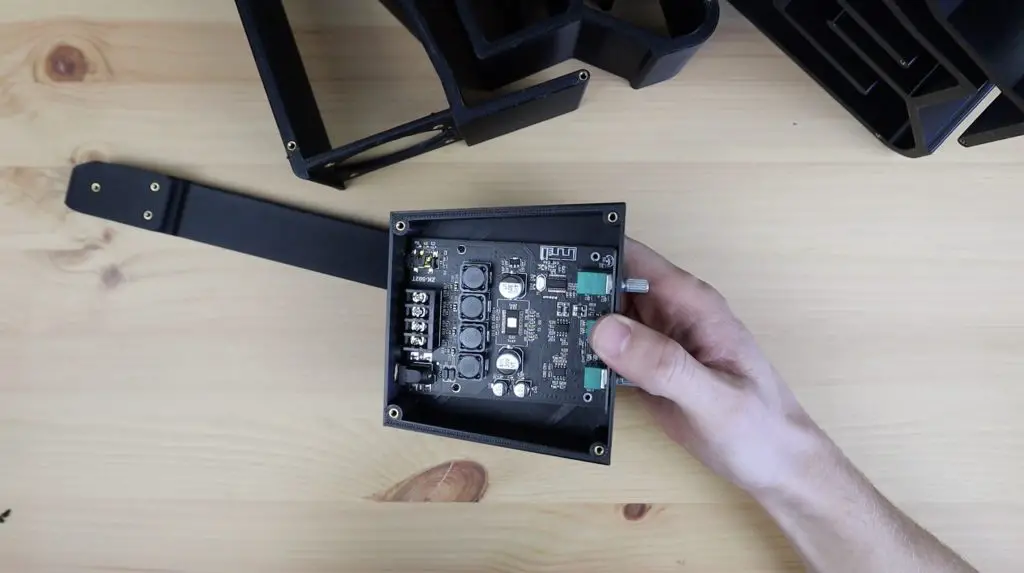
It looks like my initial hole measurements were off for these, so my front standoffs don’t align with the holes, but the two at the back hold it in place well enough. I have corrected this in the model, so your prints should all align correctly.
Lastly, you’ll need to stick the included heatsink onto the chip in the centre of the board – the one with the shiny surface.
Assemble The Remaining Components
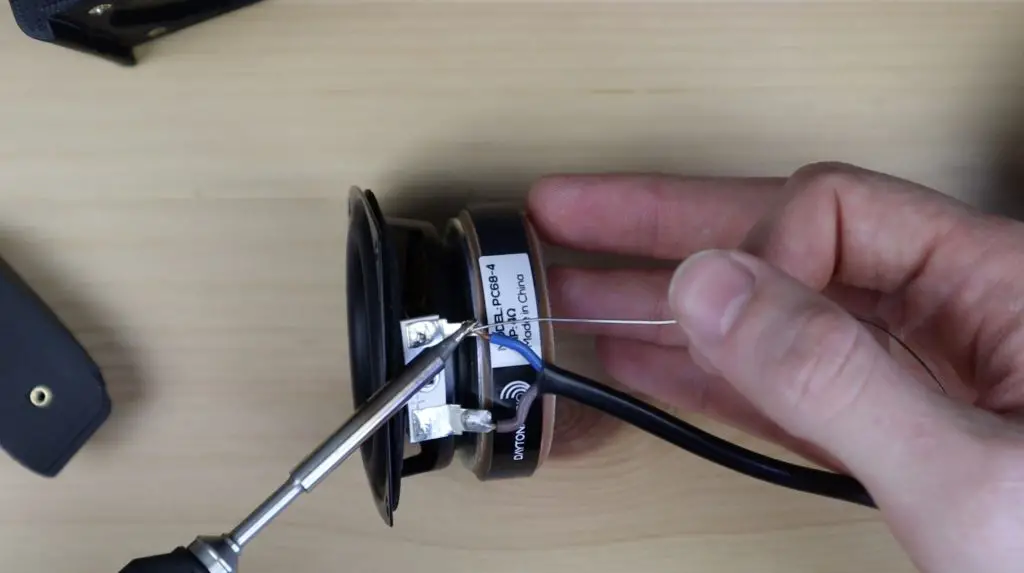
Before installing the drivers in the housing, I’m going to solder some two-core wire onto them to run to the amplifier. You can use speaker wire for this or any spare wire you have at home of a suitable gauge. I used some wire from an old printer power cable.
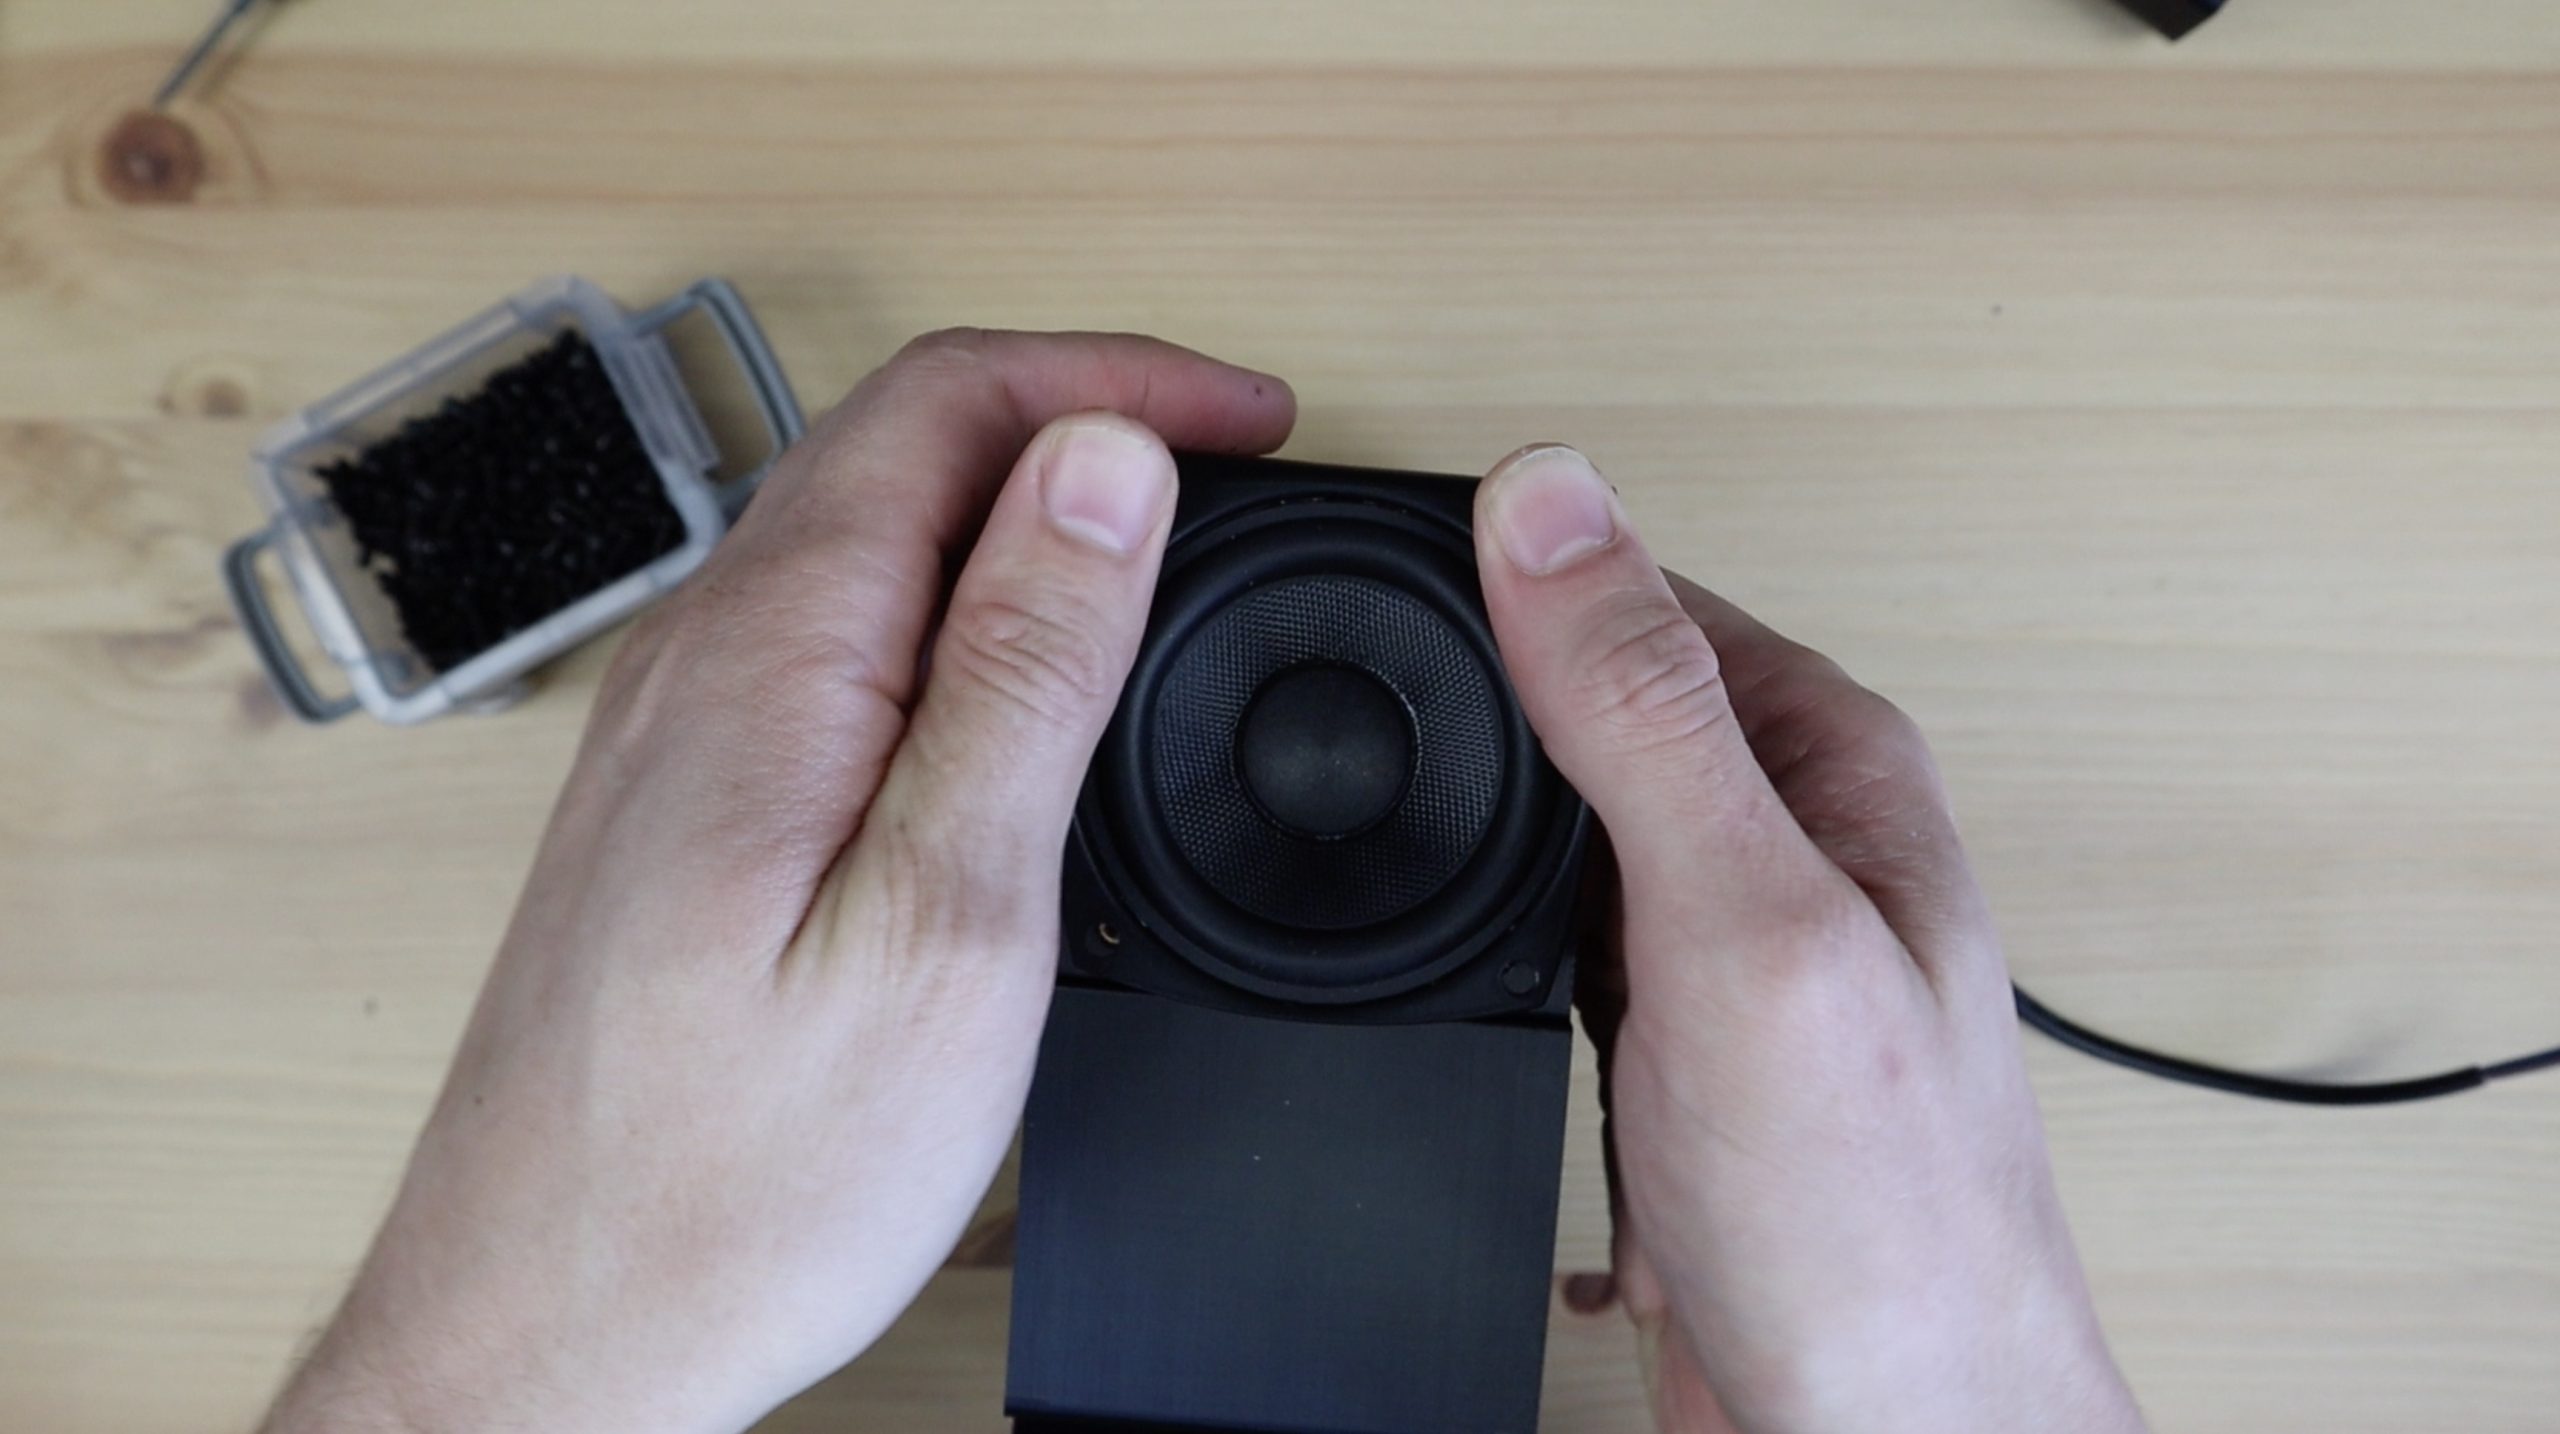
Push the drivers into the holes in the front of the housing, feeding the wire through first. The drivers are then held in place with some M3 x 8mm screws. I used black screws for all of the ones that are visible on the outside to keep with the general aesthetic.
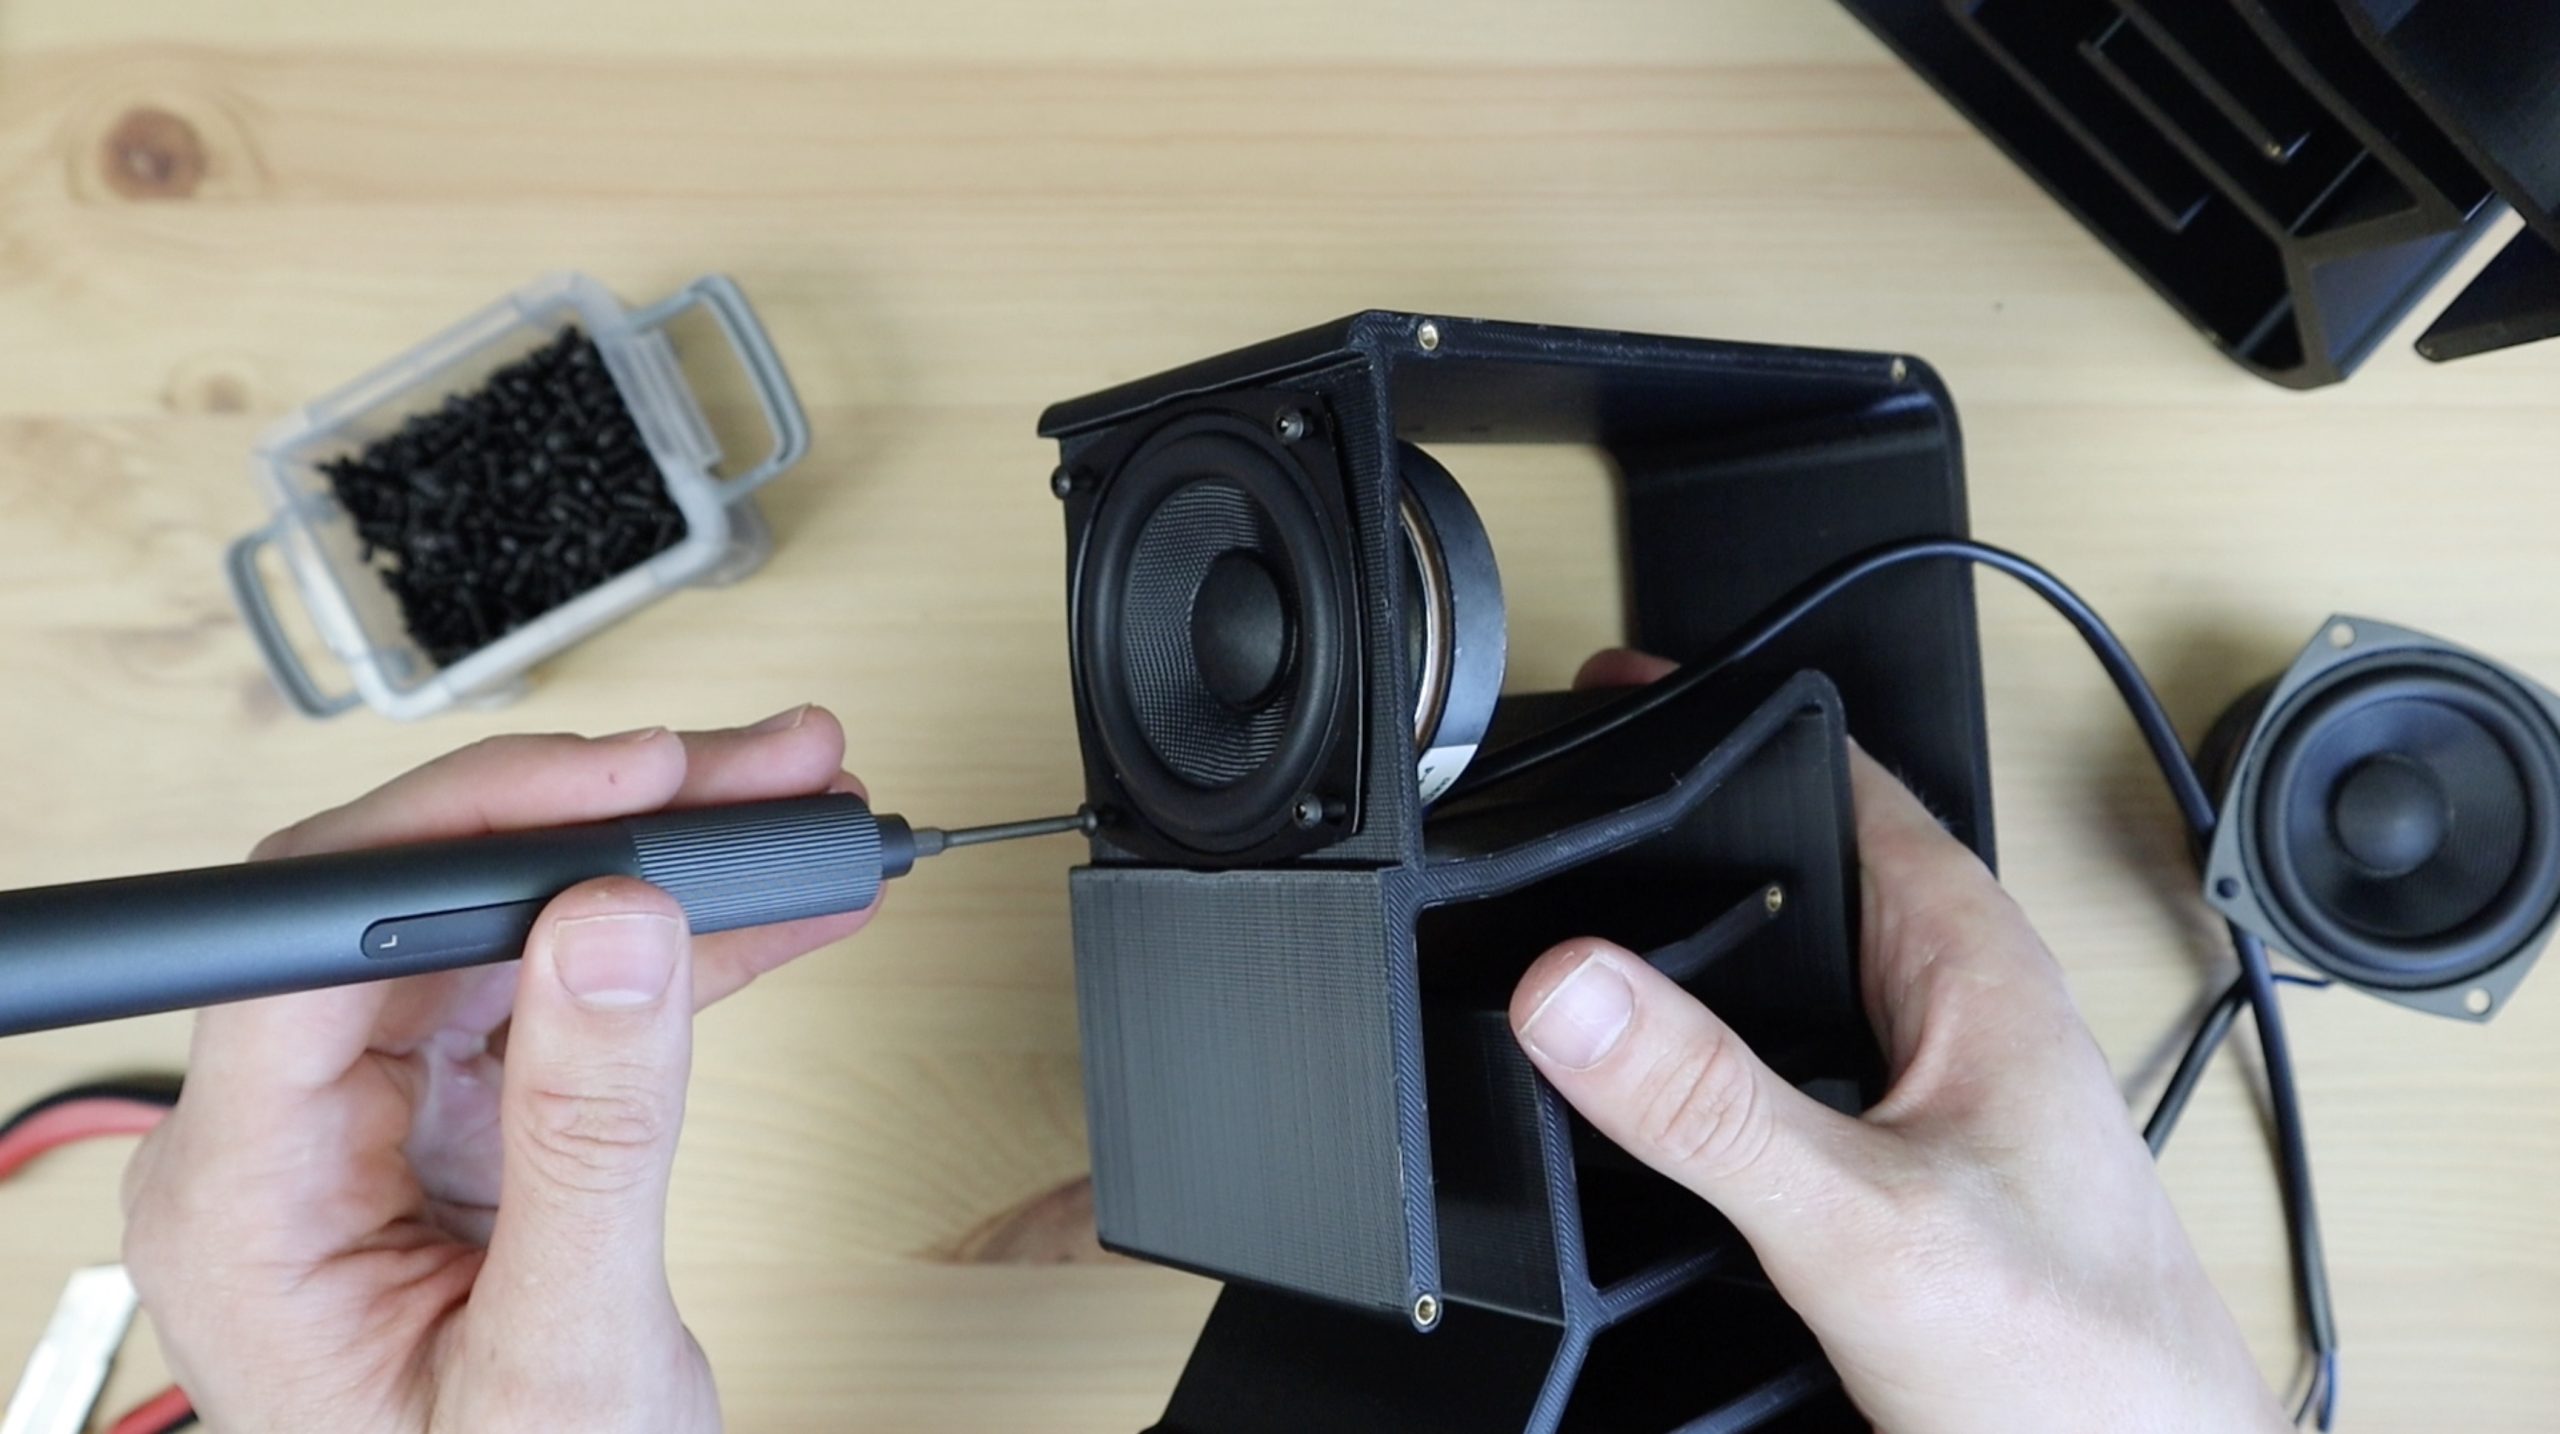
The inner acrylic side panels can then be installed on the housings, again using some more M3 x 8mm screws.
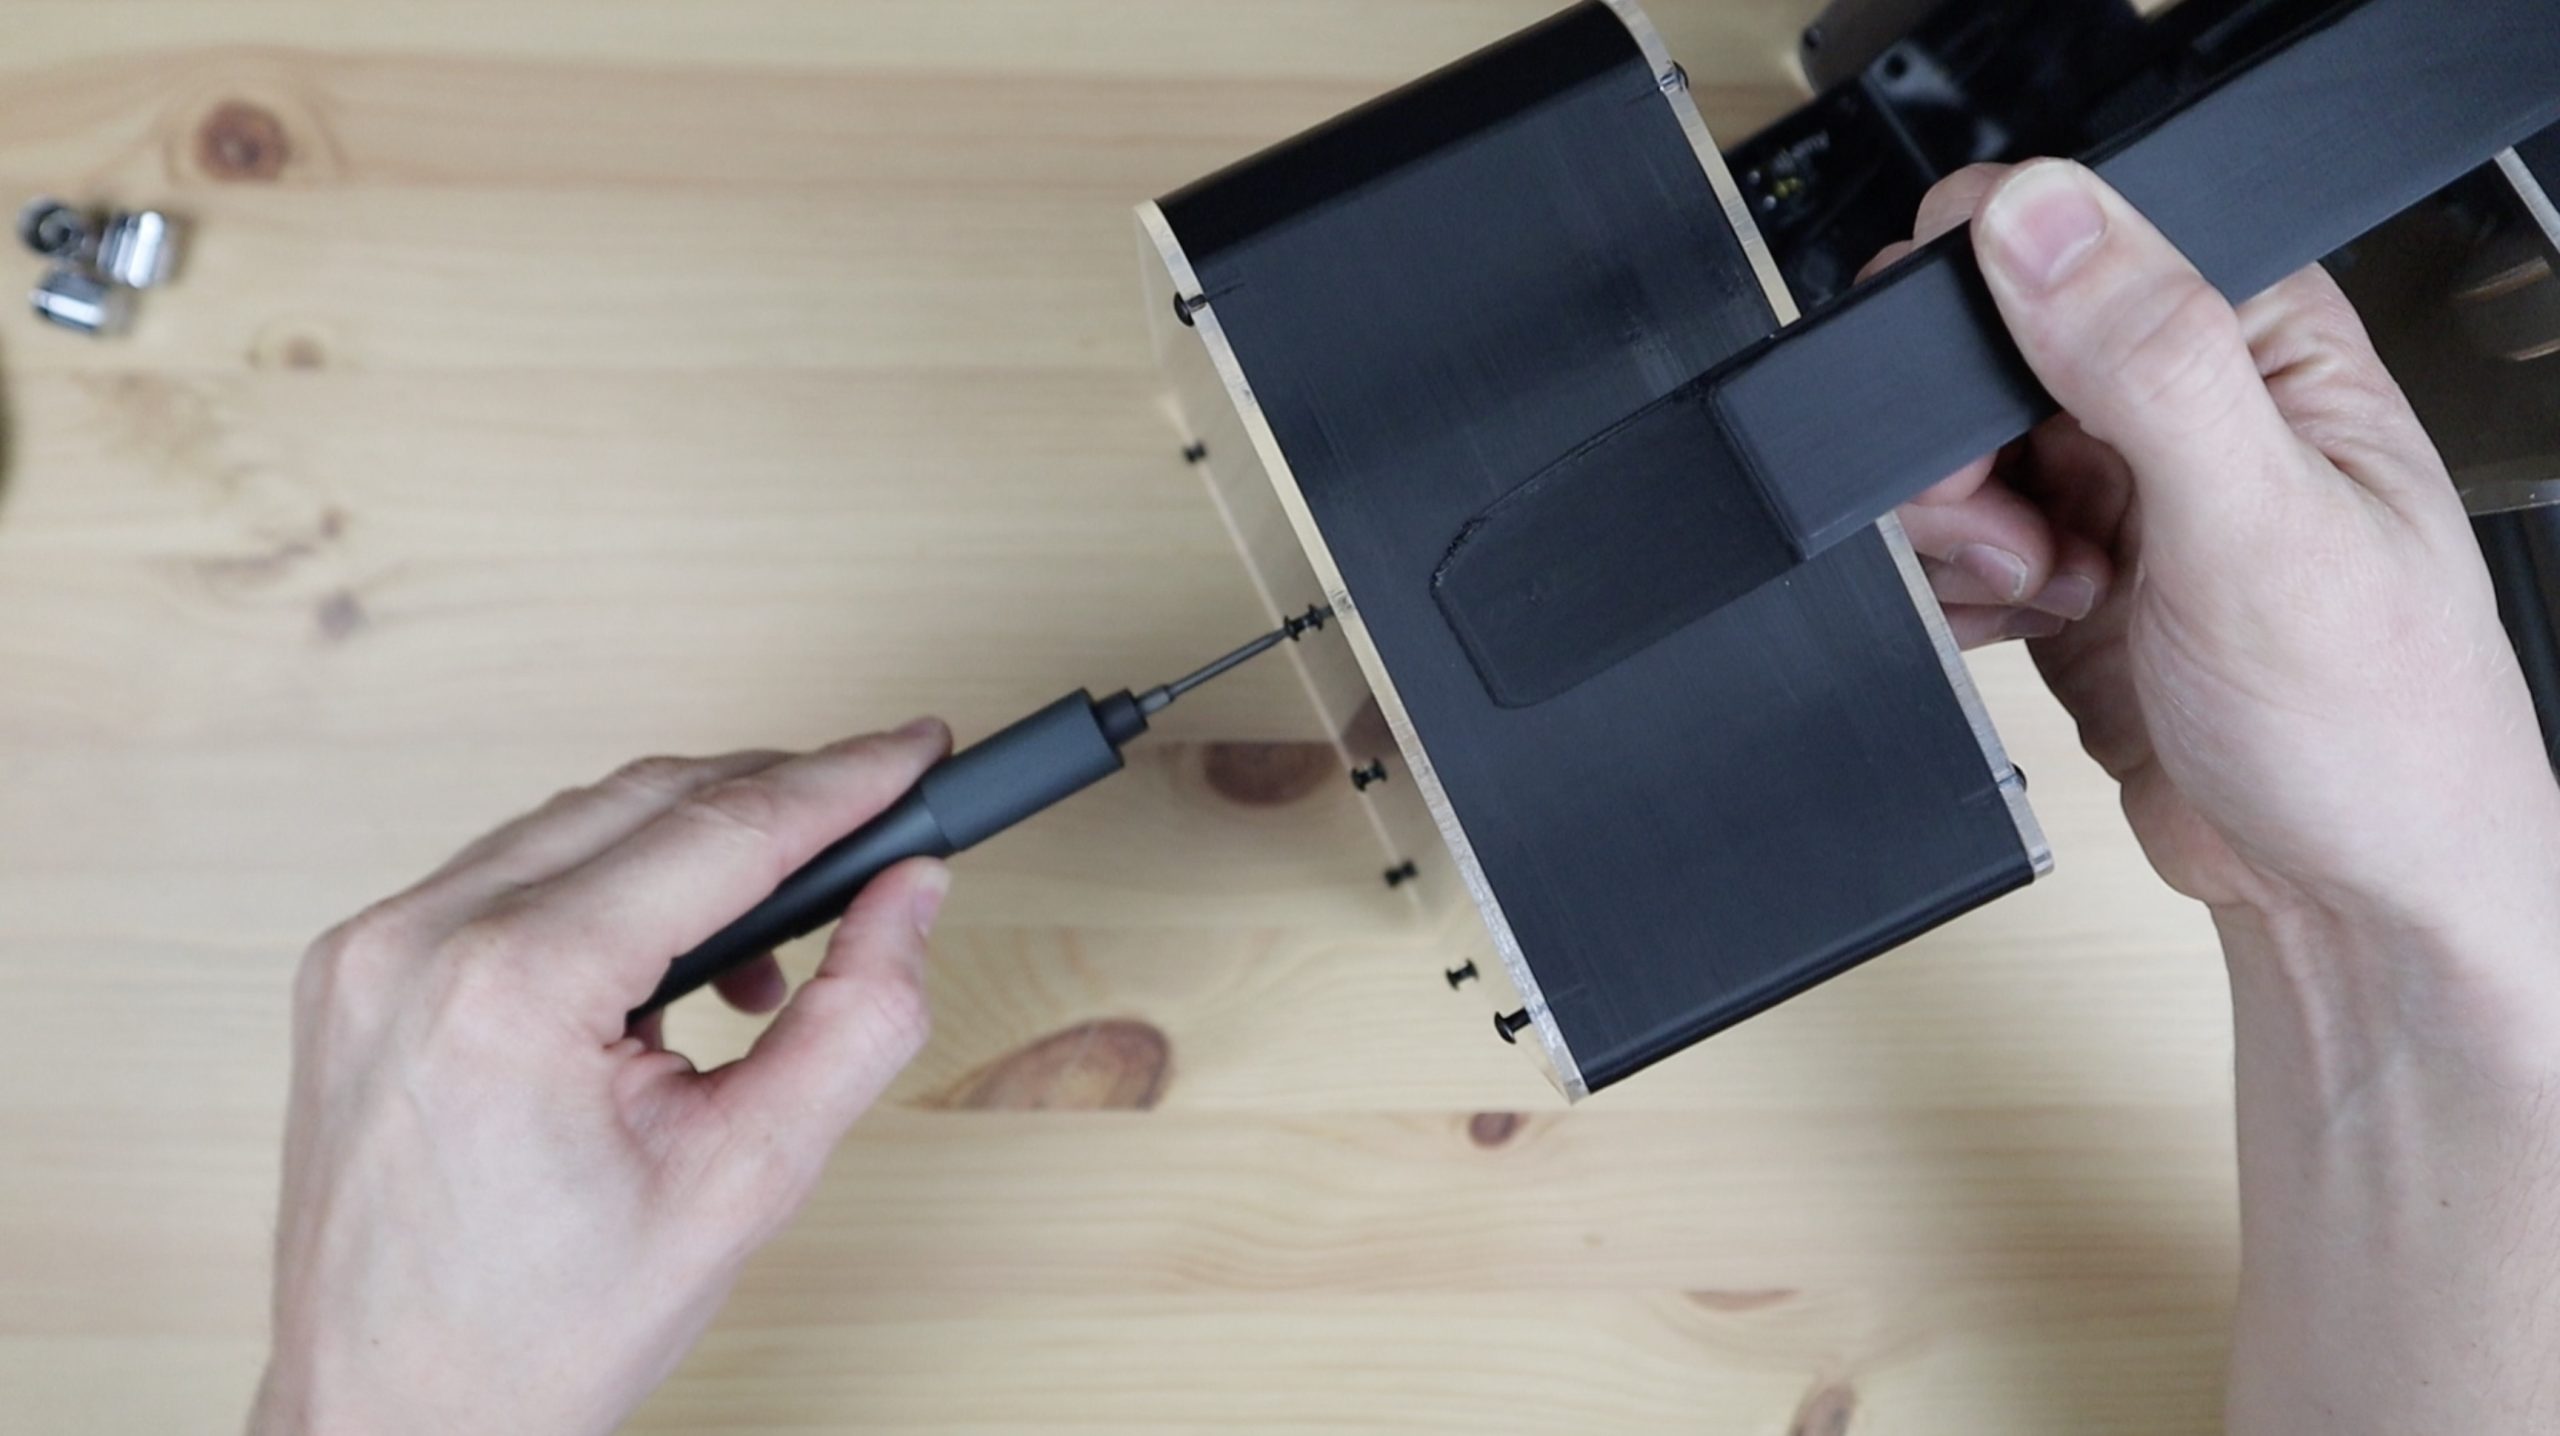
We can then mount the amplifier housing between the two speaker housings. For this, I’m going to use slightly longer M3 x 12mm screws.
There are two holes in each speaker housing that feed through the 3D printed bracket at the bottom and through the clear acrylic cover to screw into the threaded insert in the amplifier housing.
Then we can install the handle on top of the speaker to provide some additional support and a place to carry the speaker around. This is a bit tricky to get the screws into from inside the housing, but you can get a hex key into the space to tighten them. I used M3 x 8mm screws for these as well.
Now let’s hook our speaker drivers up to the speaker outputs on the amplifier. These just hook up to positive and negative in the same way they’re connected to each driver. I tinned the ends of the speaker wires first before I screwed them into the terminals.

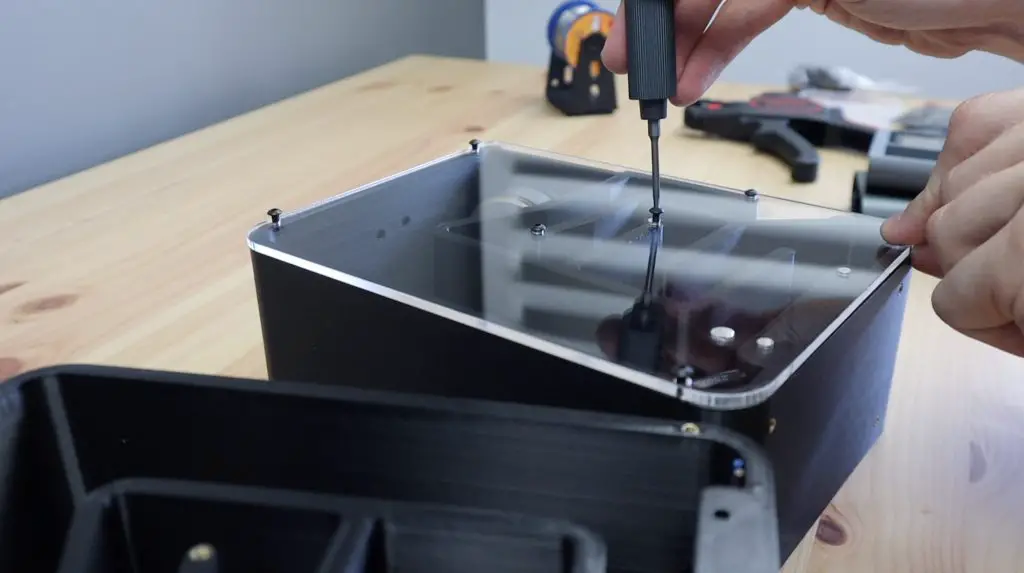
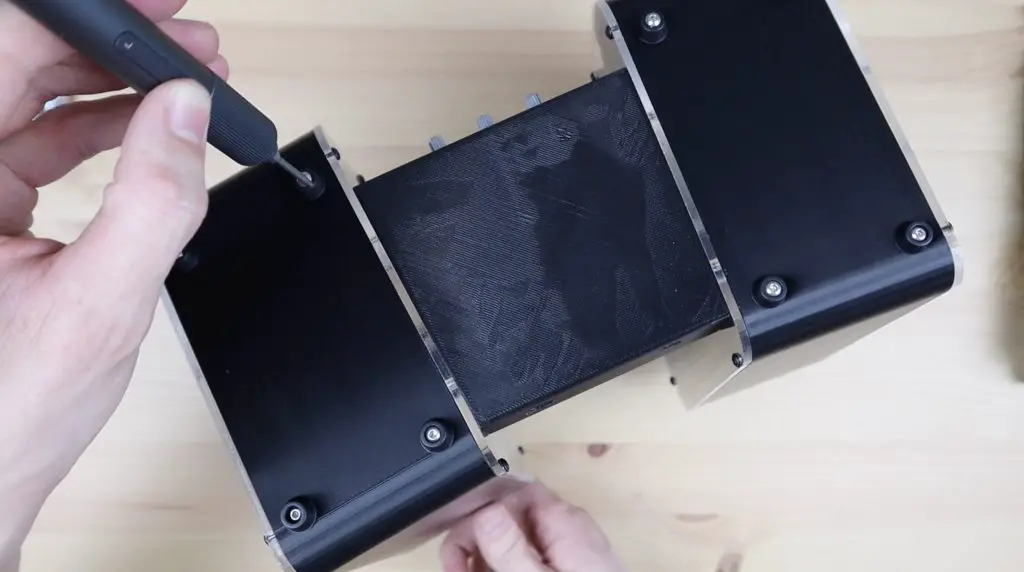
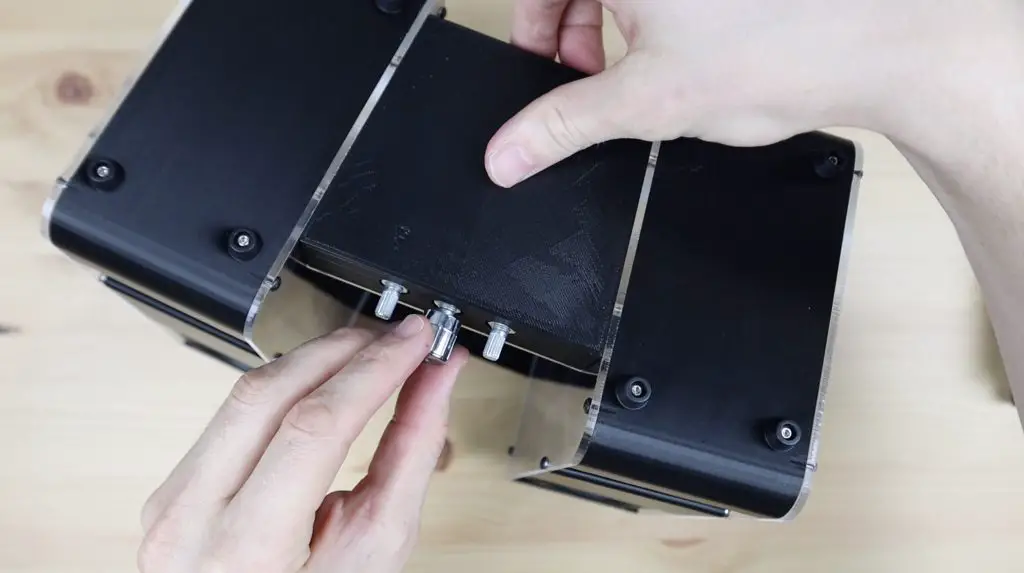
Finally, we can close up the remaining covers with some more M3 x 8mm screws.
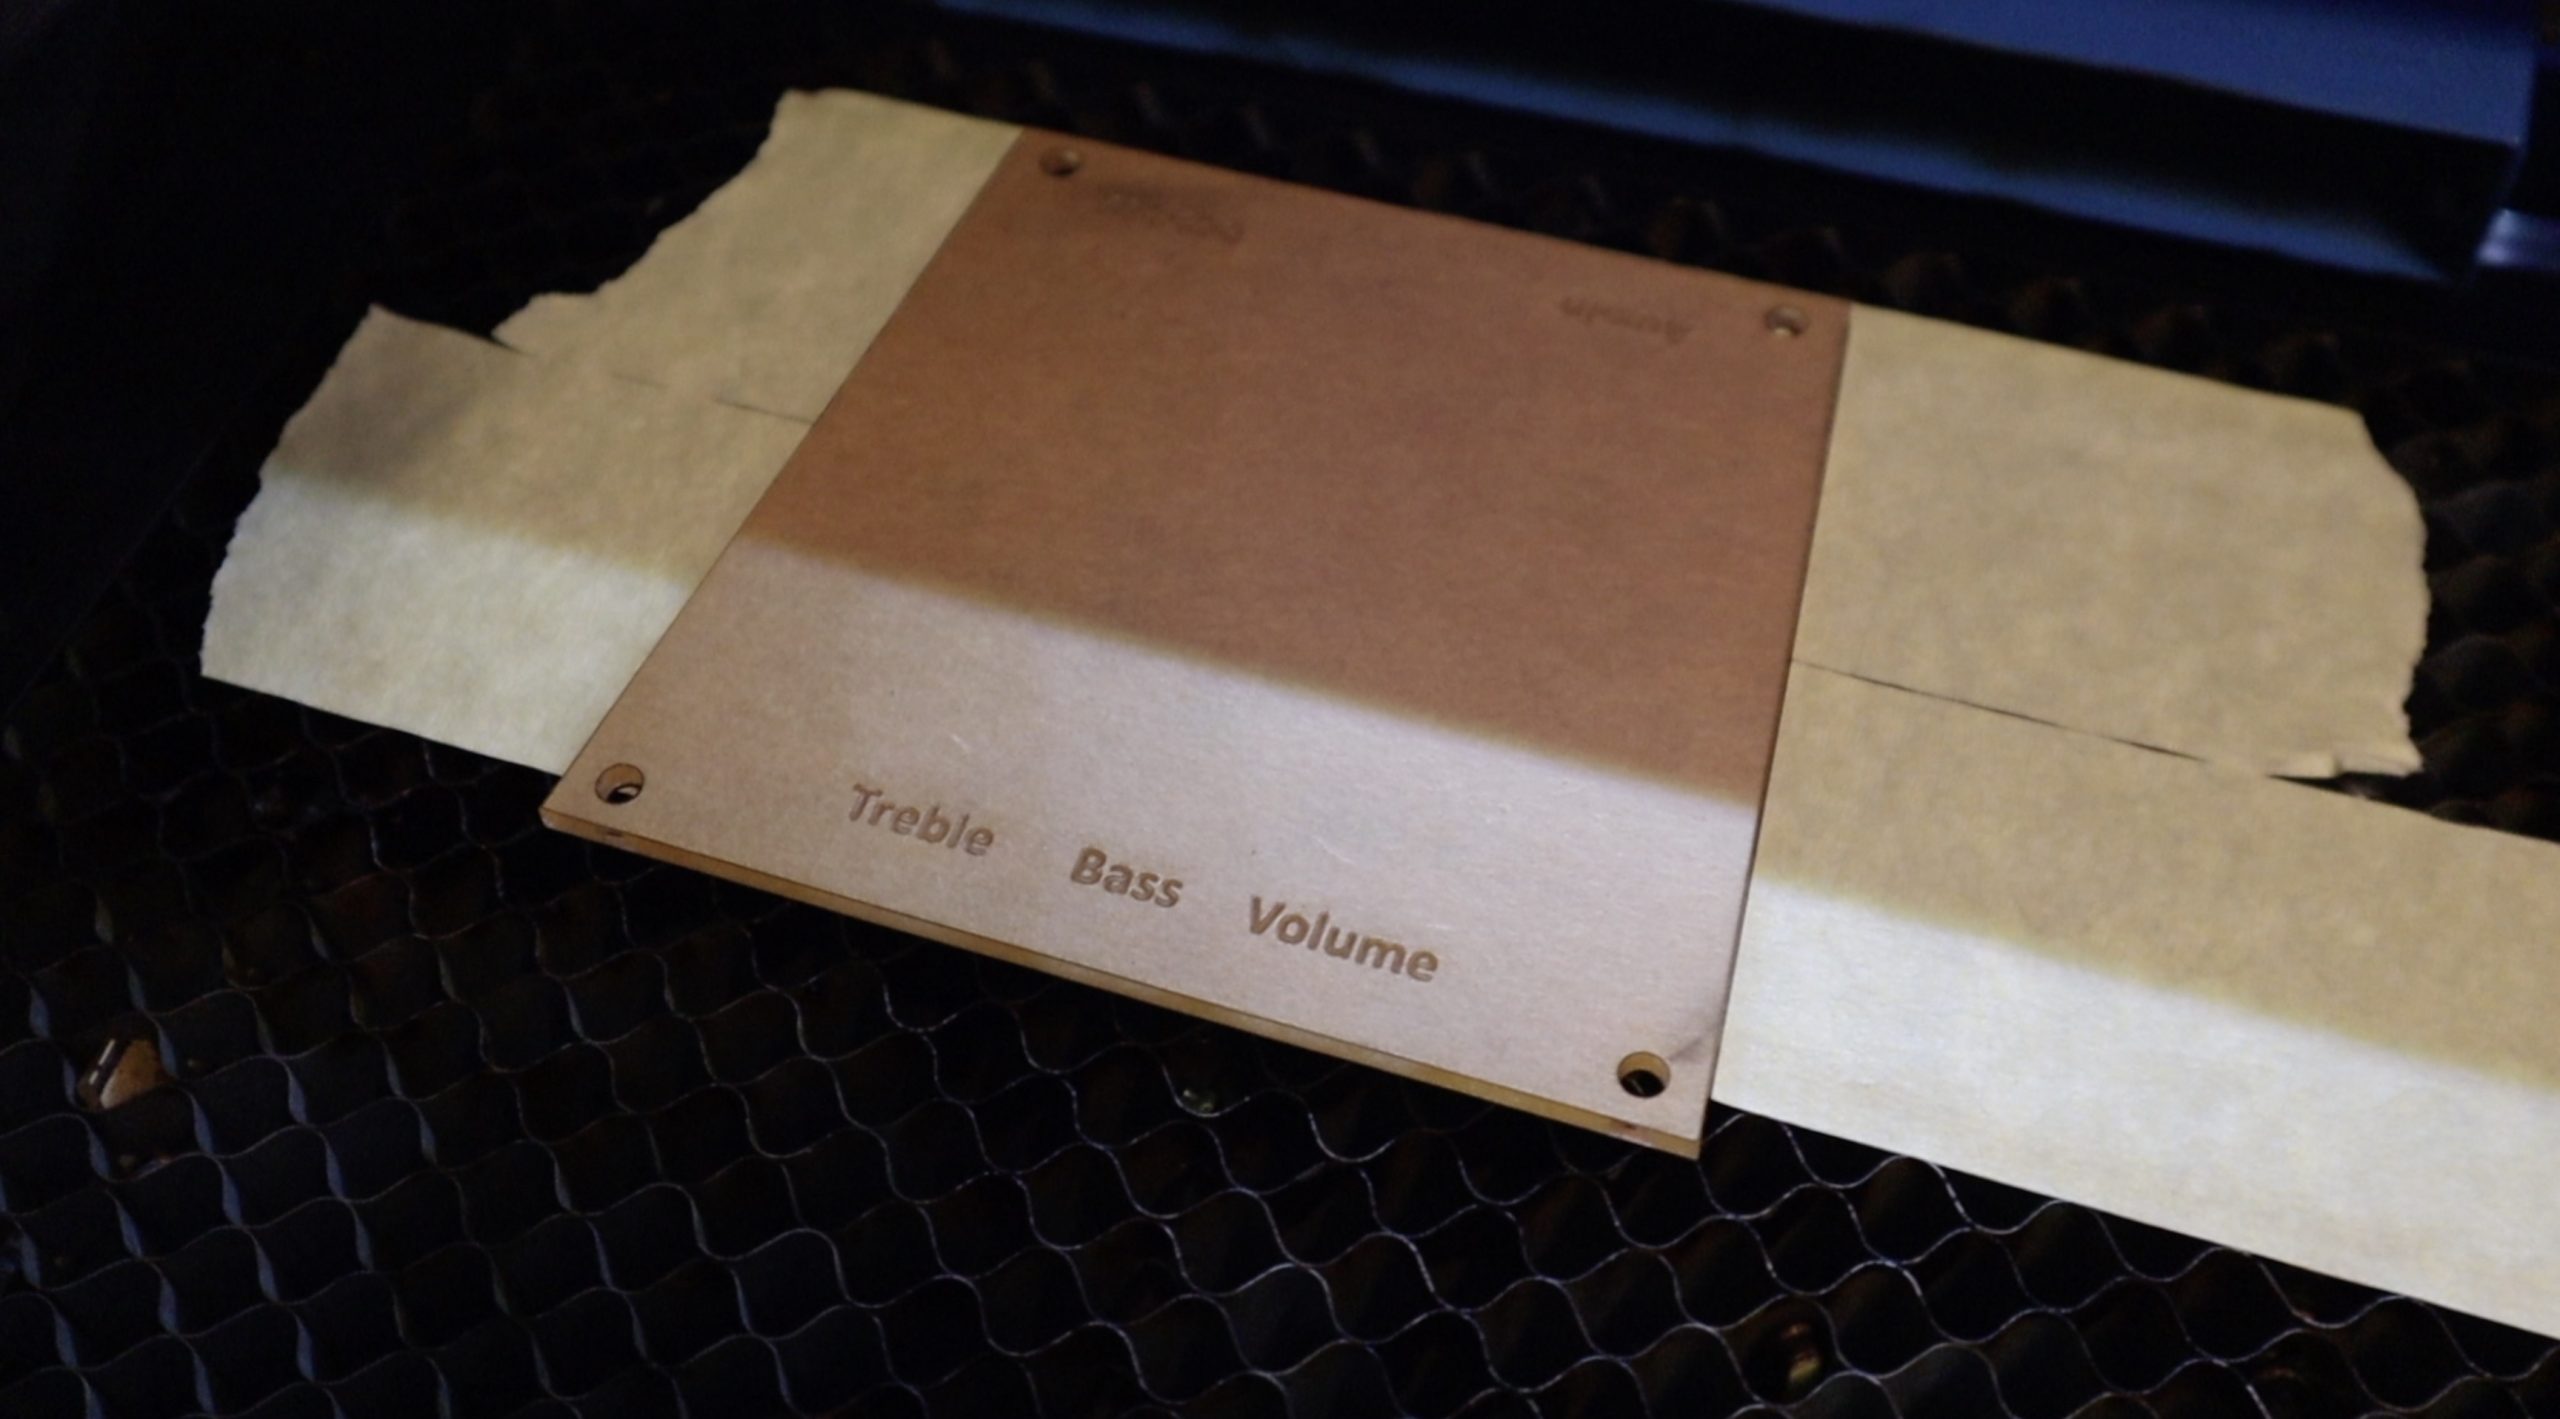
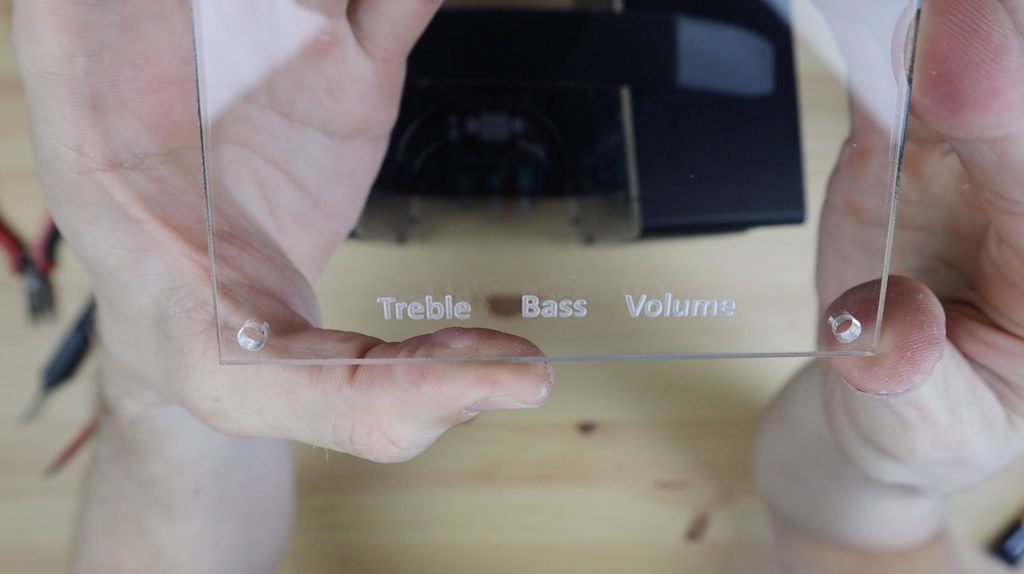
I really like how the engraving has come out on the amplifier’s cover.
I’m going to throw some soft fabric into the bottom of the speaker enclosures as a starting point. You need to do some experimentation with different size materials to try and eliminate as much of the higher frequencies as possible, so this will probably need to be revisited a number of times but should be fine as a starting point.
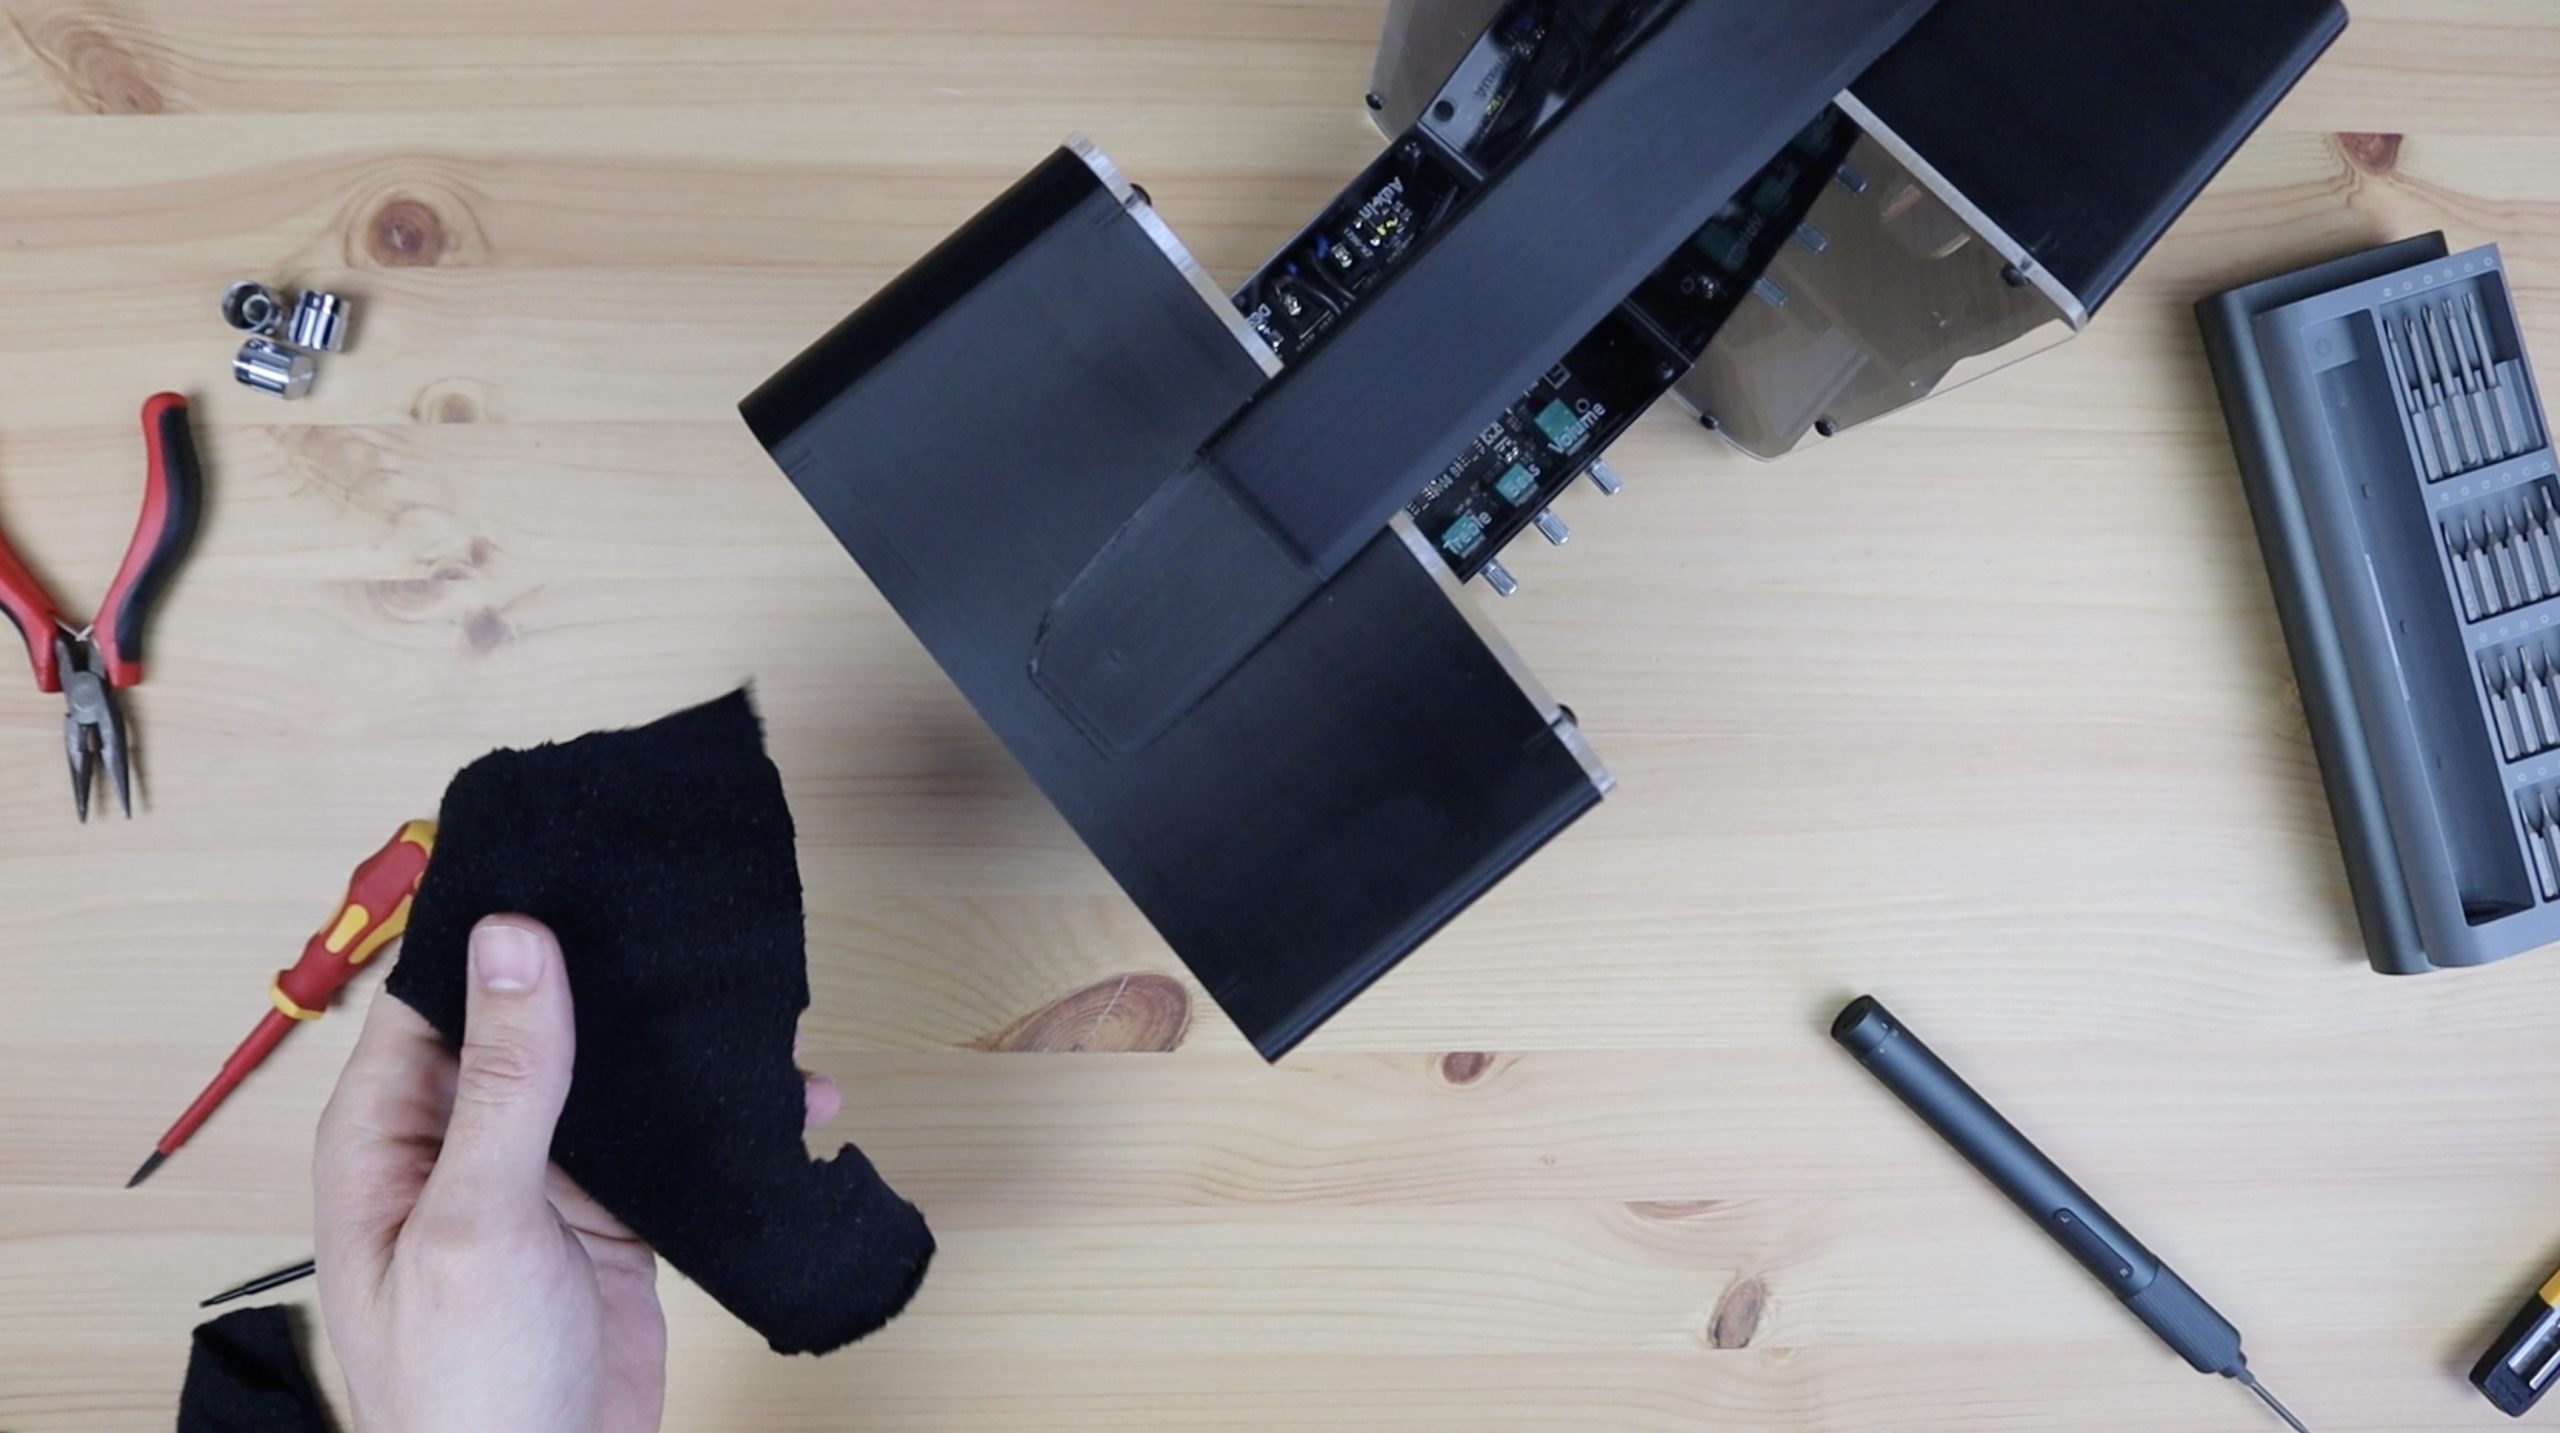
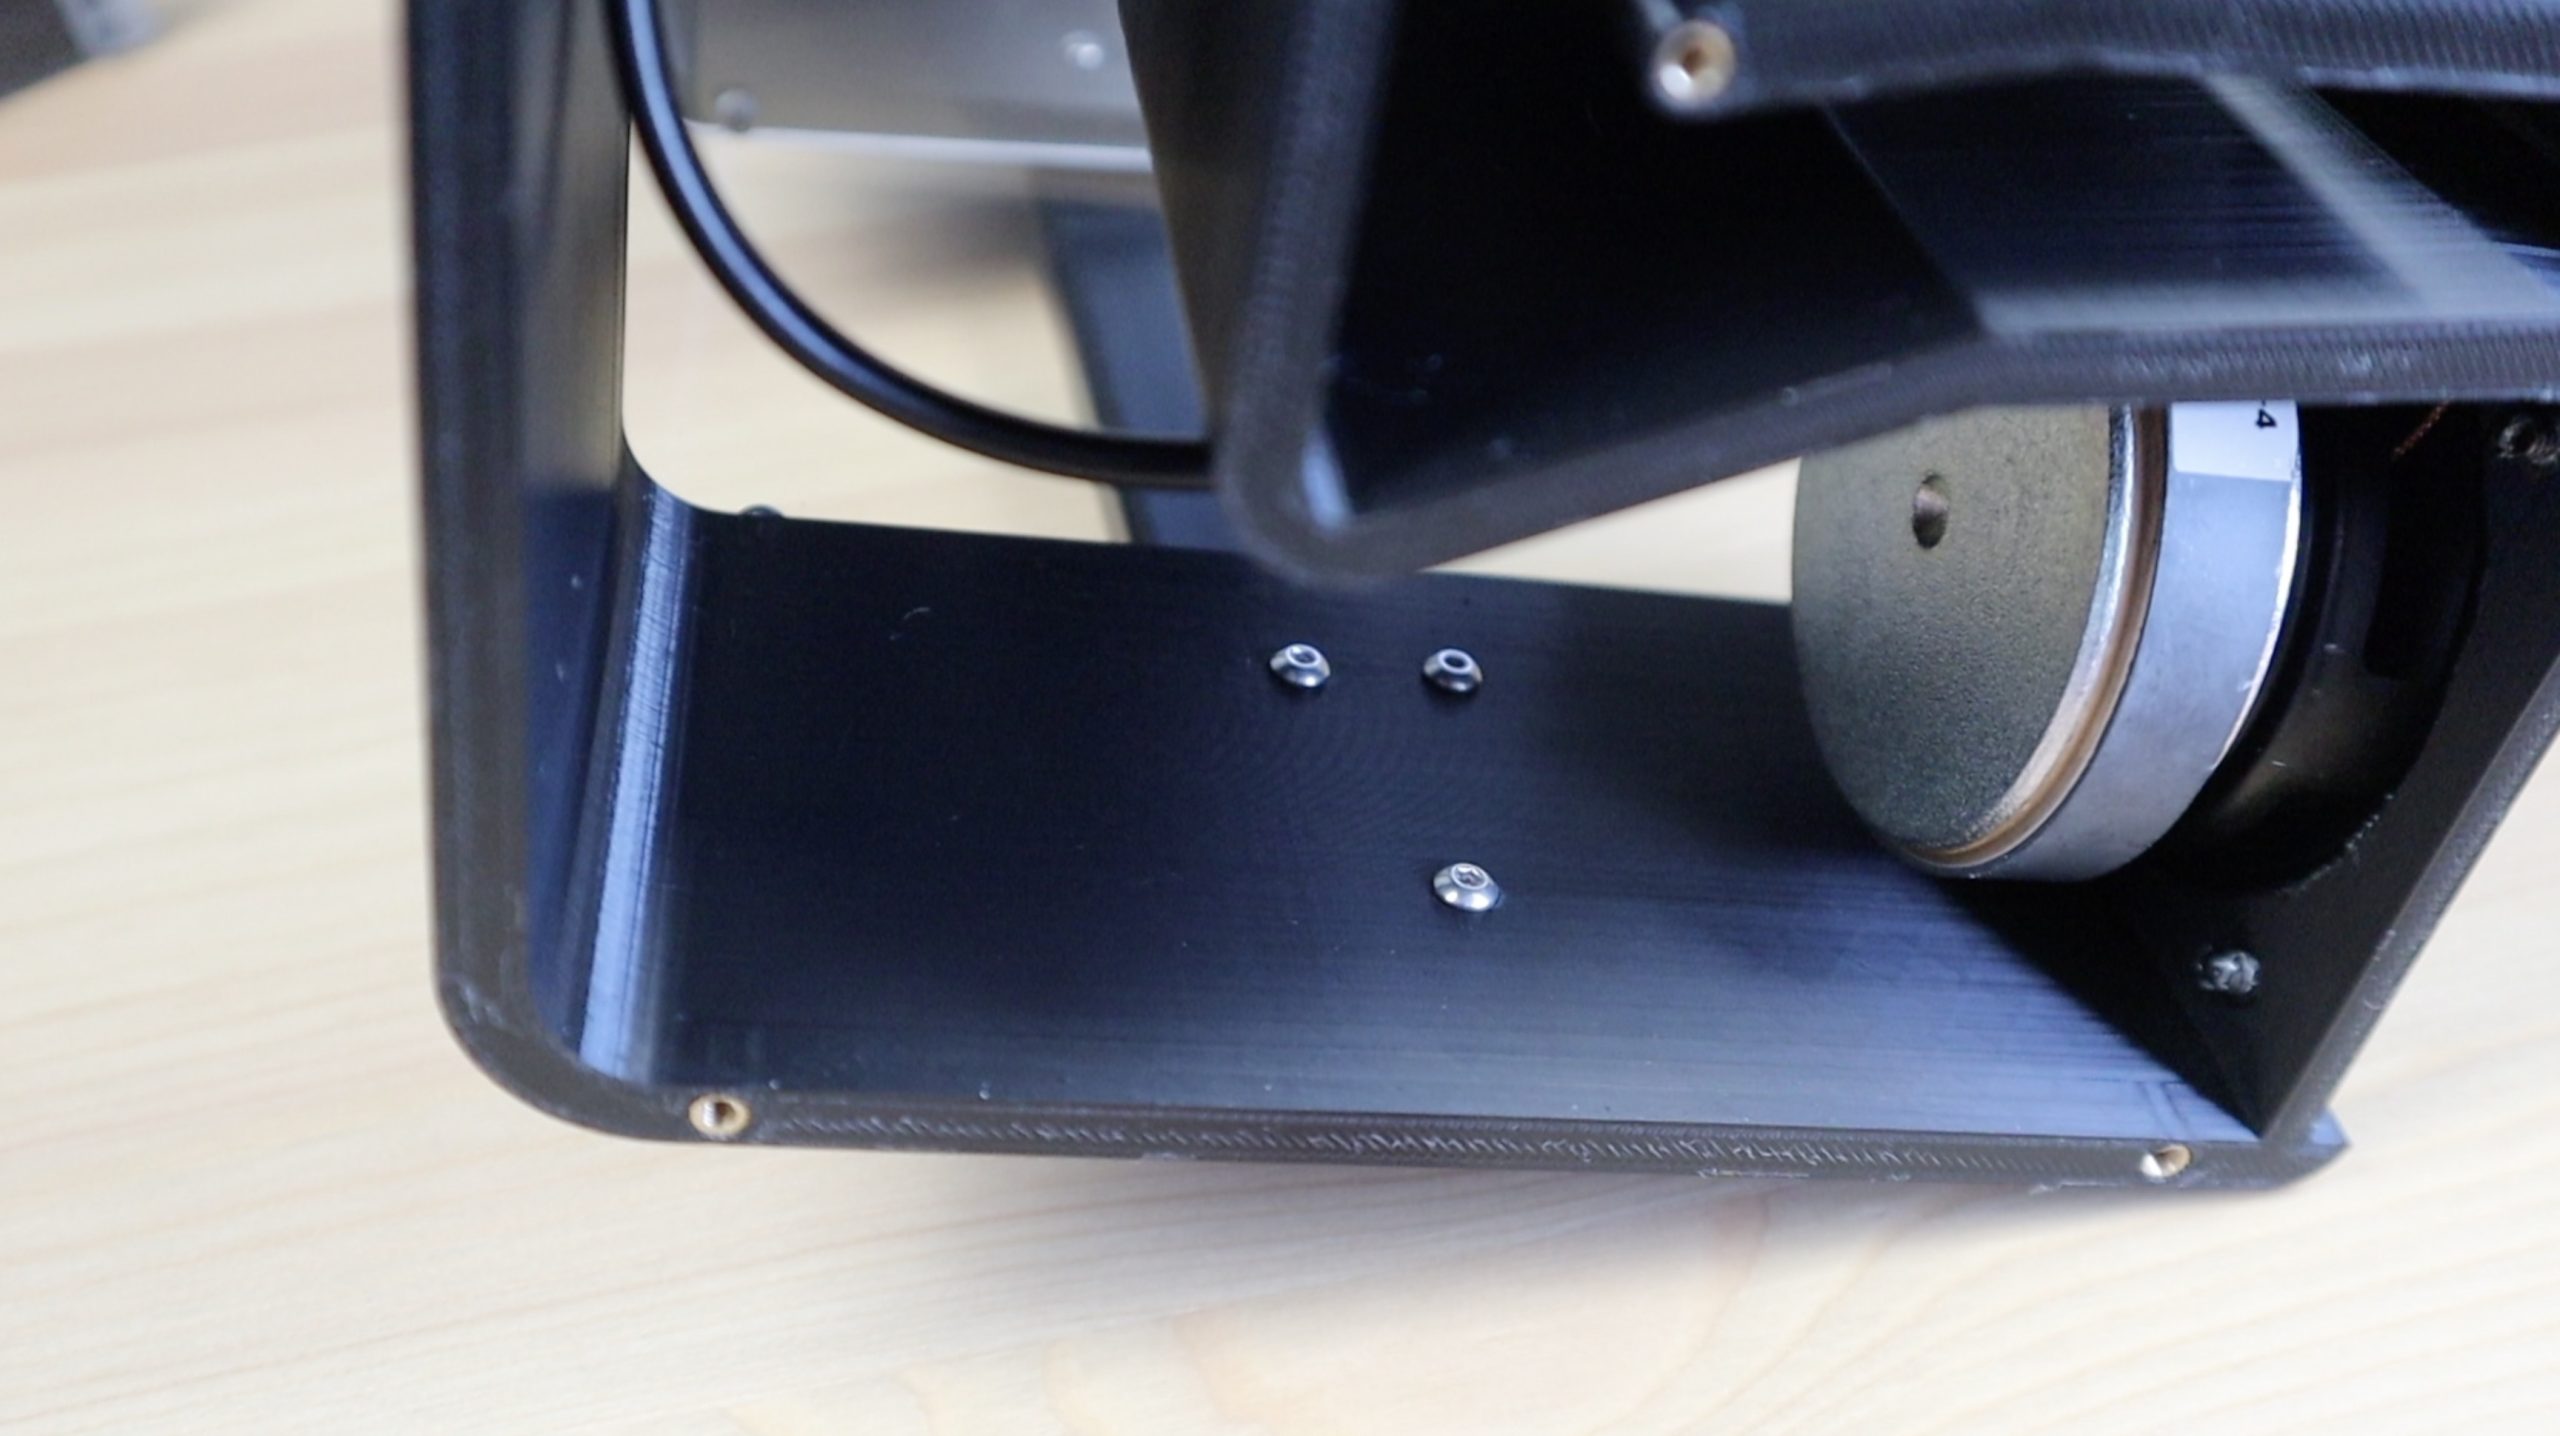
To finish it off, I’m going to screw 8 rubber feet onto it so that it doesn’t vibrate on the surface that it’s placed on. These are also held in place with some M3 x 8mm screws – don’t screw these on too tightly or you risk bursting through the inside of the speaker housing.
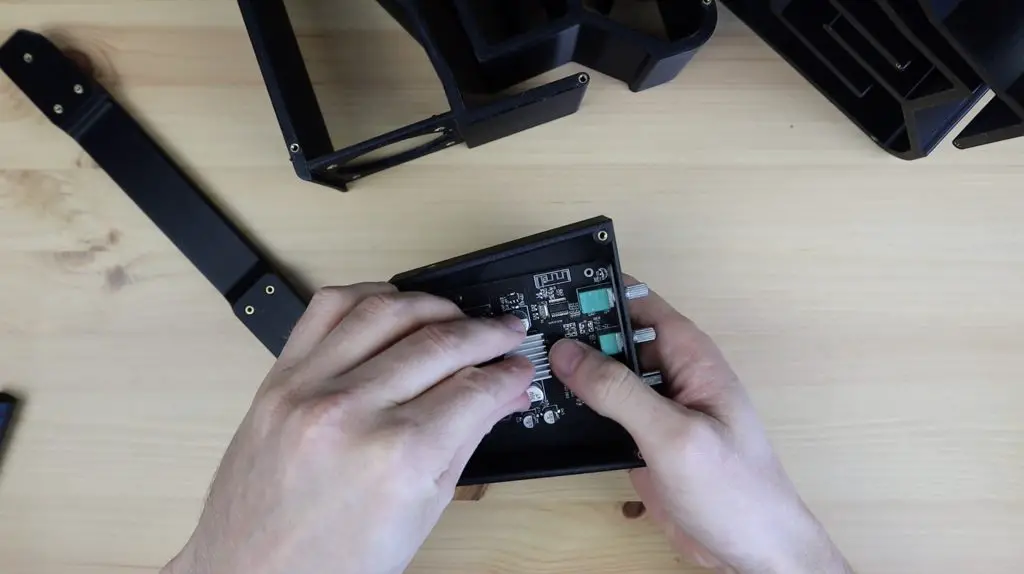
Then we can press the silver knobs onto the amplifier’s controls.
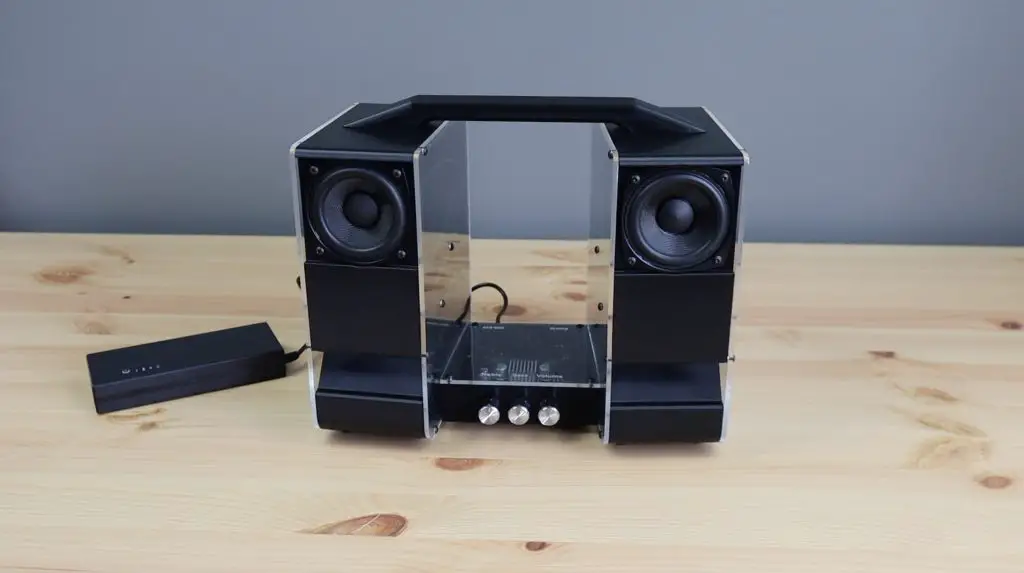
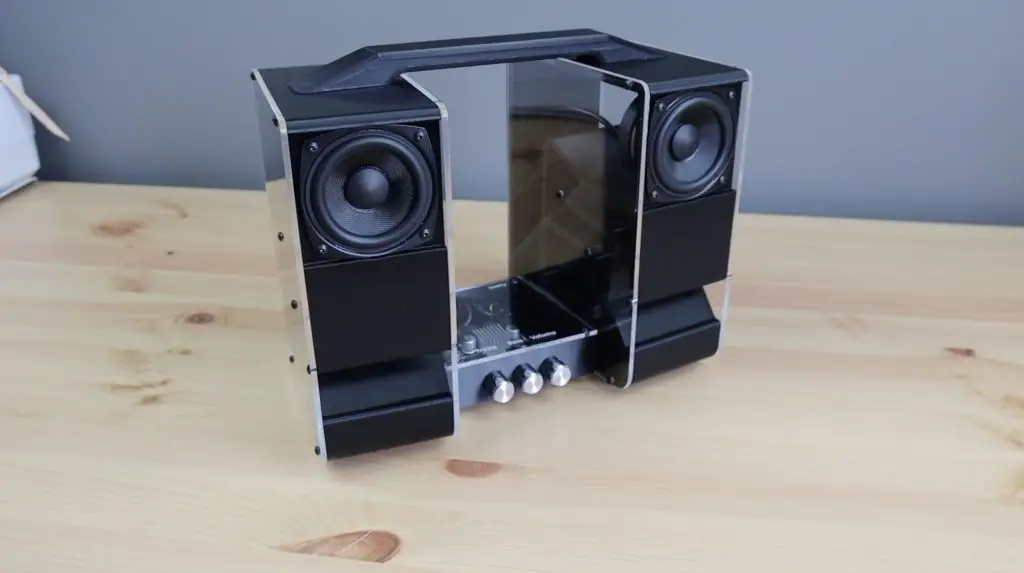
And that’s our speaker complete. All that’s left to do is to plug it in and try it out.
Testing Our New 3D Printed Bluetooth Speaker
I have to admit that I didn’t have particularly high hopes for this project when I started it, I’ve got very little experience with audio projects and everything I’ve done here is based on a few hours of googling, but I’m actually quite impressed with the final product. There is definitely some room for improvement and I’ll play around with different materials within the speaker as well, but I’m really happy with this as a starting point.
Have a listen to the audio at the end of my build video to hear it for yourself. It’s obviously difficult to convey the sound well through a video and audio recording, but you can get some idea of what it sounds like and what its limitations are.
To make the Bluetooth speaker portable, we just need to put the UPS in line with the power supply for an hour or so to charge and we can then unplug the power cable to use it.
The controls on the amplifier are great for tuning it to the type of music you like to listen to and your listening preference.
Final Thoughts on the Bluetooth Speaker
Taking a look at the cost, the drivers and amplifier cost me $50, the UPS was another $35 for portability and the filament, screws, inserts, feet and acrylic cost me about another $25, so all up the hardware cost of this speaker was about $110. In terms of time, it took me about 30 hours in total to research, design and build the speaker, so even at minimum wage here in Australia, that is about another $450.
So if you’ve got time on your hands, $110 for the hardware is quite good value for money, but you can definitely get something a lot better than what I’ve built if you value your time.
I’m really happy with the finished product and I’m looking forward to using it in my workshop.
Let me know what you think of my Bluetooth speaker design in the comments section below.
I feel like I might look at adding a bass driver to the void in the middle of the speaker as an optional add-on in future, so let me know if you’ve got any suggestions for that.
I dig your YT channel. A version 2.0 with some of the suggestions plus a Sub woofer mod for the middle void would be awesome!