The last couple of times I’ve done a project involving a laser-cut Pi case, people have asked me to put together an in-depth tutorial on how to design them. So I’ve prepared this tutorial using an open-sourced software package called Inkscape to do just that.
Inkscape is a free vector-based graphics editor that is available for Windows, Mac and Linux, so you can even run it on your Raspberry Pi. If you don’t have it installed already, visit their downloads page to download it for your device.
This tutorial is going to focus mainly on the design of the case, so I’m not going to go into much detail on how to use the basic functions of Inkscape. There are loads of guides and tutorials for this already, so it’ll be good to be somewhat familiar with the package to start.
Once you’ve got Inkscape installed on your device, grab your Raspberry Pi and a vernier or ruler to take measurements from it and you’re ready to start.
Design The Case In Inkscape
Cutting The Case Components Out
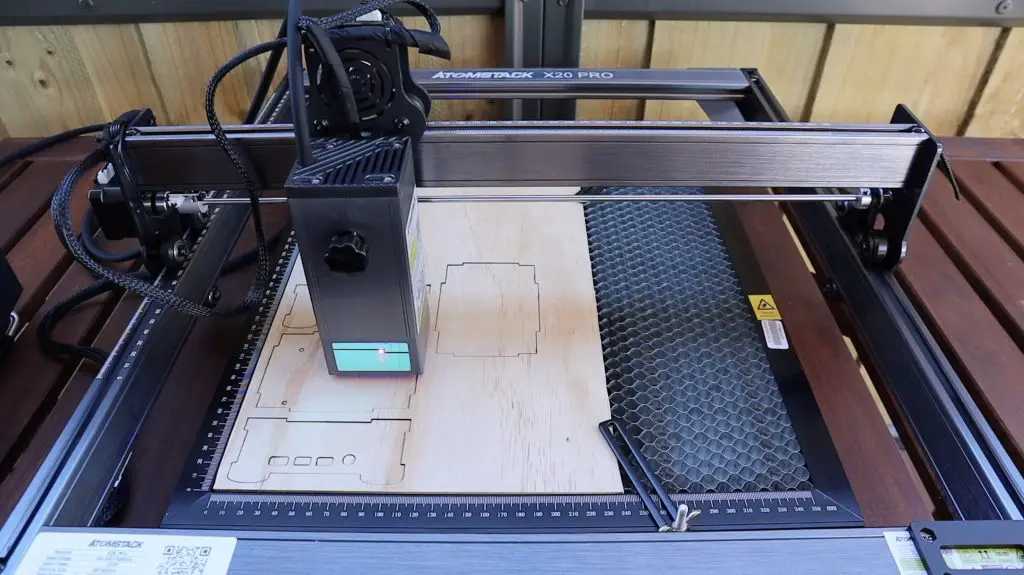
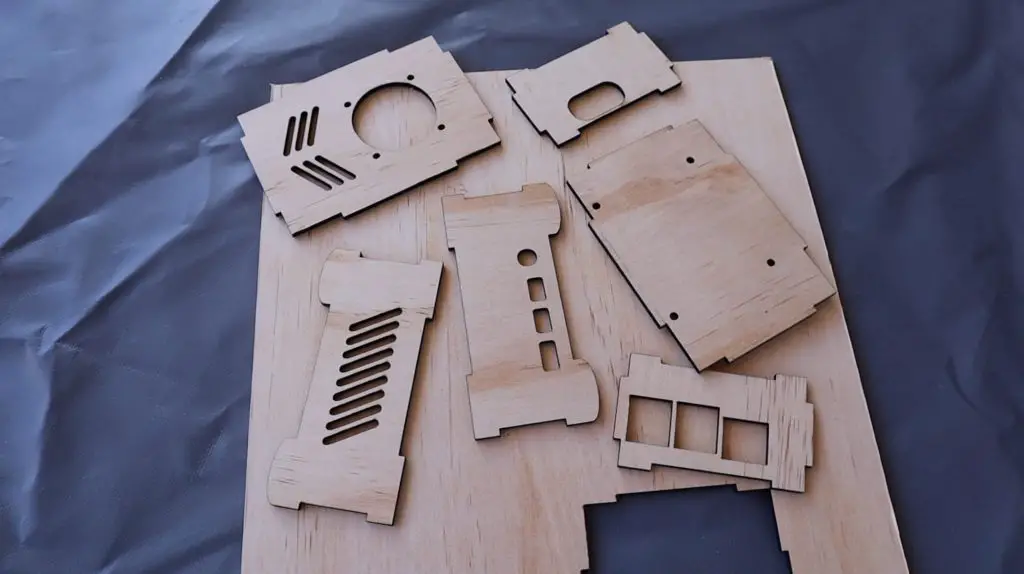
With the case design completed, let’s get the case components cut out and see how it looks.
I’m going to cut these on the Atomstack X20 Pro, this is a fantastic machine for cutting plywood and MDF sheets. The 20W diode is much faster than the 5W and 10W diodes and the air assist keeps the cuts really clean. I use LaserGRBL to control my diode laser machines as it’s easy to use and free.
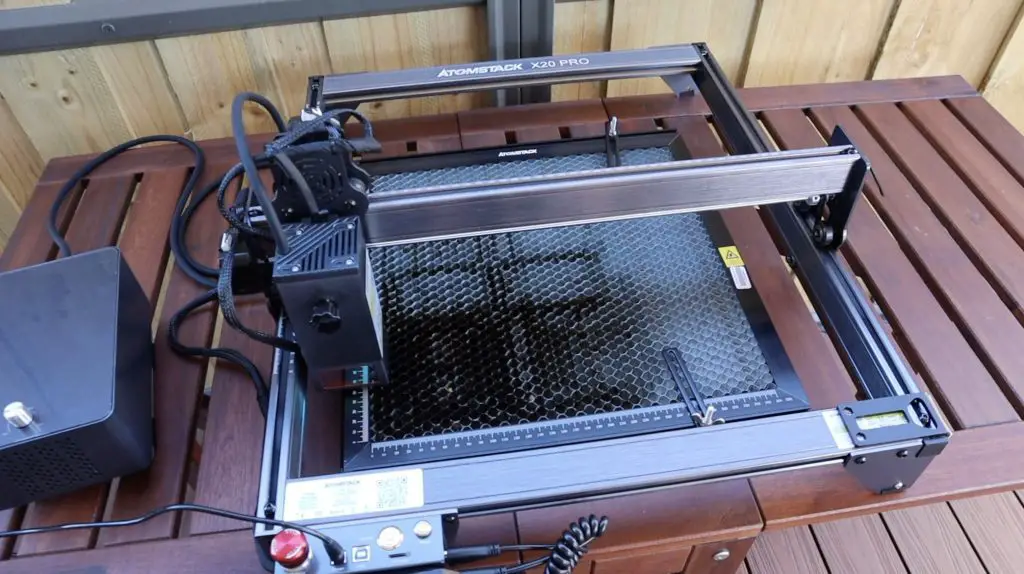
I cut these components out using a speed of 250mm/min and the laser power at 90%.
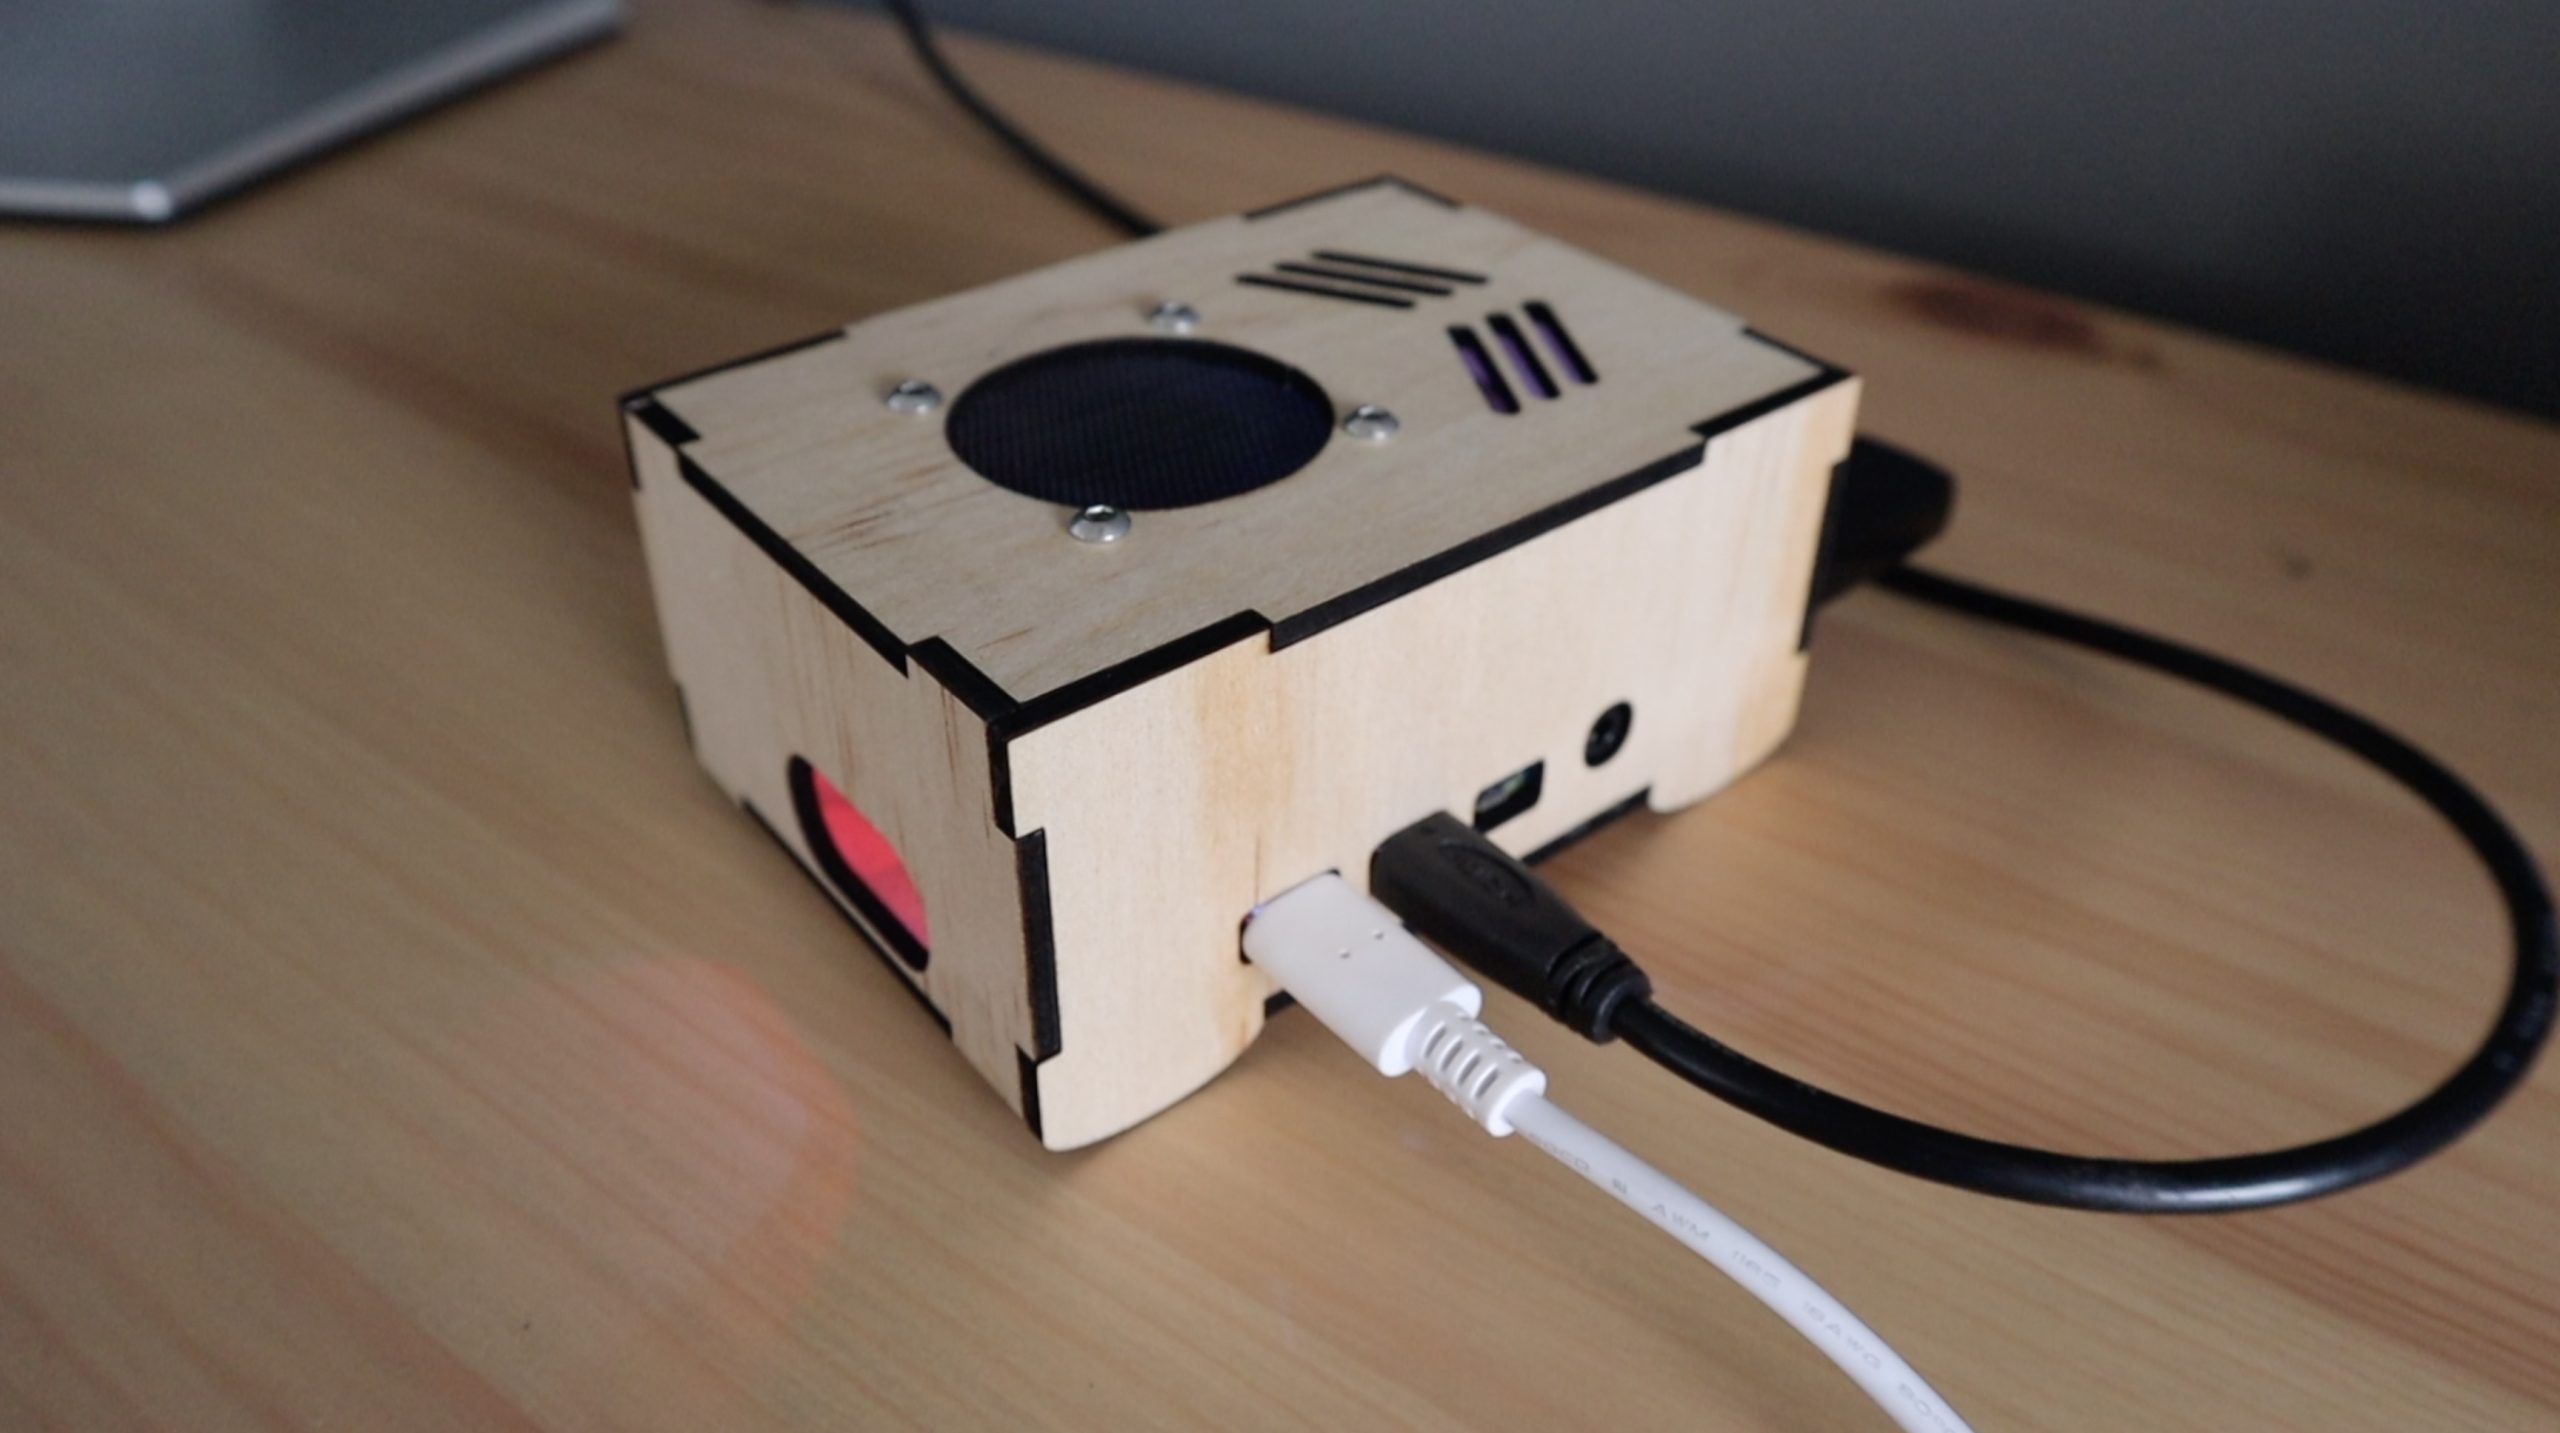
With the components cut out, we can then glue them together. I usually use PVA wood glue and either clamp or tape the components together for an hour or two while the glue dries.
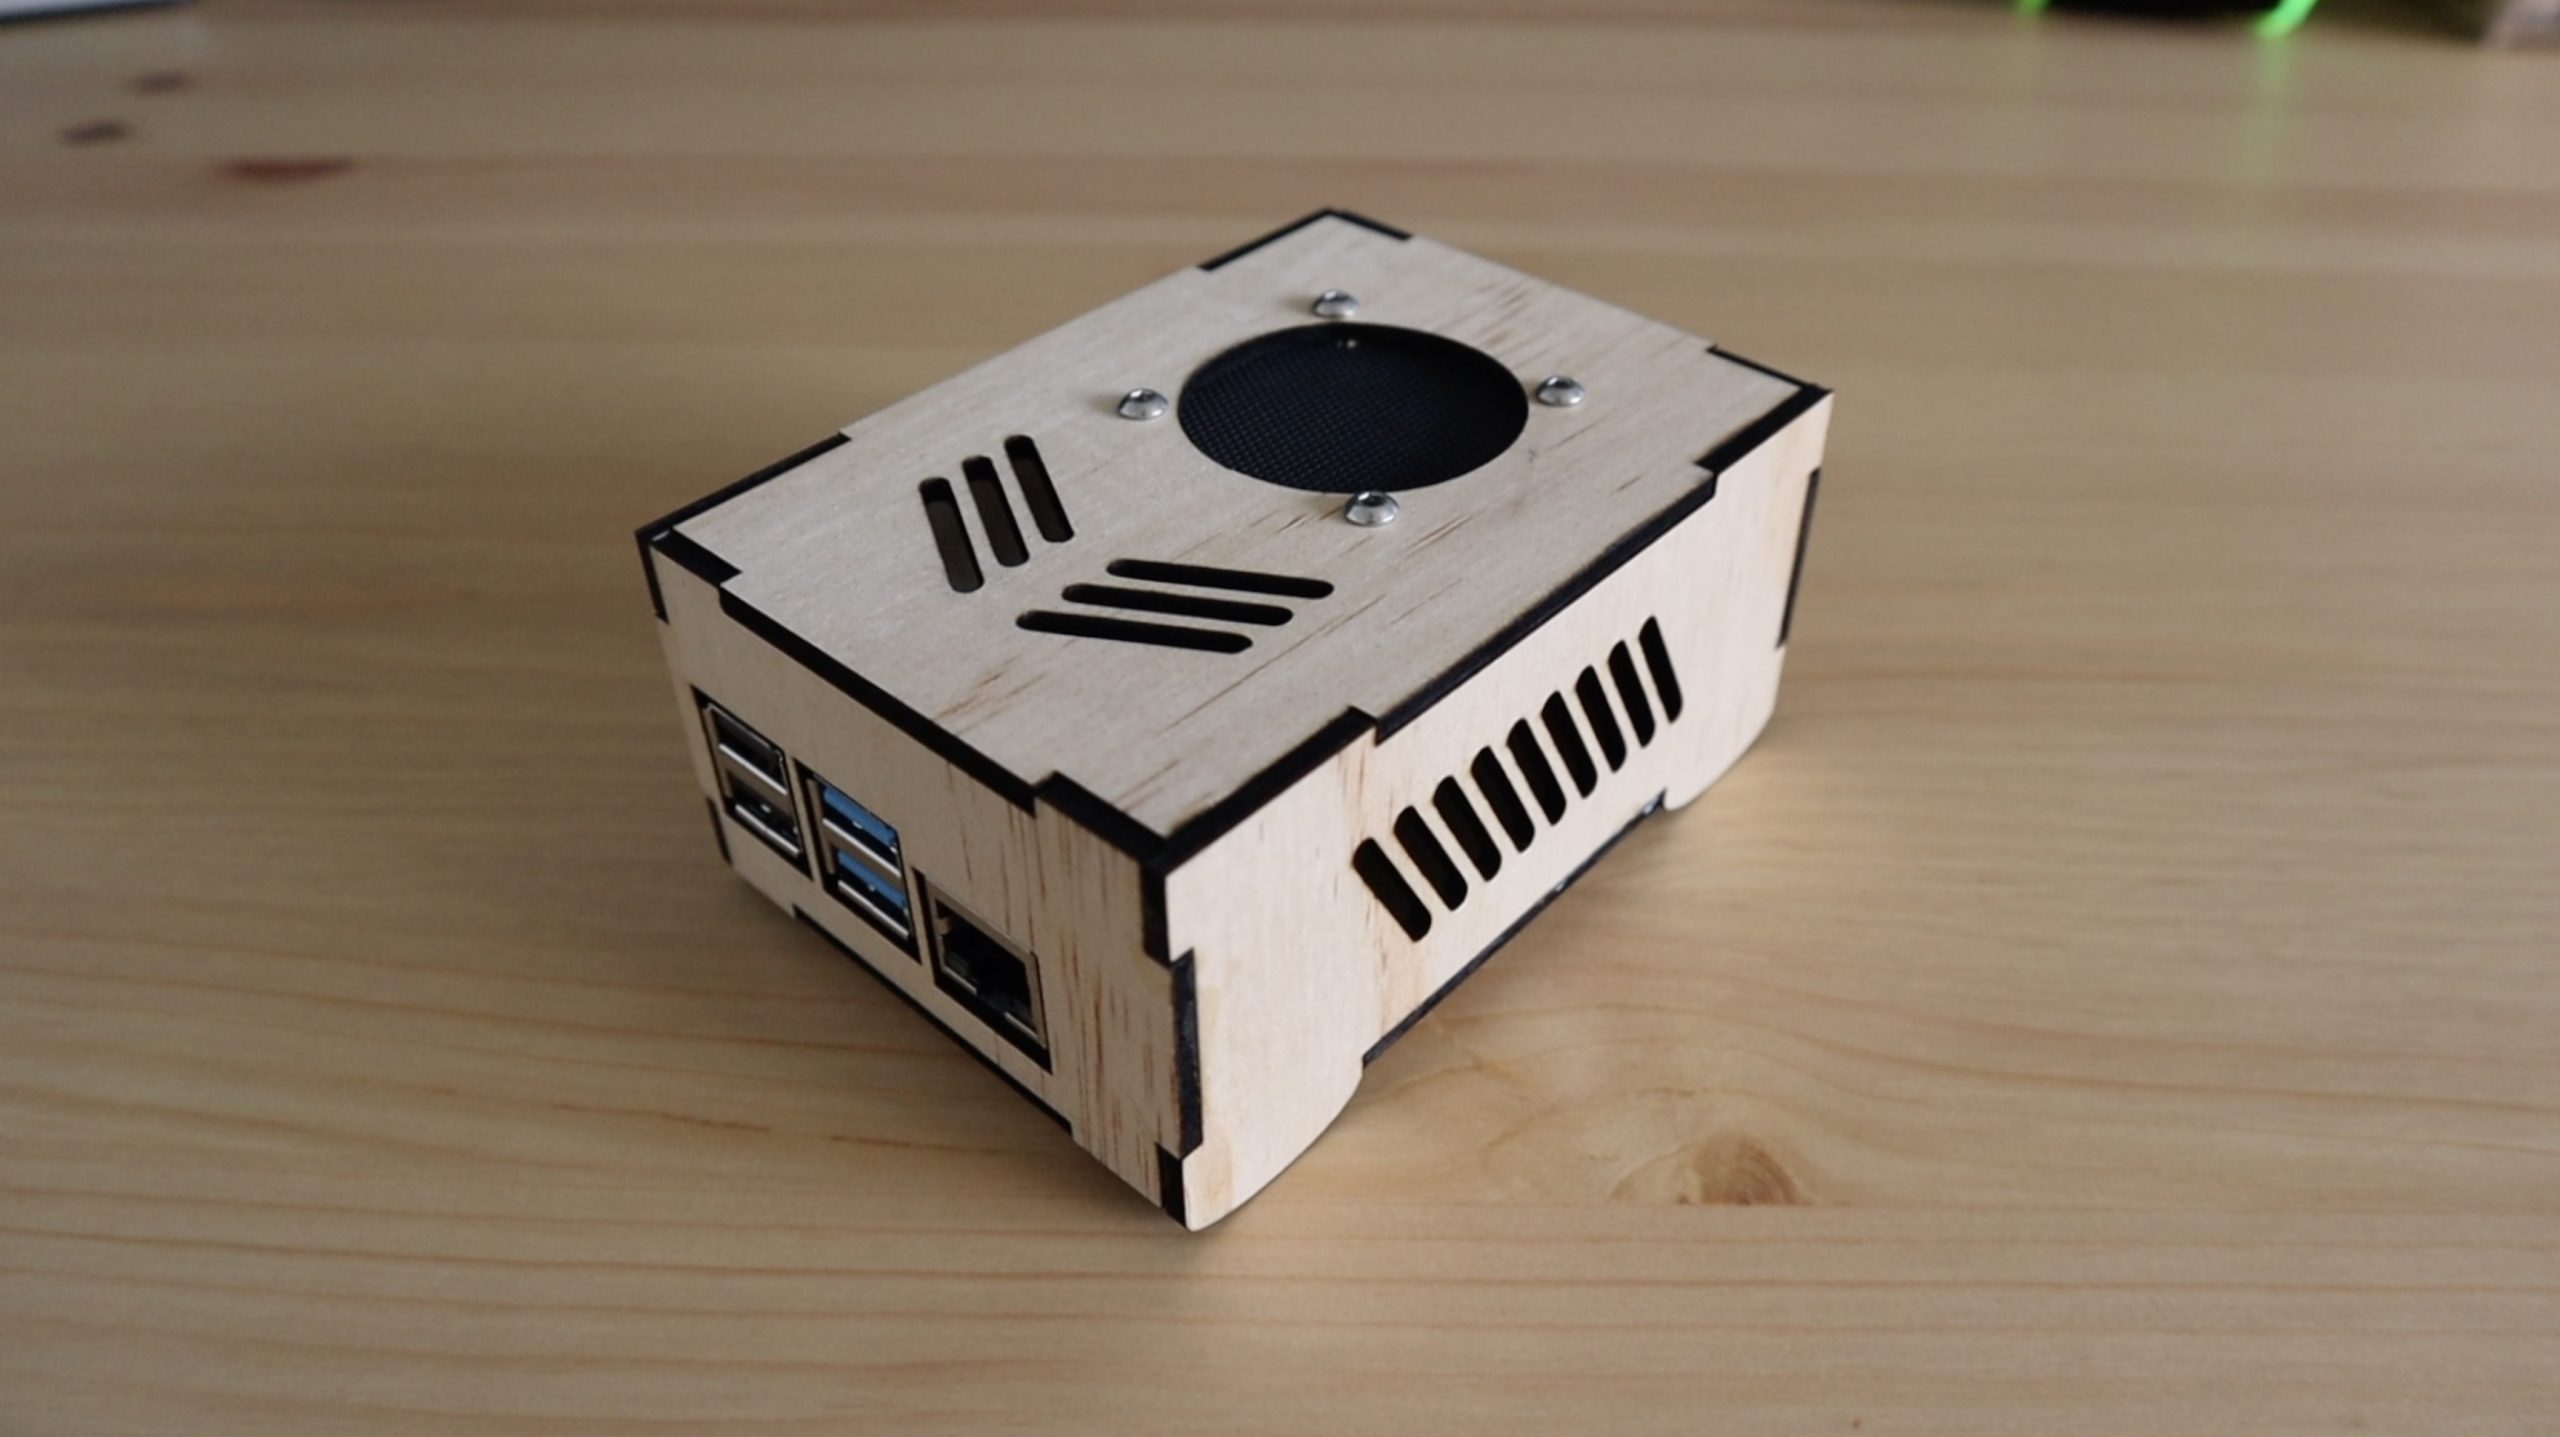
Next install the Pi into the case using some 6mm brass standoffs, M2.5 nuts and M2.5 button head screws. You can also add a 40mm fan to the lid and secure it using the included M3 screws and nuts.
It looks like our Pi fits into our case perfectly.

So now you know how to design and build your own Pi cases using free software and a diode or CO2 laser cutter.

I hope you’ve found this tutorial helpful, please let me know if you’ve got any design questions on the tutorial in the comments section below and let me know if there are any other tutorials you’re interested in.
Is there a donwload link for the actual file?
Great tutorial! I really liked how you broke down the entire process—from taking measurements to designing in Inkscape and finally assembling the case. It makes the whole workflow feel approachable, especially for beginners who want to try laser cutting for practical projects. The inclusion of real cutting settings and assembly tips adds a lot of hands-on value .
It’s a great example of how digital design can be turned into a functional product, and it clearly shows the potential of combining design tools with fabrication techniques.