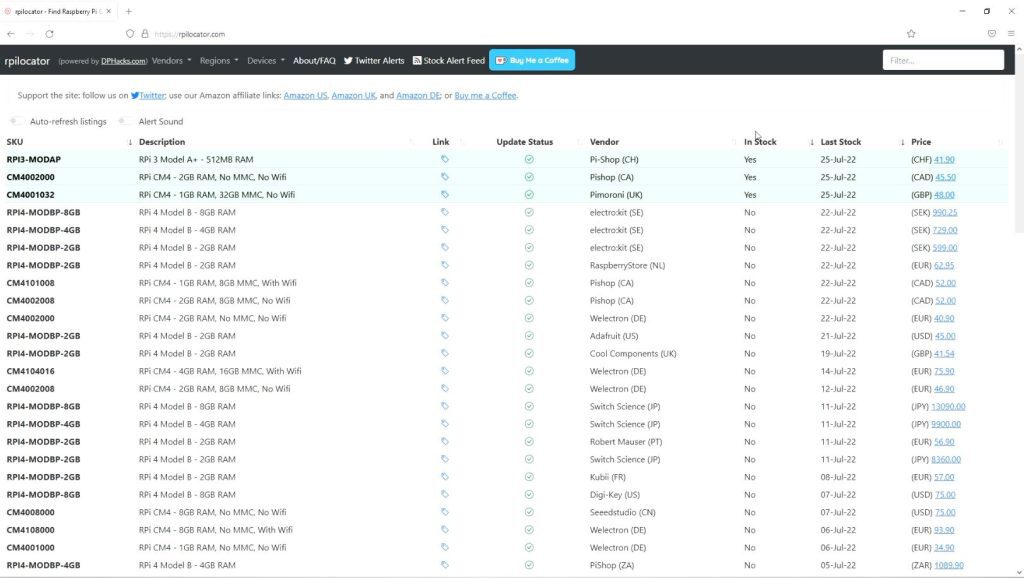
If you’ve tried to buy a Raspberry Pi in the past year or so then you’ve probably experienced some level of difficulty in getting one. They’re out of stock almost everywhere, there are generally purchasing limits on any that are in stock, and they’re often being sold at way over their recommended retail price.
A big part of what makes Raspberry Pi boards so attractive is that they’ve got really good documentation and support and a large online community, so you’ll easily find projects, tutorials and answers to any issues you run into along the way.
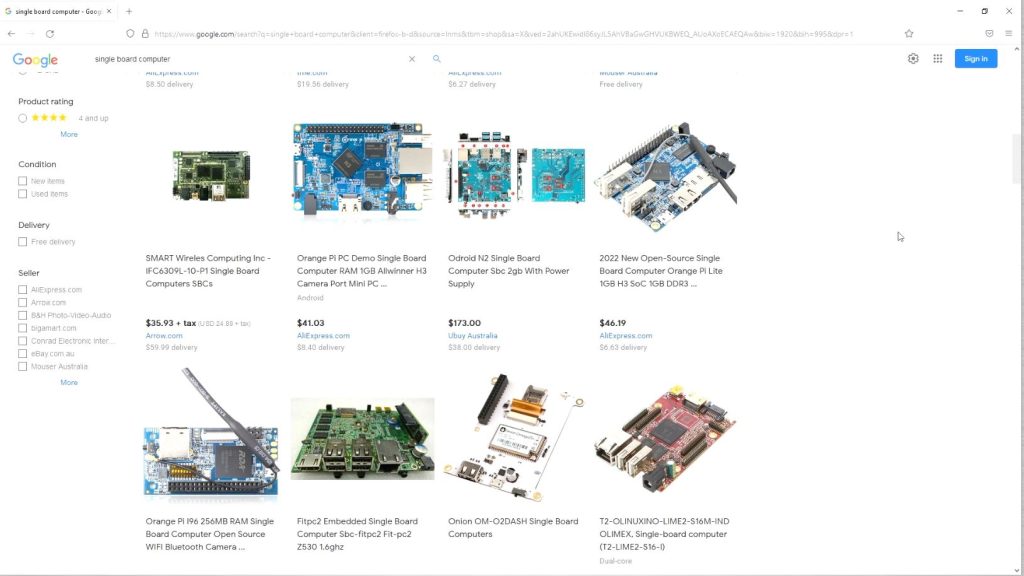
With that said, there are a large number of single-board computers available that offer similar features to Raspberry Pi’s, so I thought it would be interesting to get a few and try them out.
The Raspberry Pi 4B is one of the most popular choices for current projects, so I looked for some alternatives that offered similar specs to the 4B and were similarly priced.
I’m not looking for high-end hardware, this isn’t meant to be a benchmarking exercise, my intention is for these boards to be suitable Raspberry Pi alternatives for tinkering with electronics as well as basic web browsing and video playback. There might be more powerful or newer versions of these boards available for an increased price, but I looked at the ones that I felt provided the best value for money for use as a tinkering board. I also had a brief look at the documentation available for each before buying them to make sure that they had some basic guidelines for getting started.
Here’s my video trying out the three boards, read on for the write-up:
The Raspberry Pi Alternatives That I Choose
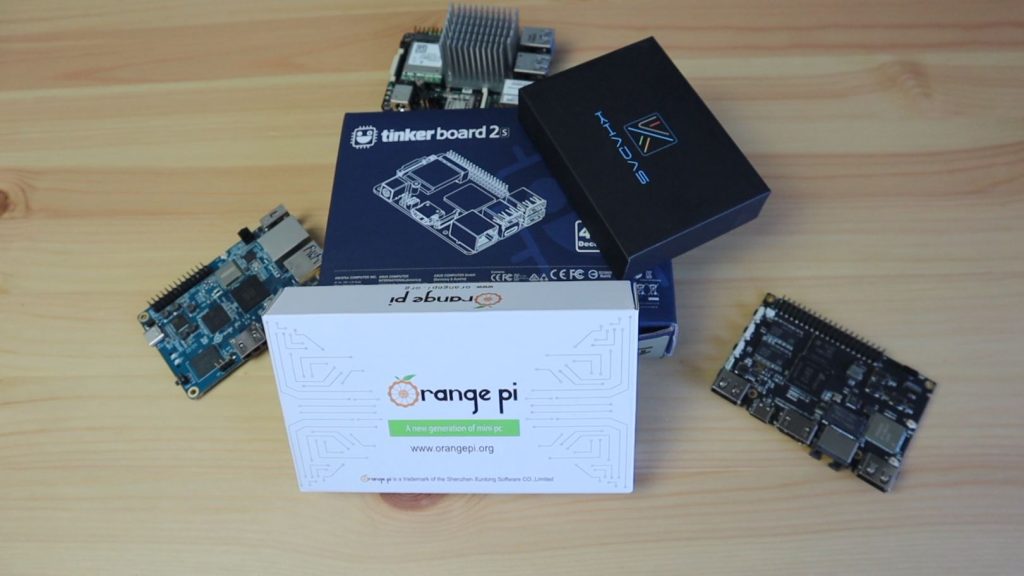
After sifting through pages and pages of options, these are the three boards that I settled on.
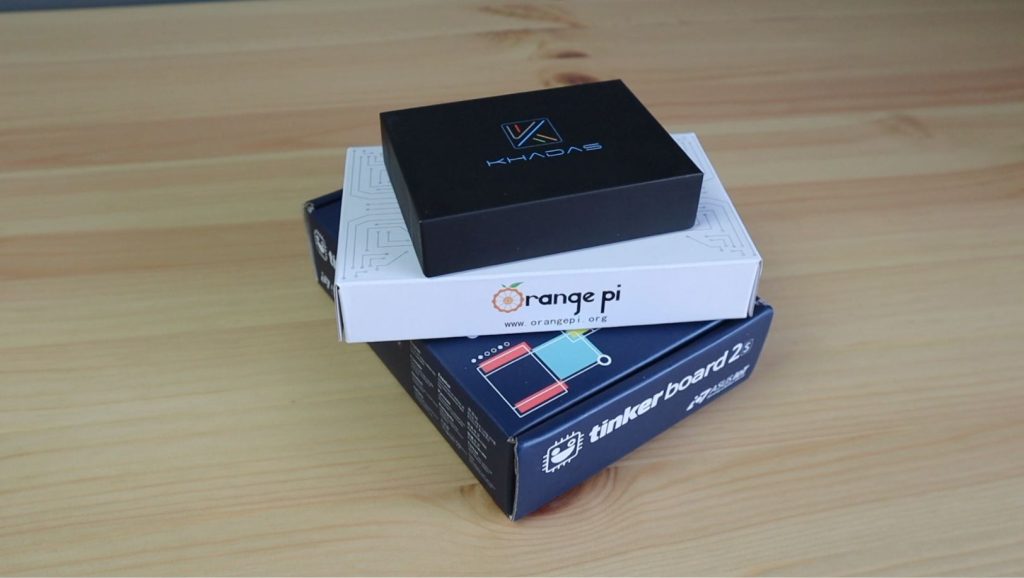
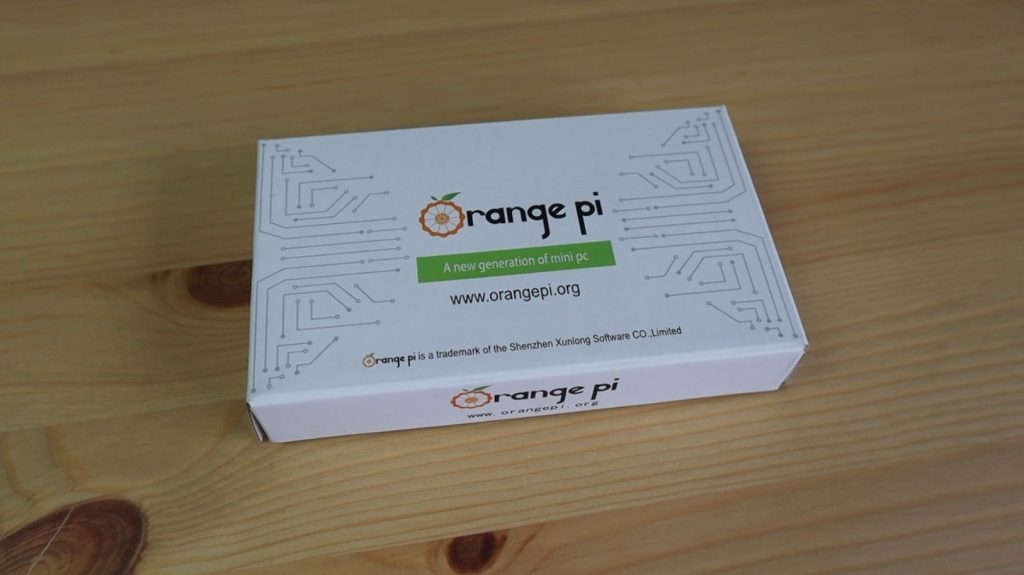
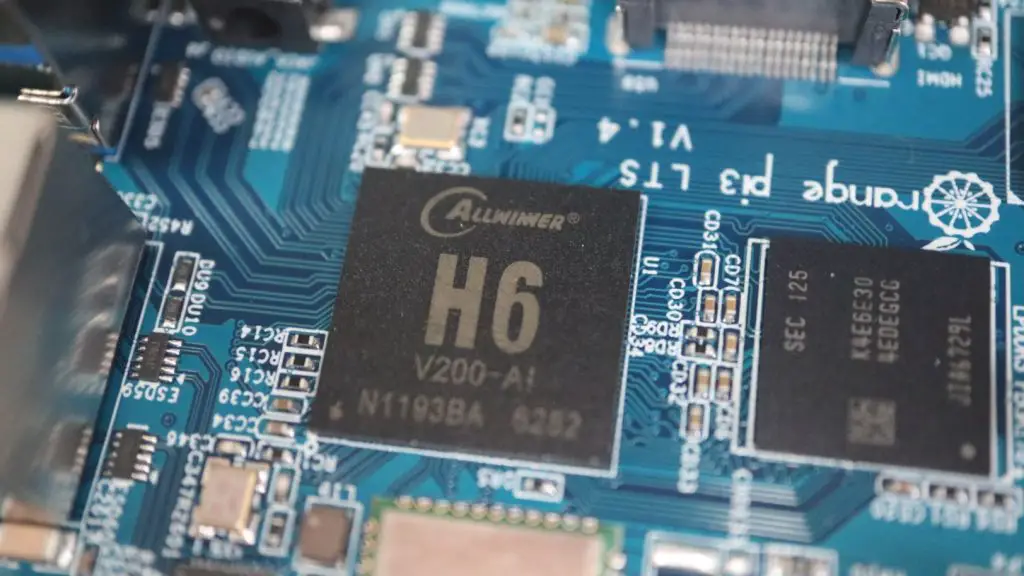
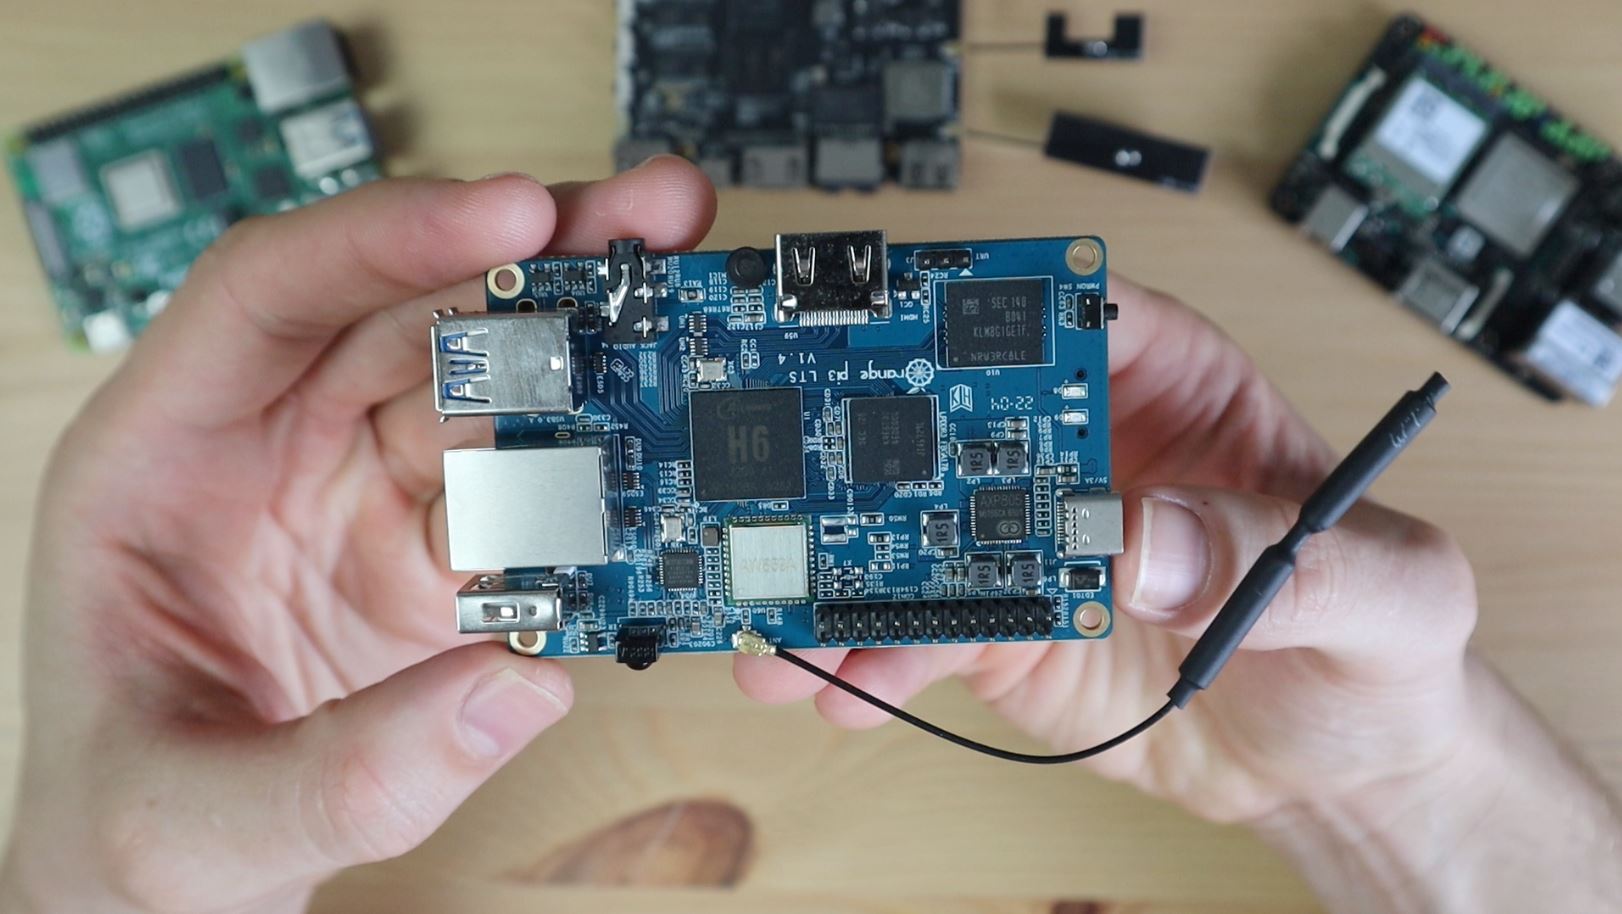
First up is the Orange Pi 3 LTS:
This board runs an Allwinner H6 Arm Cortex A53 quad-core processor running at 1.8Ghz. It’s got 2GB of DDR3 RAM and 8GB of onboard eMMC storage. It was the cheapest of the three boards at $35.
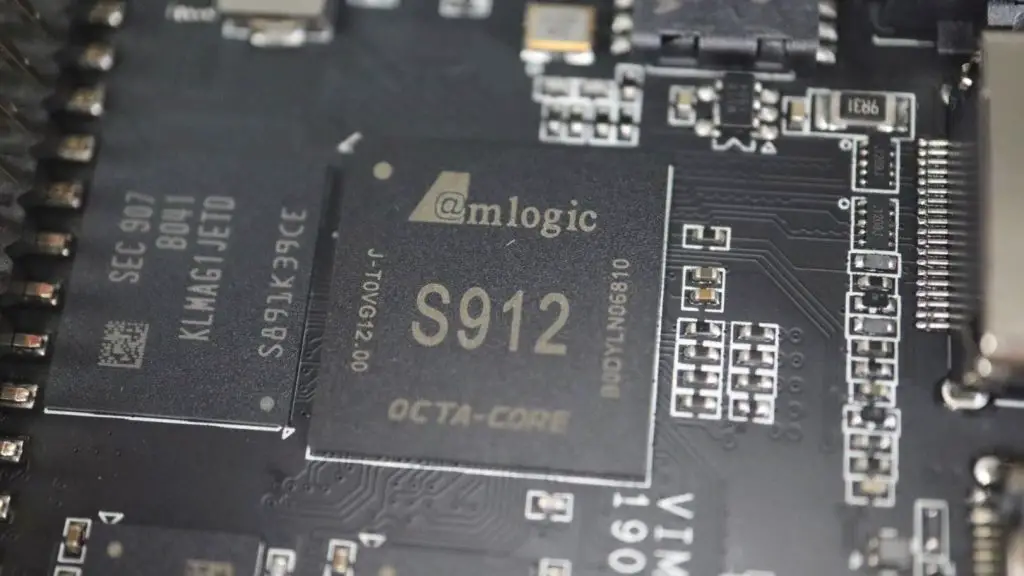
The second is the Khadas VIM2:
This board has got an 8-core Amlogic A53 SoC running at 1.5Ghz. It’s got 2GB of DDR4 RAM and 16GB of onboard eMMC storage. This was the midrange of the three at $80.
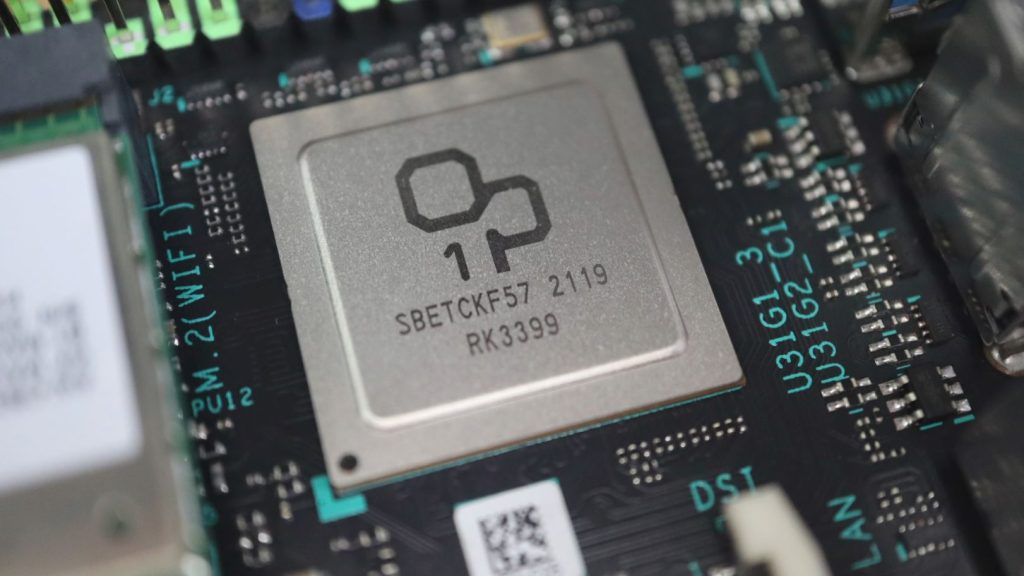
The third, and the most expensive of the three, is the ASUS Tinkerboard 2S:
This board runs a 6-core Rockchip RK3399 SoC consisting of a dual-core Arm Cortex A72 processor running at 2.0Ghz and a quad-core Arm Cortex A53 processor running at 1.5Ghz. It’s got 2GB of DDR 4 RAM and 16GB of onboard eMMC storage.
This board cost the most, at $120, which is a little more than the recommended retail price of even the 8GB Pi 4B, but it looked like it had the most comprehensive documentation. It also looked like it was the most suited for electronics projects using the GPIO pins rather than being used as a media player or home server like the other two.
This was just my first impression when looking through the documentation of all three boards, so that’s why we’re going to try them out.
For each board, we’ll take a closer look at the hardware features, then have a quick look at the operating system that it is shipped with, then try to get an LED to blink using the GPIO pins (which may require a different operating system to be loaded) and finally we’ll look at the power consumption of each.
Trying Out The Orange Pi 3
Hardware
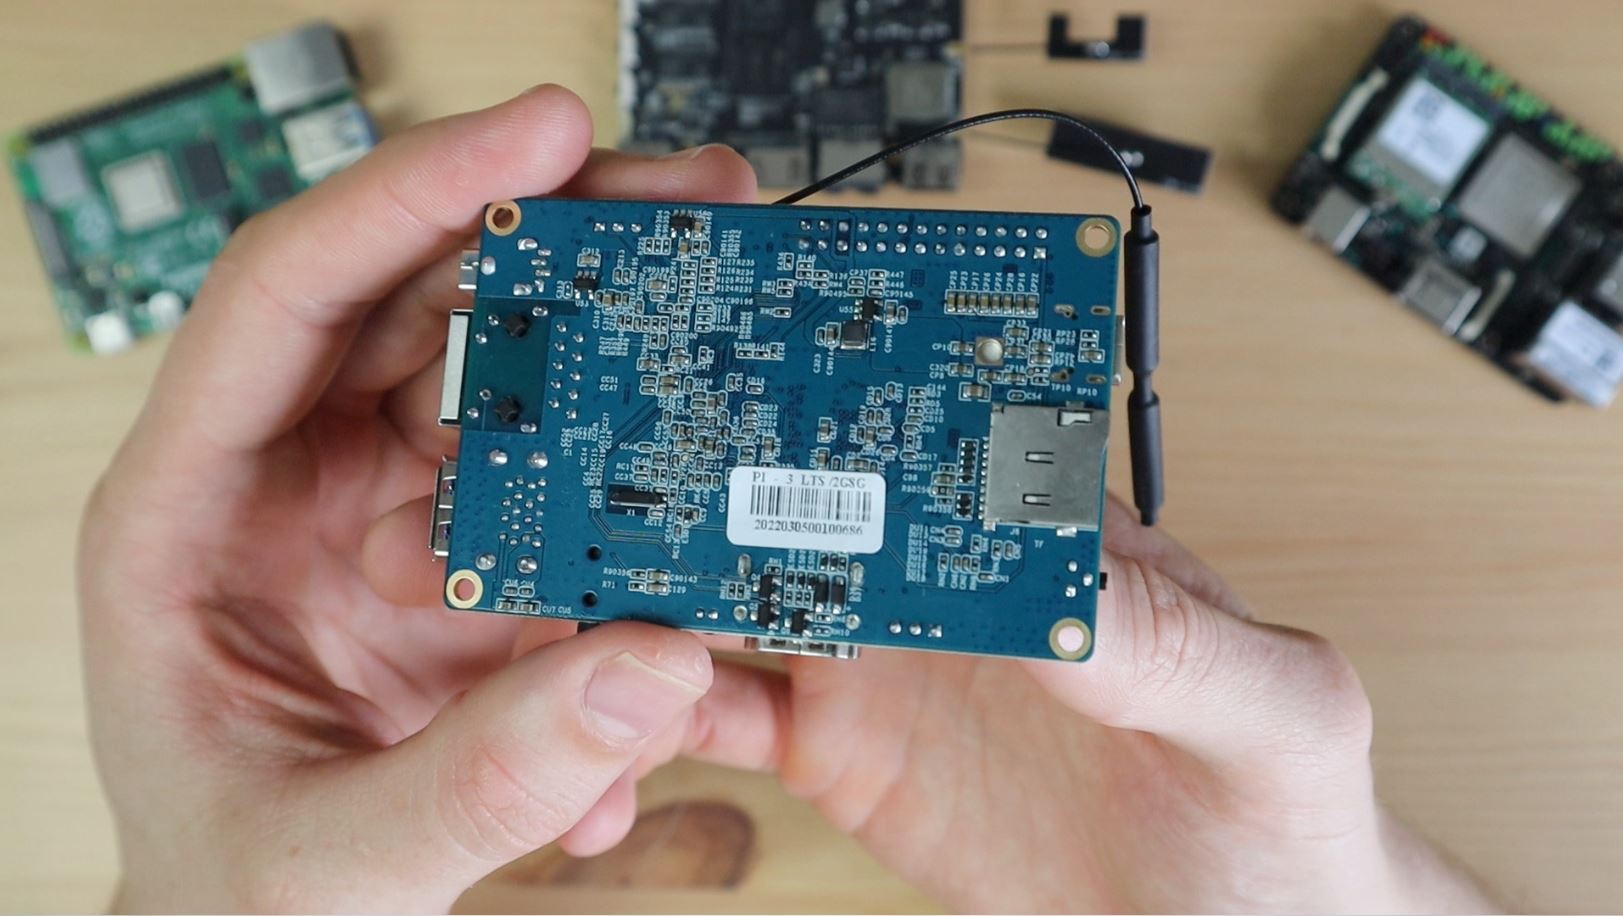
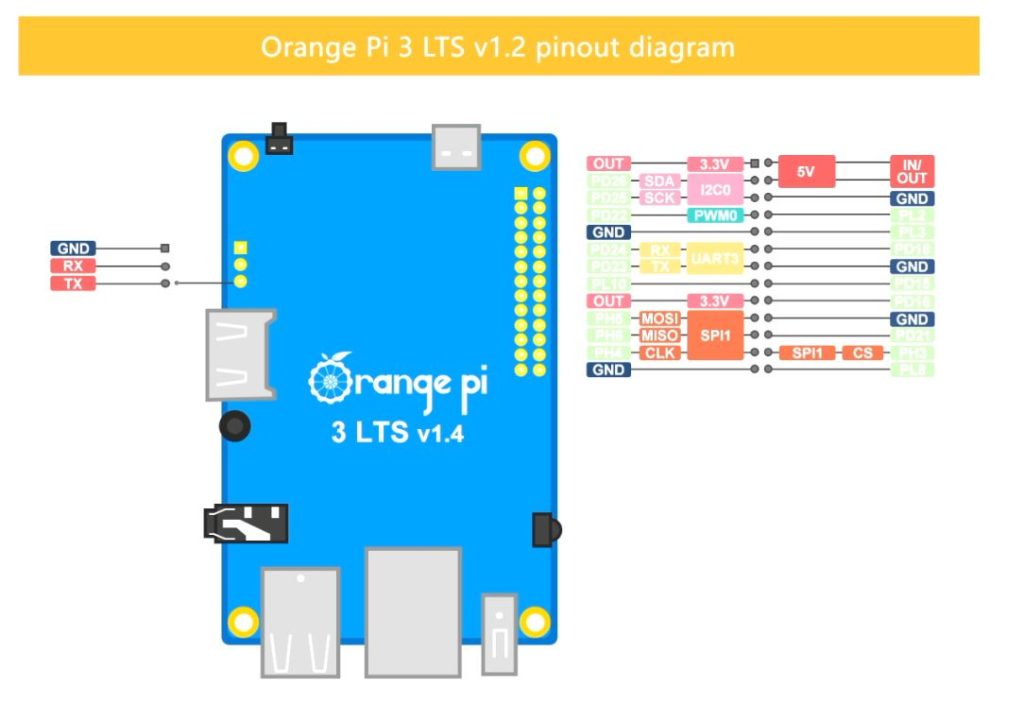
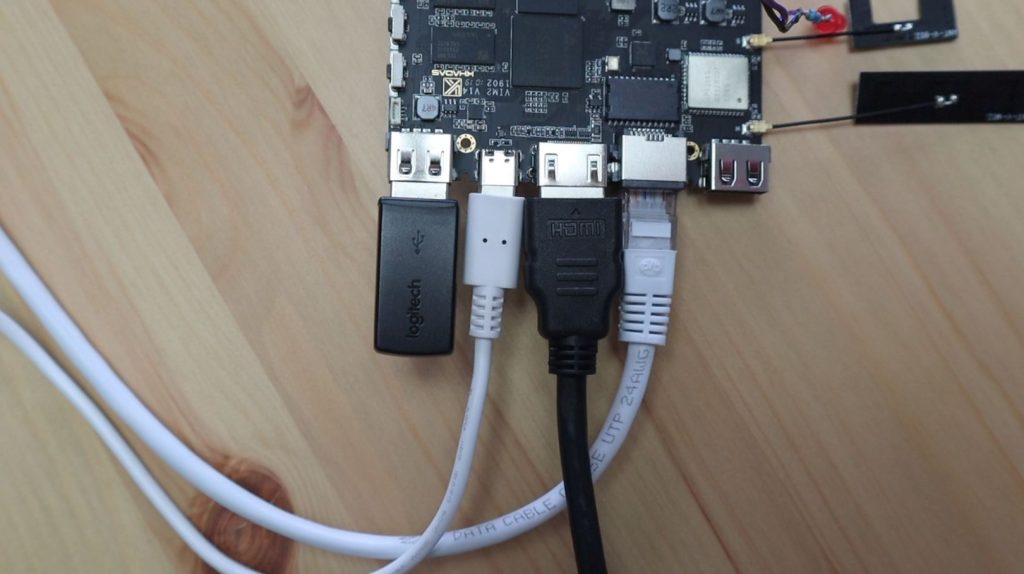
Let’s start by taking a look at the hardware around the board, we’ve got onboard WiFi and Bluetooth, an IR receiver, 26 PIN GPIO headers, USB 2.0 and USB 3.0 ports, a 3.5mm audio jack, microphone, full-size HDMI port, power button, USB C power input and then a microSD card slot on the bottom.
The GPIO pins roughly mimic pins 1 to 26 on a Raspberry Pi, so you may be able to use some shields and adaptors that only use a few pins on the Pi, but my experience is that these are few and far between. It’s more likely that this layout will just be useful if you’re already familiar with the Pis GPIO layout.
Operating System It Ships With
The Orange Pi 3 ships out with an Android operating system image pre-installed on its eMMC storage, so let’s take a look at that first. This and the Khadas board look like they’re intended to be used primarily as media player devices – so this preloaded operating system is probably quite useful for that.
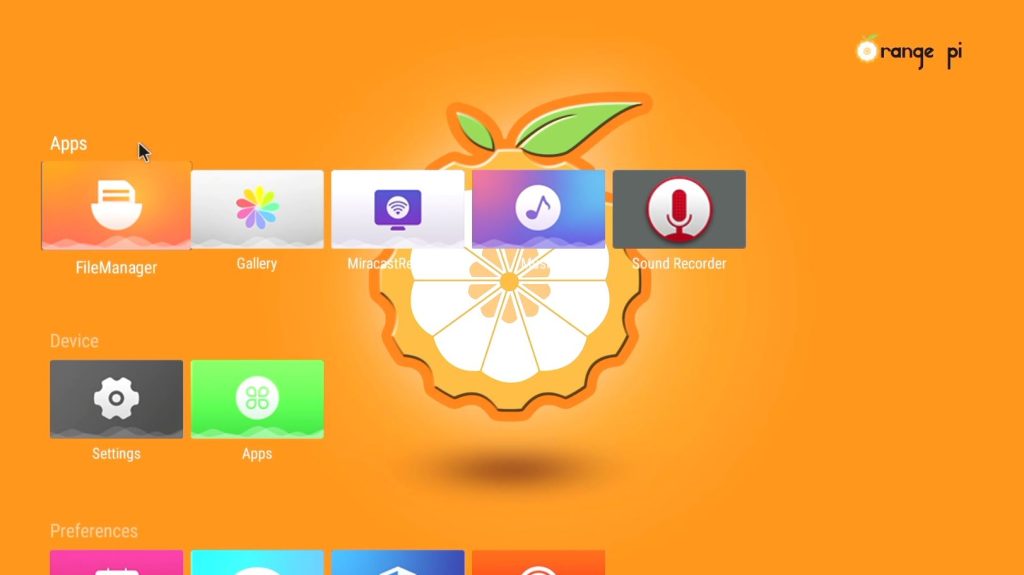
The Android operating system that it ships with is quite bare, you’ll need to install your own apps on it to get any meaningful use out of it. The pre-installed apps will just let you play content from a connected drive. So we can’t really do much without installing additional software.
Using The Orange Pi Debian Distribution
If we want to use the Orange Pi for an electronics project that makes use of the GPIO pins, we’re going to need to install Debian. They provide a Debian operating system image on their website, so let’s get that installed on a microSD card and boot it up.
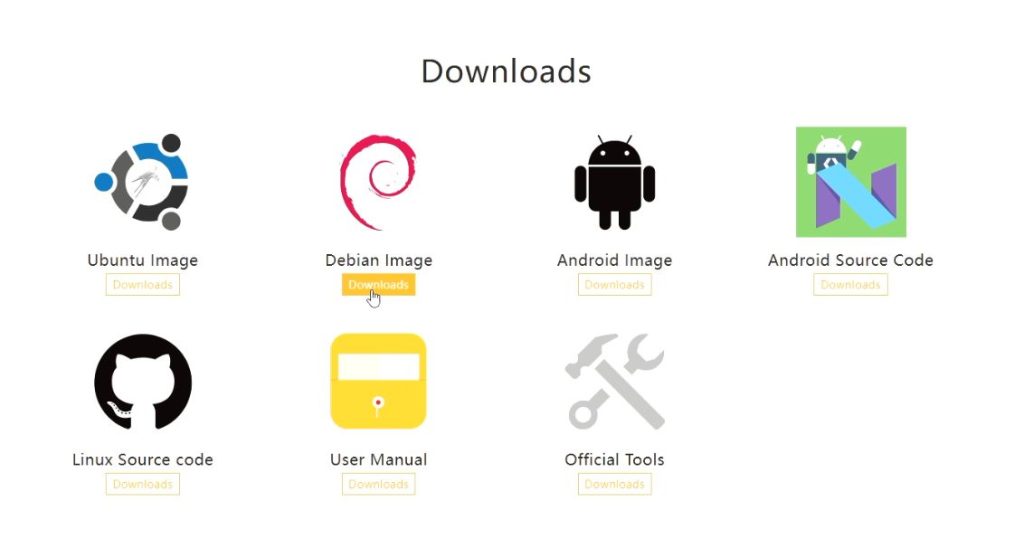
For all three boards, I’m going to use Win32 Disk Imager to flash the operating image to a 32 Sandisk Ultra microSD card.
With Debian booted up, let’s try playing some video content to see how the hardware handles it. I’m going to try to play Big Buck Bunny on Youtube on each device to see how they perform with video streaming.

The Orange Pi 3 seemed to handle this first pass reasonably well, with only a few missed frames. It looked like the display was running on a low resolution though, and heading over to the settings confirmed this. So I switched over to 1080p and tried again.

This time the Orange Pi really struggled with the playback. It was noticeably stuttering and dropping frames, and it required some buffering during playback, which is not a limitation caused by my network. So you probably wouldn’t want to use this Pi running Debian for media playback, even at only 1080P.
Turning An LED On and Off Using the GPIO Pins
As far as documentation goes, the user manual covers a pretty broad range of tests to check the basic functionality of almost all of the features of the Orange Pi. It’s written reasonably well too. They have a section in the manual on using the GPIO pins, with one in particular for the control of the digital pins, so I’m going to work through that.
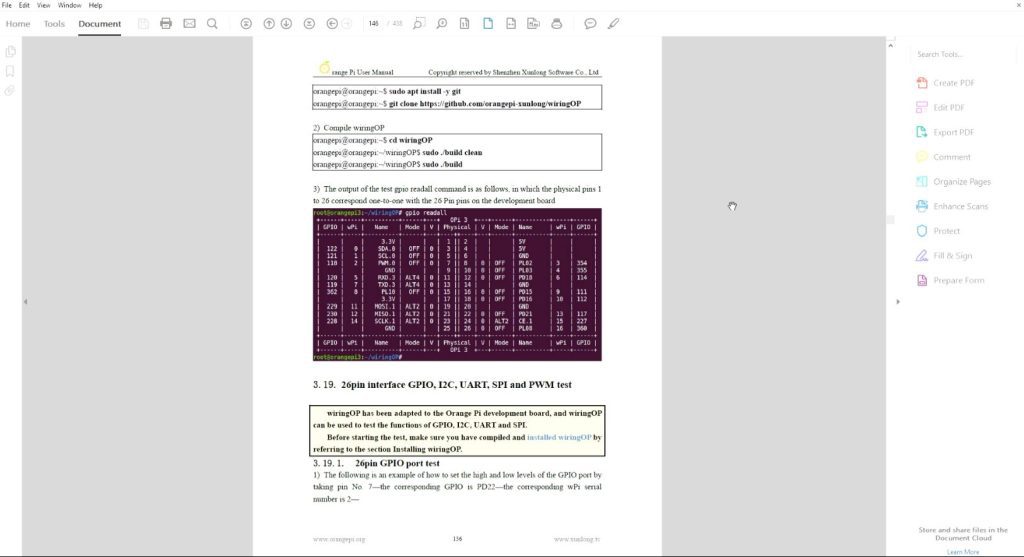
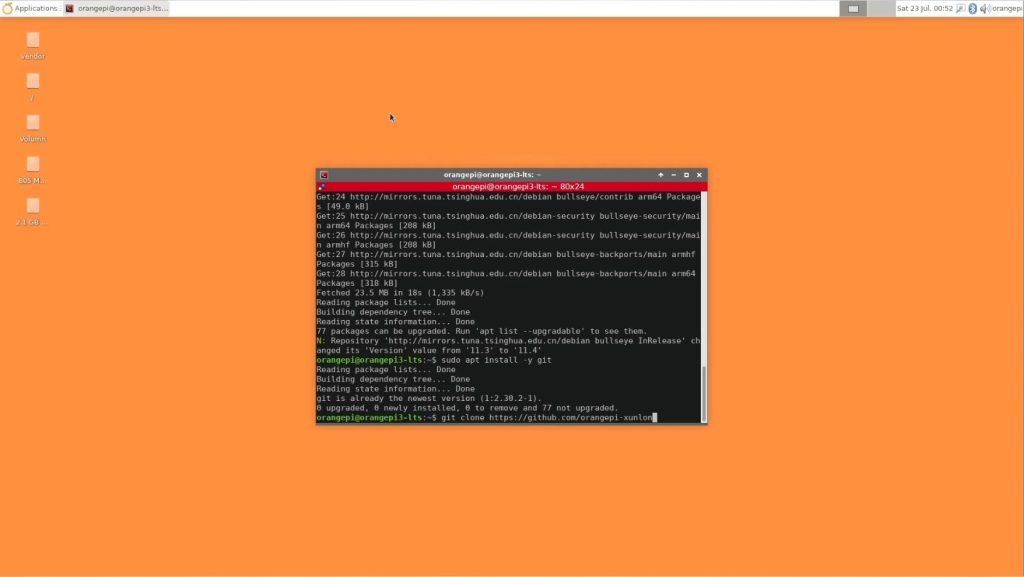
I ran an update, and then downloaded and compiled the wiringPi library, following the instructions.
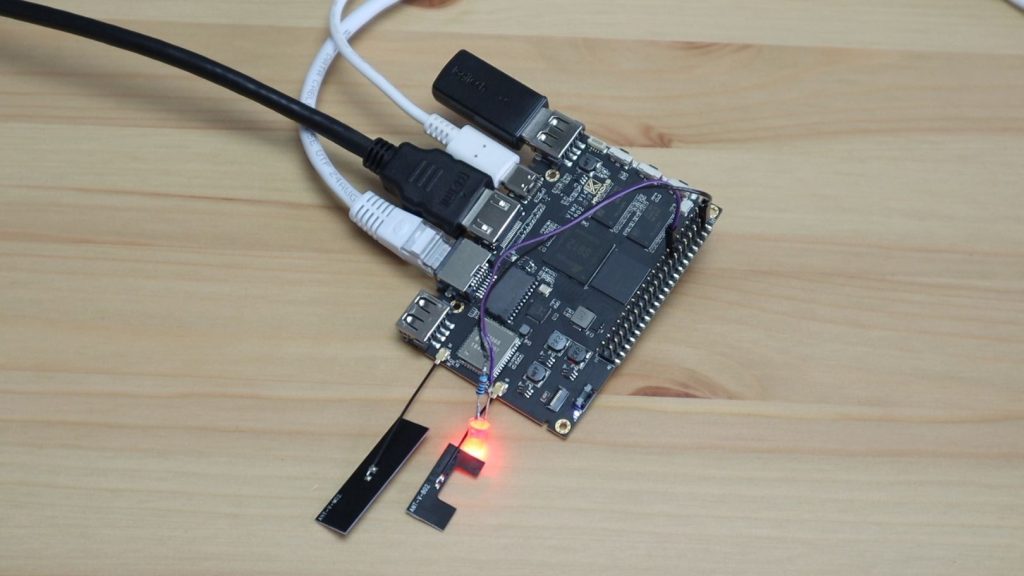
Now let’s connect our LED to the GPIO pins. I first checked that the LED works when connected to a GND and 5V pin, so I knew that the pins are powered. I then connected it to Pin 7 to test.
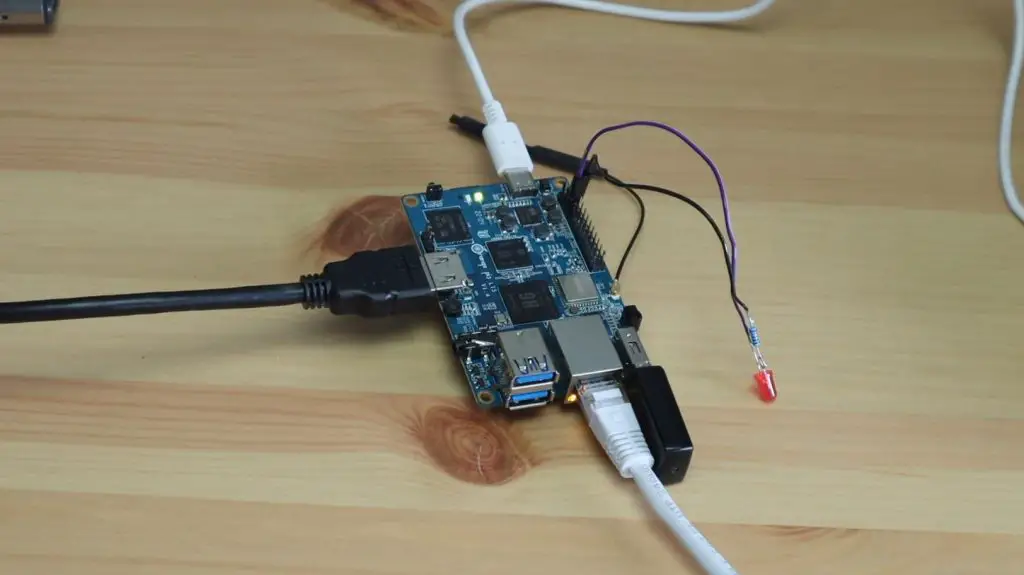
Using the GPIO readall command we can see what GPIO number corresponds to physical Pin 7 in the table, so that’s GPIO118 and wPi pin 2.
If we set it as an output pin we now see that the mode has changed to out.

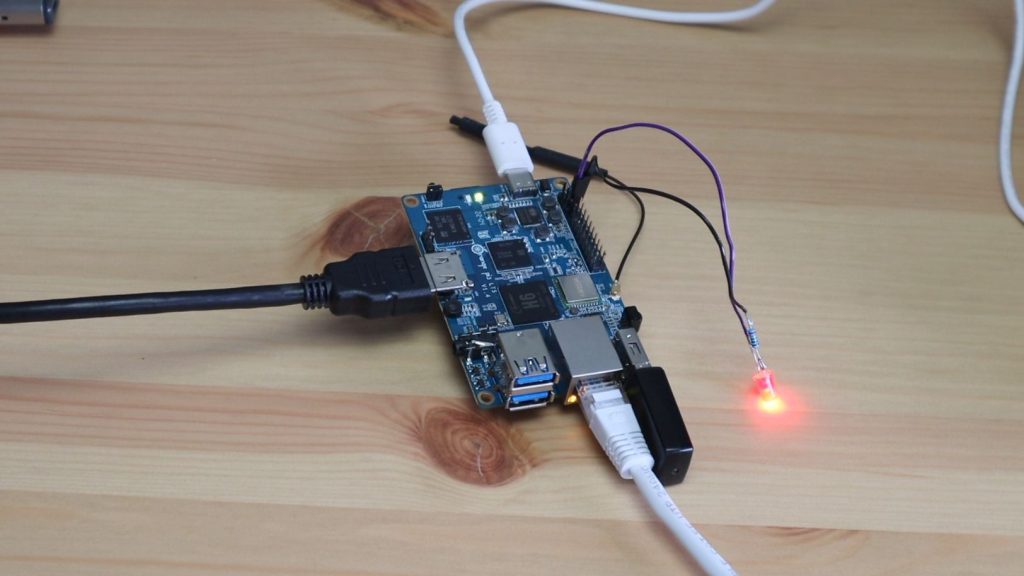
Then we can try setting the pin high or low using a 0 or 1, and our LED is now turning on and off.
There are also a few examples in the wiringPi library to help you get started with coding your own projects that use the GPIO pins.
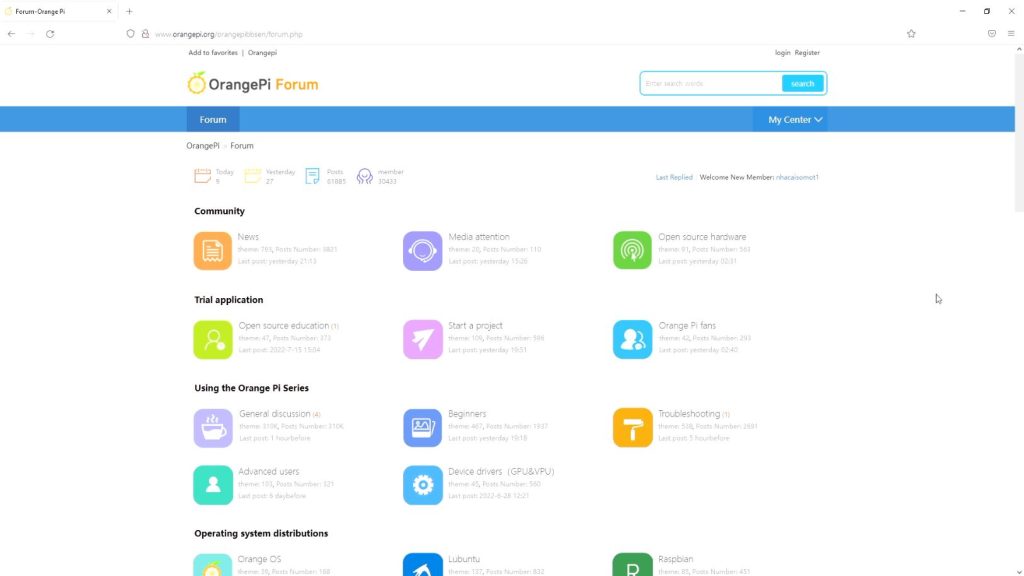
So it was relatively easy to get an LED to turn on or off using the GPIO pins. They also have a dedicated forum with a reasonably active community. Most questions or issues raised get useful answers in a day or two and they cover a range of topics, from questions for beginners to troubleshooting assistance, help with drivers and even topics on various distributions – all of which seem to still be active.
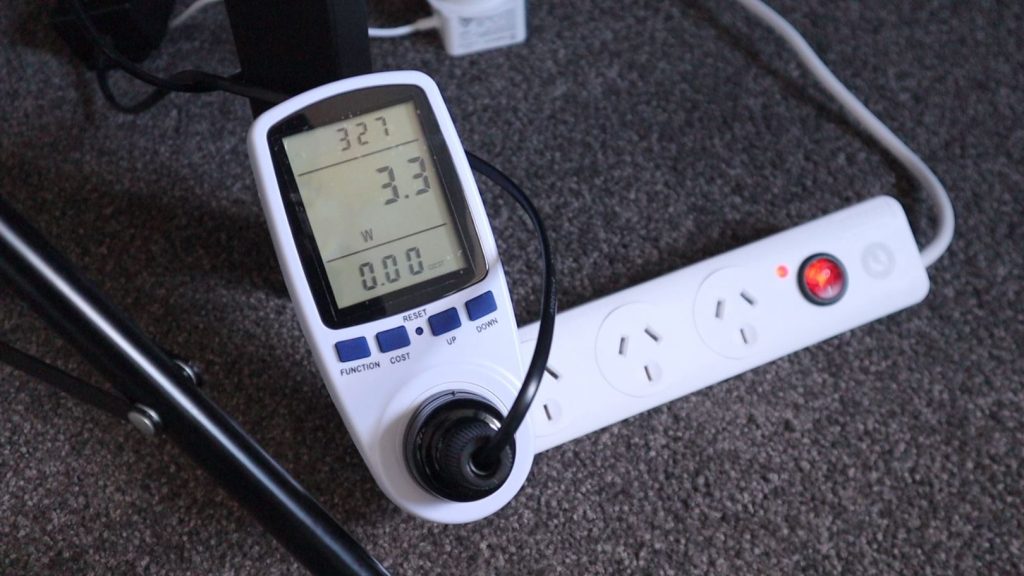
Power Consumption
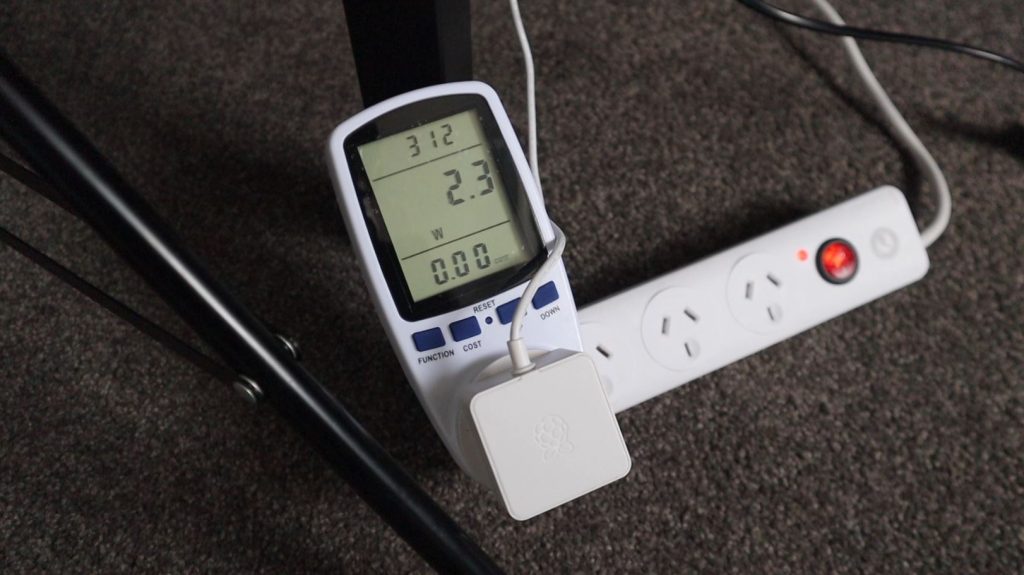
Taking a look at the power consumption on the Orange Pi 3, it uses around 2.3W at idle and around 4.3W when the CPU is loaded. So it’s quite an efficient board – that’s less than 1A draw at 5V, even when loaded.
So for $35, I’d be happy with the hardware and the community around the Orange Pi 3.
Trying Out the Khadas VIM2
Hardware
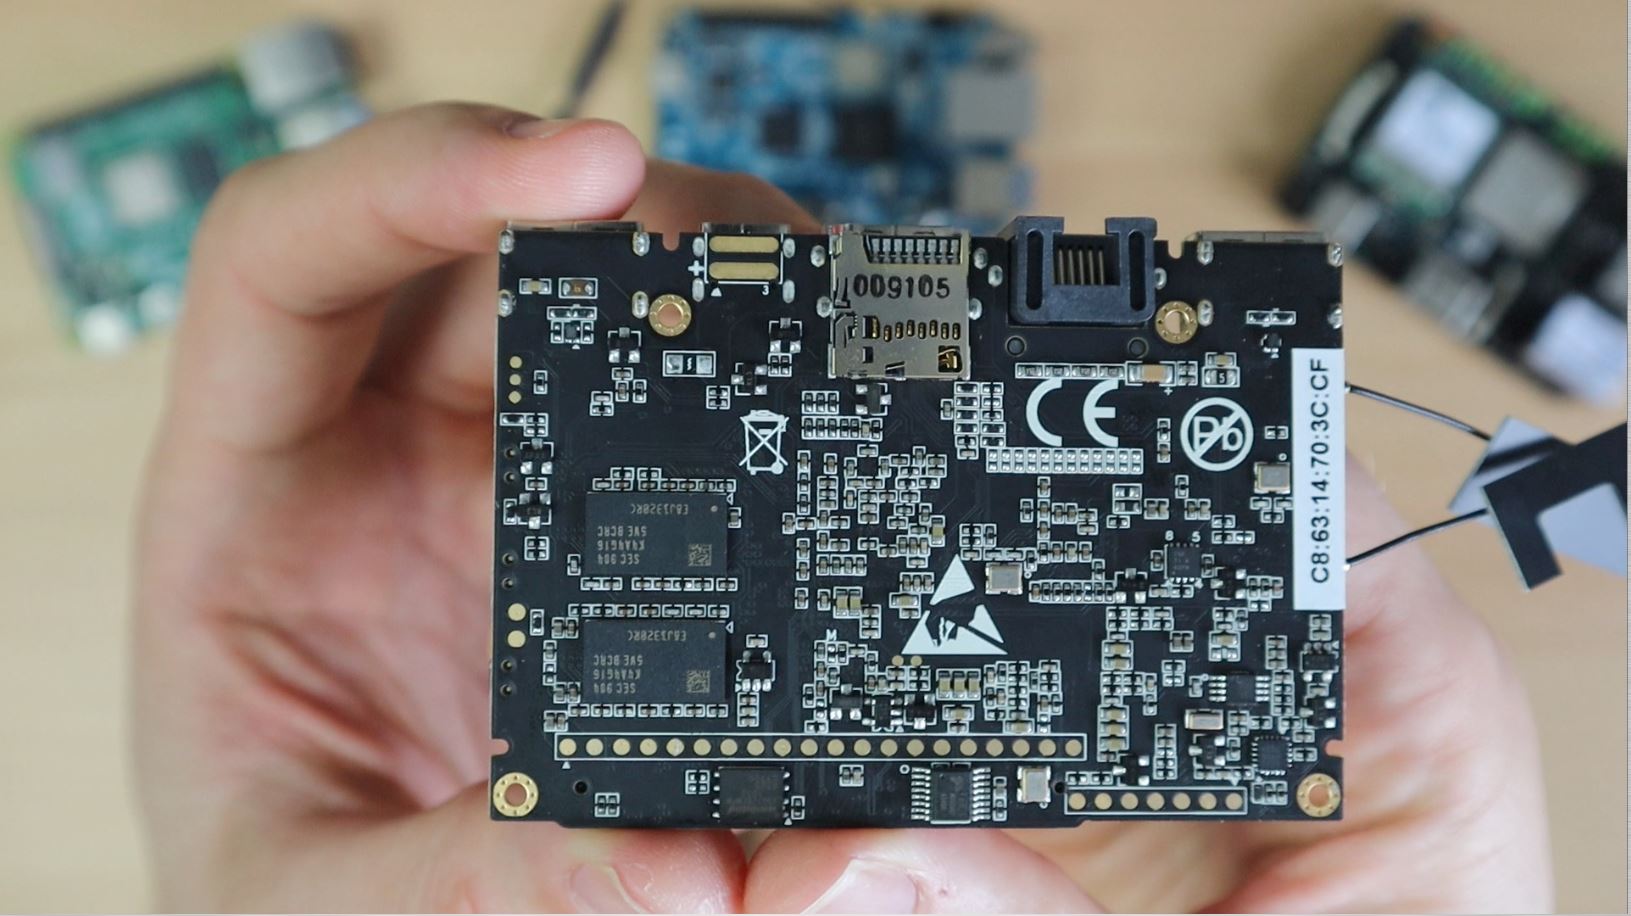
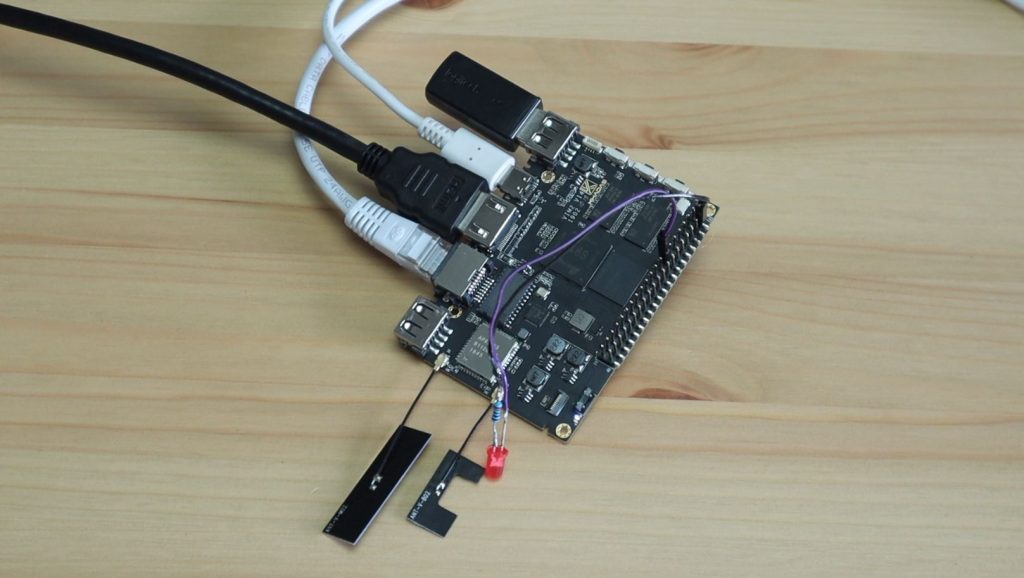
Taking a look at the hardware around the board, we’ve got two USB 2.0 ports (so no USB 3.0), we’ve got Gigabit Ethernet, a USB C power input, a PWM fan connector, reset, function and power buttons, an RTC header, a 40-pin GPIO header, infrared receiver, and onboard dual-band WiFi and Bluetooth. On the underside, we’ve also got a microSD card slot and then a range of pads for power input, MCU and GPIO connections which are great if you plan to use this board on an expansion module or PCB.
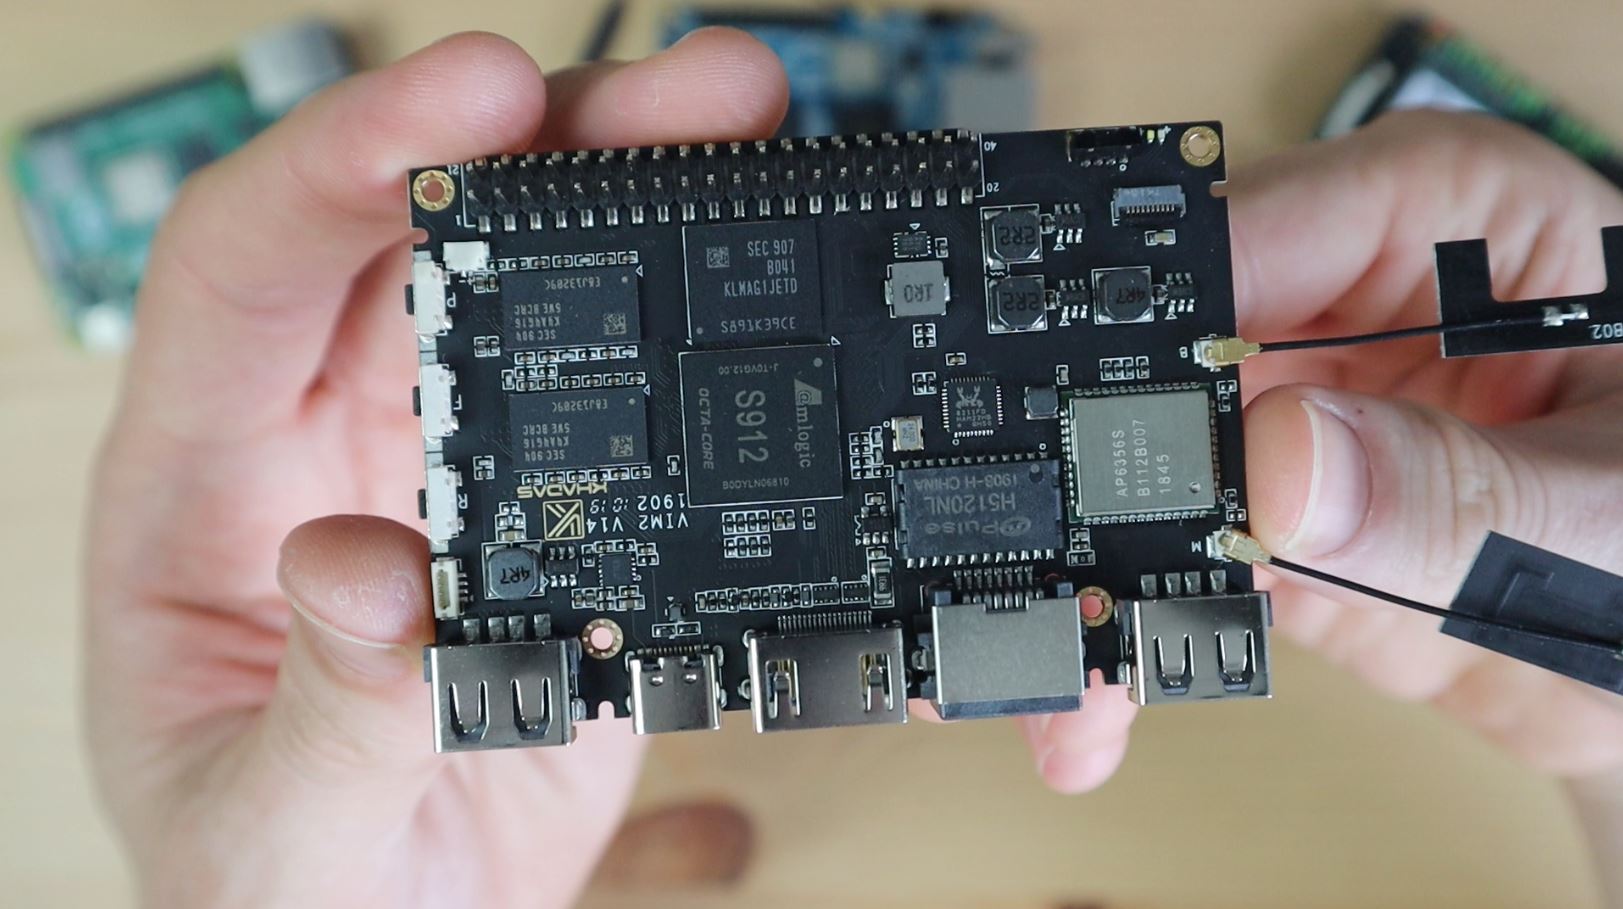
The VIM2 has a 40-pin GPIO header like the Raspberry Pi, but the pinout is quite different so you won’t be able to use any Raspberry Pi shields or hats on the VIM2 directly.
Operating System It Ships With
Like the Orange Pi, the VIM2 also ships out with an Android operating system pre-installed. This version of Android has a few useful apps pre-installed, including the Chrome browser, so we can actually try streaming Big Buck Bunny directly.
The VIM2 actually did a much better job at streaming this than the Orange Pi. This wasn’t really a fair test and is probably also partially to do with the ligher weight operating system. To keep it fair, we’ll also see how well it runs on the Linux-based operating system. This is also running at 4K, so it’s at a much better resolution than the Orange Pi could handle as well.

Using The Khadas Ubuntu Distribution
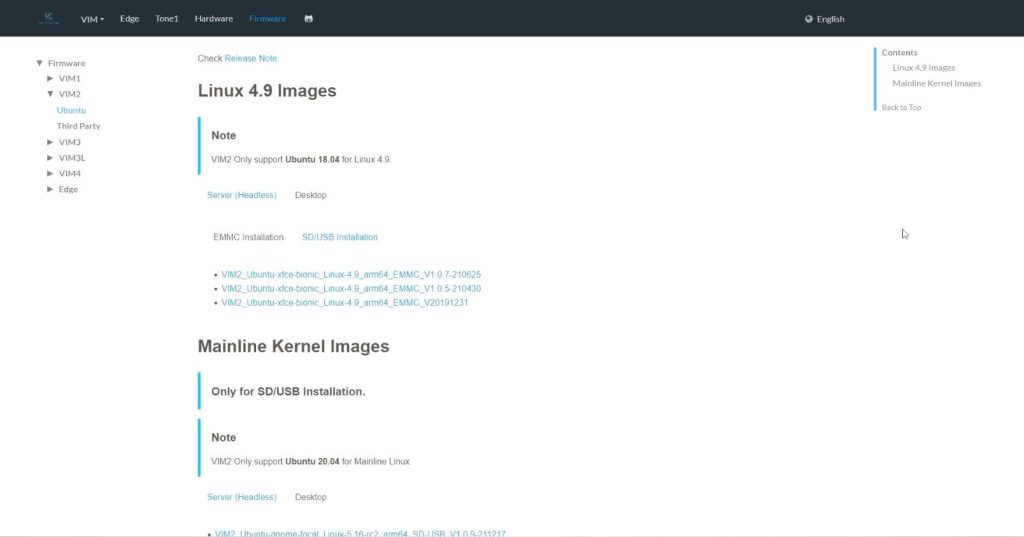
To be able to use the GPIO pins to turn an LED on and off, we’re going to need to install a Linux image. They provide a list of up-to-date operating system images in their product documentation, so it’s as easy as heading over to the page for your board and downloading the image that you’d like to use.
With the operating system image loaded onto our microSD card, we now need to boot the VIM2 from the microSD card rather than from the built-in eMMC storage. To do this, we need to enter Keys mode using the side buttons.

Now that we’ve got it booted, let’s try streaming on it. Before playing the video, I also checked to make sure that it is running at 1080P like the Orange Pi was.
The VIM2 also struggles a bit with streaming HD content on the Linux-based operating system, with similar issues to the Orange Pi. So if you’re going to be using your board as a media player then you’re probably much better off running an operating system that’s designed for use as a media centre like Android, Plex or Kodi.

Turning An LED On and Off Using the GPIO Pins
Next, let’s try to plug the LED into the GPIO pins and turn it on. I’m going to plug it into GPIO pin 7. I again tested that the LED works on the 5V and GND pins first, so I knew that the GPIO pins have power at least.
In the documentation, they tell you that the Amlogic chips include two GPIO ranges and they tell you to first figure out the range base for your GPIO pins using a terminal command. You can also get the pin index listed for each GPIO pin by entering another command. They provide this for both of the GPIO ranges but then there is no information on which range is used for what or how these are actually mapped to the GPIO pins.
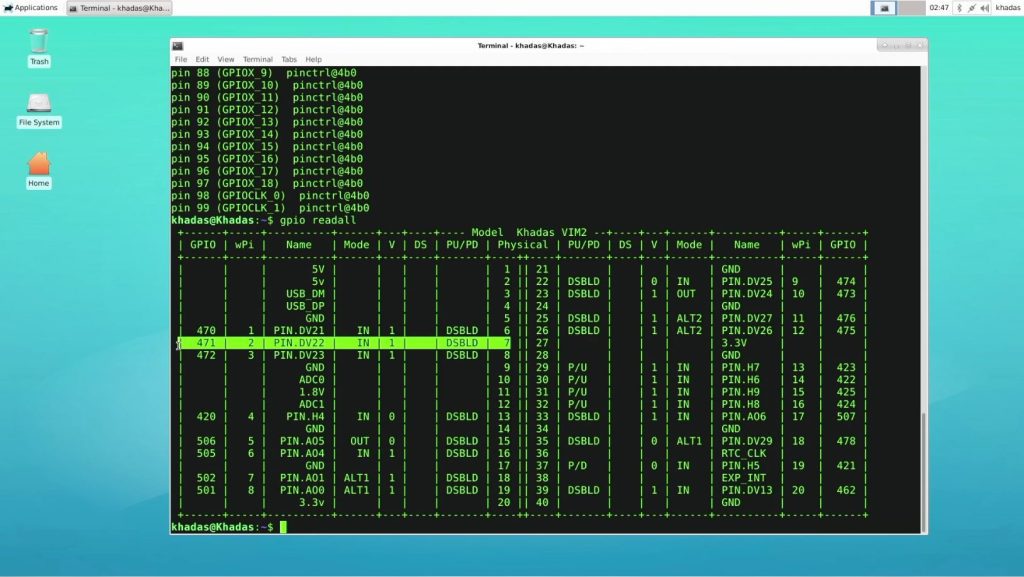
I found it easier to just get the information using the GPIO readall function as I did previously on the Orange Pi.
If we look at the table, physical pin 7 corresponds to GPIO number 471.
So now let’s run through the process to set that pin up as an output pin and turn on the LED.
If we set it as an output in the terminal and then check its status in the table, we’ve actually now got pin 6 set as an output.
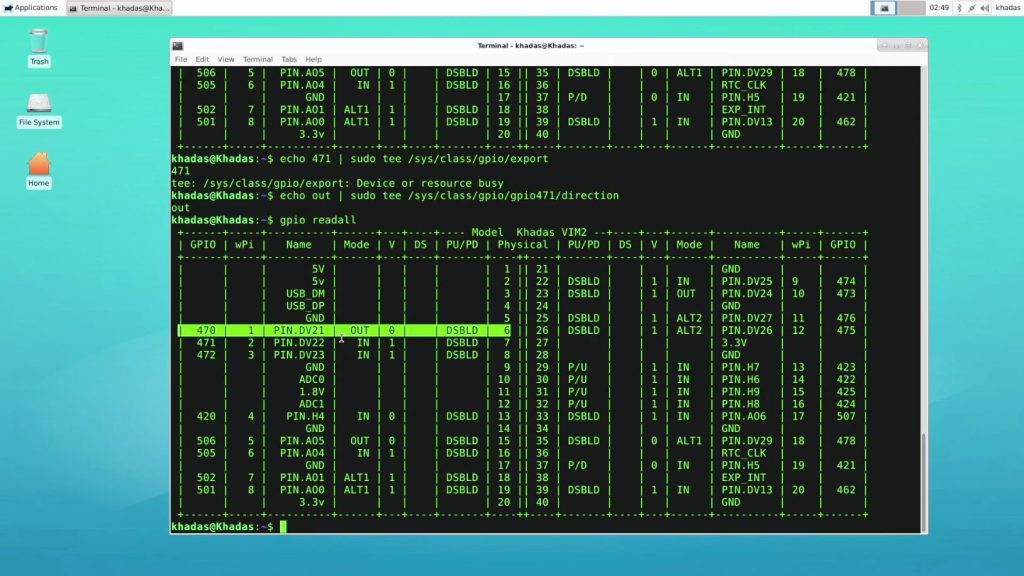
If we cycle it on and off, the LED is not doing anything and from the table it looked like it was cycling pin 6 on and off. So I moved the LED to pin 6 and tried again.
Now we can turn our led on and off.
This obviously seems like a trivial issue, but small issues like this can leave you wasting hours fault finding. If I hadn’t used the GPIO readall table, I probably wouldn’t have found this issue and I would have spent time going back through the setup and control steps trying to figure out what I had done wrong.
Other Issues With The VIM2
In using the VIM2, I also found two issues that I found to be somewhat annoying.
The first is that the USB C power port is too close to the HDMI port, so unless you’re using a low-profile cable, you land up having to wedge the two in alongside each other. You can usually just force them into place but this puts unnecessary stress on the ports and you may land up eventually damaging the smaller USB C port.
The second was that the buttons on the side were really easy to push when trying to remove cables. When trying to plug or unplug a device or cable in (made worse by the above issue), I’d often press one of the buttons by mistake when holding the board. This then caused it to turn off or reset, which was frustrating. You could simply be trying to plug in a mouse dongle and you press the reset button by mistake and then have to wait for it to boot up again (and risk corrupting the software).
Khadas also have fairly good documentation. There is a lot to work with, and they have a good spread of information on the hardware and software side, but there are some obvious omissions. They also have an online community and forum which has open topics, but the community doesn’t seem to be as active as the Orange Pi community.

Power Consumption
Taking a look at the power consumption on the Khadas VIM2, it uses around 1.5W to 2.0W at idle and about 3.5W when loaded. So it’s a bit more efficient than the Orange Pi, and I already thought that that was quite good.

For $80, I’d say that this is probably a bit better than the Orange Pi for a media centre, but it looks like it’s got a smaller online community and a bit less support. So you’d probably want to stick with the Orange Pi for electronics projects and tinkering.
Trying Out the Tinker Board 2S
Hardware
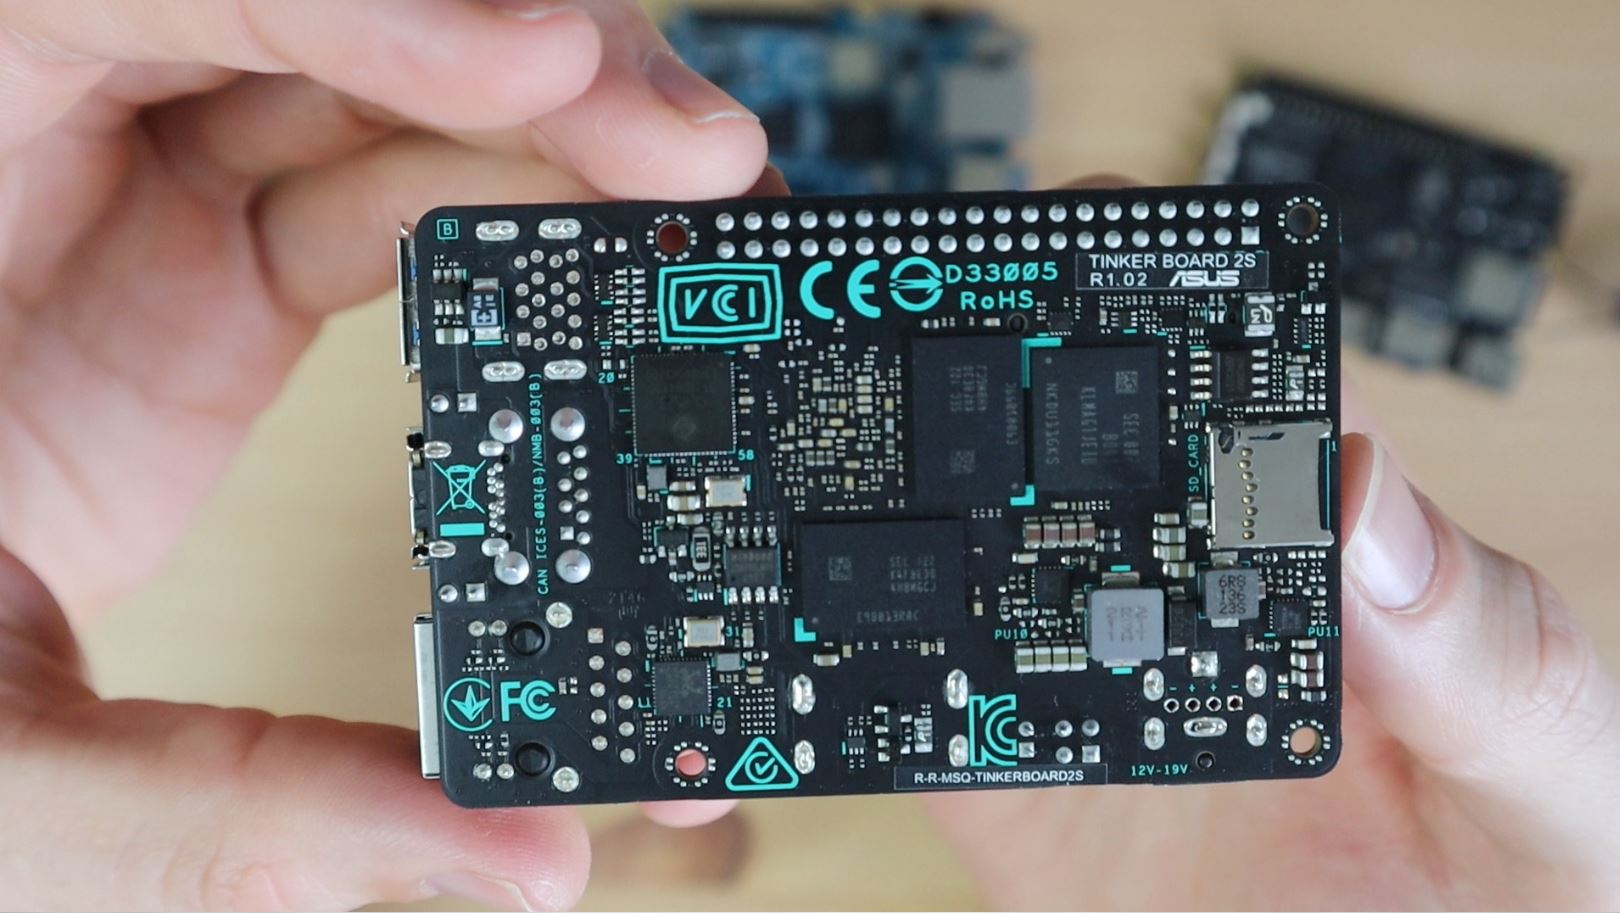
The Tinker Board 2S, although the most expensive of the three, is probably the closest to a Raspberry Pi. It’s got the same footprint and general layout as a Pi 3b, with a couple of standout differences.
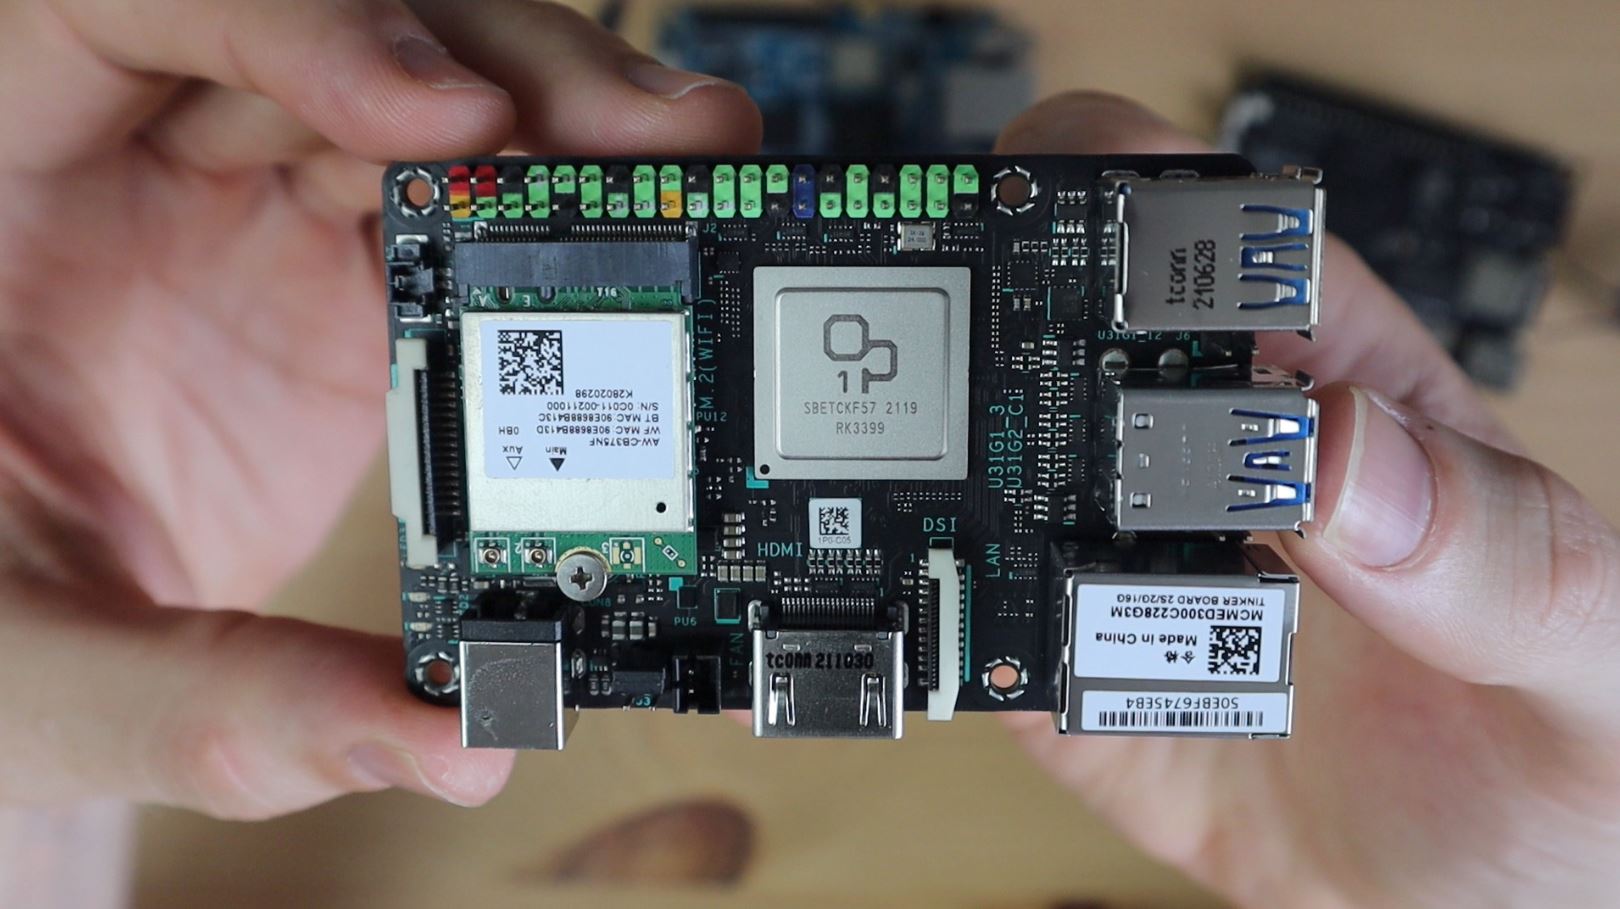
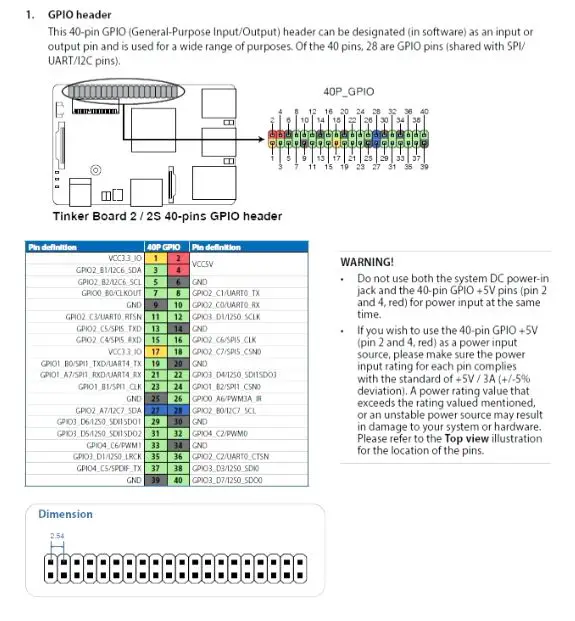
It’s got three USB 3.2 Gen 1 type A ports and a single USB 3.2 Gen 1 type C port, with the ability to drive an external display hooked up to the USB type C port – so you can run dual displays although it’s only got a single HDMI port. It’s also got dual-band WiFi and Bluetooth, a DSI and CSI connector, a 5.5mm DC barrel jack for power, 2 pin fan connector, a RTC battery connector and 40 pin GPIO header, and on the back is a microSD card slot.
Another appealing feature of the Tinker Board 2S is that the GPIO layout is exactly the same as the Raspberry Pi. Since they share the same footprint as well, you should be able to use some of the same shields and hats on the Tinker Board.
Operating System It Ships With
I couldn’t find any information on whether the Tinker Board’s onboard eMMC storage was preloaded with a particular operating system, so let’s just plug it in and see whether it boots.
After a few minutes, nothing had come up. So I guess it isn’t preloaded with any operating system, which is a bit strange for a device with onboard storage. But we can now move on to loading the operating system onto the Tinker Board.
Using Tinker OS
Tinker OS is ASUS’ distribution of Debian that is designed to be run on the Tinker Board series. There are two options to boot the Tinker Board from, the first is to load the operating system image onto a microSD card and the second is to load the image onto the built-in eMMC storage. I’m going to load it onto the microSD card as that’s what I’ve done for the others.
From their website, you can download a prepared operating system image. Make sure that you select the correct version for your Tinker Board version. They also have some other operating system options available.
Now that we’ve got TinkerOS installed and booted up, let’s check that the monitor resolution is set to 1080P and then try streaming Big Buck Bunny.

Of the three boards, this one did the best by far when playing video content on Linux. There were a couple of stutters initially, but the image quality is great and the stream is actually quite usable.
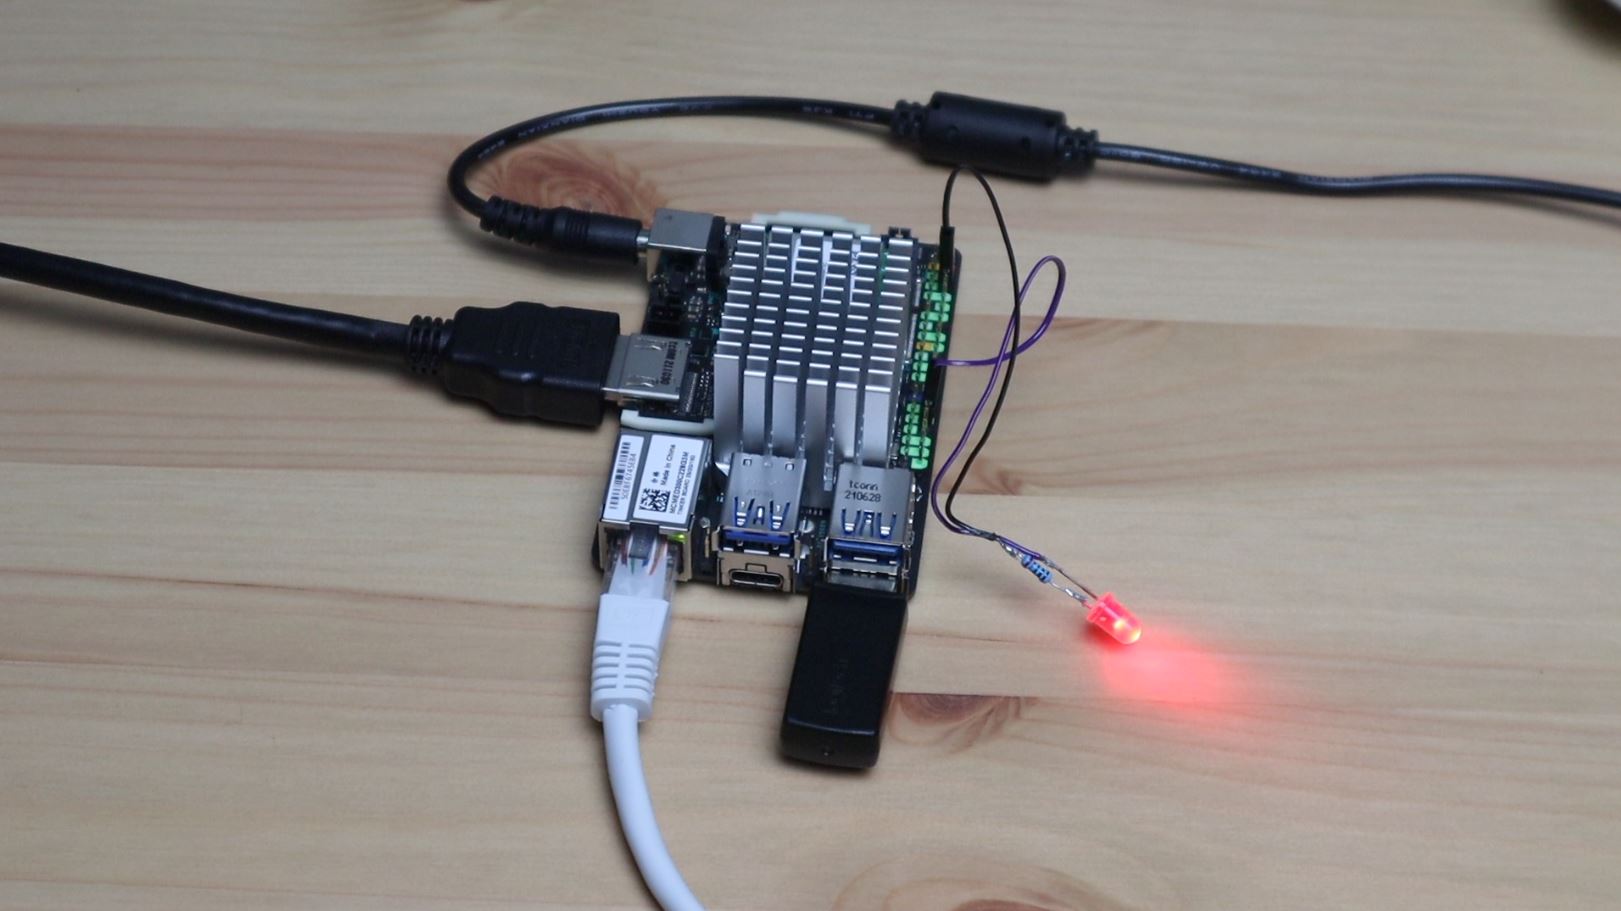
Turning An LED On and Off Using the GPIO Pins
Unfortunately, the good start was short-lived. It was at this stage that I realised that the documentation was quite in-depth on the hardware side but was almost nonexistent for the software.
After about an hour of reading through forums and pages online, I found a Github repository that was linked to by a few sources as being the best way to start using the GPIO pins.
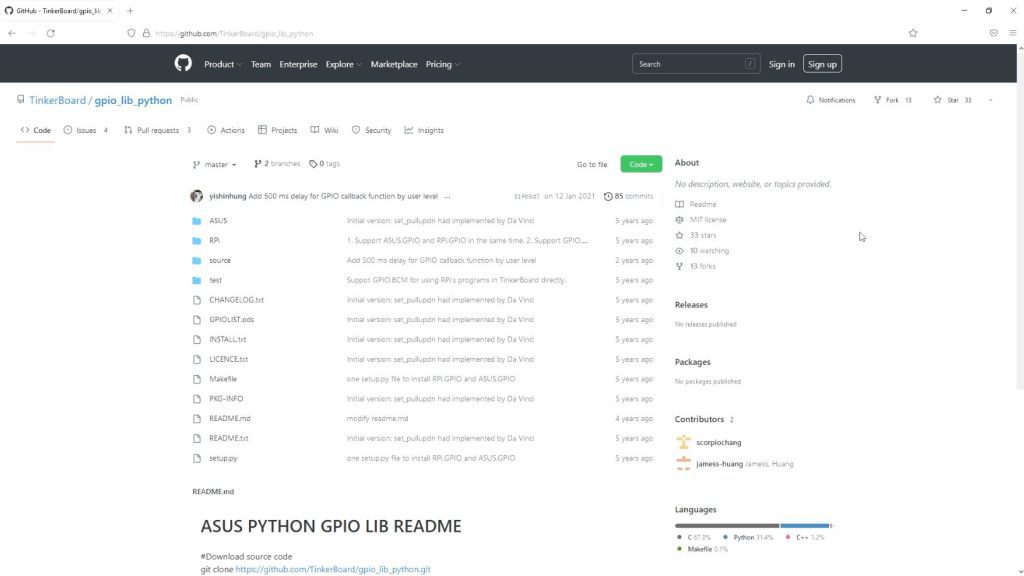
I tried this out a bunch of times in different ways and even on different versions of TinkerOS and just ran into errors – some of which said that this library could only be used on ASUS boards.
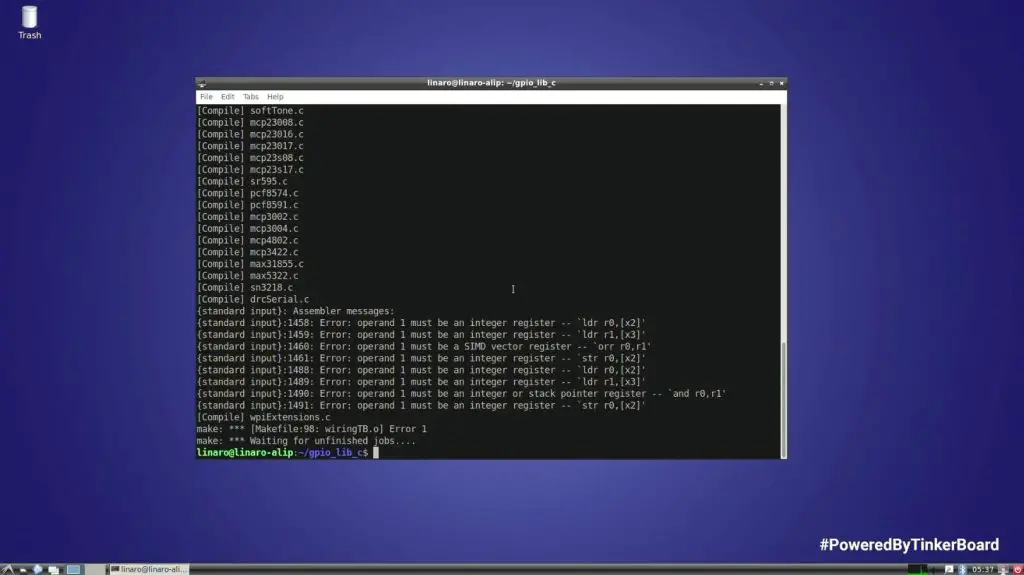
I eventually found an answer to another person’s question on a semi-unrelated topic saying that you don’t need to do the install that I had been trying to do as the libraries were already integrated into the later versions of TinkerOS.
This then lead me to the next issue. All of the examples that I could find use GPIO pin numbers like 0, 10 or 12, but don’t ever say what physical pins these correspond to. These numbers aren’t mapped out on any diagram or in a table that I could find.
I eventually figured out that pin 12 referred to in the scripts, mapped to CPU pin 146, which corresponds to physical pin 32, which was labelled GPIO4C2. Not exactly a logical sequence to follow.
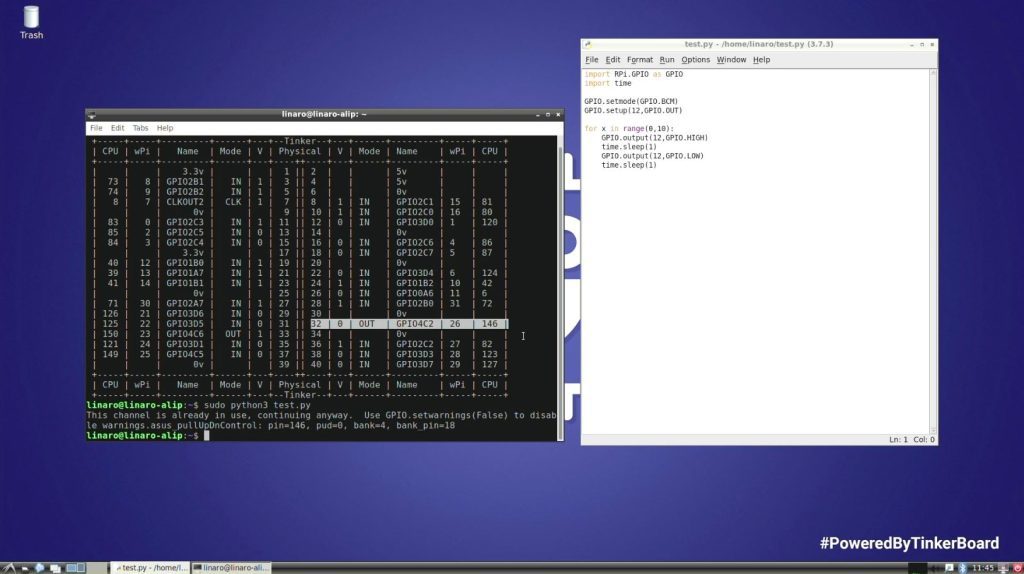
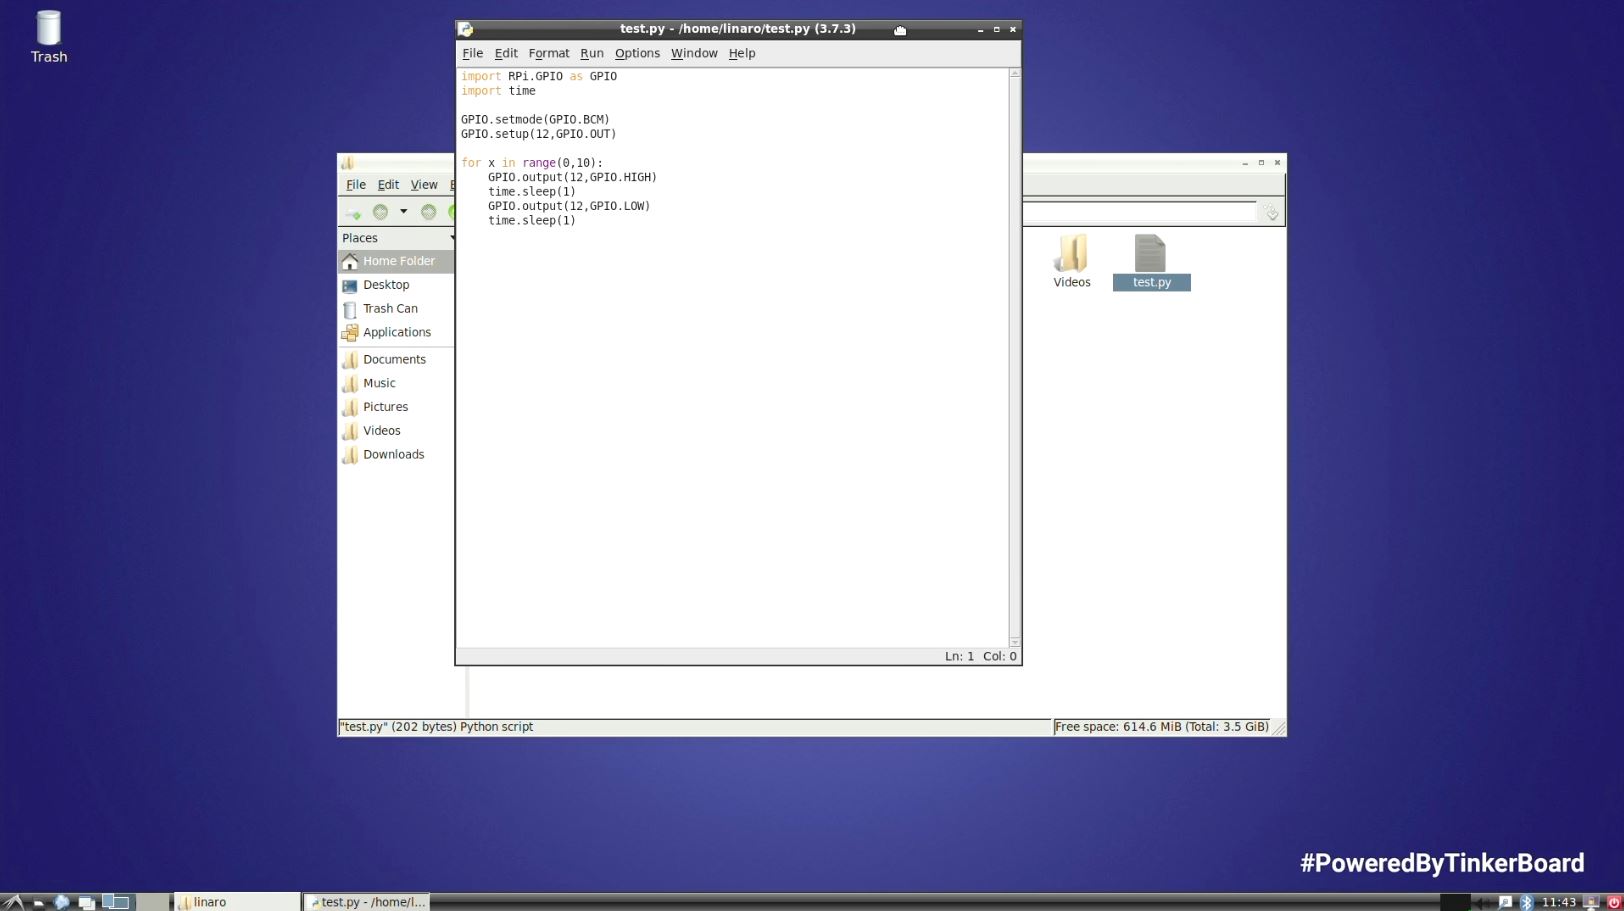
So after a few more hours than I’d like to admit, I eventually got a basic python script like this to turn the LED on pin 32 on and off.
Power Consumption
In the documentation, they claim that the Tinker Board uses 3.65W at idle and 8.18W under load. My testing produced a result of about 3.3W at idle and 8.5W under load, so this lined up with their documentation reasonably well.
The Tinker Board can also handle substantially more than this through power delivery to connected USB devices and that’s why they’ve opted for the 12 to 18V barrel jack rather than a USB C power input like the other two boards.
If low power consumption is your goal then this board is obviously not as low as the previous two that we’ve tested, but it is a lot more powerful.
Final Thoughts On The Tested Pi Alternatives
So, the question I set out to answer, was whether any of these boards could be considered to be worthwhile Raspberry Pi alternatives, and would I recommend any of them?
I’d say that the Orange Pi 3 is a worthwhile option for tinkering with basic electronics projects using the GPIO pins. At $35, it’s fairly cheap and you get a good set of features for your money with a reasonably online community to help you out. You’ll probably manage with basic digital inputs and outputs just fine, but I suspect you’ll get stuck with any components that require established libraries or communication protocols to communicate with the Pi.
The Khadas VIM 2 is probably the best option of the three for a media server or TV box. It’s Android software package seemed to handle video playback well, so I suspect it’ll do a good job with other media-related operating systems as well. You’ll probably run into issues if you try to use it for electronics projects and there isn’t a whole lot of online support for it.
The Tinker Board looked like a great option on paper, and the hardware was quite impressive too, but the documentation relating to the software leaves a lot to be desired. I wasted numerous hours going down the wrong paths on the basics and while this might not happen to everyone, you’ll likely eventually stumble upon a component or piece of software that you’d like to get working and aren’t able to. At $120, I just couldn’t justify buying this over even an overpriced Pi 3 or Pi 4.

Through using these three boards, I was reminded why Raspberry Pi’s are so sought after. Their documentation, software support and online community extend far beyond the actual hardware. Anyone can copy the hardware, but it’s so much harder to build a community around the product like they’ve done around the Raspberry Pi.
I literally spent about 18 hours working on these three boards to get the basic functions I’ve shown here to work, and nothing I’ve shown is anything remotely complex. It wouldn’t have taken me more than ten minutes to get a brand new Raspberry Pi running on a new operating system installation and blinking an LED. I would have also been be able to find numerous tutorials to explain how to do so.
So if you value your time and you expect to build projects that require more complex electronics or software to function then I’d definitely still recommend spending the extra money or buying an older Raspberry Pi. You’re not just buying the hardware, you’re buying into a community, and you’ll save yourself a lot of frustration in doing so.