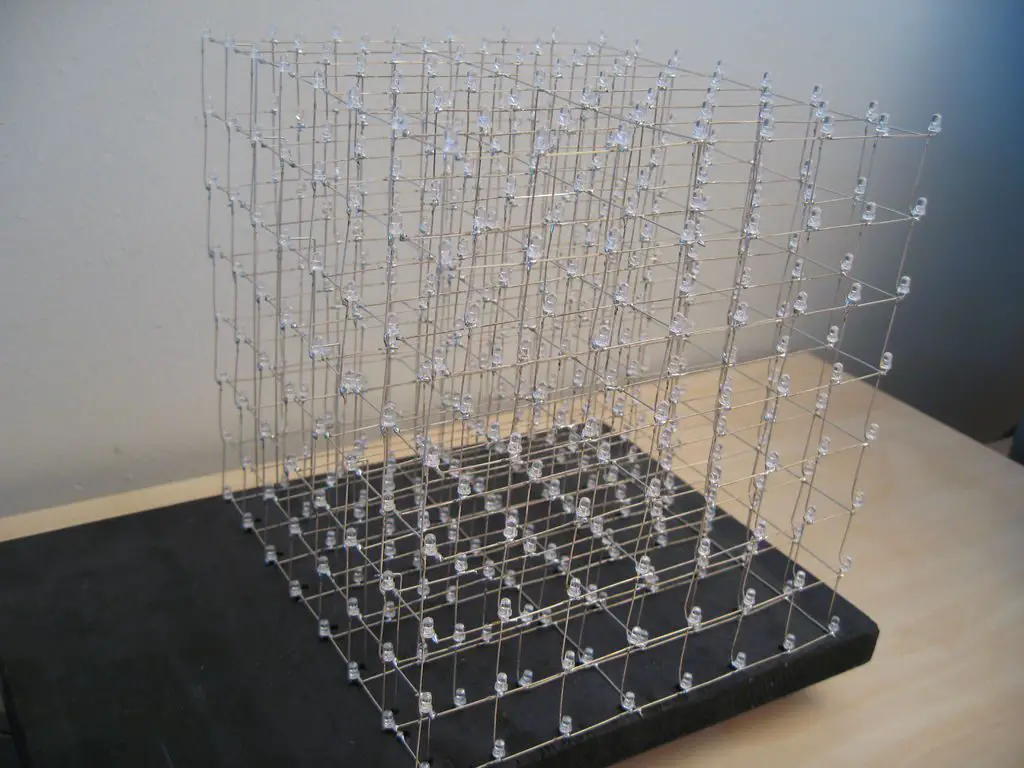
This 8 x 8 x 8 LED cube is probably one of the coolest Arduino projects we’ve come across. You’ll learn how to control 512 LEDs independently using a simple ATmega32 Chip or Arduino Uno / Duemilanove micro-controller. You’ll also learn how to use multiplexing, a process of turning LEDs on and off individually in a way that makes numerous LEDs appear to be on simultaneously.
The guide we’d like to recommend has been written up by chr and he has really done an awesome job of taking you through the step by step instructions to build and program your LED cube. We’ve provided the full link the this guide below.
It will take you a few days to build the hardware and then a day or two to complete the programming but it will definitely be worth it when you see the results.
Have a look at the video below if you still need convincing.
According to chr, this project looks far more complex than it actually is and you should be able to complete it as long as you have a basic understanding of:
- Simple Electronics
- How to Solder
- How to use a Multimeter
- Programming in C or The Arduino IDE – This is optional as he does provide the full working code which you’ll just need to upload.
The cube costs around $67 to build with the ATmega32 chip or $73 if you’re building it with an Arudino Uno.
The full guide to building the cube can be found on chr’s Instructable Guide.
If you’re new to Arduino you may want to read through our guide on Getting Started With Arduino before you take on a more complex project.
Have a look at the cube running Conway’s game of life simulation:
Would you like to learn more about this project? Are you interested in projects similar to this one? Then Practical Arduino Projects is the book for you, available now on Amazon as an eBook or in Print form.
Let us know if you’ve built an LED cube in the comments section below. We’d love to hear how yours has turned out and what you’ve used it to display.