Today I’m going to be taking a look at the new Oplà IoT kit from Arduino, which they’ve kindly sent across for me to unbox and share with you.
Thank you to Arduino for making this post and video possible!
The kit was launched in early November, so just in time to find it under the tree for Christmas 2020.
Where To Get An Arduino Oplà Iot Kit?
The kit sells for $114 from the official Arduino online store. I’ve put links to the Arduino store product page and to the kit on Amazon below. It is quite expensive, but it also comes with a lot of functionality on the IoT carrier board and a lot of potential for building more complex IoT projects once you’ve worked your way through the included ones.
Purchase Links
What’s On The Box?
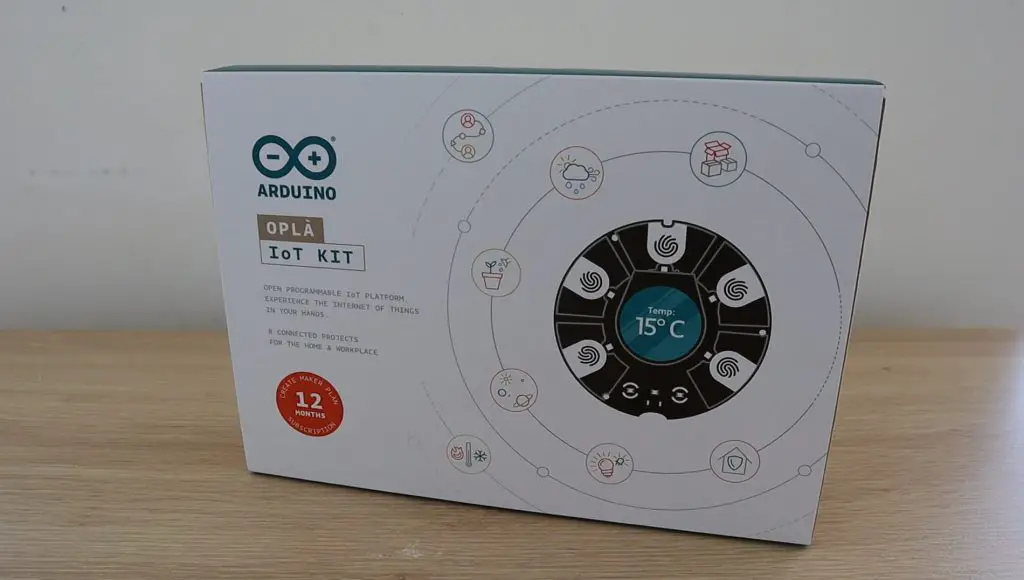
Let’s start by taking a look at what the box looks like and what’s on the outside.
The box is quite large and prominently features the MKR IoT Carrier board on the front. There are also a couple of graphics around the carrier depicting the included projects and a bright orange feature disc highlighting the included 12 month Create Maker Plan Subscription.
On the back of the box, we’ve got a description of the included components and details of the included projects.
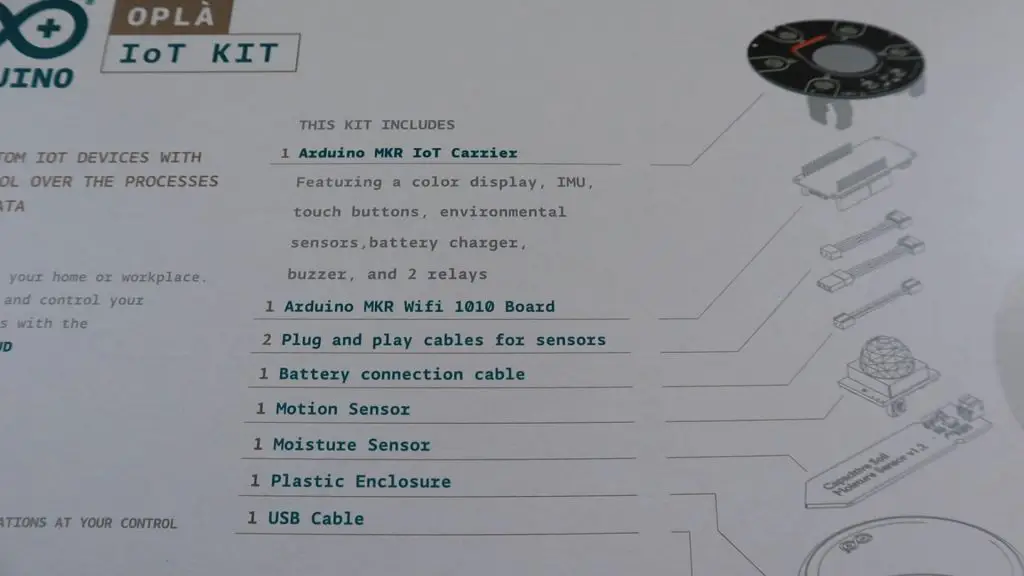
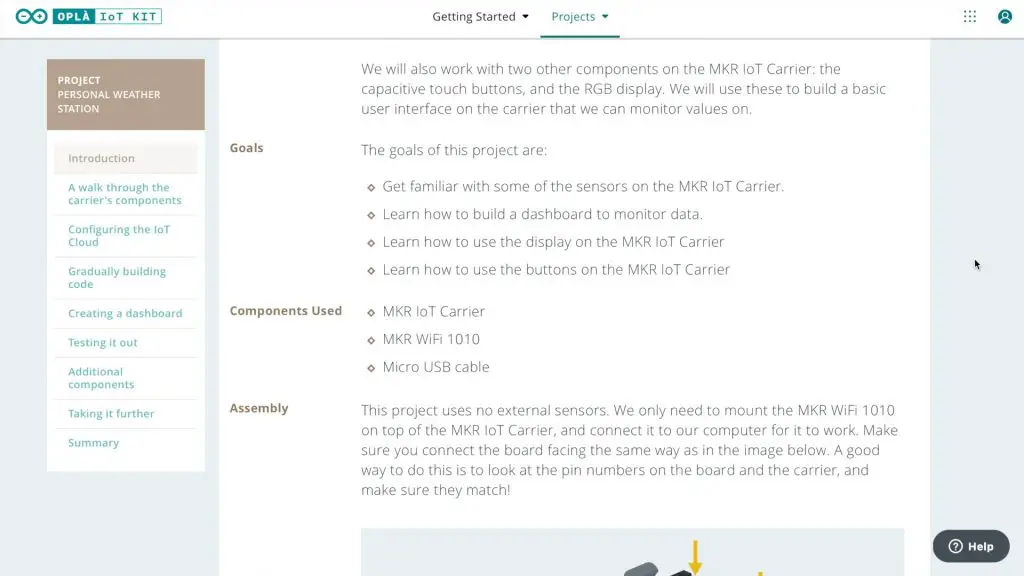
From the list on the box, the kit includes a MKR IoT carrier, which is the big round board featured prominently on the front, as well as the Arduino MKR WiFi 1010 board, cables for the sensors and battery, a motion sensor, a moisture sensor, a plastic enclosure and a USB cable.
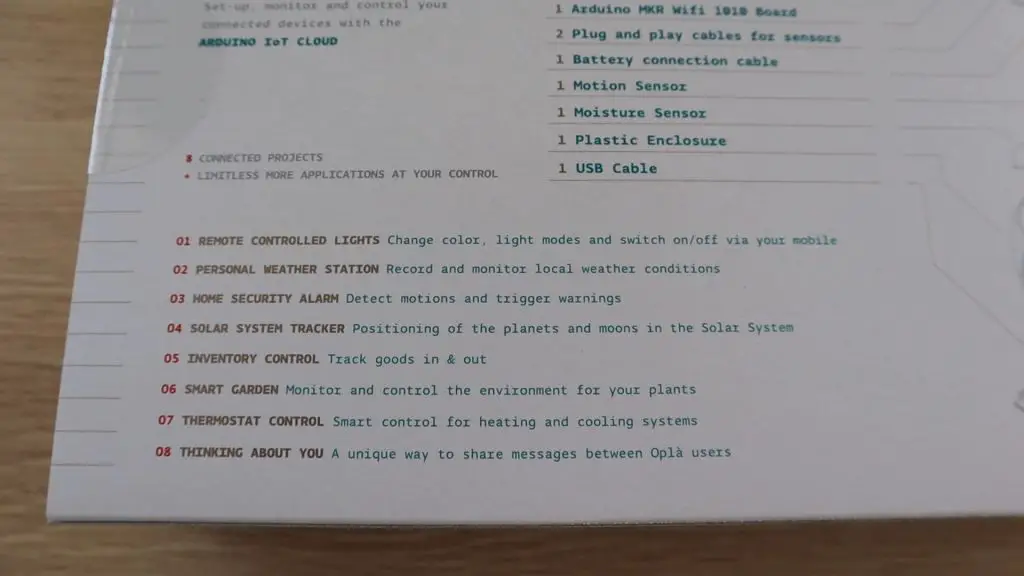
Using the included components and their instructions, you can build 8 projects, which all make use of the Internet in some way.
Some of these projects are more common, like the Smart Garden and Personal Weather Station and there are also some unique ones like the Solar System Tracker and the Thinking About You project.
Unboxing The Arduino Oplà IoT Kit
Now that we’ve taken a look at what’s on the outside, let’s get the box open and see what is inside.

The outside of the box is a slip-on cover which is held in place with a clear, round sticker on each end.
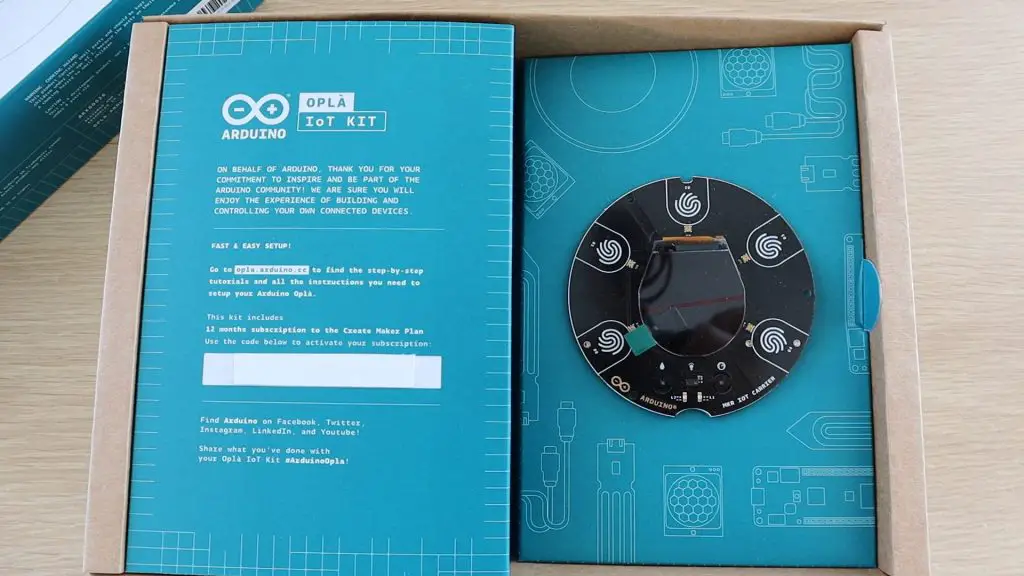
With the slip-on cover removed, you’re immediately presented with the MKR IoT carrier board, as well as an introduction to the kit and instructions on where to get started.
You also get a code to activate your 12 month Create Maker Plan.
The carrier board is the heart of this kit, and although the MKR WiFi 1010 board is the brains behind the kit, this carrier is the device you connect all of the sensors and IO devices to and what you use to control and interact with the Arduino.
You then lift the side panel which the IoT carrier is mounted onto to find the rest of the components behind it.
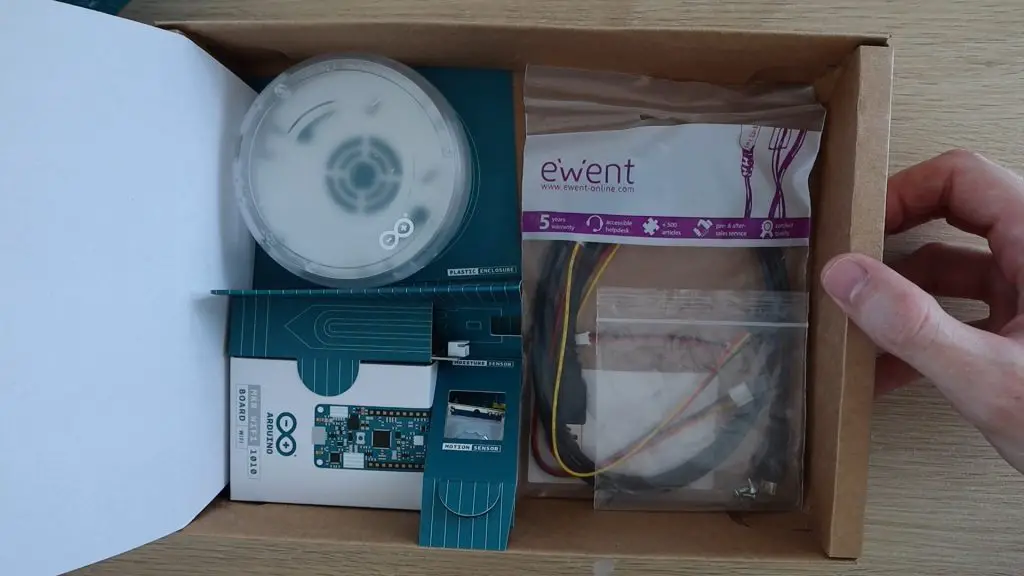
So, in the back of the box we’ve got the Arduino, the plastic enclosure, the sensors and the cables.
Taking A Closer Look At The Oplà IoT Kit Components
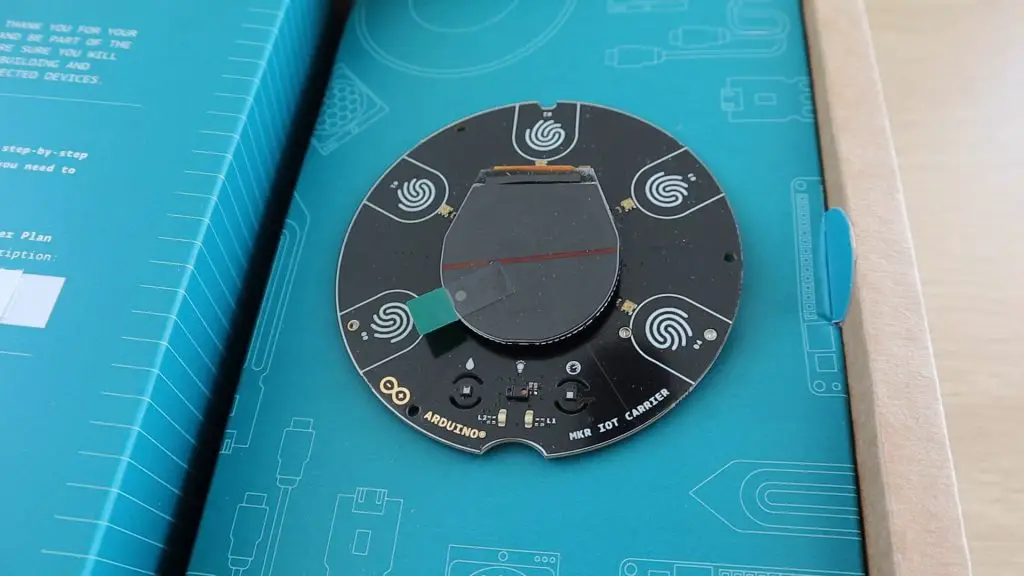
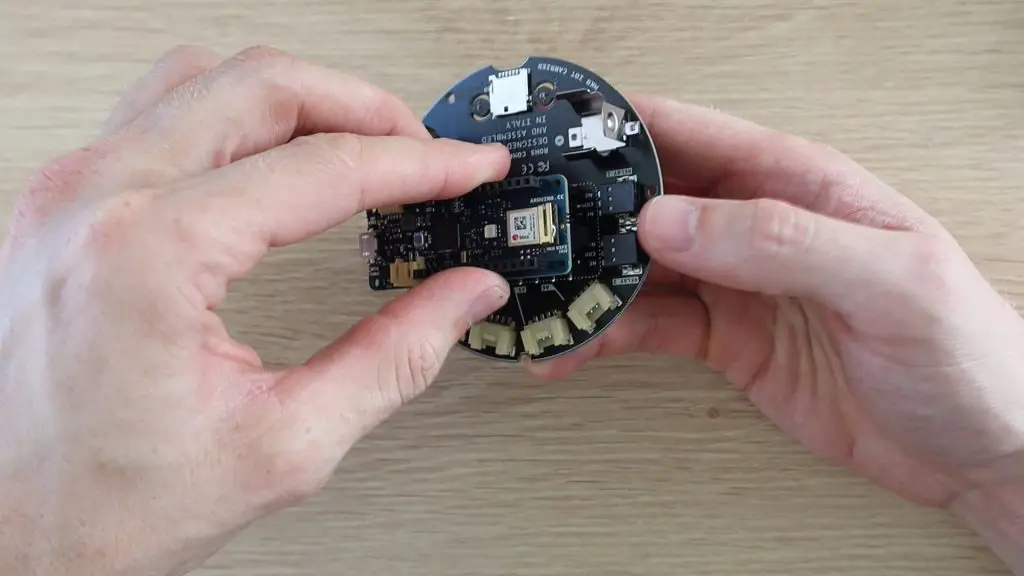
Now that we’ve got the box open, lets get the components out and take a closer look at each of them. We’ll start with the MKR IoT Carrier on the front of the flip-out section.
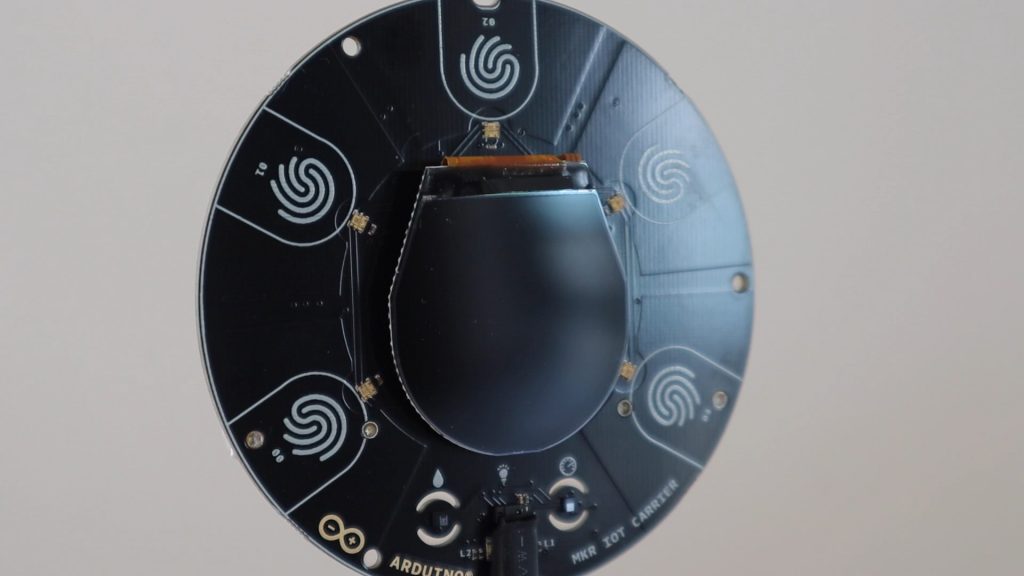
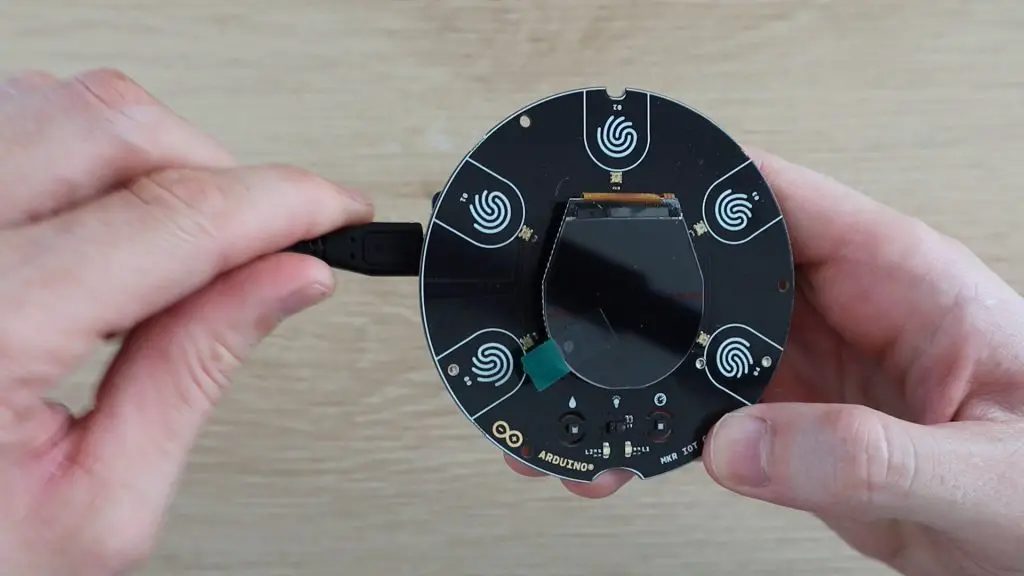
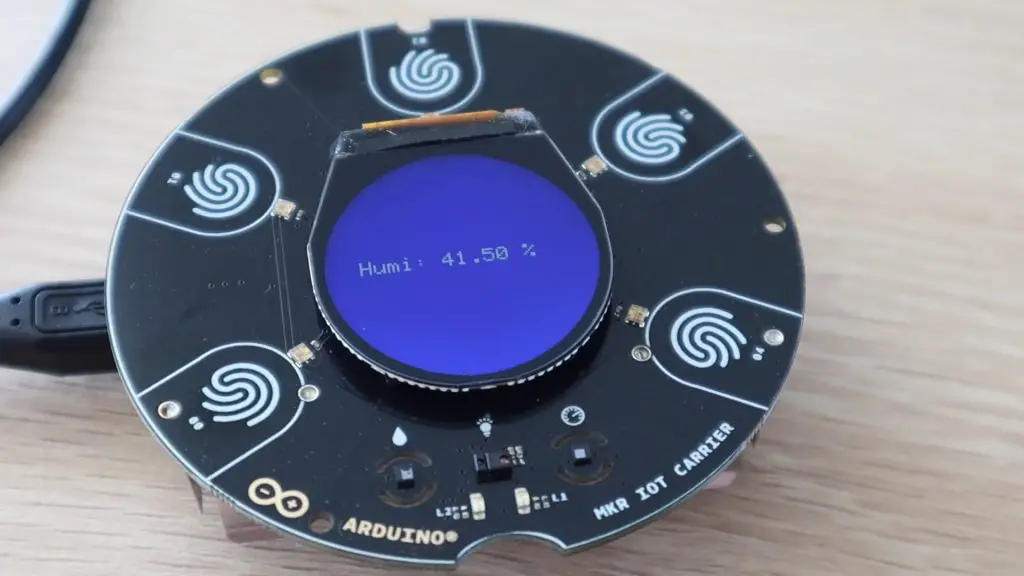
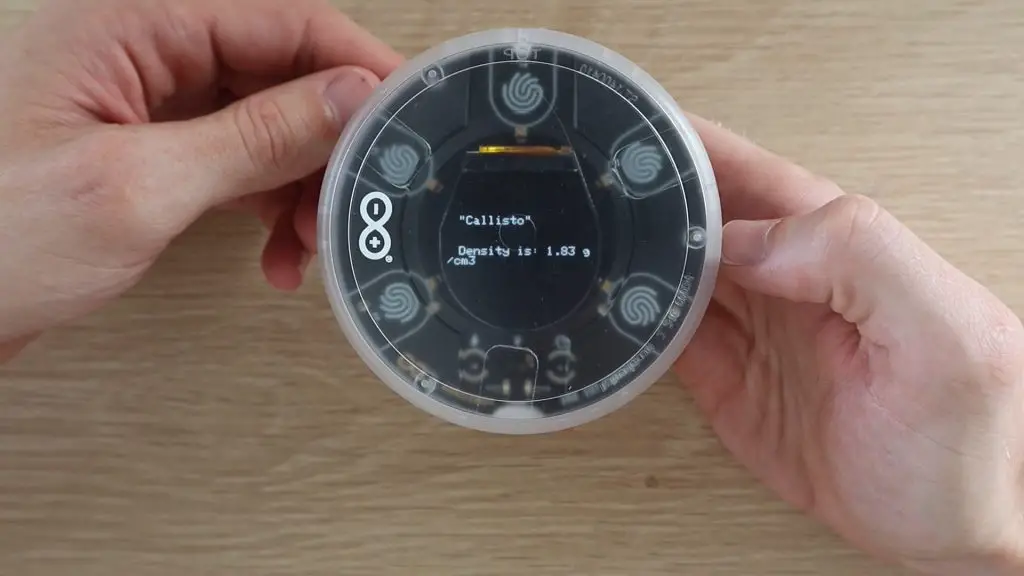
On the carrier we’ve got a large round OLED display in the middle surrounded by 5 RGB LEDS and 5 captive touch sensors.
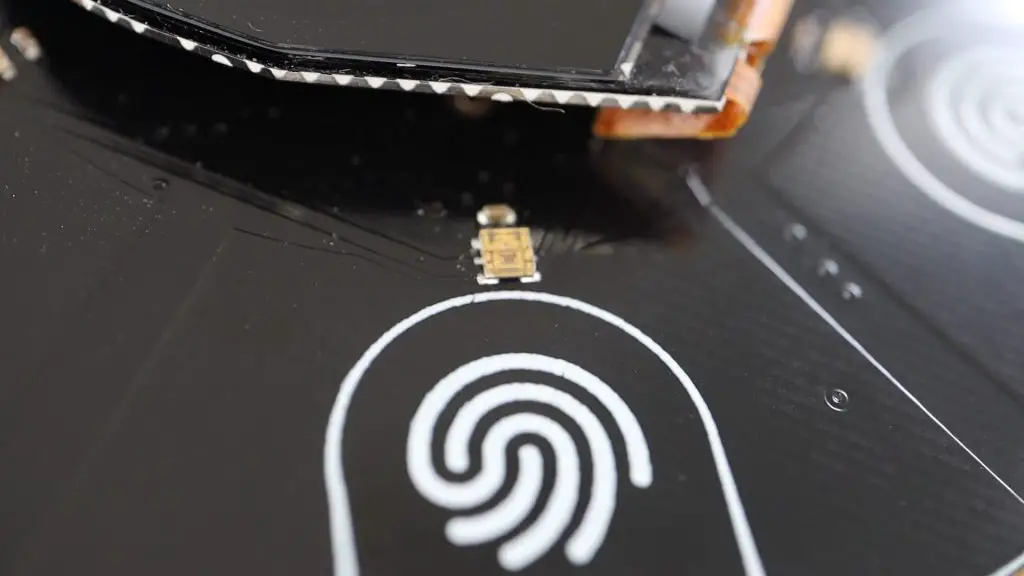
We’ve also got some smaller sensors along the bottom edge, which are each labelled with a graphic.
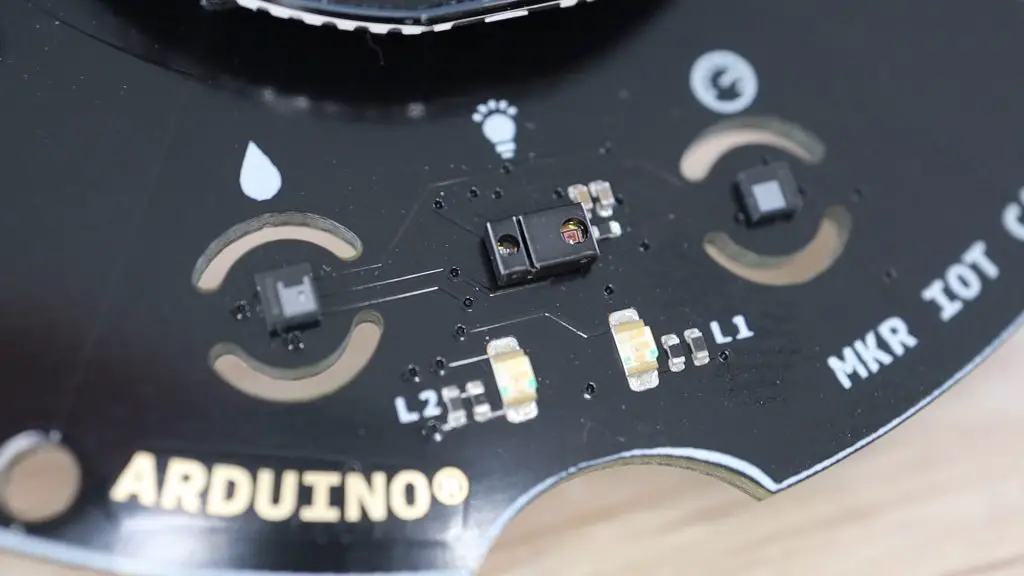
These look like a humidity sensor, light sensor, and then the IMU or motion sensor. There are also another two small LEDs below the sensors.
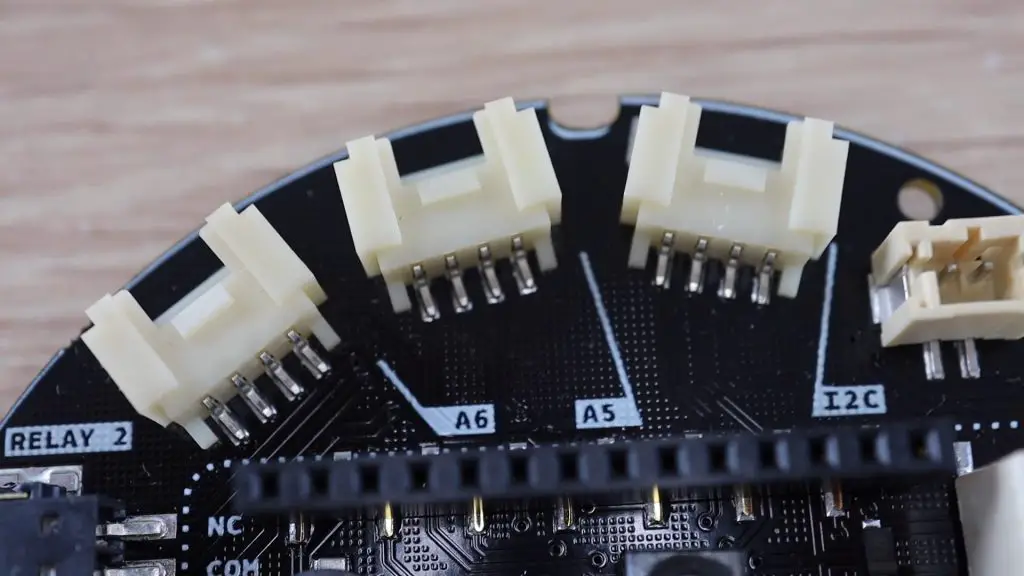
On the back, we’ve got some sockets for external sensors. These include two analogue inputs and an I2C port. The plug on the right side is for the battery cable connector.
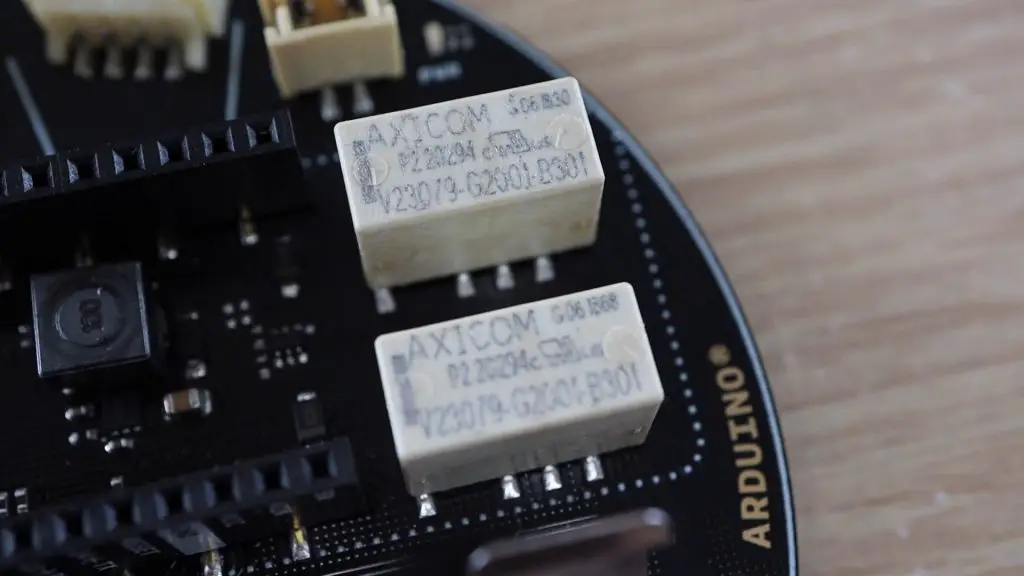
We’ve got two relay outputs, which can be used to drive things like lights and pumps or switch appliances on and off. The relays are on one side of the carrier and the ports for the connections to the relays on the other.

We have also got the socket for the Arduino, and then an SD card slot, and a battery holder.
The carrier takes an 18650 lithium ion battery, which from the box sounds like it can be charged by the carrier board.
I like that they’ve included the battery holder to enable the board and enclosure to be completely standalone, without needing a power supply. I’ll probably test out the battery life at some stage as I’ve always found WiFi-connected controllers to be quite power-hungry.
We’ve then got the plastic enclosure. The plastic is frosted over, but you can still see into it to see the buttons and display. It feels like it’s well built and good quality plastic, like it would hold up fine if it were dropped or bumped around.

The back cover looks like it just snaps into place and has two screw holes to mount it onto a wall.
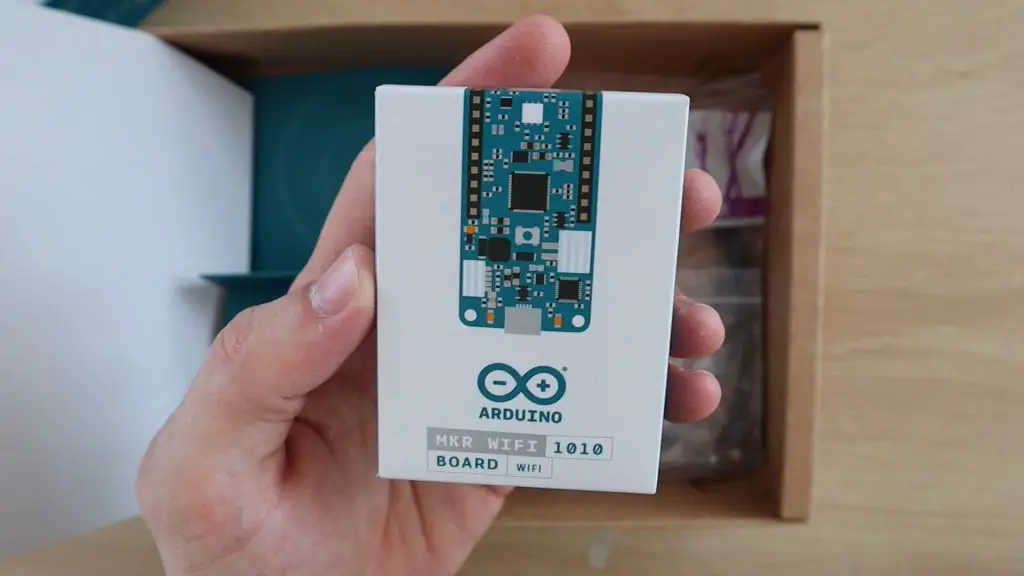
We’ve then got the Arduino MKR WiFi 1010 board, which Arduino says is the easiest point of entry to basic IoT and pico-network application design.
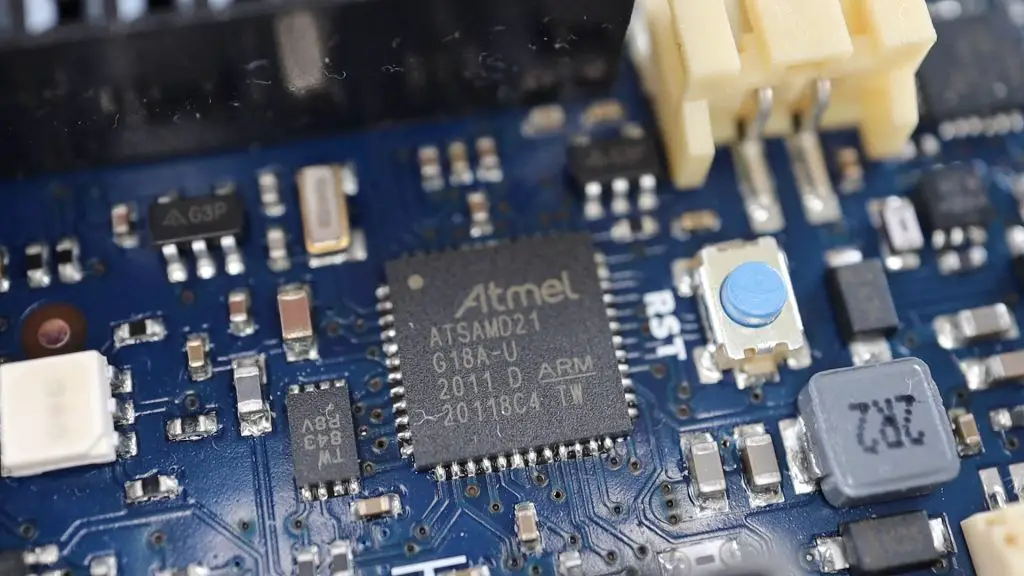
The chip on the board is a low power Arm Cortex-MO 32-bit SAMD21 processor and it has both Bluetooth and WiFi connectivity, which is powered by the onboard Nina-W10.
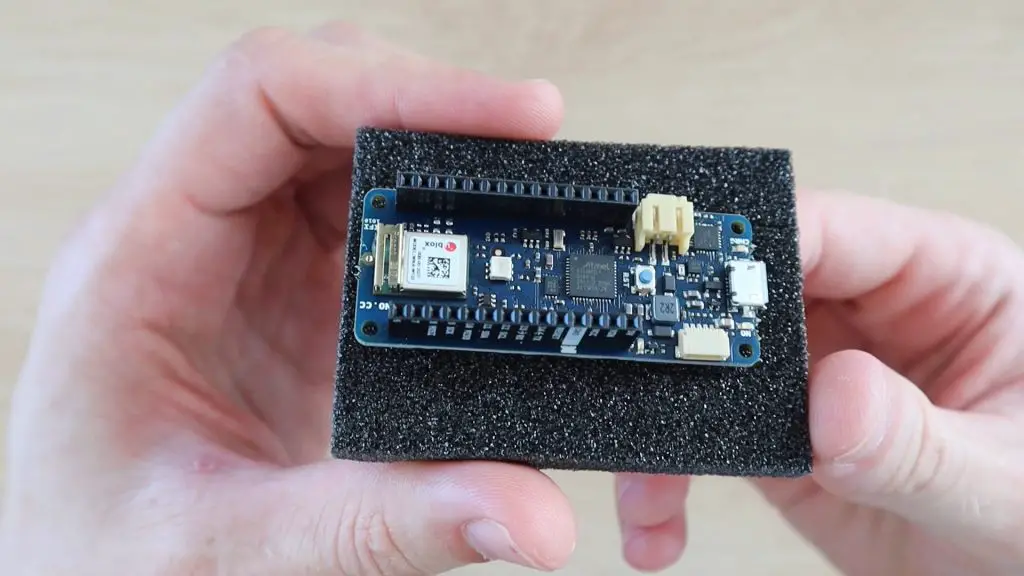
The board has 8 digital IO pins, 13 PWM pins, 7 analogue input pins, a 10 bit analogue output pin as well as UART, SPI and I2C interfaces, so it really is a powerful board with a lot of features.
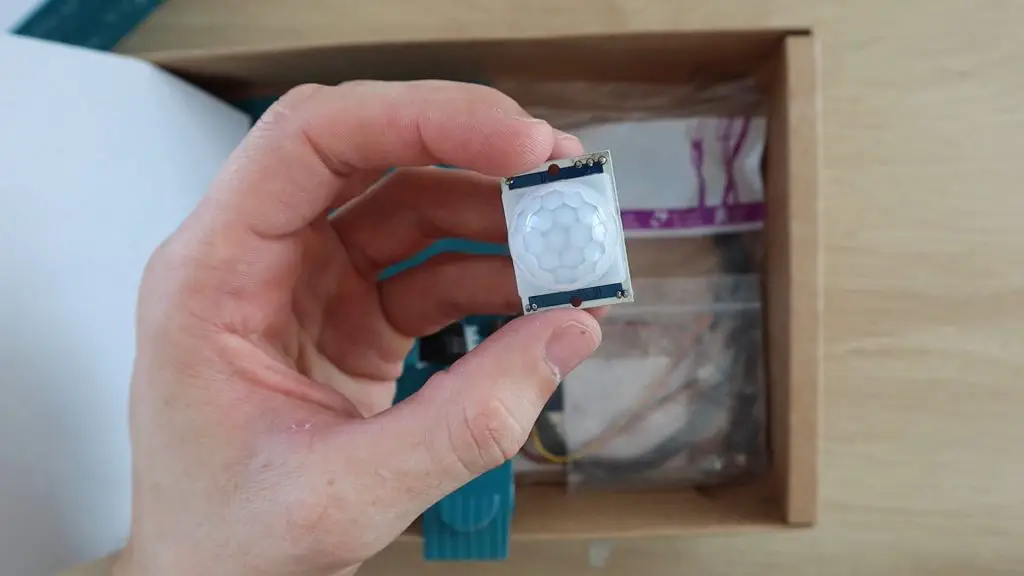
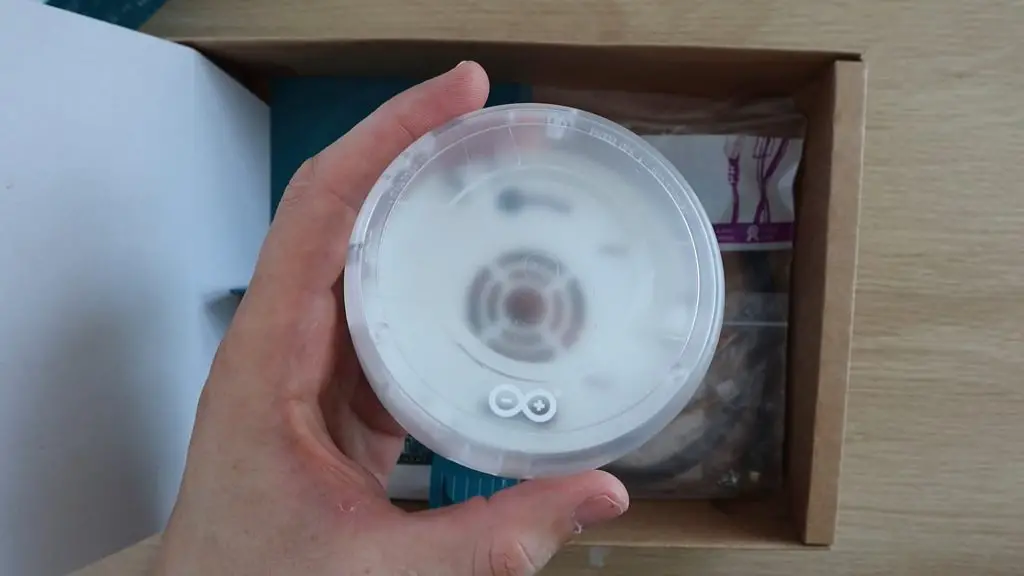
We’ve got a motion sensor.
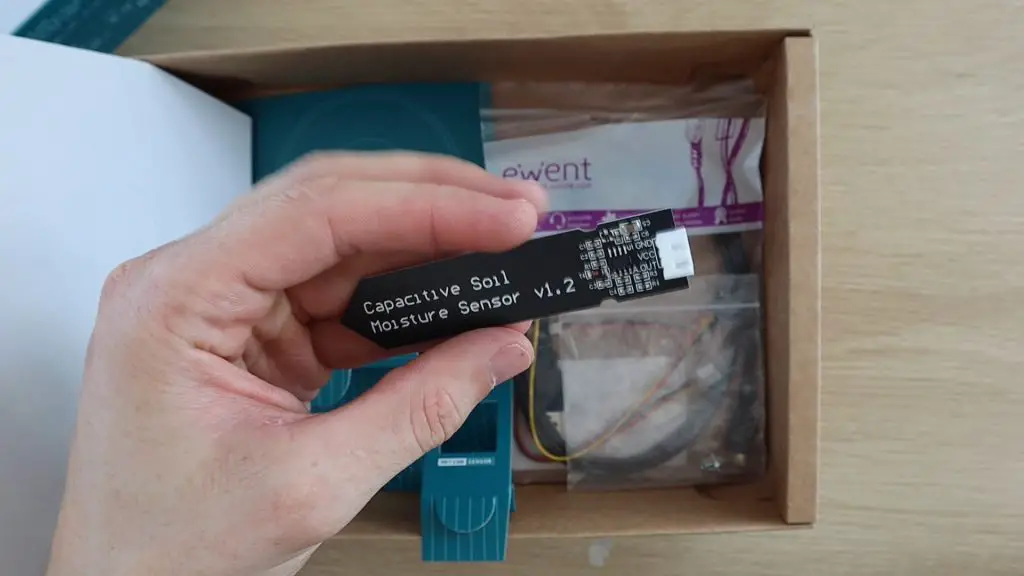
A captive moisture sensor, which I prefer over the resistive moisture sensors which are often supplied.
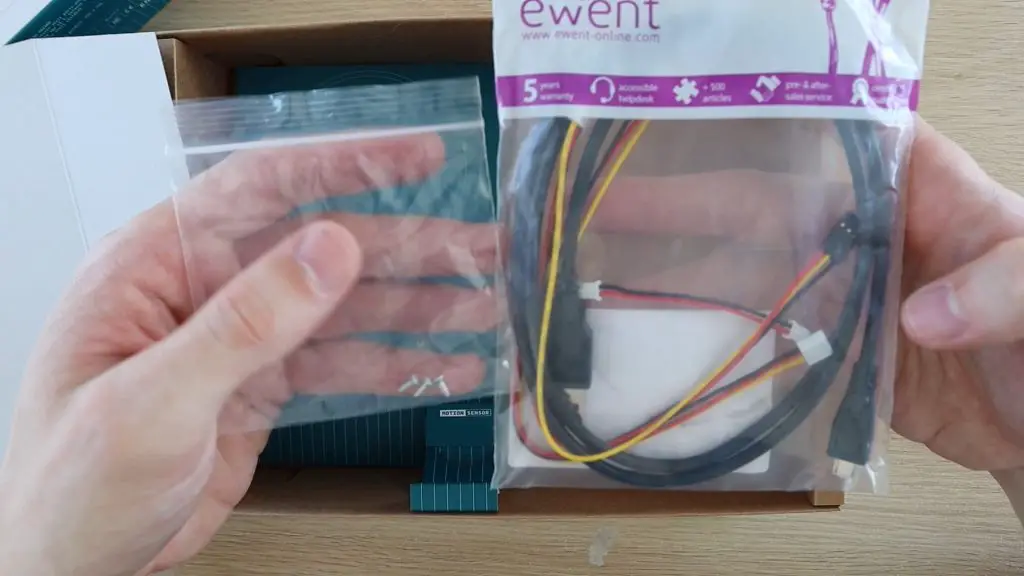
And then also the cables and some small screws, which I assume are to mount the carrier to the case.
Getting Started With The Oplà IoT Kit
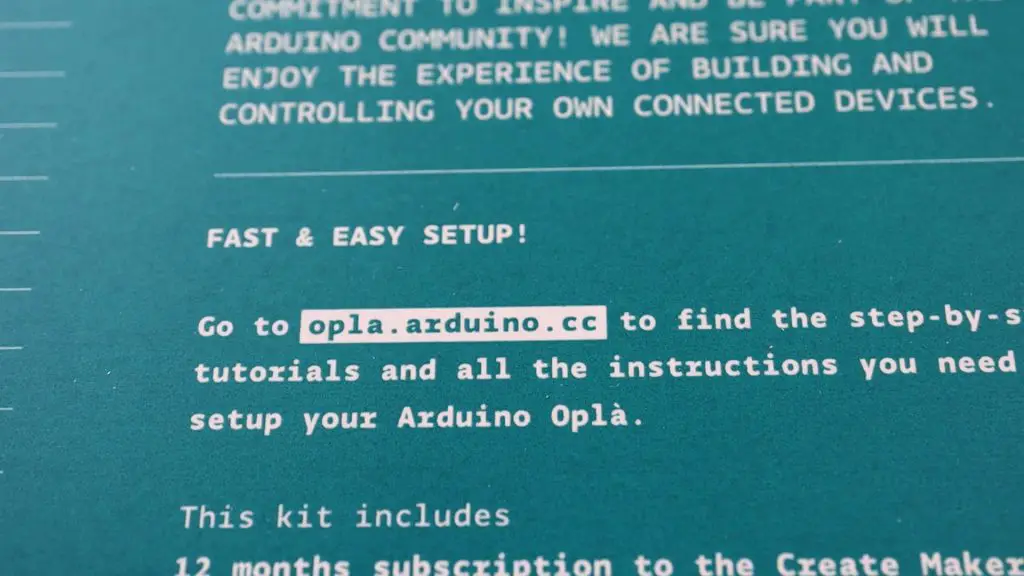
The front panel inside the box said we should head over to opla.arduino.cc to get started, so let’s have a look at what is there.
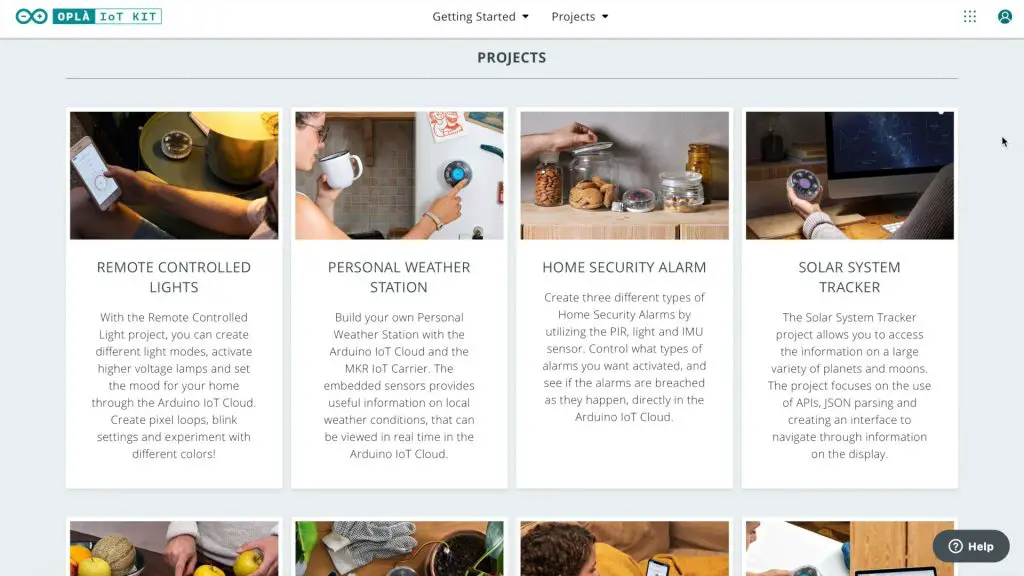
The Opla IoT homepage lists the 8 included projects.
Each project page includes instructions that detail which components are used, as well as how to assemble, program and use the Arduino and carrier to complete the project.
There are also two getting started guides.
The first, called Getting To Know The Carrier, shows you how to use and program the MKR IoT Carrier
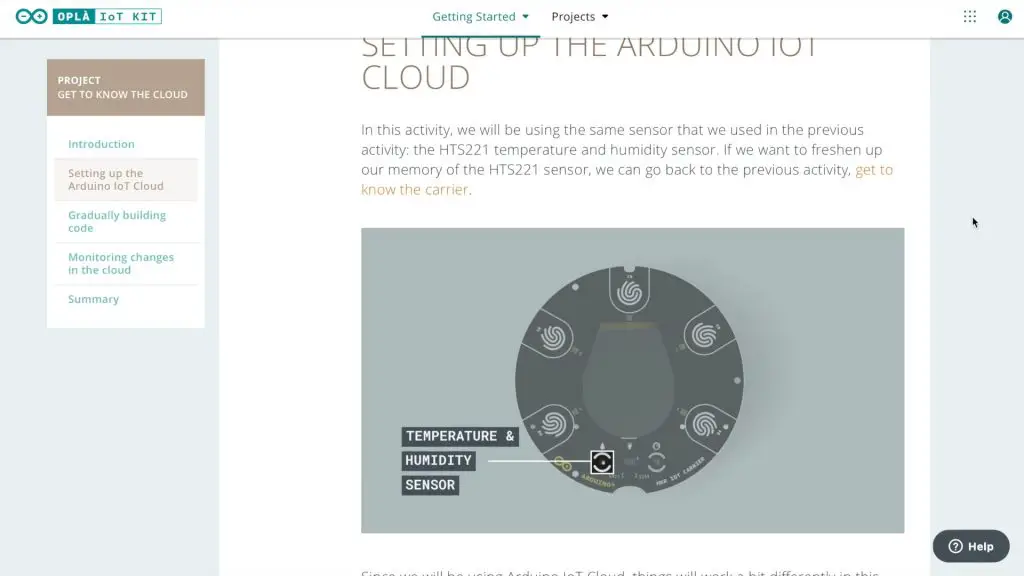
The second, called Getting To Know The Cloud, details how to use the cloud functionality, including programming the Arduino and then creating and using web-based Dashboards.
There are essentially two different ways to use this kit, the first is to upload your project directly to the Arduino and use it in conjunction with the carrier, and the second is to load a generic cloud application onto the Arduino and connect to it using Arduino’s cloud server and web-application. This enables you to create dashboards to view information and control and monitor the sensors and relays remotely.
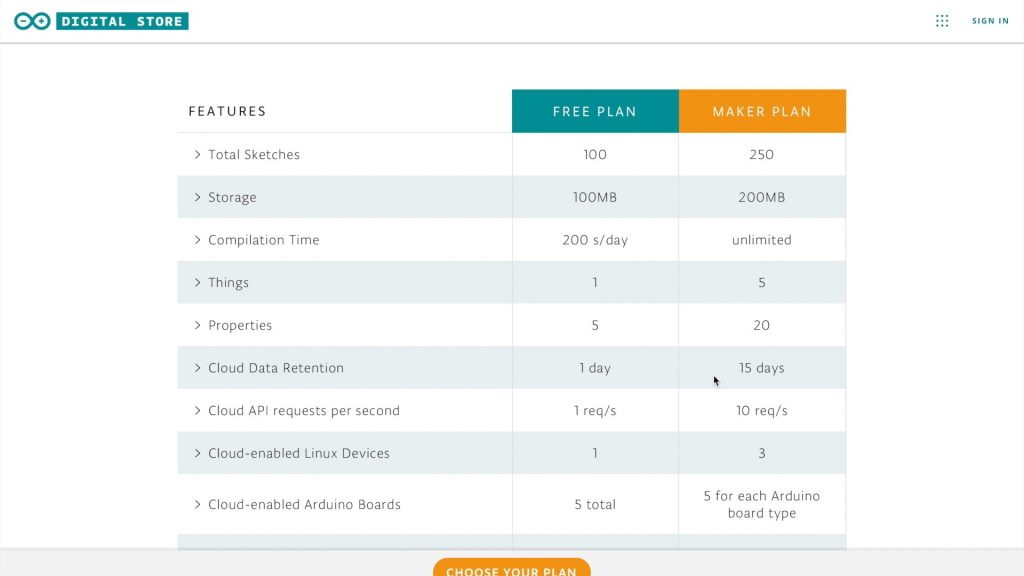
Included with the kit is a 12-month maker plan, which gives you access to Arduino’s web-based toolkit, enabling you to create, store and compile sketches online as well as store data from your cloud-connected Arduino boards. They’ve also got an Android and iOS mobile app that allows you to view and control your Arduino from your mobile phone or tablet.
Let’s put the Arduino onto the IoT carrier and try out the introductory sketch.
The Arduino plugs into the back of the IoT carrier and you still program the Arduino by plugging the included USB cable directly into the Arduino’s USB port.
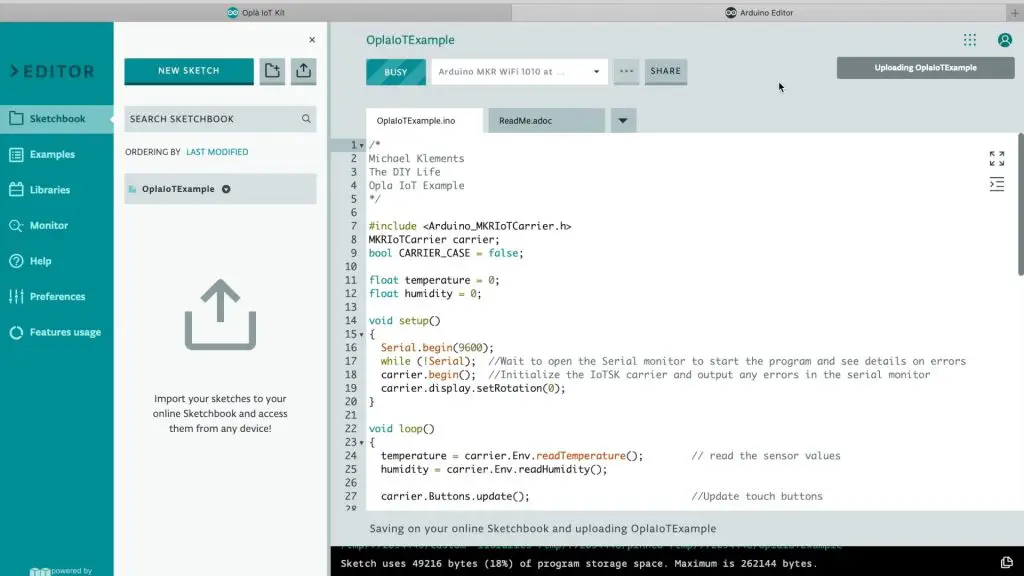
I then used the online IDE to compile and upload the OplaIoTExample code, which displays a basic temperature and humidity readout on the OLED display.
You’ll need to install the Arduino Create Plugin on your computer to allow the web application to communicate with your Arduino, but this was quick and easy to do and the application picked up my board right away.
I uploaded the code and was able to then see the temperature and humidity data being displayed on the Serial monitor.
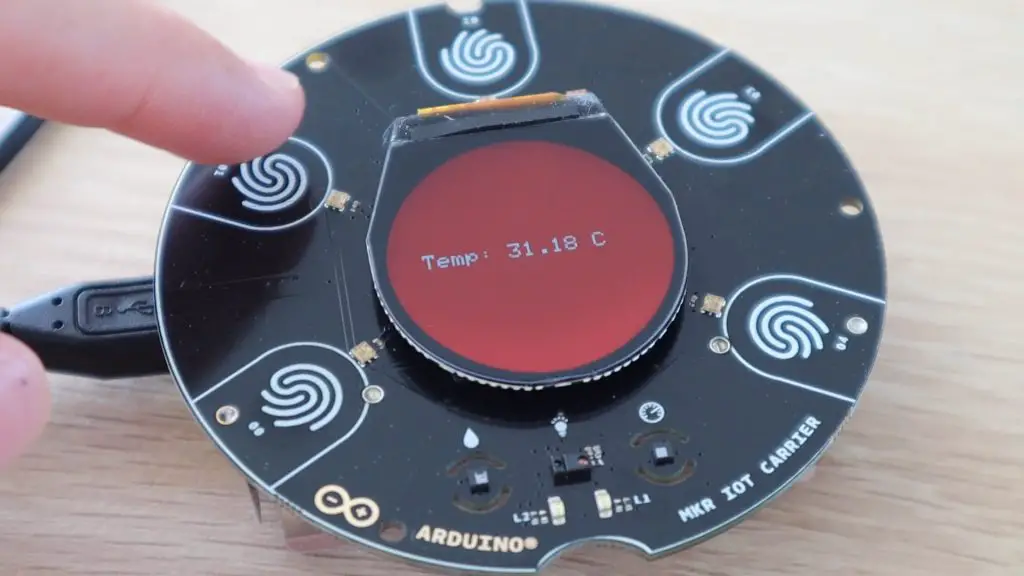
The carrier now also displayed the temperature in red and I was able to change between the temperature and humidity displays by simply touching the two sensors buttons, 00 and 01, alongside the display.
First Impressions of the Oplà IoT Kit
As with other genuine Arduino products, the IoT carrier board feels like it’s good quality and well built. I’ve had my original Arduino Uno for over 8 years now, I’ve built hundreds of projects on it and it’s still going strong.
The carrier and MKR WiFi 1010 board look and feel modern. The round colour OLED display at the centre looks great and gives you loads of options for creating feedback displays and menus for the surrounding touch sensors. The touch sensors are also a welcome addition and add to the modern and unique look of the carrier.
I like that they’ve included the enclosure as a way to make your projects look more complete without having to buy or 3d print a case. The case reminds me of the Nest Thermostat, and wouldn’t look out of place on a wall in your home as an IoT hub for your latest project.
Overall, I really like that Arduino has taken another step towards building a cloud-based system. There are already loads of projects and platforms out there to create IoT devices. But without a dedicated server to host the cloud services, you’re left with only having local network control or having to try and get your own static IP address and configure port forwarding on your router to access your device over the internet. This makes it significantly more complicated, and less secure than this solution.
Look out for my next Oplà IoT post where I’m going to try building one of the included projects.
What do you think of the Arduino Oplà IoT Kit? Do you have one already or are you going to be getting one? Let me know in the comments section.