I recently built a soil moisture monitor, which relies on a 18650 lithium-ion battery to power it. This got me wondering which Arduino would be best to use for a battery-based project and what can be done to improve the battery life. So, in this test, we’re going to be looking at the power consumption of a number of different Arduino boards with the aim being to try and power them for as long as possible using two 18650 lithium-ion batteries.
Here’s a video of the test, read on for the test write-up:
Setting Up The Test Rig
Let’s get started by showing you what I’m going to be using for the test and how I’m going to be testing each Arduino using the batteries.
These 18650 batteries are 3.7 voltage each and come in a range of capacities from around 1800 to 4500mAh. The ones used for this test are on the higher end, at 4200mAh, meaning that they can supply 4.2mA for 1000 hours or 420mA for ten hours or any combination of current and time for which the product is 4200.
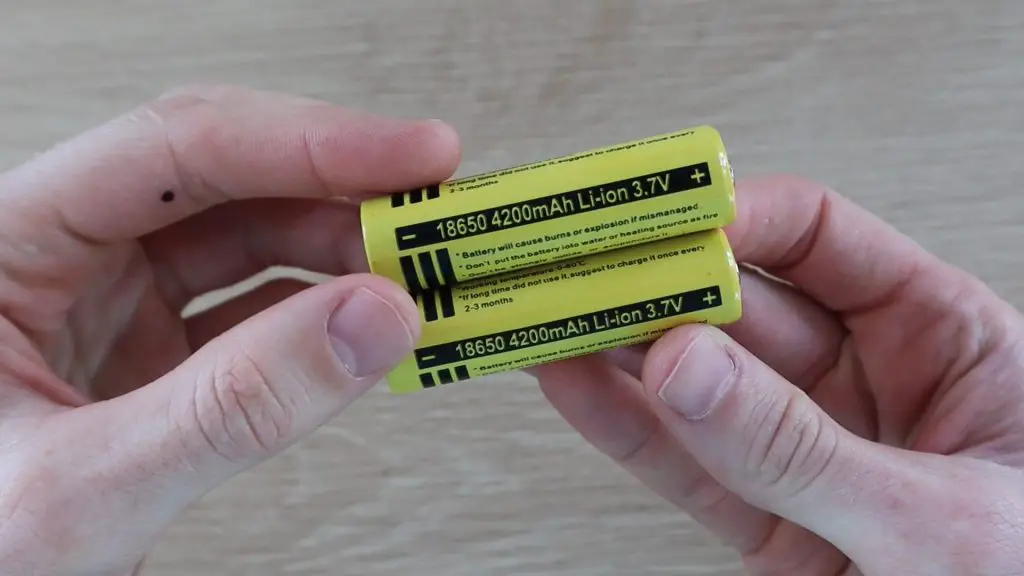
Most Arduino boards require a minimum input voltage of around 6V, so we’ll be powering each Arduino using two batteries connected in series, with an input voltage of 7.4V to power these boards. I’ve also included a 3.3V Pro Mini, which is able to run on a single battery as a comparison.
4000mAh 18650 Lithium Ion Batteries – Buy Here
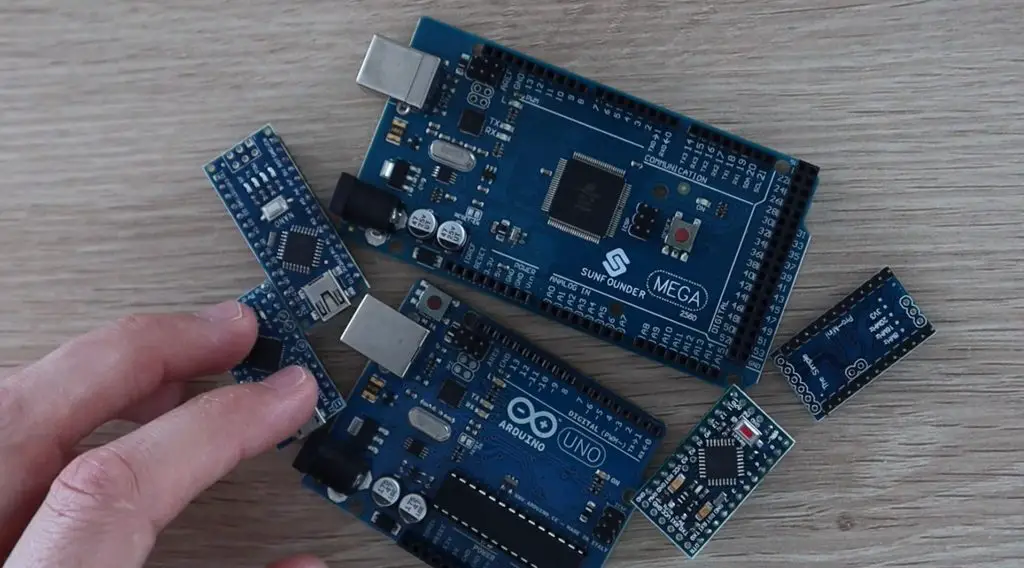
We’re going to be testing the power consumption of 6 different Arduino boards:
- Arduino Uno – Buy Here
- Arduino Mega – Buy Here
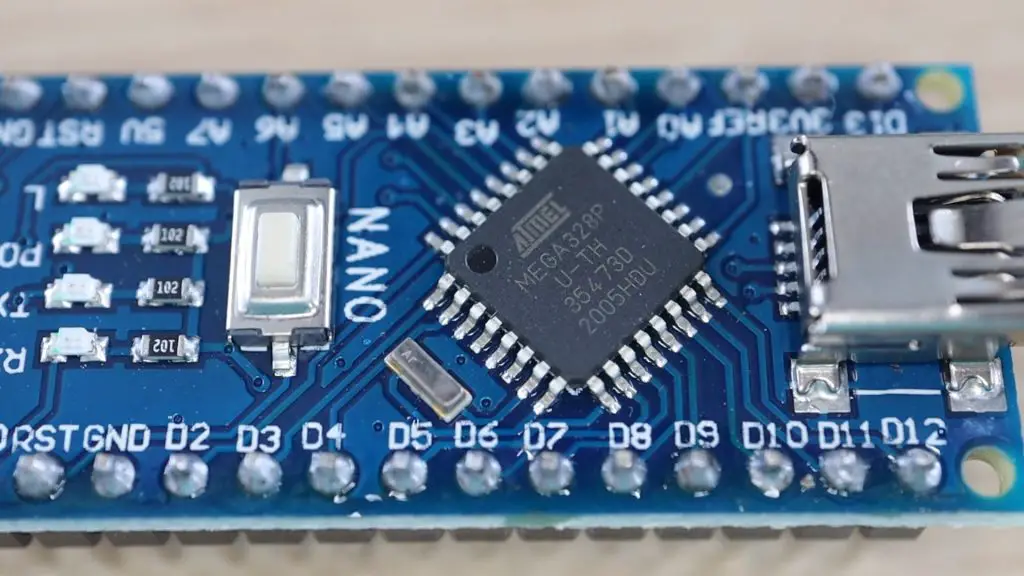
- Arduino Nano – Buy Here
- Arduino Pro Micro – Buy Here
- Arduino Pro Mini 5V – Buy Here
- Arduino Pro Mini 3.3V – Buy Here
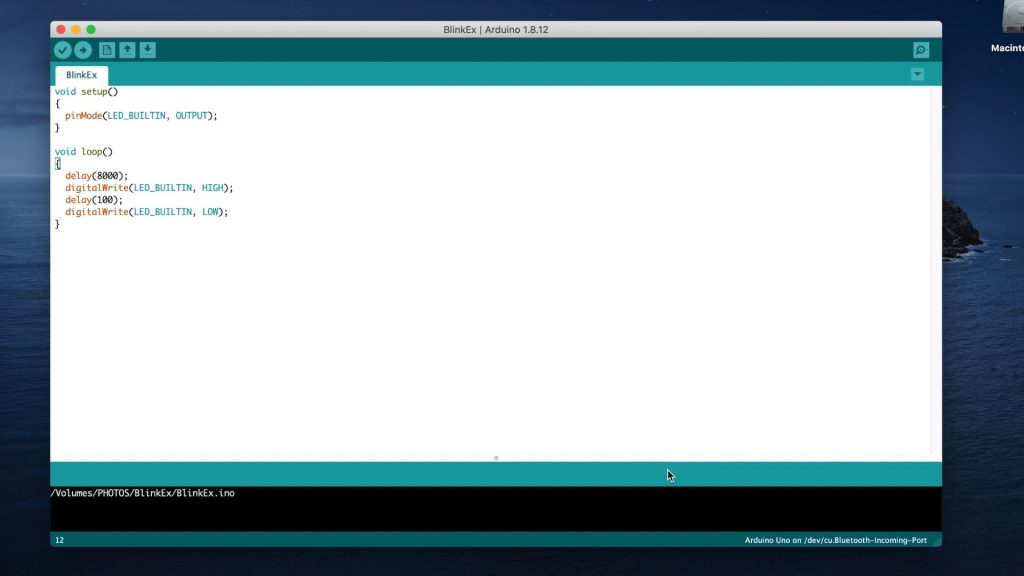
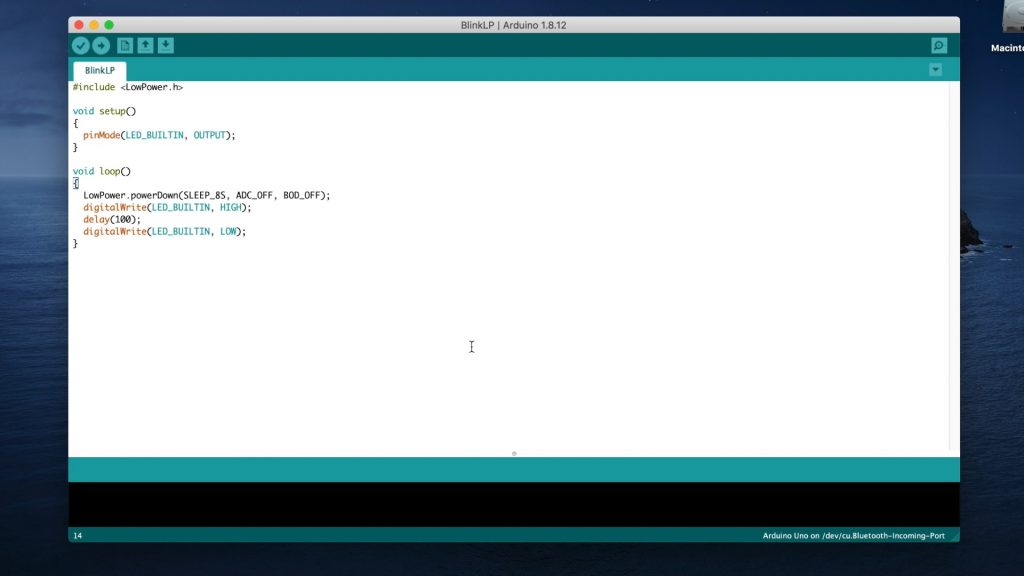
I’m going to be loading a basic sketch onto each Arduino which has has an 8 second delay and then flashes the onboard LED for 100milliseconds just to tell us that the sketch running and this will just loop repeatedly.
The Atmega chips on these boards support a number of different sleep modes that turn off any unused peripherals in order to conserve power when the Arduino is running on batteries.
I’m not going to go into too much detail on how this works, but we’ll be using a low power library that enables you to put the Arduino to sleep for a certain amount of time or until an interrupt is triggered.
So, I’ll include two tests for each board, one without sleep mode and one in which the Arduino is put to sleep for the 8 seconds between flashes instead of running a delay. I’ll discuss this option a bit later when we look at the difference in power consumption.
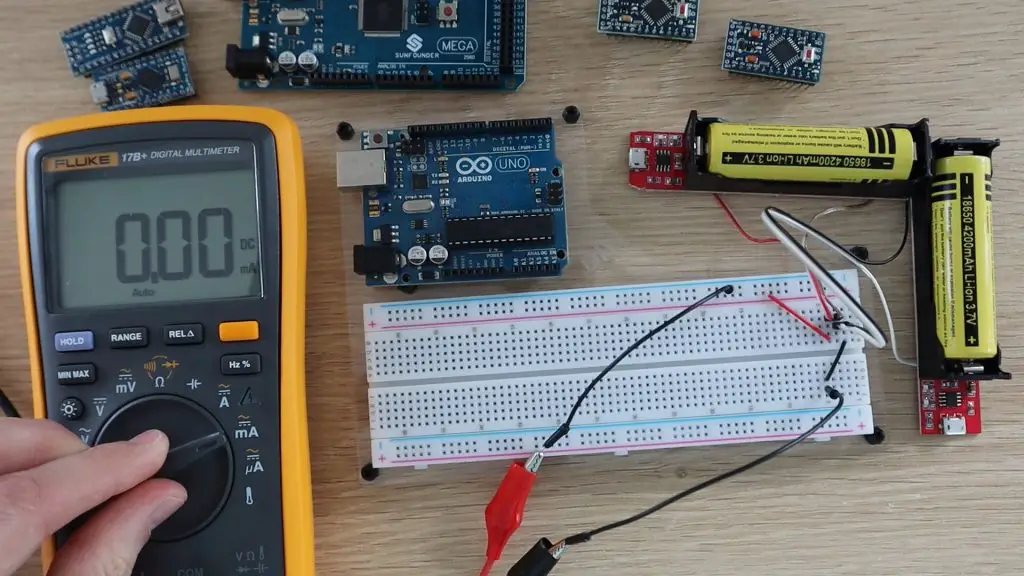
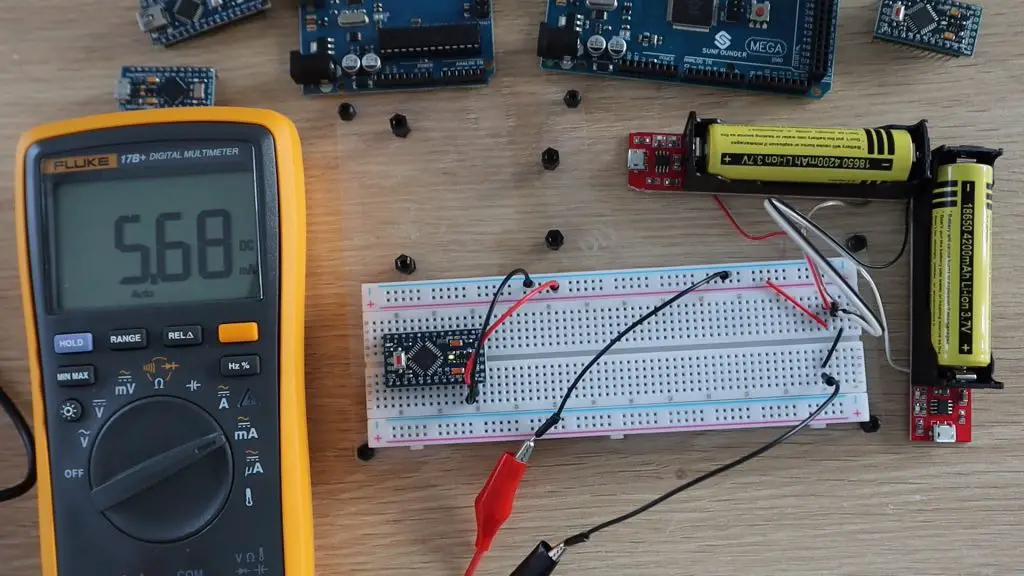
I’ve connected the two batteries in series and then connected them to my multimeter to measure the current draw. The multimeter is going to be showing the current drawn in milliamps.
Fluke 17B+ Multimeter – Buy Here
Testing The Arduino’s Current Draw
Now that the test rig and sketches are ready, let’s start testing the Arduinos.
We’ll start off with the Arduino Uno, since it’s one of the most common boards available. This board is designed to be robust and easy to use rather than power efficient or compact, so I doubt it’s going to do very well in the power test, but let’s try it out as a starting point.

In each test, I’ll allow the current to stabilise for a bit and then record the average current drawn during the delay time. We’ll ignore the peak current drawn while the led flashes as this only happens for 100 milliseconds every 8 seconds, which is only around 1% of the time.
On the Uno in normal mode, we get a current draw of 54.4mA, which means it would run for about 77 hours or three days on the two 18650 batteries.
Now let’s load the sleep sketch and see if there is any difference.
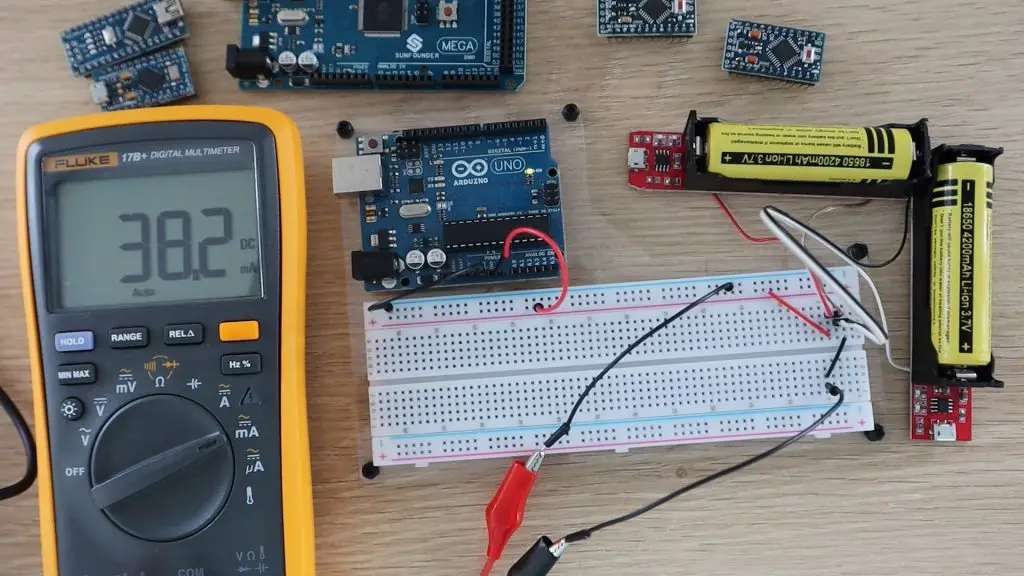
If you watch the video, you’ll notice the current spike briefly when the LED flashes and then return to the low power mode current draw.
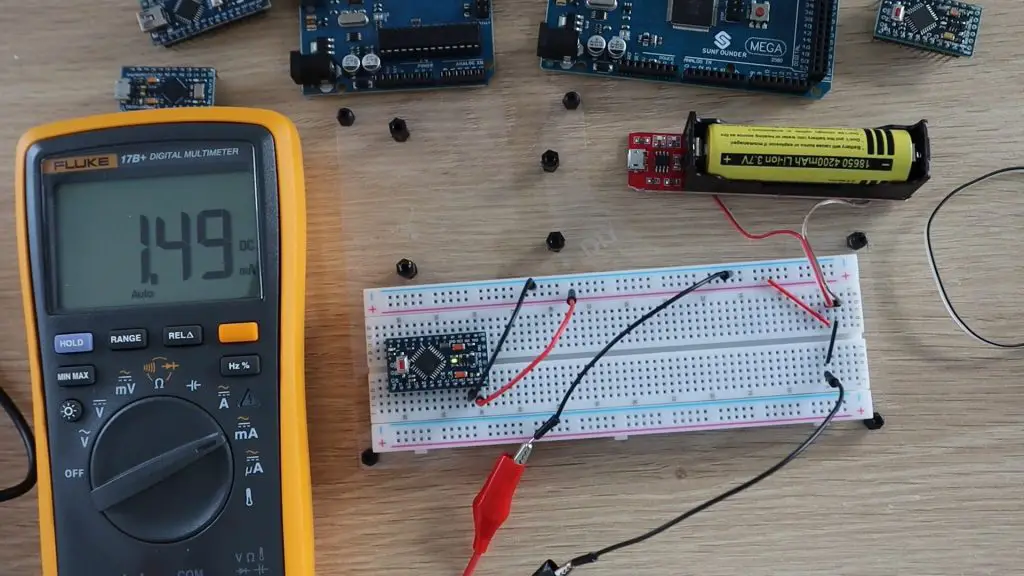
So if we use the sleep mode between flashes, the current consumption goes down to 38.2mA. So we expect it to be able to run for around 110 hours or 5 days.
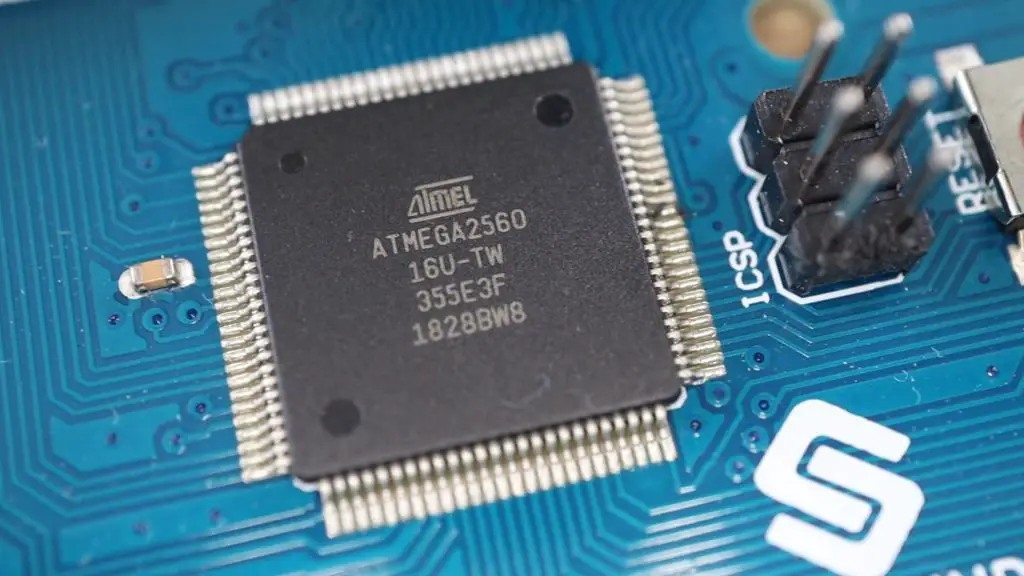
Now let’s try an Arduino Mega. We’d expect the Mega to be the worst performer as it’s the largest board, has the most IO and the most complex chip on it.
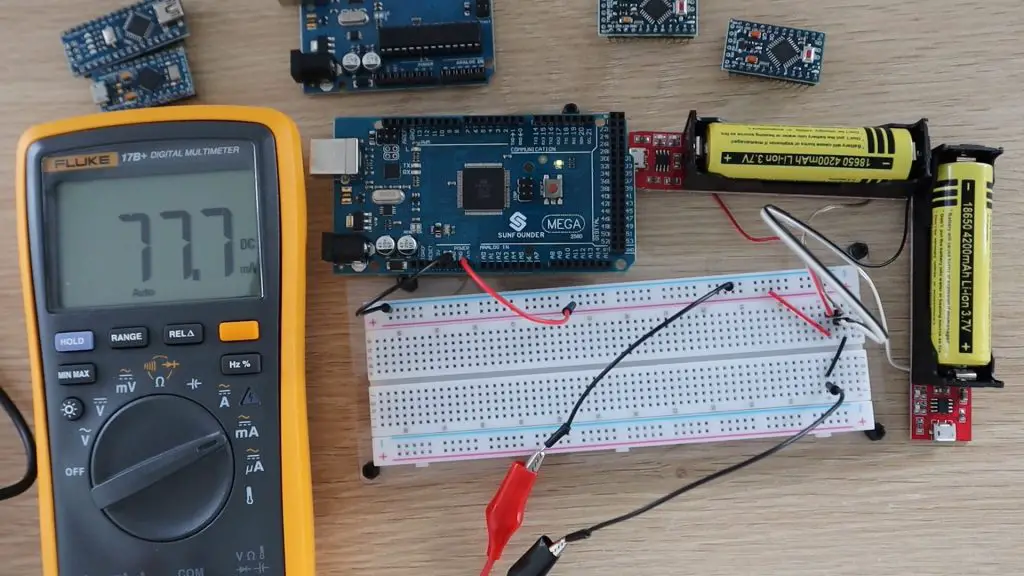
As expected, this board draws a bit more power than the Uno, it draws around 77.7mA, so it would only last for 54 hours or 2 days.
Now let’s look at the Mega in low power mode.
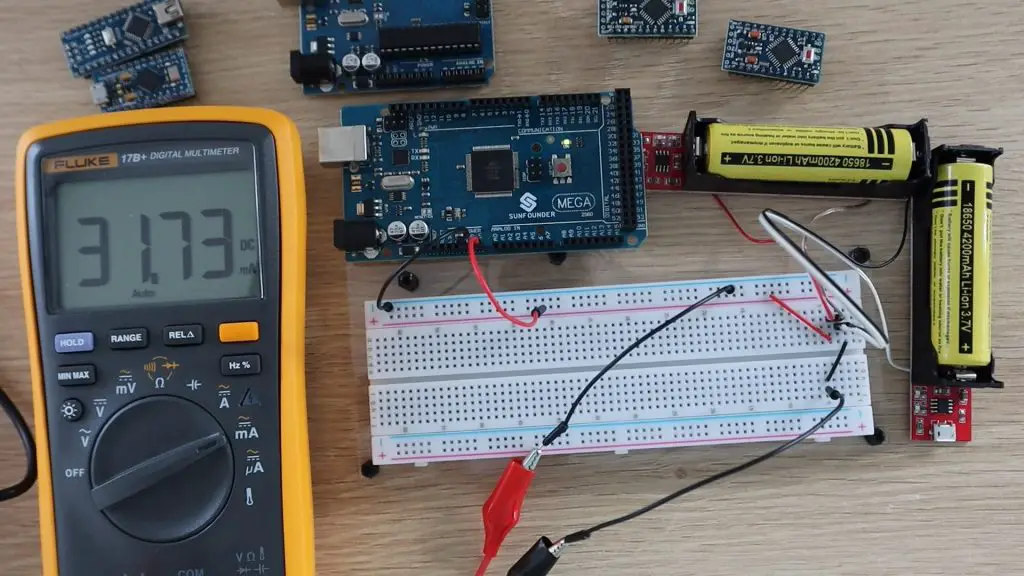
So in low power mode, an Arduino Mega draws around 31.7mA and would run for about 132 hours or 6 days.
Next we have a Nano. I’d expect the Nano to be the most efficient board so far as it’s designed for smaller, more portable projects and is a lot more compact than the Uno or Mega.
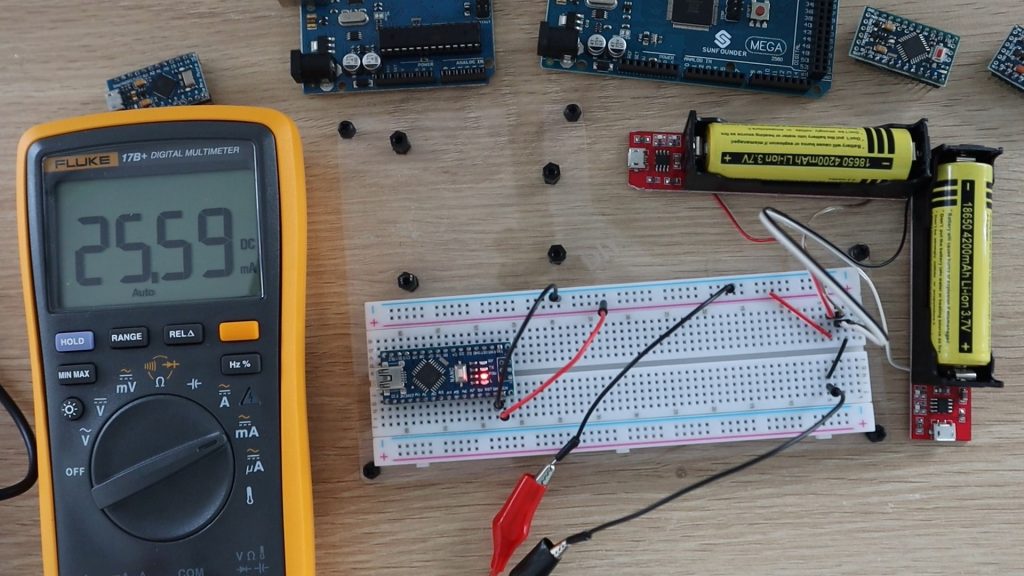
The Nano seems to be a lot more efficient than the Uno or the Mega. The Nano draws 25.5 milliamps, so we’d expect it to run for 165 hours or 7 days.
Now let’s try the Nano in low power mode.
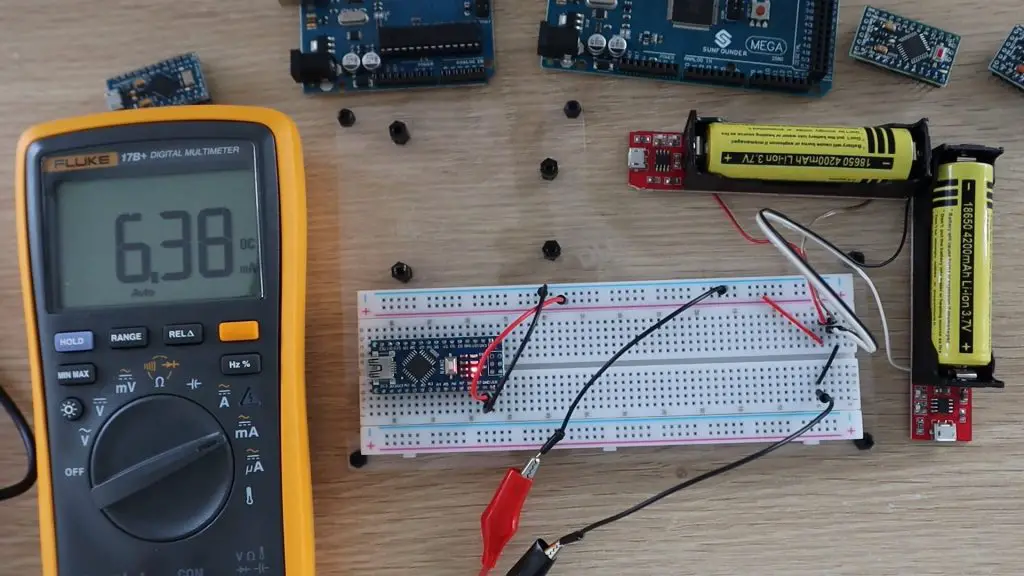
Using the sleep mode sketch, the Nano draws only 6.4 milliamps, so it would run for around 656 hours or 27 days. So we’re almost at a month. Let’s see if the Pro Micro can get to a month.
Next let’s try a Pro Micro in normal mode.
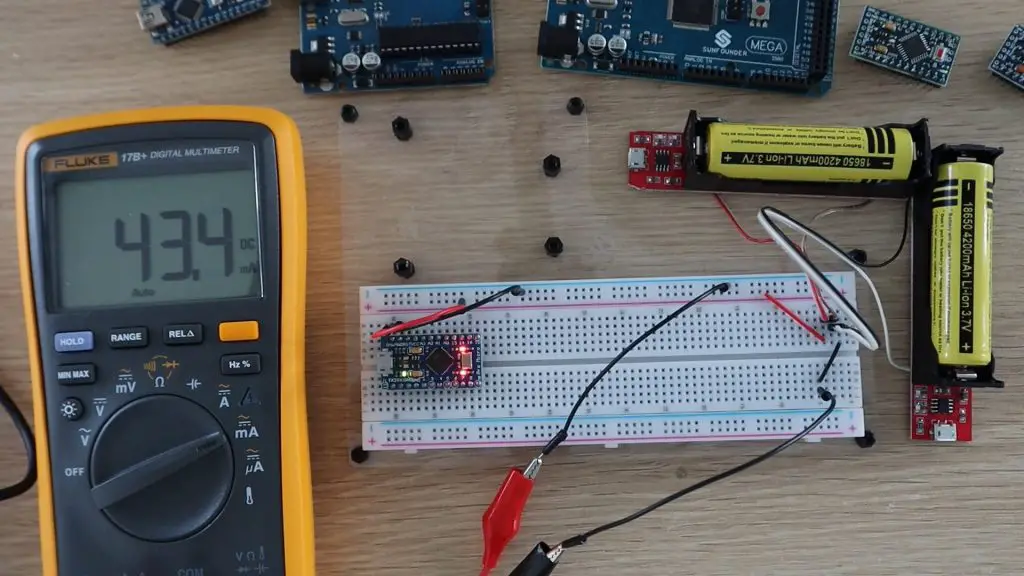
The Pro Micro actually did a lot worse than the Nano, which I didn’t expect. I thought that it would be similar, if not better, than the Nano. It drew around 43.4mA, so it would last for only 97 hours or 4 days.
Now let’s try low power mode.
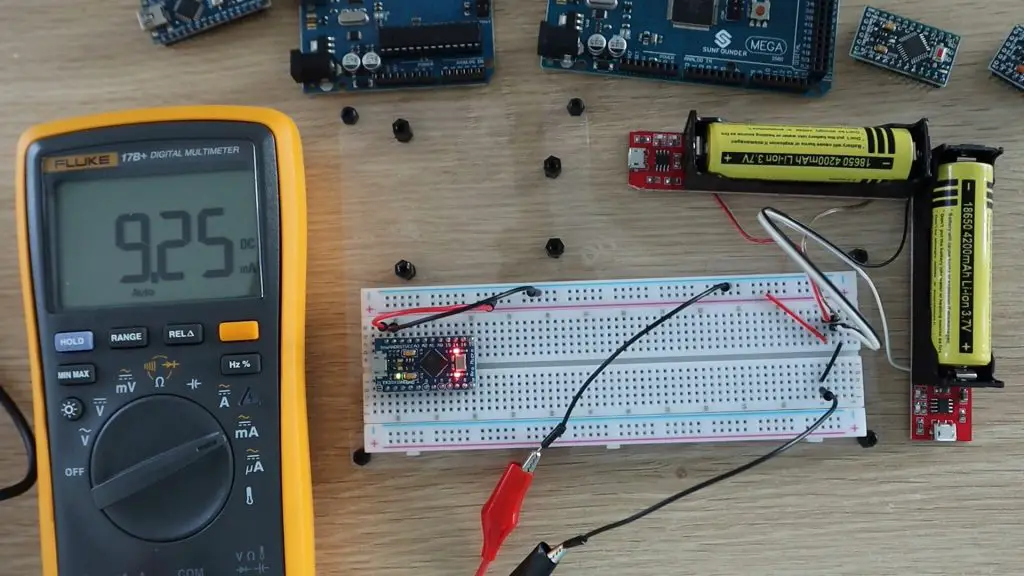
In low power mode, the Pro Micro drew 9.25mA, so it’s much better than the Mega and Uno but the Nano is still the most efficient.
Next, we’re going to try powering a Pro Mini. This is a very similar form factor to the Pro Micro but it has a different chip and the onboard USB host has been removed, so you need an external programmer to connect it to your computer.
First we’ll try the 5V Pro Mini in normal mode.
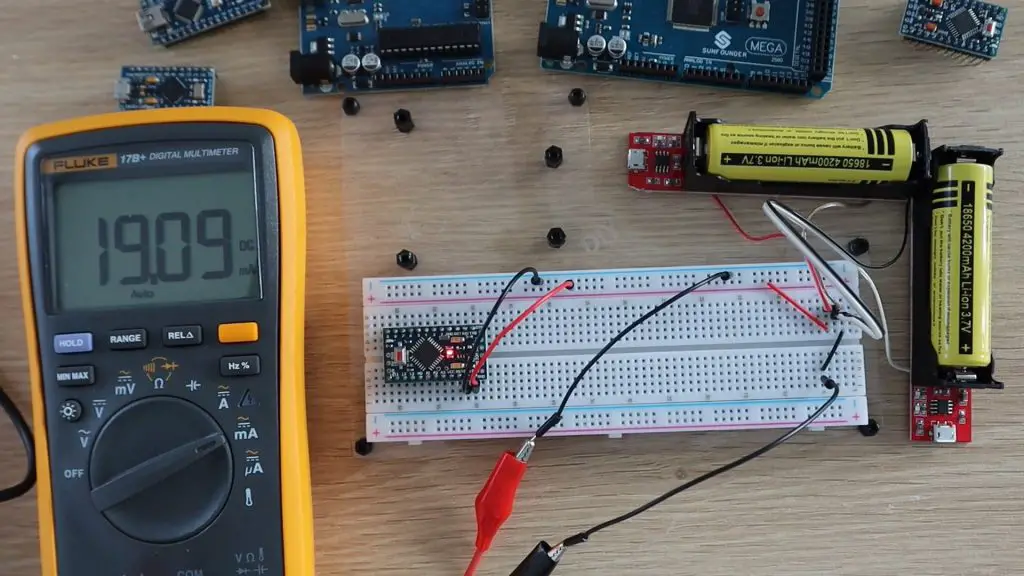
The Pro Mini uses just 19.1mA, which is a little less than the Nano, and means that it will last around 220 hours or 9 days.
Now let’s try the 5V Pro Mini in low power mode.
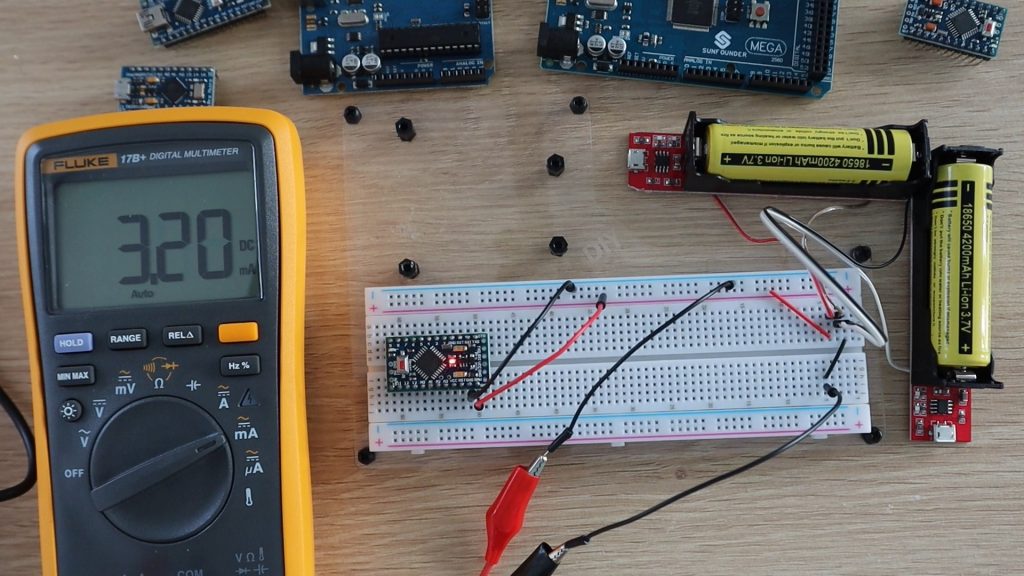
If we put the Pro Mini to sleep between flashes, it uses just 3.2mA, which means that it will run for 1313 hours or 55 days, we’re now getting closer to 2 months.
Lastly, let’s try the 3.3V Arduino Pro Mini and see if it does better than the 5V version. We’ll still be powering the 3.3V Pro Mini using the two 18650 batteries for this first test.
The 3.3V Pro Mini draws substantially less current than the 5V version, just 5.5mA, which is even better than the Nano in low power mode. So it will run for a month in normal mode, let’s see how long it will run in low power mode.

The 3.3V Pro Mini uses just 1.6mA in low power mode, so it will run for around 109 days, which is a bit over 3 months.
Let’s see if that changes if we power it with just one battery. Remember that if we’re halving the input voltage, we’d expect the current to increase to supply the same amount of power to the Arduino.
Strangely, there was actually a slight decrease in input current. This is probably due to the onboard voltage regulator being more efficient at voltages closer to the operating voltage. So you’ll actually get better battery life by powering a 3.3V pro mini with a single 18650 battery. You’ll get almost 4 months.
The Results, How Long Can Each Arduino Run On Batteries?
Now that we’ve completed the test for each board, lets look at how long each Arduino can run on batteries.
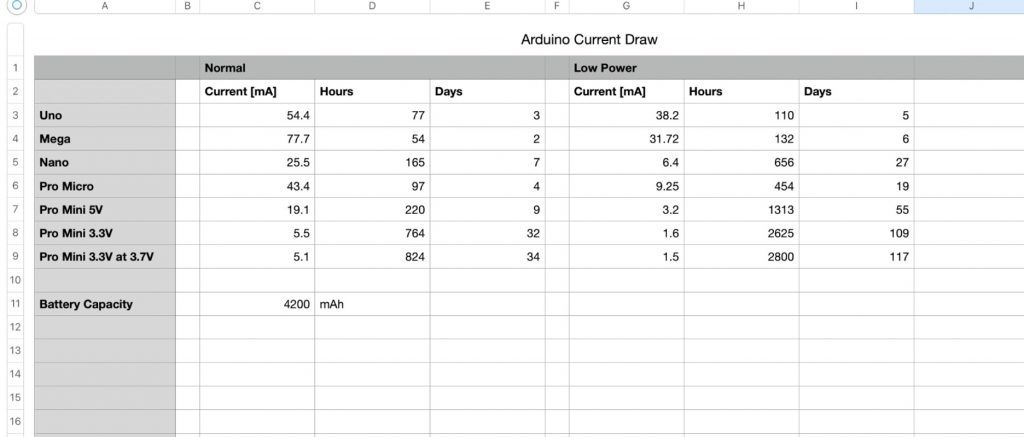
The most power-efficient board in both modes is the 3.3V Pro Mini, lasting almost 4 months on a single 18650 battery.
There’s also a significant decrease in power consumption when using sleep mode, so you should definitely consider using it if you’re designing battery-based projects.
Now you obviously can’t have the Arduino sleeping the whole time, it’s actually expected to do something if it’s connected up to a project. But, on most projects where you’d be looking to power the Arduino using batteries, you’re only using the Arduino for a fraction of the time that the system is powered up.
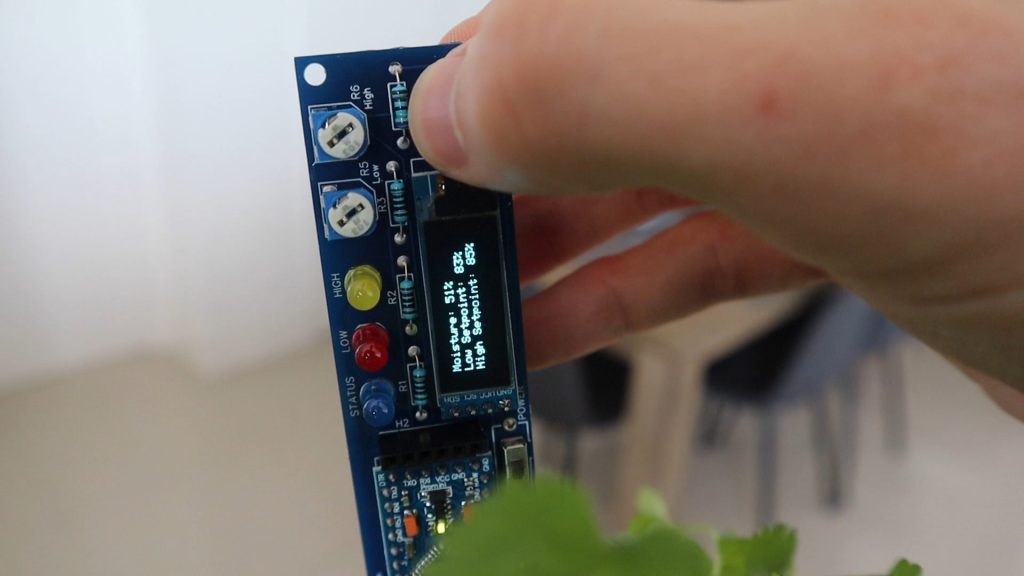
For example, if we look at a soil moisture monitor, the soil doesn’t suddenly dry up in a couple of milliseconds, and even watering the plant takes a minute or two for the water to be evenly soaked up into all of the soil. Also, your plant isn’t going to die if its roots are dry for 2 seconds. So, you really only need to take soil moisture readings in minute intervals rather than every couple of hundred milliseconds. You could, therefore, have your Arudino sleep for a minute, then take the measurements over a few hundred milliseconds and then sleep again, so your Arduino would be sleeping for most of it’s “on” time.

Similarly, for weather stations, even rapid outdoor temperature changes only change over a number of minutes. So, you can set your Arduino to wake up every 5 minutes and take a new temperature and humidity measurements, rather than take measurements on every loop cycle.
It’s also important to note that there’s a difference between putting the Arduino to sleep and simply putting delays into your code. Delays don’t stop the Arduino from processing operations, they just tell the Arduino not to proceed until an amount of time has passed.
You can think of the two like this; putting a delay into your code is like having a child asking “are we there yet”, “are we there yet”, “are we there yet” over and over until the answer is yes and it’s able to proceed. Putting the Arduino to sleep is like setting an alarm and allowing the Arduino to do nothing until the alarm rings and wakes it up again. You’ll get much longer battery life by allowing your Arduino to do nothing between readings rather than constantly checking if the amount of time has elapsed.
Look out for the next test, in which I’m going to try and further reduce the power consumption of a 3.3V Arduino Pro Mini and see if we can get it to run for over a year on a single 18650 battery.
Let me know in the comments section what battery based Arduino projects you’ve built.
I did an old temperature measurement project with an Esp8266 card. The deep sleep mode is really impressive. I had done with a hack (soldering a wire on a pin not present on the board for an esp01). You can also increase the autonomy by removing the LEDs. And I powered the board through the board input without going through the usb on Arduino. Converting the current from 7.2v (2×3.7) to 5v produces the loss. We can earn more. For some apps there is a voltage tolerance so we can under power the card. There is also the possibility of limiting the speed of the cpu to 8mhz rather than 16. But your article is really interesting.
Thanks for the tips. I actually tried a few things on the 5V and 3.3V Pro Mini’s this past weekend, including removing the LEDs and playing around with the onboard regulator and different powering options. I’ve managed to get a 3.3V Pro Mini to run at around 5 microamps in sleep mode between flashing the onboard LED, so around 300 times better than the best case in this test. It turns out the voltage regulator uses up quite a lot of energy in converting the voltage, especially at low current.
I must actually have a look at doing the same test with an ESP8266 and ESP32 and see how they do. I’m also interested to see how a Raspberry Pi Zero would do since these are also often used for long term projects running on solar power or batteries.
I am delighted to read this future test. I will not miss the article.
Hmm, regarding very low-run systems based on the Promini 3.3v… have you looked at the Cave Pearl Project by Ed Mallon? There’s a lot there you might find interesting.
I haven’t, but I’ll definitely go an have a look at his work. Thank you.
How about testing how long an Arduino can run on batteries vs. a BeagleBoard or Raspberry Pi on the same batteries?
Thanks for the suggestion, I’ll have a look at this.
Where did you buy the micro usb charger?
I think I got it from Banggood, but they’re also available on Aliexpress.
I found this interesting for deciding on which microcontroller to choose, for use ìn 2 upcoming projects (at least):
PO box/letterbox monitor.
Wristwatch.
How long would the most efficient MC from the above last on a single CR2016 cell, and a single CR2032?
Also with a Li-ion, of a similar size?
Would one of the MC ICs work well when the Li coin cell runs low, at say, 2.5V ?
Or would i need to pass its voltage through a DC to DC converter so even when it’s given 2.5, it would still output 3.3V?
But if so, would that DC-DC converter waste a lot cell power when the cell is new at say, 3.15V?