In this project, we’re going to be looking at how to run your own personal Bitcoin node on a Raspberry Pi. By running your own node, you can skip using a third party and directly make transactions on the Bitcoin network, without any additional fees.
If you don’t know how Bitcoin works, it’s essentially a network of thousands of nodes like the one we’re going to be building in this video. Each one has its own full copy of the Bitcoin blockchain, which is a record of every transaction which has ever occurred on the network. These nodes then work together to verify the transactions and maintain the blockchain. So you’ll essentially have a record of every Bitcoin transaction stored on your node and you’ll be helping to keep the Bitcoin network decentralized.
This is different to mining Bitcoin, which is a really bad idea on a Raspberry Pi as it would take you a couple of hundred years to mine a single dollar. Unlike Bitcoin mining, running a node doesn’t require any expensive hardware and can be done on a $35 Raspberry Pi and an external hard drive.
We’re going to be running a software package called Umbrel on our Bitcoin node. It’s really easy to use and their website literally guides you through the installation process step by step. The best part is that it’s free and all of its source code is available on GitHub.

Here’s my video of the build, read on as I take you through the project step by step so that you can build your own node:
What You Need To Build Your Own Bitcoin Node
- Raspberry Pi 4B (8GB used) – Buy Here
- 32GB MicroSD Card (16GB Min) – Buy Here
- Low Profile Ice Tower (Black version used) – Buy Here
- 1TB M.2 NVME SSD – Buy Here
- External NVME Case (Not the one I used, but similar) – Buy Here
- 1TB External SSD (Alternative to above) – Buy Here
- Raspberry Pi Power Supply – Buy Here
- Ethernet Cable – Buy Here
- 4 x 3mm Yellow LEDs – Buy Here
- 4 x 150ohm Resistors – Buy Here
- M3 Screws & Nuts – Buy Here
Banggood Alternatives
In addition to the above, you’ll need to 3D print some parts for your case. I used a Creality Ender 3 V2 for this project. I used a K40 Laser Cutter to engrave and cut out the case lid.
The above parts are affiliate links. By purchasing products through the above links, you’ll be helping to support this blog, with no additional cost to you.
Designing & Making The Case
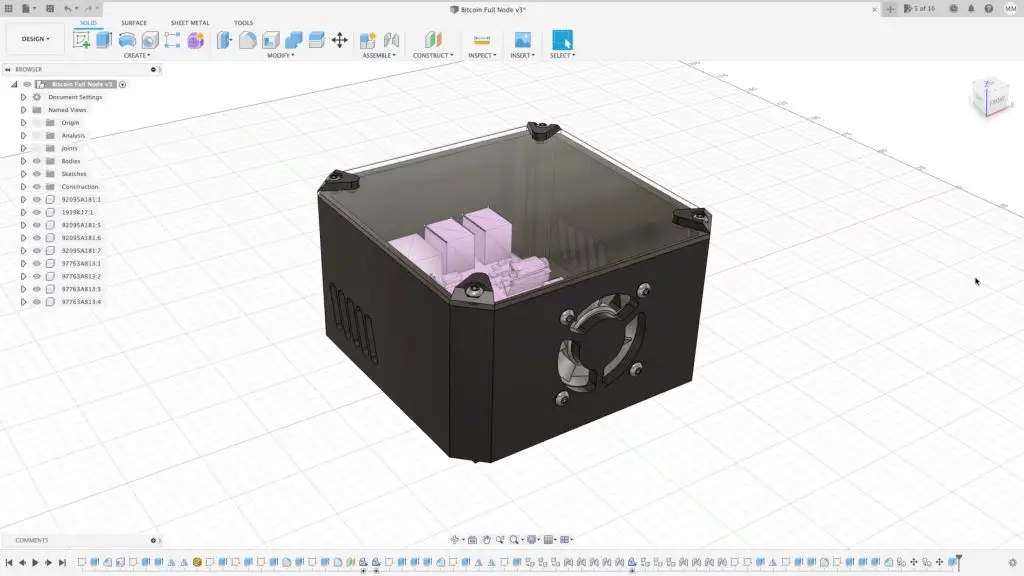
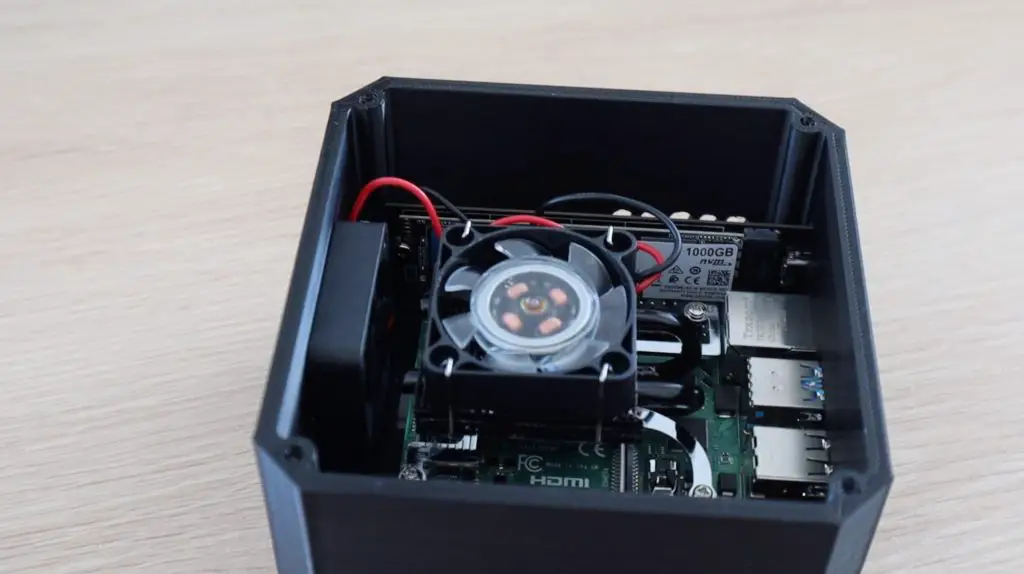
I started out by designing a case for the Bitcoin Node using Fusion 360. I designed the case to house the Raspberry Pi with the low profile Ice Tower installed and the SSD alongside it. I chose to used an M.2 NVME drive because it’s a bit more compact than a typical 2.5″ external one. SSDs produce quite a bit of heat, so I added a second fan onto the front of the case to push air into the case, which will then be exhausted from the vents on the side.
Print your own case – get the 3D print and laser cutting files
Note: The drive enclosure that I used is not all that common. I have provided an alternate case design for the linked Sabrent drive. This cutout is large enough to insert the entire Sabrent enclosure into the case (with the port sticking out a little).
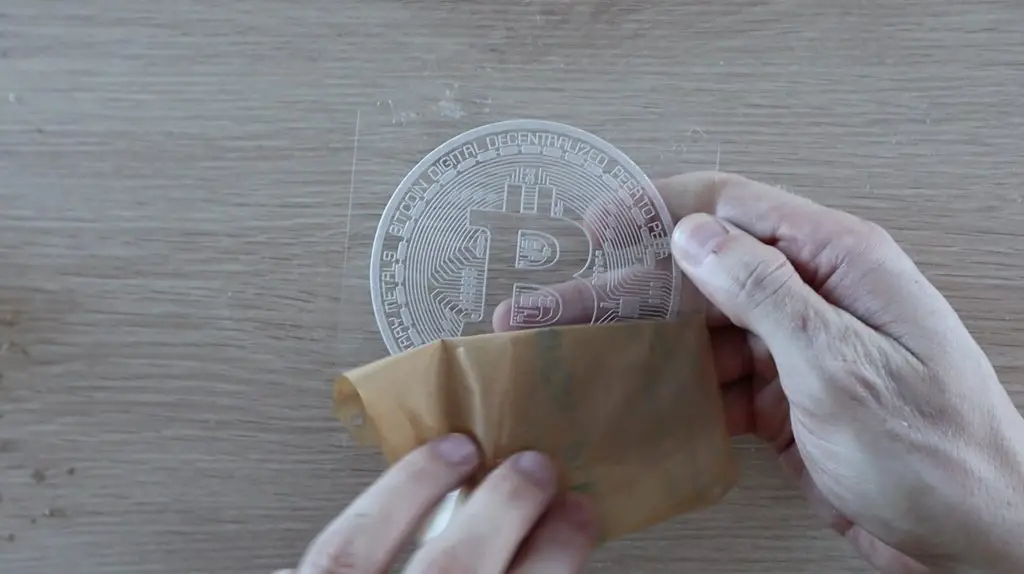
Lastly, I designed a clear acrylic cover which I’m going to engrave a logo onto. I’m also going to install some yellow LEDs in the corners in to give the logo a gold glow while it’s running.
I enjoy designing and building my own cases for my Raspberry Pis, have a look at this mini desktop case I built to make my Pi look like a mini desktop computer.
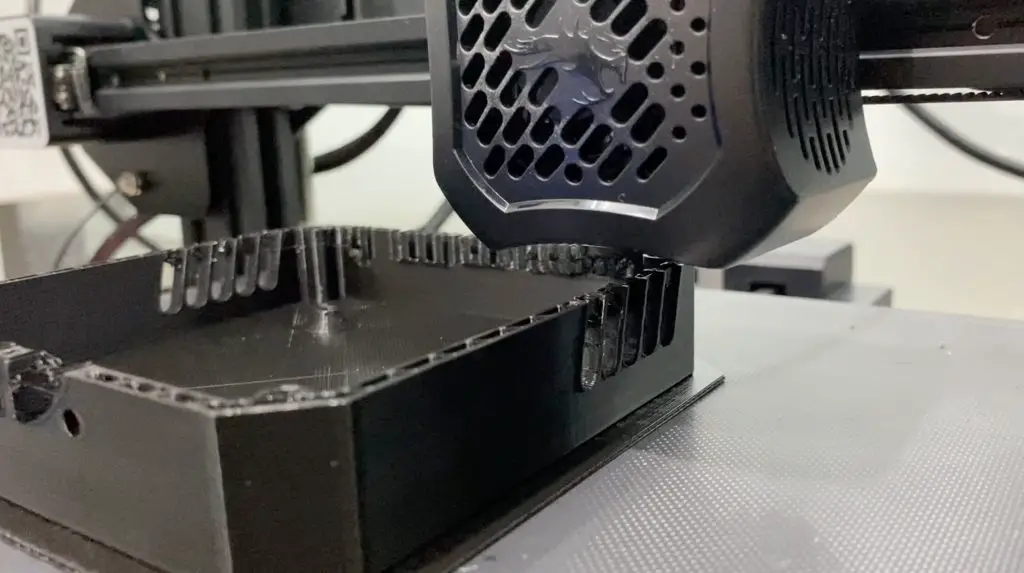
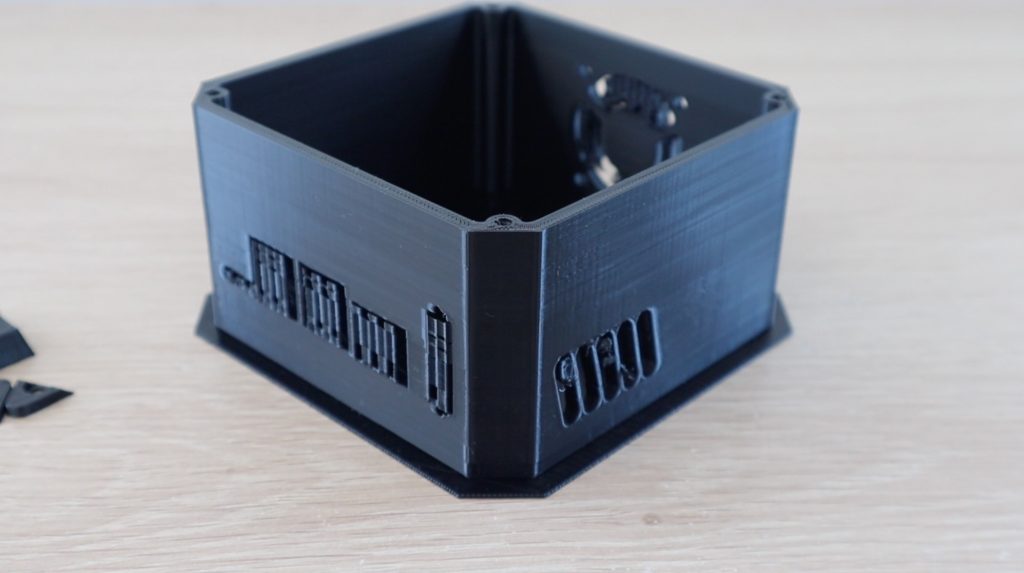
I 3D printed the case on my Ender 3, along with 4 legs and 4 corner clamps for the cover. The corner clamps are mainly there to stop the light from the LEDs from shining up and out of the case and keep it contained within the acrylic.
I printed the case in black PLA using an infill of 15%. The legs and corner clamps were printed solid using the same filament.
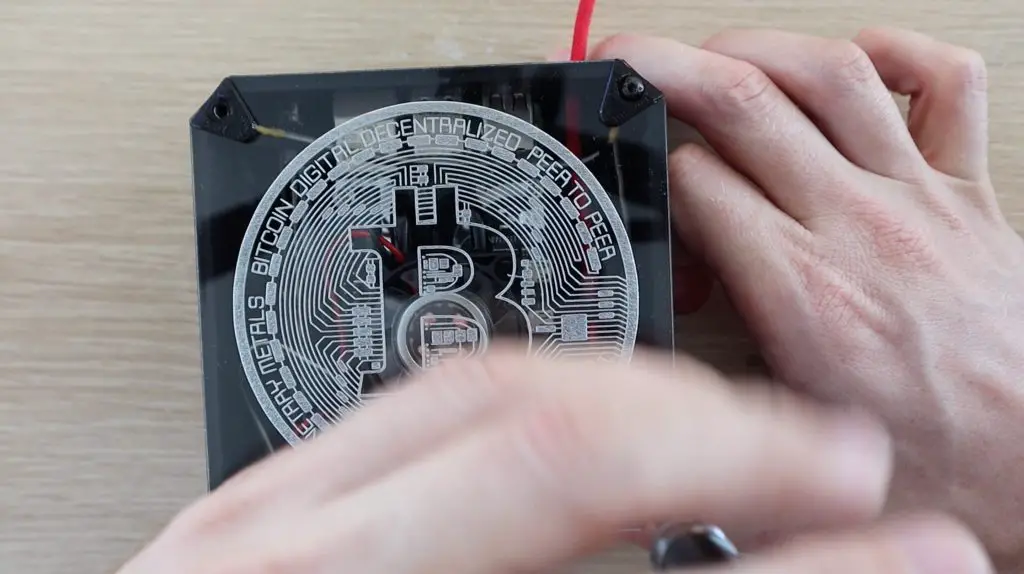
I then laser engraved and cut out the lid for the case from a sheet of 2mm clear acrylic. I designed the engraving and the cutout in Inkscape to the same dimensions as the sketch used in Fusion 360.
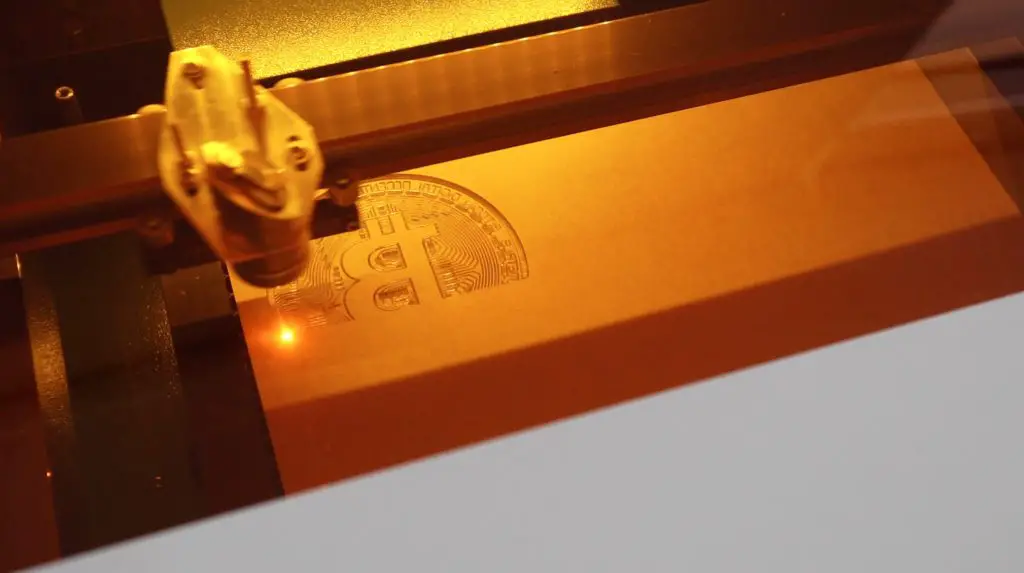
I engraved a mirror image of a Bitcoin logo into the back of the lid so that the top surface is still smooth, so it won’t trap dust and can easily be cleaned.
Assembling The Bitcoin Node
Now that we’ve got all of the components made up, let’s start assembling it.
First I’m going to install the legs, which are just held in place with an M3x8mm screw in each. In hindsight, it probably would have been easier to just glue these into place.
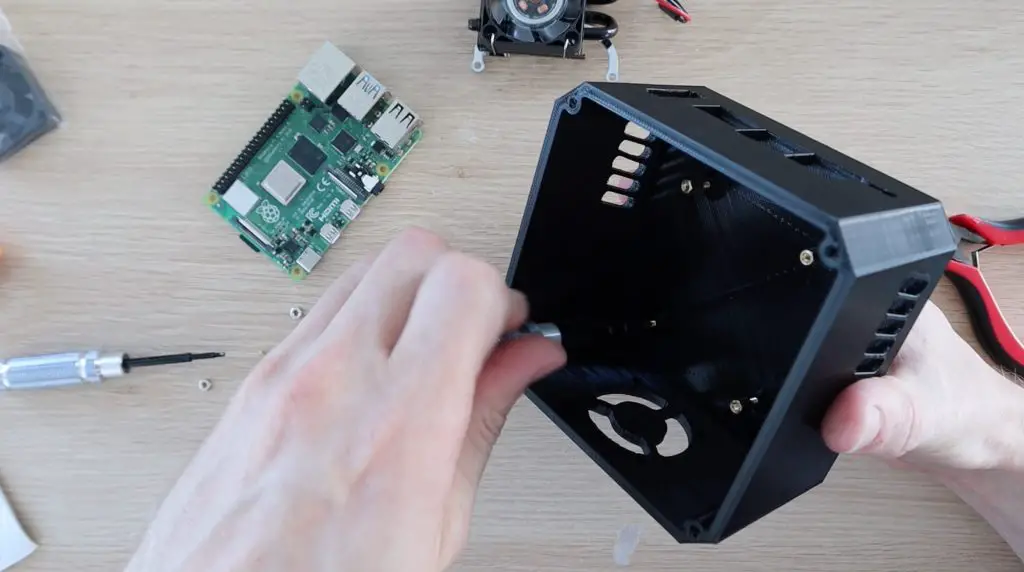
Next, let’s open up our Raspberry Pi. I used an 8GB version of the Raspberry Pi 4B, but you should be able to use the 2GB and 4GB versions as well.
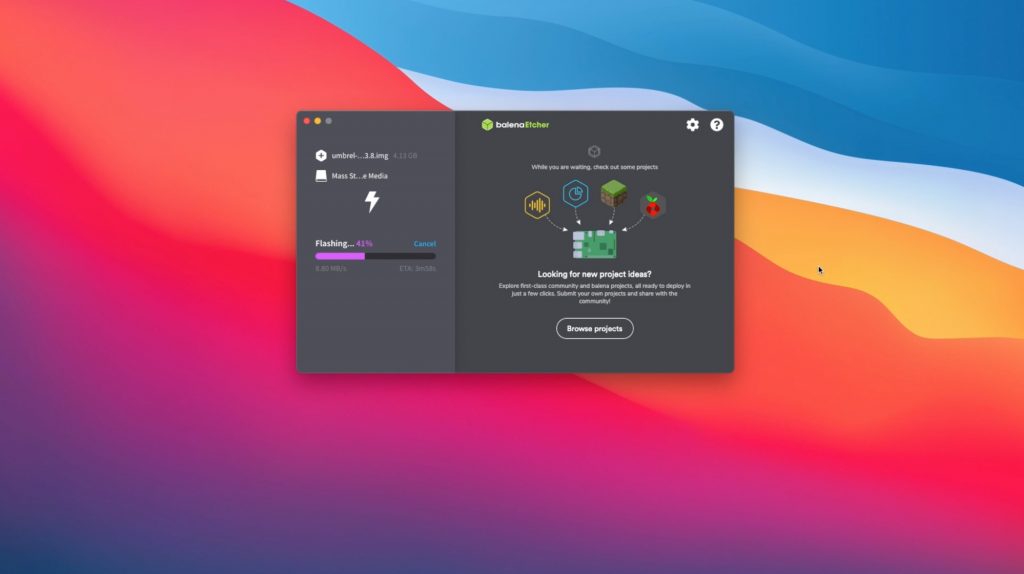
Before I install the Pi in the case, I’m going to flash the SD card. I’ll do this using the method outlined on the Umbrel page. This involves downloading Balena Etcher and the Umbrel image and then flashing the image to the SD card.
Now that this is done, I’m going to put the SD card into the Pi and then assemble the Ice Tower as per the instruction booklet which came with it. Don’t add any of the brass standoffs yet, we’re going to use these in the next step.
To mount the Pi, we’re going to install one set of brass standoffs which came with the Ice Tower on the bottom of the case and hold the Pi in place with the second set. You’ll probably need to use a wrench or spanner to screw the standoffs into the base, they’ll be too tight to screw in with your fingers.
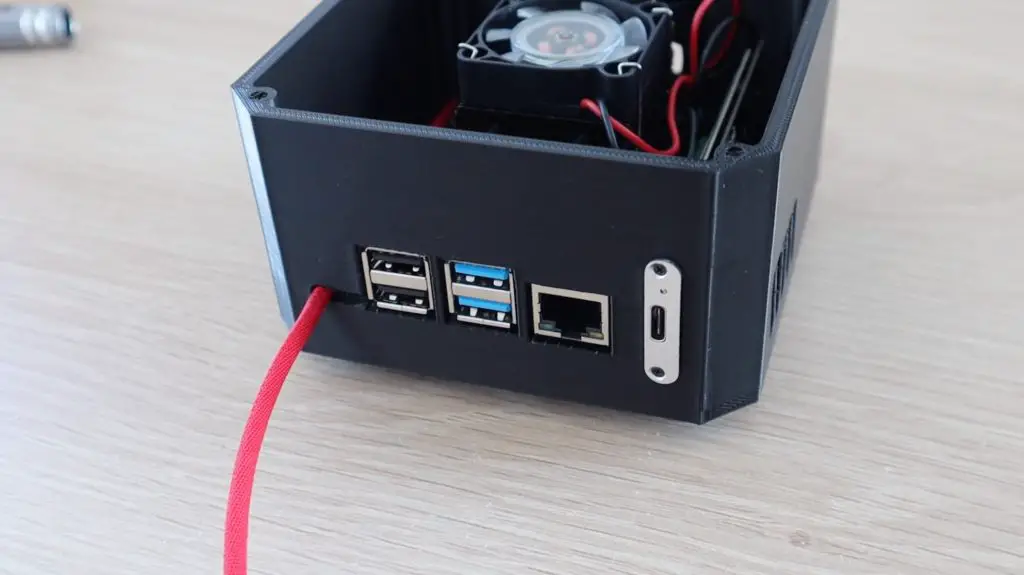
I missed a step here – I forgot to add the USB power cable through the slot near the USB cutout. You’ll see in the subsequent steps.
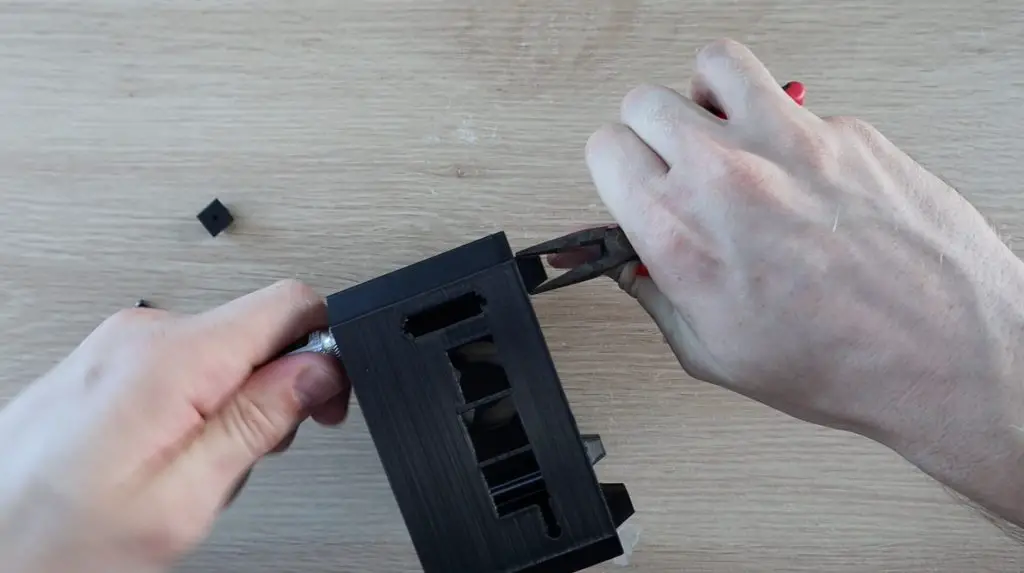
Next I’m going to add the cooling pad and install the Ice Tower on the CPU. The Ice Tower is held in place using some M2.5 screws which go into the brass standoffs. These also came with the Ice Tower.

Next, I’m going to install the second fan which came with the Ice Tower onto the front of the case. I pressed some M3 nuts into the pockets on the front and then secured the fan with some M3 screws. The fan should be mounted so that it pushes air into the case, although the airflow direction is not critical – it’ll work either way.
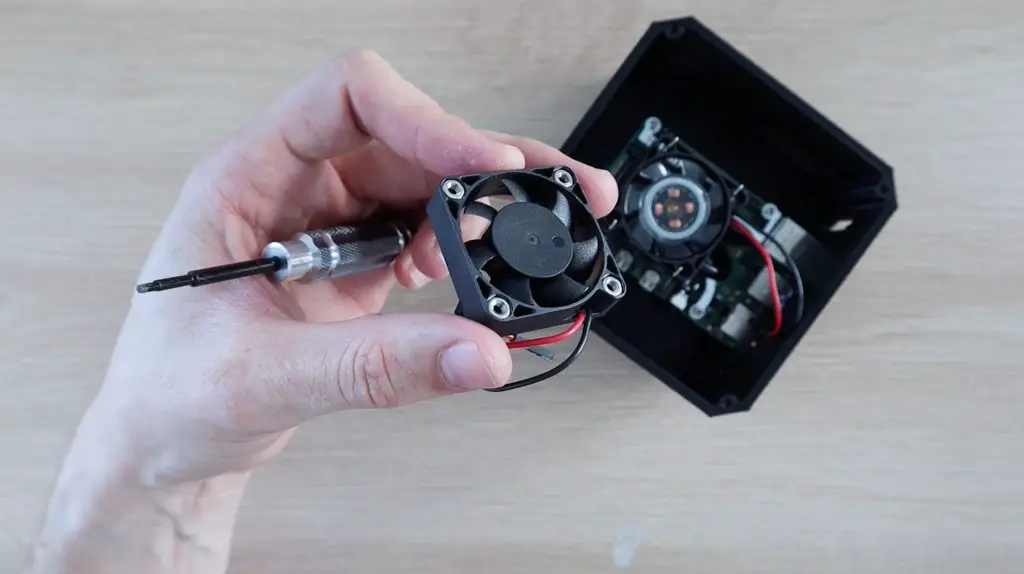
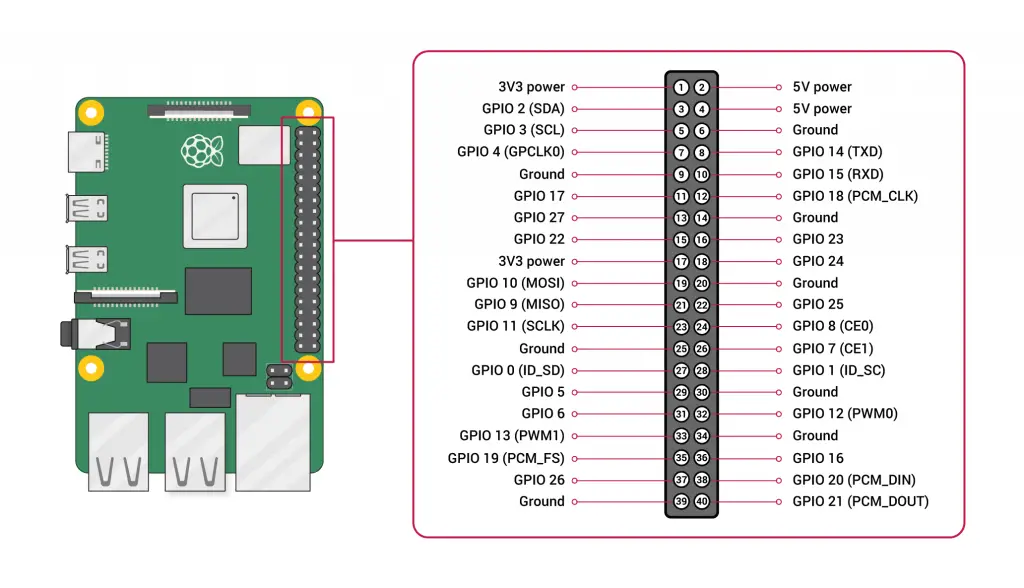
Once this was done, I connected the wiring for the fans to the Pi’s GPIO pins.
These just go onto two available 5V and GND pins near the end of the GPIO header.
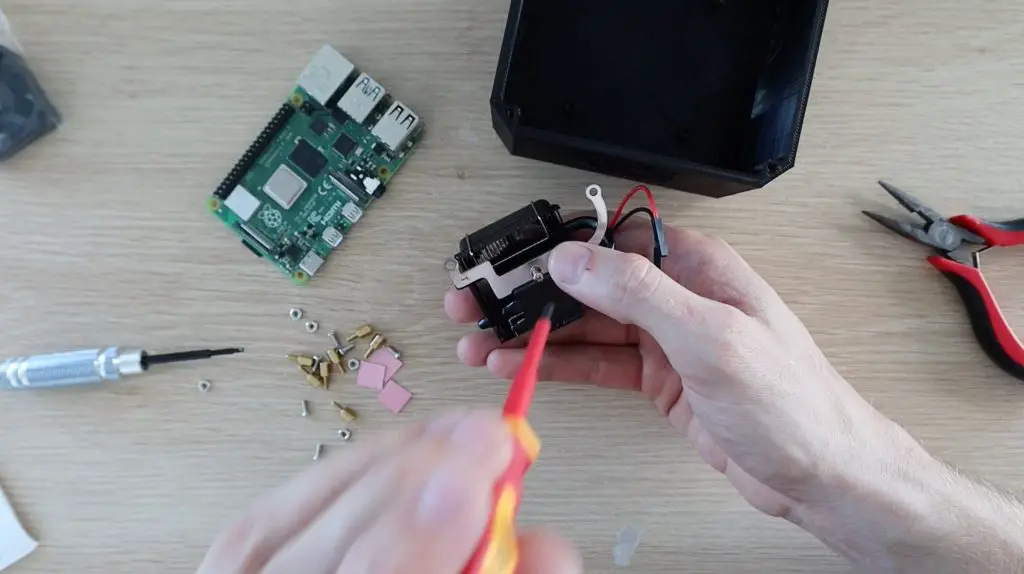
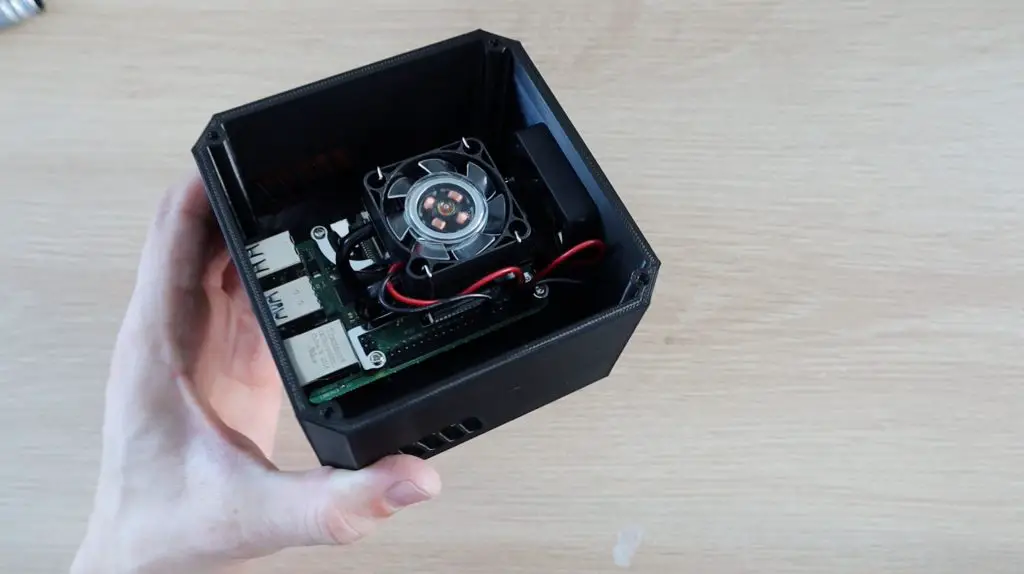
Now that the fans are done, we can install our SSD. As mentioned earlier, I’m using an M.2 NVME drive, so I needed a way to connect the drive to the Raspberry Pi. I bought a low profile USB C enclosure for it and I’m going to just be using the PCB inside it to mount the drive onto. We don’t need the rest of the enclosure for this project, the case will act as the new enclosure and we want to be able to get some airflow over the drive to keep it cool.
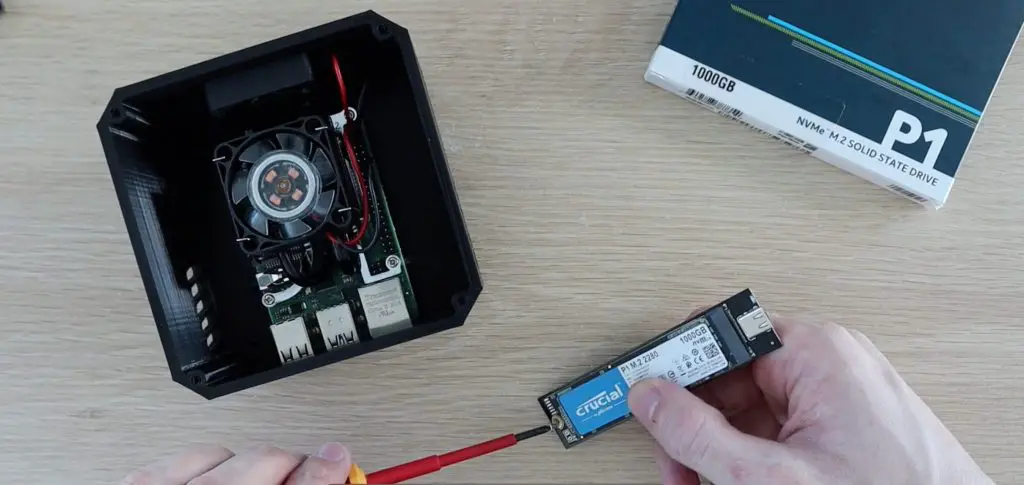
I designed a cut-out in the case to mount the faceplate from the enclosure to hold it all in place.
It was at this stage that I noticed that I had designed a slot to run the power cable through and had forgotten to put it through the case before installing the Pi. I chose to put in a slot rather than add a large cutout to fit the connector through.

So I had to remove the Pi to add the power cable and then re-install it.
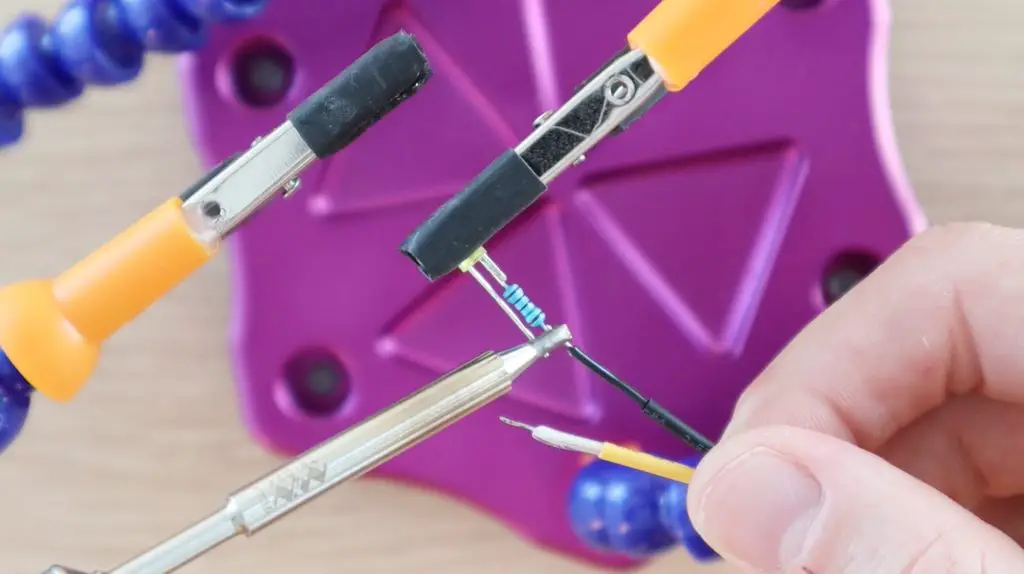
I then made up a string of four 3mm yellow LEDs, one for each corner of the case. These are designed to fit into the holes I cut on the cover. I used a 150-ohm 1/4W current limiting resistor on each LED, then connected them in series and added some dupont connectors to the end to plug into the GPIO pins.
I glued the LEDs into the cover with some clear epoxy. The top of the LEDs protrude a little from the surface of the cover.
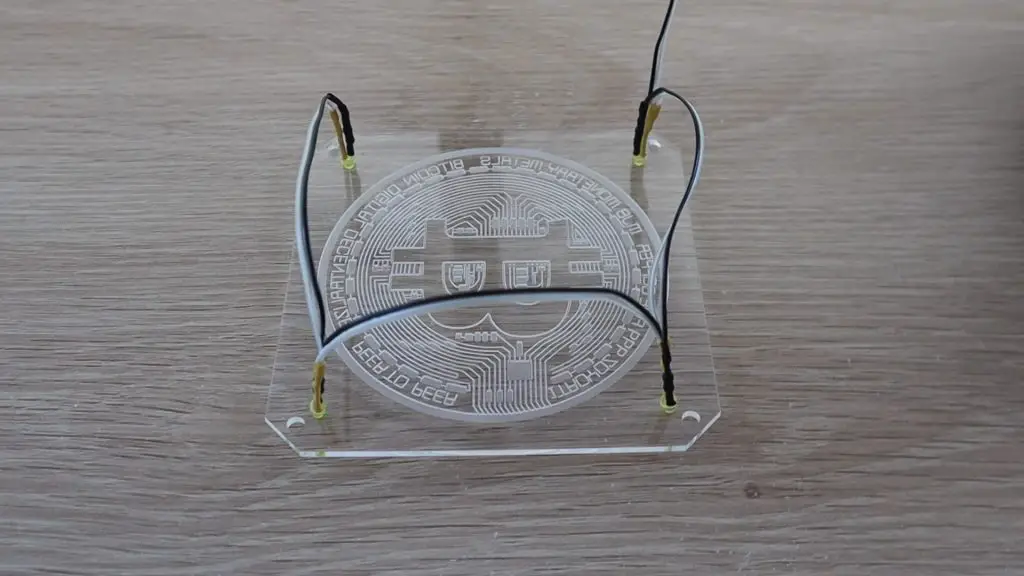
I then plugged it in and closed it up using an M3 screw through each of the corner clamps. The corner clamps should align themselves as they go over the top of the protruding LEDs as well.
Now that this is all done, the Bitcoin node is complete and ready to be powered up.
Powering Up the Bitcoin Node
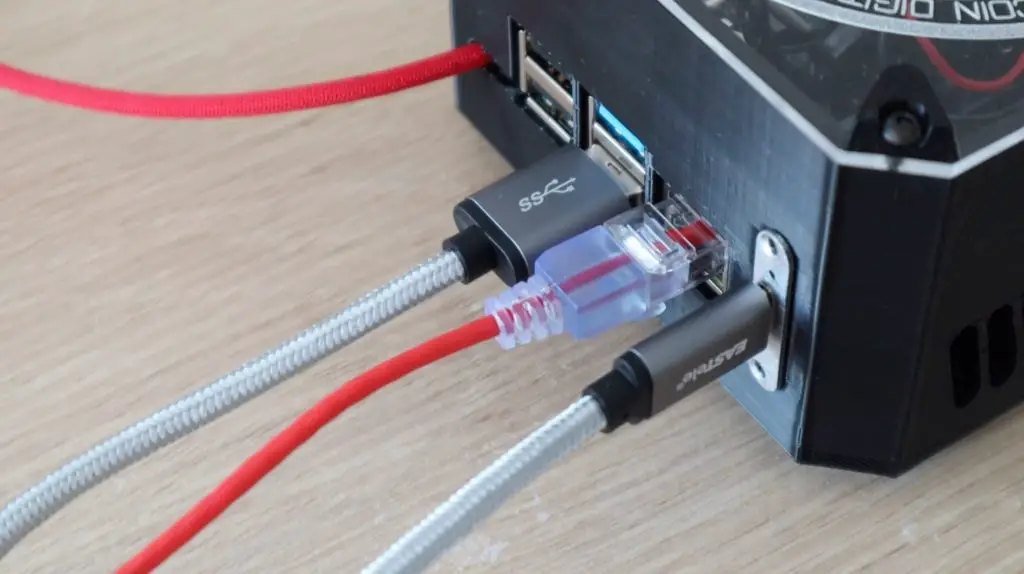
Now that the Bitcoin node is assembled, lets plug in our cables and power it up. Umbrel says to allow the node 5 minutes to boot up before trying to access it.
When I switched the node on for the first time, I found that the RGB lighting in the fan on the Ice Tower detracted from the yellow glow of the LEDs.
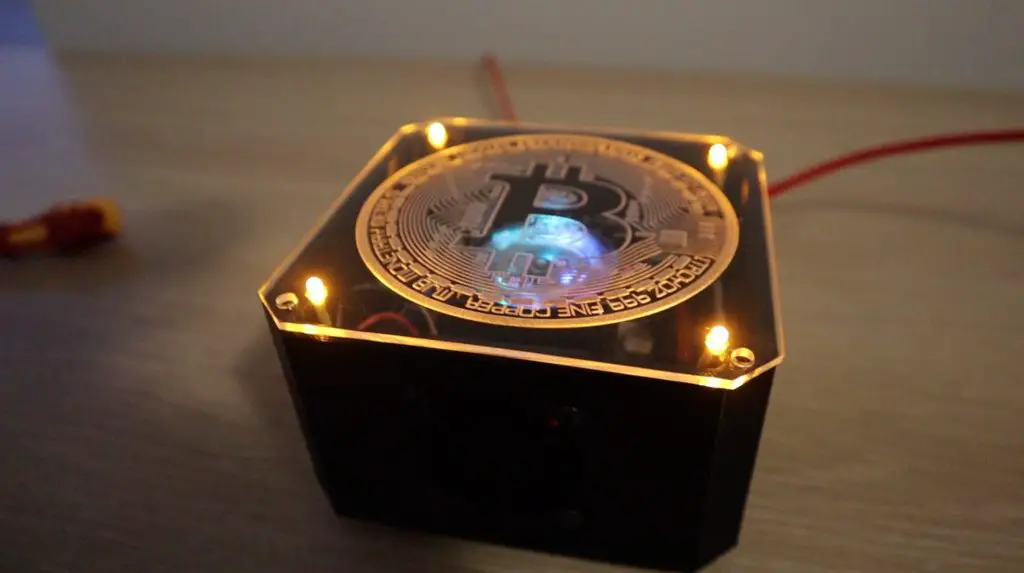
I decided to replace the fan with another plain black fan which I had from another Ice Tower. You could probably also get away with just removing the fan on the Ice Tower altogether. The fan on the side of the case blows directly onto the heat sink as well.
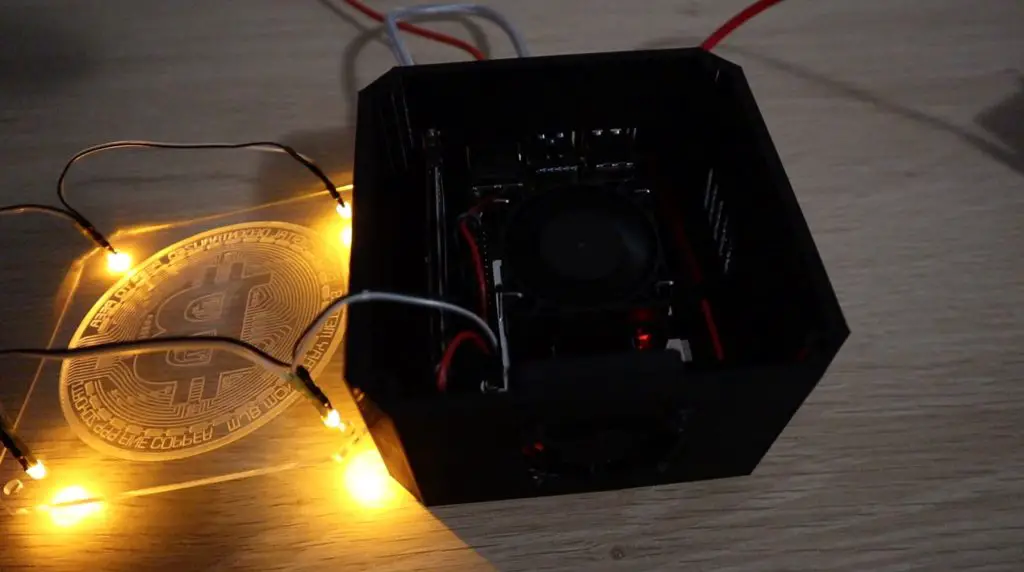
This produced a much cleaner look. You can now only see the faint flashing LEDs on the Pi and the SSD under the cover.

Now let’s get back to Umbrel. You don’t need to connect a monitor to it to set up, once it’s booted up then you can access the dashboard by going to umbrel.local on any other computer or mobile device connected to the same network.
If you do plug in a monitor, you’ll be able to see some diagnostic information while it is booting up, but this is not necessary.
When you open up the dashboard you’re presented with a welcome screen and you’re then guided through the setup process.

You’ll need to type in your name and choose a password. Then you’re asked to write down your seed words as a recovery mechanism if you forget your password. It’s quite important that you do this as there is no “I forgot my password” option when logging in. Lastly, you’ll need to accept a disclaimer.
You’ll then be taken to the main dashboard.
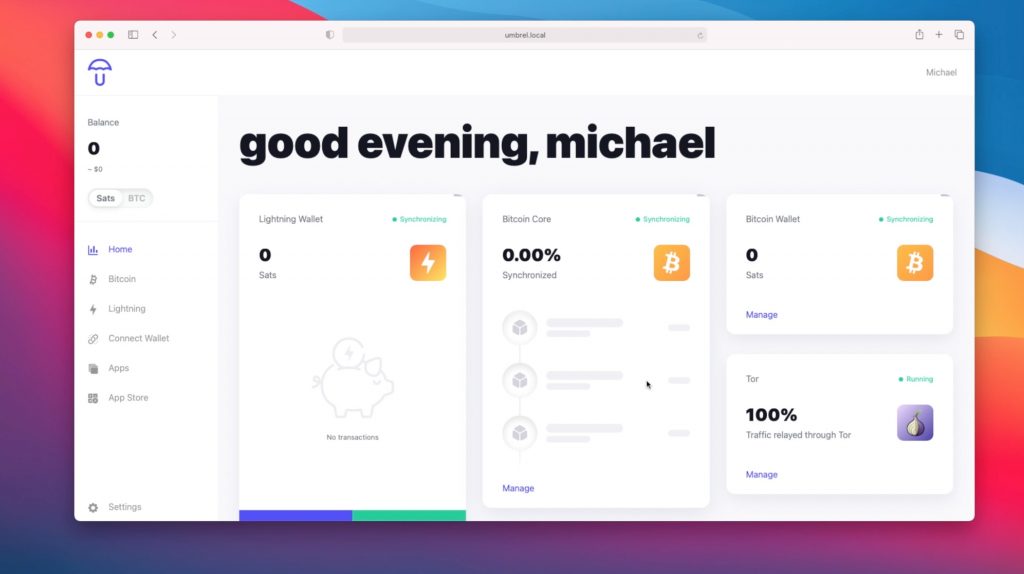
Your node will begin downloading the Bitcoin blockchain. Depending on how fast or in my case, how slow your internet is, this could take a few hours or even a few days. At the time of making this video, the blockchain is around 327 gigabytes. Your node will also transfer a similar amount of data on a month to month basis, so you need to have a reasonably good internet service to maintain your Bitcoin node.
You’ll still be able to use your node while the blockchain is being downloaded, but you’ll have to wait to unlock the full functionality of your node.
You can also add apps and your wallets to your node to truly customise and get the most use out of it.
Let me know in the comments section if you do land up building your own node and what you think of this one.
Hi, I decided to start my first umbrel btc node few days ago, but I have troubles with the M.2 NVMe SSD used together with the orico externam M.2 NVMe enclosure (namely this one: https://www.aliexpress.com/item/4001297316228.html?spm=a2g0s.9042311.0.0.2ab54c4dSuID2a).
First I had the ADATA SX8200 Pro which was not detected by RPi, then I tried Samsung EVO 970. This one is detected, but still umbrel is not started as the debug log shows some problem with “can’t read superblock on /dev/sda1” and due to this nothing is copied and configured on the M.2 NVMe SSD drive. So again, umbrel does not start.
Please, would you know what can be the prolem and how to get it to work? Maybe some changes in config files etc.
Thank you.
Hi Marek,
I’ve also had some trouble in the past with finding an NVME drive and enclosure combination that will work with the Pi. I’m not really sure what the issue is, I just tried a couple of combinations until I found one which works. I assume that some of the boards in the enclosures use a chipset that is not compatible with the Pi as they seem to work fine on my Windows and Mac computers. There may be a workaround through a config file, but I’m not sure.
Yes, I already fond another M.2enclosure with different chipset (JMicron), which works. Thanks.
Does this setup really work for mining Bitcoin? Did your Bitcoin node really work? People are saying this can’t work.
Running a Bitcoin node is entirely different to mining Bitcoin. It is not practical to mine Bitcoin on a Raspberry Pi, but it’s perfect for running a node. A node is just a means to transact on the blockchain without having to use a third-party provider.
Will this low profile case work instead of your case? I don’t have the capacity to build my own case just yet.
https://www.amazon.com/GeeekPi-Raspberry-Low-Profile-Horizontal-Included/dp/B085HFTMB1/ref=pd_bxgy_3/147-0902213-2656007?_encoding=UTF8&pd_rd_i=B085HFTMB1&pd_rd_r=616de6cd-38ae-4de7-b6c1-ba9f971f7f92&pd_rd_w=Gc7Up&pd_rd_wg=PeZm6&pf_rd_p=fd3ebcd0-c1a2-44cf-aba2-bbf4810b3732&pf_rd_r=DJ39BEQFAJJZ2G501PHE&psc=1&refRID=DJ39BEQFAJJZ2G501PHE
Yes, you don’t have to use a case for the Pi to run the node. The case you’ve linked to will fit the Pi and heat sink, you’ll just need to use an external SSD or SSD enclosure.
when I go to http://umbrel.local/ it says that the site cant be reached?
Either your Pi isn’t booting up properly or there is a network issue between the Pi and the computer you’re trying to access it on. Try plugging a monitor into the Pi when booting up to see the progress and any errors which come up.
can you run multiple nodes and makes more transactions and more money overall ??
Nodes don’t make money, they enable you to save money by not having to pay third-party transactions fees when transacting on the blockchain. You’ll also be assisting in keeping the blockchain decentralized.
Hello. May I know whether I could run the bitcoin full node based on your raspberry pi desktop design? I have noticed that it only has 1 fan instead of 2 fans, will it be too hot to run as bitcoin full node? Thanks in advance.
Yes you should be able to, you’ll just need to use an external HDD or SSD. It won’t need any additional cooling, one fan is fine for full CPU load on the Pi.
Hi Michael
Great video as always
I am running Raspberry Pi OS Lite 32 bit and get the followijng error
git clone https://github.com/adafruit/Adafruit_Python_SSD1306.git
ot
sudo git clone https://github.com/adafruit/Adafruit_Python_SSD1306.git
pi@raspberrypi:~ $ git clone https://github.com/Adafruit_Python_SSD1306,git
Cloning into ‘Adafruit_Python_SSD1306,git’…
remote: Not Found
fatal: repository ‘https://github.com/Adafruit_Python_SSD1306,git/’ not found
Checked on github and it says –
DEPRECATED LIBRARY Adafruit Python SSD1306
his library has been deprecated! We are leaving this up for historical and research purposes but archiving the repository.
We are now only supporting the use of our CircuitPython libraries for use with Python.
Check out this guide for info on using OLEDs with the CircuitPython library: https://learn.adafruit.com/monochrome-oled-breakouts/python-wiring
Hi Rav,
You’ve use a , instead of a . at the end “,git” instead of “.git”
The depreciated library message is just a note that they’re not updating it anymore. It still exists and works.
Thanks Miichael, will correct that error.
I have started again from scratch with Raspberry Pi OS Lite 32 Bit
I am now getting the following –
pi@raspberrypi:~ $ sudo pip3 install Adafruit_BBIO
sudo: pip3: command not found
What operating system are you using? Pip3 is usually installed by default on Raspberry Pi OS – On a Debian system, you can also install python3 by sudo apt-get install python3 and pip3 by sudo apt-get install python3-pip.
สล็อตเว็บไซต์สล็อต สล็อตออนไลน์ ยอดนิยมแล้วก็เป็นที่ชอบใจเป็นอย่างมากสำหรับผู้เล่นเกมสล็อตออนไลน์ในช่วงเวลานี้ PG SLOT นับว่าเป็นที่น่าดึงดูดช่วยทำเกมให้กับผู้เล่น24ชม.