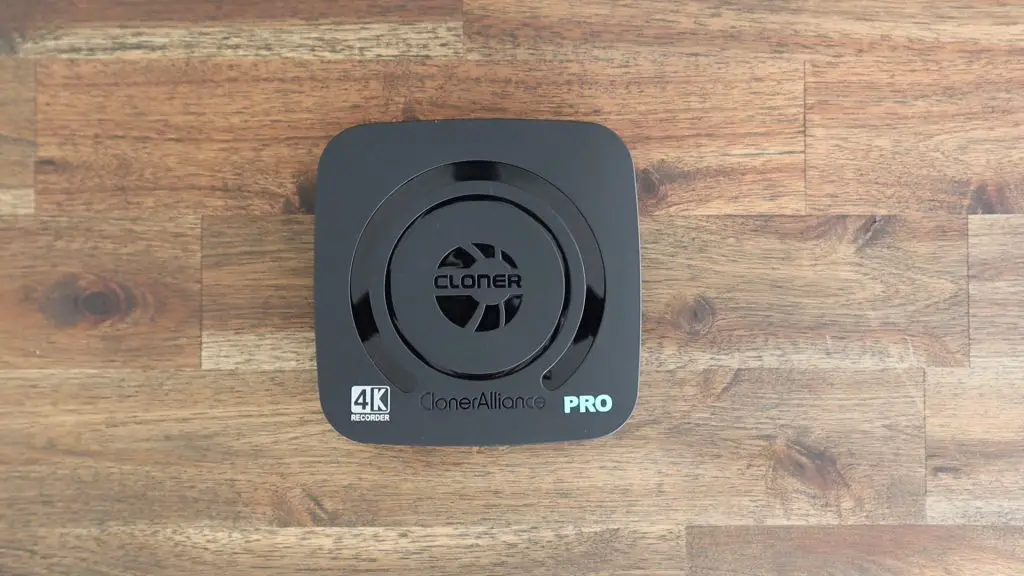
Today, we’re going to be taking a look at the ClonerAlliance UHD Pro video capture box which was sent to me by the team at ClonerAlliance to review and share with you.
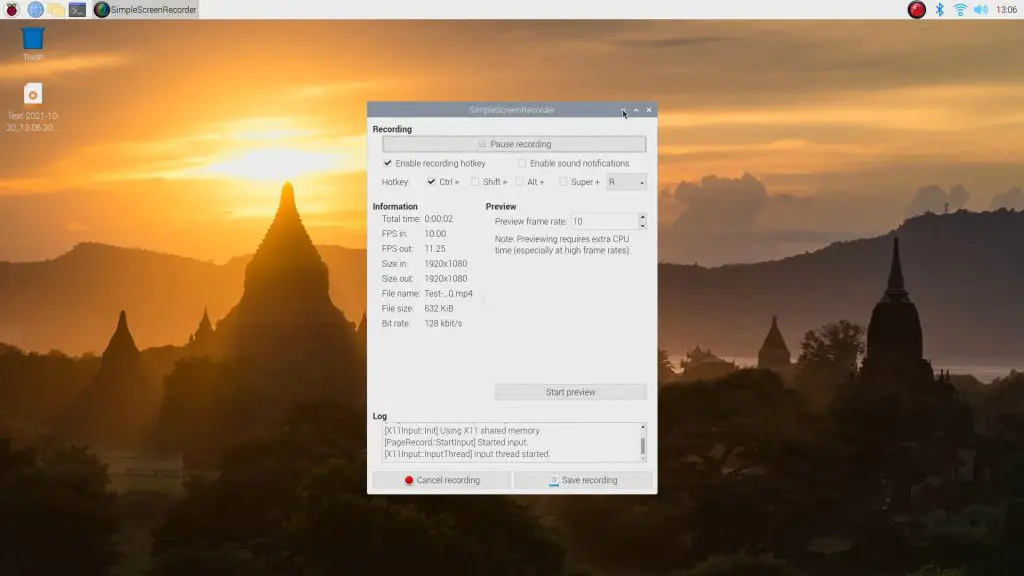
I often get asked on my Raspberry Pi tutorial videos why I’ve used the full desktop version of Raspberry Pi OS when the project is intended to be run without a monitor or external display connected once it has been set up. There’s actually quite a simple answer. I use a screen recording utility, typically SimpleScreenRecorder, running in the background to capture the screen contents for the tutorial.
Although it looks a bit odd to immediately open up a terminal window and do the whole setup from there, it works pretty well for a tutorial because you can then follow along in either version of the operating system.
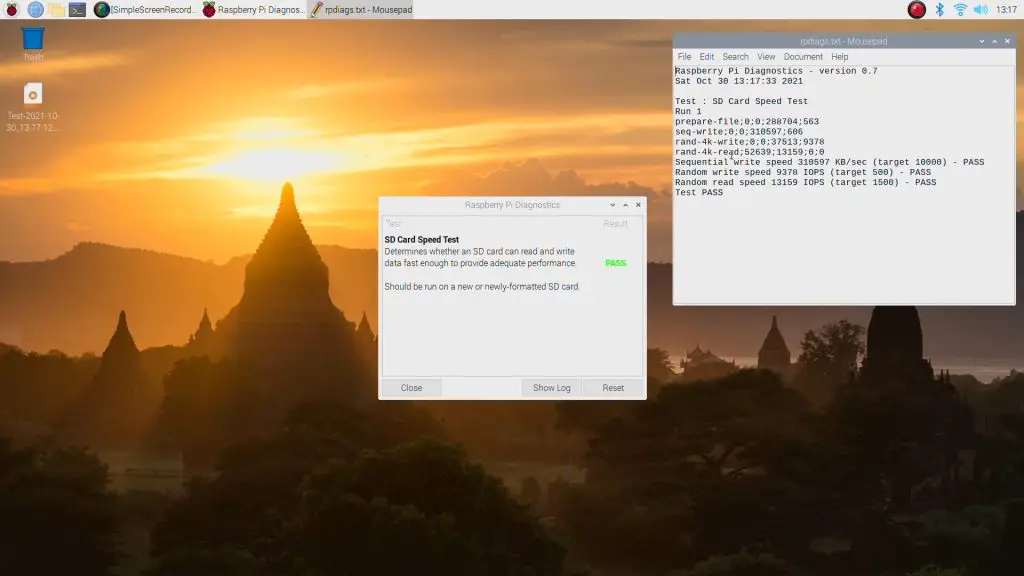
It does however have one pretty significant drawback, and that is that it uses a bit of the Pi’s processing power in the background to capture the screen contents. It also slows down the read and write speed to the SD card or SSD in the process as the Pi is continually writing to it.

This goes unnoticed for general command line inputs, but if you’re running any speed tests or benchmarks then they land up being affected by the screen recording, which Is obviously not ideal.
Another issue is that I can only start recording once the desktop is reached, so I can’t include any initial setup or boot-up footage or prompts and I can’t record the screen contents of builds that do not have a traditional desktop interface.
So when ClonerAlliance asked me if I’d be interested in reviewing their new UHD Pro video capture box, it definitely caught my attention.
Have a look at my unboxing and review video, otherwise, read on for the write-up.
I’ve also tried using a video capture card in the past, but these become messy because you need a second computer to record the video output and there is usually a significant amount of latency involved. This means that the inputs made on the Pi only show up on the video output on the secondary computer’s monitor after a second or two, which makes it almost impossible to work with.
The ClonerAlliance UHD Pro addresses all of these issues in the form of a standalone device that sits between the video source and the monitor and allows you to capture 4K video with very low latency directly to a USB attached drive. So it’s ideal for gamers on consoles, and even computers, as you don’t have to try to run any capture software in the background. Your computer’s processor and graphics card are fully dedicated to the game you’re playing.
The CLonerAlliance UHD Pro also has provision for audio and microphone inputs and has a USB interface for live streaming.
With all that said, let’s get it unboxed and have a look at how it works.
Unboxing The ClonerAlliance UHD Pro
The ClonerAlliance UHD Pro comes in a box that is similar in size to an iPad’s.
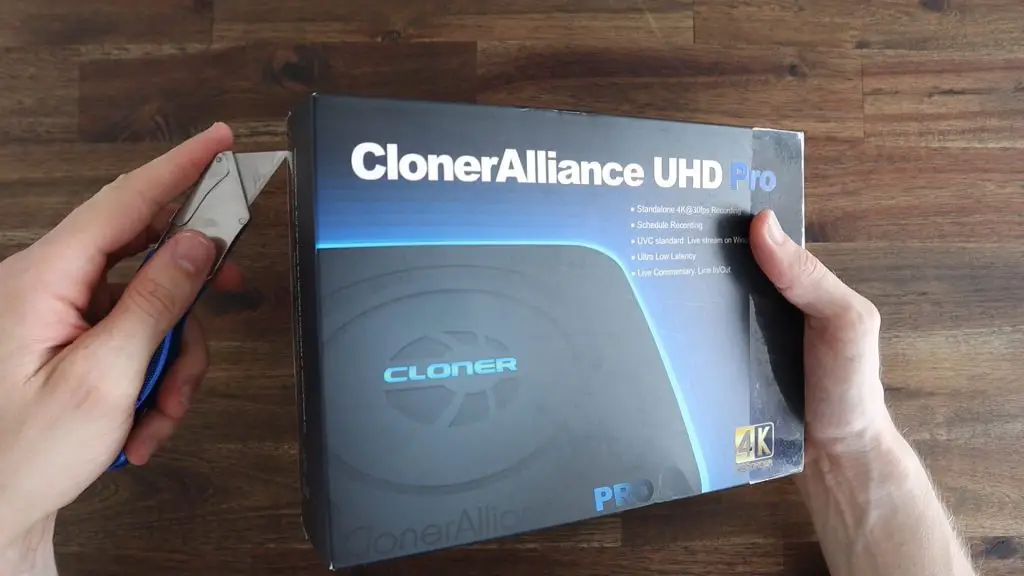
The device is in a protective sleeve within a cardboard insert that divides the box into three sections, the other two of which contain the cables and accessories.

Included in the box you’ve got the Cloner Alliance UHD Pro capture box;
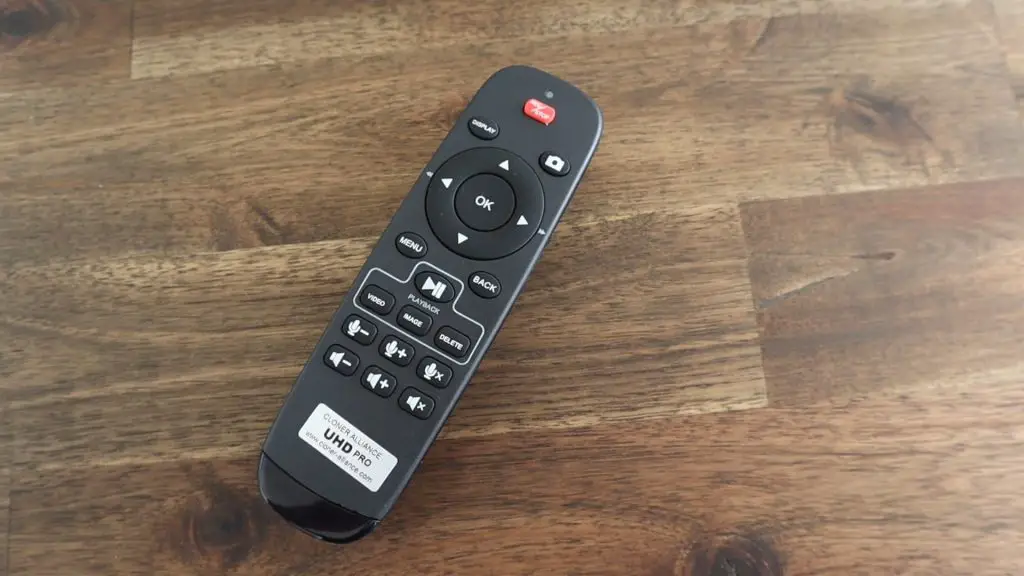
A remote control, which is pretty basic, but has all of the functions you’ll need including arrows and buttons for navigating through menus, a set of buttons to control video capture and playback and some audio controls;
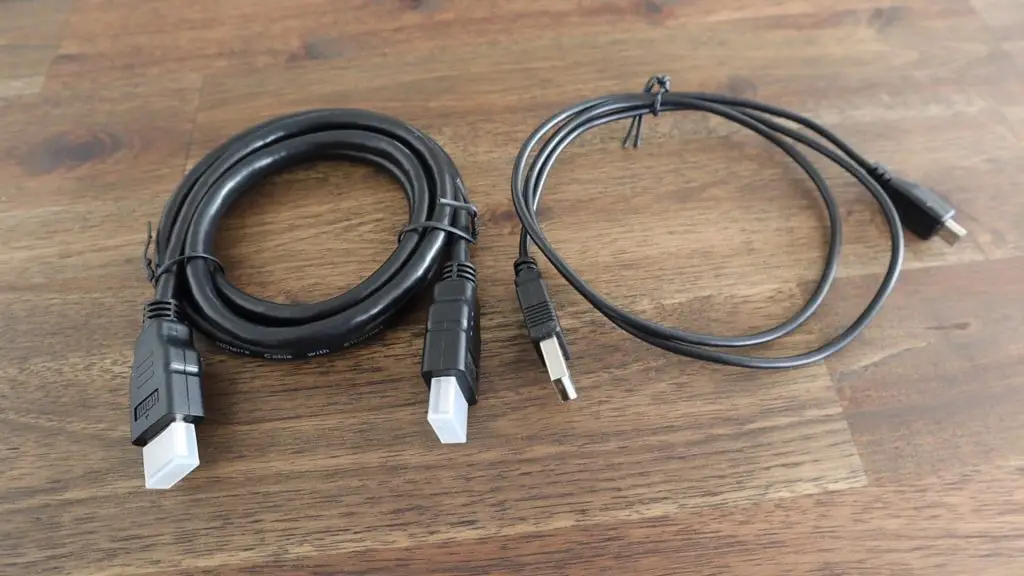
You’ve also got an HDMI and micro-USB cable. You’ll need two HDMI cables to use the box as a passthrough device, so they’re relying on you having the first as part of your current setup;
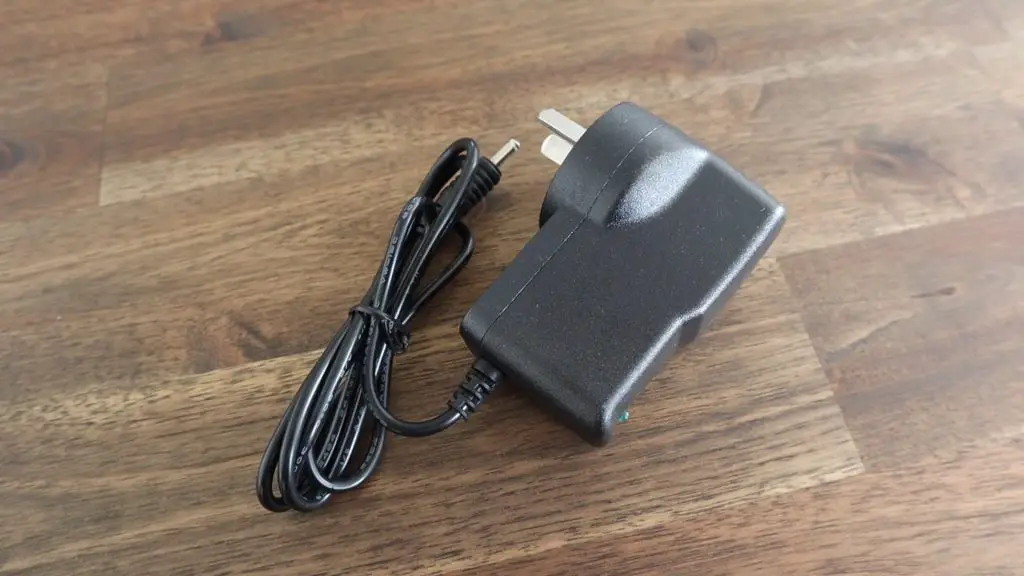
A 5V, 2A power adapter, which is customised to suite your country of order’s outlets (it looks like US, UK, EU and AU options are available). I’m not sure why they didn’t just make this a USB C power adaptor given that it’s running at 5V anyway, that would make it a lot easier to power as part of a mobile setup.
And a quick start guide. The quick start guide is a summary of the basic setup and operating instructions. It’s pretty well written, is in full colour and has images to support the text.
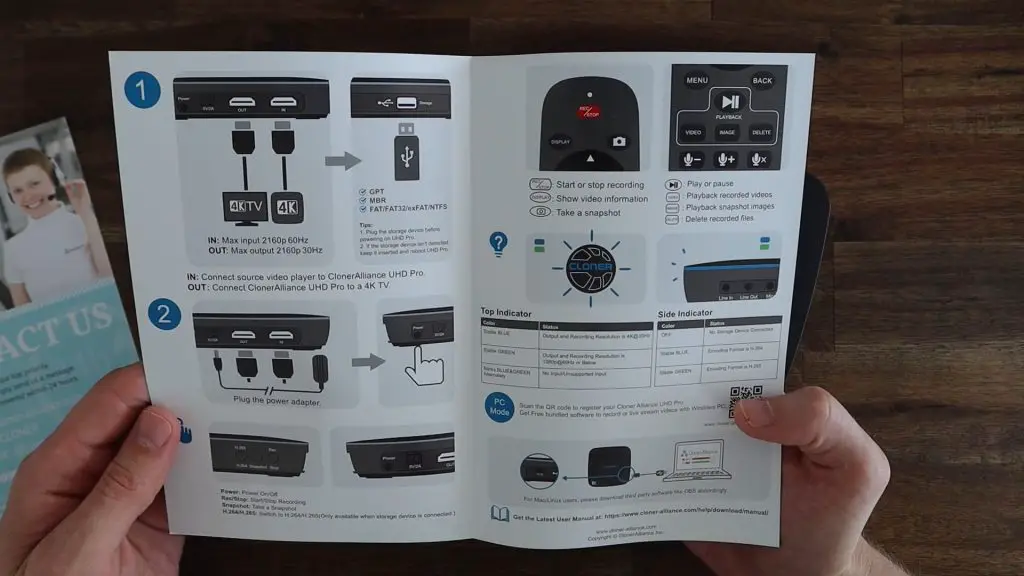
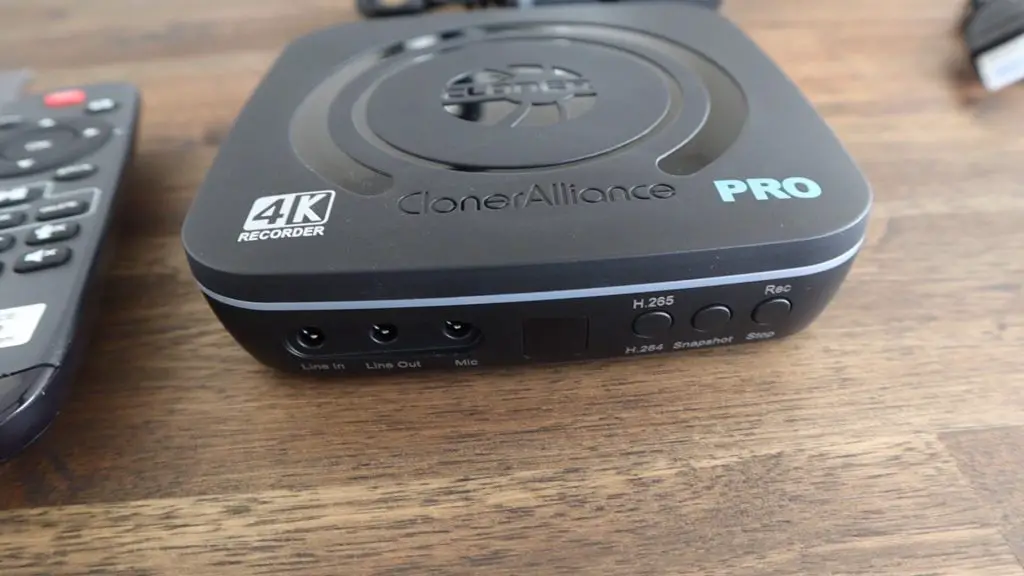
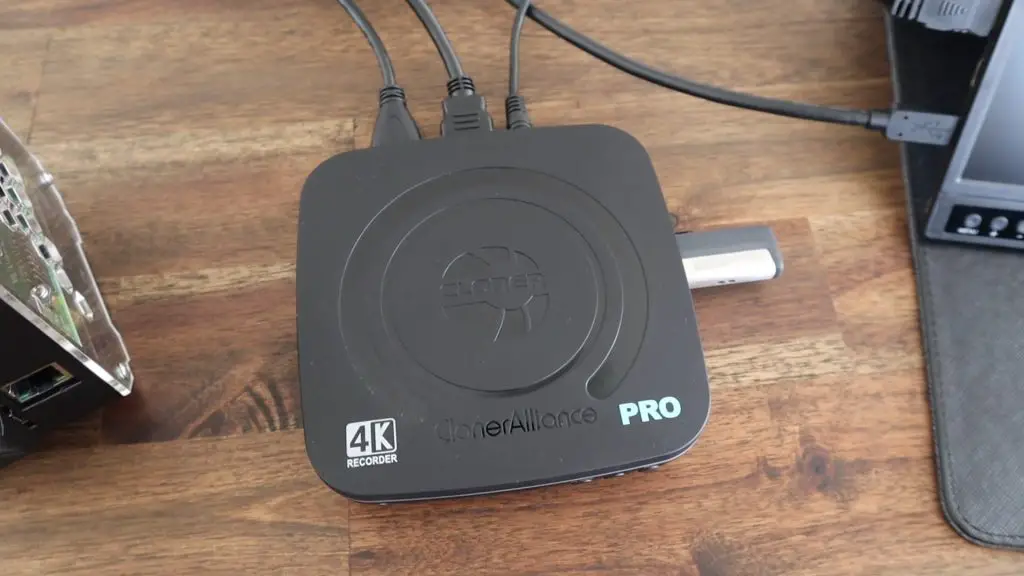
The ClonerAlliance UHD Pro Ports & Interfaces
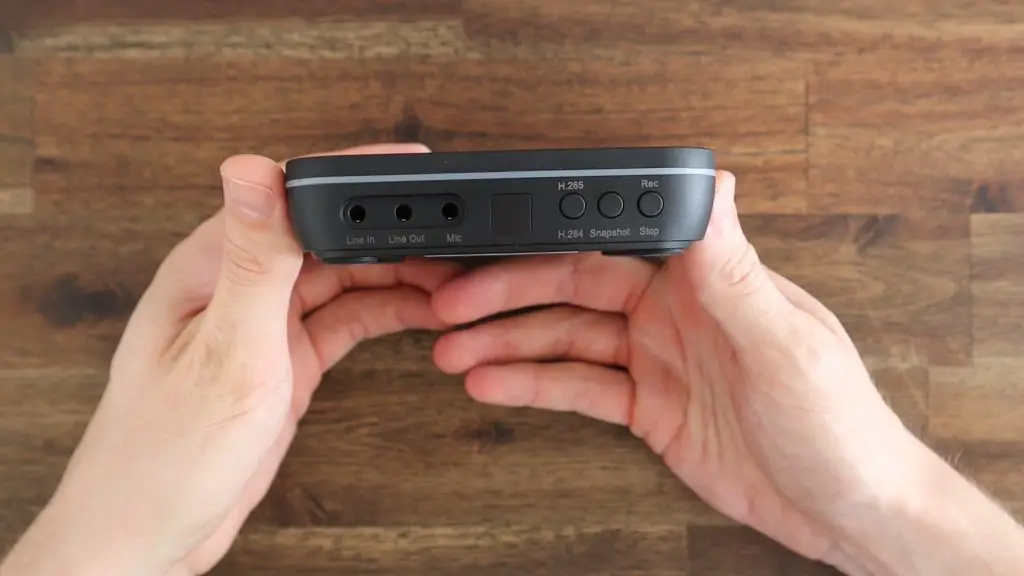
Taking a closer look at the capture box, on the front you’ve got 3.5mm audio ports for line in, line out and a microphone input as well as three buttons, one for the compression mode, one to capture still frames and the last to start and stop recording.
There is also a tinted window in the middle for the IR receiver for the remote control.
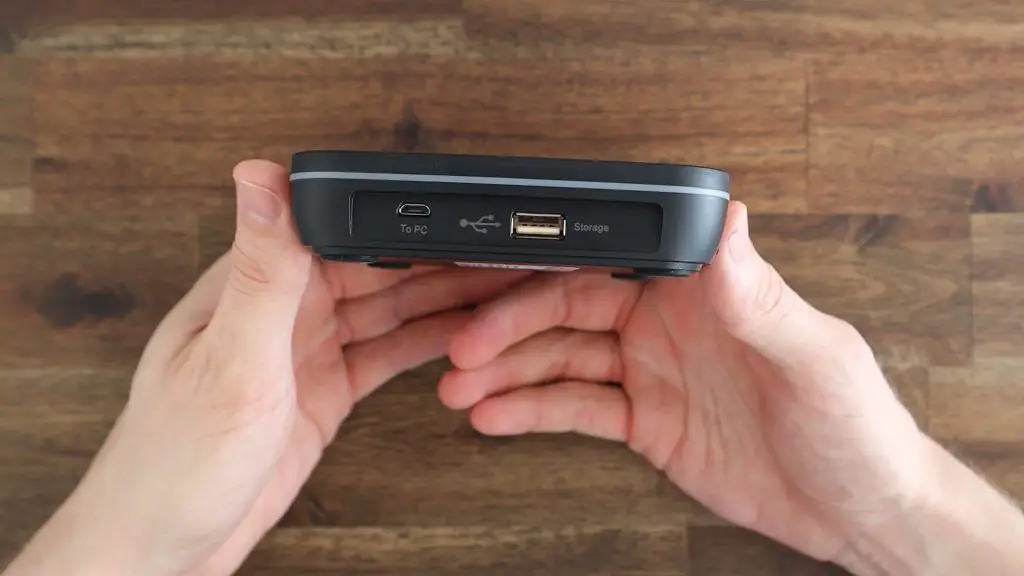
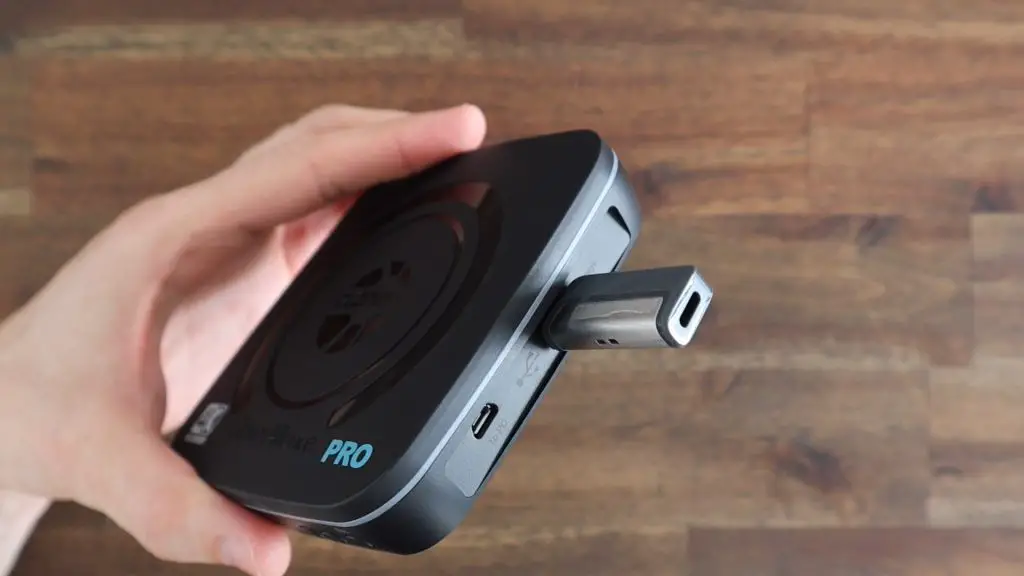
On the right side, we’ve got a USB type-A port to plug in a storage device and a micro-USB port to plug into a computer if you’d like to capture video directly to your computer or use the box for live streaming.
They don’t really mention anywhere what speeds are required for the external drive, they just say that it should be a high-speed drive. I’d imagine that you would want to use a USB 3.0 flash drive or SSD if you’re recording 4K video, you’ll likely run into bandwidth issues on USB 2.0 drives.
On the back, you’ve got your full-size HDMI in and out ports as well as the power supply input and a power button.

The bottom of the case is raised with large rubber feet and is vented to provide some cooling.

Setting Up The ClonerAlliance UHD Pro
Setup is really straightforward, you just need to plug a fast storage device into the USB port on the side. As mentioned earlier, you’ll probably need to use a USB 3.0 flash drive or SSD for 4K recording.
Then hook up your source and monitor to the HDMI ports and plug in your power supply.
When you switch it on, you’ll notice a green or blue LED band around the rim which is used to indicate the compression mode being used – blue for H.264 and green for H.265. This can be changed using the leftmost button on the front or from the remote control.
It’s a nice addition to support H.265 video compression. This more modern compression standard dramatically reduces the file size of the video files without any reduction in quality, which is particularly useful when you’re recording 4K video or when you’re streaming on a subscription plan where your data usage matters.
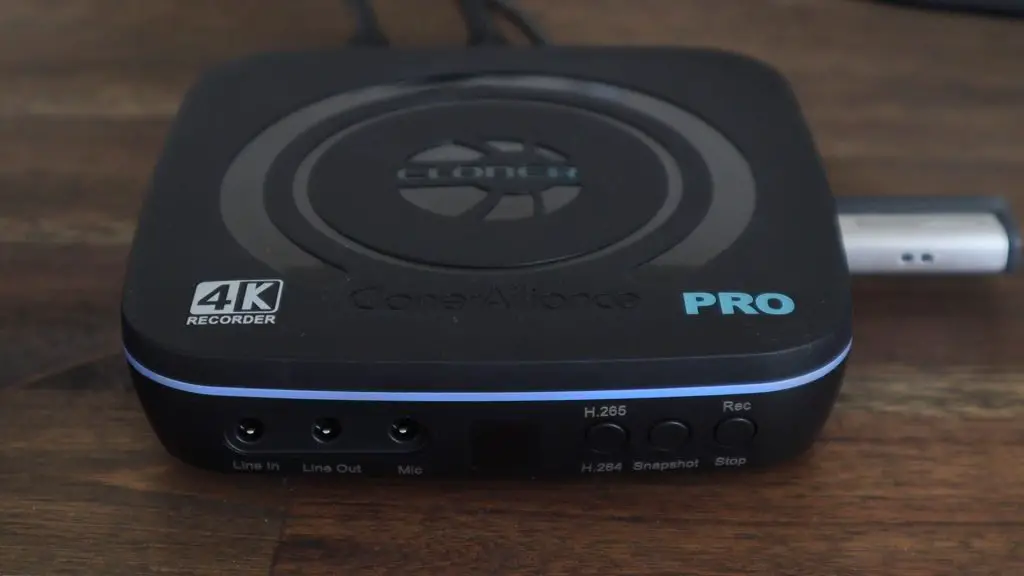
The Cloner logo on the top also lights up in green or blue to indicate 1080P or 4K output and recording resolutions respectively. It also flashes between green and blue when there is no input or the input is unsupported.
Once your computer, console or set-top box is running, your display will look exactly the same as it does without the UHD Pro. You’ll now be able to hit record on the remote control and a side panel will show up temporarily, to display the recording settings, and the contents of your screen are then being recorded. This is indicated by a small red “REC” icon on the top left, which can be turned off if you’d like.
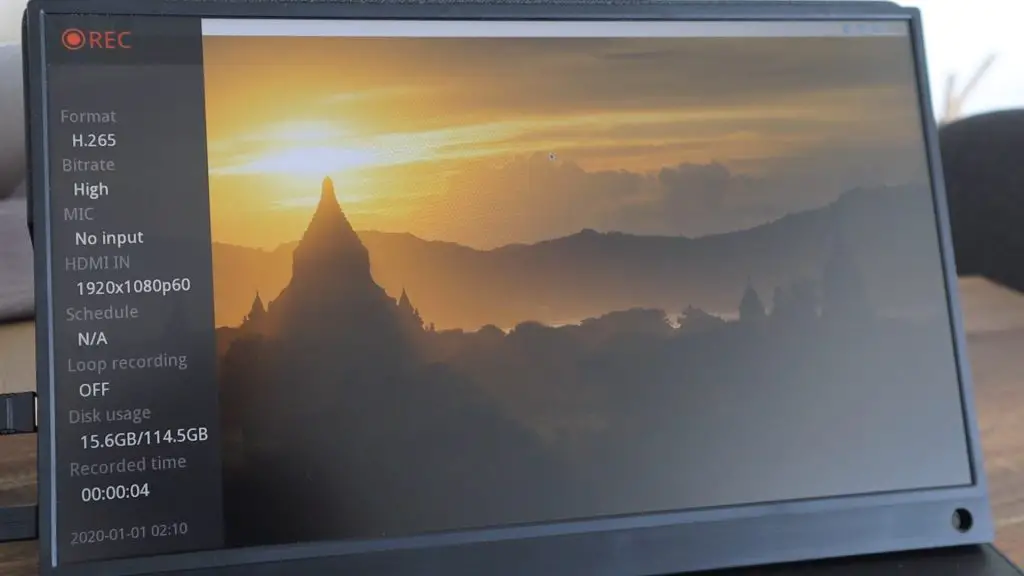
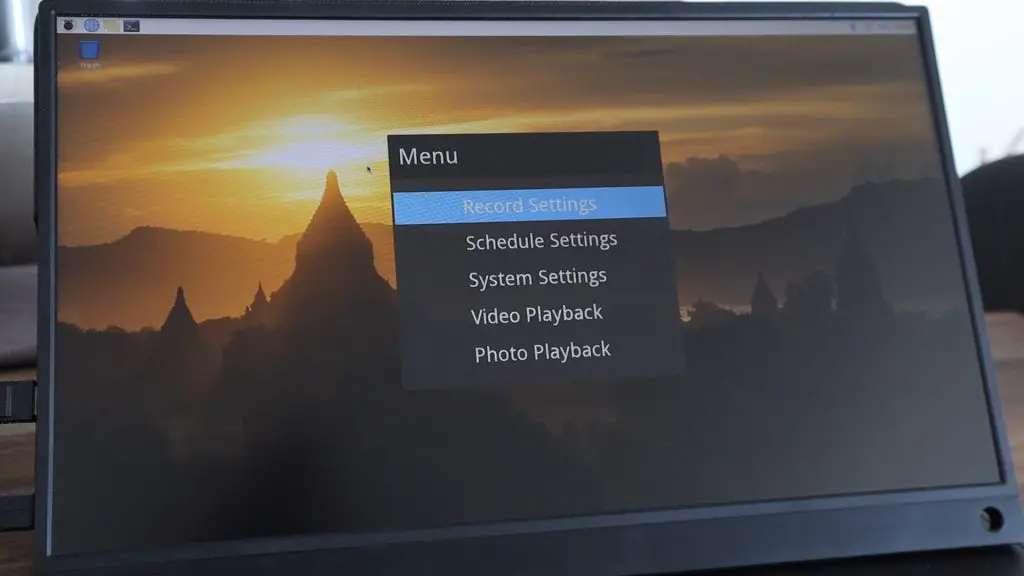
You can also access a range of overlaid settings menus with the remote control. These settings allow you to make changes to the recording output, set the system date and time, modify the display settings (like the “REC” icon) etc..
This is also where you can schedule recordings so that you don’t miss any live TV or sporting events. If you leave your ClonerAlliance UHD Pro connected, you can set it to start recording automatically on a particular date and time.
Test Footage From The ClonerAlliance UHD Pro
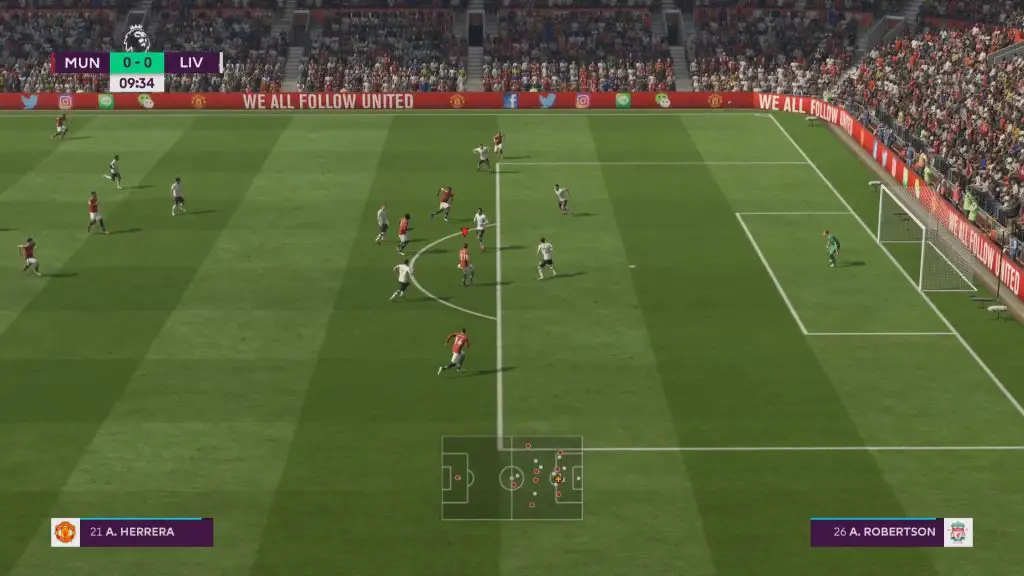
I tested the ClonerAlliance UHD Pro on a number of devices, including obviously one of my Raspberry Pis, my Apple TV and Xbox and it worked really well with each of them.
The capture box also records any sound being provided over HDMI as well.
Video capture from the Apple TV and Xbox worked immediately. I had to change the display output settings through raspi-config on the Raspberry Pi to get the input to be seen by the ClonerAlliance UHD Pro, but it then worked without any further issues.
I’m not really sure what the issue was, the output resolutions are all listed as compatible with the Cloner Alliance UHD Pro, so it seemed to be an issue with the encoding, although this only seems to affect some output resolutions on the Pi and not others.
There is one limitation to its 4K recording ability and that is that it can only record 4K video at 30 frames per second. It’ll allow inputs of 4K 60 frames per second and it supports passthrough of the full 4K 60 fps, so it won’t interfere with your framerate for gaming, but it will only capture up to 30 fps in 4K. Alternately you can also configure it to record at 60 fps, but at a reduced 1080p resolution.
Because it just requires an HDMI input, it also works on older platforms. So the ClonerAlliance UHD Pro video capture box is also ideal for capturing retro games, as well as for creating digital copies of old VHS tapes or DVDs. If your media player has an HDMI output and can be seen by your TV then it’ll likely work with the recorder box.

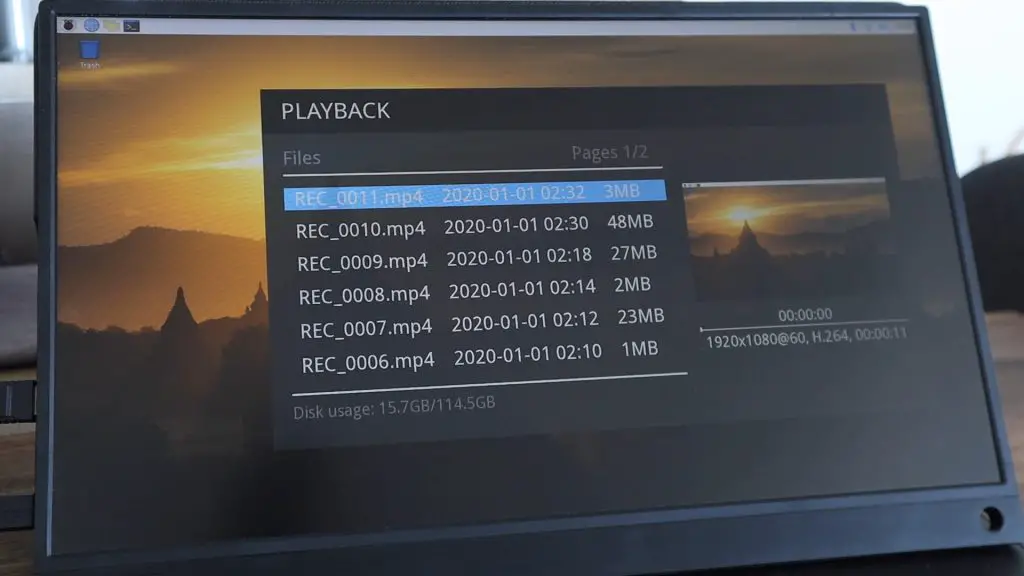
When you’re done recording, you can also playback your footage directly from the device. So you don’t have to wait to get it onto a computer first.
This interface could be a bit more user friendly, but it has all of the information you need and it is relatively easy to find the video that you’re looking for.
Final Thoughts
The ClonerAlliance UHD Pro is a powerful and compact standalone video recorder that is particularly useful for gamers on consoles and PC’s that don’t want to have to run screen recording utilities in the background. Its’ simple and easy-to-use interface makes it a breeze to get set up and running and I’ve been impressed with the quality of the screen recordings that I’ve taken over the past week.
If I had to nitpick, I’d say that it would have been more functional to replace the barrel jack power supply with a USB C power supply so that it could be used as part of a mobile setup and I would have liked to see an SD or microSD card slot for the footage to be saved to in addition to the USB drive.
I’m definitely looking forward to using it on my upcoming tutorials and project videos!
Let me know what you think of the ClonerAlliance UHD Pro in the comments section below.
Hello, I make this project, but I want to see same info like disk but for my external drive (/dev/sda1). Can you tell me script? Thank you!
Will Sly Fox ? software work with this unit?
You shouldn’t need to use software like that as this is recording the displayed contents from the player (exactly what is seen by the TV/monitor), it’s not re-encoding the files from the media source.
Hi Michael !
Very usefull stuff.
How can I add the RPI’s voltage ?
Wow, this ClonerAlliance UHD Pro Video Capture Box seems like a game-changer for capturing and reviewing high-quality videos!