Today we’re going to be using the new Kywoo3D Tycoon Slim 3D printer to print two new cases for my Raspberry Pis. I’ll be printing one in regular PLA to get an idea of the print quality that the Tycoon Slim can achieve and one in TPU, which is a flexible filament that is perfect for creating bump and drop resistant cases – but is also notoriously difficult to print with. The TPU version will be especially useful for Pi’s that you’re going to use for travelling, like a portable media server or NAS.
This 3D printer was sent to me to try out and share with you by Kywoo3D through the online 3D printing store Tinker Hive. Tinker Hive is an authorised re-seller of Kywoo3D products and they offer three payment options, with the option to pay your printer off in four interest-free instalments, making it more affordable for tinkerers to get into 3D printing.
Kywoo3D is a relatively new company to the 3D printing game, having successfully launched their Tycoon 3D printer on Kickstarter in April last year. They’ve now brought out a more compact, and cheaper version called the Tycoon Slim, and that’s what we’re going to be taking a look at and using for today’s prints.
Here’s my video of the project, read on for the full write-up:
What You Need For This Project
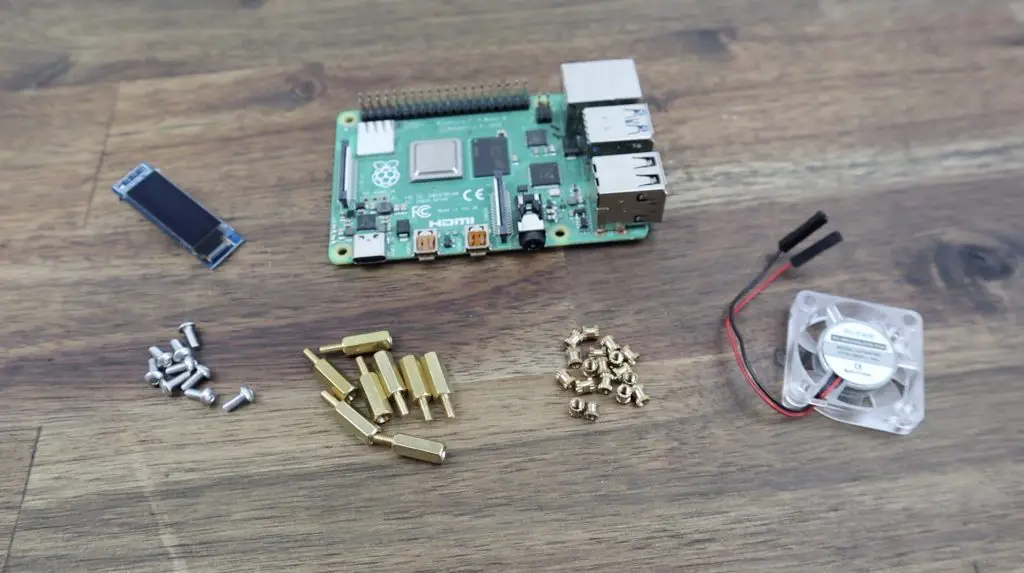
- Raspberry Pi 4b – Buy Here
- 32GB MicroSD Card – Buy Here
- M2.5 x 12mm Brass Standoffs – Buy Here
- M2.5 Button Head Screws & Nuts – Buy Here
- M2.5 Brass Threaded Inserts – Buy Here
- I2C OLED Display 128×32 – Buy Here
- 30mm 5V Fan – Buy Here
- Aluminium Heatsink – Buy Here
Equuipment Used
- Kywoo3D Tycoon Slim – Buy Here
- TPU Filament – Buy Here
- Xiaomi Electric Screwdriver – Buy Here
- TS100 Soldering Iron – Buy Here
Some of the above parts are affiliate links. By purchasing products through the above links, you’ll be supporting my projects, with no additional cost to you.
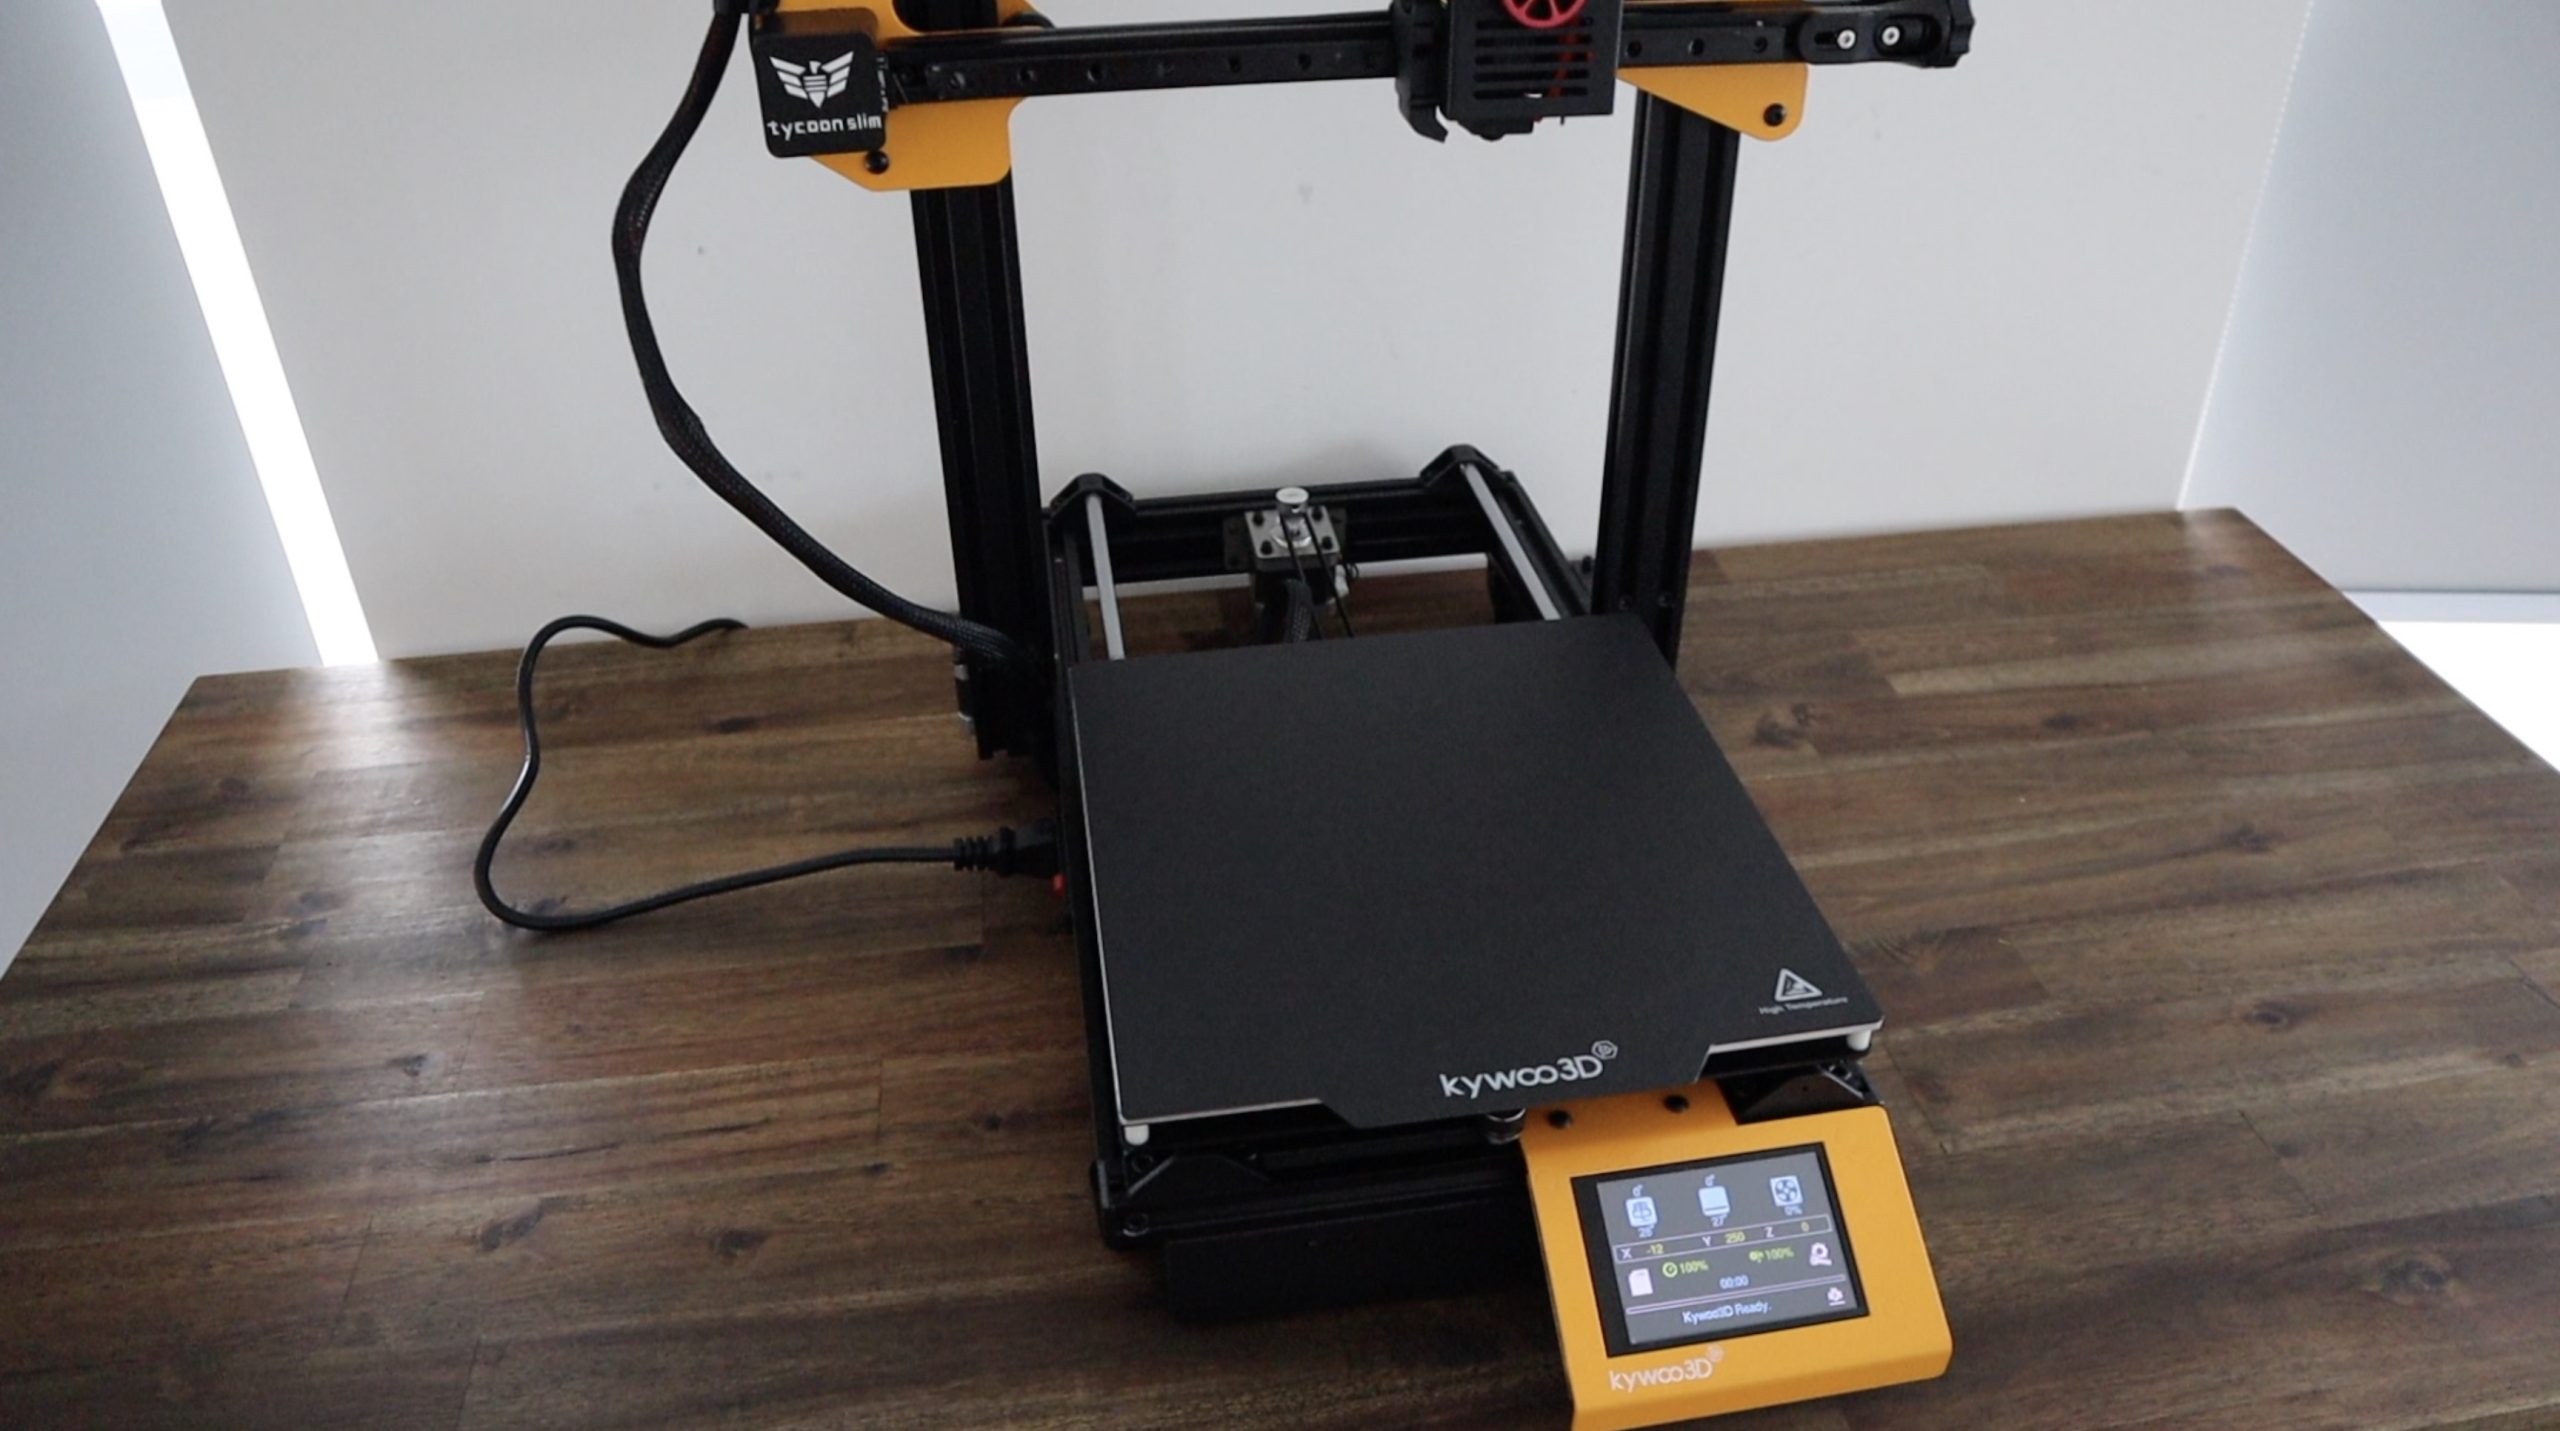
First Look At The Tycoon Slim
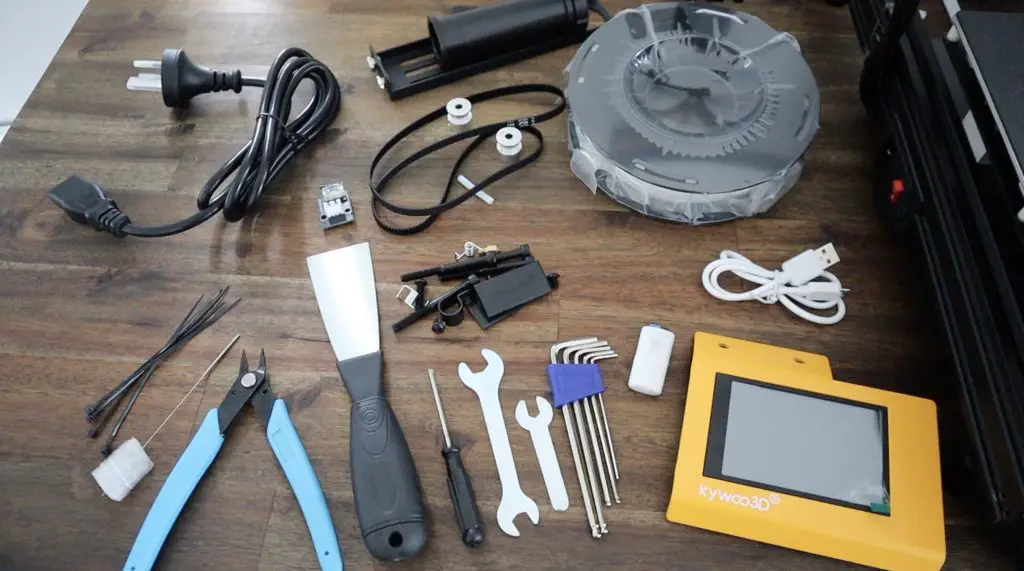
The Tycoon Slim comes mostly pre-assembled and is well packed with fitted foam inserts.
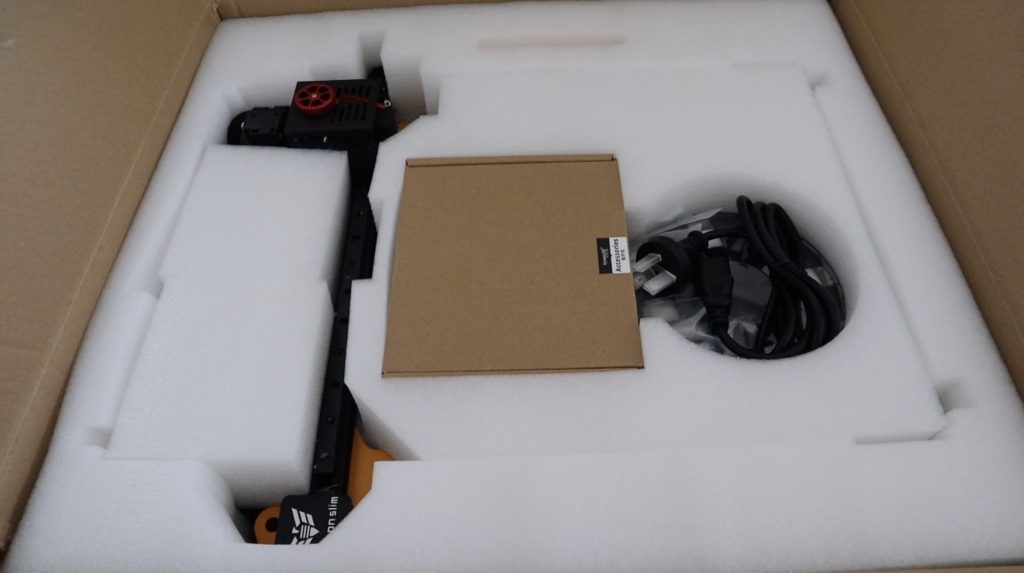
It comes with all of the tools required to assemble and operate the 3D printer and even includes a mini-sized spool a filament – something I haven’t seen supplied with a new printer. You usually just get a coil of a couple of turns of filament that is barely enough to complete the pre-loaded test print.
With the Tycoon Slim unpacked and set up, you may notice that its print volume is slightly larger than the Creality Ender 3 V2, but it is also around $100 dollars more expensive. I’m going to be comparing it a lot to the Ender 3 V2 as this is one of the printers that I’ve got the most experience with, I’ve got three of them and they are running for a large portion of each day – so I really know their strengths and weaknesses well and I can see that Kywoo3D have tried to address some of these weaknesses in the design of the Tycoon Slim.
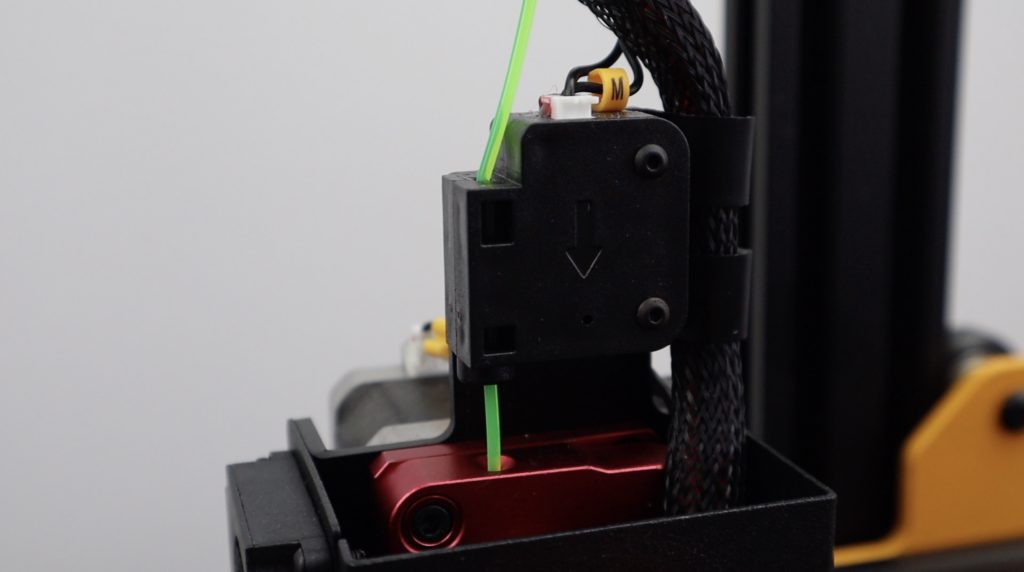
The first and probably most noticeable is that the Tycoon Slim has a direct drive extruder with a filament runout sensor.
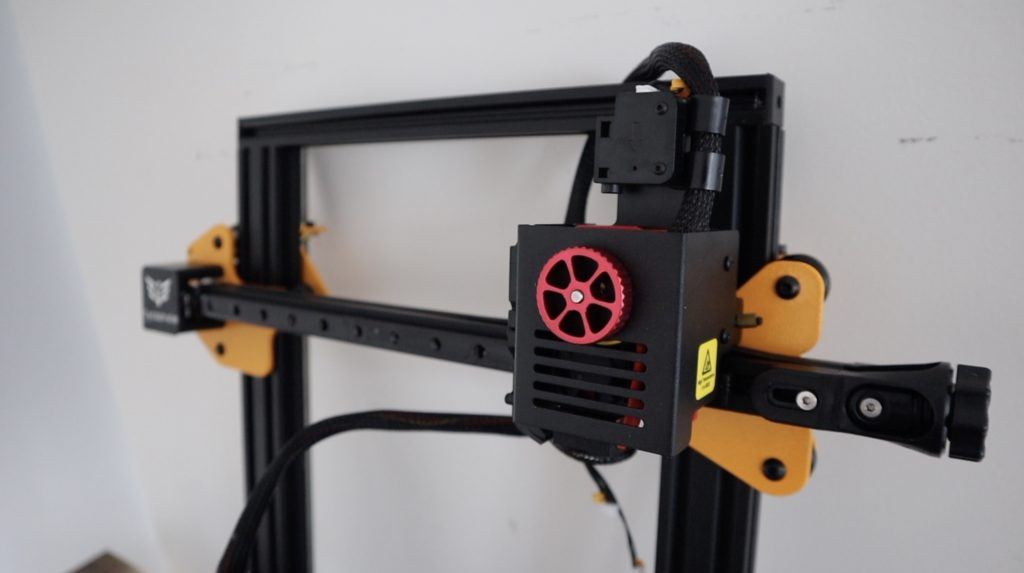
Now I wouldn’t classify the extruder type as a weakness on the Ender 3, but it does limit the materials that you are able to print with. With a direct drive extruder, you are able to print with flexible materials like TPU, so that’s one of the materials that we’re going to be trying out to make our Raspberry Pi case.
Next, they’ve added a double vertical axis drive and they’ve addressed a common problem with axis misalignment by coupling the two lead screws together with a belt underneath the printer. This ensures that both motors always start up in the same position and move together.
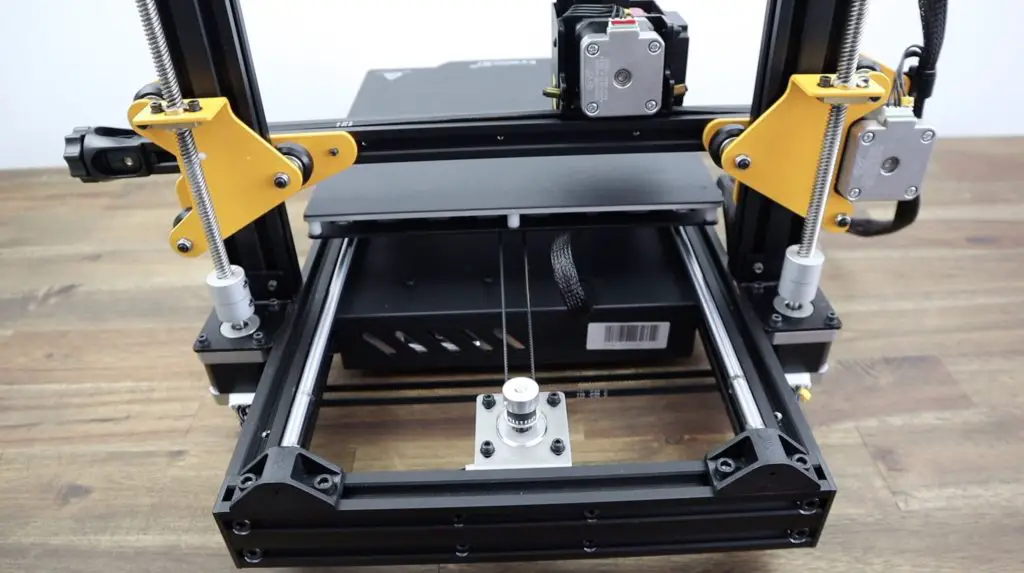
They’ve also done away with v-slot gantries and rather provided a linear rail design for the x-axis and a dual rod slider design for the y axis.
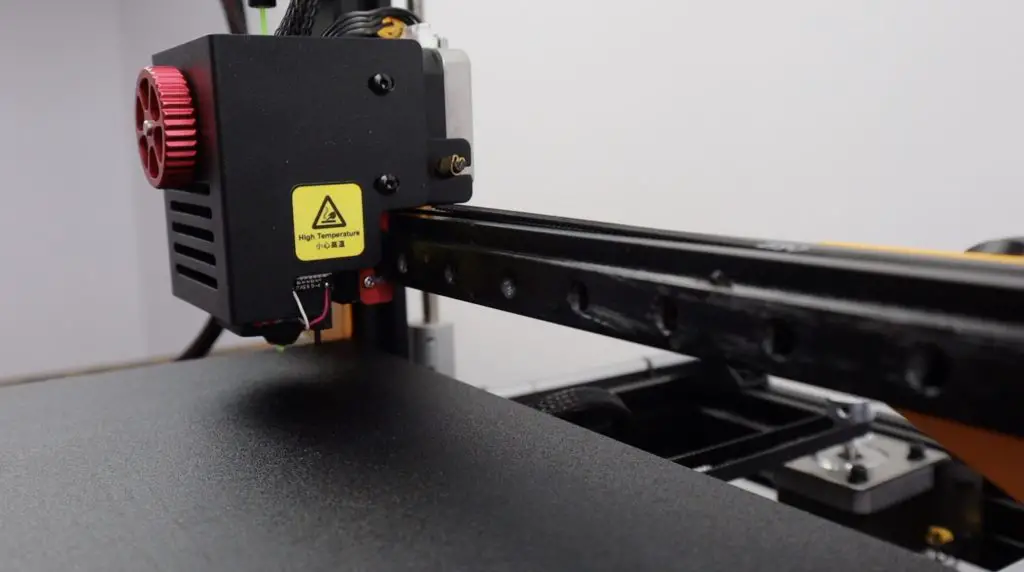
You’ll also always get great first layer results with an integrated Kywoo Touch bed levelling sensor.
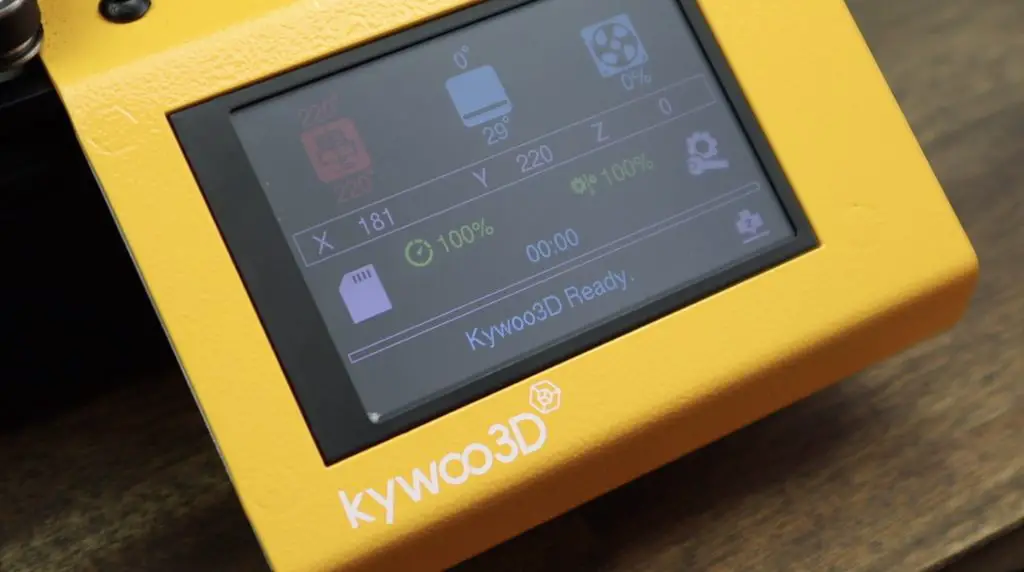
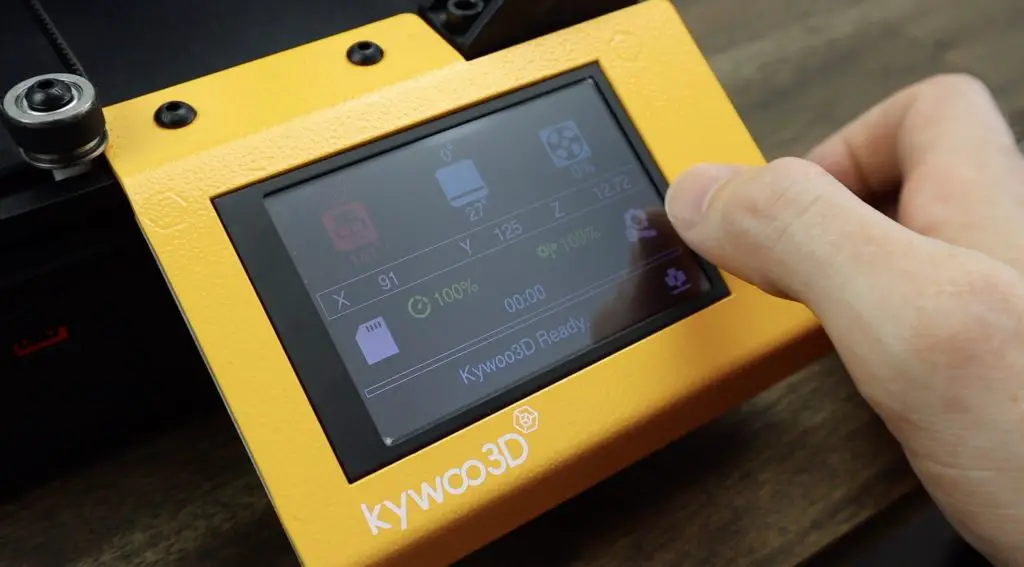
You’ve also got a number of now fairly standard design elements, like a colour touch display, silent TMC2209 drivers, print resume from power-off and adjustable belt tensioners.
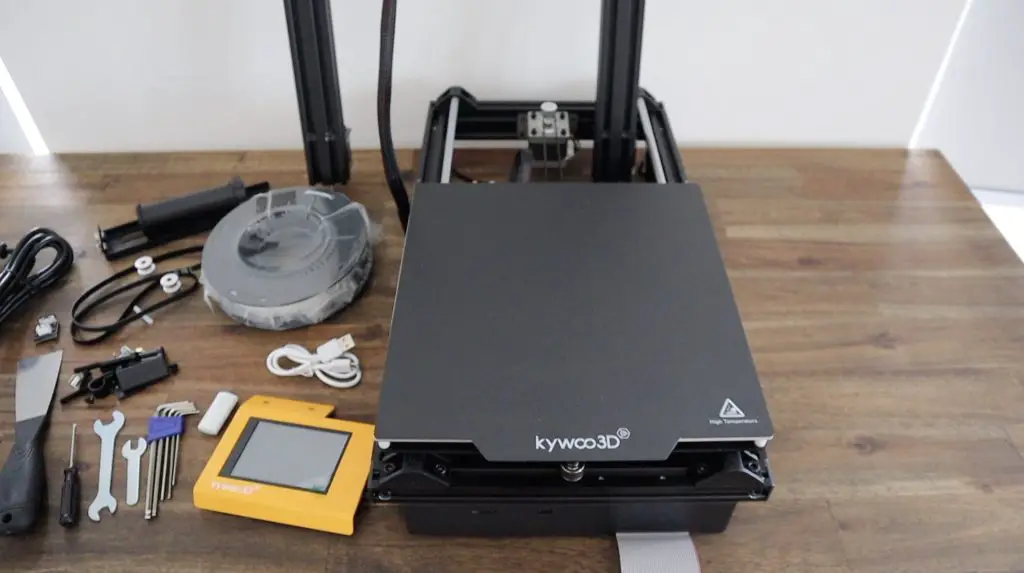
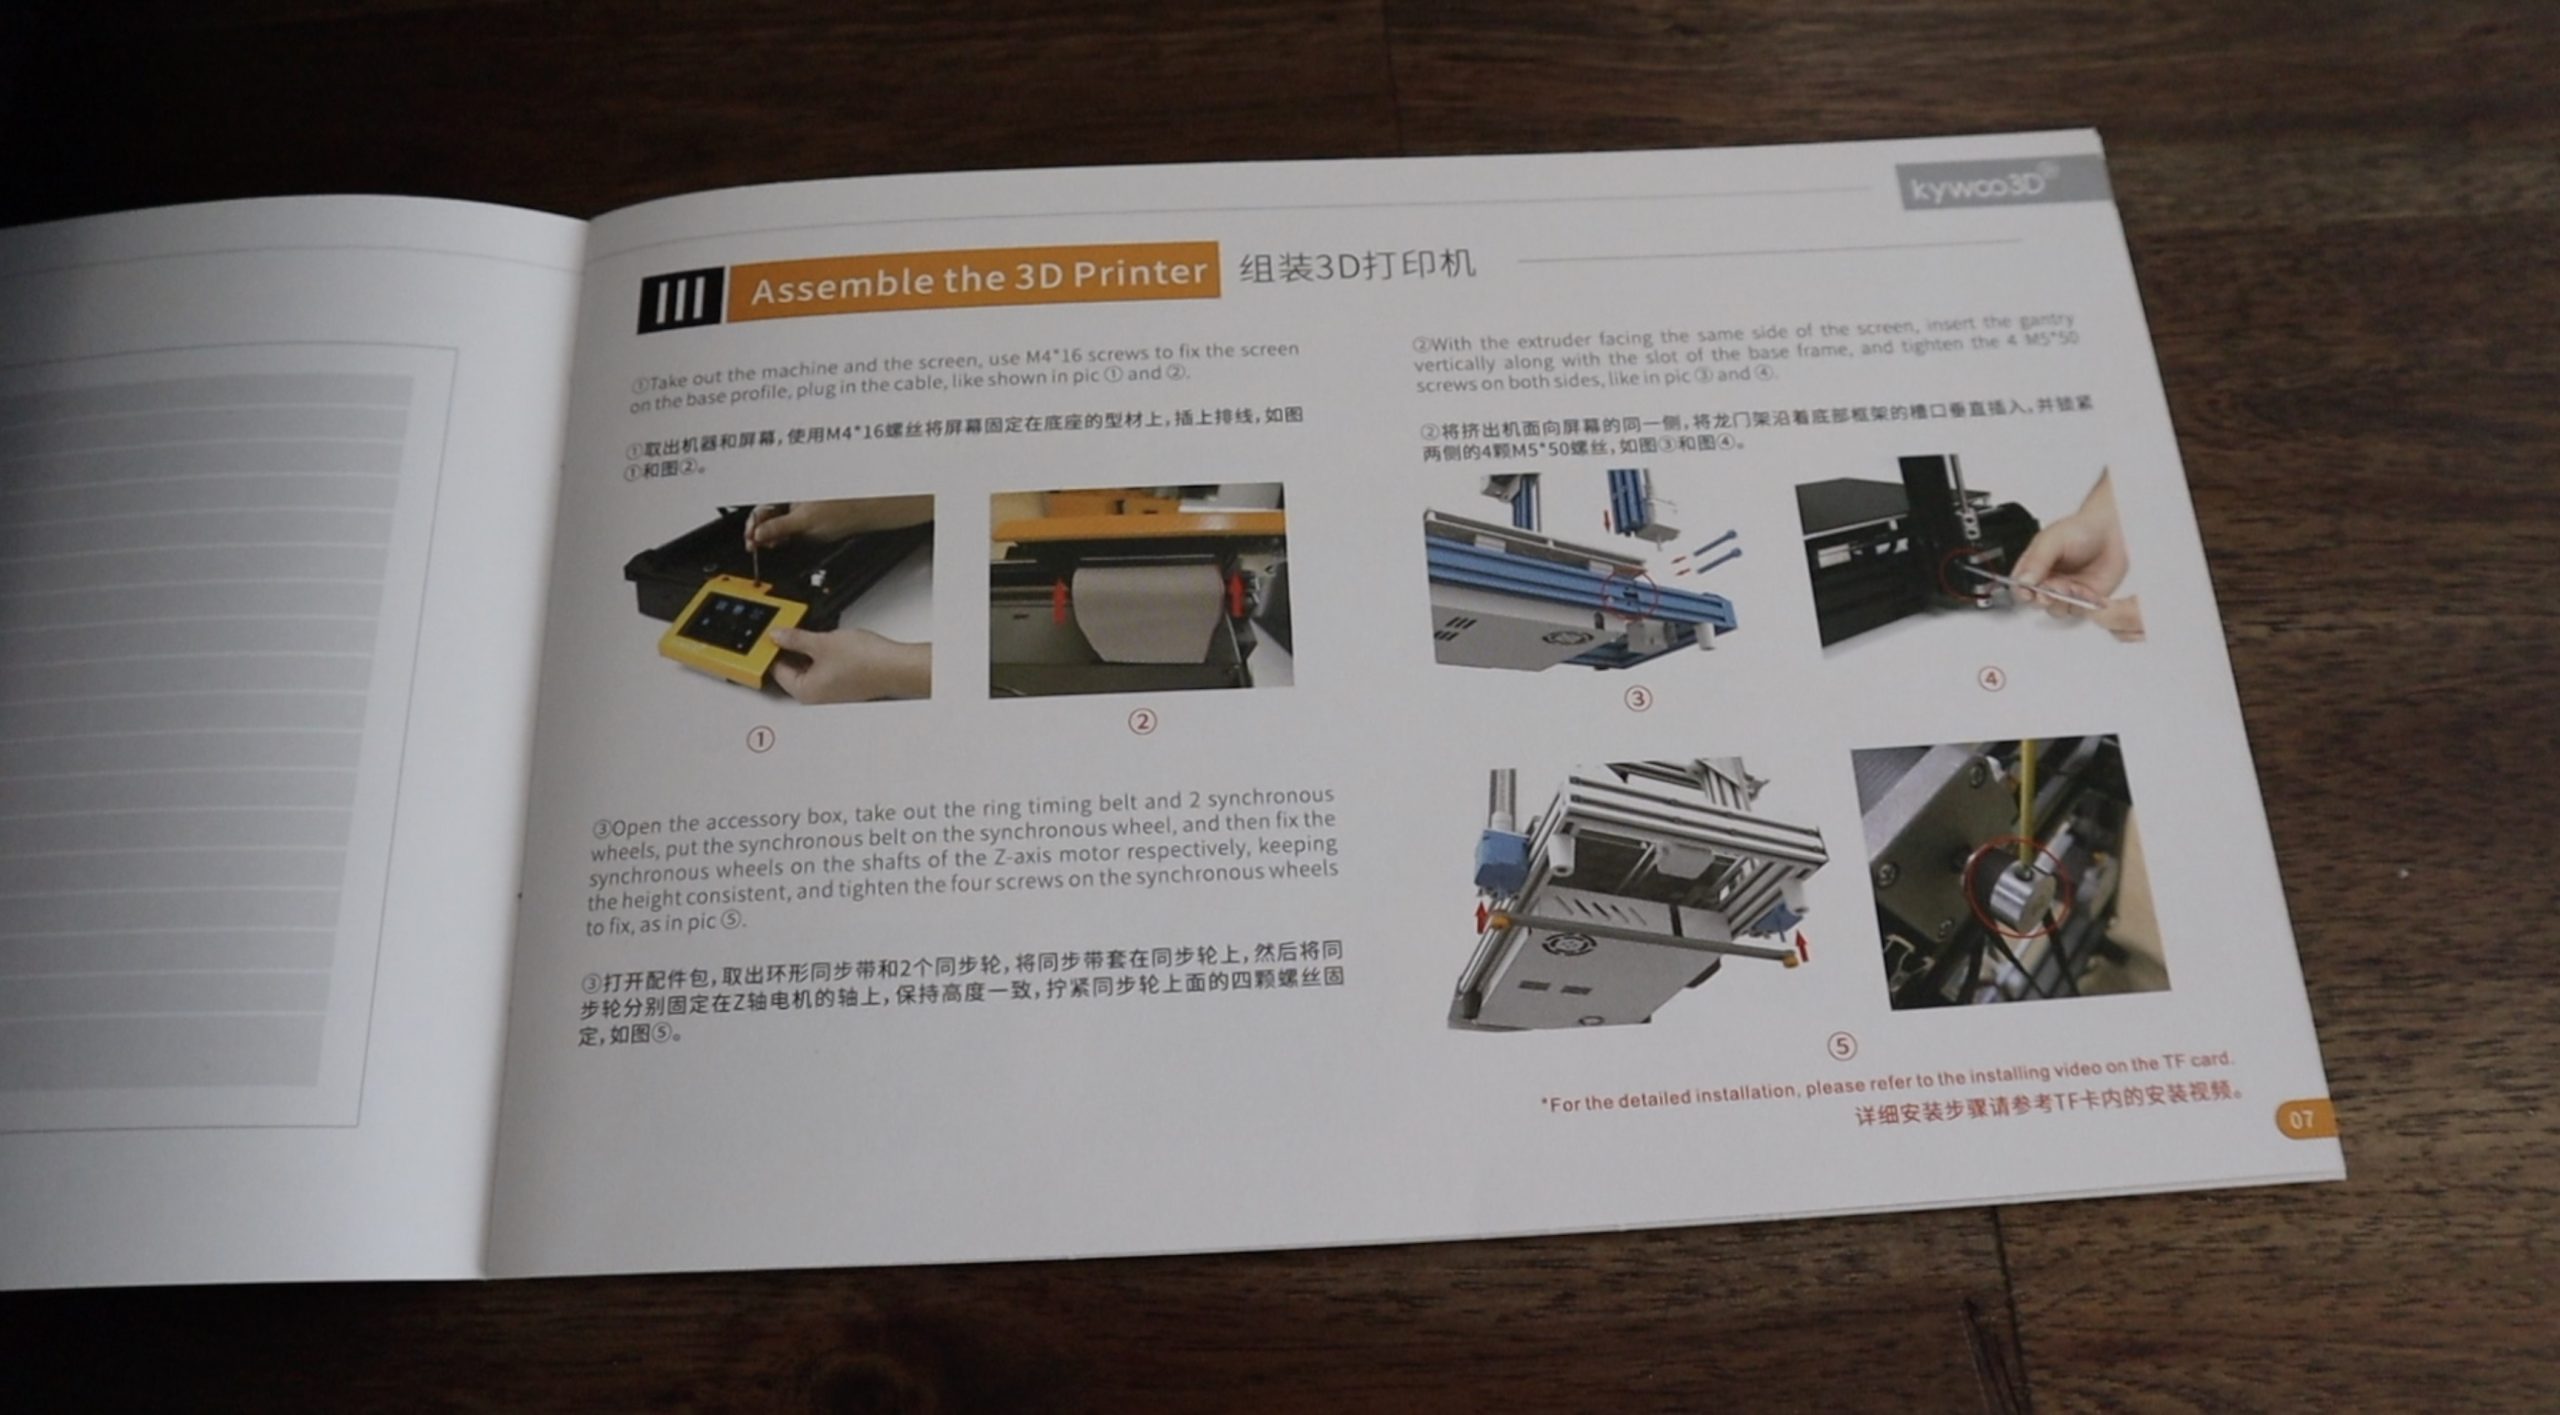
Assembly of the Tycoon Slim was really simple as it is largely pre-assembled when it is shipped out. It probably took me around half an hour to get it set up to the point where I was able to start my first prints.
I printed one of their test prints, which is a bird whistle and then a version of my Raspberry Pi Desktop Case and these both came out really well.
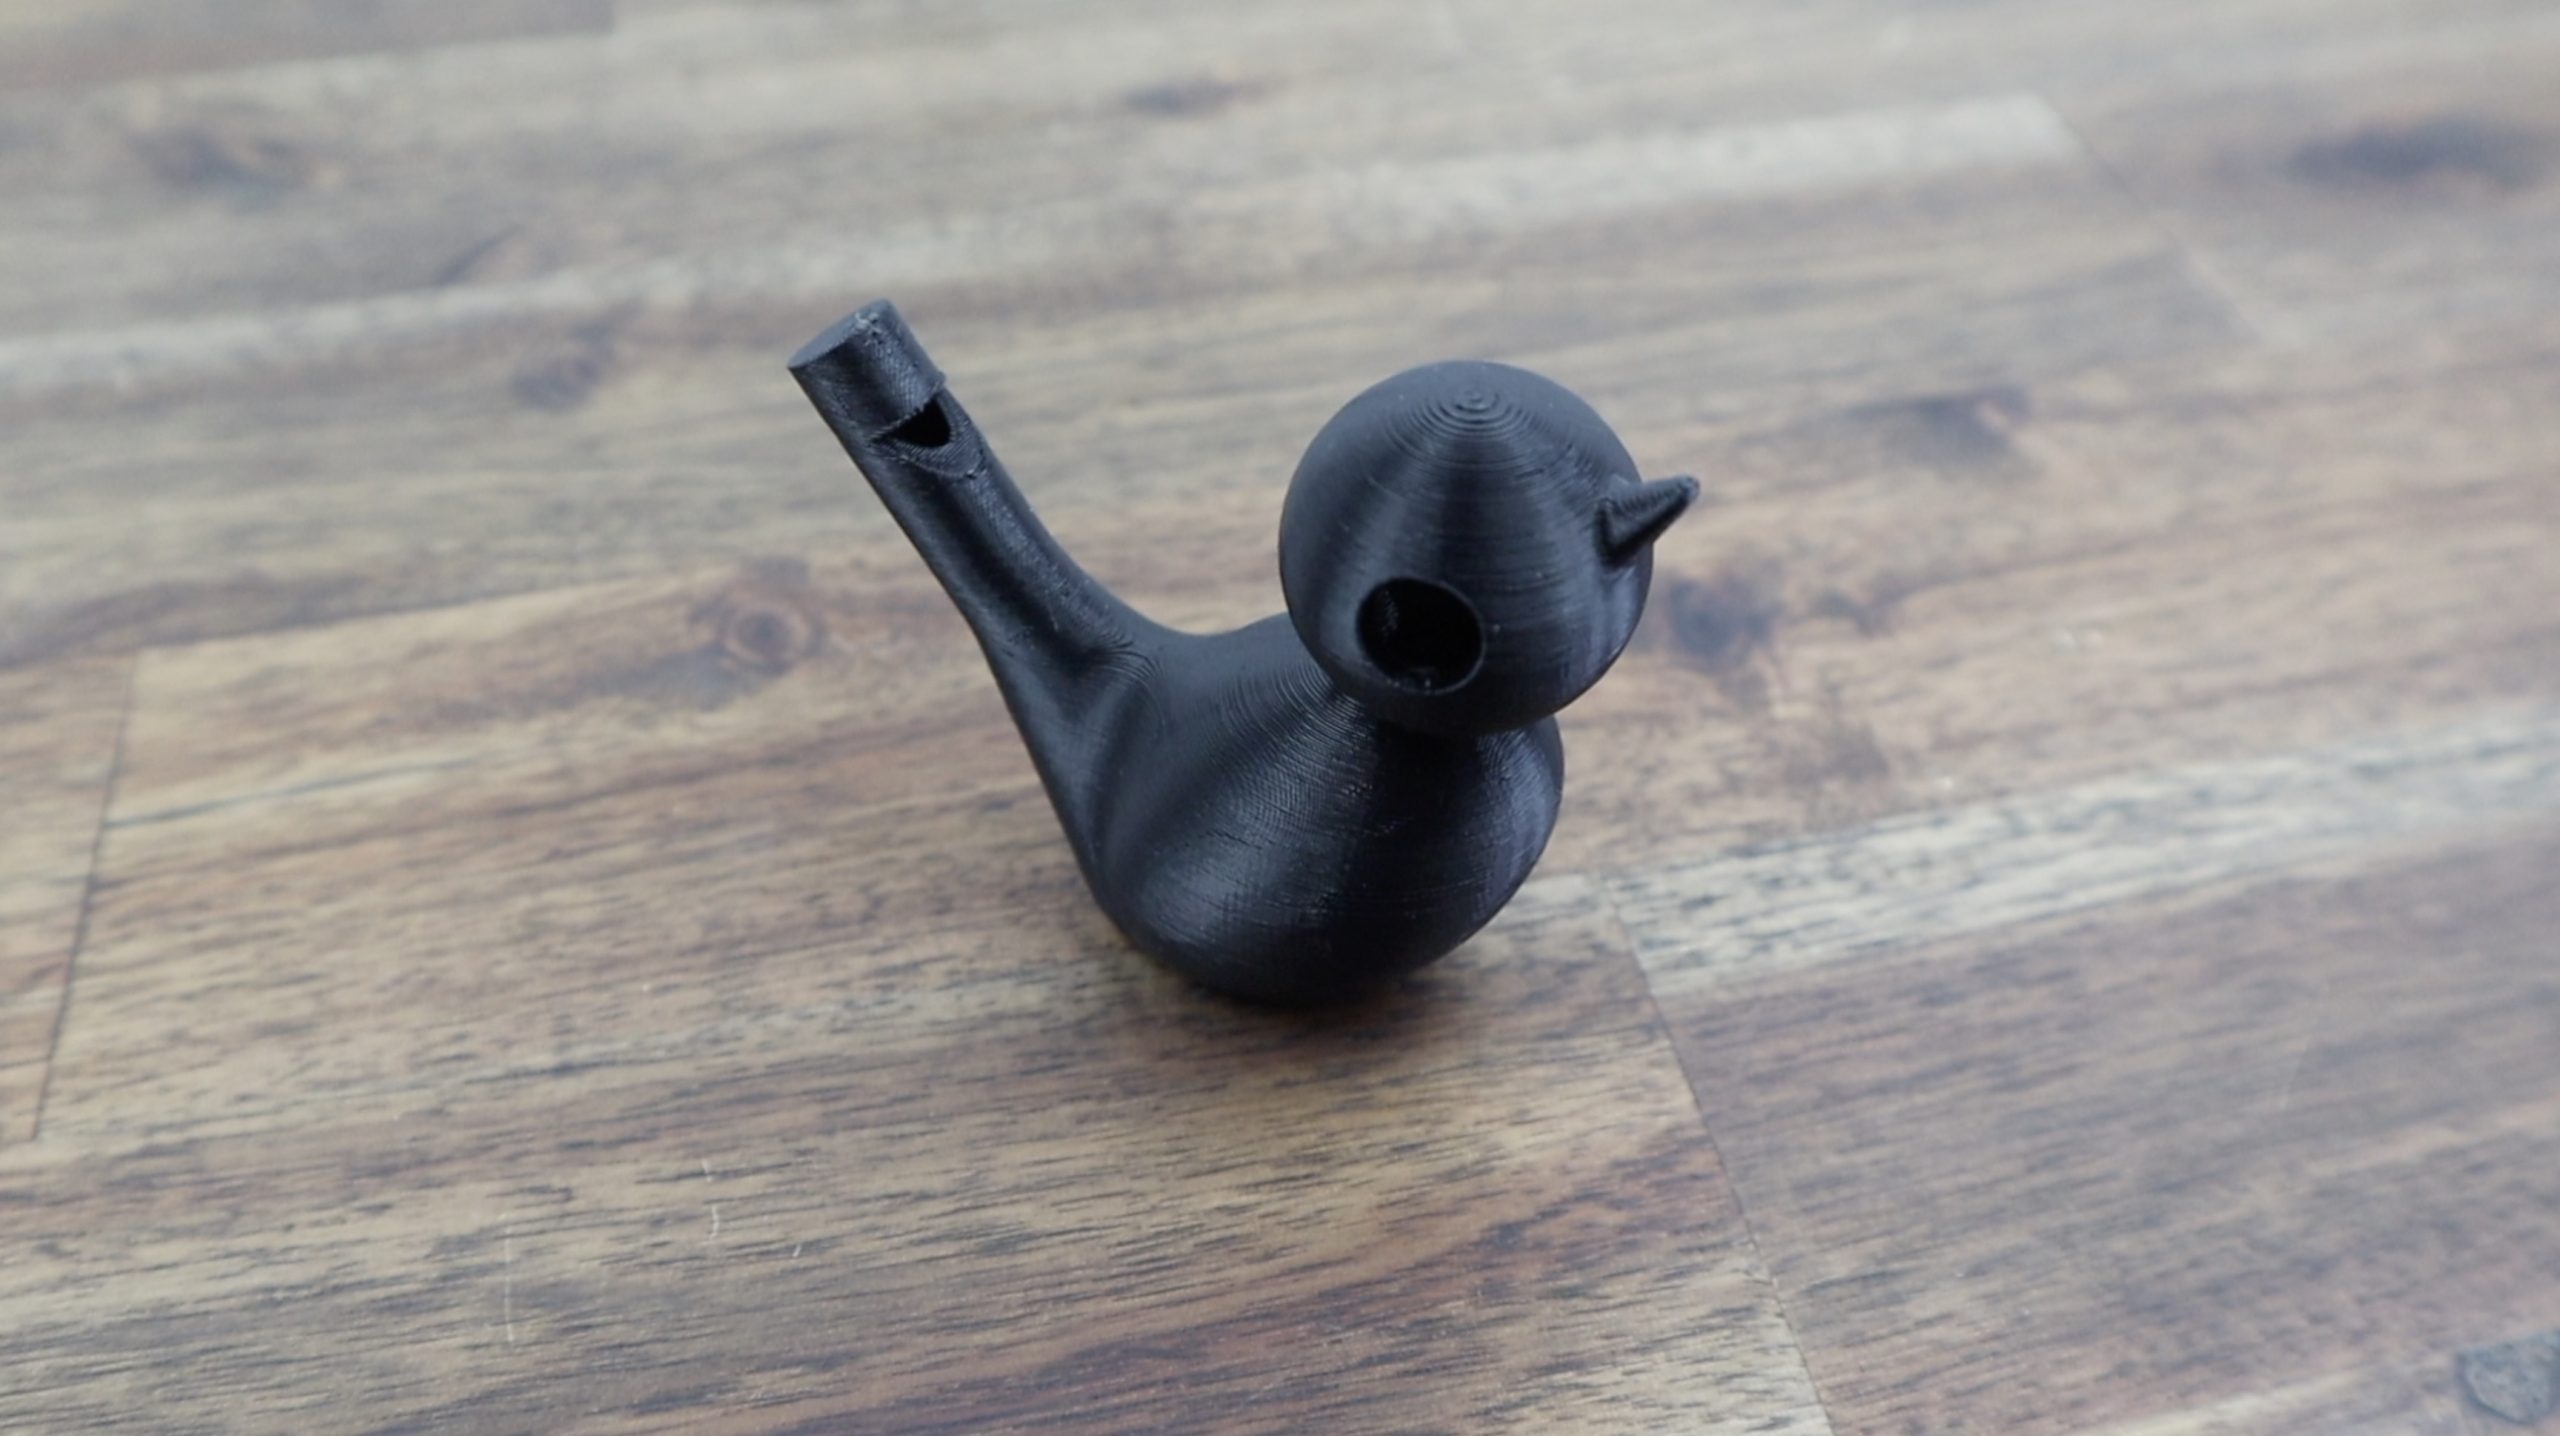
These were both printed using their standard recommended printing profile without any tweaks and the print quality right out of the box is quite impressive for a printer that also didn’t need any manual levelling or adjustments to be made to the bed.
So now that we’ve got the printer working, let’s design our case and see how it handles printing with a flexible filament.
Designing The Raspberry Pi Case
I designed the case in Fusion 360 using a traditional split design – although I’m going to be using the Raspberry Pi’s mounting points and some brass standoffs to close the case up rather than using separate screws just for the case. There are obviously some pros and cons to this, so I’ll see how it holds up.
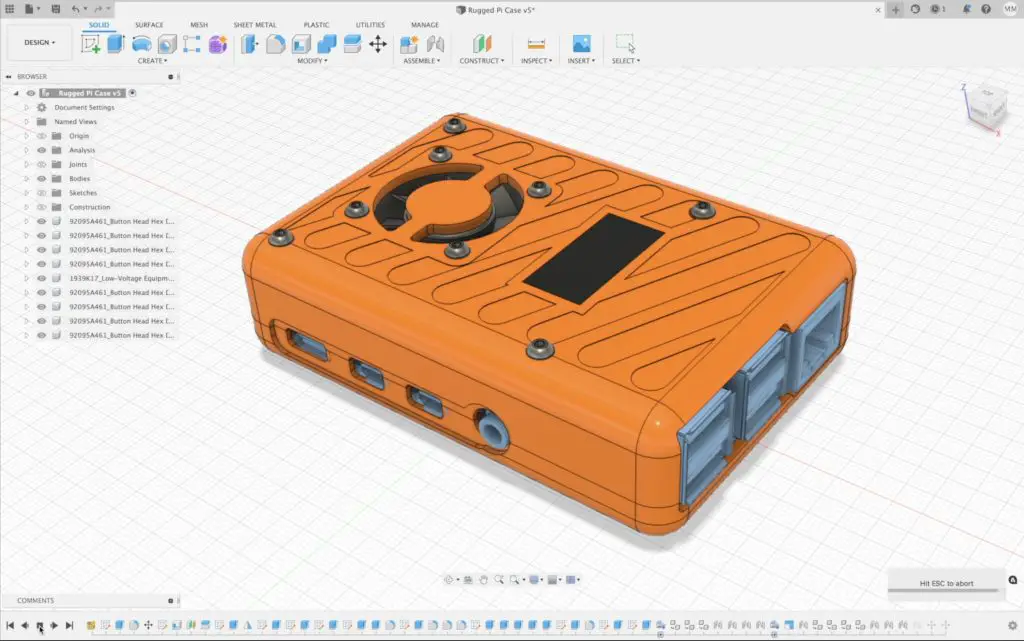
I’m going to use a small 30mm fan for cooling, which will draw air in through the top of the case and exhaust it through the enlarged holes between the USB and Ethernet ports.
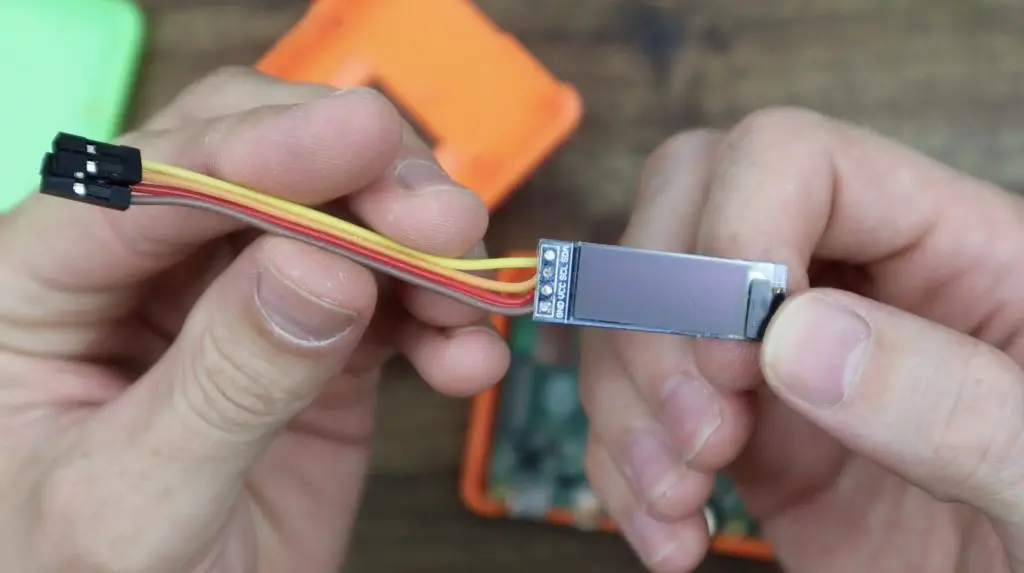
I’m also going to add a slim I2C OLED display to display stats or status information if it is running in a headless setup.
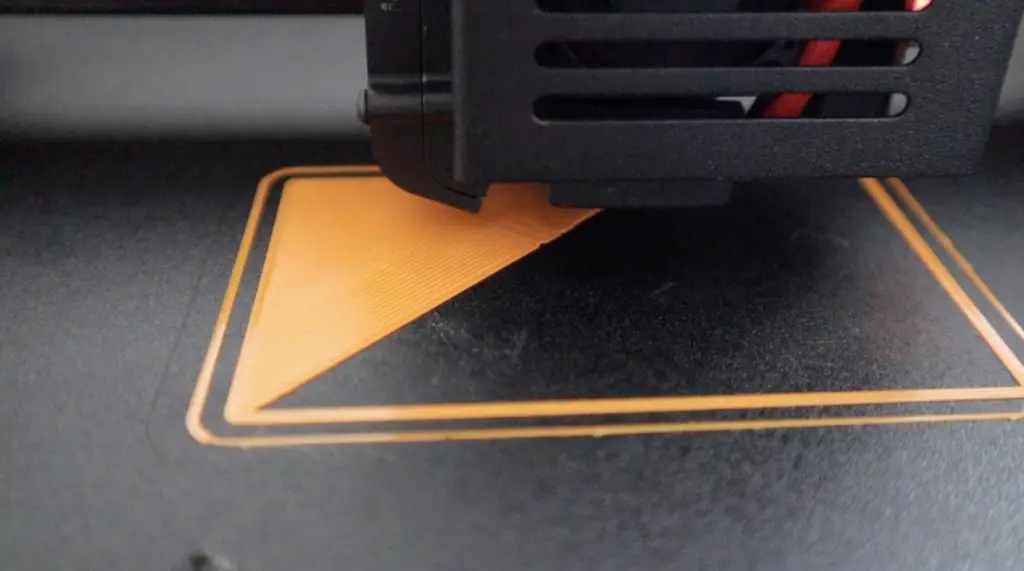
3D Printing The Raspberry Pi Cases
I exported the case shell halves and opened them up in Cura for slicing. I haven’t used TPU before, so I’m still going to have to experiment with the print settings, but I did find some general guidelines online and used these, along with Kywoo3Ds suggestions as a starting point.
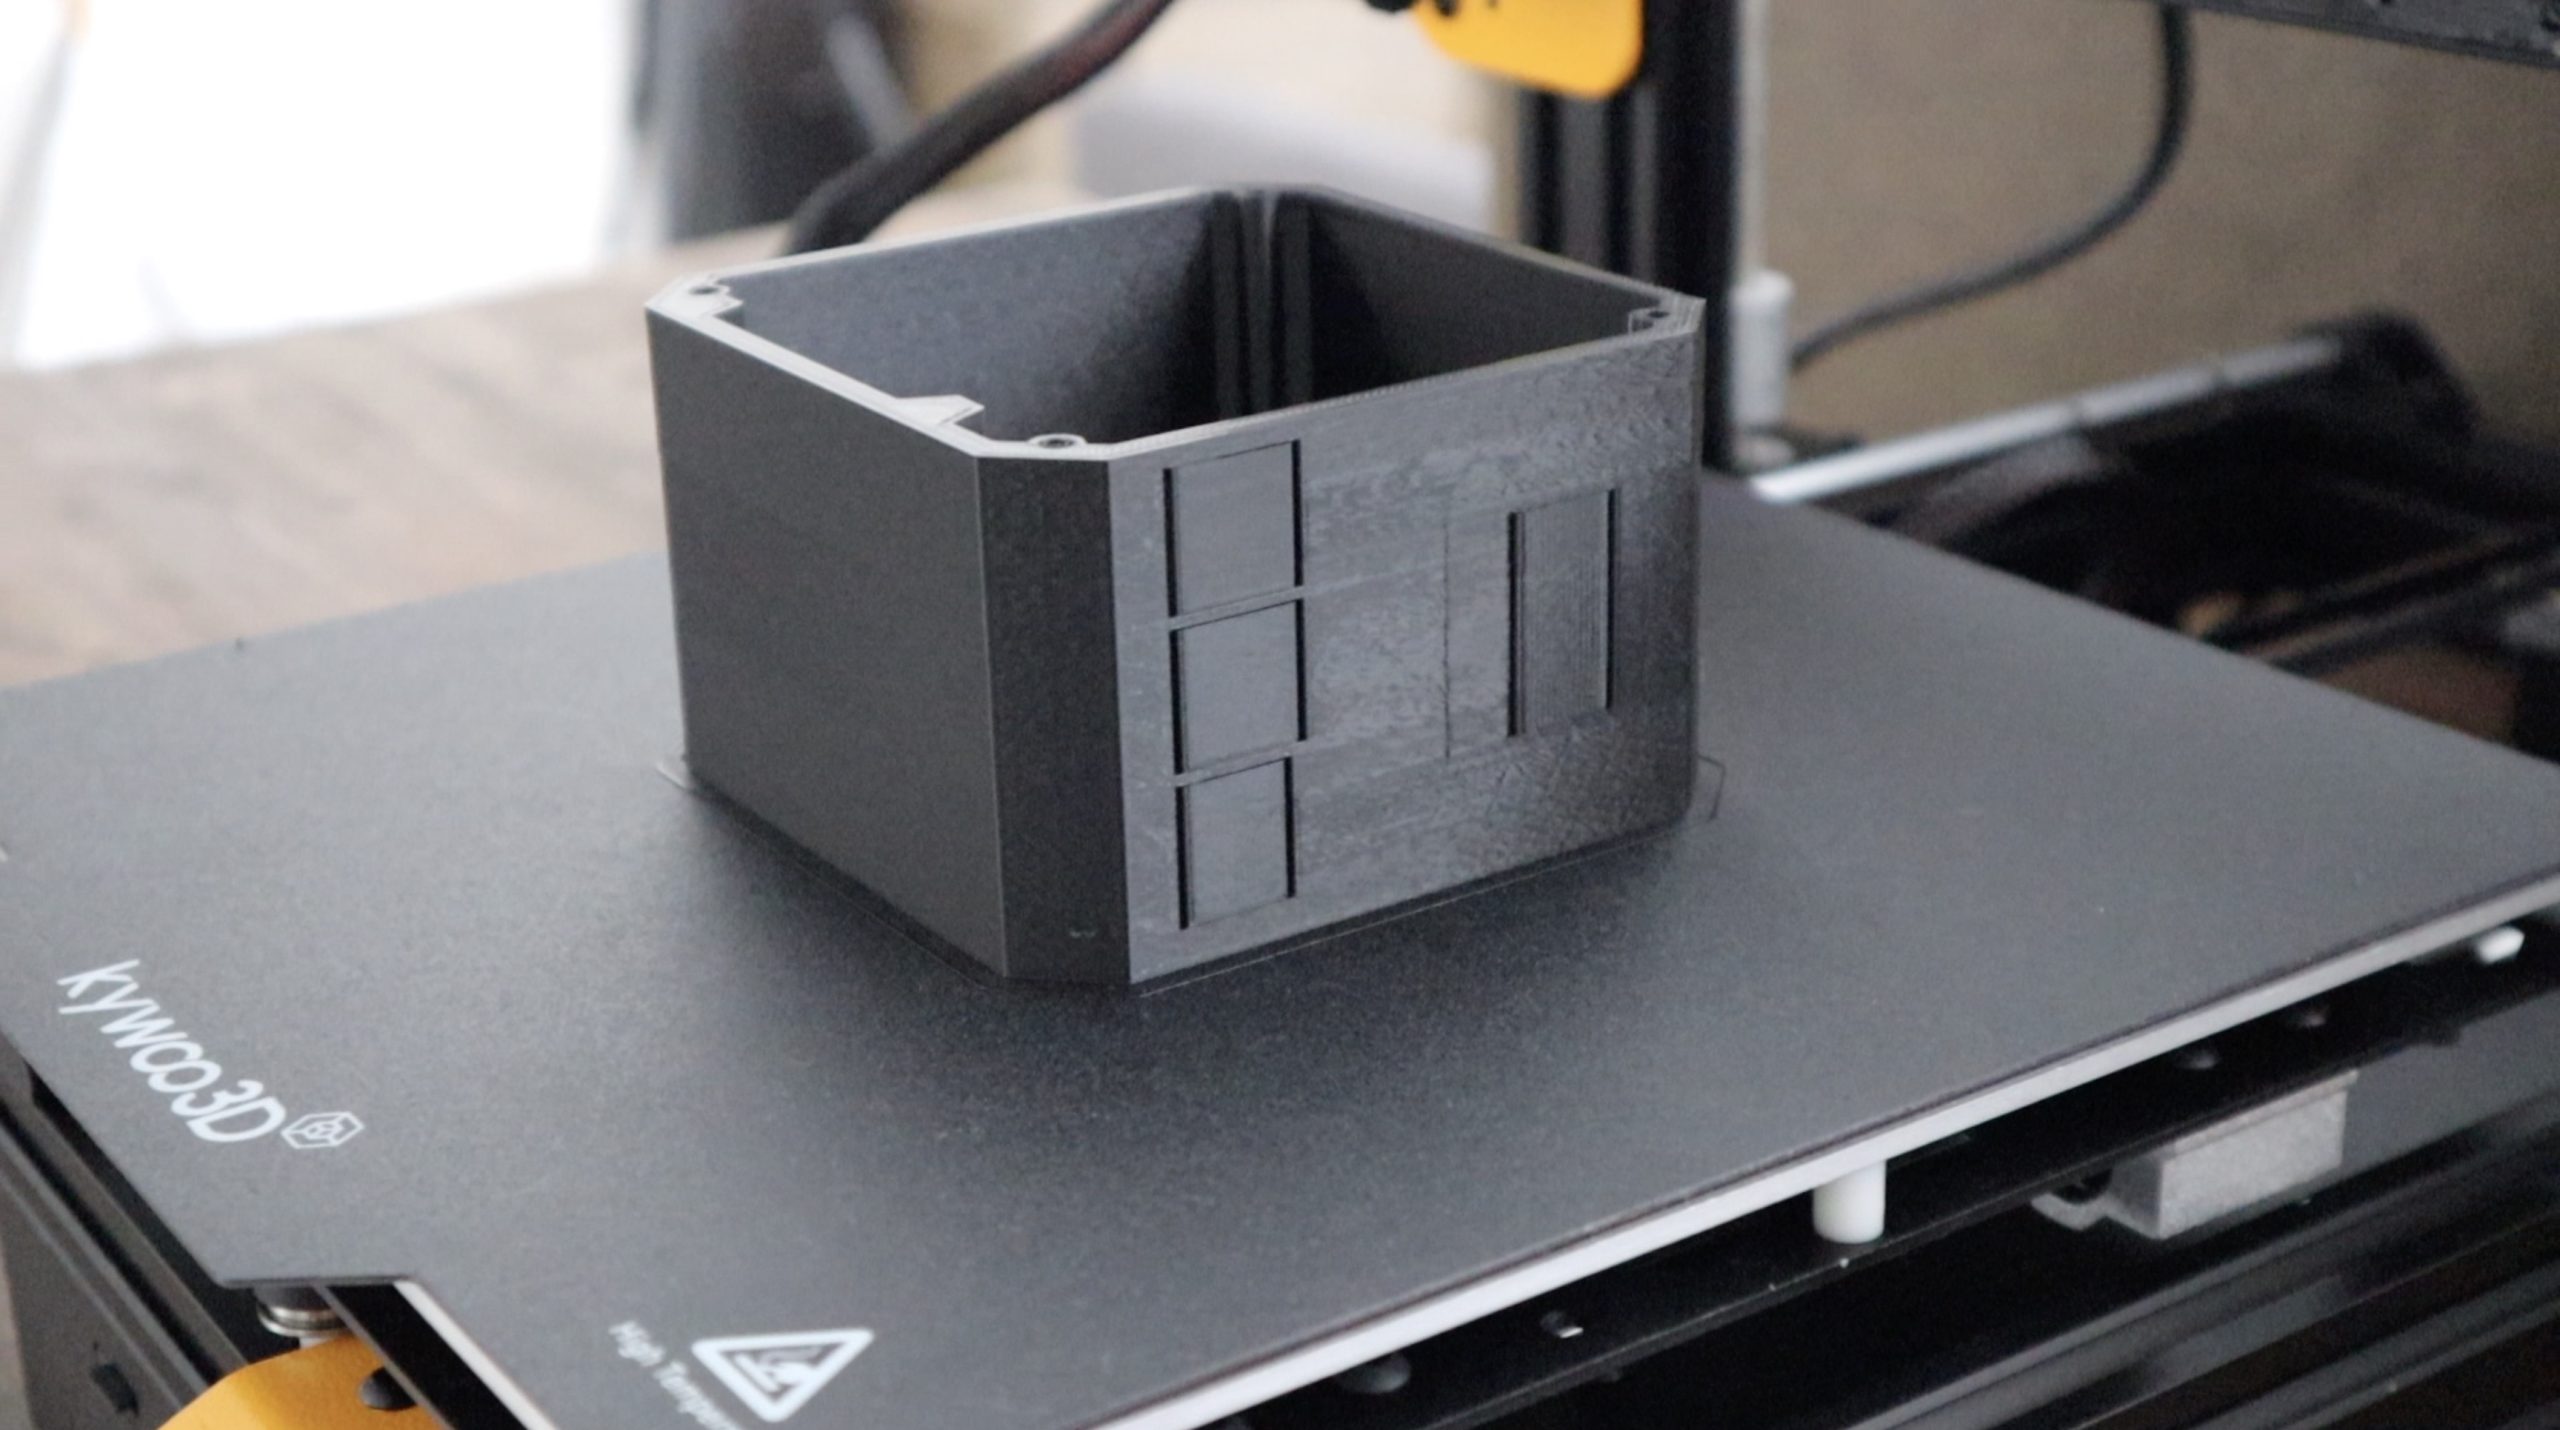
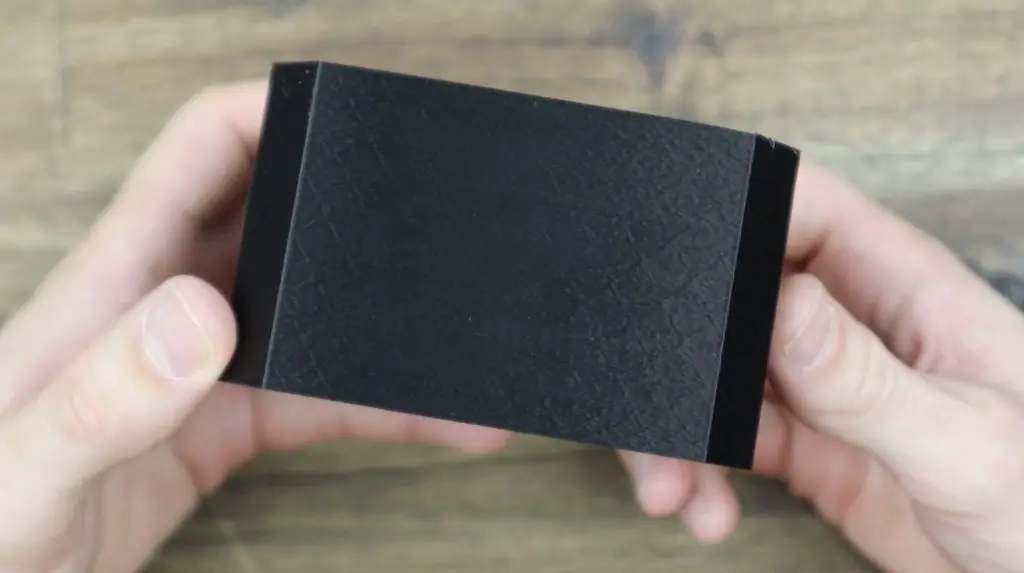
Printing in TPU did have its challenges and I had to play around with the settings to get reasonably good quality prints. Because TPU filament is flexible, it’s really easy to run the extruder too fast and you land up with the filament folding over itself blocking the top of the hot end. I had two initial prints fail quite early on because I was trying to print too quickly and at too low a temperature. After a couple of test prints, this is what I managed to achieve.
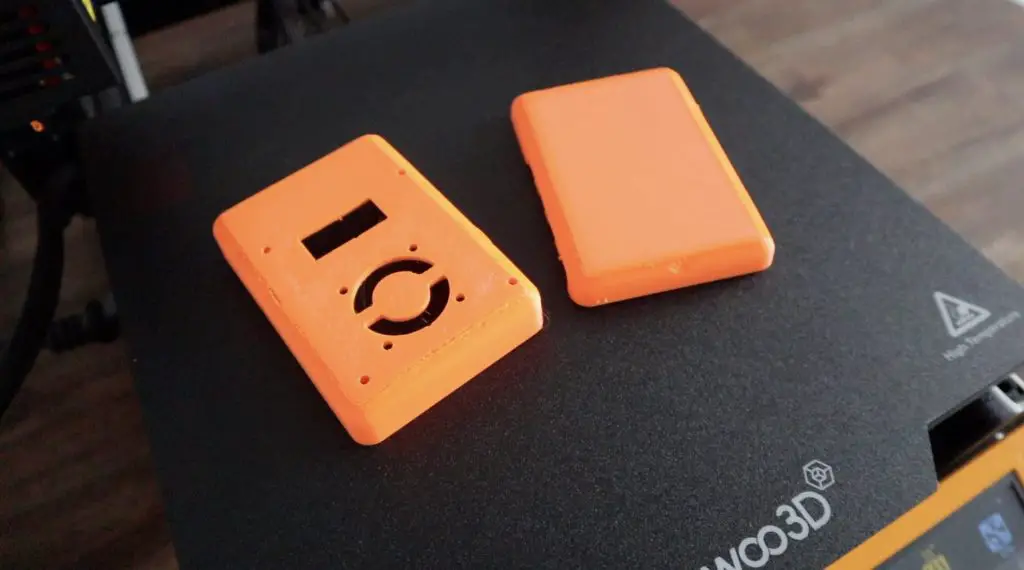
There are a few signs of under extrusion, which is a bit of balancing act between under extrusion and a successful print or over extrusion and blocking the nozzle. I’ll hopefully eventually find the perfect combination of speed and temperature to get near perfect prints. But other than that, this print is really good, the small features are still quite clearly defined and the fit around the Pi is fantastic.
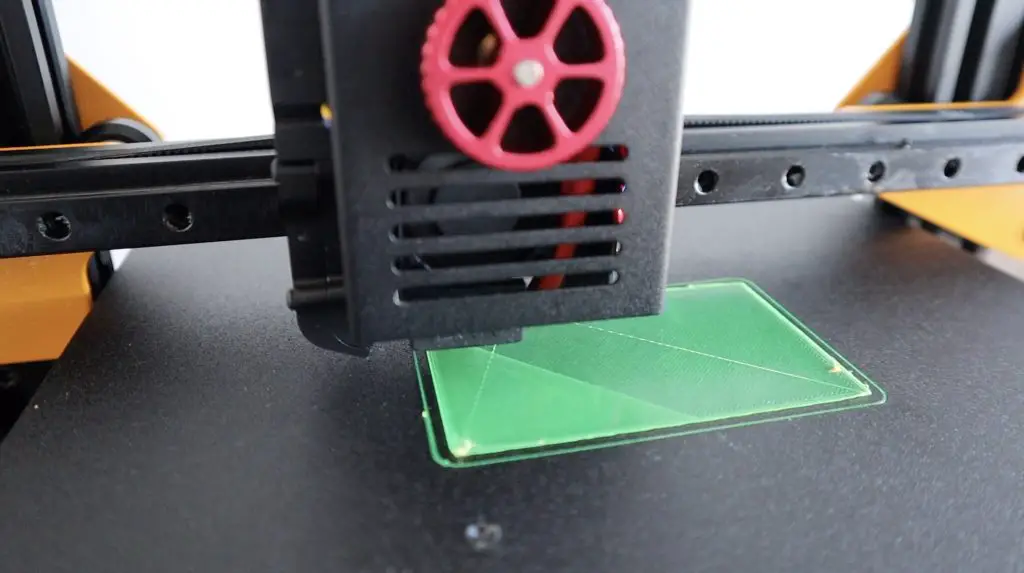
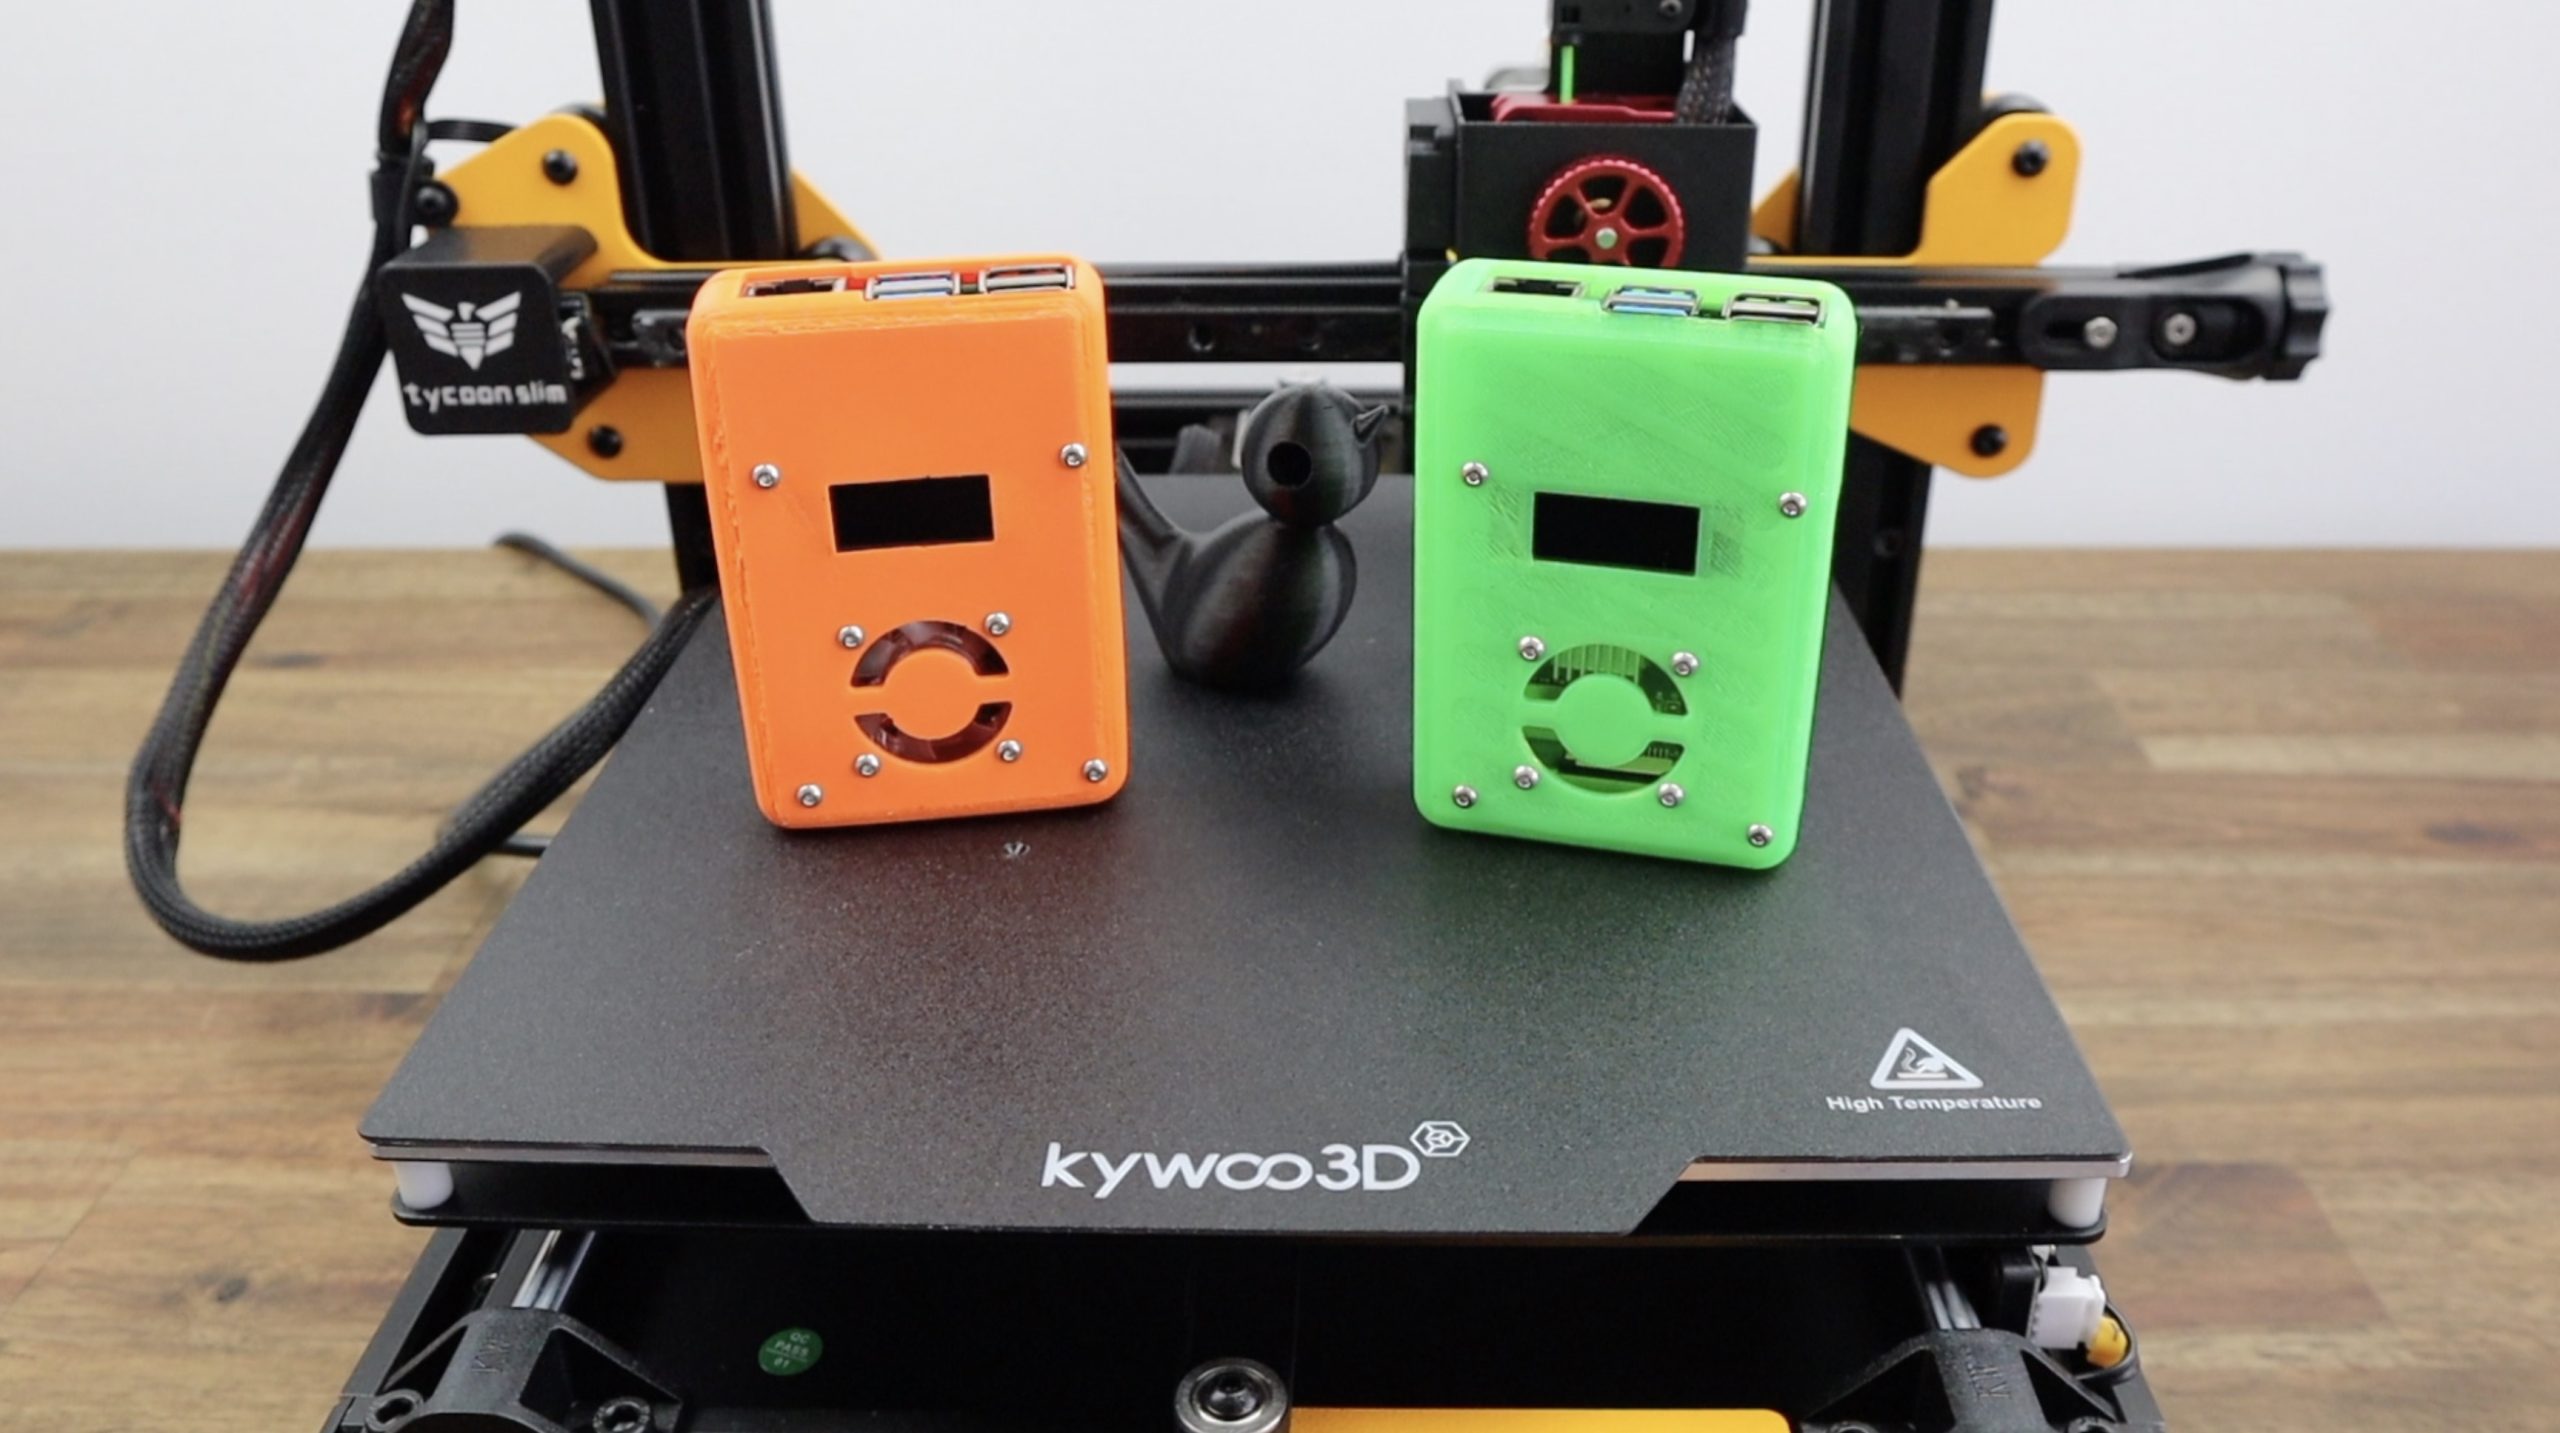
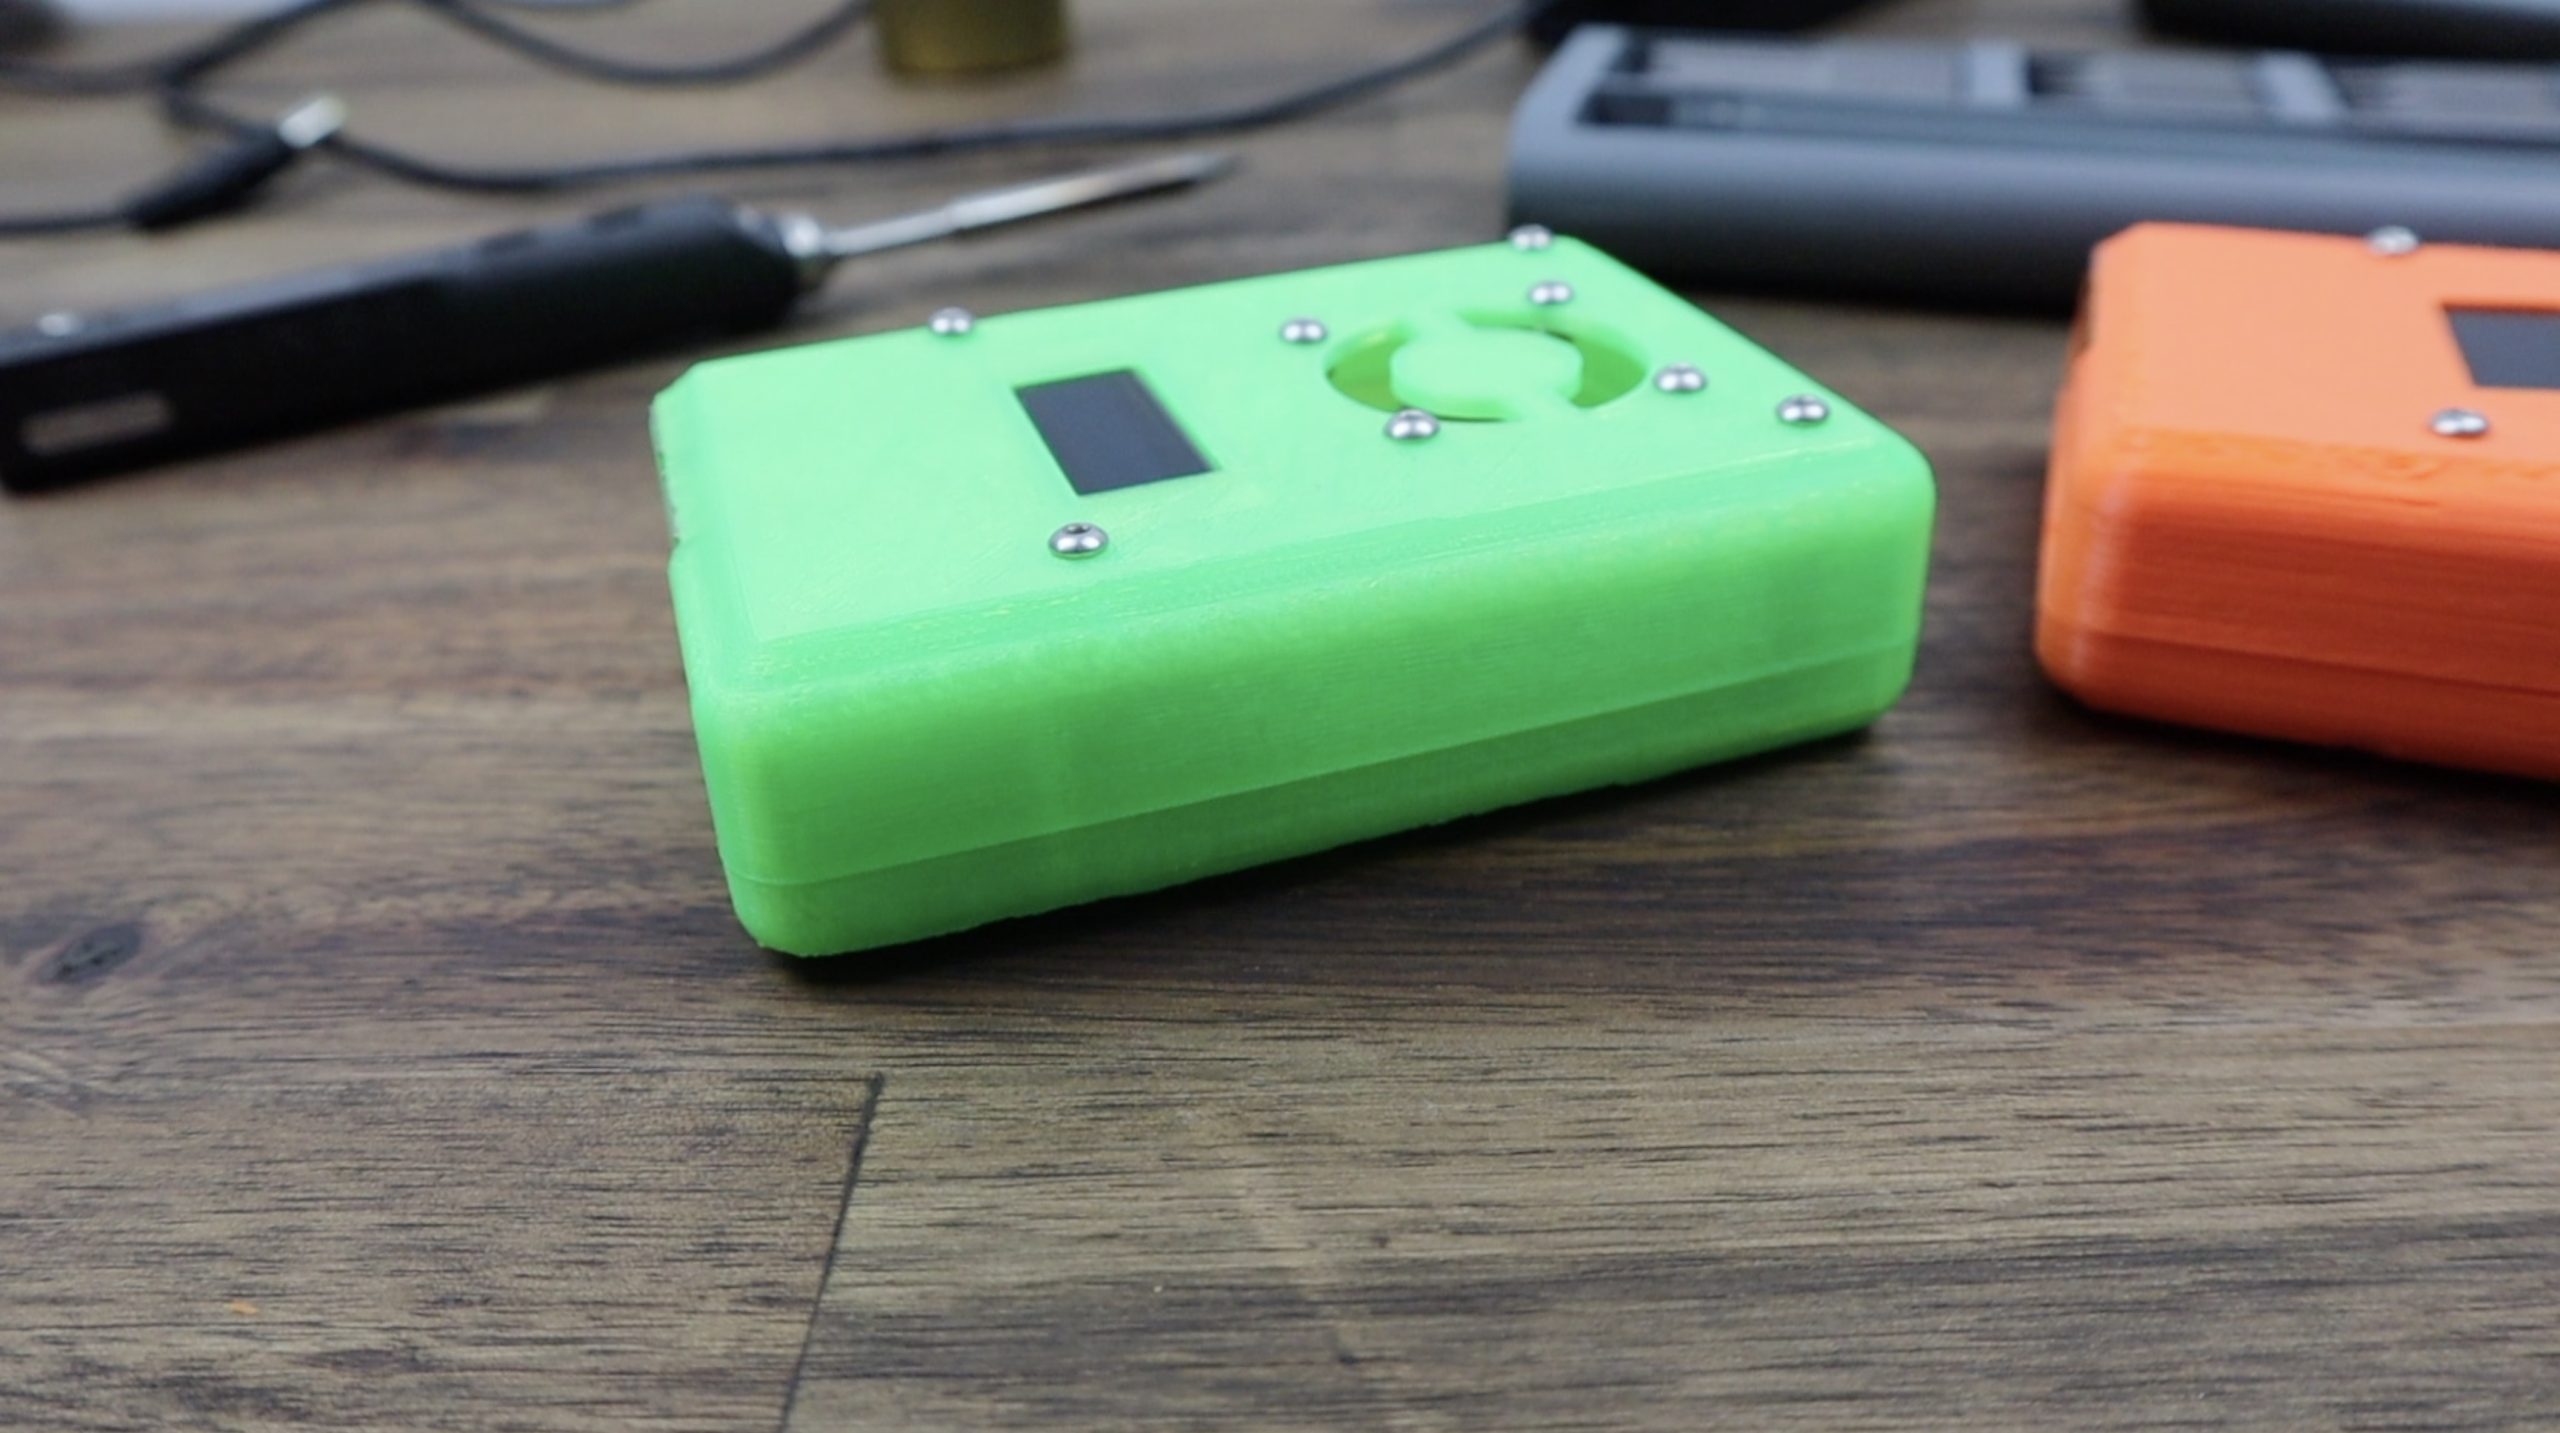
I then printed out a second case in translucent green PLA as well, so that you can see the quality difference between the two different filaments. The translucent green PLA case came out really nicely, the print lines are clean, the layers are consistent and the parts fit together perfectly.

Assembling The Cases & Installing The Pis
Now that we’ve got our cases printed, we can move on to installing the components.
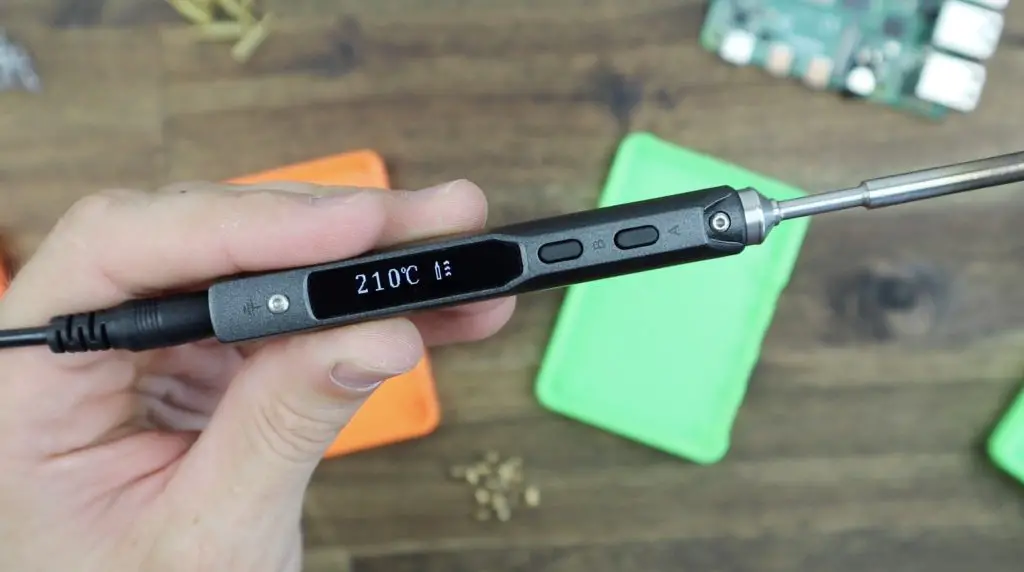
To start, we need to add our brass inserts to the case to secure the Pi and hold the standoffs. I’m using M2.5 inserts and they’re melted into place using the tip of a soldering iron. I’m going to set the temperature to 210 degrees, which is in the middle of the recommended nozzle temperature for TPU, so should work perfectly.
Just place the tip of the soldering iron into the brass insert and wait for it to heat up and melt into place. This shouldn’t require any force.
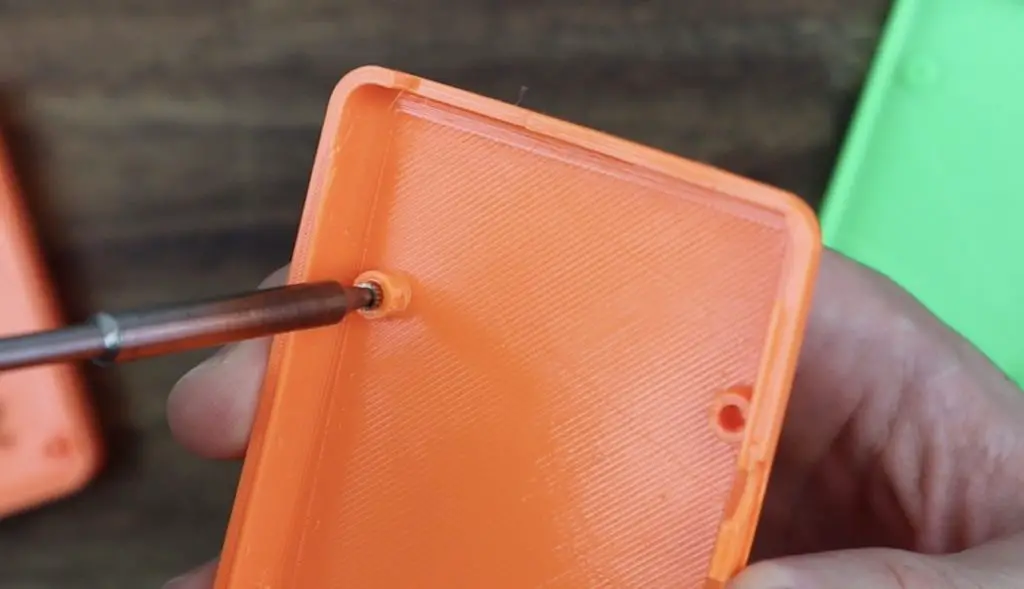
I’m also going to do the same on the PLA print while I’ve got it out.
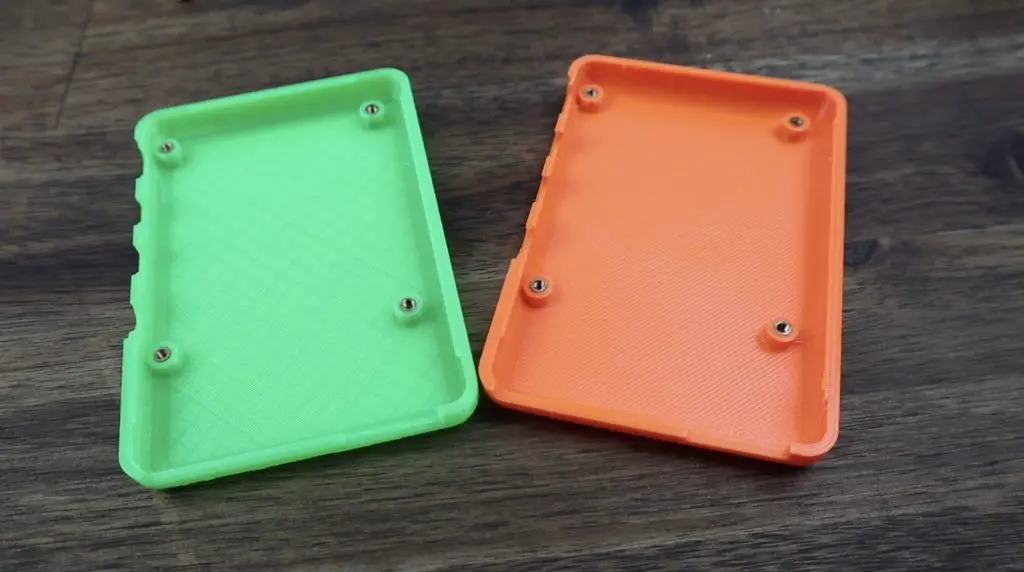
Now we can install our Raspberry Pi into the case. The Pi is then held in place on the base using some M2.5 brass standoffs.

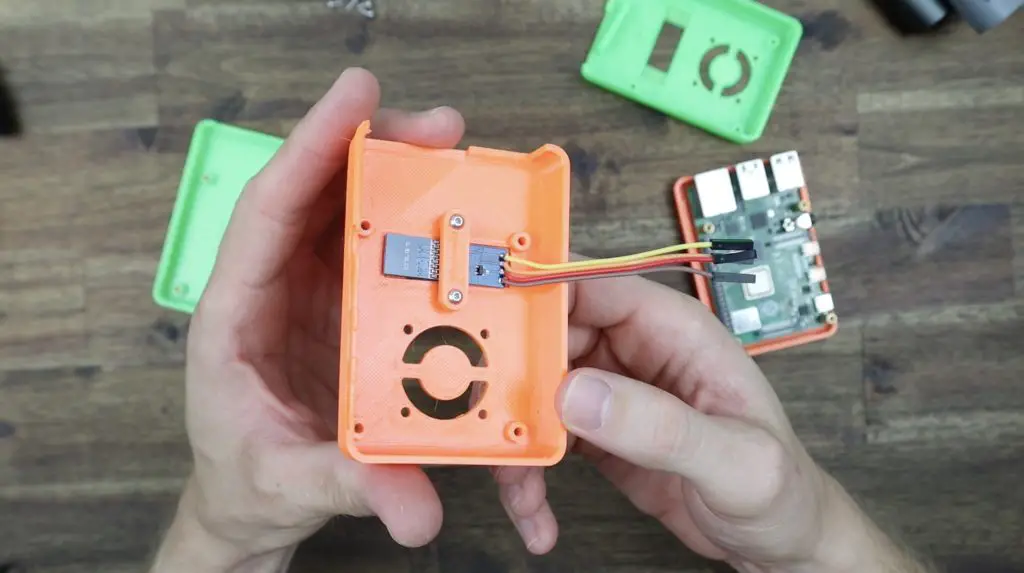
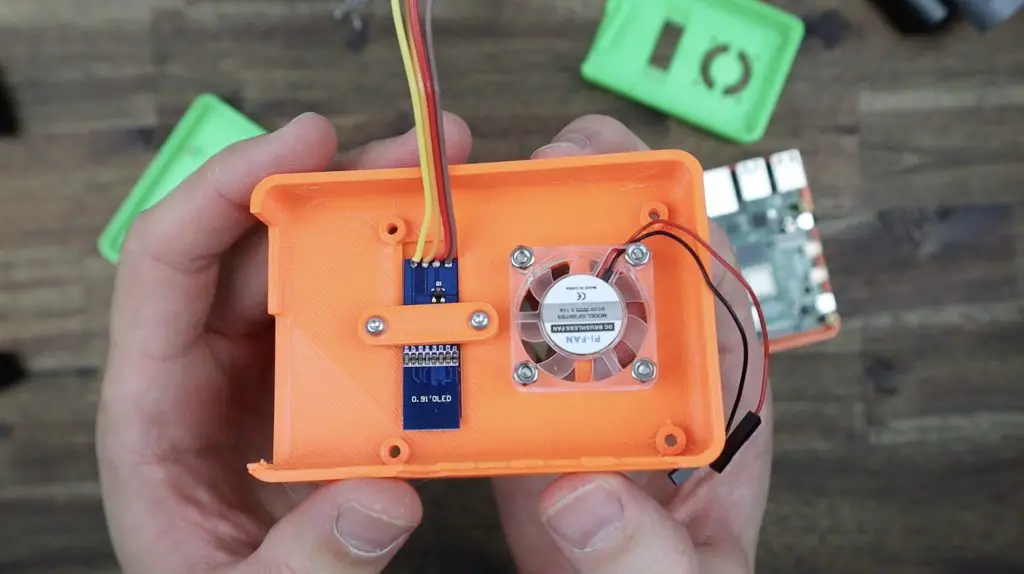
On the case lid, we can mount our 30mm fan and the I2C OLED display.
I’ve had to remove the header pins on the display so that it is compact enough to fit into the case. I just added a short lead directly to the pads on the PCB.
The display is held in place using some M2.5 screws which hold a retaining clip around the back of the display and screw directly into the printed standoffs.
The fan is held in place with some M2.5 button head screws and nuts on the inside.
We can then connect our fan and display to our Pi’s GPIO pins. I’ve connected the fan to 5V and GND and the display to GND, 3.3V and then the two I2C pins SCL and SDA.
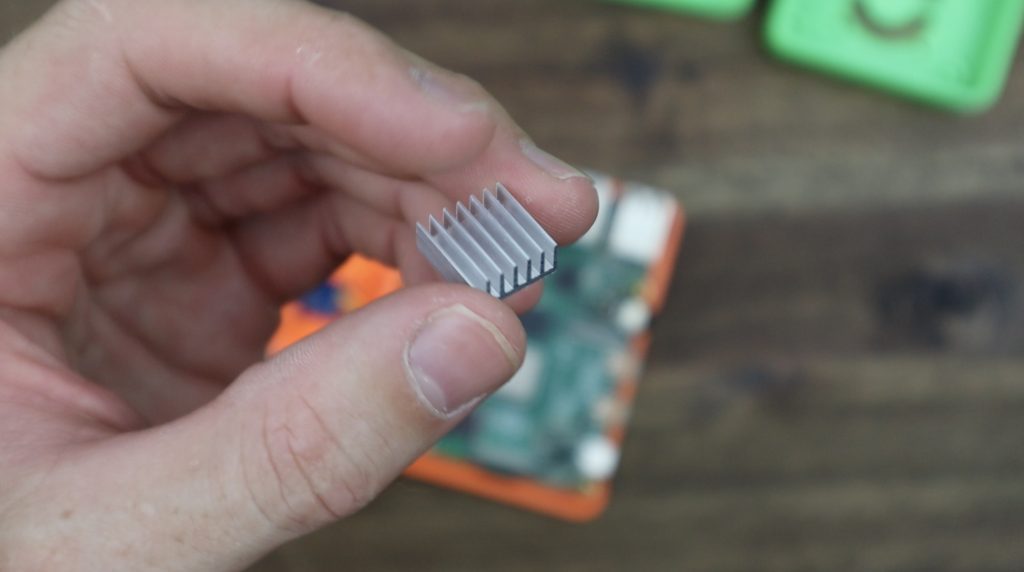
I’m going to stick a small heat sink onto the CPU which, with the fan directly overhead, should be a good compact cooling solution.
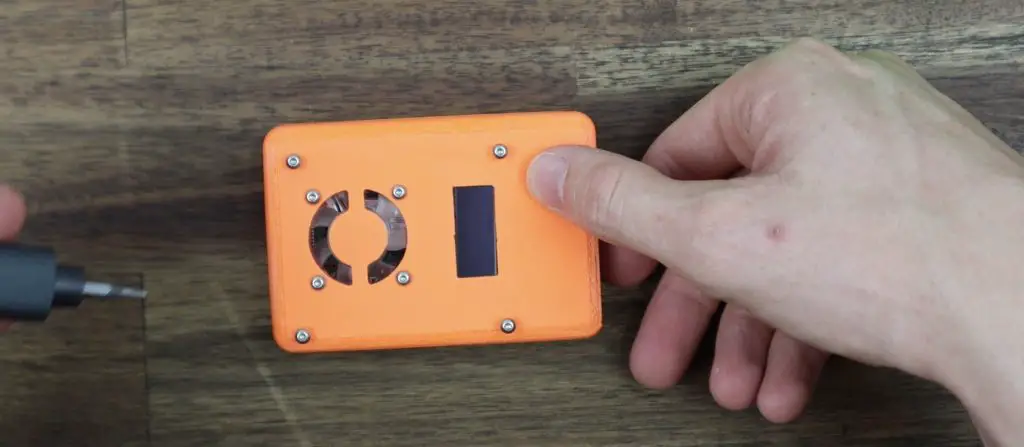
We can then close up the case using some more M2.5 button head screws which screw into the brass standoffs.
And that’s our Pi installed in the case. When you turn it on you’ll still need to program the I2C OLED display to show our Raspberry Pi’s performance stats. You can do this using the script that I’ve used previously on my other designs, you’ll just need to change the display size to suit this more compact version.
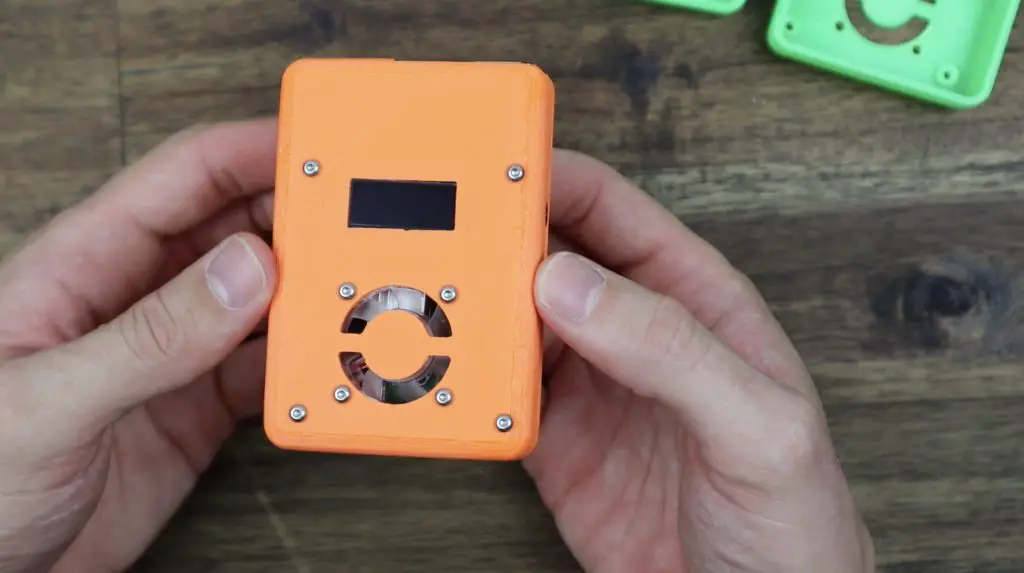
Our case is now complete. We’ve got a durable cover that provides a bit of protection against drops and bumps, which is great for throwing into a travel box or your car.

I’ve assembled the translucent green case as well, to get a feel for how it looks and fits. I, unfortunately, didn’t have a second 30mm fan, so I’ll be running this one without the fan for a few days until the fan arrives. But it should still be ok for light tasks.
Final Thoughts On The Tycoon Slim
By using the Tycoon Slim over the past few weeks, I have been quite impressed by how well it has worked and how little I’ve had to do to get some good quality prints.
As with any new company and product, there are a couple of things that could be improved on and Kywoo3D have already told me that they have made some improvements to the latest version of this printer which is currently being shipped out.
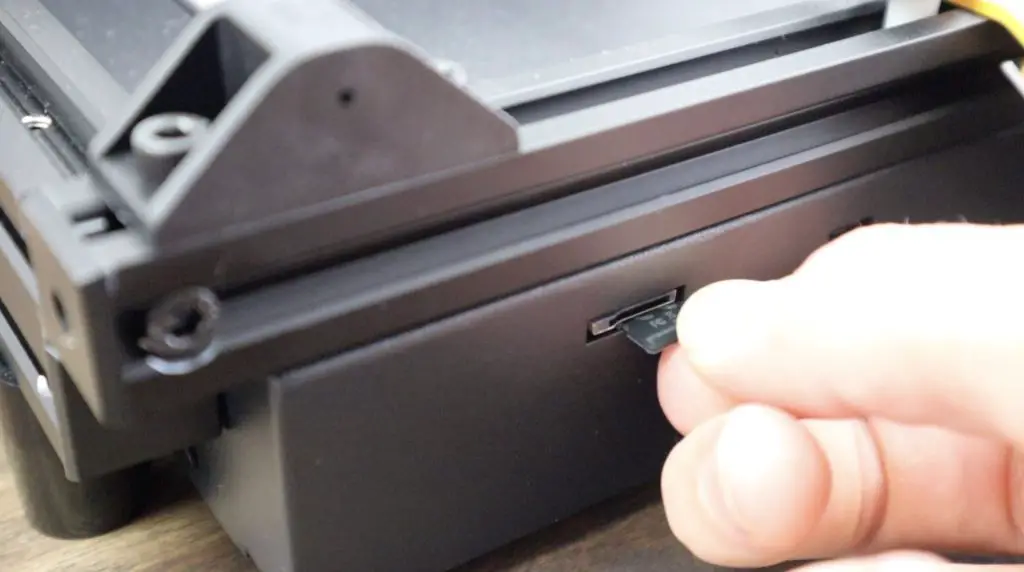
The clearance around the SD card slot is a little bit too big, so it’s easy to push the card into the metal housing instead of the slot. Kywoo3D are aware of the issue and have made up a 3D printable bracket to prevent this, which you can print out and install yourself.
Some other things they’ve changed is an improved bed levelling sensor and a glass print bed. The glass print bed is great once you’ve dialled in your bed levelling, and I use these on my other 3D printers, but I actually quite like the simplicity and ease of use of these magnetic print beds.
My only real complaint with this printer is that the user interface on the touch display is not as intuitive as I would like. There are a couple of missing features or features that I haven’t been able to find. Things like pre-heat that automatically set a preheat bed and nozzle temperature, or just generally being able to find options or settings since there isn’t really a main menu – each item’s settings are within each icon on the display. This is obviously not a deal-breaker but does take a bit more time to get used to.
Overall I think it’s a great first printer and it makes getting started with 3D printing about as simple as it can be.

Let me know what you think of the Kywoo Tycoon Slim in the comments section and be sure to check out Tinkerhive for all your 3D printing needs.