I’ve been wanting to build a motorised camera slider for a while now, so when some popped into my Amazon suggestions a week or two ago, it re-ignited the urge to build one.
So, in this guide, I’m going to be showing you how to build your own motorised camera slider which can pan, rotate and track objects for some really cool shots. It’s driven by an Arduino Pro Mini and some TMC2208 stepper motor drivers and can lift a mirrorless camera like the M50 vertically or in any other angle or orientation, even upside down.
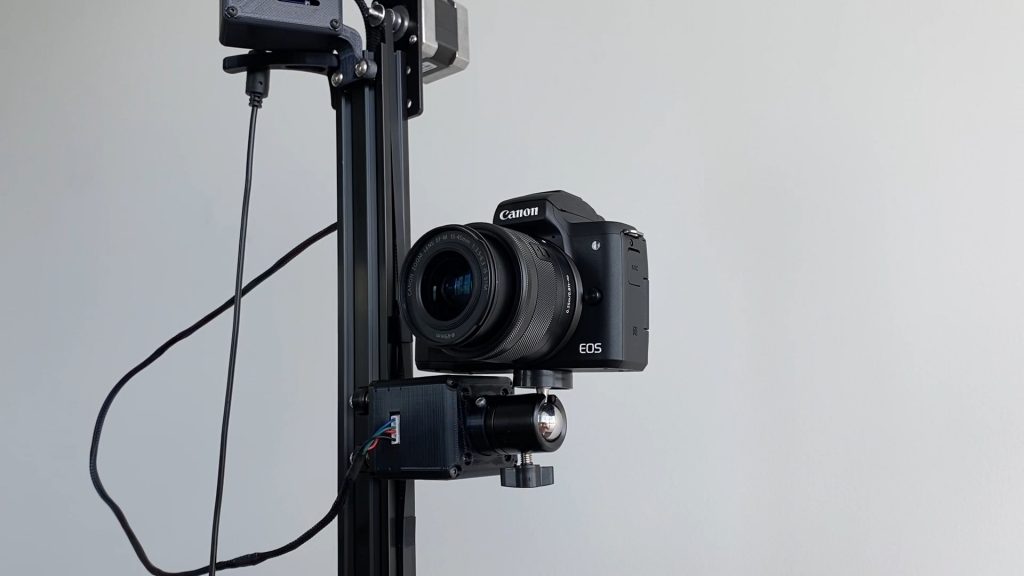
Here’s a video of the build and the slider in operation, read on for the step by step instructions:
What You Need To Build Your Own Camera Slider
There are quite a few parts to this build, but it isn’t actually that difficult to make. So don’t let the parts list intimidate you!
Parts From Amazon (Affiliate)
- 2040 Aluminium Extrusion 700mm – Buy Here
- 2040 V-Slot Gantry – Buy Here
- GT2 Tensioner – Buy Here
- GT2 5mm Pulley – Buy Here
- GT2 Belt – Buy Here
- 2 x Nema 17 2.5” Stepper Motors – Buy Here
- Camera Ball Joint Mount – Buy Here
- M5 T Slot Nuts – Buy Here
- M5 Machine Screws – Buy Here
- Arduino Pro Mini 5V – Buy Here
- 2 x TMC2208 Stepper Motor Drivers – Buy Here
- 2 x 100uF Capacitors – Buy Here
- 128×64 I2C OLED Display – Buy Here
- Rotary Pushbutton – Buy Here
- Header Pins – Buy Here
- Slider Switch – Buy Here
There are also a number of 3D Printed parts in this guide. I’ve used a Creality Ender 3 Pro to print my parts. If you don’t have a 3D printer, there are a number of online 3D printing services available to print and deliver your parts as well.
Parts from Banggood (Affiliate)
- 2040 Aluminium Extrusion 700mm – Buy Here
- 2040 Gantry – Buy Here
- GT2 Tensioner – Buy Here
- GT2 5mm Pulley – Buy Here
- GT2 Belt – Buy Here
- Nema 17 Motor Mounting Plate – Buy Here
- 2 x Nema 17 2.5” Stepper Motors – Buy Here
- Camera Ball Joint Mount – Buy Here
- M4 T Slot Nuts – Buy Here
- M4 Machine Screws – Buy Here
- Arduino Pro Mini 5V – Buy Here
- 2 x TMC2208 Stepper Motor Drivers – Buy Here
- 2 x 100uF Capacitors – Buy Here
- 128×64 I2C OLED Display – Buy Here
- Rotary Pushbutton – Not Available
- Header Pins – Buy Here
- Slider Switch – Buy Here
How To Make The Motorised Camera Slider
We’re going to build the camera slider in three stages. We’ll first assemble the extrusion mounted mechanical slider components and motors, then assemble the PCB and electronics case, and finally program the slider to perform our movements.
Assembling The Mechanical Slider
One of the cheapest and easiest ways to make sliding rigs is to use aluminium t-slot extrustions. These are widely used on 3D printers, laser cutters and other hobbiest CNC machines, so they’re pretty inexpensive and come in a range of sizes and lengths. They’re really useful for mounting components, you can buy special t-slot nuts which fit into the groves to clamp brackets and mounting plates onto.
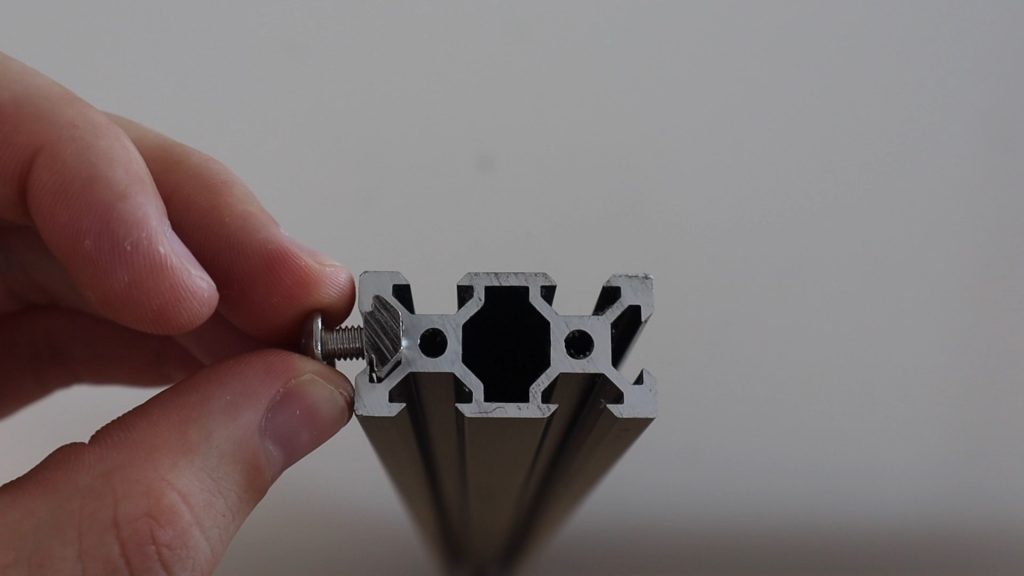
I picked out a 2040 extrusion and then a basic mount for the stepper motor, a sliding gantry, a belt tensioner and then the belt and pulley. I also picked up a ball joint camera mount so that I could position the camera at different angles.
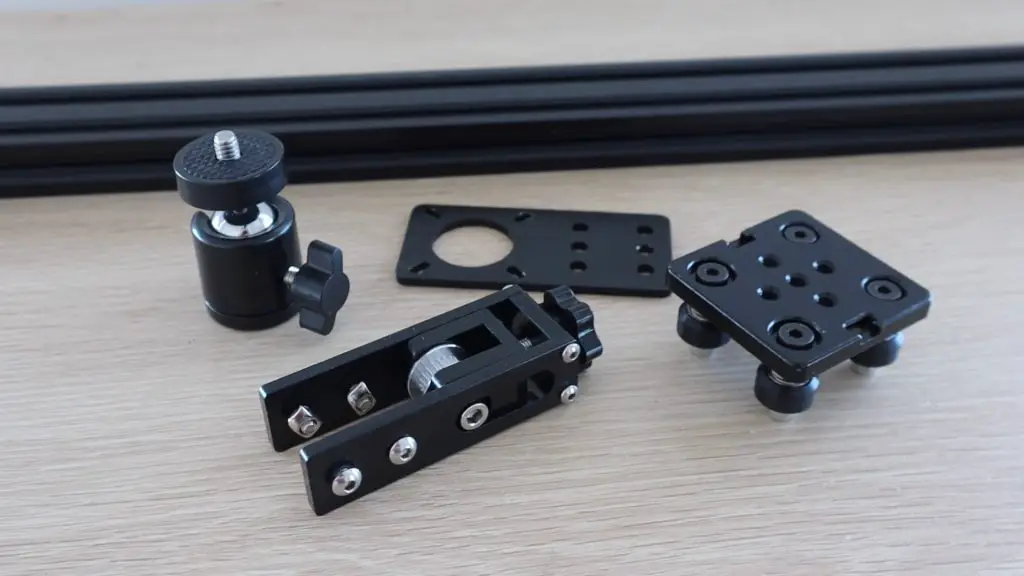
If you don’t want to build a motorised slider and you’re happy to move your camera along the slider yourself, then you don’t even need the motor mount or the tensioner, just the extrusion and the gantry. An un-powered slider is just as useful to get some great footage, you just need a bit more effort and patience to get the shots.
I installed the components onto the extrusion, along with two stepper motors which I salvaged from an old 3D printer. These are just standard Nema 17 stepper motors with around 1-2A coils. I designed and 3D printed a basic housing for the motor as well as an adaptor for the camera mount and some belt clamps.
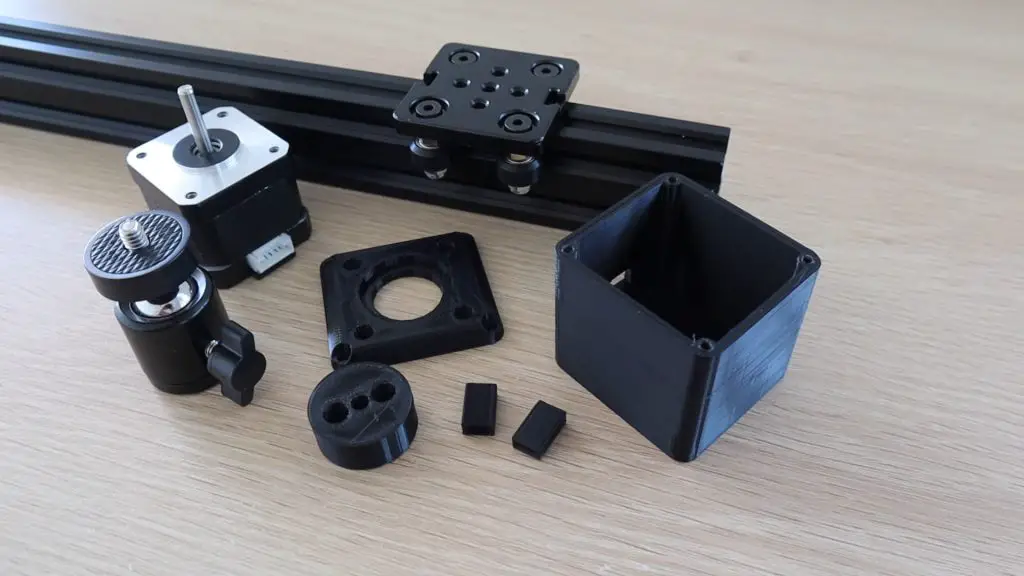
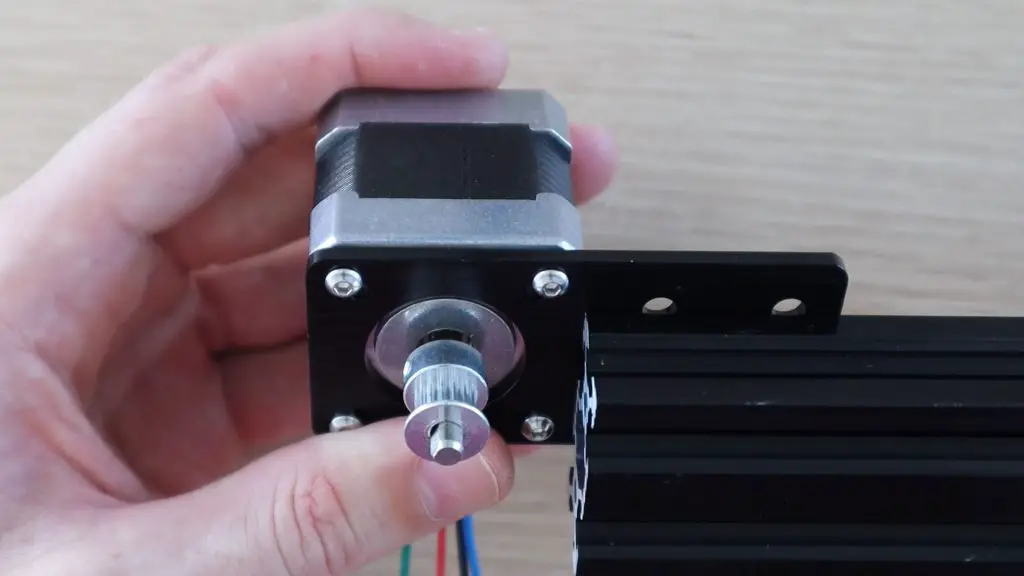
The motor mount is just screwed onto one end of the aluminium extrusion using some M5 button head screws and t-slot nuts and the pan motor is then mounted onto this mount with the motor shaft facing towards the extrusion and positioned in line with the top pair of side slots.
I then secured the pulley onto the motor shaft with the teeth lined up with the centre of the top slot.
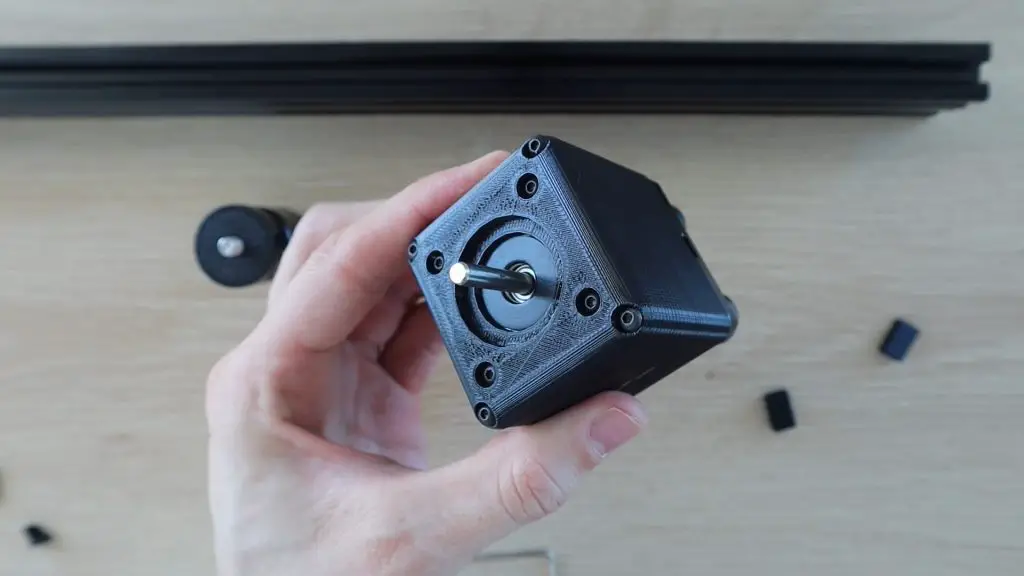
Put the second motor into the 3D printed housing, securing it to the top cover plate with M3x8mm button head screws and close it up with some more M3x8mm button head screws.
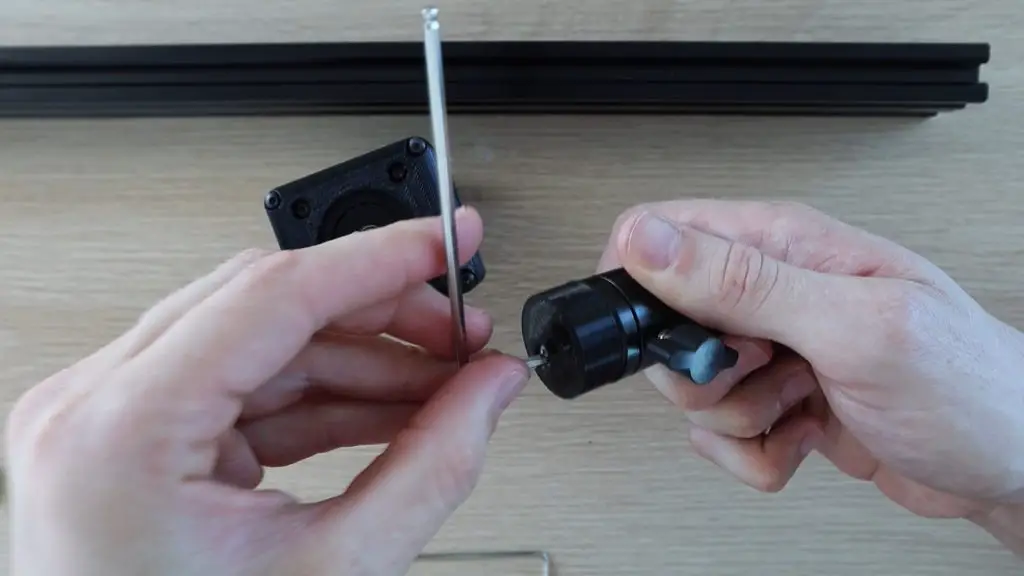
Screw the ball joint camera mount onto the 3D printed adaptor using some M4 button head screws and then secure this on the shaft with an M3x15mm cap screw.
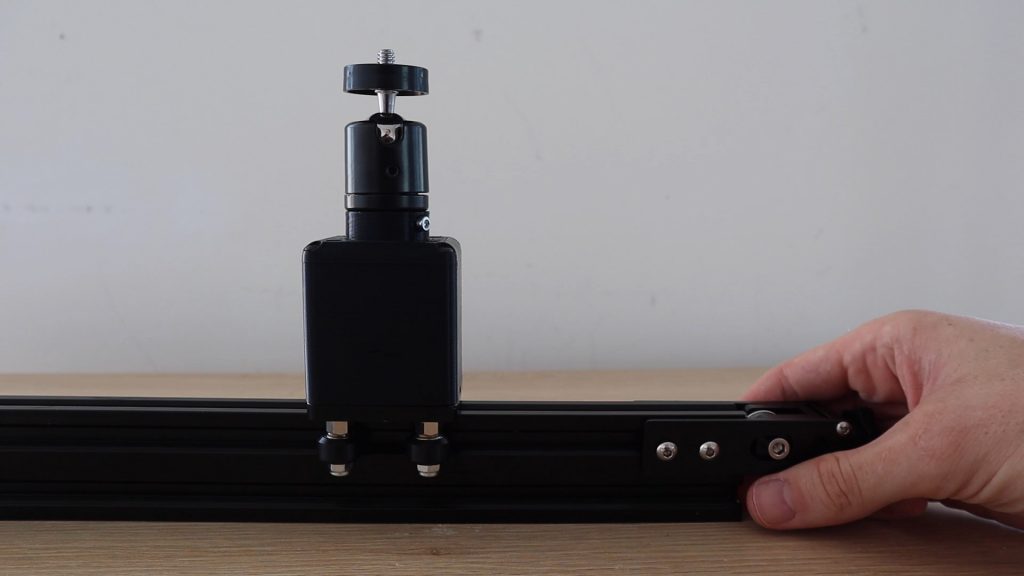
You can then slide the rotation motor and gantry onto the aluminium extrusion and finish off the end by adding the belt tensioner, again using M5 button head screws and some t-slot nuts.
The “tightness” of the gantry can be adjusted using the nuts on the underside of one pair of wheels. These nuts move the wheel supports closer or further away from the slot, which tightens the grip on the slot. The gantry should be firm, without and rattling when moving, but shouldn’t be difficult to move along the guides.
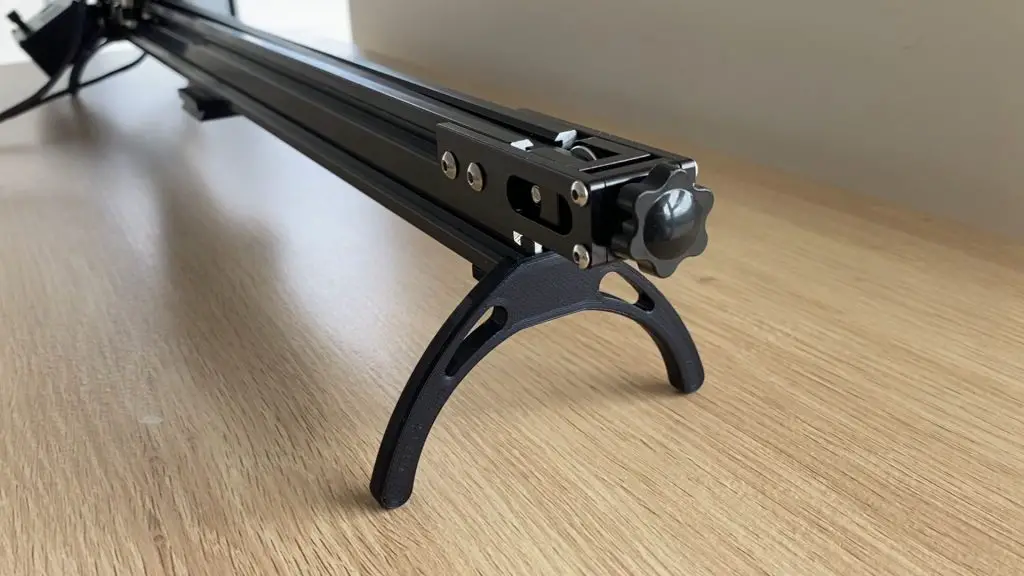
Next I needed some legs to stand the slider onto, I also designed these along with a shoe for my tripod and then 3D printed them in black PLA to match the colour of the aluminium extrusion and the motor mount.
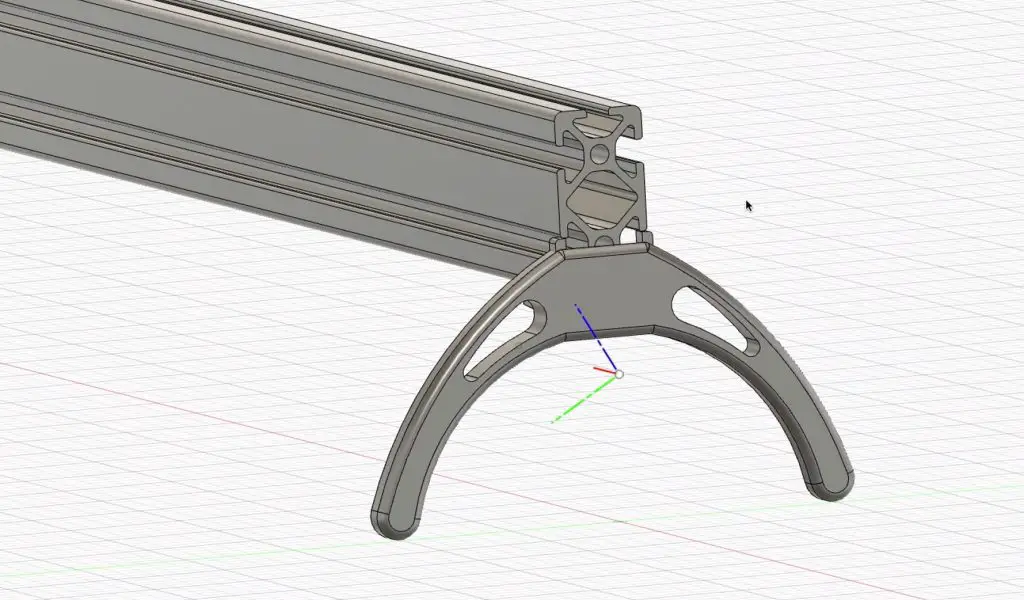
I 3D printed all of my components using Black PLA with a 15% infill.
Once the legs were printed, I installed them on each end of the slider using two M5 button head screws and t-slot nuts on each.
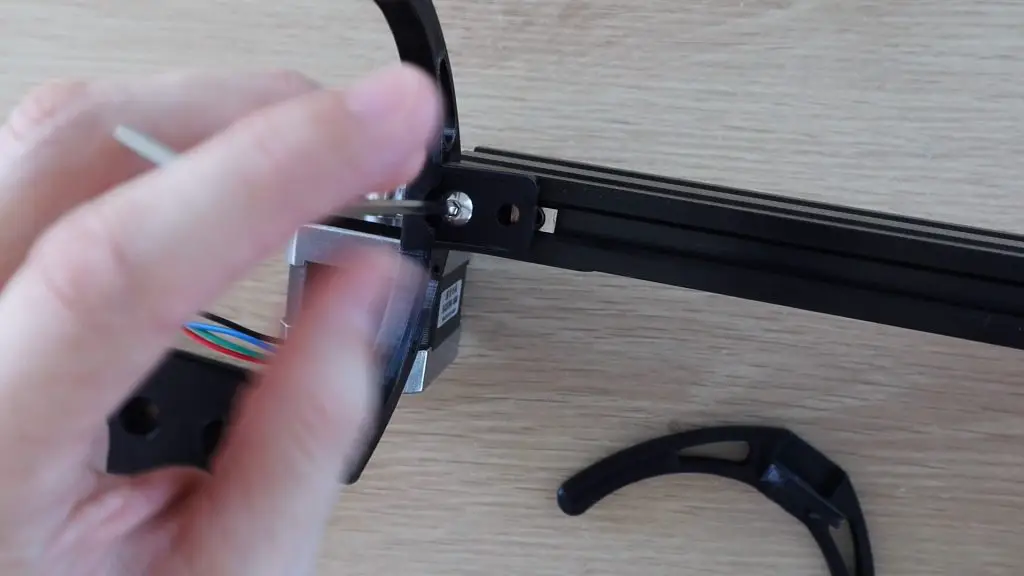
Remember to put your tripod mount onto your extrusion (if necessary) before the second leg as this closes up the entry to the slot, so you won’t be able to get the nuts into place.
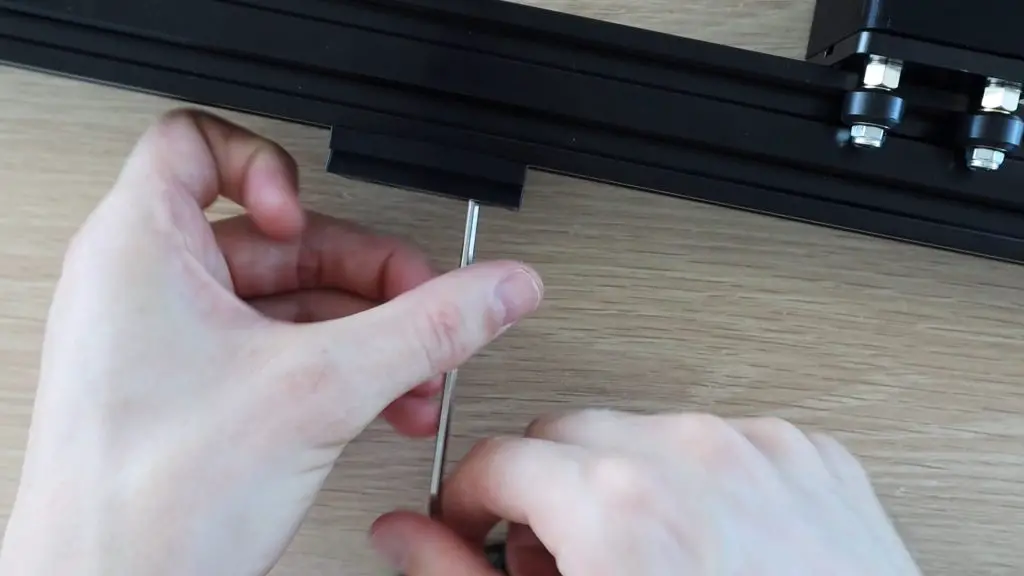
Then add the second set of legs.
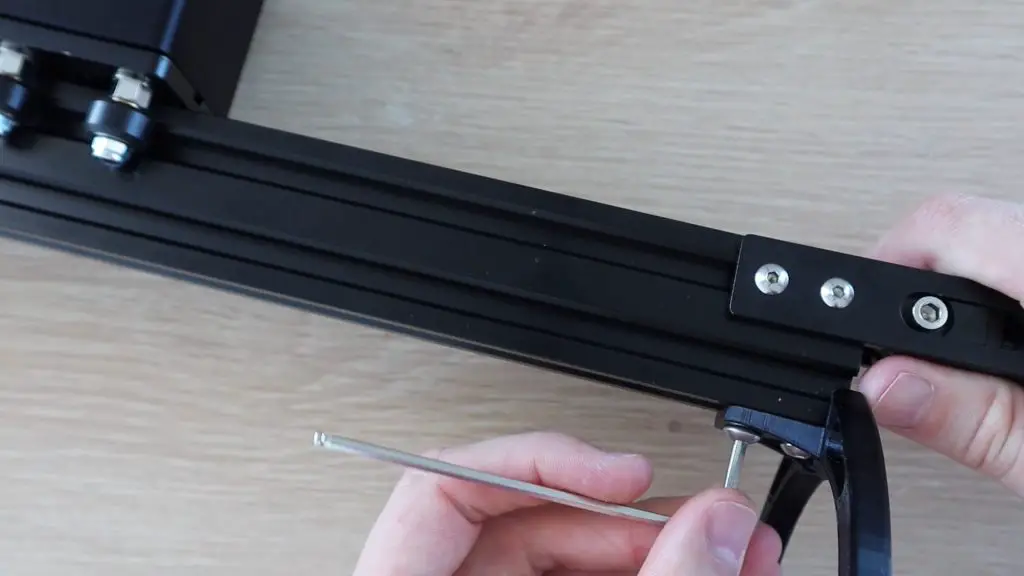
Once your legs have been added, you just need to add the belt from the motor to the gantry. Start on one side of the gantry, folding the belt over itself and securing it with a 3D printed clamp, then feed the belt around the motor, through the middle of the extrusion, around the tensioner and back to the opposite side of the gantry. The belt should be trimmed to length so that there is about 3-4cm of overlap near the gantry.
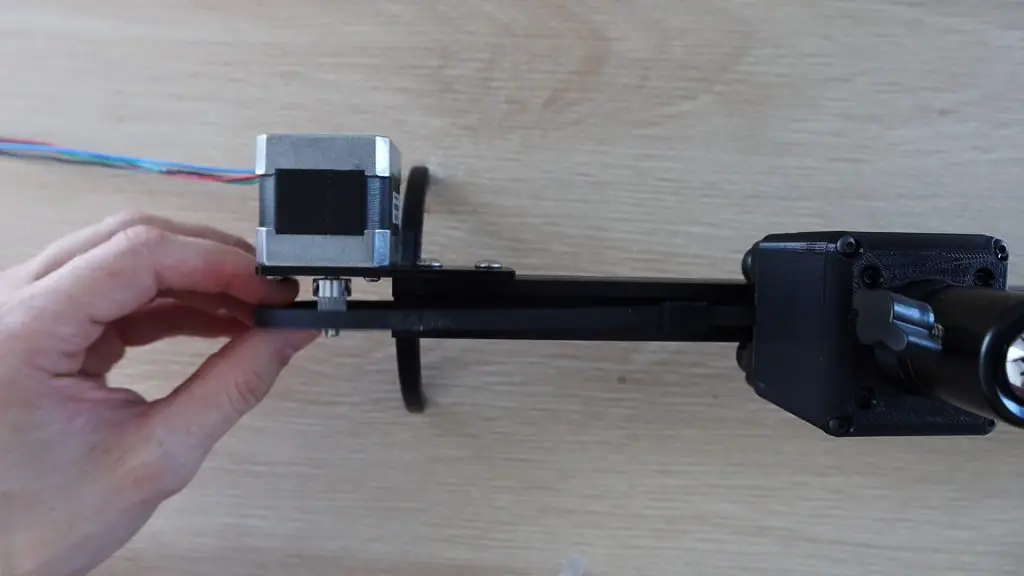
The belt needs to be pulled finger tight (with the tensioner completely loose) and you can then tension the belt by tightening the tensioning screw.
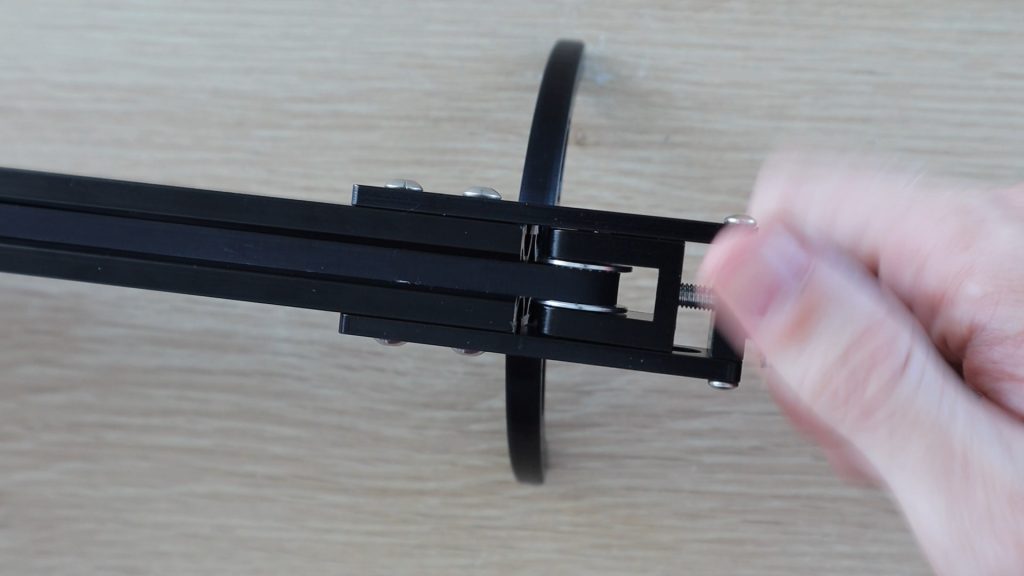
We’ve now got the basic slider together with our two stepper motors, so we need a way to get them moving.
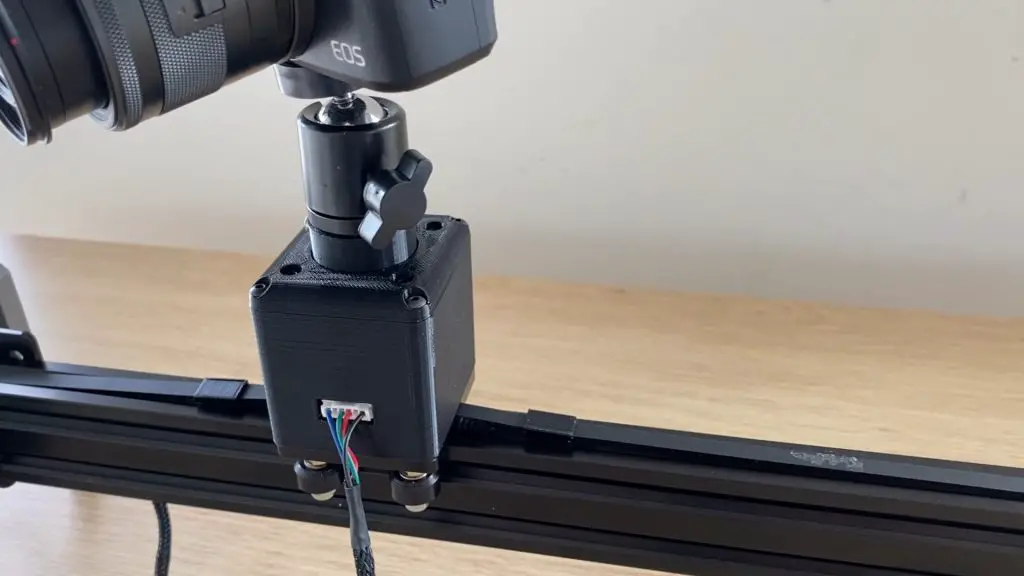
Designing And Assembling The Electronics
To control the camera slider I’m going to use an Arduino pro mini. The Arduino will drive the motors using two silent TMC2208 stepper motor drivers. We also need a way to input the parameters for each movement, so I added an OLED display and a rotatary pushbutton.
Testing The Electronic Components
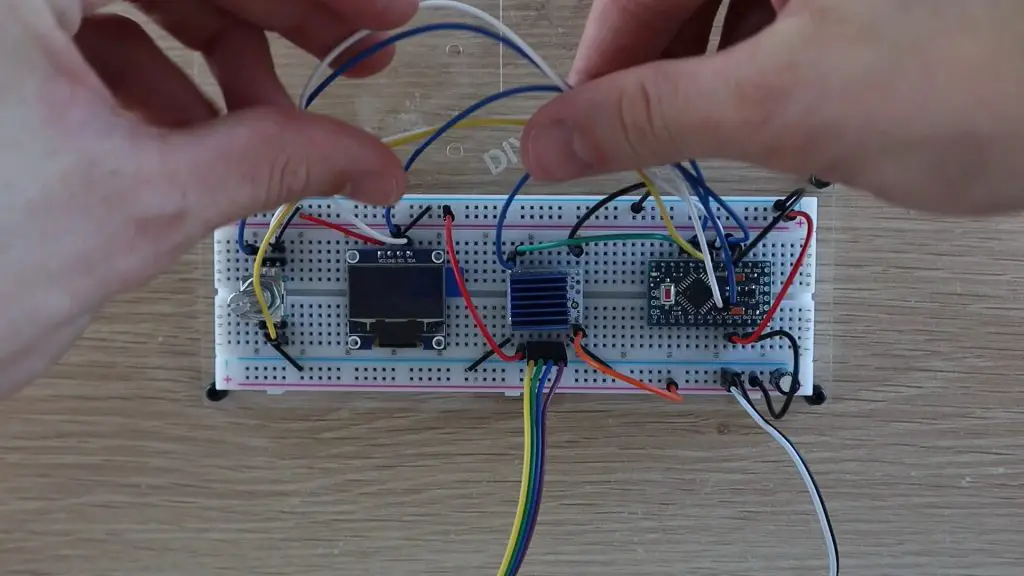
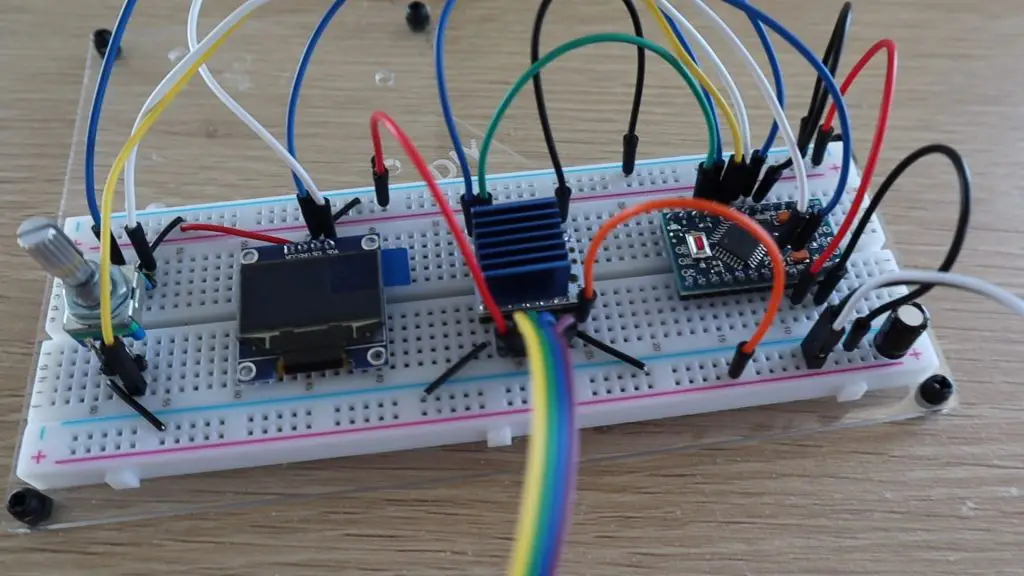
I set up a basic layout of my components on a breadboard first.
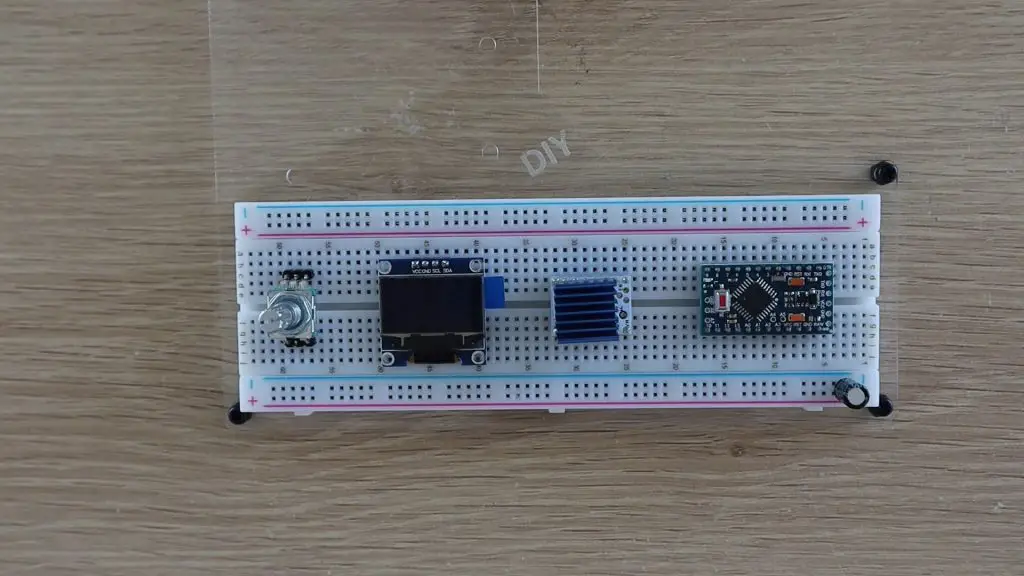
This was done to test that I had made the right connections and that the components all worked properly with the Arduino. I didn’t bother with both stepper motor drivers, if the one worked properly then the other one would too.
Designing The Circuit And PCB
Once I was happy with the connections to the electronic components, I drew up the circuit and a PCB to mount the components onto.
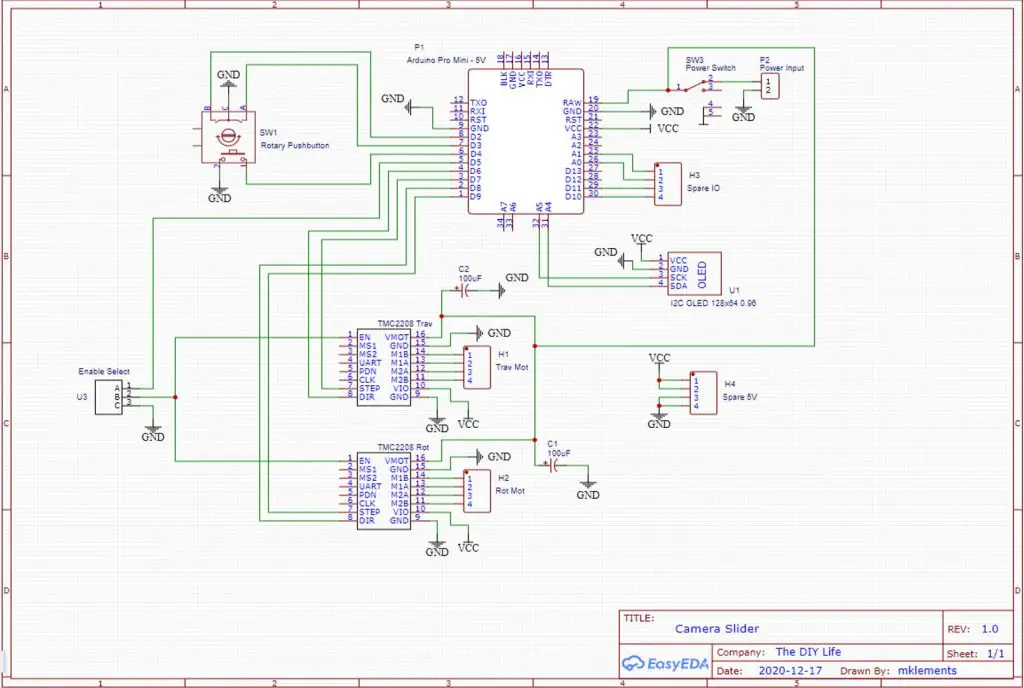
You don’t have to use a PCB, you can mount your components onto a breadboard, but a PCB makes a stronger and more reliable build, especially for something that you’ll be moving around a lot.
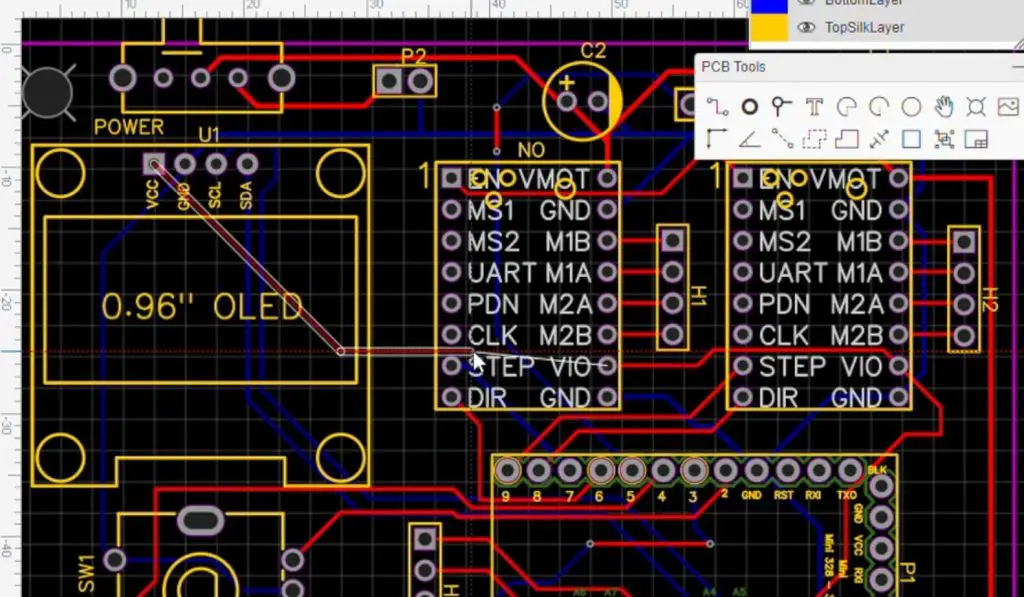
I got my PCBs made by PCB Way. They literally had them made and shipped out to me in 24 hours, which was quite impressive.
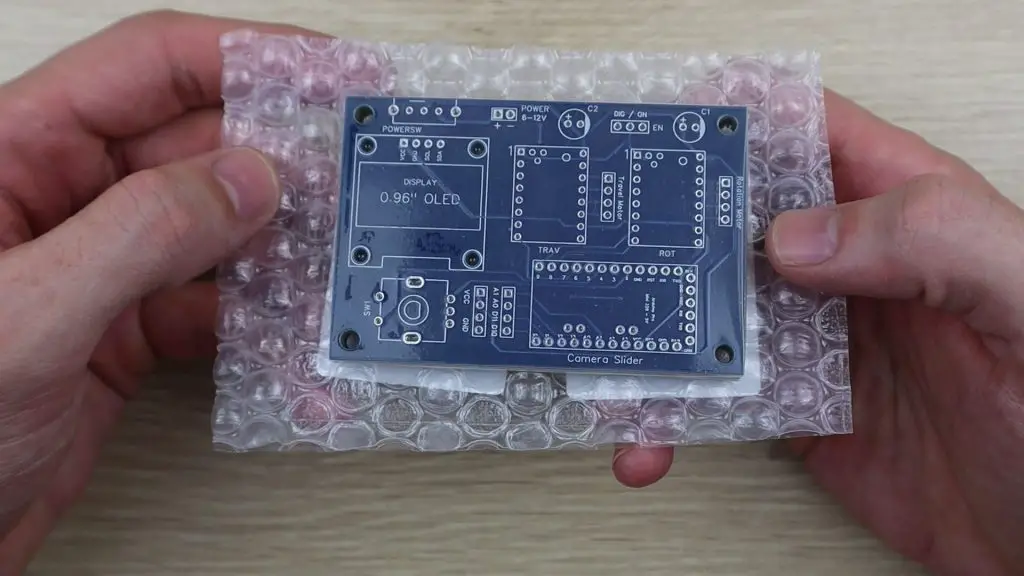
They did send me these PCBs for this project for free, but you can order your own PCBs from them from just $5 for 10 basic two layer boards. They’re really good quality and they also have a couple of different colour options, so you can really customize your projects.
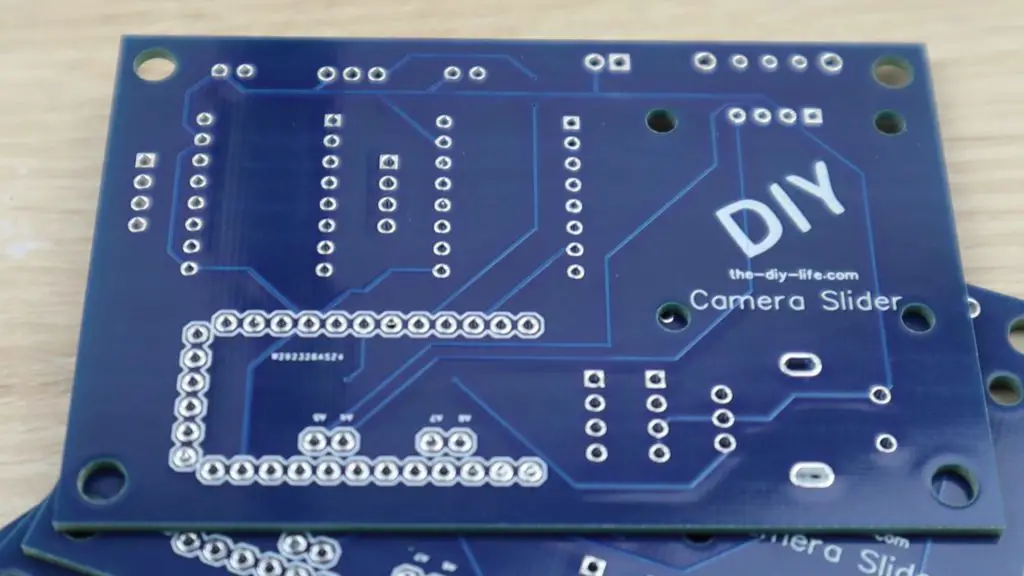
Assembling The PCB
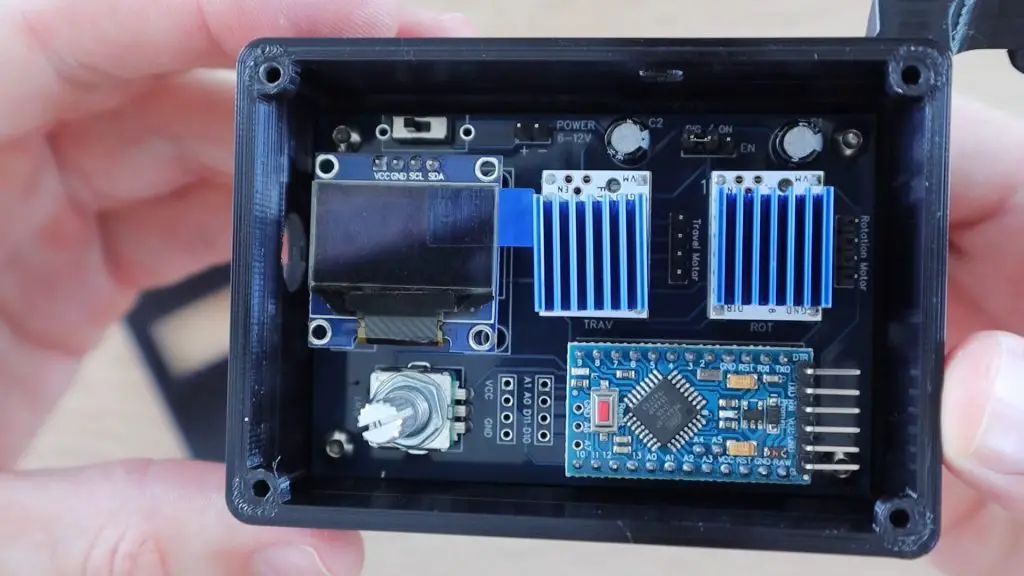
I then soldered the components and header pin connectors onto the PCB. I used a header pin connector for the display as well as I was planning on mounting it directly onto the case and having a short ribbon cable to the pins.
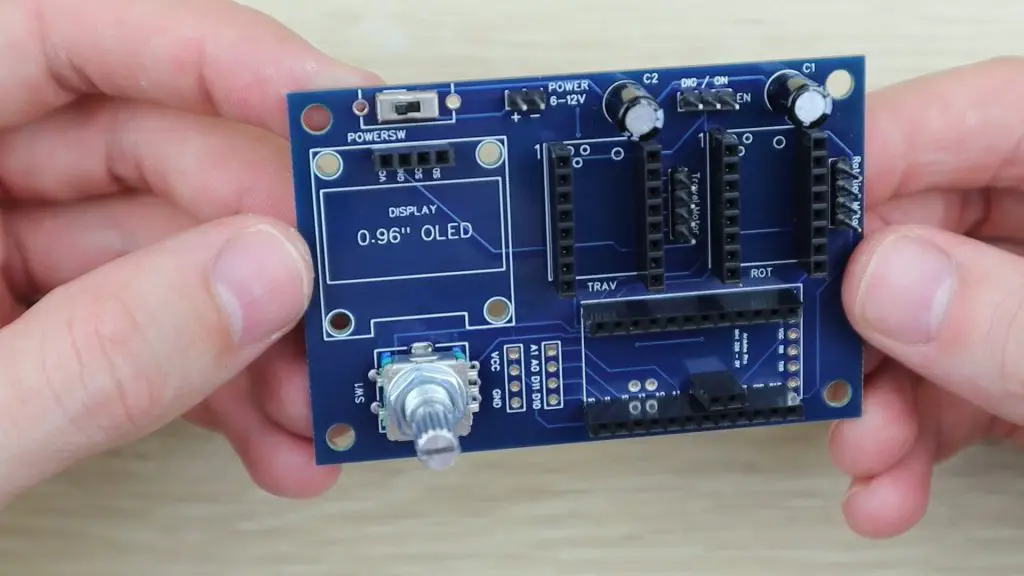
I put the heat sinks onto both TMC2208 motor drivers, soldered the pins onto the display and Arduino and then pushed them into the sockets on the board.
You’ll also notice that there is a small jumper on the top right of the board, just above the motor drivers. This jumper selected between having the motors always energised (can be moved by hand) and energised on command by the Arduino i.e. the Arduino can enable or disable the motors. My code makes use of the drive enable function using the Arduino to control them.
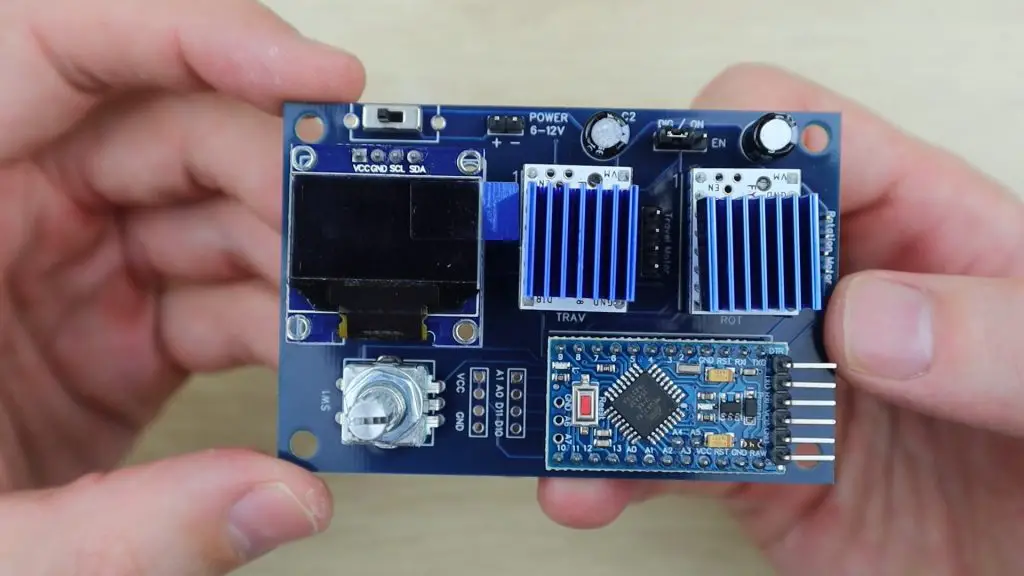
Making The Electronics Case
I then sketched the PCB into my CAD model and designed a case to house it and mount onto my slider.
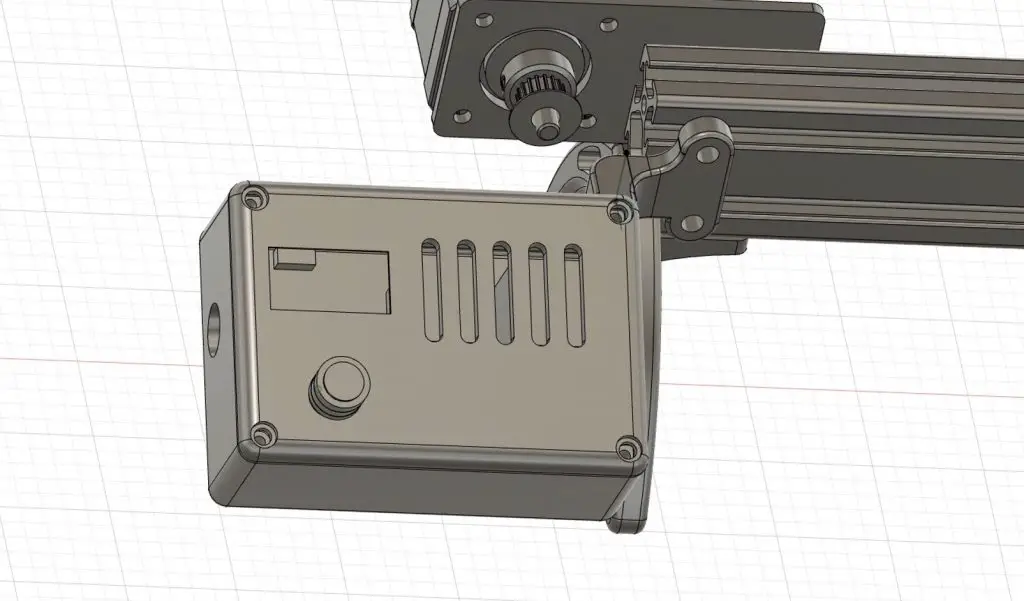
I 3D printed the case components again using Black PLA and a 15% infill.
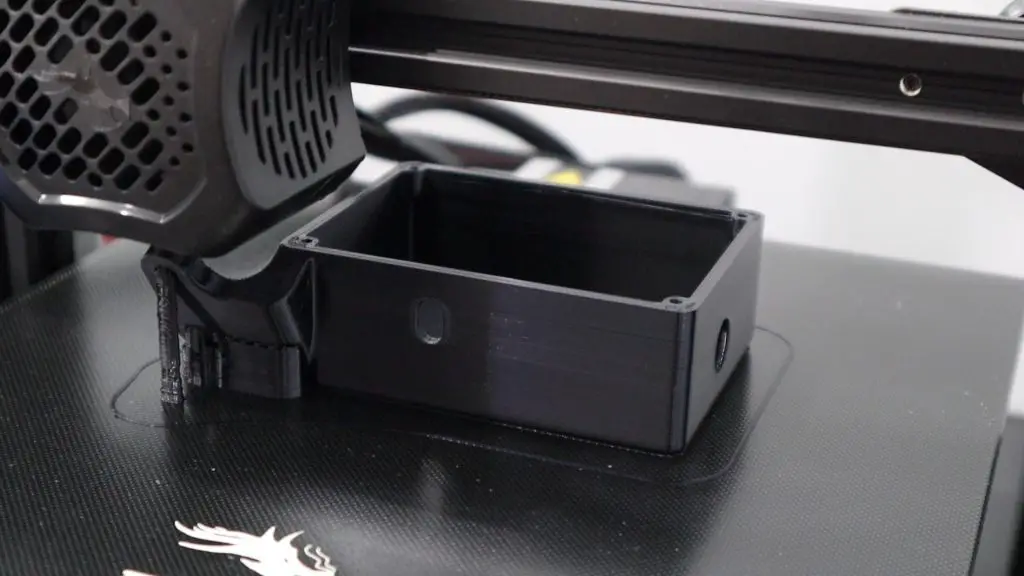
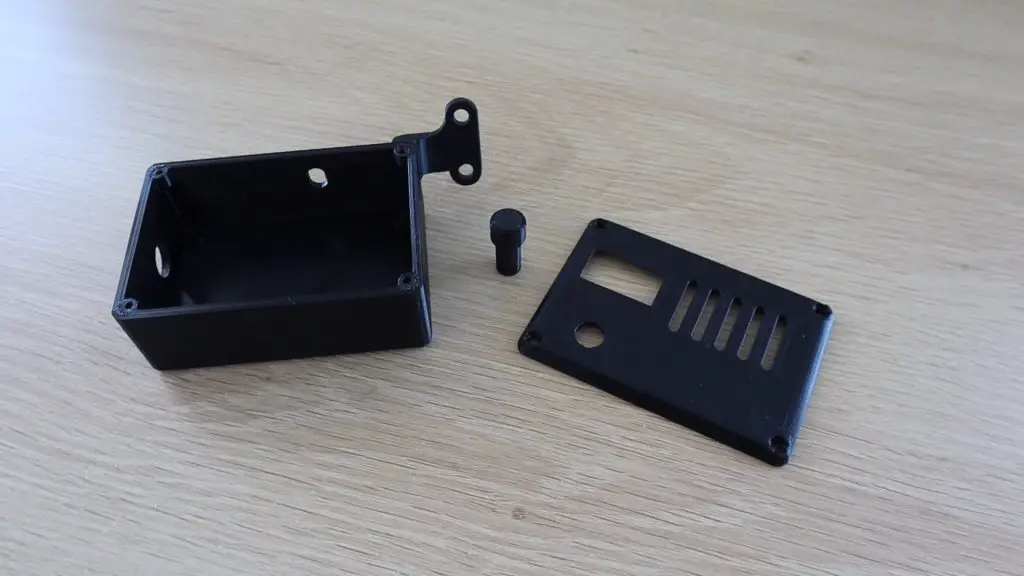
I installed the PCB into the case, holding it in place with some M3x3mm button head screws. My display is still shown plugged into the header pins here, it was removed for the next steps.
I then made up a short power lead to a 5.5mm barrel plug socket (the same one used on the Arduino UNO) to mount onto the side.
I mounted to case onto the slider using some M5 button head screws and t-slot nuts.
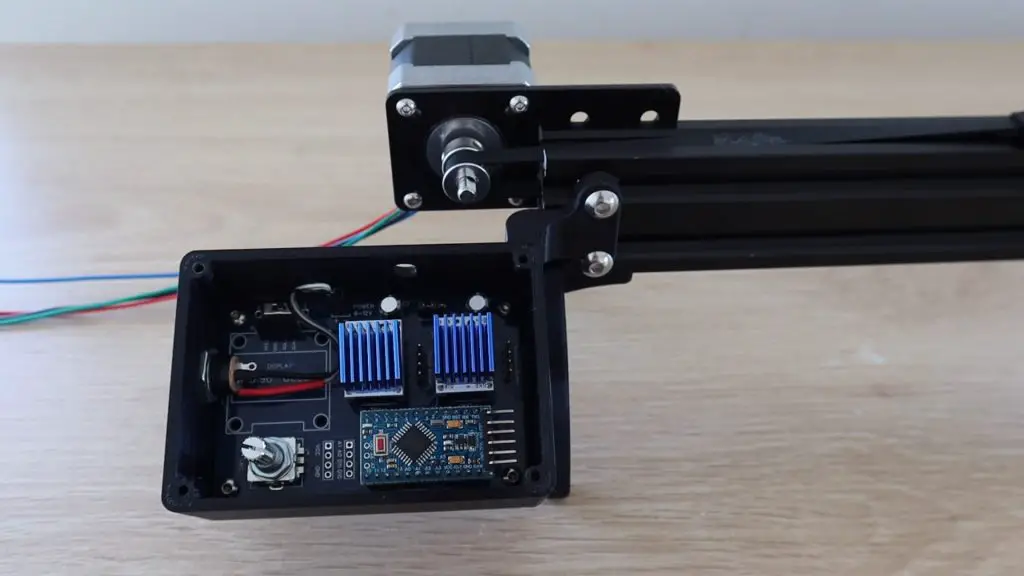
I put a switch onto the PCB to use if you’d like to, but I prefer just having it on when its plugged in and off when its not. A switch is useful if you’re powering it from a battery pack or your’ve got it set up somewhere permanently. If you want to use the switch then you’ll need to modify the case so that it’s accessible through the side.
I connected my motors to the PCB ports alongside each driver and put the wires into some braided sleeving to keep it neat.
Programming The Camera Slider
With that all done, it was time to tackle the programming, which was a bit more of a project than I had anticipated.
Making menus with these rotary pushbuttons is a really neat way to input information with a single device, but you land up having to do quite a lot of coding to make up for it.
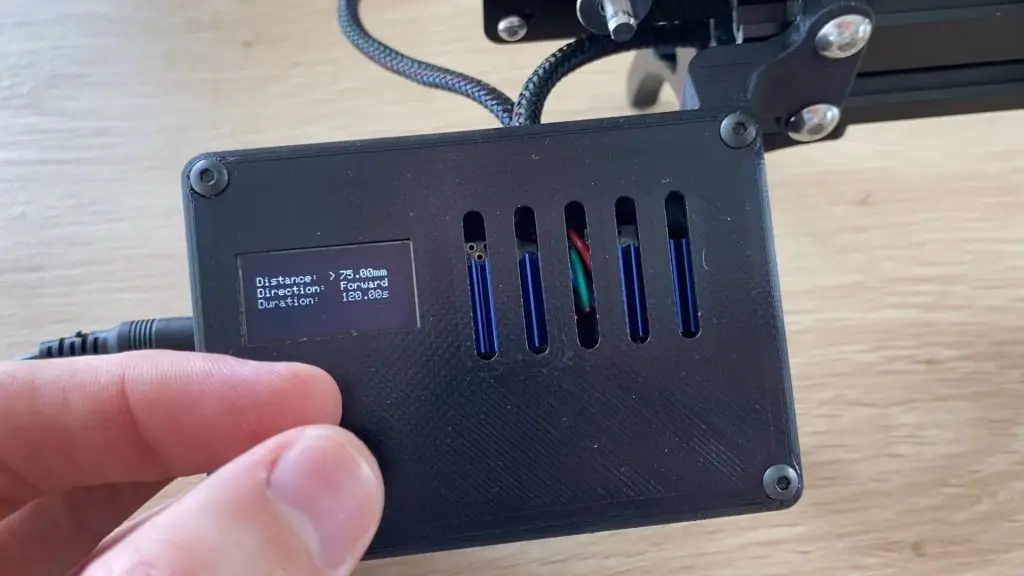
I got the pan and rotate functions working quite quickly and then came the object tracking. I simplistically, or rather stupidly, initially thought this was easy. The camera moves from A to B and rotates through a bit less than 120 degrees, so just divide up the movement and rotation and it’ll work perfectly.
Except that thats not how it works at all.
In order for the camera to stay fixed on an object, it needs to move slowly in the begining, quite quickly in the middle and then slow down at the end again. There’s a bit of trigonometry involved in getting the camera to follow the object properly.
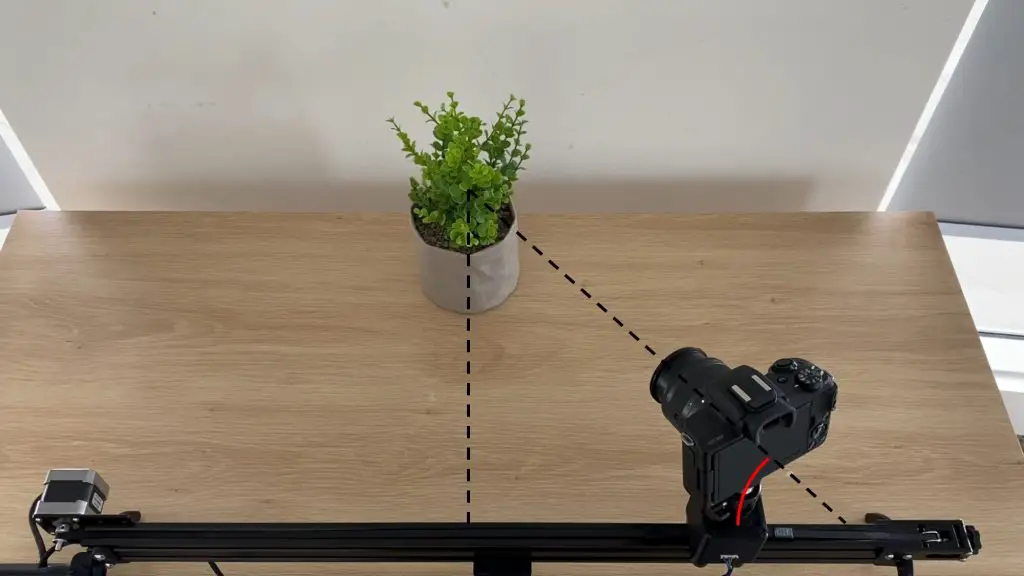
At least I had now realised what I had done wrong and could fix it, so after another few hours of coding, it was finally working.
Here’s my final version of the code. I usually go through the code in some detail for each project, but this project’s code is quite lengthy. I have added quite a few comments in the code to help you follow through it.
I have started a GitHub repository for the code if you’d like to share your adaptations and improvements. Some adaptations have been shared below as well.
Code Variations
Our community has also helped out with some useful additions to the code. Here are some of the modified versions. Note that I haven’t tested these versions of the code.
Limit Switch Inclusions by Paul Bartlett
Paul has added micro-switches to the two ends of the rail to act as limit switches to stop the motor. He has also added a short routine to move the motor back a little at the ends of travel to release the switches and added a routine to automatically home the gantry after running a movement.
Use A 1.3″ Display by Tony Tren
Tony has modified the code to work with the 1.3″ OLED display.
Closing Up The Case
Once I had programmed the Arduino, I closed up the case using four M3x8mm screws and then pushed the knob onto the rotary encoder.
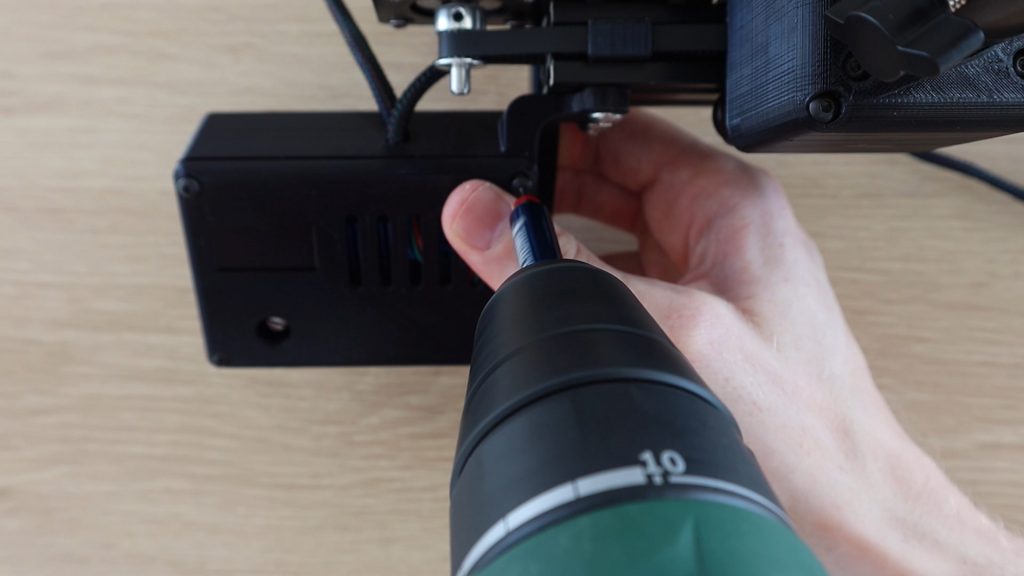
The motorised camera slider was now ready to be used.
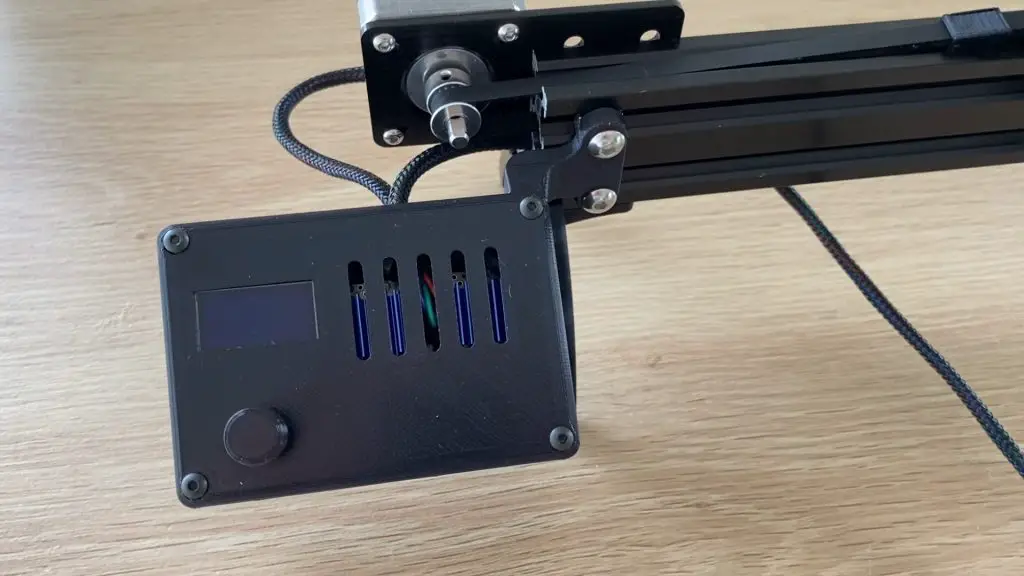
Using The Camera Slider
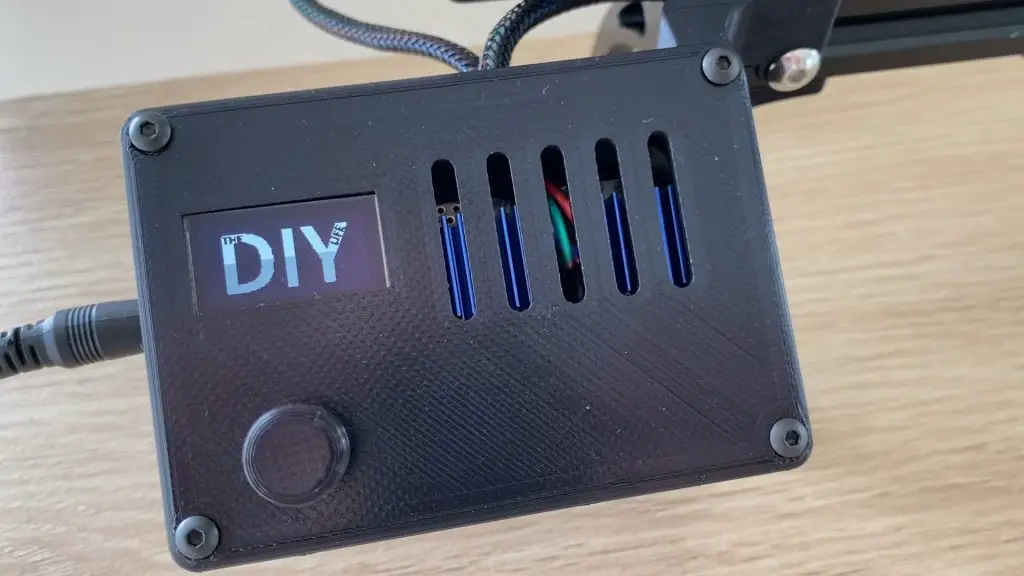
When you first put power onto the Arduino, a splash screen is briefly displayed.
You’re then presented with the main menu, which allows you to choose from four options – pan, rotate, pan and rotate and object tracking mode.
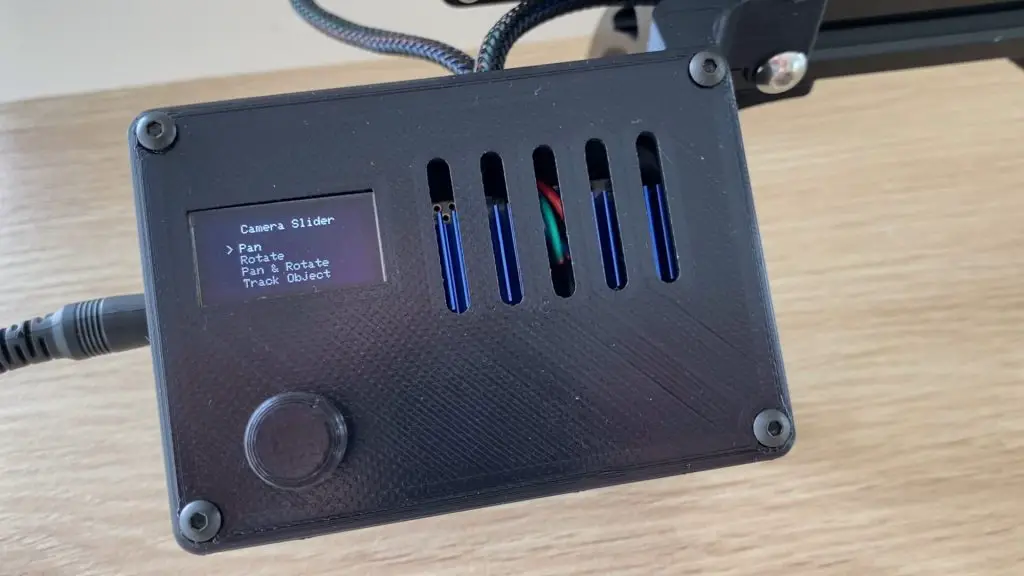
The options are selected by rotating the encoder and are selected by pressing the encoder. Once a mode is selected, a parameter input screen allows you to input the distance, angles, timing and directions for each movement.
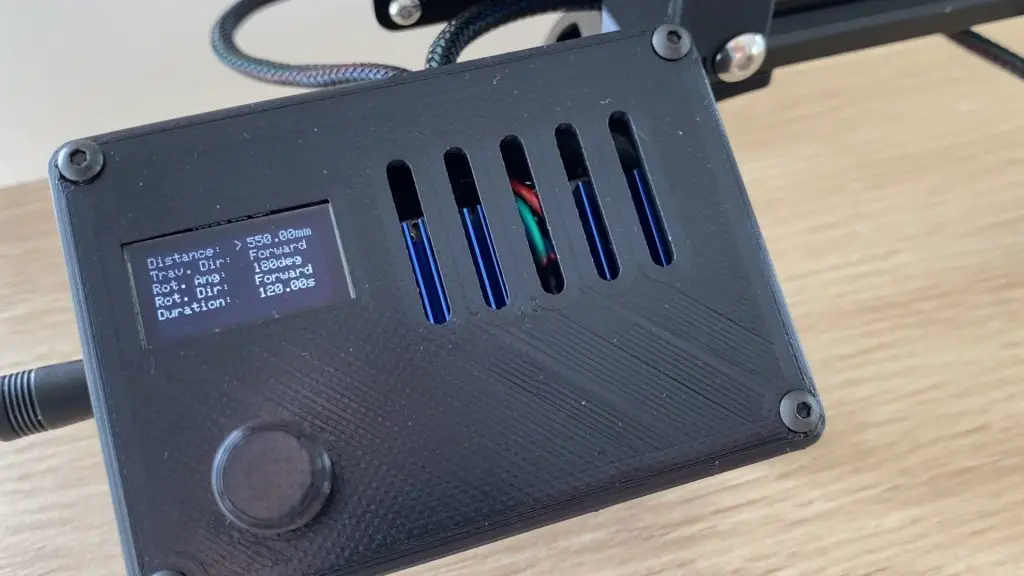
Once all of the parameters have been input, you push the encoder button to start the movement and it then enables the motors and runs. The drivers then remain enabled at the end of the movement until you push the button again to release them. This is to ensure that the camera isn’t suddenly dropped once the movement is complete.
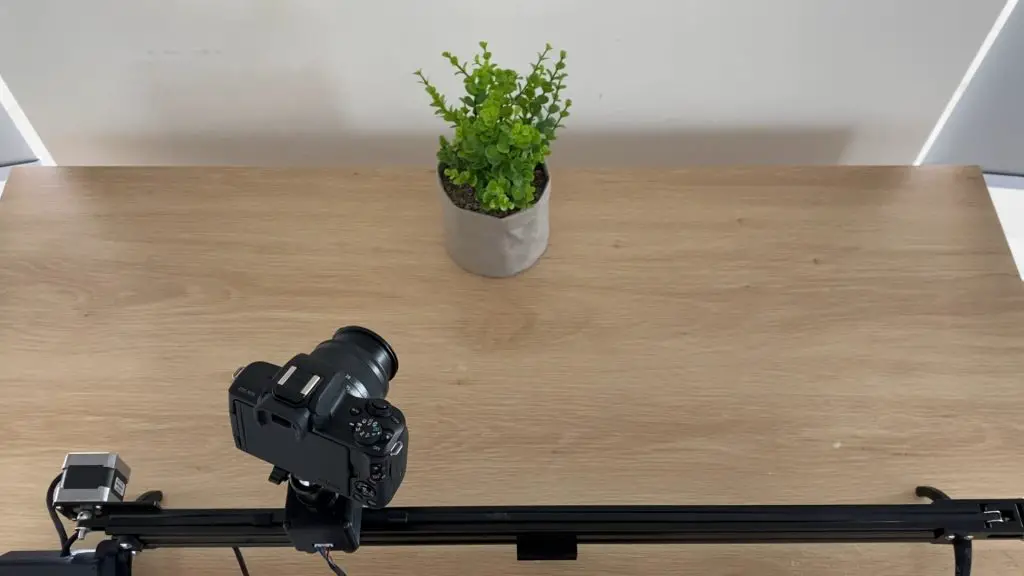
The camera slider works pretty well, staying fixed on the object from one side to the other. There is one limitation in that you need to know the pan distance and the distance to the object quite accurately, otherwise you land up slightly over or under rotating the camera. This isn’t a big issue but it does mean that its difficult to keep the object exactly in the centre of the frame without getting a ruler out each time. I’ll probably look at designing an interface to a Raspberry Pi in future so that I can run TensorFlow to do real-time object tracking. This should give more reliable results without any measurements.
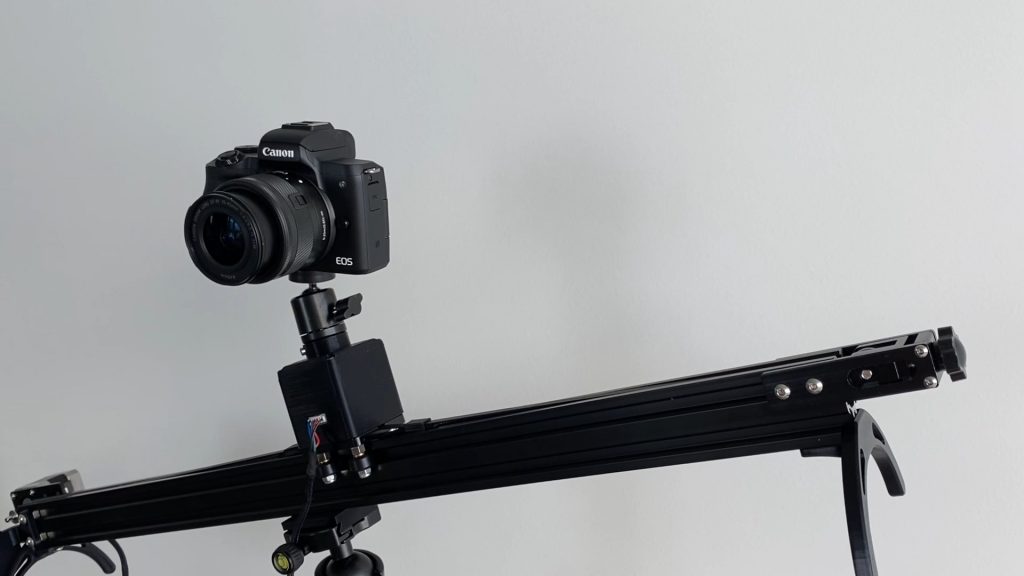
The TMC motor drivers were a great choice for this build as they are really smooth and quiet, so you bearly notice them running.
As always, let me know what you think of this motorised camera slider in the comments section and let me know what you would do differently. But most importantly, enjoy building your own!
Community Builds
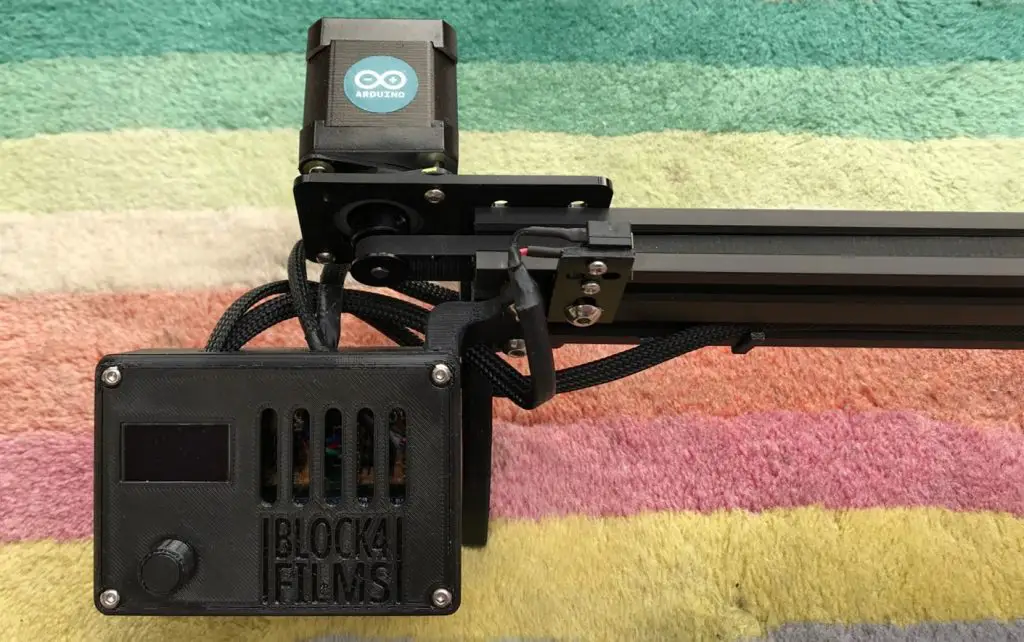
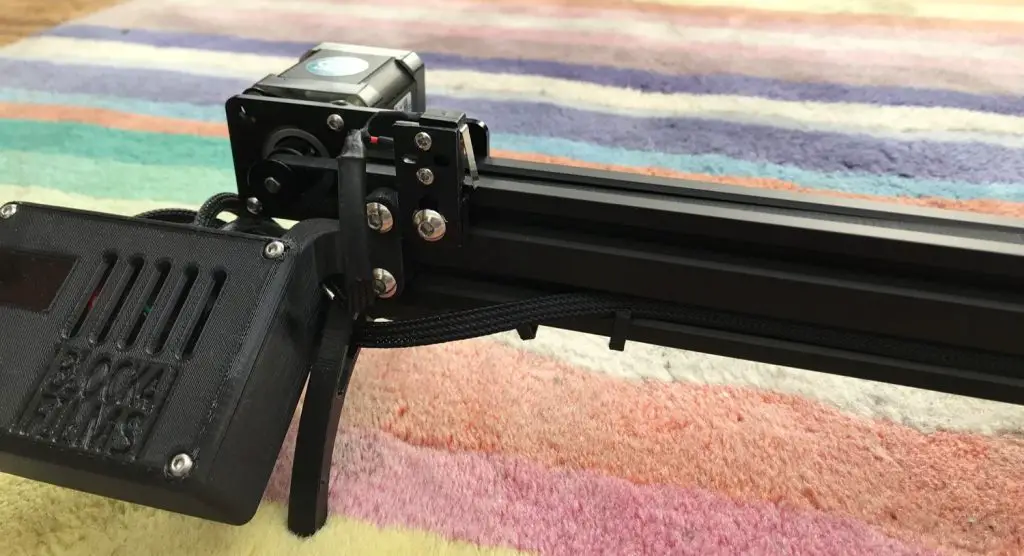
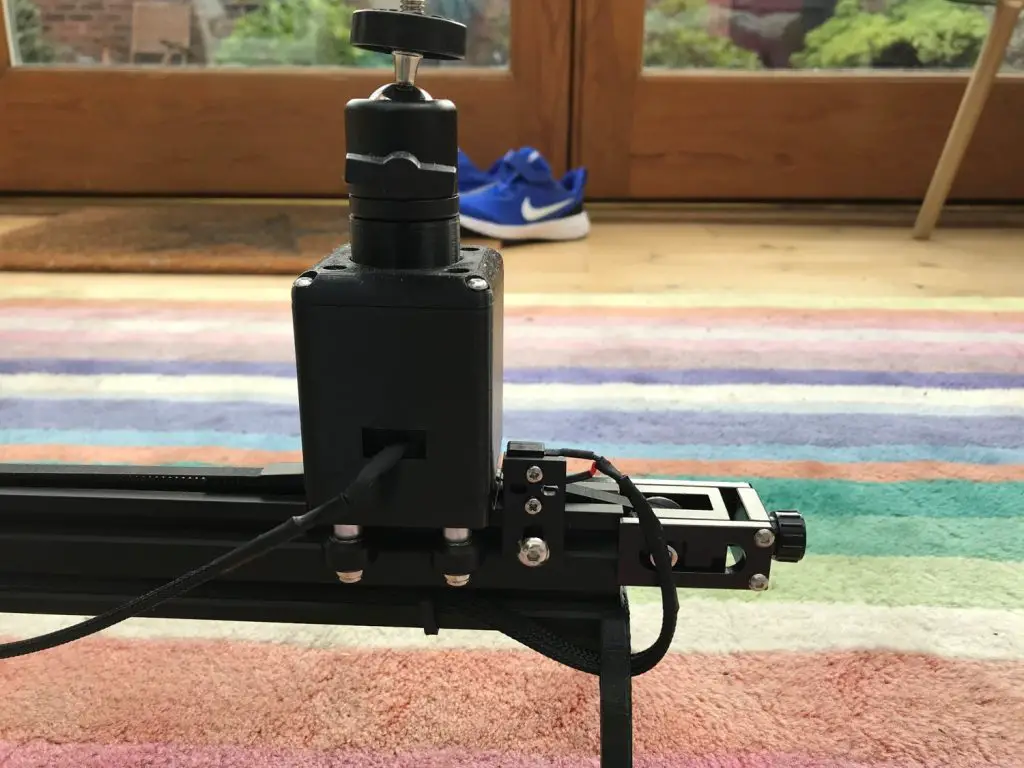
Andrew Campbell has shared his camera slider build with some neat modifications, including adding the limit switches by Paul. Have a look in the comments section for his feedback and thoughts on the project.


Very nice project !
Could you please also share the electronics schematic diagram ?
Thanks Fred. I’ve updated the schematic with a better resolution copy, it’ll also load a larger image if you click on the image to open it in a new page.
Michael, very nice. I do have a question though. I am a member of Instructables which is where I ran across your build. About a year ago someone built something similar except it was for focus stacking macro photos. It would start at the nearest focus point of an object, take a photo, move the camera a little closer & take a photo, move a little more, take a photo, etc. until you had a series of macro shots with all points being in focus & then merge the images. Do you think something like this could be programmed into your Arduino slider?
Hi Gregory,
What you’re describing sounds like it would be quite easy to program. I built a lightning photography tool a while ago which uses an optocoupler to trigger a physical input on an older Canon camera. I guess you’d have to try and set up a Wifi trigger or put an optocoupler onto a remote trigger to trigger modern DSLR’s shutters. But this is certainly something that could be done quite easily with an Arduino.
Is there a reason why (or benefit to) you would move the camera between shots rather than automate the turning of the focus ring on the camera rather?
Hi Michael,
Here’s the Instructable that I mentioned.
https://www.instructables.com/Automated-Macro-Focus-Rail/#discuss
Dtrewren, the author, didn’t use an Arduino or any off the shelf microcontroller but cobbled his own together. I’ve played around with Arduinos so I know a little bit about them. He used a stepper to turn a lead screw instead of a cogged belt. I have two 3D printers so I think the small movement of the camera needed would work with your belt system. He also triggers the camera to take an exposure with his microcontroller.
Take a look and let me know what you think.
I’ve had a look at his Instructable, this has given me a better idea of the setup. I’d still be interested to know why moving the camera is better than adjusting the focus. This might just be my misunderstanding of the intention behind the rig or the photography technique.
The author has just used a pic chip, which in essence is just the core of an Arduino. But what you’re wanting to do is perfectly do-able with an Arduino. A leadscrew like he has used will give you higher precision, but you can get similar results using a belt and a small pulley on the motor shaft.
His trigger is similar to what I’ve built with an Arduino for photographing lightning. This is easier to do when the camera has a manual (plug in) remote trigger. Some cameras don’t have this facility and have moved this function over to WiFi. This is more difficult to get working with an Arduino and varies by camera model.
Hi Michael,
thanks for sharing this great project. I build up the electronics and so far everything works perfectly. The parts for the mechanical part of the project will arrive soon and I am pretty convinced that everything will go well 🙂
Nevertheless I have some questions:
1. The input voltage is 6-12 Volts according to the PCB. How can this be, as the Arduino is only 5V. Wouldn’t it be fried with 12V?
2. The 0.96″ display is pretty small and therefore I tried to change the code to SH1106 (1.3″) displays, but I greatly failed 😉
Can you please give some hints on how to change the code to work with SH1106 displays?
3. I have 8 PCBs left over from my order at PCB Way. If someone from Europe is interested in getting one or more PCBs, may you help with getting in contact?
Hi Joerg,
That’s great, hope it all goes well for you! To try answer your questions:
1) The 5V referred to is the Arduino’s Vcc circuit, it can accept an input voltage of 5-12V as it has an onboard regulator.
2) I’ve never used an SH1106 display, so I don’t have much experience with them. You’d probably just need to find a compatible library (possibly this one – https://github.com/wonho-maker/Adafruit_SH1106) and then you’d need to change the initial lines of code which refer to the SSD1306 display. If you use an Adafruit library like this then it looks like the notation is pretty similar, so you probably wouldn’t need to modify all lines of the code which display something. You’ll also likely need to change the font sizes and cursor positions for each text line to get them laid out correctly.
3) I think if anyone from Europe is interested in getting them off you then they can comment here to get into contact with you. Unless you’ve got another idea?
Good luck with your build and let me know how it goes with the larger display!
Hi Michael,
thanks for your detailed reply – much appreciated.
Good to know that there is an onboard regulator – now the input voltage range makes sense 😉
Regarding #2: That’s what I actually tried to do. Including the Adafruit library and changing the code where it is necessary, but it didn’t work. I can give it another try and post the compiling errors here if you like. May be we can get it running together?
Regarding#3: Yes sure, if somebody is interested in PCBs they can comment here. My initial idea was to setup a certain email address for it, but just writing a comment here is fine for me.
Cheers,
Joerg
Hi Joerg,
No problem at all.
Regarding #2, if the code is not compiling then you’ve got some syntax errors or your code is trying to use features of the old library that aren’t in the new library. The error usually shows you which lines these are in, so they should be quite easy to find and correct. I don’t mind helping out with any specific ones you’ve got an issue with.
Regarding #3, you’re welcome to share an email address here as well if you’d like. It’ll probably get quite a lot of spam though!
Hi Michael,
sorry for the late reply. In the meantime all missing parts arrived and I was able to make lot of test shots. Therefore I dropped the idea to change the code to run with a 1.3″ display as there are a lot of more important problems at the moment:
First of all: The slider does not work with a DSLR (EOS 6D in my case) properly as the camera is too heavy. It works in horizontal mode, but there are too much vibrations/wobbling. So the footage is useless.
I tried with a smaller camera, but there are still some micro vibrations.
Vertical, or even slightly angled mode is impossible as the rotate motor doesn’t keep the camera in place. This may be related to problem #2:
The system does not work with a voltage higher than 5V. If I connect it to 9V or 12V the dispay stays black and the Arduino gets hot. After a couple of minutes the Arduino is dead. With 5V everything works as expected.
May be I will give it another try after purchasing a less heavy camera, but for now I stopped testing it.
Just to give something back: I designed a new motor/ball head adapter in order to work with a center screw (1/4″) in the ball head plus a new knob which fits a little bit better on the pushbutton. Are you interested in the STL files, or shall I put it on Thingiverse?
I have seen your project in instructables and I have started to assemble it. I have already managed to start it with a 1.3 “screen although I have not managed to make your logo look correctly, but the rest of the program does work, I have even translated it into Spanish (my English is bad).
It would be great if you could incorporate a long press to stop the movement, sometimes it is necessary to stop it to avoid a problem.
Thank you very much for your work and congratulations.
Hi Michael, your project is perfect.
My question is.
Which program should i use to open the pcb board files
thanks
I’m not sure that you can open them in a package, these are generated for production of the PCB, not for editing.
Hi Dominik,
I have some PCBs left over from my order which I will sell for a small amount plus shipping. If you live in Europe feel free to contact me.
Did you send it to Thailand?
If sent by email
[email protected]
No sorry, I only ship inside Europe
Hi Joerg,
Will you post to the UK,
Hi Joerg
I am also in the UK, would you be interested in selling me a couple of your unused boards?
I have 9 unused boards.
Great, please let me know how much for two boards with postage to the UK. If you want to sell them of course. If you can email me directly that would be great.
Hi Manfred, I am interested in one board. Please let me know the cost plus shipping to UK . Can you email me
Thanks
Gary
No Problem.
Email: diy at zeitgerafft dot de
No Problem.
Email: diy at zeitgerafft dot de
Thats me, Manfref
So, one more time.
I have nine bare boards and one finished board. I can also send the circuit boards to the UK. Please send me an email directly to [email protected]
Thanks
Manfred
hello do you have any PCB? Iam from GREECE
Can you ship to Milan?
I have a couple but for the Price JLpcb is really low so i would recommend ordering from them.
Otherwise i could solder some for 50% and ask my friend to take them to milan when he is there next time.
But you’d have to wait a bit Yomna
What is the purpose of U3 “Enable Select” DIG/ON ?
The jumper selects between allowing your Arduino to enable/disable the motor drivers or just having the drivers permanently enabled when the board is powered. The drives being enabled means that the motors are held in place or “locked” and can’t be turned by hand.
Hi Michael,
Could you post a link to the Stepper motor bracket you used please.?
Kind Regards,
Hi Paul,
Here’s a link to the mounting plate that I’ve used – https://www.banggood.com/custlink/GGDdLRGUCL
Hi Michael,
That’s brilliant thank you. I have built the slider and it works really well. I’ve added limit microswitches at each end and the relevant code to stop movement when triggered. I also had to add a little routine to move the mount back just a fraction after the limit switches were triggered to release them. I have also added a menu item for ‘Homing the Slider’.
Hi Paul,
Those sound like great additions! Would you be willing to share some photos and perhaps your revised code for me to share at the end of the post (with credit to you obviously)?
Hi Michael,
May not be perfect coding but here goes:- *code moved to body of post under Code Variations
Thanks for sharing your code Paul, I’ve moved it to a downloadable file in the main body of the post.
Hello, Paul, I would also like to build my slider with endstops, where do I have to connect this?
Would you be kind to send me the code 🙂 my email is [email protected]
thank you in advance
Hey Paul, where is the input for the endstops. I want to build mine with endstops but idk where to connect ist.
Hi Chris, If you look at my code, I have added microswitches to D10 and D11. They are pulled high until the camera mount nudges the switch which then pulls them low stopping the travel. We then have to do a little step in the opposite direction to release the microswitch, otherwise it will remain triggered and stop the next movement.
Hope this helps.
Hello, let me ask a little, you declare encHighLim = 4 instead of encHighLim = 3 like Michael Klements. Does this have any effect?
Hello Paul, can you email me the code because the code posted on the post will compile error, possibly due to translation. [email protected]
Thank you very much!
Sure thing. I’ll check it compiles ok and send it across to you.
thanks you very much. My email: [email protected] or [email protected]
By the way I want to ask you a little: Your code declares encHighLim = 3 and Paul declares encHighLim = 4, does it affect anything and when the limit switch is connected, does the PCB need to be changed
thanks you very much. My email: [email protected] or [email protected]
By the way I want to ask you a little: Your code declares encHighLim = 3 and Paul declares encHighLim = 4, does it affect anything. and when the limit switch is connected, does the PCB need to be changed
Hi Paul, your fork is a really good improvement to the project. It would be so handy if you were able to post the working code somewhere online where it could be copied, e.g. GitHub. I appreciate that’s maybe not practicable, in which case… could you add my email to Duythi’s email too please! My email is js361873 at googlemail.com. (I spent an hour working through it on my Mac, substituting the formatting changes caused by translation and then ran into substantive issues with it, e.g. some of the pin B and pin A code was missing. My guess is something funny happened to it when it posted here.) Thanks, Andrew
I’ve created a GitHub repository for the code, so it would be best to add it there if you can.
https://github.com/mklements/ArduinoCameraSlider
Hello Michael,
I am quite new to Arduino projects but have enjoyed creating a number of projects several of which include Stepper motors. I came across the TMC2208
driver recently and ordered several from Banggood. My main problem is, that
nowhere can I find any simple code for the Arduino. All I want to do is to control one stepper motor backwards and forwards, and perhaps alter the speed.
Most of the information I come across is for 3D printers and I’m not into those, at 82 I’m too old to take in all that technical stuff. Some simple code and a simple diagram showing how to wire up the TMC2208 would also be a great help.
If you could help I would be extremely grateful, your my only hope.
Hi Les,
Have a look at https://lastminuteengineers.com/a4988-stepper-motor-driver-arduino-tutorial It tells you all about using A4988 stepper drivers (TMC2208 are compatible but better) and code to drive via an Arduino Uno.
Hello Paul, could you publish the new code, I think the same thing happened as with my publication, the compiler has errors and it is not possible to execute it.
Thanks
Les Chadwick, seria estupendo que compartieras las modificaciones, yo estoy buscando algo similar.
Les Chadwick, it would be great if you share the modifications, I am looking for something similar.
Hi Les,
I’ll have a look at writing up a guide for using the TMC2208 drivers with an Arduino. In principle, it’s quite easy. Follow the schematic for the camera slider, it’s got the two TMC2208 hookups shown. The only thing you might want to change is to just tie the EN pin to GND rather than have a jumper. The programming is exactly as you’d do for the A4988s, you set DIR high or low to set the direction and then pulse the STEP pin to step the motor one step at a time.
Someone was trying to use the oled 1.3 screen “I leave the modified code that I am using that screen. Greetings.
*code moved to body of post under Code Variations
sorry but i think the code is not displaying correctly. I don’t know if there will be another way to publish it.
Thanks for sharing Tony, I have moved the code to a downloadable file in the main body of the post.
Thank you Michael,
But there are some problems when publishing the code, I have checked this in my code and it also happens in Paul’s.
When passing to code many errors appear, for example:
display.print (F (“>”));
appears published as
Serial.print (& quot; Interval: & quot;);
but there are many more similar.
Maybe there is some way to send you the code in arduino format to avoid these errors?
Hi Tony,
Thanks for picking that up. I had noticed that the imports had been stripped, but didn’t notice the text as well. Could you email your original version of the code to – admin(at)the-diy-life.com
Thanks for the reply Mike,
I think I have got my head around that now, onward and upward!
Les
That’s great, good luck!
Thanks Michael, I have emailed you the code
Hi Michael,
Could you consider using the following Android app with your slider so that the tracking is eased ? That would mean of course replacing the Arduino Pro by another one with Wifi capabilities (Wemos D1, …) and redesigning the PCB.
https://play.google.com/store/apps/details?id=jjrobots.cameraslider
Ithe PCB is not available in my country . Could i use arduino uno and shield V3 an upload code on it? Do i have to modify the code?thanks michaels
Yes, you could use an Uno and a shield. You’d probably need to modify the code as it’s unlikely that the shield would use the same pin numbers for the drivers.
Hi Mike
Lovely project, this. I’ve been looking for a build like this to make for a friend who does filming for a living and want something that’s super quiet – this is perfect. Just wish I’d stumbled across it before I’d printed out all the bits for the adafruit mk 3 camera slider…
I have a couple of daft questions though, if you don’t mind:
(1) The stepper motor you’ve linked to is rated at 2.5A (torquey!) but the drivers are rated for 1.4A max, peak 2A. Are you running the drivers at peak or have you reduced the current being drawn (or do the motors have to be going full pelt to get anywhere 2.5A, which they presumably won’t be in this application)?
(2) Are you powering it using a mains 12v adapter, presumably rated for 5A to handle full current through the drivers plus powering the Arduino? I.e. this is always going to need mains power.
Thanks
Andrew
Hi Andrew,
That’s great! Yeah, this slider is quite a bit simpler to make, although it does have a few more bought out components. To answer your questions:
1) I’ve got the drivers set to around 1.2A. You could definitely get away with using smaller motors, these are just what I had lying around from a 3D printer. I guess it depends on what your friend would be primarily using the slider for, moving fast and/or moving upwards uses more power. I mostly do relatively slow, horizontal panning movements, so the drivers handle this just fine. You also might want to add a fan to the enclosure if you’re running the drivers near their limit for extended periods of time.
2) Yes I’m using a 12V 5A mains adaptor. You could probably use a 12V 7Ah lead-acid battery or a 11.1V 3 cell LiPo battery if you’d like to make it portable.
Best regards,
Michael
Thanks Michael, you aren’t wrong about the Adafruit slider! That thing will survive an apocalypse but it only has 400mm of travel and is really suited to time lapse stuff (in any event, my software skills aren’t up to incorporating your rotating motor into the circuit python build I’m doing of that). So now I’ve got two sliders, each abut 80% done – your BOM is so much simpler and affordable.
Just on Paul’s remix with the limit switches, am I right in thinking that the switches are just wired from D10/ D11 to ground so that when they close they bring D10/ D11 low?
Cheers,
Andrew (PS your Creality printer is clearly better than my Prusa MK3S+ as your case turned out way better than mine)
Yes, from the code it seems like Paul’s limit switches are wired to GND and bring the input down to LOW when triggered.
I would have thought that your Prusa MK3S would produce better quality prints than the Creality Ender 3. Perhaps it’s the orientation in which it was printed?
Great, thanks, that was my reading of the code but I don’t trust my software skills. I’ll wire up the switches as NO rather than NC. It turns out that when I flipped the stl file to make it print better I’d only flipped it 179 degrees on Prusaslicer; the reprint worked well, and with a heap of supports I also got the box to print perfectly, thanks. The bevelled edges are still a bit rough, but fitting this around kids means it’s never going to be perfect! Thanks for your help again! Andrew
If I want to play Paul’s code, I get the error “missing terminating ” character” what do I have to do so that I can play the code properly. Don’t know me so well with arduino.
Hi Chris, I get the same errors and it looks like something odd has happened with the code. Some characters, like “ and & have translated as words " and & so those need substituted throughout. I’m still getting errors though from other bits but am working through it. Might be worth doing a comparison of the code and copy and paste across the extra bits of Paul’s code directly into Michael’s. Thanks, Andrew.
Ha, and I see the comments section of this webpage also does the same thing! So it converted what I wrote to the symbols too!
Perhaps Paul can upload his code to another platform and provide the link here.
Nice project, but you said “tracking”. This project does not track an object. It just keeps pointing to a point in space that is a fixed distance away. I’m looking for a tracking system that like most tracking apps can control a motorized mount (DJI Osmo app for example). Good first step in that direction, though. I am looking to build a full frame with x, Y, z, linear movement plus rotation, where I can place my iphone over a marble run, interactively program where I want the camera to go so I can define the shots, then leave it to active tracking to track the marble as it rolls though the track, adjusting its speed to keep the marble framed.
Thanks Chris. Tracking is just the process of locating a moving object over time, which this does. Granted it’s not a form of active tracking which adjusts to external influences or movement of the object as well, which is what you’re after. It sounds like a really interesting project you’re working on. For object detection (like tracking a marble) you should have a look at using something like TensorFlow on a Raspberry Pi or go with a more proprietary device like a HuskyLens or Pixy2 which can be used with an Arduino.
Does anyone have a solution for a mobile battery? I tried it with a power bank 5v 3A. However, the voltage bends in because the current is probably not enough.
Hi Anno, I’m using 12v motors that the drivers will limit to a 1A draw each, so 24W total; plus another 1W for the Arduino. To cover the voltage and current demands I’ll likely have to find some 18650 lithium cells, link them in series and find a charging regulator; should be plenty available online. There might be an off-the-shelf solution around somewhere too but DIY is probably the cheaper way.
Andrew
It might also be worth considering a 7ah 12V lead-acid battery if cost is a concern, they’re just quite a bit bigger and heavier than the 18650s. A more compact solution would be a 3 cell LiPo, but you’d then need a standalone charger and some voltage cutoff protection.
I still have an 11.1V lipo from my broken yuneec drone. However, my arduino resigned yesterday when I operated the slider with a 12v power supply.
Same here. I fried 2 Arduinos with 12V already. May be there is a “version” without voltage regulator?
I tried with an adjustable power supply. 11.1 V works great. The current while pan&rotate is about 1A at ~11.1V. I think the slider uses 15-20watt to work fine. For big cameras maybe more. I am charging my lipo 11.1v atm. Then i need only an adapter for my lipo to connect to the slider.
These Pro Mini’s seem to be particularly sensitive to overvoltage. I think what’s happening is that if you move the gantry by hand too quickly then you back drive the motor and induce an EMF in the driver circuitry. This then pushes the input voltage up over 12V and this fries the Arduino.
I didn’t move the gantry but appear to have fried the regulator on my arduino, it shows 12.4v at RAW but 0.3v at VCC. My 12v power supply was cheap so maybe that extra 0.4v has been too much for the regulator.
If a new arduino with a more accurate supply ends up fried then I’m going to get a 12v to 3.3v buck converter and power the VCC that way. Won’t look pretty but should do the trick. My drivers are set to take just shy of 1A per motor so it’s not brownout as my power supply is good for 3A.
I’ve finished the adafruit feather wing slider and when you move the stepper the power light on the driver board lights up but nothing gets fried, but I think the regulator on the feather wing is more robust. BTW, the adafruit slider is very noisy and “steppy” so only good for time lapse really. That’s why I’m persevering with Michael’ design.
I am late to the party, but excited to be mid-way through building my own slider courtesy Michael’s design!
I’m confused, though, regarding the VCC and 12v input (and wondering if this is why so many are frying their Arduinos). Everything I’ve read is that the Mini will take 12v, but only through the RAW input. The VCC input bypasses its onboard regulator!
I may be completely misinterpreting this documentation, however. (Or it could be for a different model?)
From Arduino Doc page:
https://docs.arduino.cc/retired/boards/arduino-pro-mini/
POWER
The Arduino Pro Mini can be powered with an FTDI cable or breakout board connected to its six pin header, or with a regulated 3.3V or 5V supply (depending on the model) on the Vcc pin. There is a voltage regulator on board so it can accept voltage up to 12VDC. If you’re supplying unregulated power to the board, be sure to connect to the “RAW” pin on not VCC. The power pins are as follows:
RAW For supplying a raw voltage to the board. VCC The regulated 3.3 or 5 volt supply.
Have a look at Yuneec Q500 battery pack. I think with a 3d printed adapter an mount it fits perfectly unter the profile to have an portable solution.
Hi Michael Klements, I’m so excited about your project, it’s awesome, one thing I want to ask is can I extend the slider from 700mm to 1m? and then how the code will change. And another question is how is the wiring diagram if I want to add a limit switch
Yes you can, you just need to change the maxTravDist parameter to allow the gantry to travel further. Limit switches should be wired to any of the free digital IO pins the same way a switch or pushbutton would be.
Paul’s code, when you upload there are many errors related to spelling, it seems that when uploading the file there was an error.
I’m also waiting for an alternative upload of the code. I finished my slider, in addition I changed the housing so that I can install a 6v ni mh battery under the board. The end switches are already installed. Unfortunately, I cannot program myself.
Chris,
Send me your email and I’ll send the code to you.
Michael,
Your github page wont allow me to upload files
Hi Michael, my question: how much voltage you used on power suply? (Arduino is 5v, it didn’t runs on 12v), and can i used another motor driver ? Or must to be tmc drivers
Thanks
I used 12V. If you’re using my PCB design then you can use any driver with the same pin configuration as the TMC2208s. If not then you can use any stepper motor driver which is able to be driven by an Arduino.
Hi Michael,
Hope you are doing well.
Can I use Arduino Uno with same pin config and code?
Thanks and Regards,
Akhil Dev
Hi Akhil,
Yes, you can.
Finally finished this and got it working. Have to say I am well impressed with it Michael, thanks for all your help during the build. Thanks to Paul too for the upgrade with limit switches. It’s super quiet and smooth in operation and looks very professional.
I had some difficulty with getting it to work but it turned out to be a dead Oled display out of the box, as the code stops early on if the screen isn’t working, The moral is: don’t skimp on a cheap Oled – and don’t solder up a new pcb without checking the display! The clips on the belt were catching the micro switches so I made a small 4mm spacer and problem sorted. I also printed out a few more cable clips to keep the micro switch leads nice and neatly contained in the extrusion. Cheers.
Thanks for the great feedback Andrew! The hidden cables for the micro-switches sound like a neat addition to the build.
If you’ve got some photos to share, I’d love to include them at the end of the post as community builds (with credit to you obviously).
Hi Michael, hopefully these photos work ok: https://photos.app.goo.gl/zRdLWE6doaW7YbxH6
As you’ll see, I didn’t innovate. Using the double extrusion is handy for cable storage; to try and provide some strain relief on those exposed micro switch cables I fed the cabling through the legs of the slider as well. You can just about see the spacer I made for them too in one of the photos; was just a 15mm x 17mm x 4mm spacer in petg with an m5 hole in the middle. With more time I would have devised a wee protective case for the switches with built in strain relief and spacing. I used 2A stepper motors so had to modify the rotate motor box to add a few mm to its height. While I was in tinkercad and doing that I added 2 more screw holes at the base as there were 4 mounting holes in my trolley and I thought it might disperse any twisting forces better than just 2 screws but likely unnecessary. Paul’s code on GitHub worked a treat but this was my first time with arduino and in the end I had to use the online IDE and upload the libraries rather than the desktop IDE – I found my M1 Mac was a bit hit or miss as to whether it uploaded the sketch (something odd with the usb too). So if you have a PC or intel Mac you will likely find that less frustrating. I don’t have any of the stl files anymore am afraid. My friend is freelance and I added his logo to the case to make him look more professional, hope you don’t mind. I’ve started trying to build an arduslider, just for fun; it’s heavy, likely to be less durable and only does sliding so I reckon your design is the best out there and can be easily adapted for bigger trolley/ extrusion combos. Cheers!
Thanks for sharing your build and feedback Andrew. It really came out well and looks quite professional! I’ve added some of the photos to the end of the post.
Is there a way to get Paul’s code updated?
I am also waiting for a correct upload….
Do you know the max weight it can support?
I’m not sure what the maximum is, it handles a mirrorless camera like the M50 just fine but would probably struggle with a full frame dslr.
Hello. I built the slider according to your scheme. But my slider is longer. I try to correct maxTravDist in the code, I write, for example, 800, and when I start the slider, it writes “Too Fast”, and the carriage movement does not occur. Immediately the end. What else can I fix in the code?
Hi Andrew,
The slider does a check to see that you’re not asking the motor to move faster than a certain speed for each movement. This is calculated based on the distance to be travelled and the time you’ve set. If you’re making the slider longer then you’ll need to adjust the maximum time as well (maxDur), and ensure that your requested distance and time do not result in a delay interval between pulses that is less than minInterval.
hello. I don’t know anything about programming at all. please help me to configure these parameters.
hi Michael. I wrote in the firmware: maxTravDist 800, maxDur 3600, minDur 20. When selecting the time, it writes “Too fast” – for any time interval. Help me fix the firmware – I don’t understand anything about programming.
Hi Andrew,
Your duration divded by the maxTravelDistance multiplied by your pulsesPerMM needs to give you a pulse duration that is greater than your minInterval. Looking at your numbers, 800 x 50 = 40,000 as your pulses for your travel distance. Your duration of 3600 divided by 40,000 pulses is an interval of 90 milliseconds. This should be within the minimum interval you’ve set.
Hi Michael. If we take your firmware as a basis, we get the following calculations: pulses Per MM=50, max Travel Distance=550, maxDur=1800, minInterval=400. If you calculate it using your formula : 550*50=27500, 1800/27500=0,065 (65 milliseconds). but minInterval=400?! 400>65! What am I doing wrong?
What you have written is correct except that the minInterval is in microseconds not milliseconds, so it is actually 65000 > 400 or alternately 65 > 0.4. Using your numbers and keeping a minInterval at 400 microseconds, you should be able to go down to a travel time of around 20 seconds before it starts saying “Too Fast”.
Hi, Michael. I apologize for the very large number of questions… I use pulses Per MM=50, max Travel Distance=800, maxDur=1800, minInterval=400. Counting: 800*50=40000, 1800/40000=0,045 (45000 microseconds). 45000>400. Everything meets the condition for successful operation. BUT IT DOESN’T WORK. Writes “Too fast”, I tried to set different time intervals using the encoder-on the “Too fast” screen. The firmware allows you to run the program, but the carriage does not move, and immediately on the screen the inscription “Complete”. Now, through experiments, I have determined that if you choose a path distance of 650 mm, then everything works well, but if the distance is more than 650 (up to 800), then the carriage does not move (“Too fast”). What else can I fix?
Hi Andrew, no problem at all, this could be an issue that others experience as well, so it would be good to get it resolved. Unfortunately, I don’t have access to my slider at the moment to test it as I’m away from home for the next few weeks.
I’ve had a look through the code again and I can’t see a problem with the logic (it also works perfectly for shorter lengths). I’m thinking that there is probably an overflow occurring on one of the variables used in the calculation. The integer variable type can only store numbers up to 32,767, which is fine for the 550 distance but exceeds the limit at 800 (40,000 pulses).
If you change all of the variable types associated with this calculation from int to float then it should resolve the issue. I’ll have a look at doing this when I’ve got a chance as I’d need to test it again on the rig.
Hi, Michael. I will look forward to solving this problem. Thanks.
Hi, Michael. I would like to ask you to return to the issue of increasing the distance to 800 mm. please.:)
Ive posted a fix, please see below my updatedscript, with help from a friend 🙂
Changed the int to Long
https://github.com/erikcramerjr/Camera-Slider-DIY-life-script-
That’s great, thanks Erik!
Hi Michael,
I was wondering if you could share the steps file of the housing for the PCB.
Thanks,
Erik
Hi guys! Is only I have this error while uploading Pau’l code like this:
‘gt’ was not declared in this scope
if (millis () – buttonPressTime >= debounceTime) //Debounce button
Can increase the distance to 1000 mm?
To add a back or home button, where do I need to add it?
Thanks for this great project! I just want to show what I´ve done so far.
I´ve built my slider from JJRobots (https://www.thingiverse.com/thing:2866829). So I have to change some parameters inside the arduino sketch.
Please find a first test run here: https://youtu.be/XAevLfsruTg
Nothing special, just 2 minutes of tracking a Cigar Box Guitar.
Great work!
Hi Michael, what microstepping crushing did you used? My motors is very silent on 1:1.
The TMC2208s default to 256 microsteps.
Nice project good work. Just daft question how you keep the tracking camera steady when the motor not spinning for tracking. Thanks really interesting
The drivers “lock” the motor position when they’re enabled, so the rotation motor is held in place even when it’s not being used.
A very nice project. I´m printing the motor enclosure at the moment!
Thank you for all the detailed information!
That’s great, good luck with your build!
Hey Michael,
I Love your camera slider build. I too was working on a camera slider; but since I started a while back, I didnt really come across this one. The one I refered to was from a youtube video that I found and then followed instructions.
I have absolutely no coding skills and Im actually a sales professional (with a wrong career choice…) I just Love DIY stuff… I reverse engineered and customized stuff to my needs. To be frank I’m not very happy with my slider build and I really want to try yours.
My problem lies in the fact that I built PCBs; they can be used with other code too, but; its based on the Arduino Nano.
Could you please help me porting your code to work on the Nano? I could remap the pins if needed to suit my PCB design.
The project I followed:
(https://www.youtube.com/watch?v=Yy15lyZ27XQ&ab_channel=RZtronics)
(https://github.com/RajPShinde/CamSlider)
Thanks and Cheers!
Hi Dunks,
There are a couple of issues that I see with adapting the hardware you’ve got. The encoder is connected to non-interrupt pins, so the logic in the code around all of the menus will need to be changed. The pins to drive the motors are easy enough to change, but you’d need to make slight modifications to the PCB to accommodate the TMC2208 drivers instead of the A4988 ones. I don’t think my design would work with the A4988s as the “jumps” in steps would probably cause noticeable vibrations on the rotation motor.
I’m running both motors with TMC 2208 drivers in legacy mode and it works. Won’t that work for me?
Yes, if you’ve got the TMC drivers working on your board already then that’s a good start. The interrupt pin issue is a fairly big one though, it requires a rework of a large portion of the code to get the menus and parameter inputs to work the way your board was designed to.
Got it working but the rotary encoder is all over the place. Im unable to find quality ones here in Goa (India)
Hi, Michael. I would like to ask you to return to the issue of increasing the distance to 800 mm. please.:)
Hi Michael,
which parameters do I have to enter in the program so that I get a slider length of 1300mm?
Many Thanks
Manfred
Hi
Is there an alternative to the board you made, I’m rubbish at soldering, so wonder what other options are available. Also have seen a arduniuo nano how much different is this to mini pro?
Your only real option without soldering would be to use a breadboard. You might be able to find a CNC shield for an Arduino Uno that has provision for TMC2208 drivers.
Hi,
The display linked in the parts from Amazon, looks like it has changed, the GND and VCC are switched from what’s on your diagram. It made the Arduino nice and warm…..
This has been a great project, thanks so much for posting.
Hi Bob,
Thanks for letting me know. I’ve fried a couple of displays because of this as well. It’s quite frustrating that there are two versions of the same display out there and they’re even often sold by the same supplier – you just get what they had available at the time.
Hi Michael,
I like this project and will build myself. But I have some problem that I use TMC2208 V1.1 so it cannot order stepper motor to rotate anymore, I have set Vref already. What I do mistake , what do I need to do before put it in circuit?
Thank,
Sakda
Hi Sakda,
I’m not really sure what you are asking. V1.1 of the TMC2208 drivers should still work the same way, unless there is a hardware difference that I missed?
Hi Michael,
May I ask below;
– which mode of dreiver I will use ? Standalone or UART
– what state of EN Pin to connect? Vcc or GND
The driver is being used in “Legacy Mode”, essentially the same mode as the A4988 drivers.
EN is pulled to ground to enable the driver.
Hi, is there anywhere I can download the cad drawings for this?
What do you mean by cad drawings? The 3d model files are available to download for 3D printing.
Hi Michael,
I still cannot find a valid version of Paul’s modified code with limit switches.
Could you please update your post or GitHub accordingly ?
My slider is ready, It just waits for a code whithout errors.
Thanks a lot !
Hello Fred,
i have the correct code. Please send me your email address. I am sending you the right code.
My address: [email protected]
I also have circuit boards for this project.
Best regards
Manfred
Thanks a lot Manfred, I just sent you an email.
If Paul agrees, I can share the code somewhere since many people seems to be asking for it.
Hi Manfred
I would also like the code. I sent an email but it just bounced.
Regards Hugh
No Problem.
I need the working Code also. Pls send it to [email protected]
I couldnt send an email to manfred. Thank u very much.
Manfred,
I get a delivery error with your email address [email protected]
Could you please check ?
Ok, here is a Dropbox-Link
https://www.dropbox.com/sh/lpium4ed3c9uxn6/AAB8Z8ku-qoHyAmlz83wk8K6a?dl=0
There are several files and folders there. I’m not sure which file it was anymore. Just try. OK?
Best regards
Manfred
I checked the files of your Dropbox: 1 is the original one, 1 is the original one + spanish translation and the third one is Paul’s code but it doesn’t compile too …
Hello, I just replayed the “CameraSliderPaulBartlett.ino” file on my board. Everything runs smoothly. What error message do you get?
At the line with the code:
if(calcInterval (calcTravelPulses ()) “));
I get the error message:
missing terminating ” character
I’m using the standard Arduino IDE 1.8.13, configured in that case with:
Board: “Arduino Pro or Pro Mini”
Processor: “ATMega328P (5V, 16MHz)”
Programer: “AVR ISP”
Thanks again for your help !
Hi there,
on which line is the code?
I can’t find the line in the “CameraSliderPaulBartlett.ino” file.
best regards
Manfred
Hi Manfred,
Line 723 if you edit the code with Notepad++ or Visual Studio
Hello Fred,
please take the file from this link: https://www.dropbox.com/sh/lpium4ed3c9uxn6/AABh8-ZaK6XOLkTKRCj5wvcka/CameraSliderPaulBartlett?dl=0&subfolder_nav_tracking=1
This is the “CameraSliderPaulBartlett.ino” file. Line 723 of the file says something completely different. Please take a closer look.
Best regards
Manfred
Hi Manfred.
can i get the file too. I try to download from link above but its deleted. Thanks.
Hi Manfred,
This one compiles correctly ! Many thanks for your support !
Hola Michael, está muy bueno tu proyecto, hize uno similar dónde también copie el código y lo arme, mi consulta es, dónde tiene la funcion ” objet tracker” de tu codigo, que es lo que hace precisamente esa función? Perdón que escriba en español..
Espero puedas responderme…en el otro codigo que probé, tiene una función preview..que sería , cómo quedaría el tracker realizado..
Hi Emiliano,
The object tracker function allows the slider to combine the pan and rotate motion to keep the camera fixed on (or pointed at) an object in front of it. So it turns the camera as the camera moves along the slider so that the object stays in the field of view.
Hello,Michael
Can i get the Paul’s code,here is my email [email protected]
Thanks
The earlier links with dropbox files are deleted
https://www.dropbox.com/sh/voc8cjnyg452yys/AABEoyJ0skUYaL3xL7bVlg7Ra?dl=0
hi,Michael.
I did everything by the diy,but when I connect 8v,arduino is getting super hot and the oled is black…I am using your PCB and your code
Check the pin assignment (VCC and GND) of the Display. There are two different types of connection.
Those are wired without headers,yes i noticed the vcc and gnd problem,but i think thats not the case this time…
[…] etc. dient, baute ich seit einiger Zeit an einem etwas größeren Slider nach einem Plan von MICHAEL KLEMENTS. Allerdings ist das V-Profil, dass ich verwende deutlich […]
Hello Michael,
I also work with EasyEDA, can you post the schematic. So I can adapt the layout of the board to the 1.3 inch display.
Many greetings from the Black Forest
Thomas
Hello Michael,
I have got the slider working so far. Also have the problem the rail is 900mm long and how can I manage to change the settings so that the slider needs for example for the entire distance 8 or even 12 hours. I work with times between 1 minute and 12 hours. Day-Night Time Lapse.
Many greetings
Thomas
Hi Thomas,
You’ll need to do a bit of re-working to the code to get those options to work. The problem is that the variable types used (int) overflow eventually (at the number 2,147,483,647) and start causing issues. You’ll need to change the variable types to double or float, but this requires rework to a few functions and sections of the code.
Hi Michael,
I have 3 spare PCBs I no longer need so am willing to send to anyone in the UK who would like one for just £5 which includes postage. If anyone is interested, please email me at [email protected]
Hey Paul, I’m preparing to make my own PCB order from the US. Can you tell me what specifications you ordered your PCB with? Like, dimensions, thickness, and whatever that other stuff is. TIA!
Hello, I built your project and am having a problem with the rotation motor not turning. I have swapped the driver boards to test each driver board separately, swapped out pcb’s, swapped out arduino boards, swapped out motors, and have confirmed all components are functional. For some reason, the rotational motor won’t function and I am not sure what to try at this point. I did test various power supplies and have not had any luck. Could you please give me some insight as to what it might be?
As a side note/separate issue; during one of my tests, I plugged in a 14v turnigy lipo battery, that I verified only had 11.1v of charge with my multimeter before plugging it in, and it instantly fried both my arduino and display. Do you know why this would happen? I put 12v input using a bench top supply and had no issue before this. I did use a separate pcb’s after this for the other testing listed above.
Thanks for your help.
Hi Jesse,
If you swap the pin numbers of the two drivers/motors around in the code, does the rotation motor then work? This would help identify whether this is a software or hardware issue. Another thing to check would be that there is a jumper present on the enable pin selector.
I’m not sure why your battery may have damaged your Arduino or display. There are two likely scenarios – one is that the battery voltage “spikes” above 11.1V when initially connected, the second is that “forcing” the motors to move can generate a voltage that may accumulate and lead to a level where the board may be damaged.
Hello
are you powering the arduino from the driver output or directly from power supply because the drivers are not powering up the arduino
The power input supplies power to the Arduino and the drivers all separately. The drivers do not power the Arduino.
Hello
your project is very interesting.
I downloaded yours and Paul Bartlet’s.
I’m very interested in rail endstops, but Paul’s code has a lot of problems with special characters.
Some information in comparison with yours is abnormal.
on my side I will try to add a 3rd axis of rotation to put a camera on the rail with a variable angle of inclination from 30° to 45° the plate is set up so as to always have the bubble.
If you have PAUL’s code well written, I’m interested.
For the mechanical part I have a 4m rail, with 3 motors 1 for the translation, 2 for the PAN and the TILT of the Camera. This is the project.
Jean Yves
I just redownloaded Paul’s code.
I have an error in void runtrack “displaystart was not declared in this scope’ , is it weird??
Jean Yves
Michael I have tried numerous times to get you to update the software with my modifications correctly. You can download it from http://bartvoip.co.uk/CameraSlider/CameraSliderPaulBartlett.zip
Thank You
Hi Paul,
I have replaced the download with the one you’ve linked to.
Thank you for sharing your hard work! This looks awesome!
I’m embarrassed to ask, but I did search through the blog and the video comments first. Would you please tell me the specifications I need to order the PDBs? I’ve never done that before, it’s really interesting!
I see the details are included in the Gerber files, sorry about missing that.
For people having issues with the script not working with Longer axis.
Ive together with a friend of mine changed the int to Long and this has fixed that.
Ive changed the original script and the version with homing sensors from Paul, you can download them here.
https://github.com/erikcramerjr/Camera-Slider-DIY-life-script-
There is a zip file and the 2 scripts.
Please not i cant give any warranty on the script it just works for me.
si des personnes sont intéressé j’ai des PCB.
Hello, I live in Milan and need a pcb. If anyone around this area has one, please contact me.
Hi Michael, I’ve been planning to do this build for a few months since I first stumbled on your YouTube channel and this article. However, after some desk research and a few rough calculations I realised that I need more torque for my application: sliding a larger camera and lens combination, including at inclines. As I’m new to electronics and the Arduino/Raspberry Pi platforms, it’s been a steep learning curve but a lot of fun – thanks for the inspiration!
I should first explain my application doesn’t require the object tracking, only the slider movement but at varying speeds and inclines with heavier loads, and different accelerations and travel times. I might add the object tracking later, but I have in mind using a Raspberry Pi for that (possibly in conjunction with Marlin 2.0) and I haven’t got my head around that bit yet: one step at a time!
The route I’ve decided to go is to base my build around the Trinamic 5130A BOB driver which can drive a motor up to 2A coil current (2.5A peak) at up to 46V – so suits my higher torque needs. The downside vs the TMC2208 is that it’s more complex, as the on-board motor control functions this driver uses require SPI communication (rather than just the EN, Step and Direction signals) and tuning of the board settings to the motor, plus input of acceleration, velocity and pulses information from which the driver takes over and controls the motor movement. So there’s more testing and tuning involved, to find the motor settings that work for your application. And more coding to develop a menu system that’s easy to use, based on your application needs.
I thought I’d share my thoughts here in case it helps someone else who needs a higher torque solution, to shortcut their research process. There’s a great comparison of TMC drivers on the Watterott website which serves as a good starting point for the differences (Watterott are a German company who make quality versions of TMC boards). The main reason for considering a TMC driver like the 2130, 2209, 5130 or 5160 is that these boards all drive the motors ‘on-board’ the driver board, giving access to more control over their functions like StealthChopper (for improved acceleration at lower revolutions, it drives the motors via voltage control for best torque – as I understand it), SpreadCycle (for high-speed, current-based control), StallGuard (for software-based homing and stall-protection/stall-detecting) and CoolStep (which optimises power supply to motors to save energy and run cooler). These drivers can also be run in “standalone” mode for Step/Dir control like the 2208, and the driver then uses StealthChopper etc automatically to smooth out the microsteps – but in this mode you can’t fully optimise for maximum performance out of your motor/for your application.
I made a false start by buying a clone 5160 (the v1.2 from BigTreeTech) only to find it is not so user friendly for testing and seems to have some SPI communication issues for Arduino use that are beyond my know-how to solve. You see the 5160 bundled as packages with expansion boards for 3D printer upgrades, so presumably the drivers are optimised for this sort of plug-and-play application. So after some research I decided to follow some good advice on the Photomacrography site by a product developer/engineer who recommended starting with the Trinamic 5130 driver rather than the 5160, as it is very well supported (eg on the TMCStepper library), cheap to buy the Trinamic product (so help can be accessed from the designer/manufacturer), and there is plenty of advice out there since it’s not a new driver. The 5160 is really designed for high current use up to 4A but the electronics involved are much more advanced and complex, not really beginner stuff.
So cut a long story short, I’m now at the planning stage studying the 5130 datasheet and Trinamic blog code, and studying the circuit diagrams and parts I might need for my application. I plan to build the first attempt around a NEMA 17 2A, 48V motor as I figure this is a nice balance between size and power and matches the 5130 driver’s 2A maximum perfectly. My next steps are:
1. Study the datasheet (I’m already somewhat familiar with the 5160 datasheet which helps) and identify the functions and circuits I will need to drive this motor for my application. The datasheet from Trinamic is superb, very detailed with everything you need including circuit diagrams for the interface options such as power supply (including highly optimised or simpler options). A quick tip: also study the “Evaluation” kit from Trinamic, as this is an expanded board that uses the 5130 driver chip but is larger and a more plug-and-play solution inteded for faster prototyping/development use. If board size is not an issue, this evaluation board might even be a better option for a beginner like me. But at any rate, the evaluation board datasheet details everything you need to know to use this driver, and the website has download files for the PCB design layouts if you want to really optimise the setup and copy in your own PCB design, for example, some of the routing of signal and power lines in relation to GND and the placement of components on the board.
2. Figure out the off-the-shelf components I can use (like power supply – I’m planning to use a mains 24V DC supply that I already have, subject to testing, but the 5130 needs 3.3V IO power (it can use 5V to power signals, but to reset the driver whilst the motor is powered, 3.3V power seems to be the way to go – I’m still studying this though so do your own research) and the Arduino say 9V, so I’ll need some sort of step-down PSU. A watch-out for the 5130 driver: the motor power supply needs always to be on whilst the Arduino is powered, if you are supplying IO power to the 5130 from the Arduino – so you have to power up the motor first on startup, and the Arduino has to be powered down last on switch off – otherwise you can fry the driver. This is why I understand a better solution might be to provide the signal power to the 5130 from a standalone power supply rather than the Arduino, then you can reset the 5130 without fear of damaging the Arduino.
3. Draw final circuit diagrams based on those in the datasheets for all the components, and figure out a PCB layout to test.
4. Amend your Arduino code to drive the 5130, with the same user controls (ie LED and control knob). I may choose to add in “Go To A” and “Go to B” buttons for easier to-and-fro repeated movements, rather than having to cycle through the menu each time. This is specific to my needs: I’ll be using the slider for filming clips that might need many retakes, or re-using the same movements on different takes. Also, the 5130 needs different input from the Step/Dir control that your 2208 needs. Instead of the Arduino controlling the motor movement, the Arduino has to send a set of settings to use, including a maximum acceleration, maximum velocity and number of pulses (ie distance) and the driver then controls the movement. So if I want a certain travel time, to achieve say a 10 second video clip at a certain acceleration and max speed, then I need to find the acceleration and max velocity settings that will deliver a 2 second travel time. I’ve already prepare the spreadsheet for testing this and capturing the values, for the setting intervals I will want to use – so it’s just a matter of testing, and then putting those values in a LUT (Look Up Table). All simple to do, but time-consuming. However, the 5130 requires tuning to the motor anyway, so I would have to run these tests anyway to figure out the maximum inclines and acceleration/velocity settings that my motor is capable of with different settings (ie StallGuard settings and StealthChopper settings).
5. Prototype and test it.
So I’ve a bit of work to do yet to get it working, but the physical slider is built with the motor and pully system (adapted a 1.3 metre slider that I have for this purpose), and it all functions nicely mechanically.
If you’re interested, I’ll post an update here when I have it working.
Thanks again for the inspiration, and getting me started. Whilst the project has mushroomed in complexity, it’s a lot of fun making stuff!
Hello.
This design is brilliant. After burning two arduino pro mini modules, I decided to run the project on CNC shield v3.
I have modified the code, but I have a problem with the rotation button (the button works, but the rotation, unfortunately, does not – I cannot change the value)
I would ask for help if possible – maybe others will also benefit.
Below are the places where I modified the code:
================= modified lines of code ==============
static int pinA = 13;
static int pinB = 12;
#define encButton 11
#define enablePin 8
#define travDirPin 5
#define travStepPin 2
#define rotDirPin 6
#define rotStepPin 3
===============================================
Everything works except the rotation of the button.
Should I set inputs 12 and 13 somewhere apart from the first two lines?
The rotary pushbutton needs to be on pins that support external interrupts (not all Arduino pins do). Depending on what controller you’re using, you’ll need to look up which pins you are able to use and then re-arrange the IO to suit these.
Hope this helps.
Hey Michael, this is a fantastic project and thank you so much for sharing. I’ve just finished putting mine together for a first Arduino project and I’m stoked it’s working and getting cool shots!
Pics: https://imgur.com/a/rniCqBm
I am noticing some jitter in the pan movement though so I’m already redesigning the carriage for the ball joint to sit lower and be belt driven by the rotate motor, and I want to experiment by using a gear ratio to hopefully smooth out the rotation. I’m not super knowledgeable in code so I was hoping you could confirm for me that the variable to change would be “pulsesPerDeg”, and if for example I wanted to use a 2:1 gear ratio would I just double that variable from 4.4444 to 8.8888 pulses? Or would more changes to the code be required to make it work?
Lastly, would you consider posting this project to Printables or Thingiverse so I can share my remix? I’ve already made some modifications to your 3D files to make the compartment lid print cleaner, as well as redesigned the coupler to fit with a Smallrig mini ball head.
Hi James,
That’s great, it’s always good to see community builds!
Yes, that’s correct, if you add a gear ratio to the rotation motor then you’ll just need to change the pulses per degree accordingly.
Sure, I’ll look at putting the model files up on Thingiverse to enable them to be remixed.
It works! I’ve used a 5:1 gear ratio and the rotation is much smoother now
Progress shot: https://i.imgur.com/kXLEMti.jpg
Hey also before I made this mod I noticed that the pan duration for tracking is slower than the normal pan mode. 10 seconds in pan mode for example takes 10 seconds, but in tracking mode 10 seconds comes out to about 16 seconds. Do you know what would be causing that discrepancy?
I’ve just got a couple more tweaks to make but I’m almost ready to upload my files and updated bom.
Thanks again!
That’s awesome, it’s looking great! Glad to hear the rotation is now much smoother.
On the issue with the timing discrepancy – I would guess that I may have not added the rotation motors time to the calculation or something like that. I’ll have a look at it this weekend and see if I can pick out what might be wrong.
Excellent project Michael!! He has inspired all of us. Thank you very much for sharing your developments! Greetings from Argentina!
Thanks Damian
Hi Michael
You did a wonderful job about this project and I thank you for sharing it.
I’m about to start assembling but the OLED display I own has inverted VCC/GND pinout (mine is GND VCC SCL SDA).
VCC GND SCL SDA you use seems to be harder to find right now.
Could you please share another PCB version with switched OLED VCC/GND or if you don’t have time for it just share your EasyEDA file ?
Thanks.
R/
Michael
Hi Michael!
Fantastic project)!
It would be cool to be able to set the number of moves as well as infinite repetition. this function is available on many sliders.
I am so excited to work on this! This will be my first arduino project. I have printed the items needed (that is the easy part for me!) and the other items begin arriving today.
I’m curious of how to go about letting it go back and forth in infinite repetition until it stops. I’d like to use this slider for my b-cam when shooting interviews so I won’t be sitting with it.
Let me know if there is a way to do that. Otherwise I’ll see if I can figure out the code and update here.
Thanks so much for this amazing work Michael!