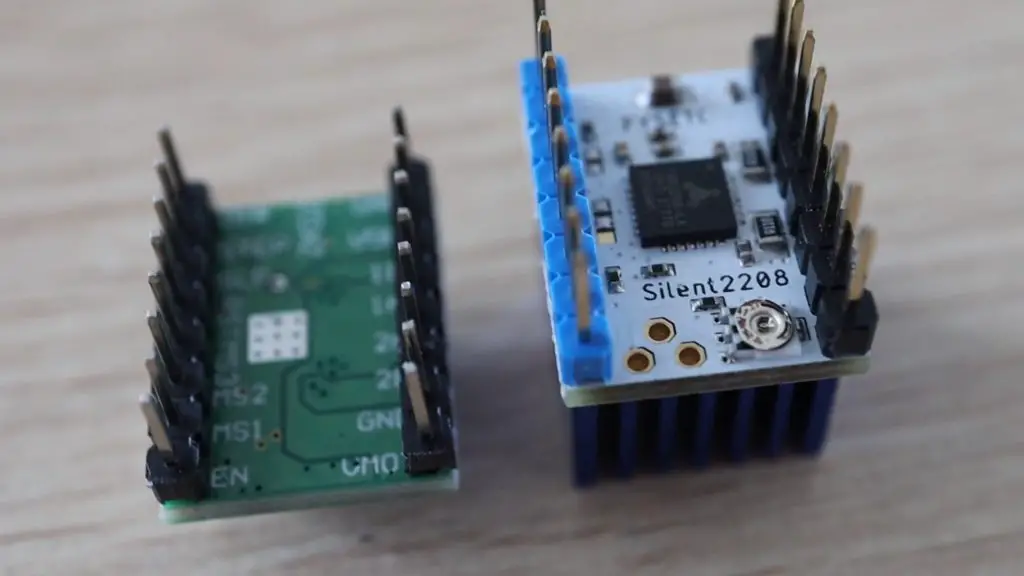
The TMC2208 stepper motor drivers are a popular choice for reducing the stepper motor noise on 3D printers and laser cutters. They’re particularly useful because they can be used as an almost direct replacement for the A4988 stepper motor drivers which are already widely used. They have the same footprint and pin layout so that they are able to operate in place of an A4988 driver without any significant modifications.
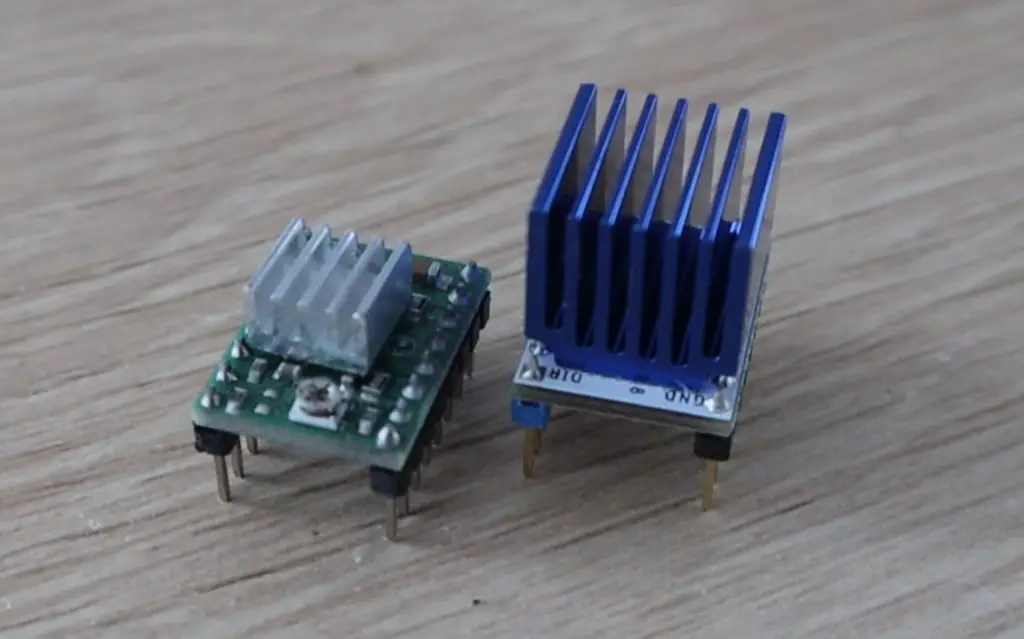
Here’s a photo of the green A4988 driver on the left and the white TMC2208 driver on the right. The TMC2208 driver has a significantly larger heat sink, the boards are actually the same size.
I’ve heard that people have been impressed by how well they’ve worked to silence their 3D printers, but I was curious about how much quieter they would be. So I ordered two to try out. They’re typicallyy about $10 each (including shipping etc.), which is quite a bit more than the A4988’s, which you can often get for $2-3 each, but you only usually need 3 or 4 of them at a time, so it’s not an expensive upgrade. You can also often get much better pricing if you buy an upgrade set of 4 or 5 of them.
Buy You Own TMC2208 Drivers
- Buy TMC2208 (5 Pack) – https://amzn.to/3j78RMR
- Buy A4988 (5 Pack) – https://amzn.to/3o0sABv
The above links are Amazon affiliate links
Comparing The Two Drivers
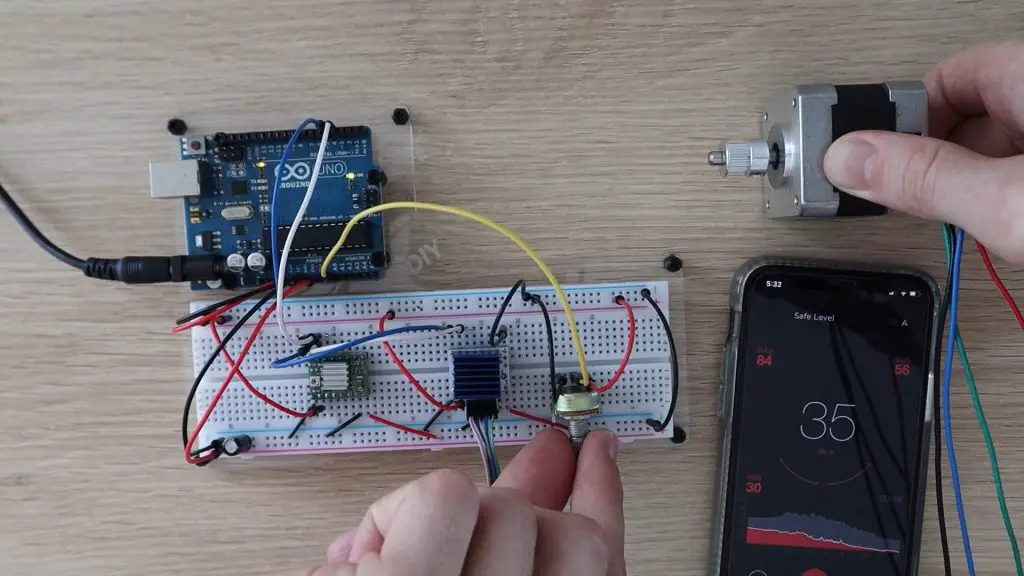
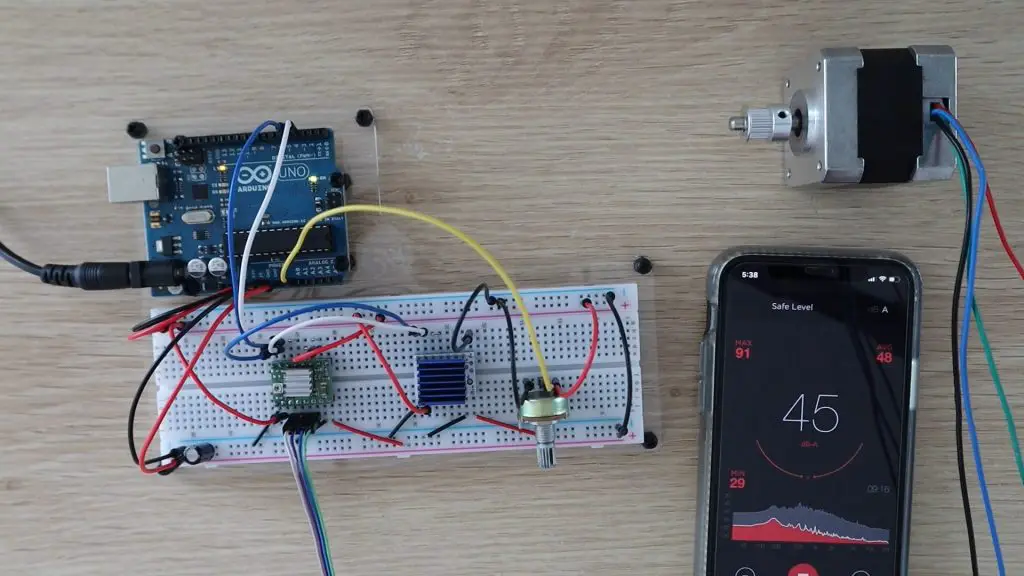
For this test, I’m going to compare the two side by side using the same motor so that you can hear the difference. I’ll also show the actual sound level readout in decibels from an app on my phone for comparison.
Here’s a video of the full test so that you can hear the sound difference for yourself:
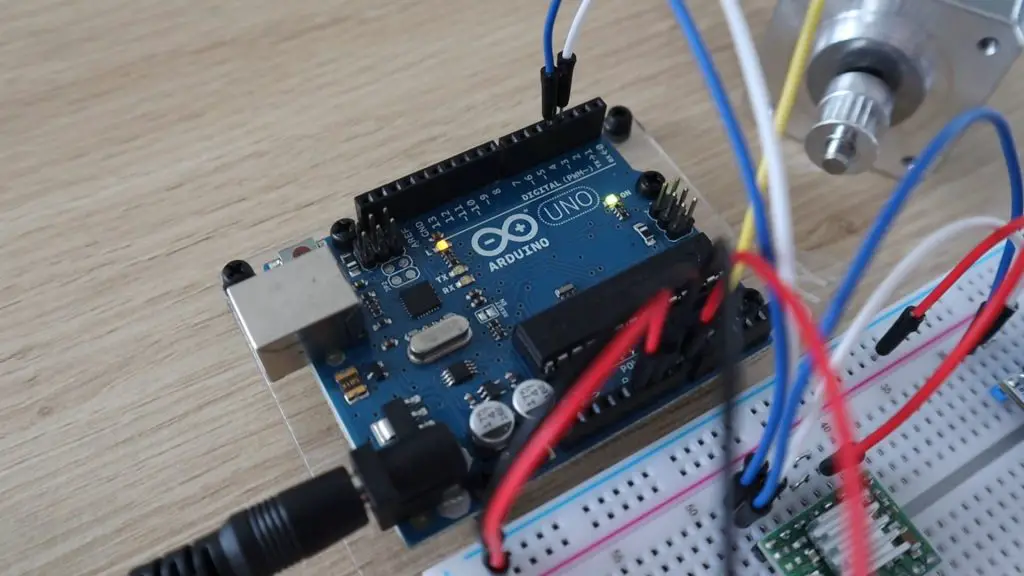
Let’s start by setting them both up on a breadboard so that we can compare them. We’ll use the same signals from the Arduino to each driver, so both drivers are on the same supply voltage, the same logic level voltage and are receiving the same direction and step signals from the Arduino. I’ll just swap the motor connection between the two to change which driver is driving the motor.

I’ve also add a 10K pot to one analog input so that we can adjust the motor speed.
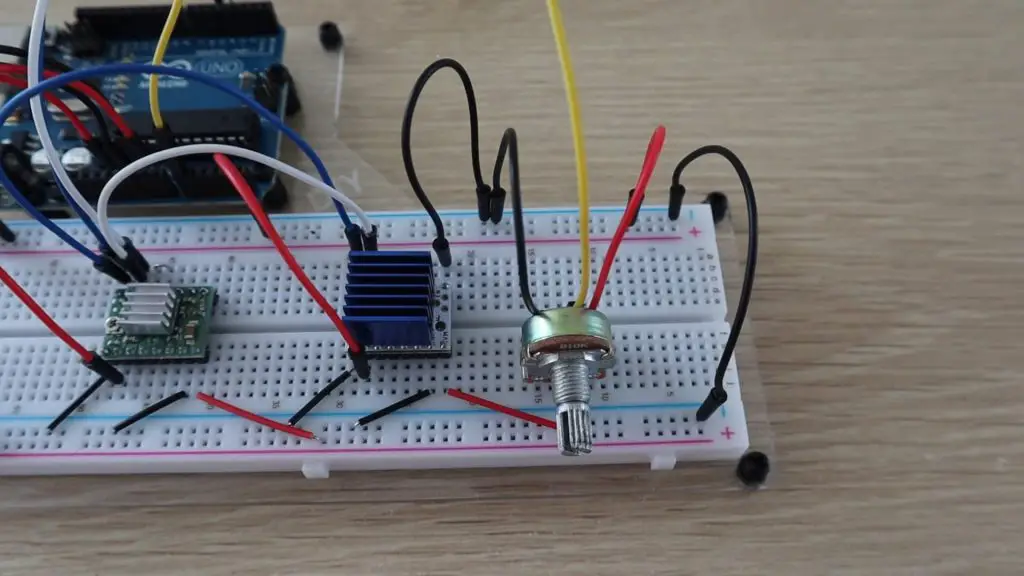
You may also have noticed, with the two boards set up side by side, that the current limit adjustment pot is on opposite sides of the two boards, so keep this in mind if you do swap your A4988 drivers with TMC2208 drivers so that you don’t install them the wrong way around.
Before starting, we’ll also need to set the motor current limit on each driver to suit this motor, which has a rated current of 0.8A. This is important to limit the maximum around of current which can be supplied through the motor coils so that the motor does not burn out.
Here is the sketch that I’m using to drive the motors using the potentiometer:
Lets start by testing the sound level on A4988 driver.
In full-step mode the steps are quite choppy when the motor is turning slowly, if we speed it up a bit it sounds a bit smoother.

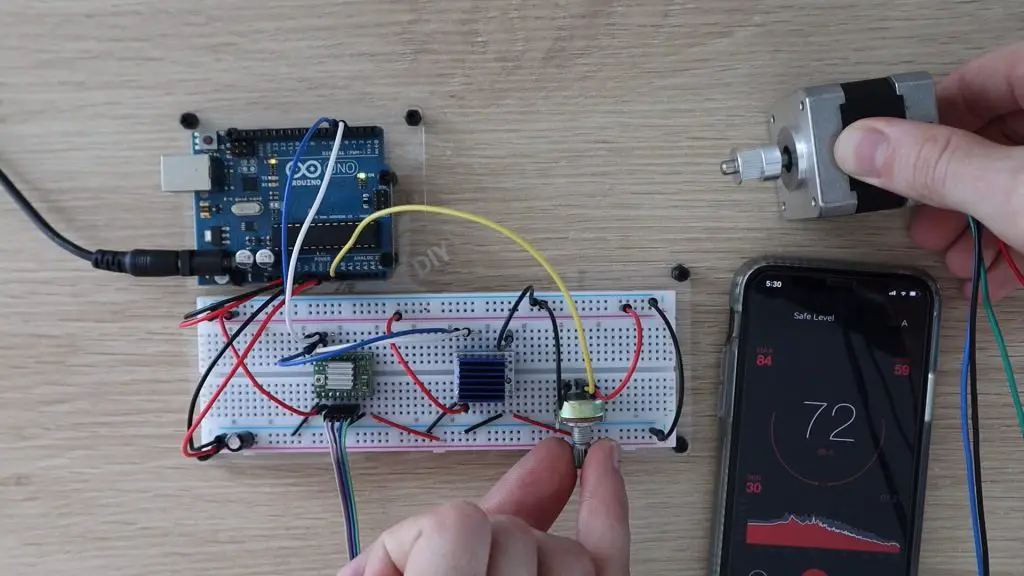
So running at a medium to high speed, we have a sound level of around 74 decibels on the A4988 driver.
Let’s change the motor over to the TMC2208 driver and see how that does. I’ll also be turning the Arduino off between tests so that we’re not swapping the motor over while the coils are being energized.
I must admit that when I tried this the first time I got frustrated that I wasn’t getting the TMC2208 driver to work and I kept messing around with the connections and power supply until I noticed that it was actually working, it was just completely silent. I wasn’t expecting such a substantial difference, I thought it would still make a small amount of noise, but it is literally almost completely silent at low speeds.
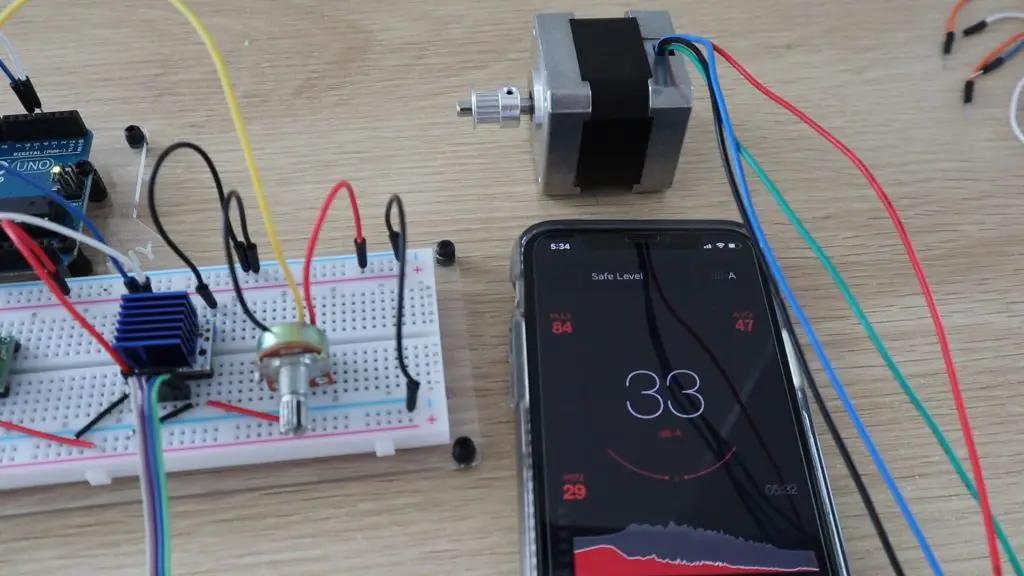
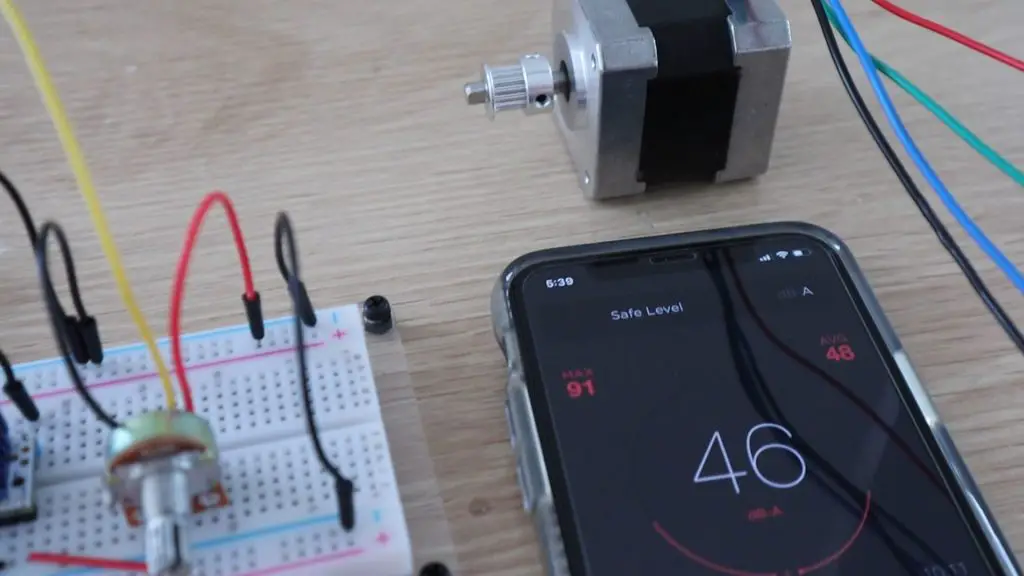
If you turn the speed up a bit you can start to hear it. Even at high speed, we’re only getting an increase of around 3 decibels over the ambient sound level and most of this is caused by the motor “stuttering” which is likely caused by the poor quality connections on the breadboard.
Now, to be fair to the A4988 driver, when operating in legacy mode, the TMC2208 will automatically interpolate the received step signals into 256 micro-steps. So let’s try changing the A4988 driver to 16 micro-step mode (which is the maximum it allows). This allows the driver to micro-step the motor 16 times for each full step, so it should be a bit quieter and smoother. We do this by putting 5V on the three micro-stepping pins on the driver.
Micro-stepping the motor has made it a lot smoother and quieter. We’re now getting a sound level of around 45 decibels, but it’s still way louder than the TMC2208 drivers.
So if you’re looking for a way to make your 3D printer quieter, and it uses these A4988 drivers, then this is a great way to do it without having to spend a fortune.
Let me know in the comments section if you’ve used these drivers on your 3D printer or laser cutter. They’d also be great for camera sliders, where smooth movement is critical.
Hi there Michael.
Just read your interesting article (AND watched the video).
My question: could you publish the Arduino sketch (code)?
I would like to know how you do the speed control using the potentiometer.
Thanks a lot
Robbert, the dutch guy in Istanbul (radioamateur callsign: TA2IX aka PA3BKL)
Hi Robert,
Sure, I have added the test sketch to the post just after the section where the potentiometer is added. Hope that helps you out!
Hi,
i read your article and wanted to control a stepper Motor with an TMC2208. But it seems that I‘m unable to do it.
I‘ve wired the arduino like you and upload the sketch file, but there ist no movement.
The Motor and the driver works in a skr 1.4 turbo Board from an 3D Printer.
I don‘t know what to do
I too a trying to control a stepper motor with the TMC2208 and trying to follow your video. Any chance you could provide me with me details?
Hi every one.
I Guess tehre are only one difference on Legacy Mode. Is that the A4988 need a bridge connection between the sleep and reset pins but the TMC 2208 driver don’t, right? I see on the video, when TMC2208 is off they have the Bridge. But when it go on, the Bridge is off (Beacoe they have different pins there), can be?
Regards